Downloaded 382 times

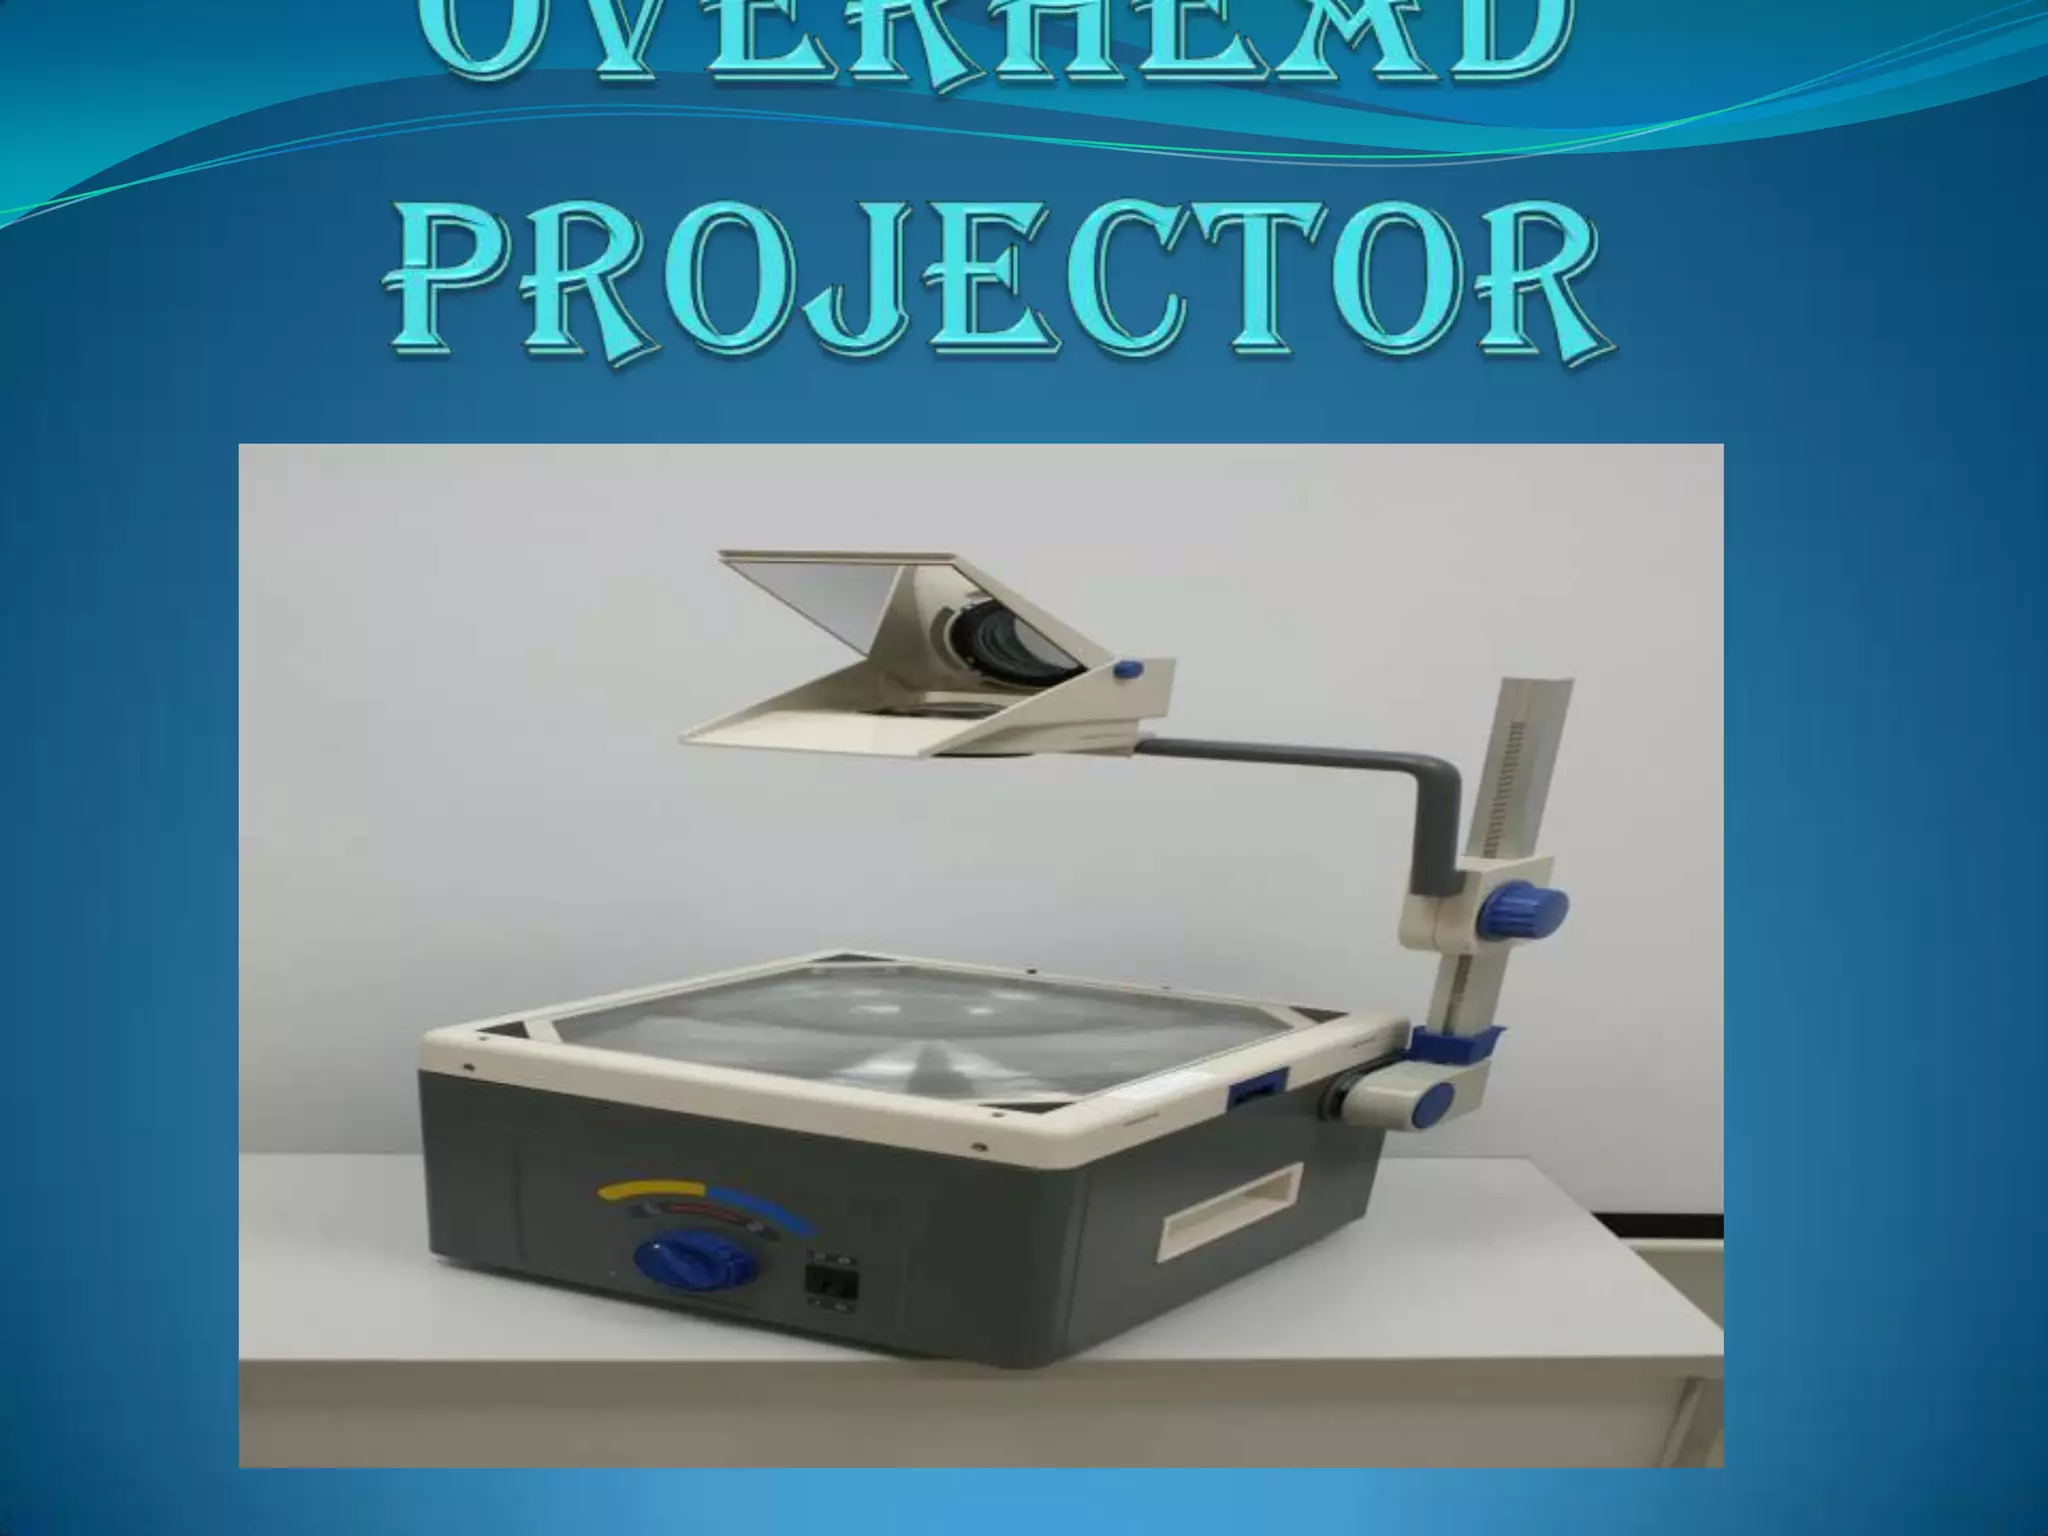


An overhead projector projects enlarged images of transparencies onto a screen. It consists of a lamp, lens, and mirror that reflects the image on the transparency up towards the screen. The presenter can see the transparency and the audience sees the enlarged projected image. Overhead projectors were commonly used in classrooms but have declined in use due to the rise of digital projection technologies like PowerPoint that allow for more interactive presentations.