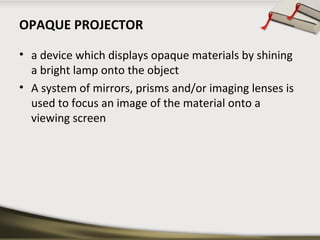
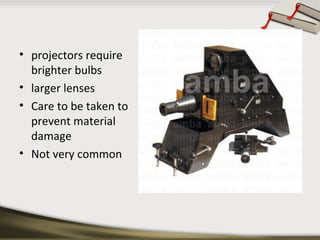
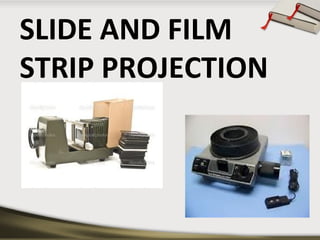
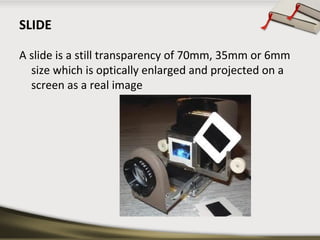
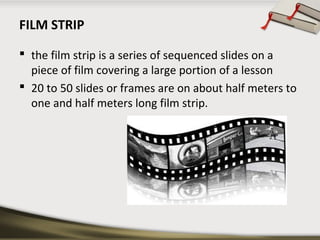
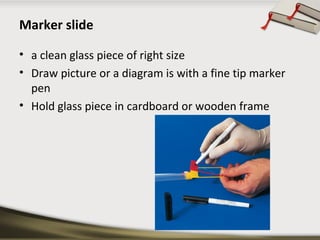
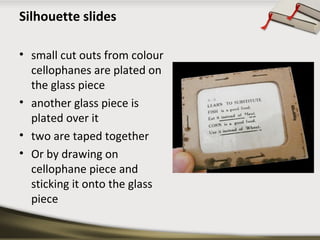
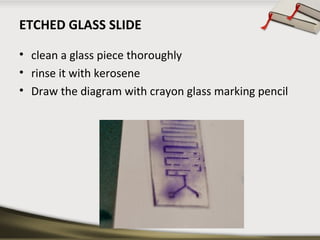
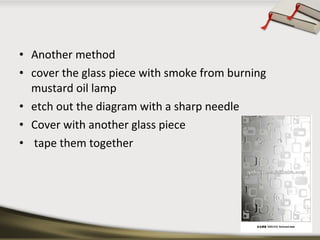
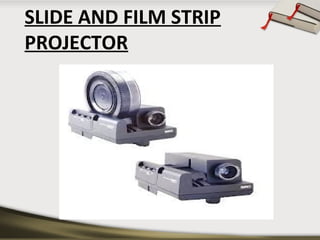
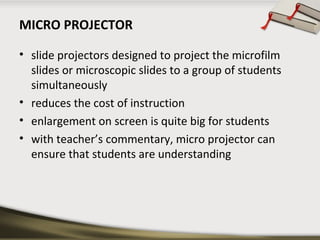
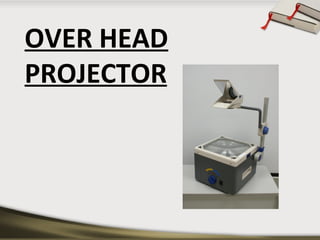
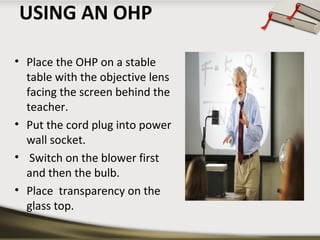
SEMINAR ON
PROJECTED AV AIDS
DEFINITION OF AV AIDS
Audio visual aids are anything by means of
which learning process may be
encouraged or carried on through the
sense of hearing or sense of sight.
- Goods
Dictionary of
education
TYPES
• PROJECTED
• NON PROJECTED
NON PROJECTED
•
•
•
•
•
•
•
•
•

Cartoons
Charts
Comics
Diagrams
Flash cards
Graphs
Maps
Photographs
Pictures

•
•
•
•
•
•
•
•
•
•

Posters
Printed material
Black board
Bulletin board
Flannel board
Magnetic board
Diagrams
Models
Puppets
Specimens
PROJECTED AV AIDS
DEFINITION
Projected visual aids are
pictures shown upon a screen
by the use of a certain type of
machine.
ADVANTAGES OF PROJECTED
AV AIDS

• Provides greater enjoyment in learning
• Stimulates more rapid learning
• Increases retention: larger percentages and longer
retention
• Compels attention
• Enlarges or reduces actual size of objects
• Brings distant past and the present into the
classroom
•
•
•
•
•

Opaque projectors
Slides
Film strips
Overhead projectors
LCD panels
OPAQUE PROJECTOR
• a device which displays opaque materials by shining
a bright lamp onto the object
• A system of mirrors, prisms and/or imaging lenses is
used to focus an image of the material onto a
viewing screen
• projectors require
brighter bulbs
• larger lenses
• Care to be taken to
prevent material
damage
• Not very common
• typically used to project images of book pages,
drawings, mineral specimens, leaves, etc
• artists’ enlargement tools
• predecessor to the overhead projector
CARE OF EPIDIASCOPE
•
•
•
•
•
•

handled carefully
Protected from breakage
away from moisture
kept clean
preferably kept in a cool room
switched off when not in use.
ADVANTAGES
•
•
•
•
•
•
•
•
•

graphic aids are projected with magnification
tracing enlarged images
no need of clipping picture from book resources
Flat specimen like coins, cloth pieces, leaves etc. can
also be projected
seen conveniently by a large number of students
Teaching material of various sizes can be used
language reading lessons
stamp size to that of 20cmx250cm size pictures.
helps in preparation of graphic aids
DISADVANTAGES
•
•
•
•

Demands total darkness
Bulky machine
Electricity required
Difficult maintenance
ROLE OF NURSE TEACHER
• Room
• Seating arrangement should be
semi-circular
• Do not allow students to sit
very close to the screen
• optical built in pointer to focus
attention
• Every picture with
commentary
• testing purposes
SLIDE AND FILM
STRIP PROJECTION
SLIDE
A slide is a still transparency of 70mm, 35mm or 6mm
size which is optically enlarged and projected on a
screen as a real image
FILM STRIP
 the film strip is a series of sequenced slides on a
piece of film covering a large portion of a lesson
 20 to 50 slides or frames are on about half meters to
one and half meters long film strip.
4 KINDS OF SLIDES CAN BE MADE BY TEACHER
•
•
•
•

Marker slides
Cellophane slides
Silhouette slides
Etched glass slides
Marker slide
• a clean glass piece of right size
• Draw picture or a diagram is with a fine tip marker
pen
• Hold glass piece in cardboard or wooden frame
Silhouette slides
• small cut outs from colour
cellophanes are plated on
the glass piece
• another glass piece is
plated over it
• two are taped together
• Or by drawing on
cellophane piece and
sticking it onto the glass
piece
ETCHED GLASS SLIDE
• clean a glass piece thoroughly
• rinse it with kerosene
• Draw the diagram with crayon glass marking pencil
• Another method
• cover the glass piece with smoke from burning
mustard oil lamp
• etch out the diagram with a sharp needle
• Cover with another glass piece
• tape them together
SLIDE AND FILM STRIP
PROJECTOR
• The slides and film strips are projected on a screen
using an optical instrument called slide and film strip
projector
• Technology same as opaque projectors
• Cannot project 3 dimensional image
• makes use of small photographs mounted on a slide
STRUCTURE
• consists of a metal case having a concave reflector
• 500 watt or 1000 watt straight filament bulb
• set of concave lens called condenser to illuminate
the slide
• slid able set of convex lenses have objective which
focuses the image of the slide on the screen.
• The metal core is fitted with as small exhaust fan to
blow out the excess heat.
• a slide frame or a film strip carrier
Using common slide and film projectors
• Place the slide projector on a rigid and stable table.
• Place the screen at an appropriate place
• Insert the slide projector or film strip carrier in its
place after opening the tube.
• Mount a slide or film strip on its carrier
• Insert the projector cord plug into the wall socket.
• Darken the room
• Switch on the cooling fan first and then the
projection bulb.
• Focus the image
• Show the slide and explain
• Insert the next slide
• Present the slides or frames sequentially
• switch off the bulb first then the cooling fan
• unplug the slide projector and store it back in its box.
PREPARATION OF A SLIDE SHOW
•
•
•
•
•
•
•
•

Collect all the available slides
check them thoroughly
Choose the slides
Arrange the chosen slides in a proper sequence
Darken the room
Make proper seating arrangements for students
start teaching
interruption during the slide show will result in the
loss of interest
CARE OF SLIDES AND FILMSTRIPS
•
•
•
•
•

they require care in handling and storage
store vertically in cardboard trays of right size
trays should be covered
they should be catalogued subject wise
film strips can be placed in rolled up positions in
cylindrical container
• container should be properly labelled
ADVANTAGES OF SLIDE PROJECTIONS.
• Requires simple skills
• convenient aid for making classroom teaching
interesting.
• small in size
• can be stored and also carried around easily
• quite cheaper
• a logical and sequential order of presentation
• image in the screen can be held for any time interval
• save time in teaching
• Capture attention and interest of students
• Interaction with students and group participation is
possible
ADVANTAGES OF FILM STRIPS
•
•
•
•
•
•
•

economical
easy to make
convenient to handle
Takes up little
can be easily stored
Provides logical sequence
Can use AC/DC power, batteries, or rechargeable
batteries with solar panels.
DISADVANTAGES OF SLIDES AND
FILM STRIP
• Need a darkened room.
• Require equipment and power that will need to be
maintained.
• Sequence cannot be changed.
• Visual media only; it requires audio or printed text.
• Require professional assistance for final production.
CARE OF THE FILMSTRIP
• Keep free of dust and dirt which can scratch the
filmstrip
• Keep dry because moisture can cause the emulsion
to become sticky.
• Then the film will stick together and be destroyed.
• Keep oily hands off the film as they can leave
residue on the film.
• Keep away from excessive heat which can cause the
film to warp.
STORAGE OF THE FILMSTRIP
• Store in containers away from heat, dust, moisture
• When winding up the filmstrip, hold onto the edges
• Do not pull to make it tighter as this can leave
scratches on the film
CARE OF THE EQUIPMENT
• Don’t handle projector while the bulb is still hot as
the bulb filament is fragile.
• Pack equipment carefully for safe transporting.
• Protect from the environment, dust, dirt, moisture
Micro projector
MICRO PROJECTOR
• slide projectors designed to project the microfilm
slides or microscopic slides to a group of students
simultaneously
• reduces the cost of instruction
• enlargement on screen is quite big for students
• with teacher’s commentary, micro projector can
ensure that students are understanding
OVER HEAD
PROJECTOR
OHP
• An OHP is an important electronic teaching aid.
• This machine projects an image from a transparency
• It will be advisable to switch off the bulbs of OHP for
5 minutes after every 10 minutes of use.
PREPARING TRANSPERENCIES
PREPARING A TRANSPARENCY
• prepared by writing on cellophane sheets with the
help of an OHP pen
• Coloured pens
• Xeroxing from any printed material
• besides single transparency can be used on a roll
RULE OF 6 FOR PREPARING A
TRANSPERENCY
•
•
•
•

Six lines per transparency
Six words per line
Six mm smallest letter size
Six cm (3+3 on each side) margin
SCREENS FOR PROJECTIONS
Effective utilization of projection material necessitates
careful selection of the screen. Types of screen are
 aluminium coated
 glass board
 flat white screen
 Screens should be mounted properly and at a proper
angle
USING AN OHP
• Place the OHP on a stable
table with the objective lens
facing the screen behind the
teacher.
• Put the cord plug into power
wall socket.
• Switch on the blower first
and then the bulb.
• Place transparency on the
glass top.
• Move the objective lens and mirror assembly up and
down to get the image in focus on the screen.
• Explain about the material on the transparency from
behind OHP with a strong pointer.
• The handle of the teacher should not come on the
slide.
• Make your points short and simple
• Remove what is not needed.
ADVANTAGES OF OHP
• teacher can face the class without any difficulty.
• The teacher can maintain eye contact and observe
the reactions of students.
• Small objects can be shown on the machine simply
by placing them on projection slide.
• The graphics and writings can be shown very clearly
and colourfully.
• It does not need as darkened room as compared to
other projectors
SOME DO’S AND
DON’T’S WHILE USING
THE OHP
DO’S
•
•
•
•
•
•
•

Focus and position image before presentation
Stand to the side of the screen
Turn off projector when not in u
Letters the larger the better
Use colour to attract attention
Put captions on top.
Have images in to two-thirds of visual position image
at the top of the screen
• Use pen or ruler to point
• Use upper and lower case letters
DON’T’S
• Walk or stand in front of the screen.
• Leave the projector on when you’ve talking about
something
• Write closely on the whole of the transparency sheet
• Have images type-written or too small
• Use black and white visuals only
• Use finger to point
• Use only capital letter
LCD PANELS
LCD
• largely superseded by data projectors
• When connected to a computer will enable to
project computer generated image onto a display
screen
• modern equivalent of the slide projector or
overhead projector.
POWER POINT PRESENTATIONS
• alternative to using OHP
• production of interesting and visually attractive
presentations
• flexibility both in terms of content and display
• Graphics, drawings, tables and organizational charts
• keep presentation simple and clear
• effectively used to emphasize the main features of
the topic.
GUIDELINES FOR POWERPOINT
PRESENTATION:

• Limit number of slides not more than 12 for a 10
minute presentation.
• Ensure text contrasts with the background
• avoid patterned background.
• Comply with copyright law, when pictures, charts,
tables or diagrams are used.
• Standardise position, colour and styles.
• Use on one or two animation or transition effects.
8 RULES FOR BETTER POWERPOINT
PRESENTATIONS
1. Remember that you are the presenter, not
PowerPoint
2. Don’t make your audience read the slides either
3. Make sure your presentation is easy on the eyes.
4. Never include anything that makes you announce,
“I don’t know if everyone can read this, …
5. Leave out the sound effects and background music,
8 RULES FOR BETTER POWERPOINT
PRESENTATIONS
6. Stick with simple animations if you use them at all
7. Proofread, proofread, proofread
8. Practice, practice, practice.
ADVANTAGES OF POWER POINT
• If you get lost, you can casually look at the power
point for guidance
• People can register the info more as they can
observe the PPT
• Images and good Presentation can make the PPT
more engaging
• Good for Reference at the end, if they ask questions
• Looks more professional
DISADVANTAGES OF POWER POINT
• You will not be able to change any slide during a
presentation
• Presenter cannot get into giving their full heart to
the presentation.
• time consuming
• Technically faults can rise
CONCLUSION
• Audio Visual Aids are very useful for the teaching
process
• audio-visual are great tools to catch the audience
attention
• It is important to use variety of teaching methods for
students with varying preferences
• An AV aid should also not distract a student from
learning experiences
Projectd av aids

Projectd av aids

  • 1.
  • 2.
    DEFINITION OF AVAIDS Audio visual aids are anything by means of which learning process may be encouraged or carried on through the sense of hearing or sense of sight. - Goods Dictionary of education
  • 3.
  • 4.
  • 5.
  • 6.
    DEFINITION Projected visual aidsare pictures shown upon a screen by the use of a certain type of machine.
  • 7.
    ADVANTAGES OF PROJECTED AVAIDS • Provides greater enjoyment in learning • Stimulates more rapid learning • Increases retention: larger percentages and longer retention • Compels attention • Enlarges or reduces actual size of objects • Brings distant past and the present into the classroom
  • 8.
  • 9.
    OPAQUE PROJECTOR • adevice which displays opaque materials by shining a bright lamp onto the object • A system of mirrors, prisms and/or imaging lenses is used to focus an image of the material onto a viewing screen
  • 10.
    • projectors require brighterbulbs • larger lenses • Care to be taken to prevent material damage • Not very common
  • 11.
    • typically usedto project images of book pages, drawings, mineral specimens, leaves, etc • artists’ enlargement tools • predecessor to the overhead projector
  • 12.
    CARE OF EPIDIASCOPE • • • • • • handledcarefully Protected from breakage away from moisture kept clean preferably kept in a cool room switched off when not in use.
  • 13.
    ADVANTAGES • • • • • • • • • graphic aids areprojected with magnification tracing enlarged images no need of clipping picture from book resources Flat specimen like coins, cloth pieces, leaves etc. can also be projected seen conveniently by a large number of students Teaching material of various sizes can be used language reading lessons stamp size to that of 20cmx250cm size pictures. helps in preparation of graphic aids
  • 14.
    DISADVANTAGES • • • • Demands total darkness Bulkymachine Electricity required Difficult maintenance
  • 15.
    ROLE OF NURSETEACHER • Room • Seating arrangement should be semi-circular • Do not allow students to sit very close to the screen • optical built in pointer to focus attention • Every picture with commentary • testing purposes
  • 16.
  • 17.
    SLIDE A slide isa still transparency of 70mm, 35mm or 6mm size which is optically enlarged and projected on a screen as a real image
  • 18.
    FILM STRIP  thefilm strip is a series of sequenced slides on a piece of film covering a large portion of a lesson  20 to 50 slides or frames are on about half meters to one and half meters long film strip.
  • 19.
    4 KINDS OFSLIDES CAN BE MADE BY TEACHER • • • • Marker slides Cellophane slides Silhouette slides Etched glass slides
  • 20.
    Marker slide • aclean glass piece of right size • Draw picture or a diagram is with a fine tip marker pen • Hold glass piece in cardboard or wooden frame
  • 21.
    Silhouette slides • smallcut outs from colour cellophanes are plated on the glass piece • another glass piece is plated over it • two are taped together • Or by drawing on cellophane piece and sticking it onto the glass piece
  • 22.
    ETCHED GLASS SLIDE •clean a glass piece thoroughly • rinse it with kerosene • Draw the diagram with crayon glass marking pencil
  • 23.
    • Another method •cover the glass piece with smoke from burning mustard oil lamp • etch out the diagram with a sharp needle • Cover with another glass piece • tape them together
  • 24.
    SLIDE AND FILMSTRIP PROJECTOR
  • 25.
    • The slidesand film strips are projected on a screen using an optical instrument called slide and film strip projector • Technology same as opaque projectors • Cannot project 3 dimensional image • makes use of small photographs mounted on a slide
  • 26.
    STRUCTURE • consists ofa metal case having a concave reflector • 500 watt or 1000 watt straight filament bulb • set of concave lens called condenser to illuminate the slide • slid able set of convex lenses have objective which focuses the image of the slide on the screen. • The metal core is fitted with as small exhaust fan to blow out the excess heat. • a slide frame or a film strip carrier
  • 27.
    Using common slideand film projectors • Place the slide projector on a rigid and stable table. • Place the screen at an appropriate place • Insert the slide projector or film strip carrier in its place after opening the tube. • Mount a slide or film strip on its carrier • Insert the projector cord plug into the wall socket. • Darken the room
  • 28.
    • Switch onthe cooling fan first and then the projection bulb. • Focus the image • Show the slide and explain • Insert the next slide • Present the slides or frames sequentially • switch off the bulb first then the cooling fan • unplug the slide projector and store it back in its box.
  • 29.
    PREPARATION OF ASLIDE SHOW • • • • • • • • Collect all the available slides check them thoroughly Choose the slides Arrange the chosen slides in a proper sequence Darken the room Make proper seating arrangements for students start teaching interruption during the slide show will result in the loss of interest
  • 30.
    CARE OF SLIDESAND FILMSTRIPS • • • • • they require care in handling and storage store vertically in cardboard trays of right size trays should be covered they should be catalogued subject wise film strips can be placed in rolled up positions in cylindrical container • container should be properly labelled
  • 31.
    ADVANTAGES OF SLIDEPROJECTIONS. • Requires simple skills • convenient aid for making classroom teaching interesting. • small in size • can be stored and also carried around easily • quite cheaper • a logical and sequential order of presentation • image in the screen can be held for any time interval
  • 32.
    • save timein teaching • Capture attention and interest of students • Interaction with students and group participation is possible
  • 33.
    ADVANTAGES OF FILMSTRIPS • • • • • • • economical easy to make convenient to handle Takes up little can be easily stored Provides logical sequence Can use AC/DC power, batteries, or rechargeable batteries with solar panels.
  • 34.
    DISADVANTAGES OF SLIDESAND FILM STRIP • Need a darkened room. • Require equipment and power that will need to be maintained. • Sequence cannot be changed. • Visual media only; it requires audio or printed text. • Require professional assistance for final production.
  • 35.
    CARE OF THEFILMSTRIP • Keep free of dust and dirt which can scratch the filmstrip • Keep dry because moisture can cause the emulsion to become sticky. • Then the film will stick together and be destroyed. • Keep oily hands off the film as they can leave residue on the film. • Keep away from excessive heat which can cause the film to warp.
  • 36.
    STORAGE OF THEFILMSTRIP • Store in containers away from heat, dust, moisture • When winding up the filmstrip, hold onto the edges • Do not pull to make it tighter as this can leave scratches on the film
  • 37.
    CARE OF THEEQUIPMENT • Don’t handle projector while the bulb is still hot as the bulb filament is fragile. • Pack equipment carefully for safe transporting. • Protect from the environment, dust, dirt, moisture
  • 38.
  • 39.
    MICRO PROJECTOR • slideprojectors designed to project the microfilm slides or microscopic slides to a group of students simultaneously • reduces the cost of instruction • enlargement on screen is quite big for students • with teacher’s commentary, micro projector can ensure that students are understanding
  • 40.
  • 41.
    OHP • An OHPis an important electronic teaching aid. • This machine projects an image from a transparency • It will be advisable to switch off the bulbs of OHP for 5 minutes after every 10 minutes of use.
  • 42.
  • 43.
    PREPARING A TRANSPARENCY •prepared by writing on cellophane sheets with the help of an OHP pen • Coloured pens • Xeroxing from any printed material • besides single transparency can be used on a roll
  • 44.
    RULE OF 6FOR PREPARING A TRANSPERENCY
  • 45.
    • • • • Six lines pertransparency Six words per line Six mm smallest letter size Six cm (3+3 on each side) margin
  • 46.
    SCREENS FOR PROJECTIONS Effectiveutilization of projection material necessitates careful selection of the screen. Types of screen are  aluminium coated  glass board  flat white screen  Screens should be mounted properly and at a proper angle
  • 47.
    USING AN OHP •Place the OHP on a stable table with the objective lens facing the screen behind the teacher. • Put the cord plug into power wall socket. • Switch on the blower first and then the bulb. • Place transparency on the glass top.
  • 48.
    • Move theobjective lens and mirror assembly up and down to get the image in focus on the screen. • Explain about the material on the transparency from behind OHP with a strong pointer. • The handle of the teacher should not come on the slide. • Make your points short and simple • Remove what is not needed.
  • 49.
    ADVANTAGES OF OHP •teacher can face the class without any difficulty. • The teacher can maintain eye contact and observe the reactions of students. • Small objects can be shown on the machine simply by placing them on projection slide. • The graphics and writings can be shown very clearly and colourfully. • It does not need as darkened room as compared to other projectors
  • 50.
    SOME DO’S AND DON’T’SWHILE USING THE OHP
  • 51.
    DO’S • • • • • • • Focus and positionimage before presentation Stand to the side of the screen Turn off projector when not in u Letters the larger the better Use colour to attract attention Put captions on top. Have images in to two-thirds of visual position image at the top of the screen • Use pen or ruler to point • Use upper and lower case letters
  • 52.
    DON’T’S • Walk orstand in front of the screen. • Leave the projector on when you’ve talking about something • Write closely on the whole of the transparency sheet • Have images type-written or too small • Use black and white visuals only • Use finger to point • Use only capital letter
  • 53.
  • 54.
    LCD • largely supersededby data projectors • When connected to a computer will enable to project computer generated image onto a display screen • modern equivalent of the slide projector or overhead projector.
  • 55.
    POWER POINT PRESENTATIONS •alternative to using OHP • production of interesting and visually attractive presentations • flexibility both in terms of content and display • Graphics, drawings, tables and organizational charts • keep presentation simple and clear • effectively used to emphasize the main features of the topic.
  • 56.
    GUIDELINES FOR POWERPOINT PRESENTATION: •Limit number of slides not more than 12 for a 10 minute presentation. • Ensure text contrasts with the background • avoid patterned background. • Comply with copyright law, when pictures, charts, tables or diagrams are used. • Standardise position, colour and styles. • Use on one or two animation or transition effects.
  • 57.
    8 RULES FORBETTER POWERPOINT PRESENTATIONS 1. Remember that you are the presenter, not PowerPoint 2. Don’t make your audience read the slides either 3. Make sure your presentation is easy on the eyes. 4. Never include anything that makes you announce, “I don’t know if everyone can read this, … 5. Leave out the sound effects and background music,
  • 58.
    8 RULES FORBETTER POWERPOINT PRESENTATIONS 6. Stick with simple animations if you use them at all 7. Proofread, proofread, proofread 8. Practice, practice, practice.
  • 59.
    ADVANTAGES OF POWERPOINT • If you get lost, you can casually look at the power point for guidance • People can register the info more as they can observe the PPT • Images and good Presentation can make the PPT more engaging • Good for Reference at the end, if they ask questions • Looks more professional
  • 60.
    DISADVANTAGES OF POWERPOINT • You will not be able to change any slide during a presentation • Presenter cannot get into giving their full heart to the presentation. • time consuming • Technically faults can rise
  • 61.
    CONCLUSION • Audio VisualAids are very useful for the teaching process • audio-visual are great tools to catch the audience attention • It is important to use variety of teaching methods for students with varying preferences • An AV aid should also not distract a student from learning experiences