Downloaded 10 times


![sheet of paper, card or other opaque material and then to move it
out of the way as and when required. This can be quite effective
when used with a simple list of headings of key points, which can be
revealed and discussed one by one. There is, however, a tendency
for the mask to fall off the projector before the material at the bottom
of the transparency is reached, something that can be prevented by
weighing it down with a suitable !aavy object (e.g. a bunch of keys
or a ruler).
+EH]
masks folded
back to reveal
material
underneath
hinges --
mask still
to be-4
removed
material still to be revealed
mask still
to be
removed
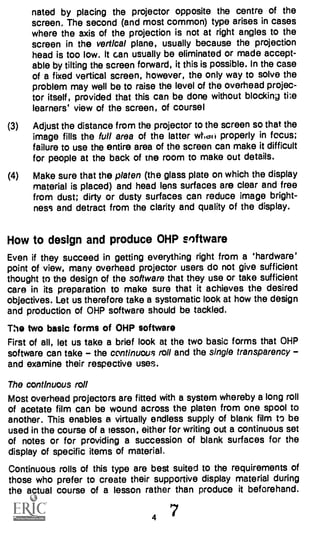
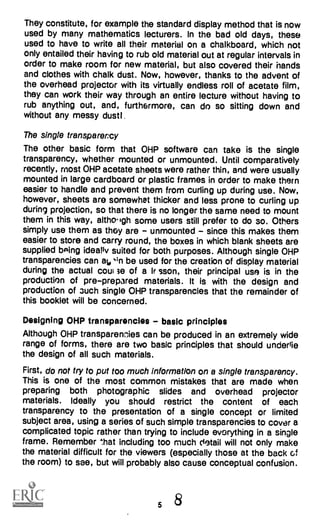
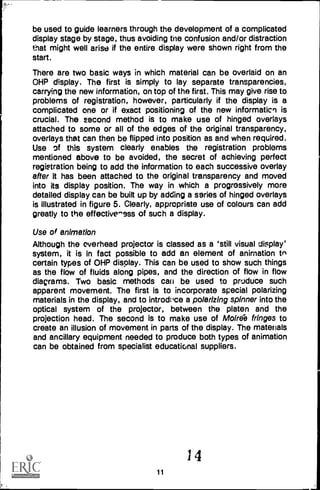
Figure 4: usa of a system of hinged masks to allow progressive disclosure of
the various sections of a block diagram
A more sophisticated and more versatile way of achieving
progressive disclosure is to cover the various items or sentions with
individual masks of the required shape and attach these to one or
more of the edges of the transparency by means of suitable hinges
(e.g. pieces of Sellotape). The masks can then be pulled back one
by one in order to reveal the different items or sections. This
technique is particularly useful with graph displays such as block
and flow diagrams, since it enables the various sections of such a
diagram to be revealed one by one, thus showing how the complete
system is built up. The use of such hinged masks is illustrated in
figure 4.
Use of overlays
Another standard technique that can bo used to bu:11 up the
information content of an overhead projector display is . I use of
overlays. This differs from progressive disclosure in that the whole of
the area of the tranbdarency is revealed from the start, with
additional information being added to the original display by
superimposing further transparencies on tie original. Again, this can
to -13](https://image.slidesharecdn.com/ed289497-151027100959-lva1-app6892/85/overhead-projector-guide-12-320.jpg)


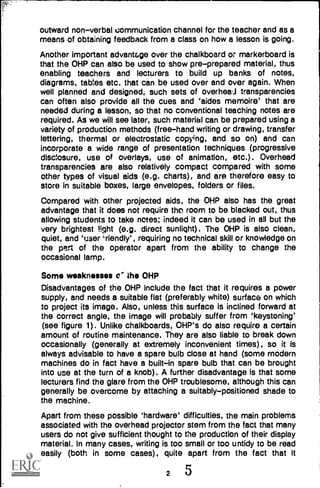
This document provides a guide for using overhead projectors effectively in teaching. It discusses the educational benefits of overhead projectors, such as maintaining eye contact with students. It also outlines some weaknesses, like the need for power and flat surfaces. The document then provides guidelines for proper setup to avoid issues like keystoning. Finally, it discusses designing overhead transparencies with best practices for content, size, and layout.


