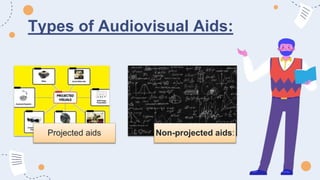
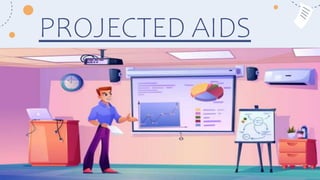
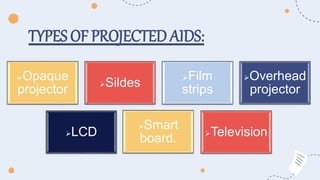
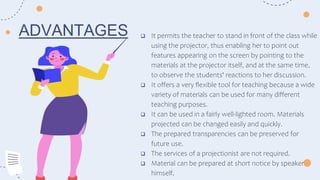
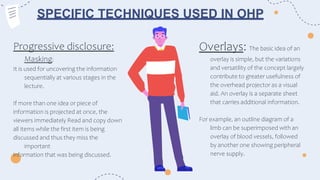
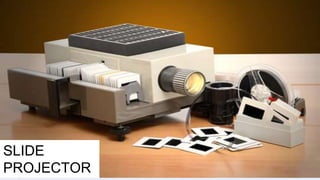
PROJECTED
AIDS
PRESENTED BY: MISS ANMOL
Audio Visual Aids
The audio visual aids can play a powerful role in enhancing the
impact and memorability of the presentation. When used
properly, they can entertain and enliven the audience while
increasing their receptivity and recall.
The reason for an audiovisual aid is simply to present an idea in a
form that the audience will understand most quickly, in a form
that is that close to the reality, to the real things as is possible,
in a form that asks the listener to do as little translating as
possible.
Definitions of
Audiovisual Aids:
 According to Edger Dale: ‘Audiovisual aids are those
devices by the use of which communication of ideas
between persons and groups in various teaching and
training situations is helped. These are also termed as
multisensory material’.
Definitions of
Audiovisual Aids:
According to Burton: ‘Audiovisuals aids are
those sensory objects or images which
initiate or stimulate and reinforce learning.’
Definitions of
Audiovisual Aids:
According to Mcknown and Roberts: 'Audio visual aids are
supplementary devices by which the teacher, through
the utilization of more than one sensory channel keeps
to clarify, establish and correlate concepts,
interpretations and appreciations.’
Types of Audiovisual Aids:
Projected aids Non-projected aids:
PROJECTED AIDS
PROJECTED
AIDS
Projected aids are used to supplement teaching with projection of
teaching material on screen.
Projected audio-visual aids refer to multimedia presentations that
combine visual elements, such as slides or images, with audio
components like narration or background music.
PROJECTED
AIDS
These aids are commonly used in presentations, lectures, or
educational settings to enhance engagement and convey
information effectively.
They can include slideshows, videos, animations, and other
interactive elements to create a more dynamic and
engaging learning or presentation experience.
PROJECTED AIDS
 Projection: It refers to a process by which things are
being visualized.
 Screen : It is a device on which you can project images
with the help of projector.
 Good quality screen should be used while using projected
aids.
 Distance between audience and screen: 2-6 formula should
be used i.e. twice the width of the screen, maximum
distance can be six times of the width of the screen. The
distance is calculated between screen and first row of
screen.
Principal of projection
There are three major projection
systems:
1. Direct projection.
2. Indirect projection.
3. Reflected or opaque projection.
DIRECT
PROJECTION
INDIRECT
PROJECTION
SYSTEM
REFLECTED/
OPAQUE
PROJECTION
SYSTEM
USES
OF
PROJECTION
PROJECTION
BASIC ELEMENTS:
LENS
SYSTEM.
1. 2. 3. 4.
MATERIAL
CARRYING -SLIDE,
FILM,
TRANSPARENCIES
LIGHT
SOURCE.
HOLDER FOR
MATERIAL TO BE
PROJECTED.
5.
CARE FOR
KEEPING
ACCESSORIES.
6.
SCREEN FOR
PROJECTION.
Basic facilities for projecting:
• Projector support: table or trolley.
• Electric power.
• Reducing light/darkening.
• Seating arrangement.
• Distance between students and screen.
CARE OF
PROJECTOR:
TYPES OF PROJECTED AIDS:
Opaque
projector
Sildes
Film
strips
Overhead
projector
LCD
Smart
board. Television
OPAQUE PROJECTOR:
OPAQUE
PROJECTOR
OPAQUE PROJECTOR:
The projection of real magnified images on a screen directly
from pictures anddrawings on papers is called opaque
projector.
Opaque projector is done by anoptical instrument called
episcope. Flat picture diagrams and other graphic material
from books, magazines, periodicals, as well as those drawn on
glossywhite paper can be straight away projected on a screen
in a darkroom.
Principle of episcope:
The light reflected from the strongly
illuminated picture is reversed by means
ofa mirror at 45° and then it is projected
on a screen using a convex lens.
The illuminated picture lies between the
focus and twice the focus of the convex
lens to produce a magnified real image.
Construction of episcope:
An episcope consists of a light-tight metal box with a slide
label lens arranged at the top. The picture is placed on a
platform near the bottom of box which is lifted up with
lever handle and then closed.
A 1000 Watt straight-filament bulb with a concave
reflector illuminates the picture strongly.
A mirror at 45° near the top corner reverse the light
reflected from the picture making it pass throughthe lens
system which can be slided. A small exhaust fan blows
out the heat of the high intensity bulb.
OPERATION OF EPISCOPE:
An episcope is operated in a darkroom
Place the picture on the platform and close it.
Switch on the blower or exhaust fan of the episcope. Switch on the bulb of the episcope.
Slide the lens to focus the image on the screen.
After showing and explaining about the picture, switch off the lamp.
After a short interval switch off the blower
All the advantages of graphic aids.
Flat specimen can be projected
during lessons.
Opaque projectors can be seen
conveniently by a large number of
students.
Software used with episcope is
inexpensive.
A
D
V
A
N
T
A
G
E
S
Filmstrips:
FILMSTRIPS
A film strip is a series of sequenced slides on a piece of
film covering a large portion of a lesson.
Generally twenty to fifty slides or frames are there on
an about half meter to one and a half meters long film
strip. A tape-recorded narrations can be synchronized
with a film strip.
USING A COMMON SLIDE AND FILMSTRIP PROJECTOR
1.Place the slide projector on a rigid and stable table.
2.Place the screen at an appropriate place so that the
whole class can see it.
3.Insert the slide carrier or filmstrip carrier in its place
behind the object lens tube after opening the tube.
4.Mount a slide or filmstrip on its carrier
5.Insert the projector cord plug into the wall socket.
Darken the room in which projection is to be carried out.
USING A COMMON SLIDE AND FILMSTRIP PROJECTOR
6. Switch the cooling fan first and then the projection bulb. Focus the image on
the screen sharply by moving or sliding objective lens forward and backward.
7. Show the slide and explain your subject matter with its aid.
8. Remove the slide after this. Insert the next slide or move the film strip to get
the next strip.
9. Present the slides or frame sequentially
10. After the lesson, switch off the bulb first then the cooling fan. Unplug the
slide projector and store it back in its box.
Instructions to be followed while using filmstrip:
 Preview filmstrips before using them and select them
carefully to meet the needs of the topic to be taught.
 Show again any part of film strips needing more specific
study.
 Use a pointer to direct attention to specific detail on
screen.
 The filmstrips can be placed in rolled up e positions in
cylindrical container.
 Each container should be properly labeled for the plastic
title of the film strip.
 If the institution has a large number of slides, they
should be catalogued subject-wise.
Overhead projector (OHP) :
OVERHEAD
PROJECTOR
● Overhead projector is a device for projecting a matter, which is written or drawn on
transparent sheet on to a screen.
● An overhead projector produces images on screen behind or over the head of the
teacher. In an overhead projector, the large-sized transparency is kept horizontal which is
intensely illuminated by a condenser lens. The final image is produced on a vertical screen
with a highly polished tilted mirror and object lens capable of sliding on a vertical mast.
● It consists of a metal box, a 1000watt bulb and a concave reflector, a condenser lens
illuminates the transparency placed on the glass sheet on the top of the box.
OVERHEAD PROJECTOR (OHP) :
1.Place the OHP
on a stable table
with the objective
lens facing the
screen behind the
teacher.
2.Put the cord
plug into a power
wall-socket.
Switch on the
blower first and
then the bulb.
3.Place the
transparency on
the glass top.
4.Move the
objective lens and
mirror assembly
up and down to
get the image in
focus on the
screen.
5.Explain about
the material on
the transparency
sitting behind the
overhead
projector with a
small pointe
Using an Over HeadProjector
(OHP) :
● Use a standard size of acetate sheet measuring 18 cm x 22.5 cm.
● OHP markers are available in two types; temporary and permanent. Temporary markers have
soluble ink and written matter can be wiped off with the help of a damp cloth. Permanent
markers are oil, spirit or wax based and their writing is preserved for long time. One may prepare
reusable transparencies with permanent OHP markers. Additions and alteration during teaching
should be made with water soluble OHP markers so that the same are wiped off after use. If you
want to reuse the transparency sheet later for another purpose, be sure to use a marker with
soluble ink.
● Transparencies must be clearly written with at least 8 mm size letters
free hand. A transparency which can be clearly read from a distance
of 2 m should project well .
PREPARATION OF OHP TRANSPARENCIES
● The best colors to use to write on transparencies are black,
blue and green. Use red sparingly. It is not a color that project
well.
● Whether you are drawing the image on the transparency or
copying it from a printed page, keep the amount of
information on the sheet to a minimum and make the image
large enough so that students in the back of the room will be
able to see it.
● Avoid copying information from a printed book or journal
page or a type written sheet.
PREPARATION OF OHP
TRANSPARENCIES
 It permits the teacher to stand in front of the class while
using the projector, thus enabling her to point out
features appearing on the screen by pointing to the
materials at the projector itself, and at the same time,
to observe the students' reactions to her discussion.
 It offers a very flexible tool for teaching because a wide
variety of materials can be used for many different
teaching purposes.
 It can be used in a fairly well-lighted room. Materials
projected can be changed easily and quickly.
 The prepared transparencies can be preserved for
future use.
 The services of a projectionist are not required.
 Material can be prepared at short notice by speaker
himself.
ADVANTAGES
SPECIFIC TECHNIQUES USED IN OHP
Overlays: The basic idea of an
overlay is simple, but the variations
and versatility of the concept largely
contribute to greater usefulness of
the overhead projector as a visual
aid. An overlay is a separate sheet
that carries additional information.
For example, an outline diagram of a
limb can be superimposed with an
overlay of blood vessels, followed
by another one showing peripheral
nerve supply.
Progressive disclosure:
Masking:
It is used for uncovering the information
sequentially at various stages in the
lecture.
If more than one idea or piece of
information is projected at once, the
viewers immediately Read and copy down
all items while the first item is being
discussed and thus they miss the
important
information that was being discussed.
SLIDE
PROJECTOR
● A slide is a small piece of transparent film of 70
mm, 30 mm or 6 mm on which a pictorial image
or scene "or graphic image is either
photographed or reproduced in optically
enlarged form and projected as real image.
● There are generally 20 to 50 slides or frames on
about 1.5 meter long filmstrip. Own photographic
films can be printed on the film to be projected.
Slides can be prepared through the photographs
and pictures or snapshots taken by teacher.
● The slides must be arranged in a sequential
manner as per the continuity of discussion is very
important while using them for teaching
purpose.
SLIDES
● The slides must be arranged in a sequential manner as per
the continuity of discussion is very important while using
them for teaching purpose.
● Using slides as a form of projected media requires
expertise. These are the still pictures on positive film which
a person can process and mount individually.
● The standard size of the slides is 2"x 2 "any 35 mm camera
can make satisfactory slides. Before projecting slides in the
classroom teacher has to collect all available slides and
arrange them in order. The slides can be previewed against
the lighted lamp.
SLIDES
The slides can be previewed against the lighted lamp. Based on the method of preparation they can be
classified into:
SLIDES
oSlides made by
photographic process. oHandmade slide
Guidelines
for
use
of
slides..
SLIDES
ADVANTAGES DISADVANTAGES
 They are compact.
 Slides are easy to carry.
 They are easy to store and can be preserved
for a long period of time.
 Less eye soaring and increased visual
impact.
 Speed of slide presentation can be
controlled by the teacher so that each
slide can be discussed for desired time
o They are expensive and can
easily get dirty and smudged
with fingerprints.
o Projector bulbs do not last very long
and are expensive to replace.
o Reduced room light is necessary to get
a clear image on the screen.
LIQUID CRYSTAL DISPLAY
● Liquid-crystal display (LCD) is electronic visual display
equipment is a new teaching aid. It uses the light
modulating properties of liquid crystal hence named as
liquid crystal display.
● The LCD projector is connected to a computer either
desktop or laptop or interactive whiteboard or less
expansive tablet Once it is connected, it allows the
computer's screen to be viewed by the entire class The
LCD can be connected directly to other electronic
equipment like VCRs, DVD players also.
LCD
● Large group of students can be taught by the
teacher in the class using LCD projector.
● Teacher can provide students with a problem
to solve.
● It is an advanced use of technology for
teaching the students. It is expensive therefore
cannot be afforded by many educational
institution.
GUIDELINES FOR USING LCD PROJECTOR
● Projection surface :
Projecting Surface should be neutral color & best suited for
natural color tones.
● Setting up the system :
 Place Projector 5-15 feet away from the projection screen
 Place projector permanently on fixed ceiling/ on stable
surface.
 Computer/laptop cable should be connected at the back of
the LCD projector on a video port.
 The power cable of projector should be connected to 3-way
electrical port.
 Lens cap of projector should be removed.
GUIDELINES FOR USING LCD PROJECTOR
● Shutting down the projector
 Press the Power button; a message may appear to check
whether to turn off the projector. Again press the power
button, projector will turn off.
 Before unplug the projector from electrical port, wait for 2
minutes to off the projector fan.
 Also ensure the flashing light is off before the projector.
POWER
POINT
PRESENTATION
POWERPOINT PRESENTATION
● PowerPoint uses slides with a horizontal or 'Landscape'
orientation.
● The software was designed as a convenient way to display
graphical information that would support the speaker and
supplement the presentation.
● PowerPoint can be an effective tool to present material in the
classroom and encourage student learning.
Designing the PowerPoint presentation
Preparing for
the
presentation
Student
accessibility
Slide content
Emphasizing
content
Typeface Point size
Clip art and
graphics
Animation
and sound
Designing the PowerPoint presentation
Color scheme in making slides:
BlackLetters
Whitebackground
Gray Letter
White Background
Blackletters
Bluebackground
WhiteLETTER
Blackbackground
POWERPOINT PRESENTATION
ADVANTAGES
 Saves times and
energy .
 Portable and can be
easily shared .
 Support multimedia
 PowerPoint can take up
time to load a presentation.
 Time-consuming to prepare.
 Technical faults can raise
and if the computer is not
supported by UPS, it cannot
be used during power cut
DISADVANTAGES
TELEVISION
TELEVISION
● Television is being acknowledged as a powerful medium of
mass education. In India, television is being used for imparting
distance education through the UGC programs and other
educational programs.
● A television can bring the real world into the classroom in the
real sense. It has the ability to bring the events and happening
to the viewer in action.
● For imparting education, television is being described as an
electronic chalkboard.
ADVANTAGES OF EDUCATIONALTELEVISIONPROGRAM:
 Television appeals to eye, ear and emotions. Because of this kind
of almost total involvement, it can induce effective learning.
 It can re-live with vividness the past events and happenings.
 It can directly show the current happening and live shows.
 The television can work as a powerful medium of mass education.
SMART BOARD
SMART BOARD
● SMART Board is an interactive whiteboard that allows
you project your presentation, write over the
projection, save the changes, and create new
presentations.
● You can show videos, DVDs and link to the internet. It is
an easy tool to use requiring no special expertise.
OBJECTIVES OF USING SMART BOARD IN
DISTANCE EDUCATION:
● Enhance instruction and learning in distance education.
● Make the communication more interactive between tutor and learners (Two
way communications.).
● Create a stimulating and engaging learning distance environment.
● Helps organize presentations and motivate learners.
● Make the learning easy to the face-to-face communication student, distance
education and EL students.
SMART BOARD FEATURE:
● It is large.
● The projector throws the computer's desktop image onto the interactive
whiteboard, which acts as both a monitor and an input device.
● Control the presentation from the screen by touching the screen.
● Capture an image of any annotations you make to a PowerPoint (or other
applications) presentation.
● Save or print a complete copy of everything written, drawn, or typed in the
Notebook software.
SMART BOARD FEATURE:
● Use the handwriting recognition feature to convert handwritten text into
typewritten text.
● USB Cable to connect the smart board to the computer.
● Users can write on the interactive whiteboard in digital ink or use a finger to
control computer applications by pointing, clicking and dragging, just as with
a desktop mouse.
● The interactive whiteboard is usually mounted on a wall or a floor stand and
is used in face-to-face or virtual settings in education business and
government.
ADVANTAGE OF SMART BOARD
:
 You can use different program through smart board like PowerPoint and
Photoshop.
 Easy to use.
 Two way communications.
 Very interactive: learner can participate through remote or through
discussion board.
 Easy to connect with computers.
 Need small space of the class.
 The interactive whiteboard is an excellent tool for the constructivist
educator.
LIMITATIONS OF SMART BOARD :
 It is difficult to setting up a whiteboard and
projector in a small classroom.
 Expensive
 Irrelevant information can distract students from
learning.
 Teacher training is needed.
 Lesson preparation time is increased.
INTEGRATING SMART BOARD WITH VIDEO
CONFERENCING
● You can integrate a SMART Board interactive whiteboard and a videoconferencing
system and you don't need an additional monitor to display your videoconference.
● It can be used as a combined video and data conference by splitting the screen into
video and application images.
● You can brainstorm and diagram as if you were at a whiteboard and control all your
computer applications directly from the board's touch-sensitive surface, while dedicating
a portion of the board to displaying the video of your remote team members.
WAYS TO USE INTERACTIVE
WHITEBOARDS IN THE ONLINE DISTANCE
EDUCATION
● It can be used with online video conferencing
● Save lessons to present to students who were absent
● Create video files to teach a software application, a lesson, or as a review to
be posted to the server or web.
● Use the built in maps to teach continents, oceans, countries, or states and
capitals.
● Present presentations created by student or teacher
● Digital storytelling.
● Brainstorming.
What is their educational value?
 They provide electronically all the familiar features of a traditional classroom
blackboard or roller whiteboard.
 Lessons can be enhanced by easily integrating video, animation, graphics, text and
audio with the teacher's spoken presentation.
 It is possible to highlight and annotate key points, using the marker pens. Anything on
the screen can be saved as a 'snapshot', making it easy to review and summarise key
teaching points.
 Material can be displayed from a number of sources, including CD-ROMs,
websites,DVDs, VHS tapes or television.
CONCLUSION
● Projected audio visuals aids are very effective
aids to classroom teaching. They have a
characteristic appeal of their own, which is
especially suitable for influencing the learner.
When combined with recorded or on the spot
commentary, they prove to be useful in a large
number of situations. However, like all other visual
and audiovisual aids, they are only aids and it
cannot be safely assumed that they alone can do
the entire gamete of teaching.
BIBLIOGRAPHY
● Sodhi JK ,Comprehensive Textbook Of Nursing Education, Second Edition, Jp Brother Medical
Publisher (P)Ltd.2022.
● Gopichandran L. Kanniammal C.Essential Of Communication And Technology, First Edition CBS
Publishers B Distributors Pvt Ltd: 2017.
● Dale Edgar, Audiovisual methods in Teaching,Third Edition,The Drydenpress.
● Celement Nisha,Essentials Of Communication and Educational Technology, Second
Edition,Jaypee Brothers Medical Publishers.
● KP Neeraja, Textbook of Nursing Education, New Delhi Jaypee Brothers; 2003.P.40-78,3512. BT
Basavanthappa, Nursing Education, New Delhi:jaypee Brothers: 2003.p.561-578
● Internet sources:
○ https://sites.google.com/a/myport.ac.uk/you-know-ict/ict- tools/youtube-vidoe-1
○ https://www.dreamstime.com/stock-illustration-film-strip- images-isolated-white-
image57891566
○ https://pnubsehistedtech-projectedmedia.weebly.com/opaque- projector--parts-and-
guidelines-in-using-the-various- projected-media.html.
References for videos:
● https://youtu.be/biZO3VNZpTA?si=ir0NcstVfzUeTKGb
● https://youtu.be/hiw5TmYINg8?feature=shared
● https://youtu.be/PjPrhaGZbD4?si=LzZ_KM7guCSVDSn-
● https://youtu.be/CU5hnd9gzmc?si=MzMA7vqFgN5uQ_nQ
● https://youtu.be/bCCWP9xe1CQ?si=O-nPAtoYBvKGmjug
THANK YOU.
ppt of projected aids.pptx

ppt of projected aids.pptx

  • 1.
  • 2.
    Audio Visual Aids Theaudio visual aids can play a powerful role in enhancing the impact and memorability of the presentation. When used properly, they can entertain and enliven the audience while increasing their receptivity and recall. The reason for an audiovisual aid is simply to present an idea in a form that the audience will understand most quickly, in a form that is that close to the reality, to the real things as is possible, in a form that asks the listener to do as little translating as possible.
  • 3.
    Definitions of Audiovisual Aids: According to Edger Dale: ‘Audiovisual aids are those devices by the use of which communication of ideas between persons and groups in various teaching and training situations is helped. These are also termed as multisensory material’.
  • 4.
    Definitions of Audiovisual Aids: Accordingto Burton: ‘Audiovisuals aids are those sensory objects or images which initiate or stimulate and reinforce learning.’
  • 5.
    Definitions of Audiovisual Aids: Accordingto Mcknown and Roberts: 'Audio visual aids are supplementary devices by which the teacher, through the utilization of more than one sensory channel keeps to clarify, establish and correlate concepts, interpretations and appreciations.’
  • 6.
    Types of AudiovisualAids: Projected aids Non-projected aids:
  • 7.
  • 8.
    PROJECTED AIDS Projected aids areused to supplement teaching with projection of teaching material on screen. Projected audio-visual aids refer to multimedia presentations that combine visual elements, such as slides or images, with audio components like narration or background music.
  • 9.
    PROJECTED AIDS These aids arecommonly used in presentations, lectures, or educational settings to enhance engagement and convey information effectively. They can include slideshows, videos, animations, and other interactive elements to create a more dynamic and engaging learning or presentation experience.
  • 10.
    PROJECTED AIDS  Projection:It refers to a process by which things are being visualized.  Screen : It is a device on which you can project images with the help of projector.  Good quality screen should be used while using projected aids.  Distance between audience and screen: 2-6 formula should be used i.e. twice the width of the screen, maximum distance can be six times of the width of the screen. The distance is calculated between screen and first row of screen.
  • 11.
    Principal of projection Thereare three major projection systems: 1. Direct projection. 2. Indirect projection. 3. Reflected or opaque projection.
  • 12.
  • 13.
  • 14.
  • 15.
  • 16.
    BASIC ELEMENTS: LENS SYSTEM. 1. 2.3. 4. MATERIAL CARRYING -SLIDE, FILM, TRANSPARENCIES LIGHT SOURCE. HOLDER FOR MATERIAL TO BE PROJECTED. 5. CARE FOR KEEPING ACCESSORIES. 6. SCREEN FOR PROJECTION.
  • 17.
    Basic facilities forprojecting: • Projector support: table or trolley. • Electric power. • Reducing light/darkening. • Seating arrangement. • Distance between students and screen.
  • 18.
  • 19.
    TYPES OF PROJECTEDAIDS: Opaque projector Sildes Film strips Overhead projector LCD Smart board. Television
  • 20.
  • 21.
    OPAQUE PROJECTOR: The projectionof real magnified images on a screen directly from pictures anddrawings on papers is called opaque projector. Opaque projector is done by anoptical instrument called episcope. Flat picture diagrams and other graphic material from books, magazines, periodicals, as well as those drawn on glossywhite paper can be straight away projected on a screen in a darkroom.
  • 22.
    Principle of episcope: Thelight reflected from the strongly illuminated picture is reversed by means ofa mirror at 45° and then it is projected on a screen using a convex lens. The illuminated picture lies between the focus and twice the focus of the convex lens to produce a magnified real image.
  • 23.
    Construction of episcope: Anepiscope consists of a light-tight metal box with a slide label lens arranged at the top. The picture is placed on a platform near the bottom of box which is lifted up with lever handle and then closed. A 1000 Watt straight-filament bulb with a concave reflector illuminates the picture strongly. A mirror at 45° near the top corner reverse the light reflected from the picture making it pass throughthe lens system which can be slided. A small exhaust fan blows out the heat of the high intensity bulb.
  • 25.
    OPERATION OF EPISCOPE: Anepiscope is operated in a darkroom Place the picture on the platform and close it. Switch on the blower or exhaust fan of the episcope. Switch on the bulb of the episcope. Slide the lens to focus the image on the screen. After showing and explaining about the picture, switch off the lamp. After a short interval switch off the blower
  • 27.
    All the advantagesof graphic aids. Flat specimen can be projected during lessons. Opaque projectors can be seen conveniently by a large number of students. Software used with episcope is inexpensive. A D V A N T A G E S
  • 28.
  • 29.
    FILMSTRIPS A film stripis a series of sequenced slides on a piece of film covering a large portion of a lesson. Generally twenty to fifty slides or frames are there on an about half meter to one and a half meters long film strip. A tape-recorded narrations can be synchronized with a film strip.
  • 30.
    USING A COMMONSLIDE AND FILMSTRIP PROJECTOR 1.Place the slide projector on a rigid and stable table. 2.Place the screen at an appropriate place so that the whole class can see it. 3.Insert the slide carrier or filmstrip carrier in its place behind the object lens tube after opening the tube. 4.Mount a slide or filmstrip on its carrier 5.Insert the projector cord plug into the wall socket. Darken the room in which projection is to be carried out.
  • 31.
    USING A COMMONSLIDE AND FILMSTRIP PROJECTOR 6. Switch the cooling fan first and then the projection bulb. Focus the image on the screen sharply by moving or sliding objective lens forward and backward. 7. Show the slide and explain your subject matter with its aid. 8. Remove the slide after this. Insert the next slide or move the film strip to get the next strip. 9. Present the slides or frame sequentially 10. After the lesson, switch off the bulb first then the cooling fan. Unplug the slide projector and store it back in its box.
  • 32.
    Instructions to befollowed while using filmstrip:  Preview filmstrips before using them and select them carefully to meet the needs of the topic to be taught.  Show again any part of film strips needing more specific study.  Use a pointer to direct attention to specific detail on screen.  The filmstrips can be placed in rolled up e positions in cylindrical container.  Each container should be properly labeled for the plastic title of the film strip.  If the institution has a large number of slides, they should be catalogued subject-wise.
  • 33.
    Overhead projector (OHP): OVERHEAD PROJECTOR
  • 34.
    ● Overhead projectoris a device for projecting a matter, which is written or drawn on transparent sheet on to a screen. ● An overhead projector produces images on screen behind or over the head of the teacher. In an overhead projector, the large-sized transparency is kept horizontal which is intensely illuminated by a condenser lens. The final image is produced on a vertical screen with a highly polished tilted mirror and object lens capable of sliding on a vertical mast. ● It consists of a metal box, a 1000watt bulb and a concave reflector, a condenser lens illuminates the transparency placed on the glass sheet on the top of the box. OVERHEAD PROJECTOR (OHP) :
  • 35.
    1.Place the OHP ona stable table with the objective lens facing the screen behind the teacher. 2.Put the cord plug into a power wall-socket. Switch on the blower first and then the bulb. 3.Place the transparency on the glass top. 4.Move the objective lens and mirror assembly up and down to get the image in focus on the screen. 5.Explain about the material on the transparency sitting behind the overhead projector with a small pointe Using an Over HeadProjector (OHP) :
  • 36.
    ● Use astandard size of acetate sheet measuring 18 cm x 22.5 cm. ● OHP markers are available in two types; temporary and permanent. Temporary markers have soluble ink and written matter can be wiped off with the help of a damp cloth. Permanent markers are oil, spirit or wax based and their writing is preserved for long time. One may prepare reusable transparencies with permanent OHP markers. Additions and alteration during teaching should be made with water soluble OHP markers so that the same are wiped off after use. If you want to reuse the transparency sheet later for another purpose, be sure to use a marker with soluble ink. ● Transparencies must be clearly written with at least 8 mm size letters free hand. A transparency which can be clearly read from a distance of 2 m should project well . PREPARATION OF OHP TRANSPARENCIES
  • 37.
    ● The bestcolors to use to write on transparencies are black, blue and green. Use red sparingly. It is not a color that project well. ● Whether you are drawing the image on the transparency or copying it from a printed page, keep the amount of information on the sheet to a minimum and make the image large enough so that students in the back of the room will be able to see it. ● Avoid copying information from a printed book or journal page or a type written sheet. PREPARATION OF OHP TRANSPARENCIES
  • 39.
     It permitsthe teacher to stand in front of the class while using the projector, thus enabling her to point out features appearing on the screen by pointing to the materials at the projector itself, and at the same time, to observe the students' reactions to her discussion.  It offers a very flexible tool for teaching because a wide variety of materials can be used for many different teaching purposes.  It can be used in a fairly well-lighted room. Materials projected can be changed easily and quickly.  The prepared transparencies can be preserved for future use.  The services of a projectionist are not required.  Material can be prepared at short notice by speaker himself. ADVANTAGES
  • 40.
    SPECIFIC TECHNIQUES USEDIN OHP Overlays: The basic idea of an overlay is simple, but the variations and versatility of the concept largely contribute to greater usefulness of the overhead projector as a visual aid. An overlay is a separate sheet that carries additional information. For example, an outline diagram of a limb can be superimposed with an overlay of blood vessels, followed by another one showing peripheral nerve supply. Progressive disclosure: Masking: It is used for uncovering the information sequentially at various stages in the lecture. If more than one idea or piece of information is projected at once, the viewers immediately Read and copy down all items while the first item is being discussed and thus they miss the important information that was being discussed.
  • 41.
  • 42.
    ● A slideis a small piece of transparent film of 70 mm, 30 mm or 6 mm on which a pictorial image or scene "or graphic image is either photographed or reproduced in optically enlarged form and projected as real image. ● There are generally 20 to 50 slides or frames on about 1.5 meter long filmstrip. Own photographic films can be printed on the film to be projected. Slides can be prepared through the photographs and pictures or snapshots taken by teacher. ● The slides must be arranged in a sequential manner as per the continuity of discussion is very important while using them for teaching purpose. SLIDES
  • 43.
    ● The slidesmust be arranged in a sequential manner as per the continuity of discussion is very important while using them for teaching purpose. ● Using slides as a form of projected media requires expertise. These are the still pictures on positive film which a person can process and mount individually. ● The standard size of the slides is 2"x 2 "any 35 mm camera can make satisfactory slides. Before projecting slides in the classroom teacher has to collect all available slides and arrange them in order. The slides can be previewed against the lighted lamp. SLIDES
  • 44.
    The slides canbe previewed against the lighted lamp. Based on the method of preparation they can be classified into: SLIDES oSlides made by photographic process. oHandmade slide
  • 45.
  • 47.
    SLIDES ADVANTAGES DISADVANTAGES  Theyare compact.  Slides are easy to carry.  They are easy to store and can be preserved for a long period of time.  Less eye soaring and increased visual impact.  Speed of slide presentation can be controlled by the teacher so that each slide can be discussed for desired time o They are expensive and can easily get dirty and smudged with fingerprints. o Projector bulbs do not last very long and are expensive to replace. o Reduced room light is necessary to get a clear image on the screen.
  • 48.
    LIQUID CRYSTAL DISPLAY ●Liquid-crystal display (LCD) is electronic visual display equipment is a new teaching aid. It uses the light modulating properties of liquid crystal hence named as liquid crystal display. ● The LCD projector is connected to a computer either desktop or laptop or interactive whiteboard or less expansive tablet Once it is connected, it allows the computer's screen to be viewed by the entire class The LCD can be connected directly to other electronic equipment like VCRs, DVD players also.
  • 49.
    LCD ● Large groupof students can be taught by the teacher in the class using LCD projector. ● Teacher can provide students with a problem to solve. ● It is an advanced use of technology for teaching the students. It is expensive therefore cannot be afforded by many educational institution.
  • 50.
    GUIDELINES FOR USINGLCD PROJECTOR ● Projection surface : Projecting Surface should be neutral color & best suited for natural color tones. ● Setting up the system :  Place Projector 5-15 feet away from the projection screen  Place projector permanently on fixed ceiling/ on stable surface.  Computer/laptop cable should be connected at the back of the LCD projector on a video port.  The power cable of projector should be connected to 3-way electrical port.  Lens cap of projector should be removed.
  • 51.
    GUIDELINES FOR USINGLCD PROJECTOR ● Shutting down the projector  Press the Power button; a message may appear to check whether to turn off the projector. Again press the power button, projector will turn off.  Before unplug the projector from electrical port, wait for 2 minutes to off the projector fan.  Also ensure the flashing light is off before the projector.
  • 52.
  • 53.
    POWERPOINT PRESENTATION ● PowerPointuses slides with a horizontal or 'Landscape' orientation. ● The software was designed as a convenient way to display graphical information that would support the speaker and supplement the presentation. ● PowerPoint can be an effective tool to present material in the classroom and encourage student learning.
  • 54.
    Designing the PowerPointpresentation Preparing for the presentation Student accessibility Slide content Emphasizing content Typeface Point size Clip art and graphics Animation and sound
  • 55.
    Designing the PowerPointpresentation Color scheme in making slides: BlackLetters Whitebackground Gray Letter White Background Blackletters Bluebackground WhiteLETTER Blackbackground
  • 56.
    POWERPOINT PRESENTATION ADVANTAGES  Savestimes and energy .  Portable and can be easily shared .  Support multimedia  PowerPoint can take up time to load a presentation.  Time-consuming to prepare.  Technical faults can raise and if the computer is not supported by UPS, it cannot be used during power cut DISADVANTAGES
  • 57.
  • 58.
    TELEVISION ● Television isbeing acknowledged as a powerful medium of mass education. In India, television is being used for imparting distance education through the UGC programs and other educational programs. ● A television can bring the real world into the classroom in the real sense. It has the ability to bring the events and happening to the viewer in action. ● For imparting education, television is being described as an electronic chalkboard.
  • 59.
    ADVANTAGES OF EDUCATIONALTELEVISIONPROGRAM: Television appeals to eye, ear and emotions. Because of this kind of almost total involvement, it can induce effective learning.  It can re-live with vividness the past events and happenings.  It can directly show the current happening and live shows.  The television can work as a powerful medium of mass education.
  • 60.
  • 61.
    SMART BOARD ● SMARTBoard is an interactive whiteboard that allows you project your presentation, write over the projection, save the changes, and create new presentations. ● You can show videos, DVDs and link to the internet. It is an easy tool to use requiring no special expertise.
  • 62.
    OBJECTIVES OF USINGSMART BOARD IN DISTANCE EDUCATION: ● Enhance instruction and learning in distance education. ● Make the communication more interactive between tutor and learners (Two way communications.). ● Create a stimulating and engaging learning distance environment. ● Helps organize presentations and motivate learners. ● Make the learning easy to the face-to-face communication student, distance education and EL students.
  • 63.
    SMART BOARD FEATURE: ●It is large. ● The projector throws the computer's desktop image onto the interactive whiteboard, which acts as both a monitor and an input device. ● Control the presentation from the screen by touching the screen. ● Capture an image of any annotations you make to a PowerPoint (or other applications) presentation. ● Save or print a complete copy of everything written, drawn, or typed in the Notebook software.
  • 64.
    SMART BOARD FEATURE: ●Use the handwriting recognition feature to convert handwritten text into typewritten text. ● USB Cable to connect the smart board to the computer. ● Users can write on the interactive whiteboard in digital ink or use a finger to control computer applications by pointing, clicking and dragging, just as with a desktop mouse. ● The interactive whiteboard is usually mounted on a wall or a floor stand and is used in face-to-face or virtual settings in education business and government.
  • 65.
    ADVANTAGE OF SMARTBOARD :  You can use different program through smart board like PowerPoint and Photoshop.  Easy to use.  Two way communications.  Very interactive: learner can participate through remote or through discussion board.  Easy to connect with computers.  Need small space of the class.  The interactive whiteboard is an excellent tool for the constructivist educator.
  • 66.
    LIMITATIONS OF SMARTBOARD :  It is difficult to setting up a whiteboard and projector in a small classroom.  Expensive  Irrelevant information can distract students from learning.  Teacher training is needed.  Lesson preparation time is increased.
  • 67.
    INTEGRATING SMART BOARDWITH VIDEO CONFERENCING ● You can integrate a SMART Board interactive whiteboard and a videoconferencing system and you don't need an additional monitor to display your videoconference. ● It can be used as a combined video and data conference by splitting the screen into video and application images. ● You can brainstorm and diagram as if you were at a whiteboard and control all your computer applications directly from the board's touch-sensitive surface, while dedicating a portion of the board to displaying the video of your remote team members.
  • 68.
    WAYS TO USEINTERACTIVE WHITEBOARDS IN THE ONLINE DISTANCE EDUCATION ● It can be used with online video conferencing ● Save lessons to present to students who were absent ● Create video files to teach a software application, a lesson, or as a review to be posted to the server or web. ● Use the built in maps to teach continents, oceans, countries, or states and capitals. ● Present presentations created by student or teacher ● Digital storytelling. ● Brainstorming.
  • 69.
    What is theireducational value?  They provide electronically all the familiar features of a traditional classroom blackboard or roller whiteboard.  Lessons can be enhanced by easily integrating video, animation, graphics, text and audio with the teacher's spoken presentation.  It is possible to highlight and annotate key points, using the marker pens. Anything on the screen can be saved as a 'snapshot', making it easy to review and summarise key teaching points.  Material can be displayed from a number of sources, including CD-ROMs, websites,DVDs, VHS tapes or television.
  • 70.
    CONCLUSION ● Projected audiovisuals aids are very effective aids to classroom teaching. They have a characteristic appeal of their own, which is especially suitable for influencing the learner. When combined with recorded or on the spot commentary, they prove to be useful in a large number of situations. However, like all other visual and audiovisual aids, they are only aids and it cannot be safely assumed that they alone can do the entire gamete of teaching.
  • 71.
    BIBLIOGRAPHY ● Sodhi JK,Comprehensive Textbook Of Nursing Education, Second Edition, Jp Brother Medical Publisher (P)Ltd.2022. ● Gopichandran L. Kanniammal C.Essential Of Communication And Technology, First Edition CBS Publishers B Distributors Pvt Ltd: 2017. ● Dale Edgar, Audiovisual methods in Teaching,Third Edition,The Drydenpress. ● Celement Nisha,Essentials Of Communication and Educational Technology, Second Edition,Jaypee Brothers Medical Publishers. ● KP Neeraja, Textbook of Nursing Education, New Delhi Jaypee Brothers; 2003.P.40-78,3512. BT Basavanthappa, Nursing Education, New Delhi:jaypee Brothers: 2003.p.561-578 ● Internet sources: ○ https://sites.google.com/a/myport.ac.uk/you-know-ict/ict- tools/youtube-vidoe-1 ○ https://www.dreamstime.com/stock-illustration-film-strip- images-isolated-white- image57891566 ○ https://pnubsehistedtech-projectedmedia.weebly.com/opaque- projector--parts-and- guidelines-in-using-the-various- projected-media.html.
  • 72.
    References for videos: ●https://youtu.be/biZO3VNZpTA?si=ir0NcstVfzUeTKGb ● https://youtu.be/hiw5TmYINg8?feature=shared ● https://youtu.be/PjPrhaGZbD4?si=LzZ_KM7guCSVDSn- ● https://youtu.be/CU5hnd9gzmc?si=MzMA7vqFgN5uQ_nQ ● https://youtu.be/bCCWP9xe1CQ?si=O-nPAtoYBvKGmjug
  • 74.