Download to read offline


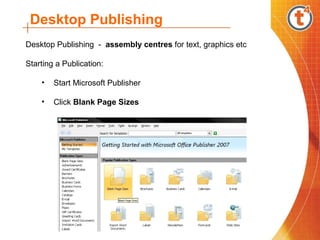


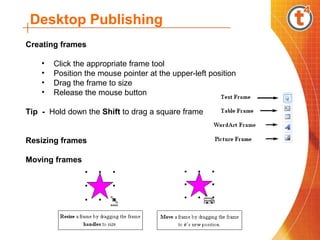


This document provides an overview of desktop publishing using Microsoft Publisher. It discusses how to set up a publication by selecting the page size and layout guides. It describes how to insert and format text, tables, graphics, and WordArt. It also covers arranging objects using layers and groups. Background elements that appear on all pages and inserting page numbers are also summarized.


![220711130046-Priya_Gope-MS_Publisher[1].pptx](https://cdn.slidesharecdn.com/ss_thumbnails/220711130046-priyagope-mspublisher1-240629074318-4219ee3b-thumbnail.jpg?width=640&height=640&fit=bounds)