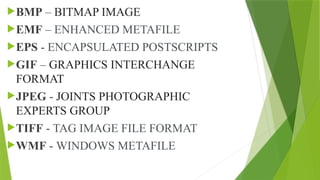
ADDING AND
FORMATTING GRAPHICS
IN A PUBLICATION
Pictures have power on the page — the
power to grab your readers' attention and
to convey or enhance your message.
Pictures help readers find entry points
into the text.
Adding Pictures and Graphics in
Publisher 2016
 Enhance your message with pictures
When you create or select images for a publication, make them:
 Relevant - Use pictures to clarify key concepts.
 Consistent - Unify your publication with your choice or
treatment of pictures.
 Human - Portraits of people will draw readers' attention,
especially if the images are relevant and tell a story.
 Motionless - Animation grabs the eye and doesn't let it go.
 Use the right size picture for the
medium
You can change the size and resolution of
graphics. The resolution of a picture is expressed
in pixels per inch (ppi) or dots per inch (dpi).
These terms are often used interchangeably.
Find the effective resolution
Every picture in your publication has an effective resolution that takes into account the
original resolution of the graphic and the effect of scaling it in Publisher.
 To find the effective resolution of a picture in your publication, do
the following:
1. Click Tools > Graphics Manager.
2. In the Graphics Manager task pane, under Select a picture, click
the arrow next to the picture with the info you want, and then click
Details.
3. The Effective Resolution field displays the resolution in dots per
inch (dpi).
File format can also affect file size. Before you change the resolution of
your picture, make sure you use a file format that is appropriate for the
content of the image. The following table lists common picture file formats,
their uses, and their advantages.
File
Format Online Desktop
Printing
Commercial
Printing Primary Uses Characteristics
BMP x x Line art (icons,
buttons, logos)
Small file size, few
colors, no
transparency, little
compression
EMF x x Line art
Improvement on
BMP, with smaller
file size
File Format Online Desktop
Printing
Commercial
Printing Primary Uses Characteristic
s
EPS x x
Line art, art with
clipping paths,
duotones, spot
colors
CMYK color data
GIF x
Low-resolution,
flat-color, sharp-
edged line art
(icons, buttons,
logos), animations
Small file size,
few colors,
transparency,
some compression
with no loss of
detail
JPEG x x Photos
Small file size,
millions of colors,
no transparency,
flexible
compression with
loss of detail
File Format Online Desktop
Printing
Commercial
Printing Primary Uses Characteristic
s
TIFF x x Photos, line art
Large file size, rich
RGB and CMYK
color data,
transparency,
compression
without loss of
detail
WMF x x Line art
Improvement on
BMP, with smaller
file size
BMP – BITMAP IMAGE
EMF – ENHANCED METAFILE
EPS - ENCAPSULATED POSTSCRIPTS
GIF – GRAPHICS INTERCHANGE
FORMAT
JPEG - JOINTS PHOTOGRAPHIC
EXPERTS GROUP
TIFF - TAG IMAGE FILE FORMAT
WMF - WINDOWS METAFILE
Working with the Picture Tools
In this topic, you will learn how to use the most frequently used features: creating
captions, selecting a style, wrapping text around a picture, swapping pictures, and
using corrections and recolor.
 Creating a Caption
Picture captions can be used to make a point, not just to describe what is in the picture.
1. Select the picture to display the Picture Tools on the Ribbon.
2. Click Caption to open the palette of caption styles.
3. Click the caption style you would like to use.
4. Select the sample caption text in the text box.
5. Type the caption text.
6. Format the caption text with the Formatting Quick Menu that appears.
 Creating a Caption
Picture captions can be used to make a point, not just to describe what is in the
picture.
1. Select the picture to display the Picture Tools on the Ribbon.
2. Click Caption to open the palette of caption styles.
3. Click the caption style you would like to use.
4. Select the sample caption text in the text box.
5. Type the caption text.
6. Format the caption text with the Formatting Quick Menu that appears.
 Wrapping Text Around a Picture
Building an effective, persuasive publication is enough of a challenge without worrying about
excess white space around the images.
1. Select the picture to display the Picture Tools on the Ribbon.
2. Click the Wrap Text command button to open a drop-down list of options.
3. Move the mouse pointer down through the Wrap Text options to preview that setting on the
text and picture.
4. Select the setting that works best for you. Publisher reformats the text according to the setting
you chose.
Swapping Pictures
Simply select two pictures and click the Swap Pictures button.
1. Select the first picture.
2. Hold down the Shift key and then select the second picture.
3. Click the Swap command button.
4. Click Swap to swap the two selected pictures.
 Using Corrections and Recolor
The Corrections and Recolor options enable you to adjust the brightness, contrast, and picture color options.
1. Select the picture that you want to adjust.
2. Click the Corrections command button to display a large palette with the selected photograph shown with a variety
of different brightness and contrast settings.
3. Move the mouse pointer over the thumbnail images, previewing the effect of that setting on the selected picture.
4. The original picture setting is shown in the middle of the options.
5. The selected picture is updated to reflect the currently highlighted setting, so you can immediately see the results.
6. With the picture still selected, click the Recolor command button.
7. Move the mouse pointer over the color settings to see a preview of the setting applied to the selected picture. A pop-
up identifies the name and specific RGB settings.
8. Click More Variations to open a color palette with the scheme colors, standard colors, and recently selected colors.
Setting a Picture Background
1. Click the Page Design tab.
2. Click the Background command button to display a palette of options: No Background, Solid
Background, and Gradient Background.
3. Click More Backgrounds to display the Format Background dialog box.
4. Select one of the option buttons to display the specific settings that can be adjusted for each
type of fill.
5. For example, select Gradient Fill, and then make your adjustments to the gradient options that
appear.
6. Click OK when you are satisfied with the settings and you are ready to apply it as the picture
background.
Adding WordArt
WordArt does just what it sounds like—it lets you create art out of words. You type in a word or phrase and then manipulate it to create art.
 Inserting WordArt
Inserting WordArt into a publication is a two-step process: select the style, and type the text.
1. Click the Insert tab to display those options.
2. Click the WordArt command button. This opens a palette of WordArt styles.
3. Click the style that best suits your publication.
4. The Edit WordArt Text dialog box appears with the sample text highlighted, so all you have to do is start typing.
5. Select a different font from the drop-down list.
6. Select a different size here if you like.
7. Click OK when you finish.
• Formatting WordArt
1. When Click the Shape Fill command button to open a palette of Scheme Colors, Standard Colors, and Recent
Colors.
2. Click to select a picture as the fill for the shape.
3. Click to select a gradient for the shape.
4. Click to select a texture for the shape.
5. Click to select a pattern for the shape.
6. Click the Shape Effects command button to open a list of different effects that can be applied to the WordArt.
7. Each of the Effects options opens a palette where you can preview and select an effect. There is also an Options
option that opens a dialog box where specific settings can be made.
WordArt is selected in a publication, there is a new WordArt Tools tab on the
Format tab. The tools enable you to select a different style, change the shape, select a
fill, and apply effects to the shape.
8. To change the shape of the WordArt, click the More button to display the same
large palette of styles you saw in the previous section, when you inserted the WordArt.
9. Click the Change Shape command button to open a palette of shapes you can
assign.
10. Move the mouse pointer over the shapes in the palette to get a preview of how
the WordArt will look if you assign that shape.
Adding Borders & Accents
Click the Insert tab to display those options.
Click the Borders & Accents command button in the Building Blocks group.
Scroll down to preview the Bars, Emphasis, and Frames options.
Click More Borders and Accents to display the Building Block Library dialog
box.
Scroll down to browse through the Bars, Boxes, Emphasis, Frames, Lines, and
Patterns.
Click one of the thumbnails to display a larger image and the name of the item.
Double-click an item to insert it into the publication.
THANK YOU FOR LISTENING !!!!
I Hope You Learned Well 
SHORT ACTIVITY!!!
ESSAY
Directions: Answer the questions based on the topics that we learned
from this lesson.
1. In saving a picture or files, why do we need to choose a file
format?
2. What is the difference between pictures and graphics?
ASSIGNMENT!!!
Directions: In your MS Publisher create an Invitations like
(Business Event, Parties, Graduation Ceremony, etc.). You
can search and save pictures online.

4TH QUARTER WEEK 5-6 Microsoft Publication.pptx

  • 1.
  • 2.
    Pictures have poweron the page — the power to grab your readers' attention and to convey or enhance your message. Pictures help readers find entry points into the text. Adding Pictures and Graphics in Publisher 2016
  • 3.
     Enhance yourmessage with pictures When you create or select images for a publication, make them:  Relevant - Use pictures to clarify key concepts.  Consistent - Unify your publication with your choice or treatment of pictures.  Human - Portraits of people will draw readers' attention, especially if the images are relevant and tell a story.  Motionless - Animation grabs the eye and doesn't let it go.
  • 4.
     Use theright size picture for the medium You can change the size and resolution of graphics. The resolution of a picture is expressed in pixels per inch (ppi) or dots per inch (dpi). These terms are often used interchangeably.
  • 5.
    Find the effectiveresolution Every picture in your publication has an effective resolution that takes into account the original resolution of the graphic and the effect of scaling it in Publisher.  To find the effective resolution of a picture in your publication, do the following: 1. Click Tools > Graphics Manager. 2. In the Graphics Manager task pane, under Select a picture, click the arrow next to the picture with the info you want, and then click Details. 3. The Effective Resolution field displays the resolution in dots per inch (dpi).
  • 6.
    File format canalso affect file size. Before you change the resolution of your picture, make sure you use a file format that is appropriate for the content of the image. The following table lists common picture file formats, their uses, and their advantages. File Format Online Desktop Printing Commercial Printing Primary Uses Characteristics BMP x x Line art (icons, buttons, logos) Small file size, few colors, no transparency, little compression EMF x x Line art Improvement on BMP, with smaller file size
  • 7.
    File Format OnlineDesktop Printing Commercial Printing Primary Uses Characteristic s EPS x x Line art, art with clipping paths, duotones, spot colors CMYK color data GIF x Low-resolution, flat-color, sharp- edged line art (icons, buttons, logos), animations Small file size, few colors, transparency, some compression with no loss of detail JPEG x x Photos Small file size, millions of colors, no transparency, flexible compression with loss of detail
  • 8.
    File Format OnlineDesktop Printing Commercial Printing Primary Uses Characteristic s TIFF x x Photos, line art Large file size, rich RGB and CMYK color data, transparency, compression without loss of detail WMF x x Line art Improvement on BMP, with smaller file size
  • 9.
    BMP – BITMAPIMAGE EMF – ENHANCED METAFILE EPS - ENCAPSULATED POSTSCRIPTS GIF – GRAPHICS INTERCHANGE FORMAT JPEG - JOINTS PHOTOGRAPHIC EXPERTS GROUP TIFF - TAG IMAGE FILE FORMAT WMF - WINDOWS METAFILE
  • 10.
    Working with thePicture Tools In this topic, you will learn how to use the most frequently used features: creating captions, selecting a style, wrapping text around a picture, swapping pictures, and using corrections and recolor.  Creating a Caption Picture captions can be used to make a point, not just to describe what is in the picture. 1. Select the picture to display the Picture Tools on the Ribbon. 2. Click Caption to open the palette of caption styles. 3. Click the caption style you would like to use. 4. Select the sample caption text in the text box. 5. Type the caption text. 6. Format the caption text with the Formatting Quick Menu that appears.
  • 11.
     Creating aCaption Picture captions can be used to make a point, not just to describe what is in the picture. 1. Select the picture to display the Picture Tools on the Ribbon. 2. Click Caption to open the palette of caption styles. 3. Click the caption style you would like to use. 4. Select the sample caption text in the text box. 5. Type the caption text. 6. Format the caption text with the Formatting Quick Menu that appears.
  • 12.
     Wrapping TextAround a Picture Building an effective, persuasive publication is enough of a challenge without worrying about excess white space around the images. 1. Select the picture to display the Picture Tools on the Ribbon. 2. Click the Wrap Text command button to open a drop-down list of options. 3. Move the mouse pointer down through the Wrap Text options to preview that setting on the text and picture. 4. Select the setting that works best for you. Publisher reformats the text according to the setting you chose.
  • 13.
    Swapping Pictures Simply selecttwo pictures and click the Swap Pictures button. 1. Select the first picture. 2. Hold down the Shift key and then select the second picture. 3. Click the Swap command button. 4. Click Swap to swap the two selected pictures.
  • 14.
     Using Correctionsand Recolor The Corrections and Recolor options enable you to adjust the brightness, contrast, and picture color options. 1. Select the picture that you want to adjust. 2. Click the Corrections command button to display a large palette with the selected photograph shown with a variety of different brightness and contrast settings. 3. Move the mouse pointer over the thumbnail images, previewing the effect of that setting on the selected picture. 4. The original picture setting is shown in the middle of the options. 5. The selected picture is updated to reflect the currently highlighted setting, so you can immediately see the results. 6. With the picture still selected, click the Recolor command button. 7. Move the mouse pointer over the color settings to see a preview of the setting applied to the selected picture. A pop- up identifies the name and specific RGB settings. 8. Click More Variations to open a color palette with the scheme colors, standard colors, and recently selected colors.
  • 15.
    Setting a PictureBackground 1. Click the Page Design tab. 2. Click the Background command button to display a palette of options: No Background, Solid Background, and Gradient Background. 3. Click More Backgrounds to display the Format Background dialog box. 4. Select one of the option buttons to display the specific settings that can be adjusted for each type of fill. 5. For example, select Gradient Fill, and then make your adjustments to the gradient options that appear. 6. Click OK when you are satisfied with the settings and you are ready to apply it as the picture background.
  • 16.
    Adding WordArt WordArt doesjust what it sounds like—it lets you create art out of words. You type in a word or phrase and then manipulate it to create art.  Inserting WordArt Inserting WordArt into a publication is a two-step process: select the style, and type the text. 1. Click the Insert tab to display those options. 2. Click the WordArt command button. This opens a palette of WordArt styles. 3. Click the style that best suits your publication. 4. The Edit WordArt Text dialog box appears with the sample text highlighted, so all you have to do is start typing. 5. Select a different font from the drop-down list. 6. Select a different size here if you like. 7. Click OK when you finish.
  • 17.
    • Formatting WordArt 1.When Click the Shape Fill command button to open a palette of Scheme Colors, Standard Colors, and Recent Colors. 2. Click to select a picture as the fill for the shape. 3. Click to select a gradient for the shape. 4. Click to select a texture for the shape. 5. Click to select a pattern for the shape. 6. Click the Shape Effects command button to open a list of different effects that can be applied to the WordArt. 7. Each of the Effects options opens a palette where you can preview and select an effect. There is also an Options option that opens a dialog box where specific settings can be made.
  • 18.
    WordArt is selectedin a publication, there is a new WordArt Tools tab on the Format tab. The tools enable you to select a different style, change the shape, select a fill, and apply effects to the shape. 8. To change the shape of the WordArt, click the More button to display the same large palette of styles you saw in the previous section, when you inserted the WordArt. 9. Click the Change Shape command button to open a palette of shapes you can assign. 10. Move the mouse pointer over the shapes in the palette to get a preview of how the WordArt will look if you assign that shape.
  • 19.
    Adding Borders &Accents Click the Insert tab to display those options. Click the Borders & Accents command button in the Building Blocks group. Scroll down to preview the Bars, Emphasis, and Frames options. Click More Borders and Accents to display the Building Block Library dialog box. Scroll down to browse through the Bars, Boxes, Emphasis, Frames, Lines, and Patterns. Click one of the thumbnails to display a larger image and the name of the item. Double-click an item to insert it into the publication.
  • 20.
    THANK YOU FORLISTENING !!!! I Hope You Learned Well 
  • 21.
    SHORT ACTIVITY!!! ESSAY Directions: Answerthe questions based on the topics that we learned from this lesson. 1. In saving a picture or files, why do we need to choose a file format? 2. What is the difference between pictures and graphics?
  • 22.
    ASSIGNMENT!!! Directions: In yourMS Publisher create an Invitations like (Business Event, Parties, Graduation Ceremony, etc.). You can search and save pictures online.