Download as PDF, PPTX
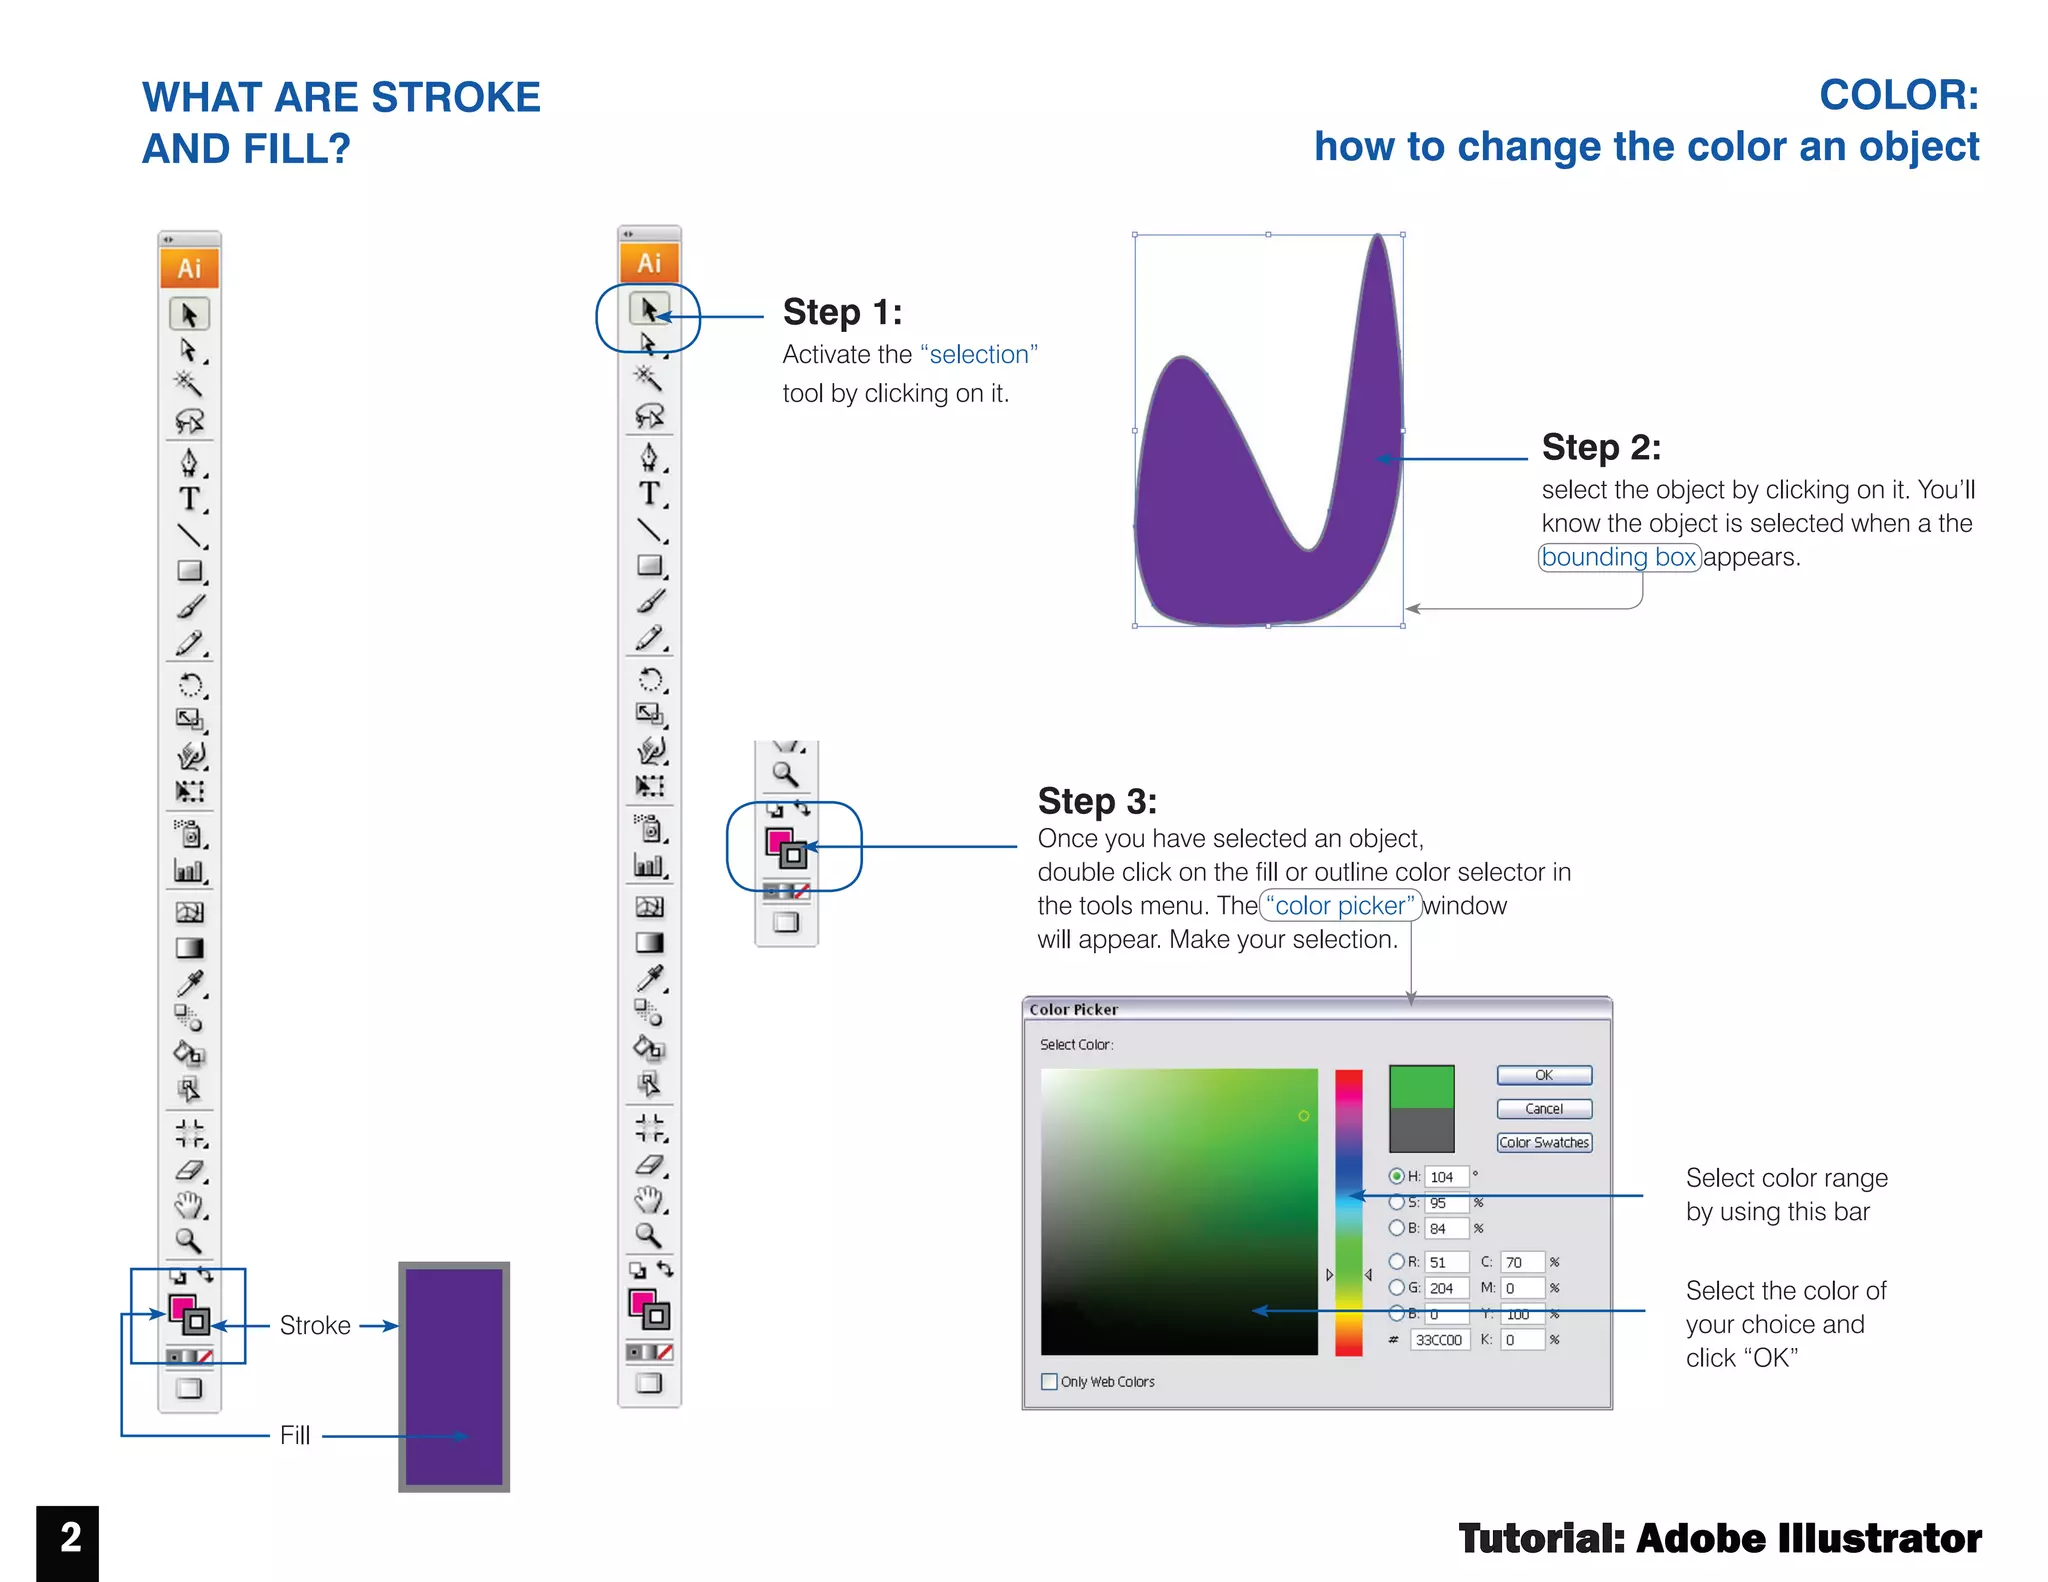
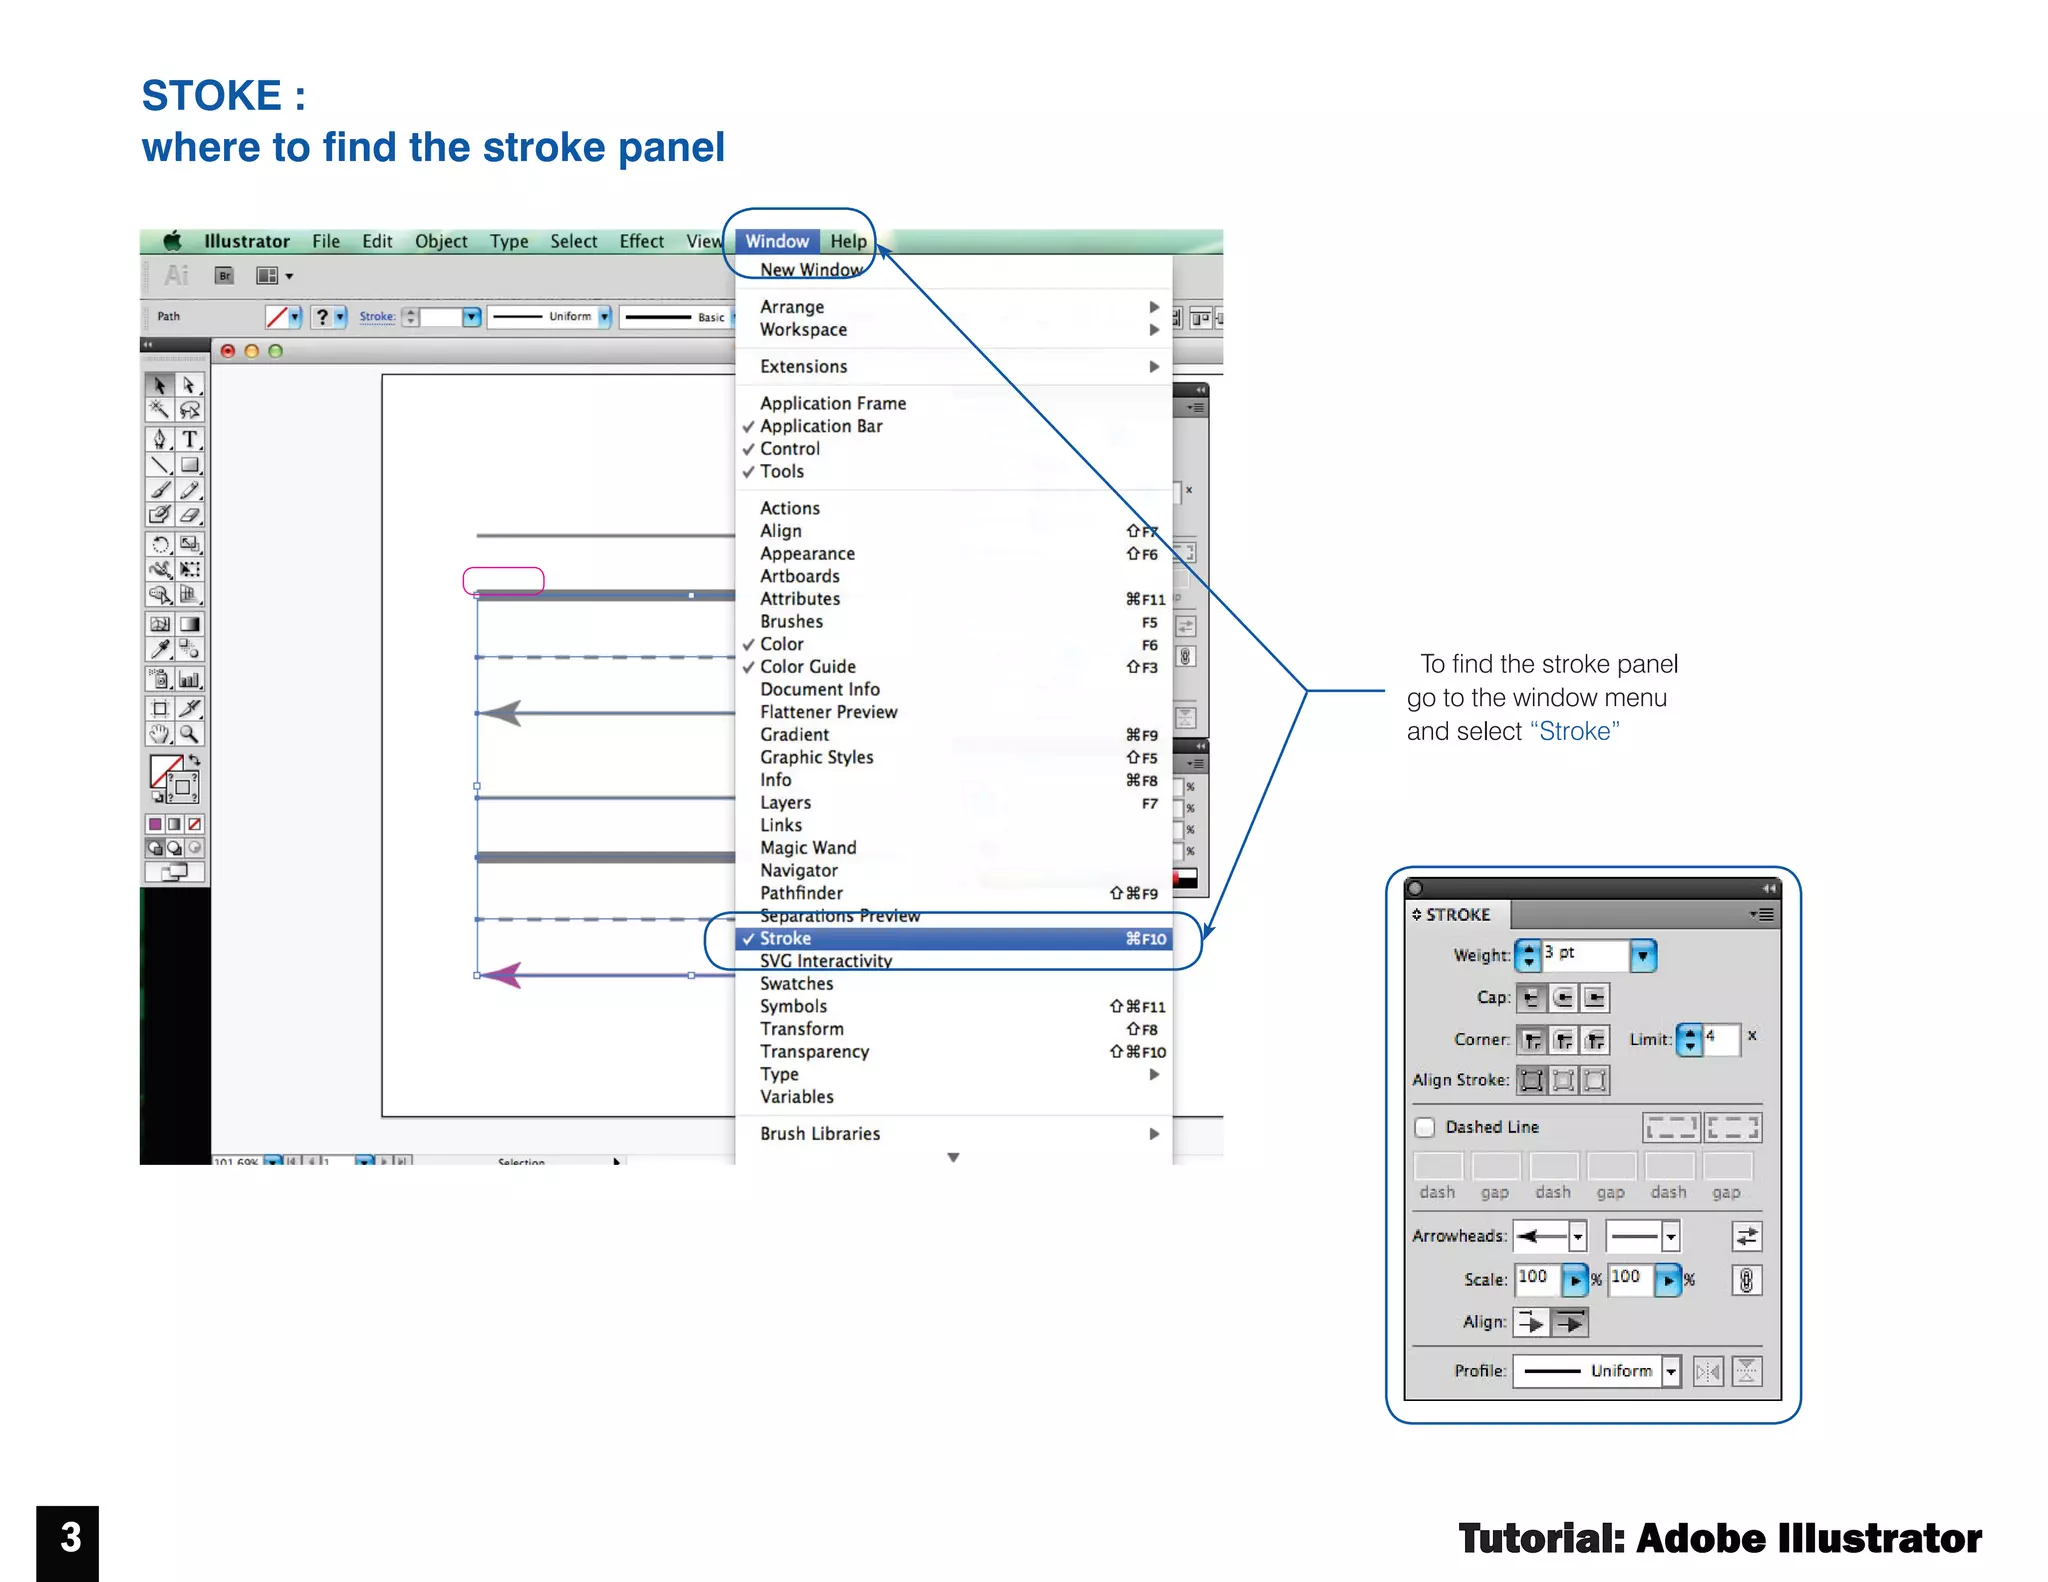
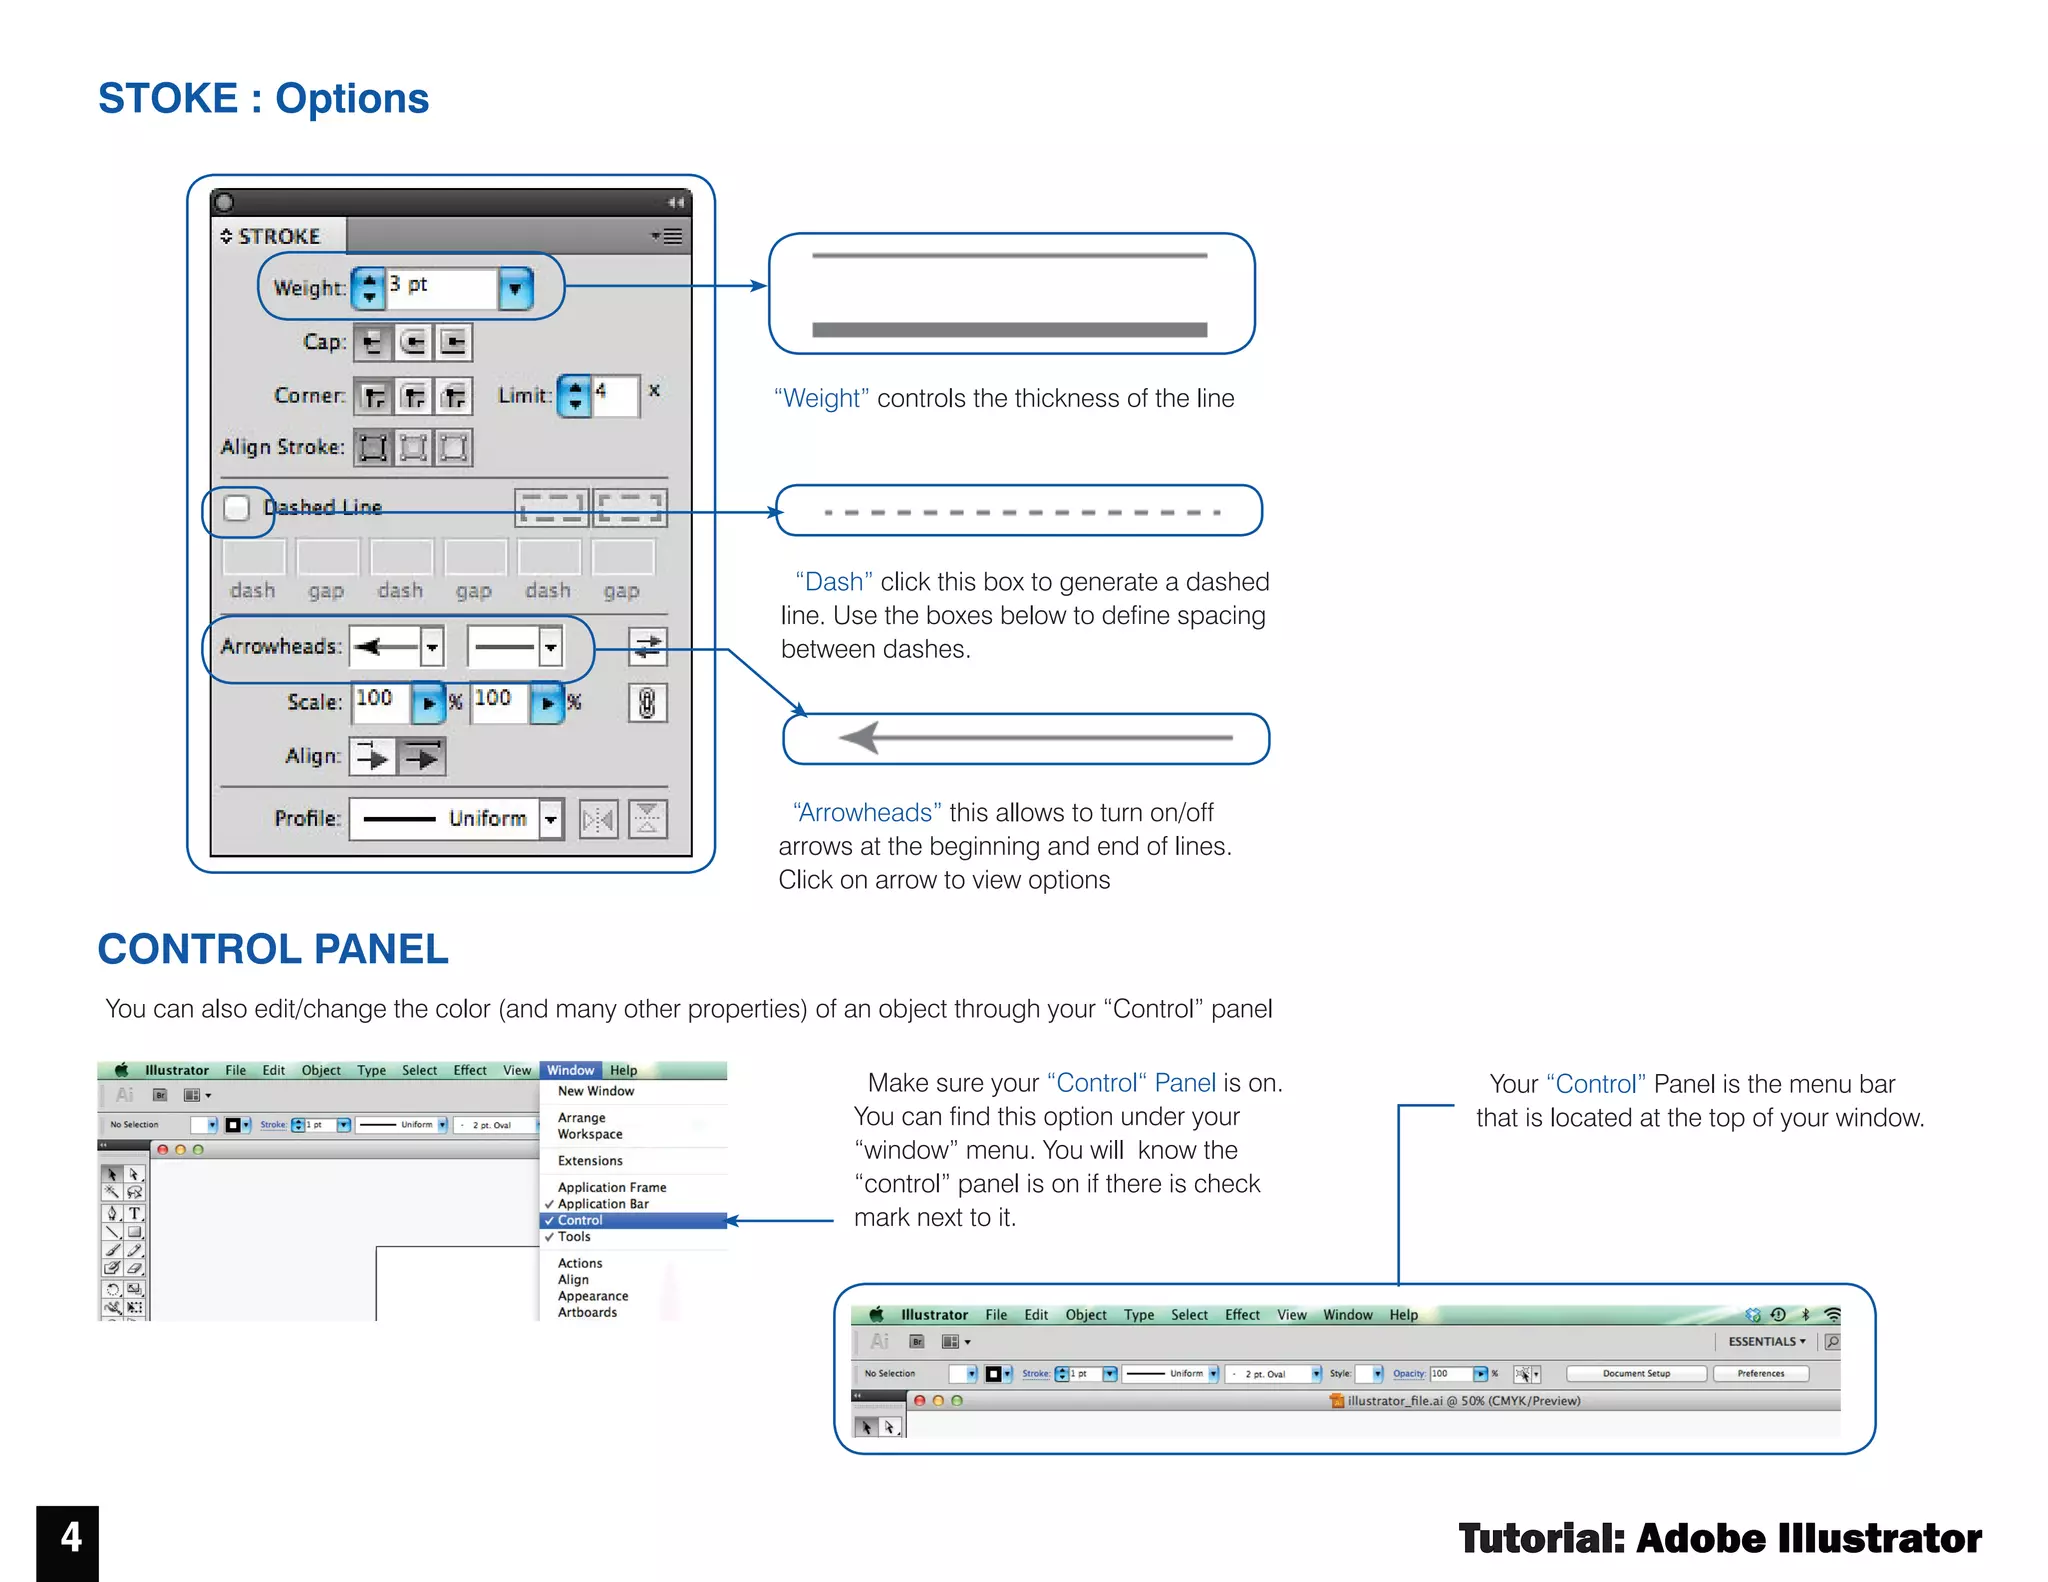
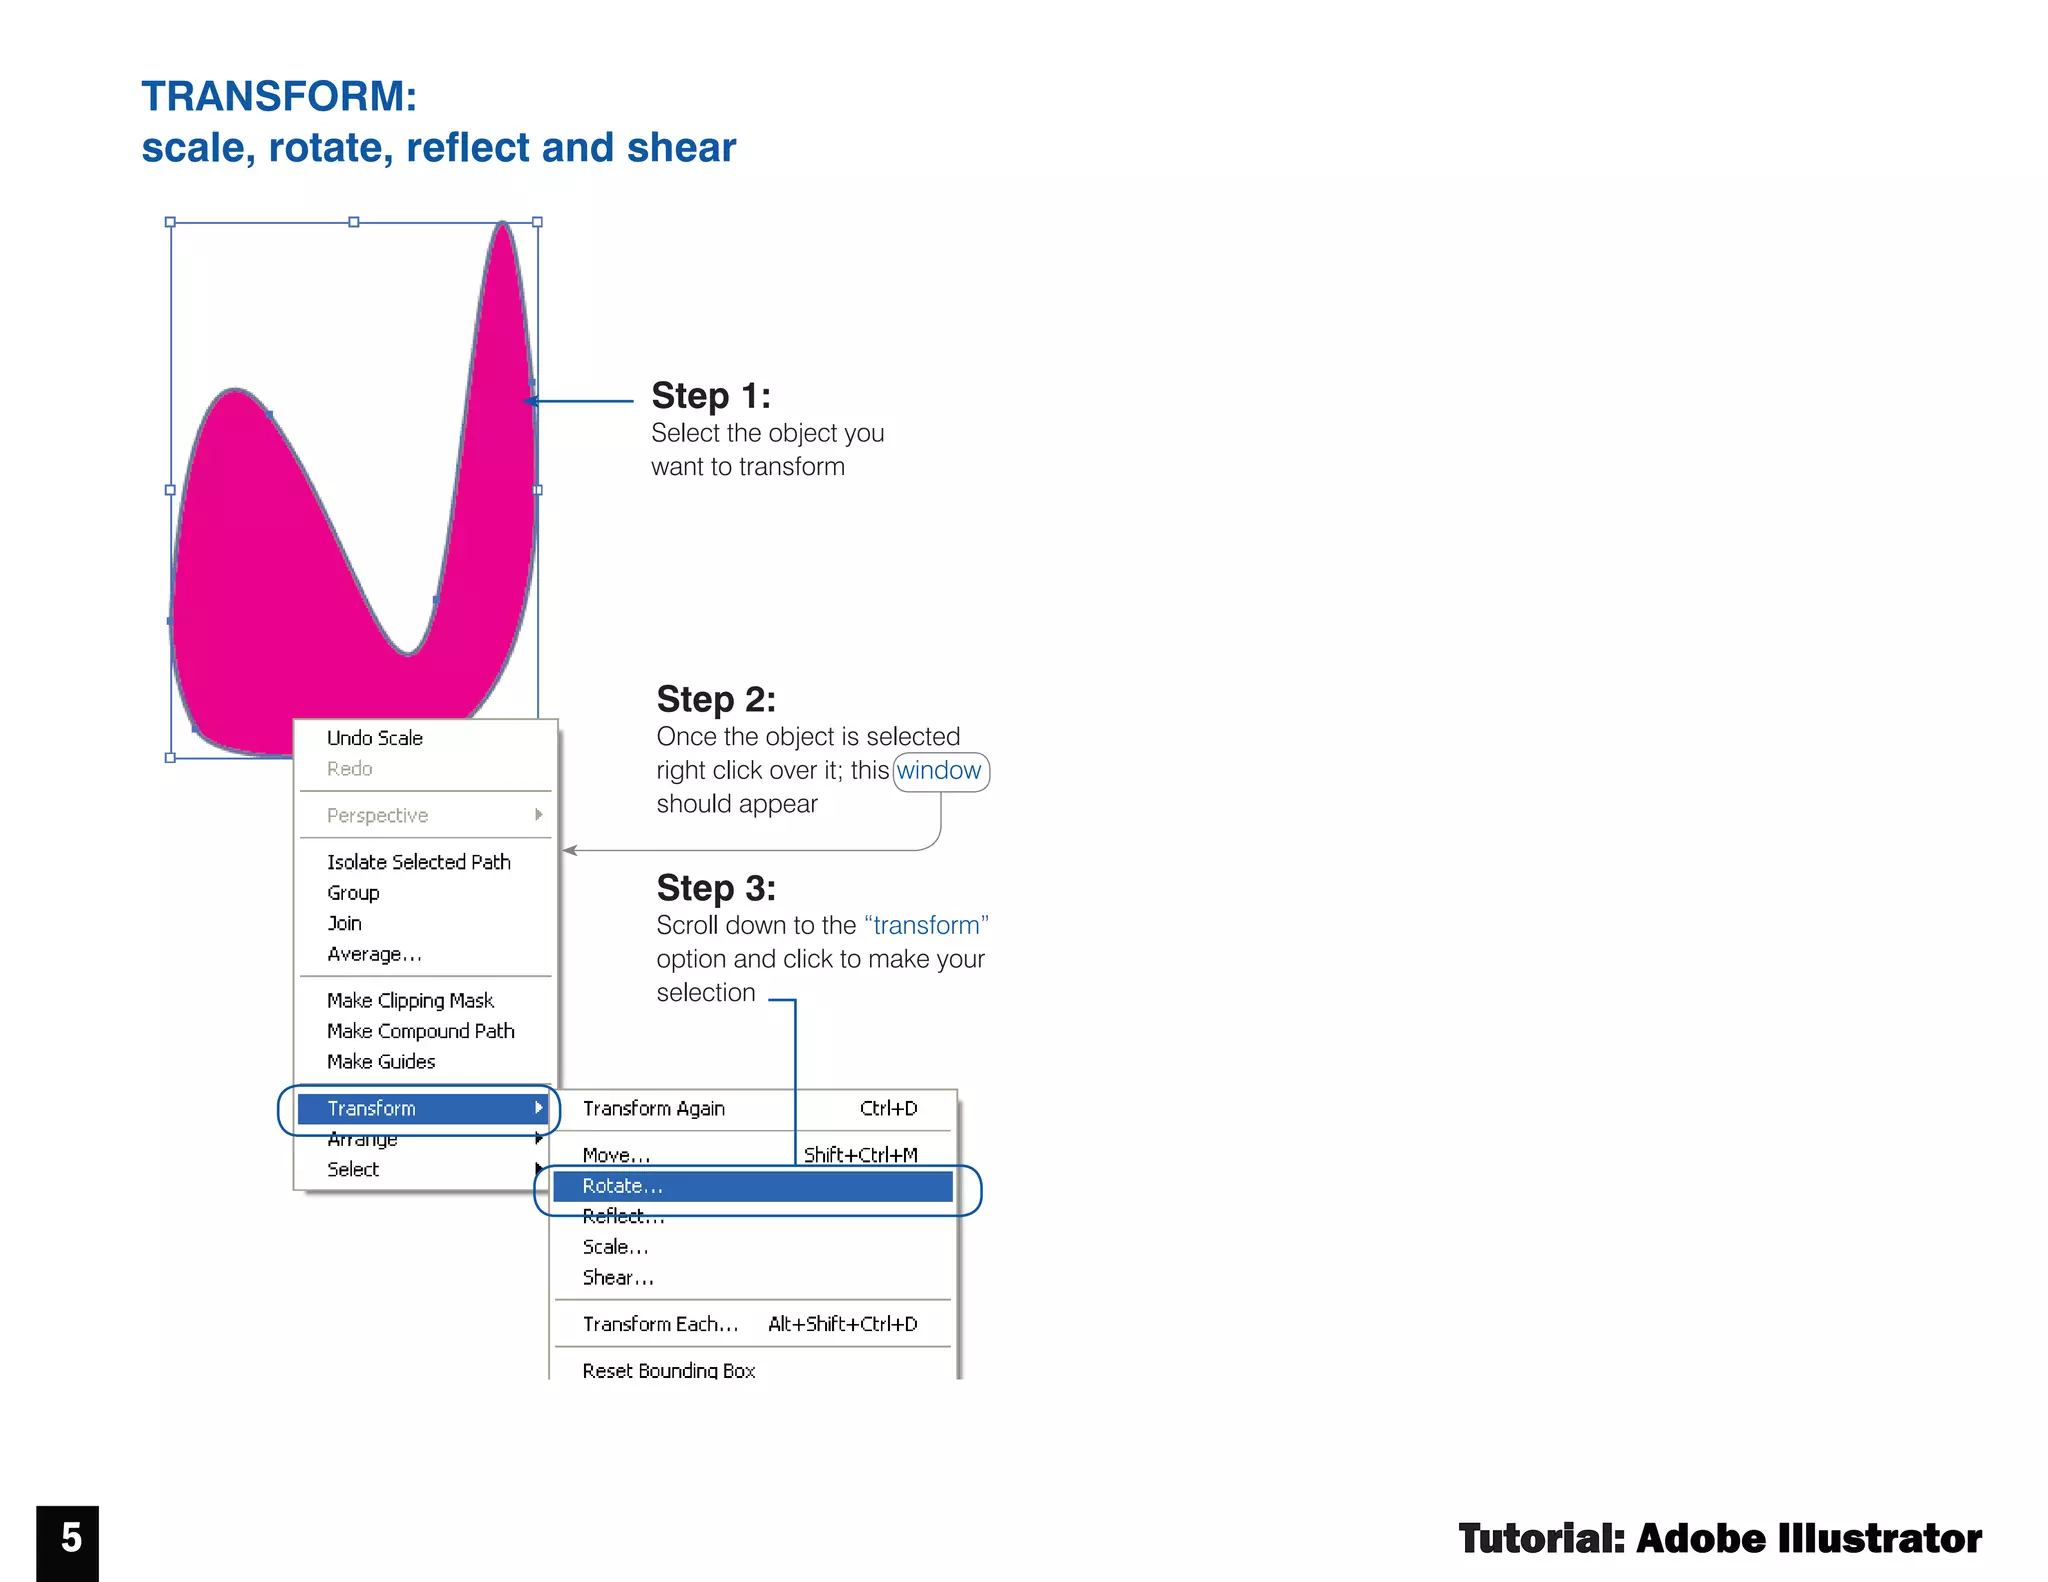
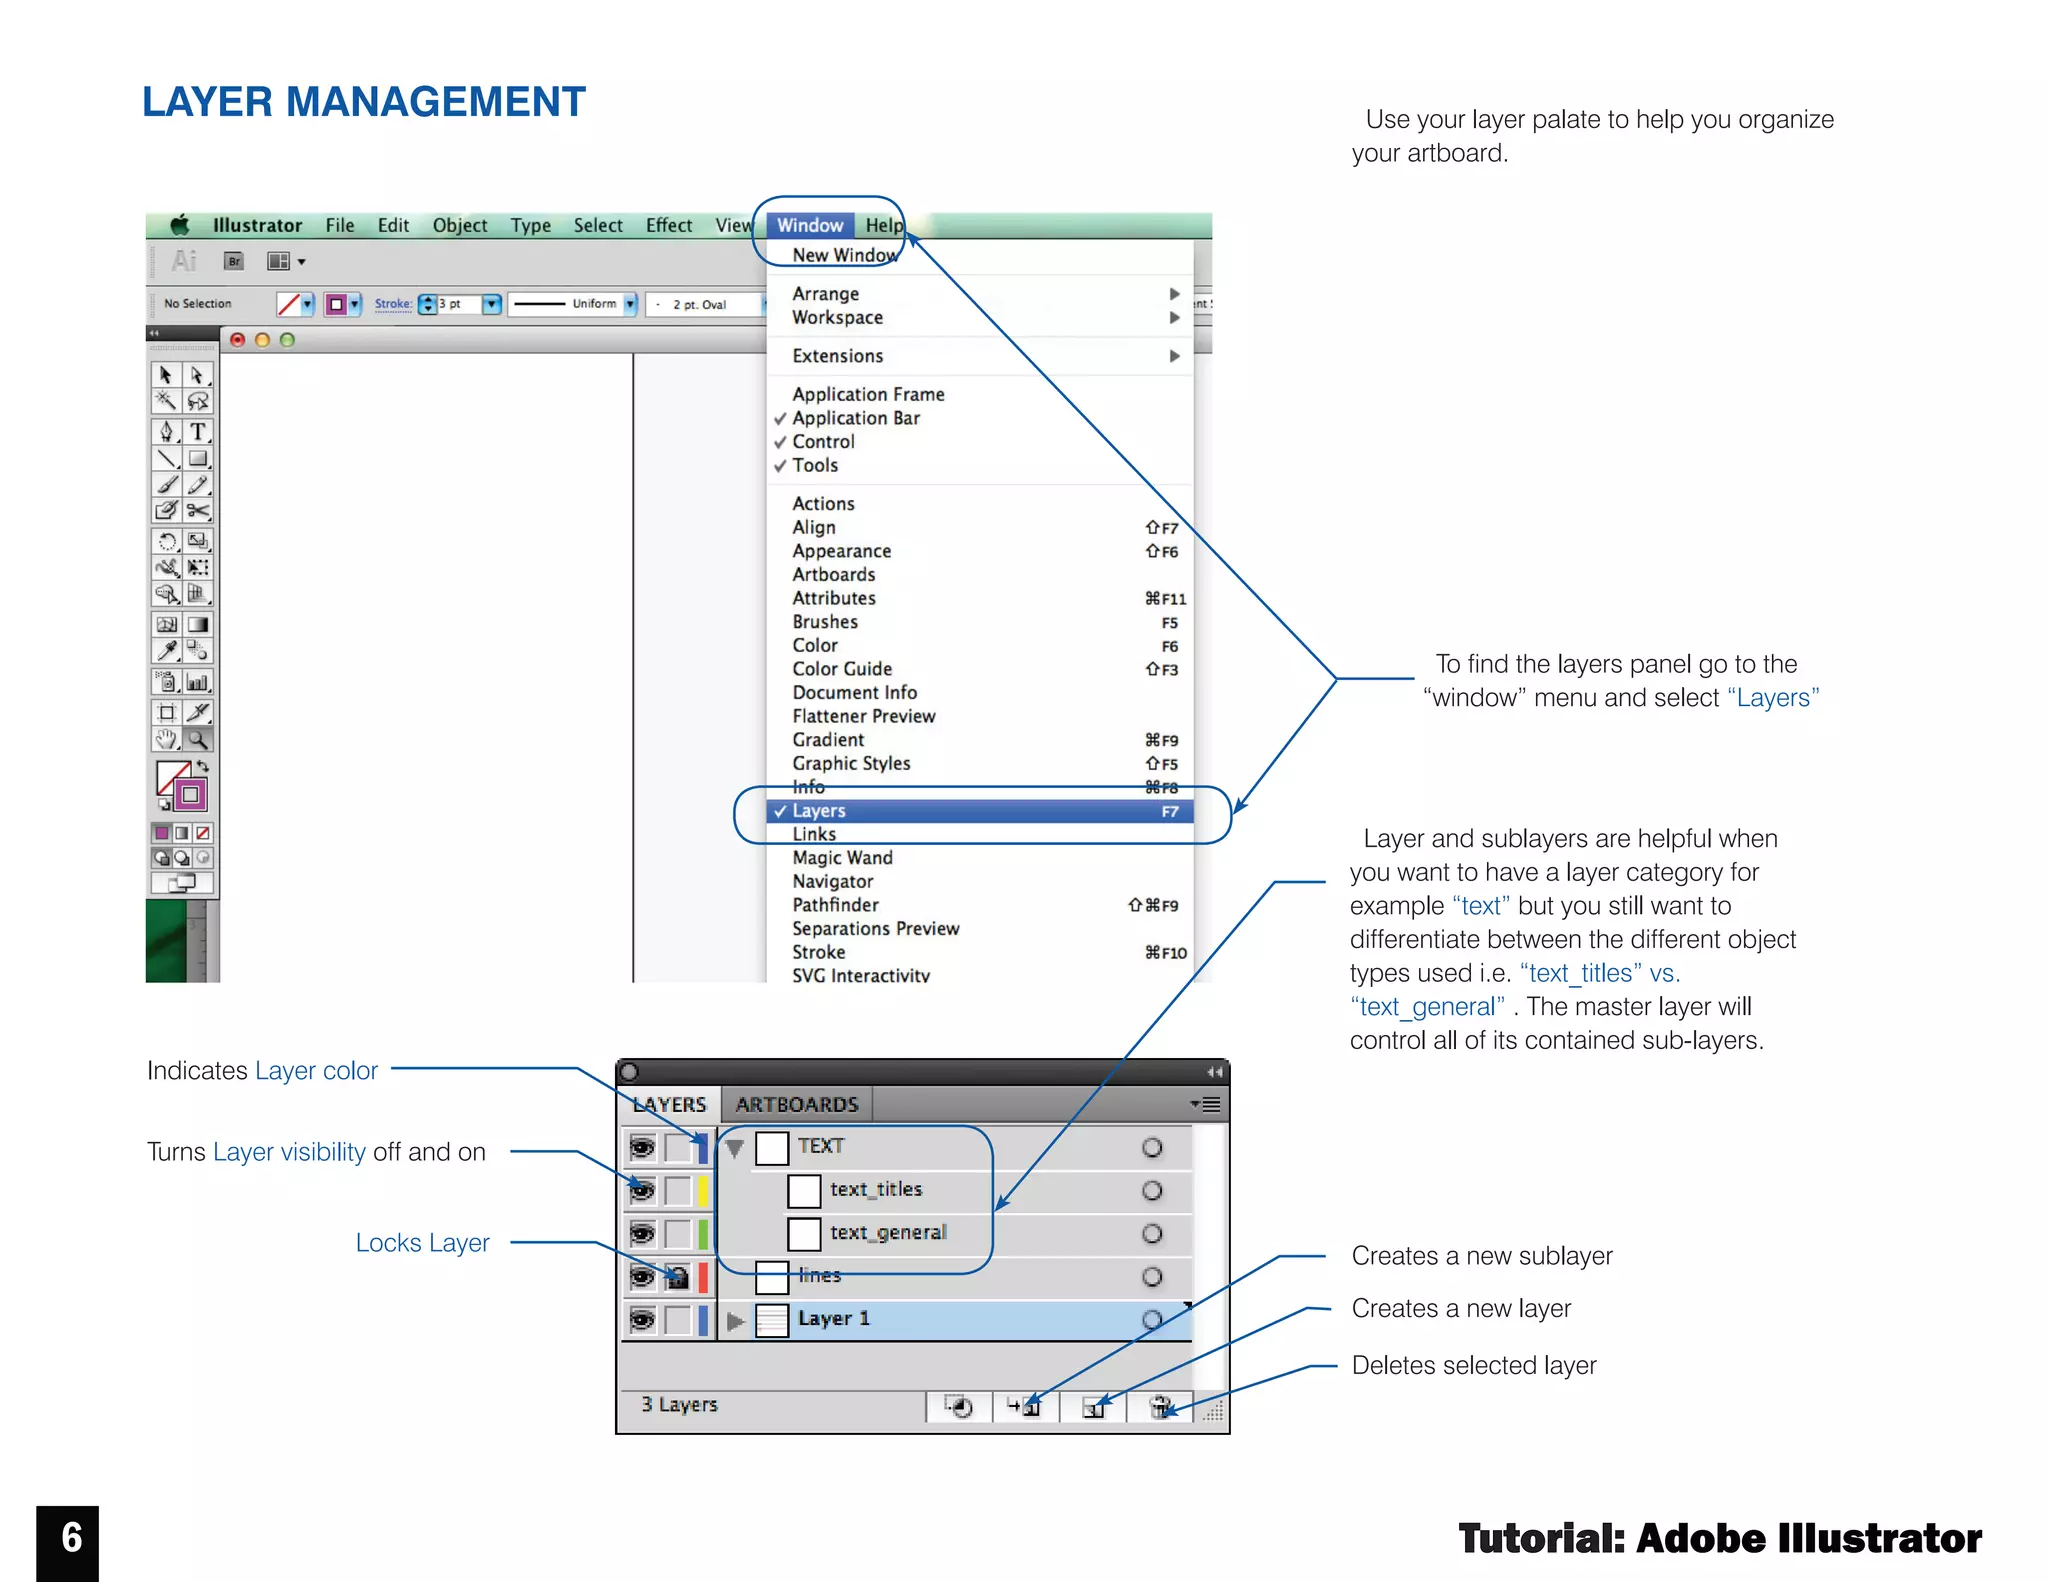
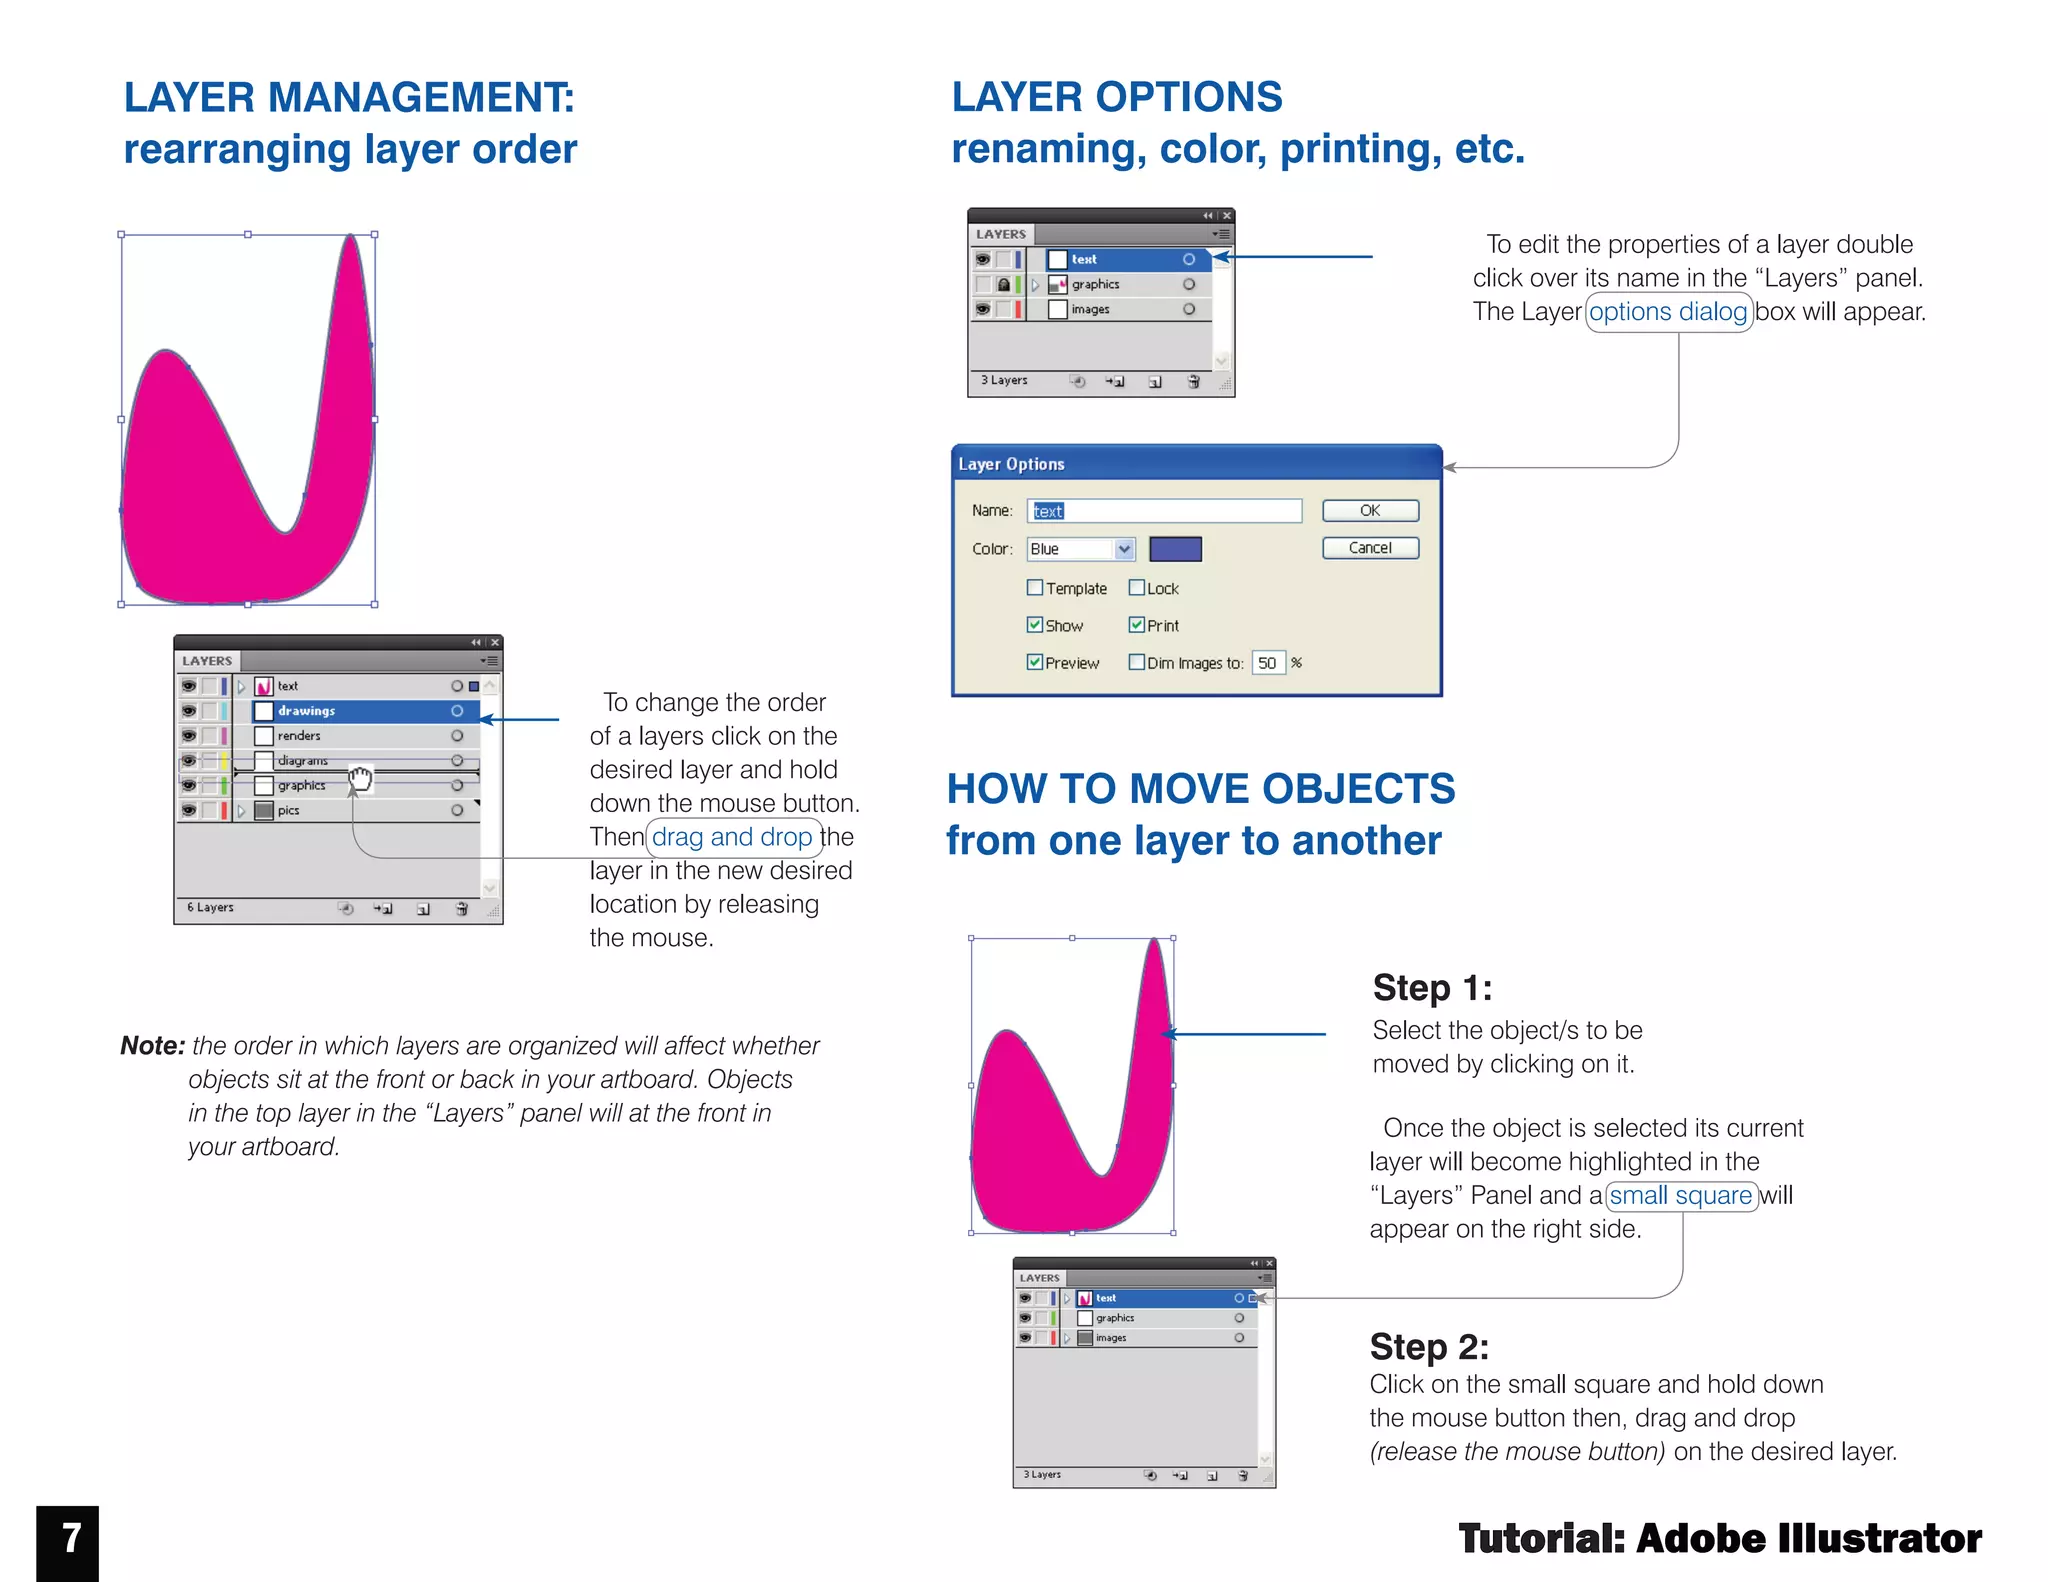
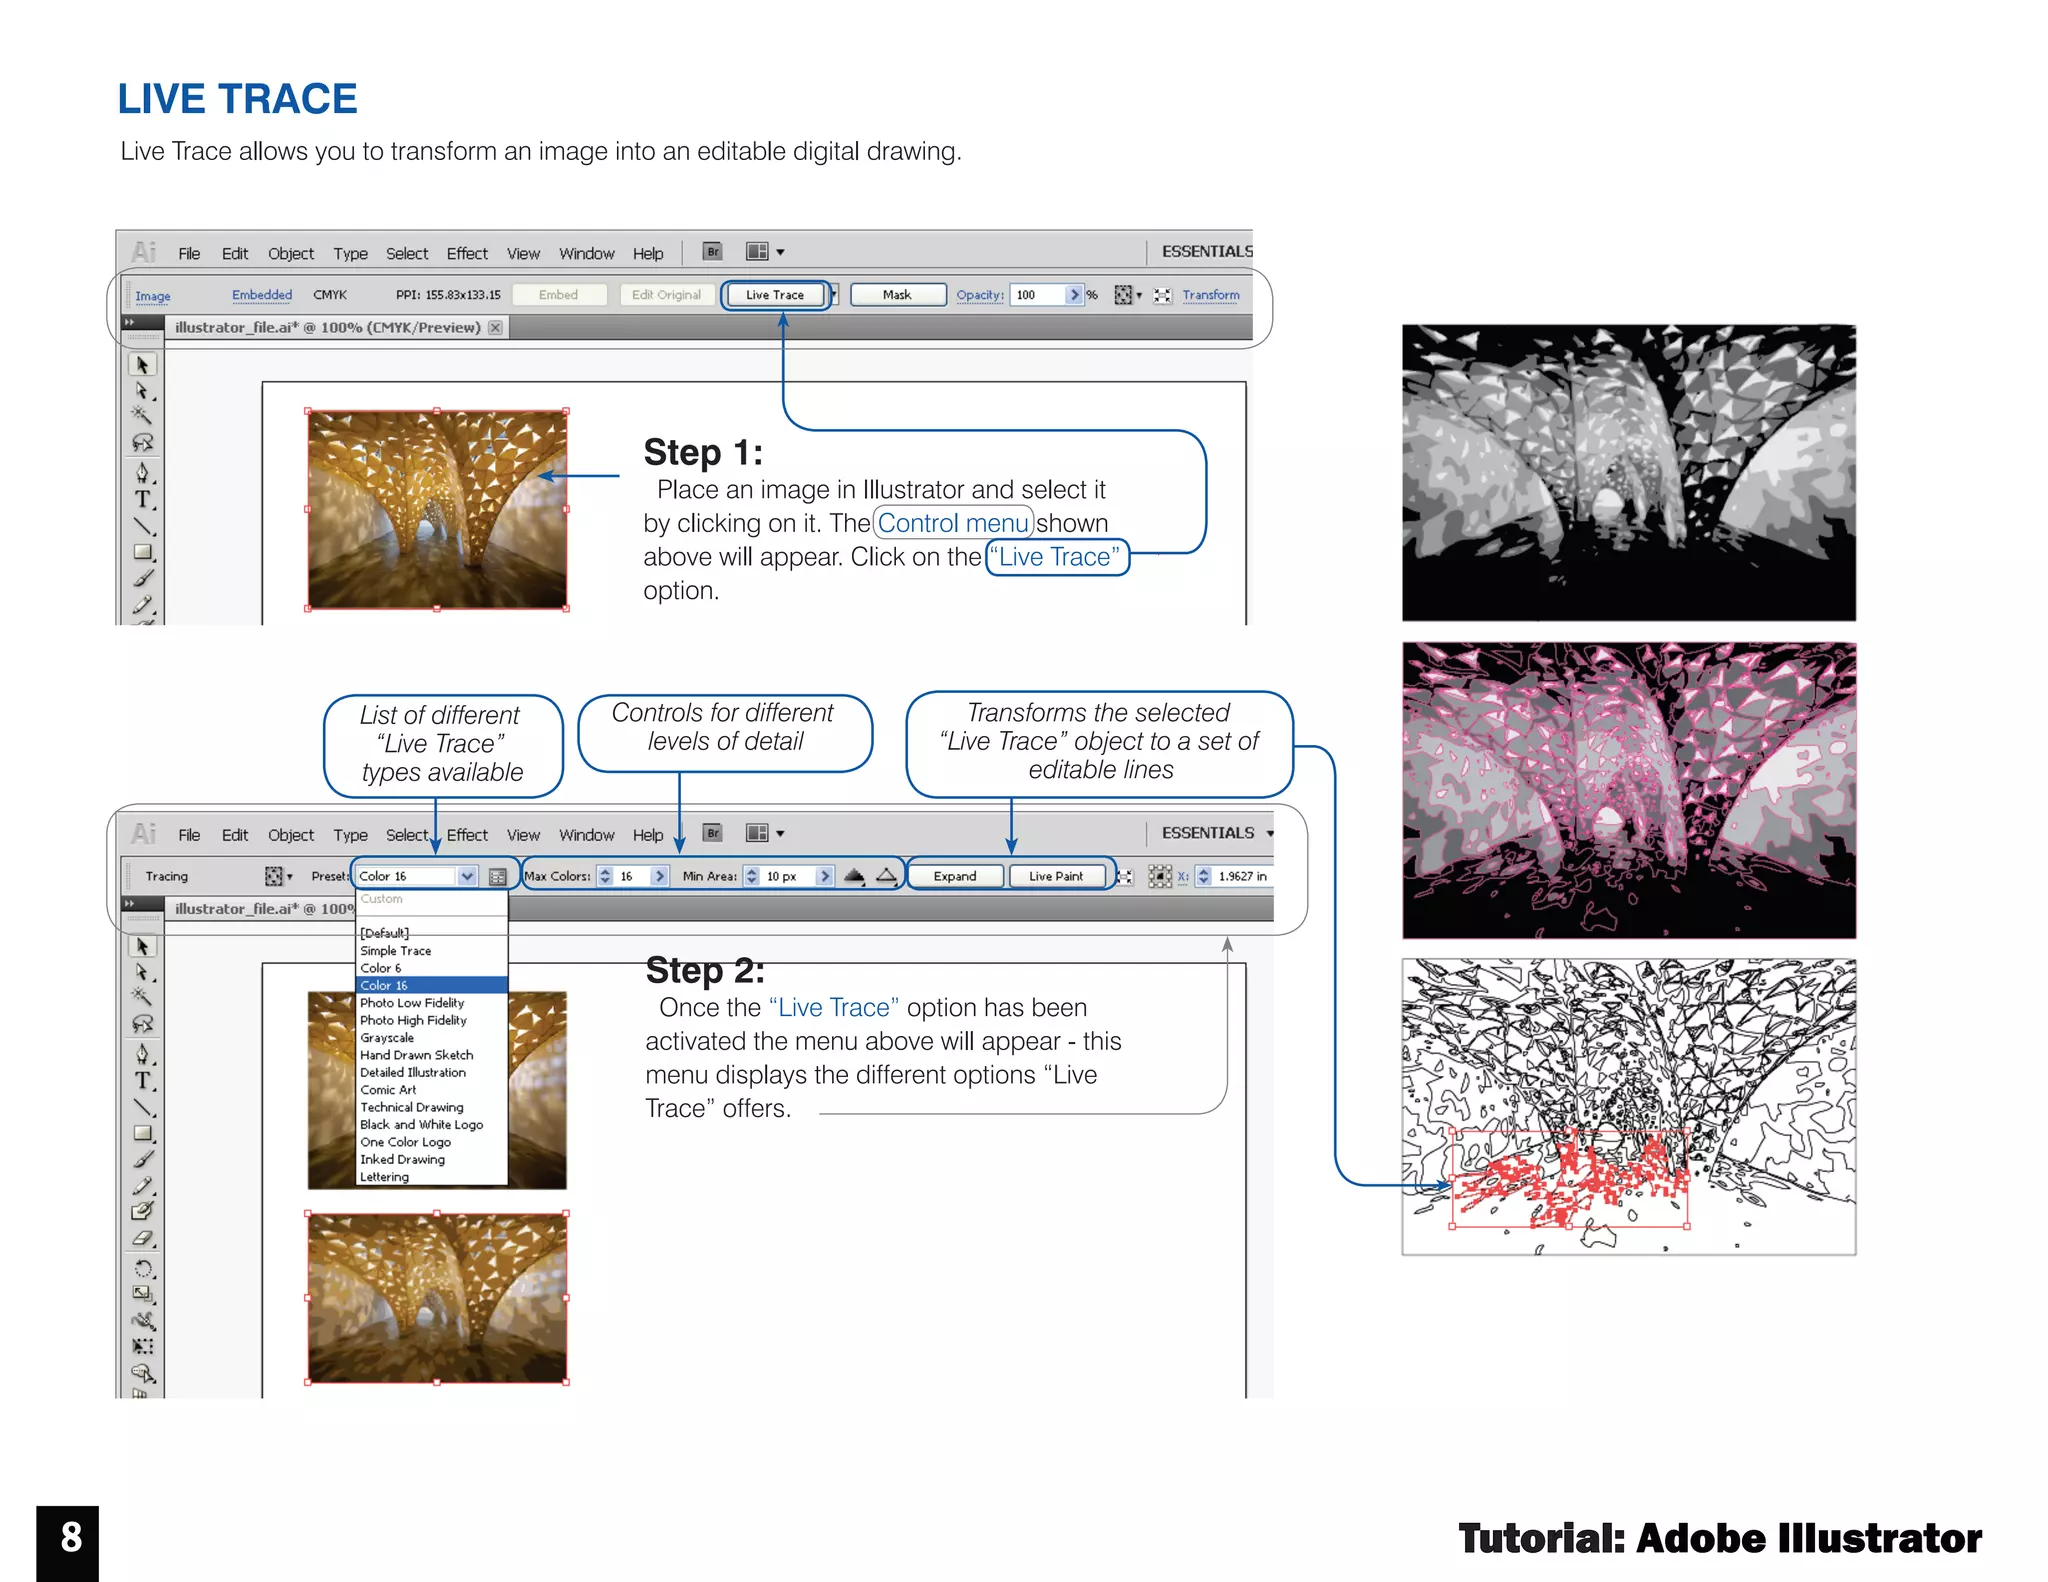
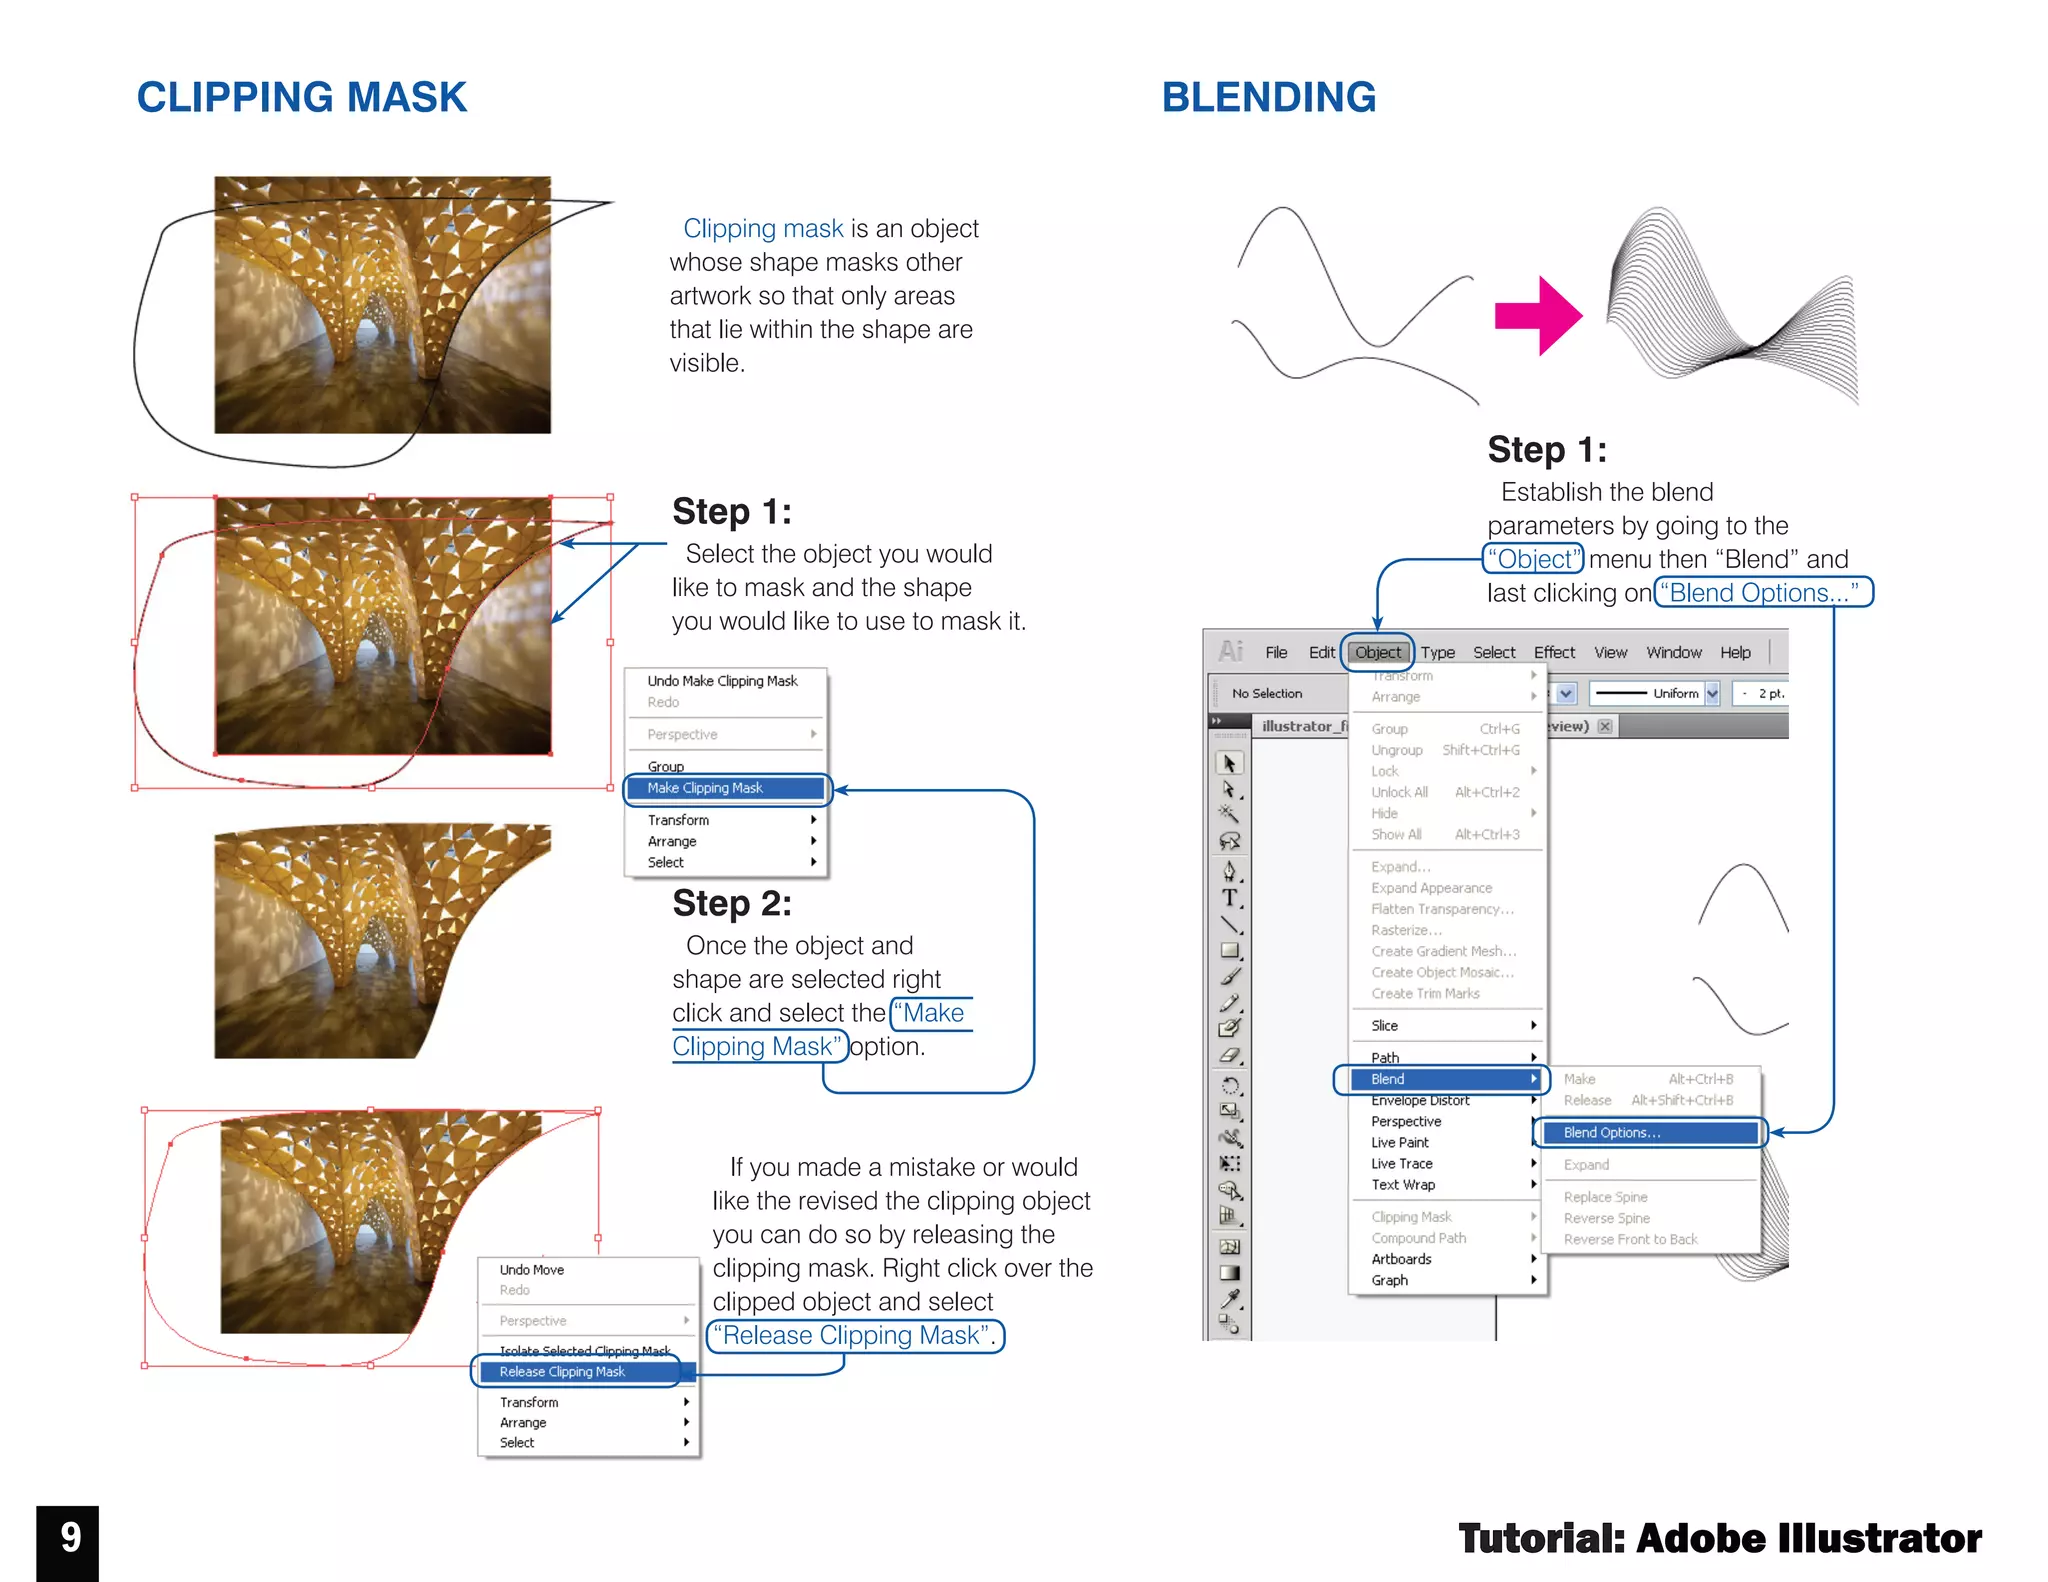
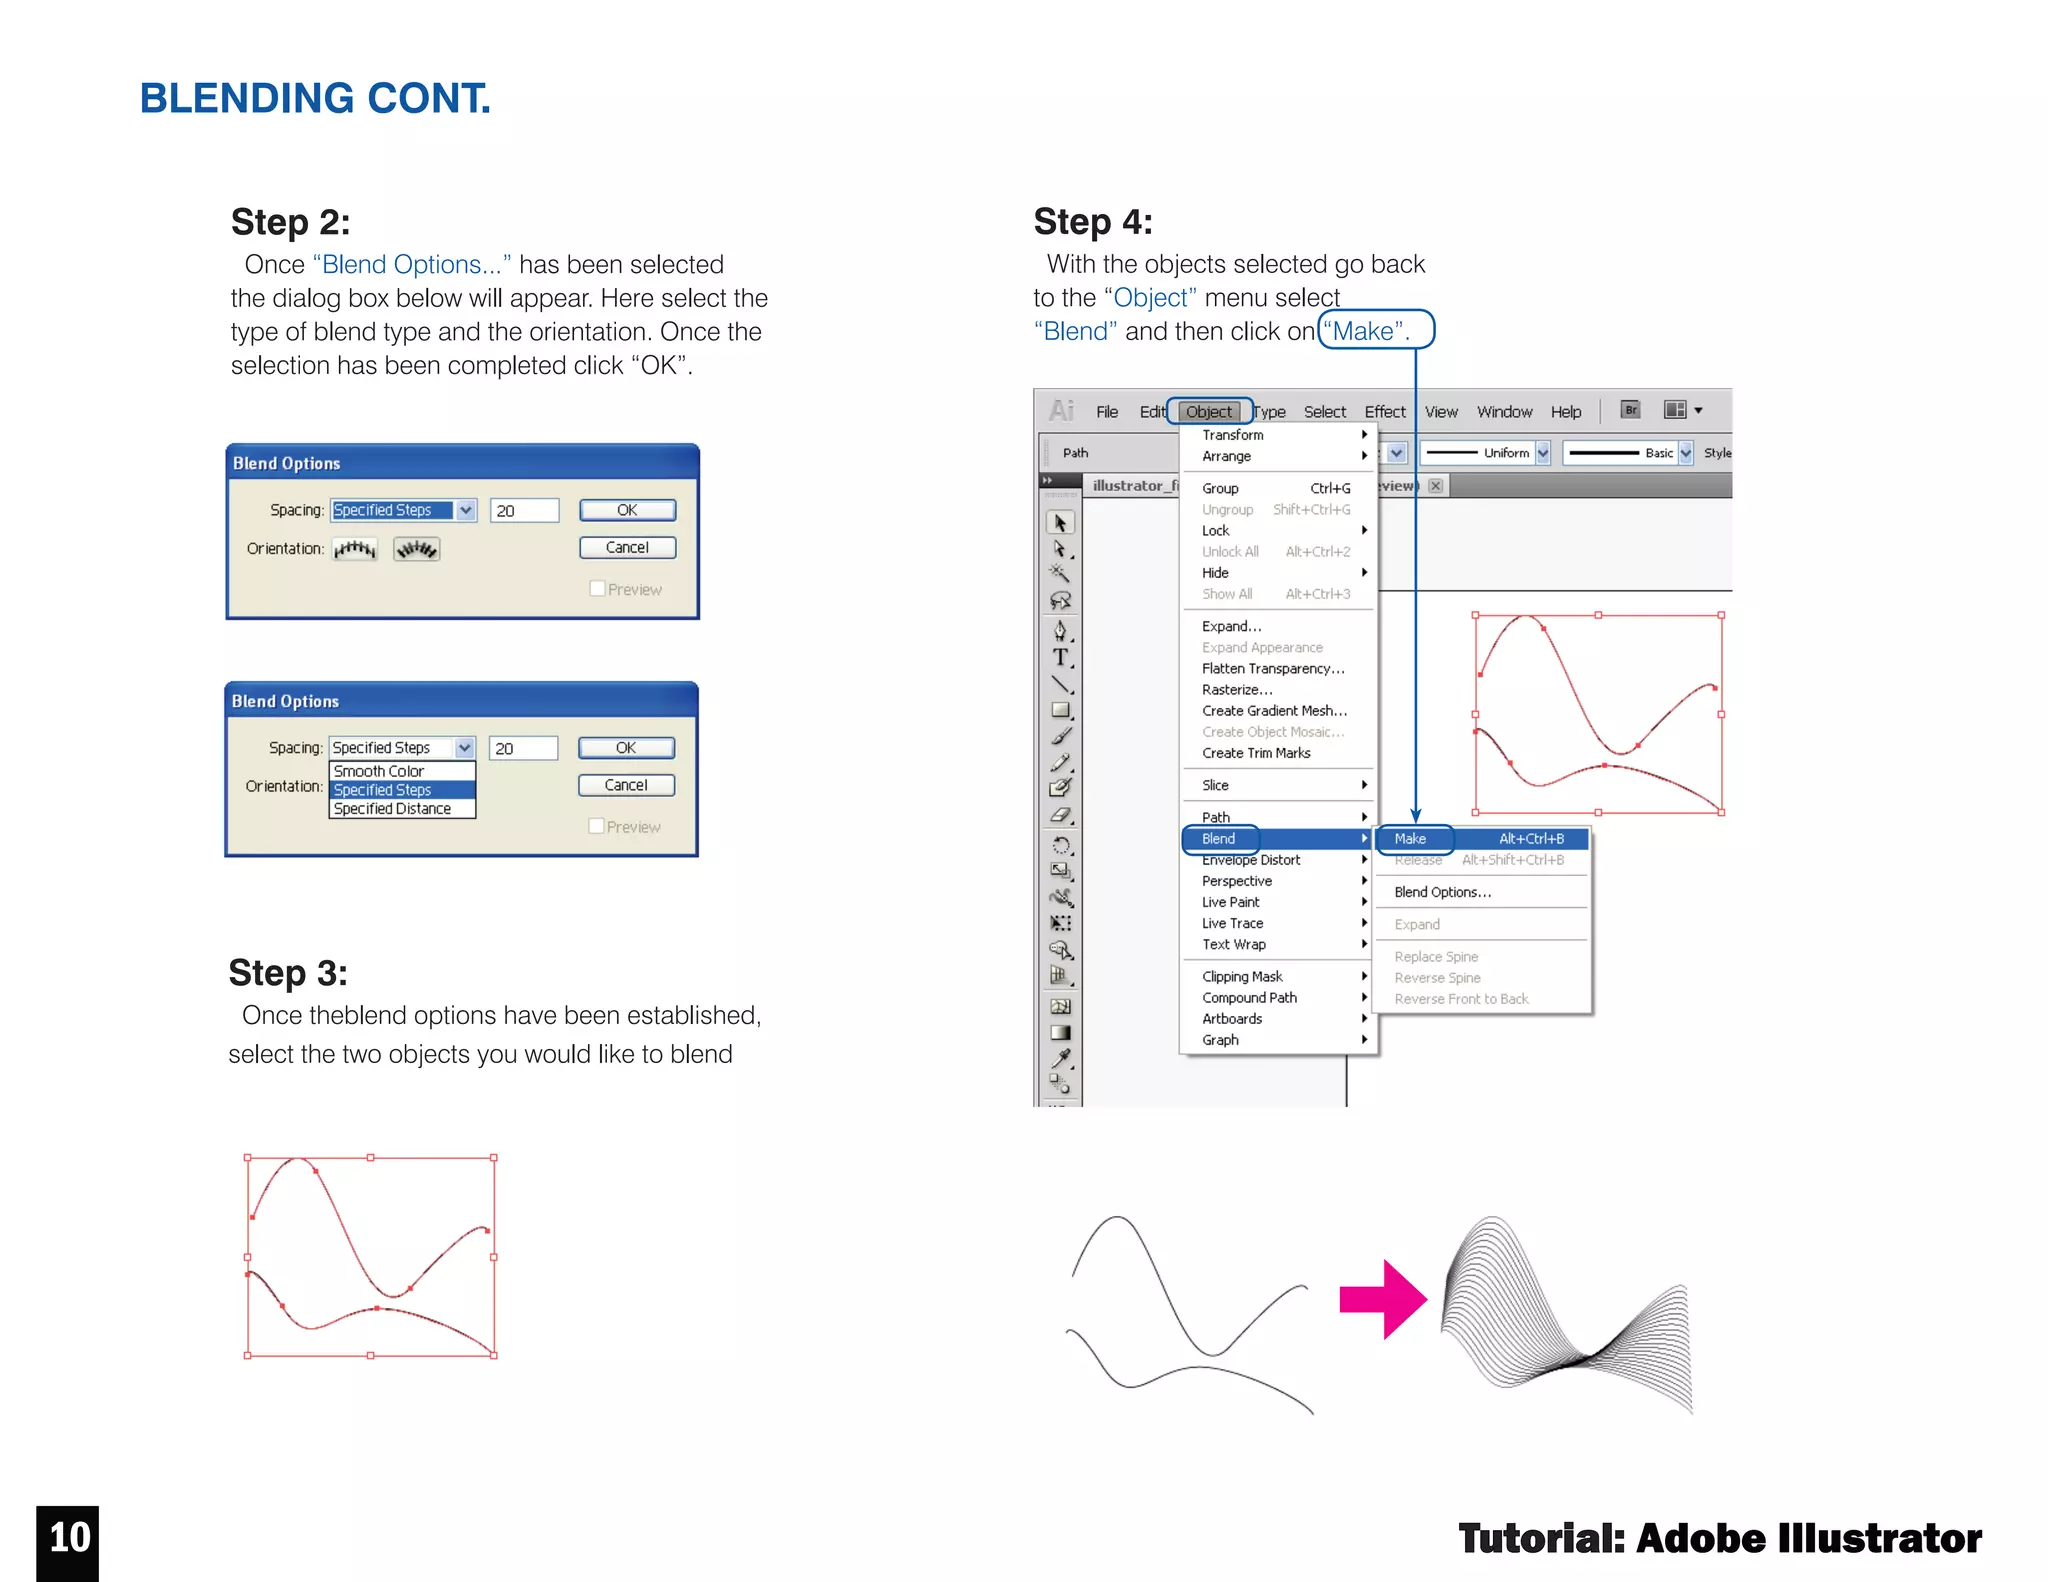
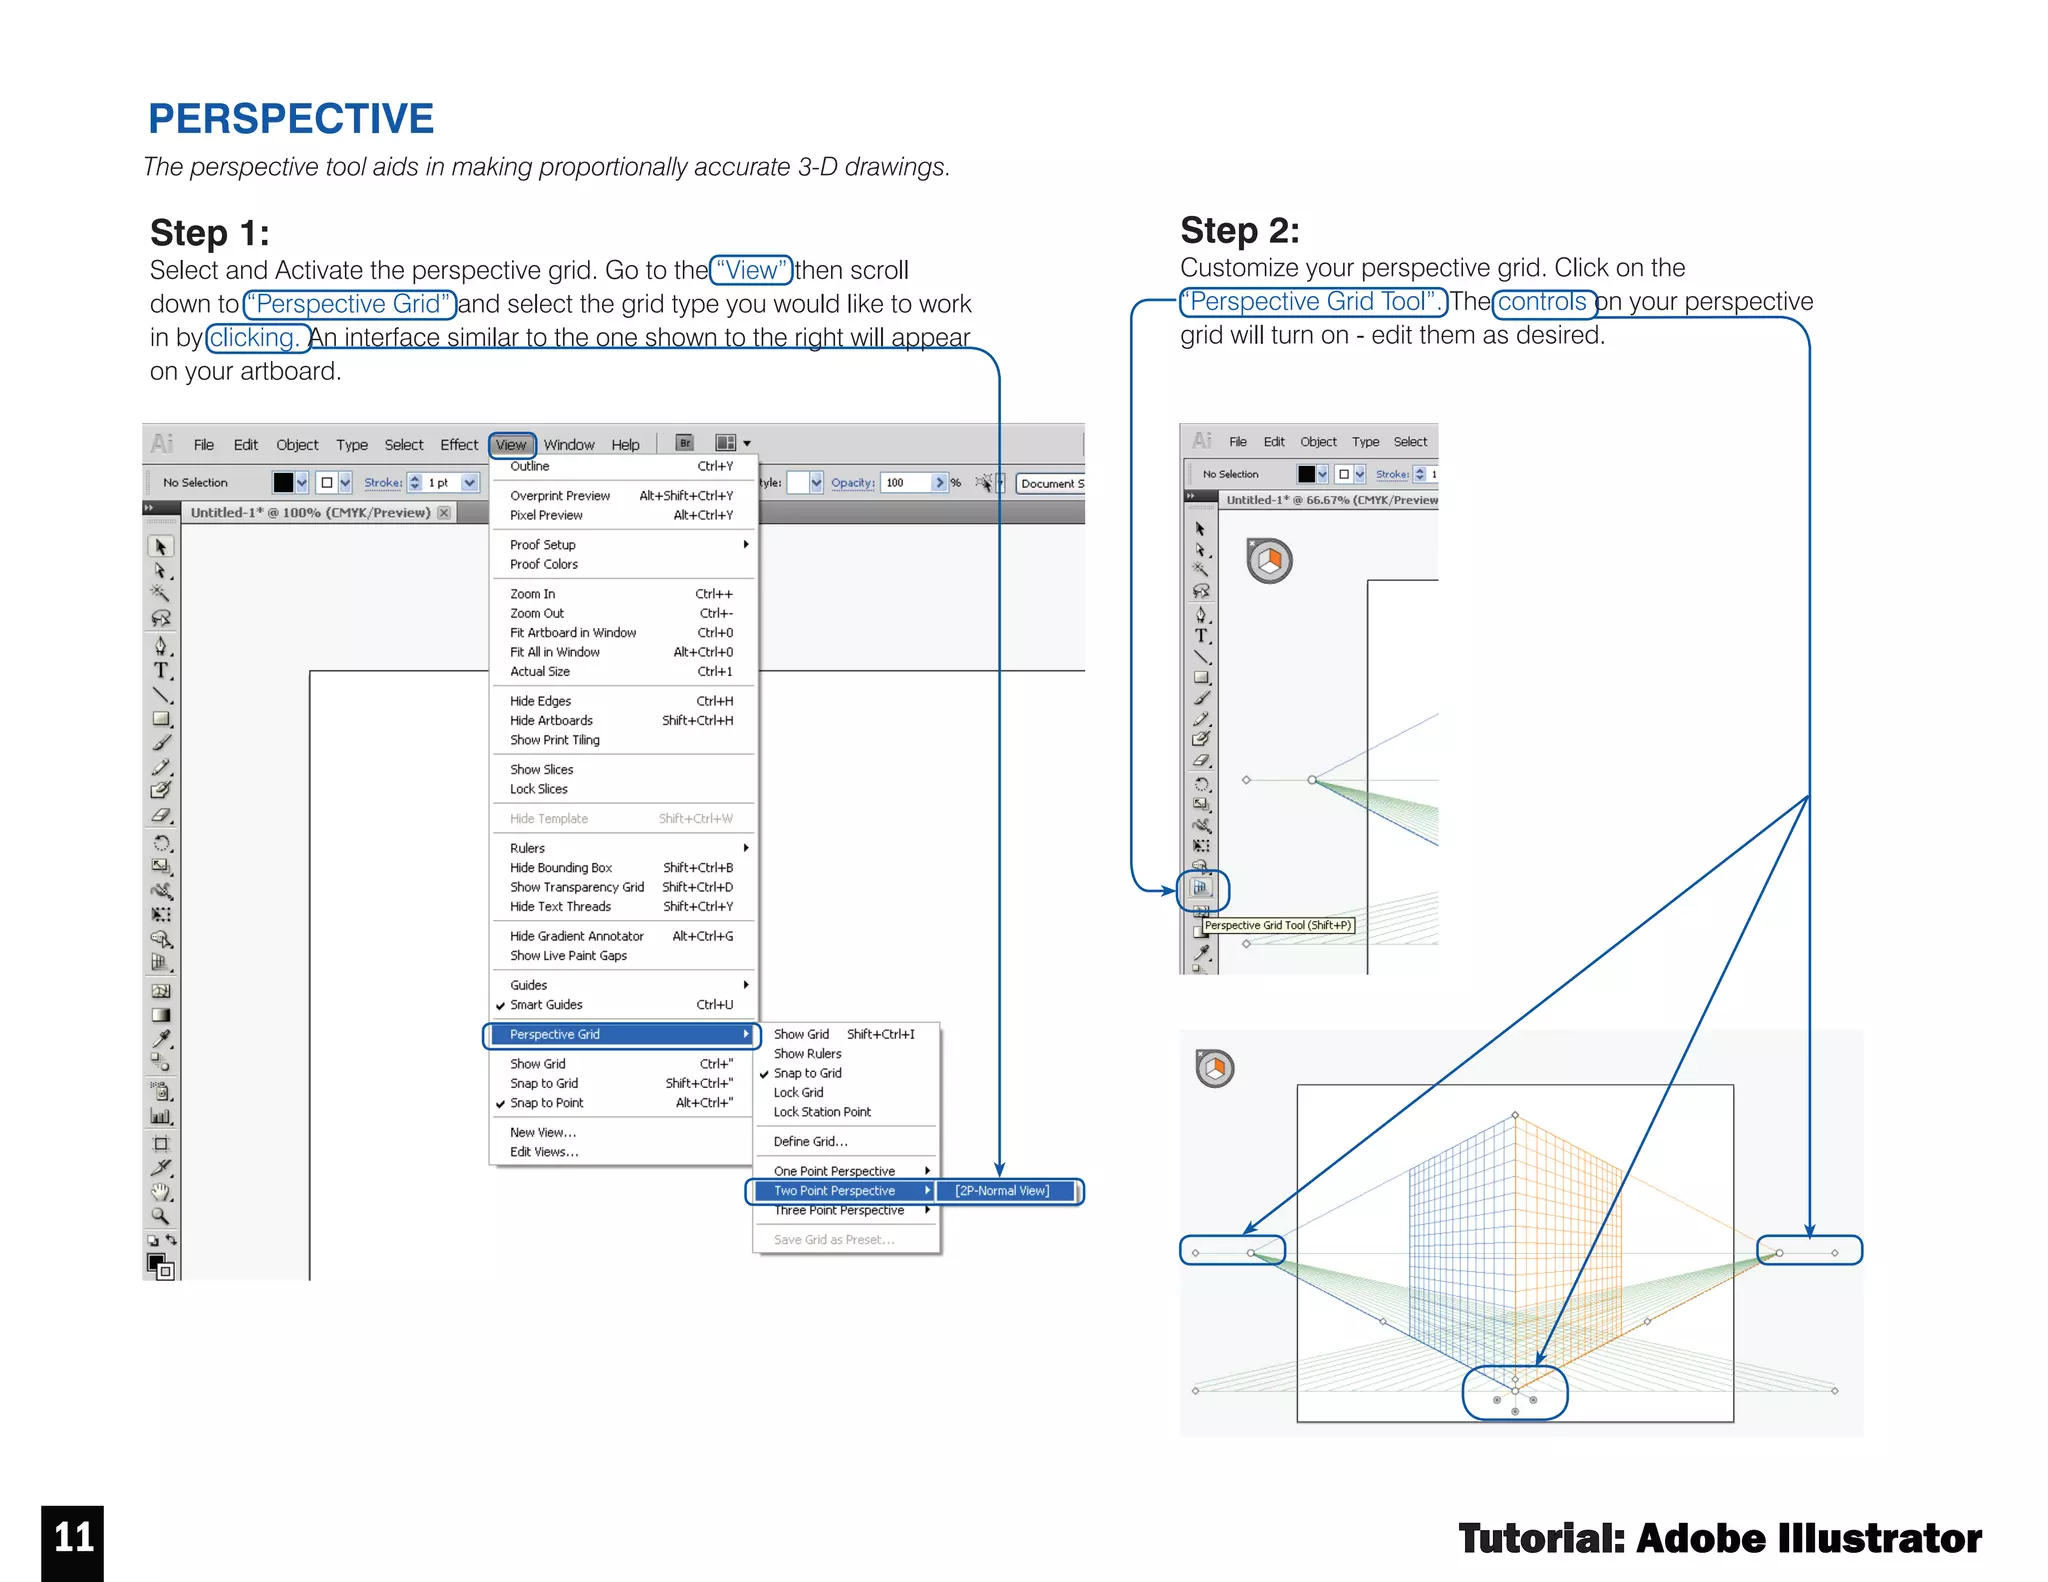


This tutorial provides instructions for using various tools and features in Adobe Illustrator CS6, including how to change colors, use strokes and fills, transform objects, work with layers, apply effects, perform live traces, create clipping masks and blends, use perspective grids, and save files in different formats such as PDF. Key tools and panels like the color picker, stroke panel, and layers panel are explained. Step-by-step directions with accompanying screenshots are provided for each topic.