This document provides an overview of three methods for adding lighting effects in Photoshop. Method one uses Photoshop's built-in lighting effects tool. Method two uses layer masking to simulate lighting by overlapping transparent layers. Method three combines the first two methods and applies them to architectural images. The document includes instructions and screenshots to demonstrate each lighting technique.
Learning Illustrator CS6 with 100 practical exercisesMCB Press
Illustrator CS6, vector drawing application from Adobe, is an excellent tool for computer-aided design. Thanks to its amazing and powerful features, you can create original artwork using drawings and images for it. Do not hesitate to make the 100 exercises in this book to discover the thousand and one possibilities hidden in this great program, as advocated by professionals.
With this book:
Meet the new applications of pattern creation tool enhanced.
Discover also improved image tracing tool that now provides clean lines and perfect fit.
Apply gradients on strokes to get interesting and striking results.
Leverage the revamped interface with optimized panels and other new features that make it more intuitive, efficient and flexible.
Enjoy improvements to some effects, such as Gaussian blur, glare and shadows, which are applied much faster now.
Adobe Illustrator CS5 Part 1 : Introduction to Illustratorcsula its training
Adobe Illustrator CS5 is used to create graphics and type in vector format. Vector graphics are made up of points, lines, and curves that are defined by mathematical equations. Vector graphics are resolution independent, which means that they can be resized to any size without losing quality. This handout provides an overview of the Illustrator CS5 user interface and vector graphics, and covers how to create different shapes using the Pen tool.
If you would like to see more videos on Adobe Illustrator, please visit http://www.youtube.com/mycsula for more online training.
There you can find FREE tutorials on Illustrator, Photoshop, Microsoft Office, HTML5, and many more!
Introduction to Adobe Illustrator Basics. Adobe Illustrator lessons (high school level). Explains the difference between bitmap and jpeg. Explains the uses of Adobe Illustrator in the Graphic Design market.
The A to Z of Adobe Illustrator – design & illustrationFanus van Straten
The Adobe Illustrator toolbar is jam-packed with useful tools you may have used a million times or that may be entirely unfamiliar to you. Add to that the numerous panels and effects, and this program can create most any type of artwork. This A–Z list breaks down every tool in the Illustrator toolbar, with a link to a quick tip.
Adobe Illustrator: 6 Essential Tips and ToolsNguyet Minh
Adobe Illustrator allows full control and editing of an artwork. Since it is so customizable, many potentials of what you can do with just simple tools are not so obvious. Let's go through the 6 tools in Illustrator you might not know.
Adobe Illustrator CS6 was used to demonstrate.
Corel Draw Beginner Tutorial: How to Make a New Product FlyerFlyer Tutor
Recreate this New Product Flyer while learning how to use the Corel Draw Interface with this step by step illustrated tutorial. Perform document setup, delete nodes, mirror image, convert to bitmap, gaussian blur, gradient, text on a path, crop images, fountain fill, line spacing and more.
Adobe Illustrator CS5 is used to create graphics and type in vector format. Vector graphics are made up of points, lines, and curves that are defined by mathematical equations. Vector graphics are resolution independent, which means that they can be resized to any size without losing quality. This handout covers vector graphic effects which include text, color gradient, and gloss effects. The lessons include creating an icon and a customized t-shirt design.
If you would like to see more videos on Adobe Illustrator, please visit http://www.youtube.com/mycsula for more online training.
There you can find FREE tutorials on Illustrator, Photoshop, Microsoft Office, HTML5, and many more!
Graphics Experts Ltd is the right solution for all of your graphic design needs. We offer affordable, professional services that encompass everything from image masking, shadow creation, web image optimization, and clipping path to image manipulation, image retouching, color adjustments, photo editing, vehicle enhancement, and even illustration.
How to Turn a Picture Into a Line Drawing in PhotoshopZenith Clipping
To transform a photograph into a line drawing in Photoshop, you don’t need it to appear as though you did it in Photoshop, you’ll need to focus on detail and set up your picture appropriately before you apply any channels.
The French Revolution, which began in 1789, was a period of radical social and political upheaval in France. It marked the decline of absolute monarchies, the rise of secular and democratic republics, and the eventual rise of Napoleon Bonaparte. This revolutionary period is crucial in understanding the transition from feudalism to modernity in Europe.
For more information, visit-www.vavaclasses.com
Unit 8 - Information and Communication Technology (Paper I).pdfThiyagu K
This slides describes the basic concepts of ICT, basics of Email, Emerging Technology and Digital Initiatives in Education. This presentations aligns with the UGC Paper I syllabus.
Instructions for Submissions thorugh G- Classroom.pptxJheel Barad
This presentation provides a briefing on how to upload submissions and documents in Google Classroom. It was prepared as part of an orientation for new Sainik School in-service teacher trainees. As a training officer, my goal is to ensure that you are comfortable and proficient with this essential tool for managing assignments and fostering student engagement.
How to Split Bills in the Odoo 17 POS ModuleCeline George
Bills have a main role in point of sale procedure. It will help to track sales, handling payments and giving receipts to customers. Bill splitting also has an important role in POS. For example, If some friends come together for dinner and if they want to divide the bill then it is possible by POS bill splitting. This slide will show how to split bills in odoo 17 POS.
Welcome to TechSoup New Member Orientation and Q&A (May 2024).pdfTechSoup
In this webinar you will learn how your organization can access TechSoup's wide variety of product discount and donation programs. From hardware to software, we'll give you a tour of the tools available to help your nonprofit with productivity, collaboration, financial management, donor tracking, security, and more.
The Art Pastor's Guide to Sabbath | Steve ThomasonSteve Thomason
What is the purpose of the Sabbath Law in the Torah. It is interesting to compare how the context of the law shifts from Exodus to Deuteronomy. Who gets to rest, and why?
Students, digital devices and success - Andreas Schleicher - 27 May 2024..pptxEduSkills OECD
Andreas Schleicher presents at the OECD webinar ‘Digital devices in schools: detrimental distraction or secret to success?’ on 27 May 2024. The presentation was based on findings from PISA 2022 results and the webinar helped launch the PISA in Focus ‘Managing screen time: How to protect and equip students against distraction’ https://www.oecd-ilibrary.org/education/managing-screen-time_7c225af4-en and the OECD Education Policy Perspective ‘Students, digital devices and success’ can be found here - https://oe.cd/il/5yV
Operation “Blue Star” is the only event in the history of Independent India where the state went into war with its own people. Even after about 40 years it is not clear if it was culmination of states anger over people of the region, a political game of power or start of dictatorial chapter in the democratic setup.
The people of Punjab felt alienated from main stream due to denial of their just demands during a long democratic struggle since independence. As it happen all over the word, it led to militant struggle with great loss of lives of military, police and civilian personnel. Killing of Indira Gandhi and massacre of innocent Sikhs in Delhi and other India cities was also associated with this movement.
2024.06.01 Introducing a competency framework for languag learning materials ...Sandy Millin
http://sandymillin.wordpress.com/iateflwebinar2024
Published classroom materials form the basis of syllabuses, drive teacher professional development, and have a potentially huge influence on learners, teachers and education systems. All teachers also create their own materials, whether a few sentences on a blackboard, a highly-structured fully-realised online course, or anything in between. Despite this, the knowledge and skills needed to create effective language learning materials are rarely part of teacher training, and are mostly learnt by trial and error.
Knowledge and skills frameworks, generally called competency frameworks, for ELT teachers, trainers and managers have existed for a few years now. However, until I created one for my MA dissertation, there wasn’t one drawing together what we need to know and do to be able to effectively produce language learning materials.
This webinar will introduce you to my framework, highlighting the key competencies I identified from my research. It will also show how anybody involved in language teaching (any language, not just English!), teacher training, managing schools or developing language learning materials can benefit from using the framework.
The Roman Empire A Historical Colossus.pdfkaushalkr1407
The Roman Empire, a vast and enduring power, stands as one of history's most remarkable civilizations, leaving an indelible imprint on the world. It emerged from the Roman Republic, transitioning into an imperial powerhouse under the leadership of Augustus Caesar in 27 BCE. This transformation marked the beginning of an era defined by unprecedented territorial expansion, architectural marvels, and profound cultural influence.
The empire's roots lie in the city of Rome, founded, according to legend, by Romulus in 753 BCE. Over centuries, Rome evolved from a small settlement to a formidable republic, characterized by a complex political system with elected officials and checks on power. However, internal strife, class conflicts, and military ambitions paved the way for the end of the Republic. Julius Caesar’s dictatorship and subsequent assassination in 44 BCE created a power vacuum, leading to a civil war. Octavian, later Augustus, emerged victorious, heralding the Roman Empire’s birth.
Under Augustus, the empire experienced the Pax Romana, a 200-year period of relative peace and stability. Augustus reformed the military, established efficient administrative systems, and initiated grand construction projects. The empire's borders expanded, encompassing territories from Britain to Egypt and from Spain to the Euphrates. Roman legions, renowned for their discipline and engineering prowess, secured and maintained these vast territories, building roads, fortifications, and cities that facilitated control and integration.
The Roman Empire’s society was hierarchical, with a rigid class system. At the top were the patricians, wealthy elites who held significant political power. Below them were the plebeians, free citizens with limited political influence, and the vast numbers of slaves who formed the backbone of the economy. The family unit was central, governed by the paterfamilias, the male head who held absolute authority.
Culturally, the Romans were eclectic, absorbing and adapting elements from the civilizations they encountered, particularly the Greeks. Roman art, literature, and philosophy reflected this synthesis, creating a rich cultural tapestry. Latin, the Roman language, became the lingua franca of the Western world, influencing numerous modern languages.
Roman architecture and engineering achievements were monumental. They perfected the arch, vault, and dome, constructing enduring structures like the Colosseum, Pantheon, and aqueducts. These engineering marvels not only showcased Roman ingenuity but also served practical purposes, from public entertainment to water supply.
GIÁO ÁN DẠY THÊM (KẾ HOẠCH BÀI BUỔI 2) - TIẾNG ANH 8 GLOBAL SUCCESS (2 CỘT) N...
Lighting with Photoshop
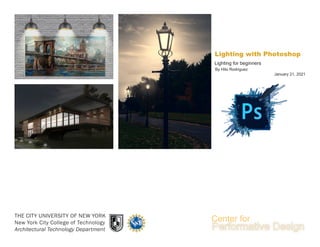
1. THE CITY UNIVERSITY OF NEW YORK
New York City College of Technology
Architectural Technology Department
January 21, 2021
By Hito Rodriguez
Lighting for beginners
Lighting with Photoshop
2. 2
This material is based upon work supported by the National Science Foundation
under Grant Numbers 1141234.
Any opinions, findings, and conclusions or recommendations expressed in this
material are those of the author(s) and do not necessarily reflect the views of the
National Science Foundation.
3. Lighting Effect
3
Outline:
there will be 3 methos provided in this
primer .
Method 1.- Beginners
Method one is to introduce the use of the
internal Adobe Photoshop Lighting source. Adobe
Photoshop has incorporated the lighting effects
tool. Only available for CC version after 2017.
Method 2.- Intermediate
Method two will introduce a layer
masking method to teach students how to
layer manage correctly and how multiple
layers overlapping can replicate the
illusion of a lighting source.
Method 3.- Advanced
Method three will incorporate the
first two methods in a strategy format to
help students use it in more architectural
needs.
4. Lighting Effect
4
Fig. 2 -2
Method One
Method one is to introduce the use of the internal
Adobe Photoshop Lighting source. Adobe
Photoshop has incorporated the lighting effects
tool. Only available for CC version after 2017.
Fig. 1-1
Its the final example of Method one.
this image will allow you to have a clear
understanding of the final goal of method one, by
using the Lighting Effect tools
Fig. 2-2
Open the background image we are using for this
activity.
This image has been downloaded from google
search as “White Brick texture seamless.”
Note: Seamless is a good searching word that
helps you search for the best available image
texture.
This image can be open in multiple ways by
selecting and dragging the image into photoshop
or by right-Click and “open with” photoshop.exe
Fig. 1 -1
5. Lighting Effect
5
Fig. 4 -2
Dragging and Copy image.
Fig. 3-1
This image can be open in multiple ways by
selecting and dragging the image into photoshop
or by right-Click and “open with” photoshop.exe
In this case, since we already have an open file
that we are using to compose the image, We
prefer to drag it into the working Photoshop file.
Fig. 4-2
After the lamp image has been added to the
working file, we can transform it by using the
keyboard “SHIFT+T” to change the scale of the
image.
Also, we can “ALT+Left Click-drag” to copy the
image.
Fig. 3 -1
6. 6
Lighting Effect
Fig. 7 -1
Fig. 6 -3
Fig. 5 -2
Group Layers
As we can observe in Fig. 7-1 there is already
three similar elements. in our working space.
Fig. 5-2
Each of those lamps has an individual layer that
represents the layer properties. Having a single
layer per object provide more flexible editing in the
future, allowing the user to edit settings.
However, it’s a good behave to group layers.
by selecting and using your keyboard “SHIFT+G”
NOTE: Photoshop is a program that works
with layer order, meaning that layers above the
list appear in front. It’s essential to work and
understand the hierarchy of each layer and
understand which layer goes above
1
1
2
3
2 3
7. Lighting Effect
7
Fig. 8 -2
Create a new layer and Fill layer with
black
Fig. 9-1
In that image, we see the icons identification.
Group: Multiple layers and create a folder group of
layers (Select layers and “SHIFT+G”.
Delete: Delete unwanted layers in the file by
“Select and Delete.”
New Layer: Allow users to create new working
layers.
Layer Mask: Allow the user to hide pixels from a
working layer by painting black or white
Note: Layer mask, Black hide pixels, White
expose Pixels.
To create a new layer and infill it with
black
1. create a new layer
2. be active in the new create layer and go to
“edit”
3.Select Fill... or you can also use the short-cut
“SHIFT+F5”
4. a new interactive window will show up. click in
“Contents”
5. Select Black. this will infill the layer with pure
black color. that will allow you to create the lighting
source.
Fig. 9 -1
Fig. 10 -3
Group Delete
New Layer
Layer Mask
1
2
3
4
5
8. 8
Lighting Effect
Lighting Effect Tools.
Fig. 13-1
The layer has been infill with black However, it’s
essential to locate that layer in between the lamps
and the back brick wall
How to activate the Lighting Effect tools.
Click one time on top of the layer infill with black to
make sure you are actively working in that layer.
1. Then go to “Filters.”
2. select “Render.”
3. Select “Lighting Effects” this might take a few
seconds to load.
After the tool window is open, you can create
three types of lighting sources.
“Spot” - “Point” - “Ambient”
NOTE: The Color and intensity can be edit in the
right side window
Fig. 13 -1
Fig. 12 -3 Fig. 14 -4
Fig. 11 -2
1
2
3
9. 9
Lighting Effect
Lighting Effects Tools
Fig. 18-1
You can click on one of the three Lights buttons
to add a spot, point or infinite Light source, in the
case of the spot and point lights you will see a
circle where you can draf any of the four handles to
control the positioning and width of the light source,
in the case of the infinite light you will see the light
control shown as Fig 17-2
Fig 17-2
this is the control settings for the infinite light
source. these can be used to adjust the light angle
and converage as well as the effect intensity
Fig 15-3
To add more lights, you can either click on the light
buttons in the options bar, or “ALT+(Grag)) on an
exisiting light to make a copy. all light source will
appear in the listed giving you the ability of turn on
or off lights
Fig. 16-4
In the Properties panel, you can click on the menu
at the top to switch between the tree types of light
sources: Spot, point or infinite. if you click on the
color box you can choose a color other than white
for the light source, below this is the intensity slider,
which controls how to bright the light will be.
Fig. 16 -4
Fig. 17 -2
Fig. 15 -3
Fig. 18 -1
10. 10
Lighting Effect
Light Source Interactive Handles and
Layer Merge
The lighting source has four handles that allow the
user to manipulate the area affected by the light
source. In the center, you will be able to find the
intensity interactive.
Please note that you can edit the scale and the
intensity of this lighting source, the lighting will
affect all layers bellow
after the light effect has been complete, you will
end up with a layer with a black background, in
order to eliminate the black background you need
to apply a normal layer filter
Fig 19-2
1. Select the layer with the light source, (this is to
make sure you are working with the correct layer)
2. Click on “normal” a list of filters will apper
Fig 20-3
3. Select “Linear Dodge (ADD)) this filder will
eliminate the Black background and blend the
lighting with the bellow layers
Fig. 21 -1
Fig. 20 -3
Fig. 19 -2
2
1
3
11. 11
Lighting Effect
Copy lighting and add art paint
Fig 24-1
by selecting the light source layer, you can copy
by “ALT+(Drag)”
NOTE: this will create multiple layers, I
recommend to group layers “SHIFT+G” to keep
your file organized
FIg 22-2
To add other elements, please select an image
and drag into the working area of photoshop
Fig 23-2
Make sure the leyer’s hierarchy is correct.
NOTE: make sure the lighting source layer is in
front of the art paint layer that we just add
Fig. 24 -1
Fig. 23 -3
Fig. 22 -2
12. Lighting Effect
12
Layer Style And Adjustment Layer
there is the method to add a “Layer Style” one is
by double click next to the layer name or select
layer and click at icon “Fx”
Steps.
Fig 26-1
1. Click next to the layer name (Double click)
2. Activate “Bevel & Emboss”
Note: Beveling and embossing is a way to create
shading and simulate shadows that make your
Object look three-dimensional.
3. Activate “Drop Shadows”
Note: This is done by creating an offset shadow
behind an object to indicate that the object is
hovering above the background in 3D space.
This methos will help you to give a more 3D
mential look and some depth in the 2D image
For the final image we can adjust the brightness of
the image by following the steps.
Fig 25-1
1. Create a new layer
2. top tab (Image>Apply Image)
Note: this will generate a single layer collage layer
with in a single image and layer. (you can easy
turn on and off)
3. Select layer (image that we just created)
4. Tab “adjustment>brightness/Constrast”
This concluted the Method 1.- Beginners
Fig. 26 -1
Fig. 25 -2
1
1
2
2
3
13. Lighting Effect
13
Method Two
Method two will introduce a layer masking
method to teach students how to layer
manage correctly and how multiple layers
overlapping can replicate the illusion of a
lighting source.
14. Lighting Effect
14
Method three
Method three will incorporate the first
two methods in a strategy format to help
students use it in more architectural
needs.