Download as PDF, PPTX
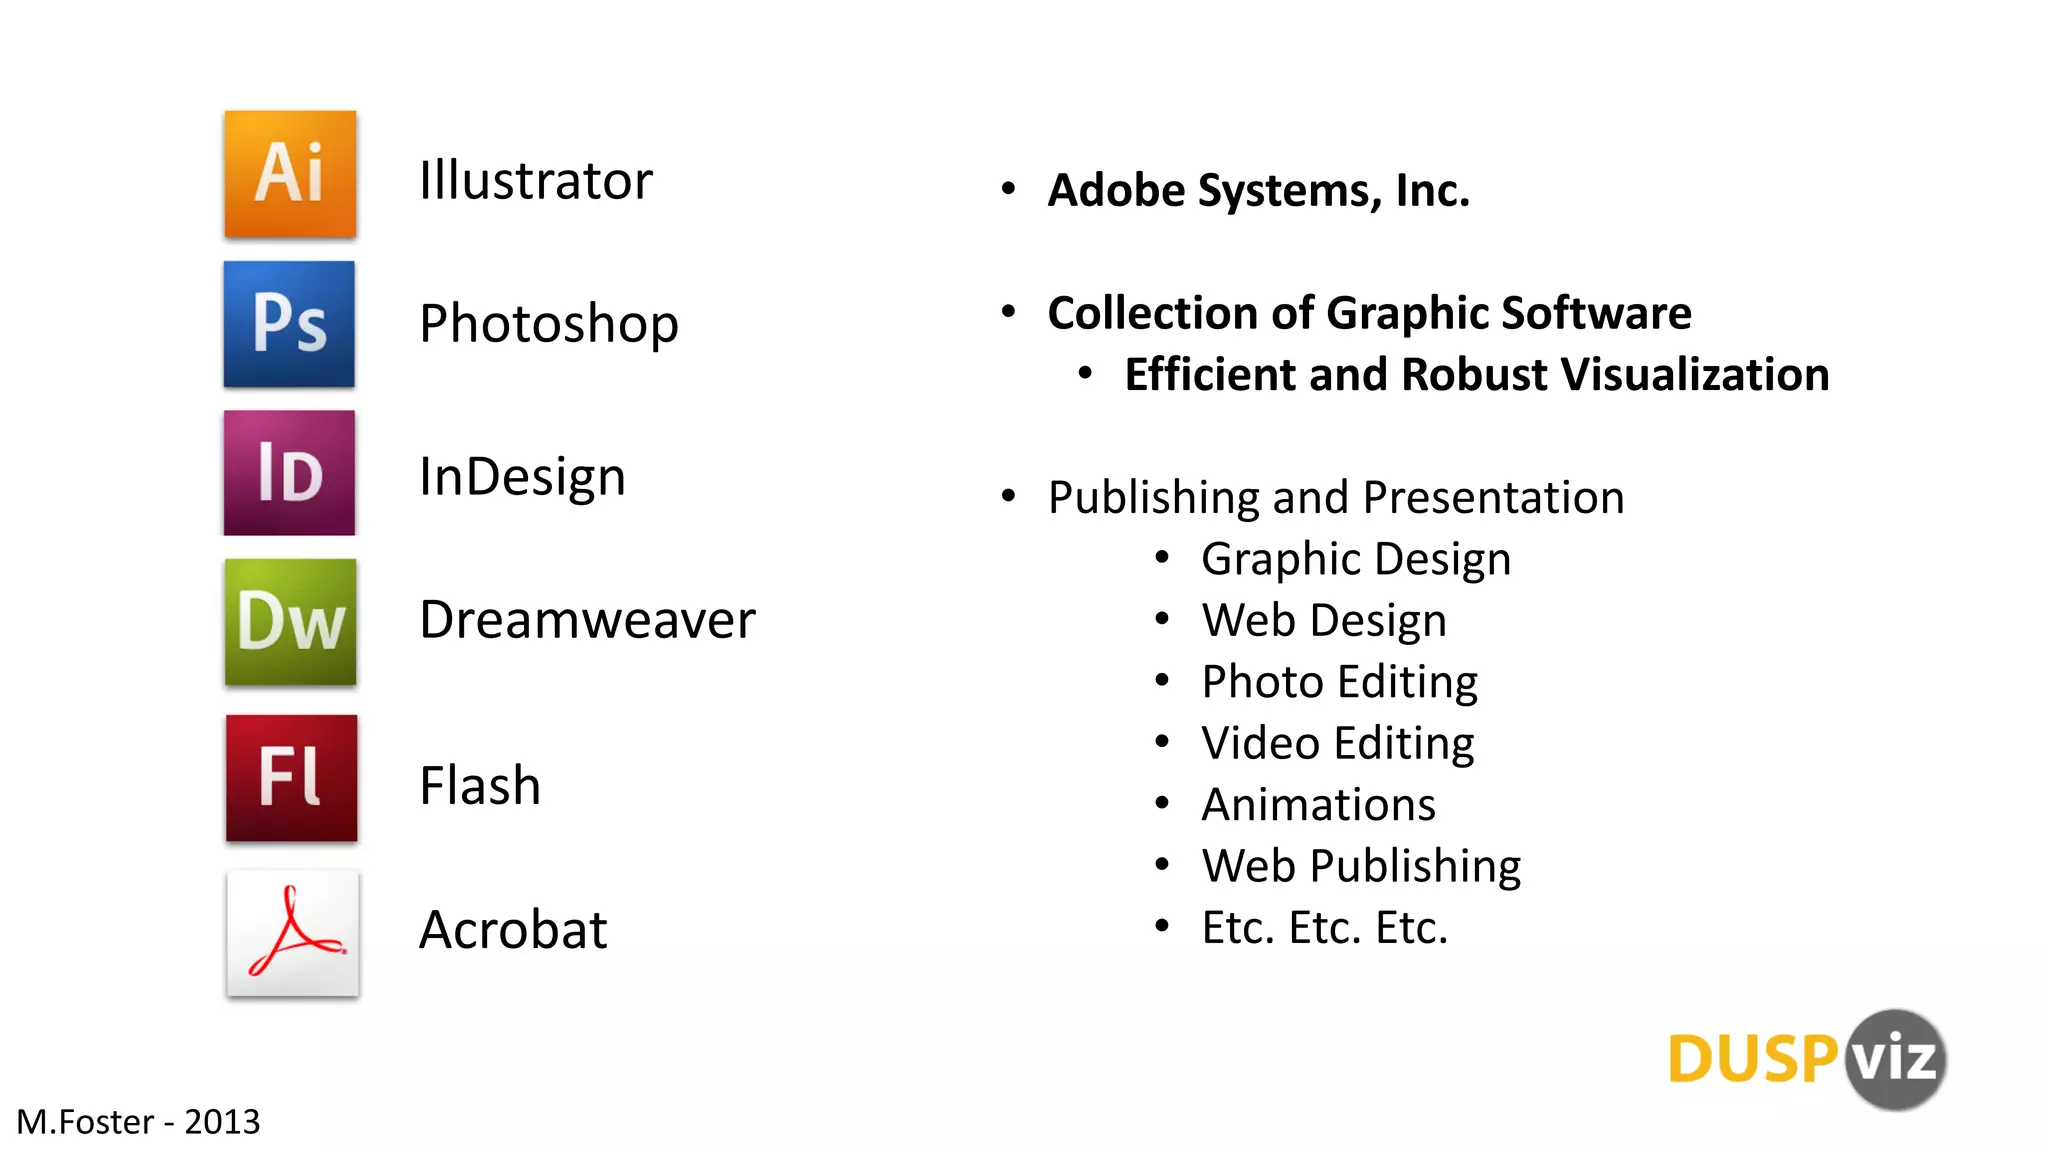


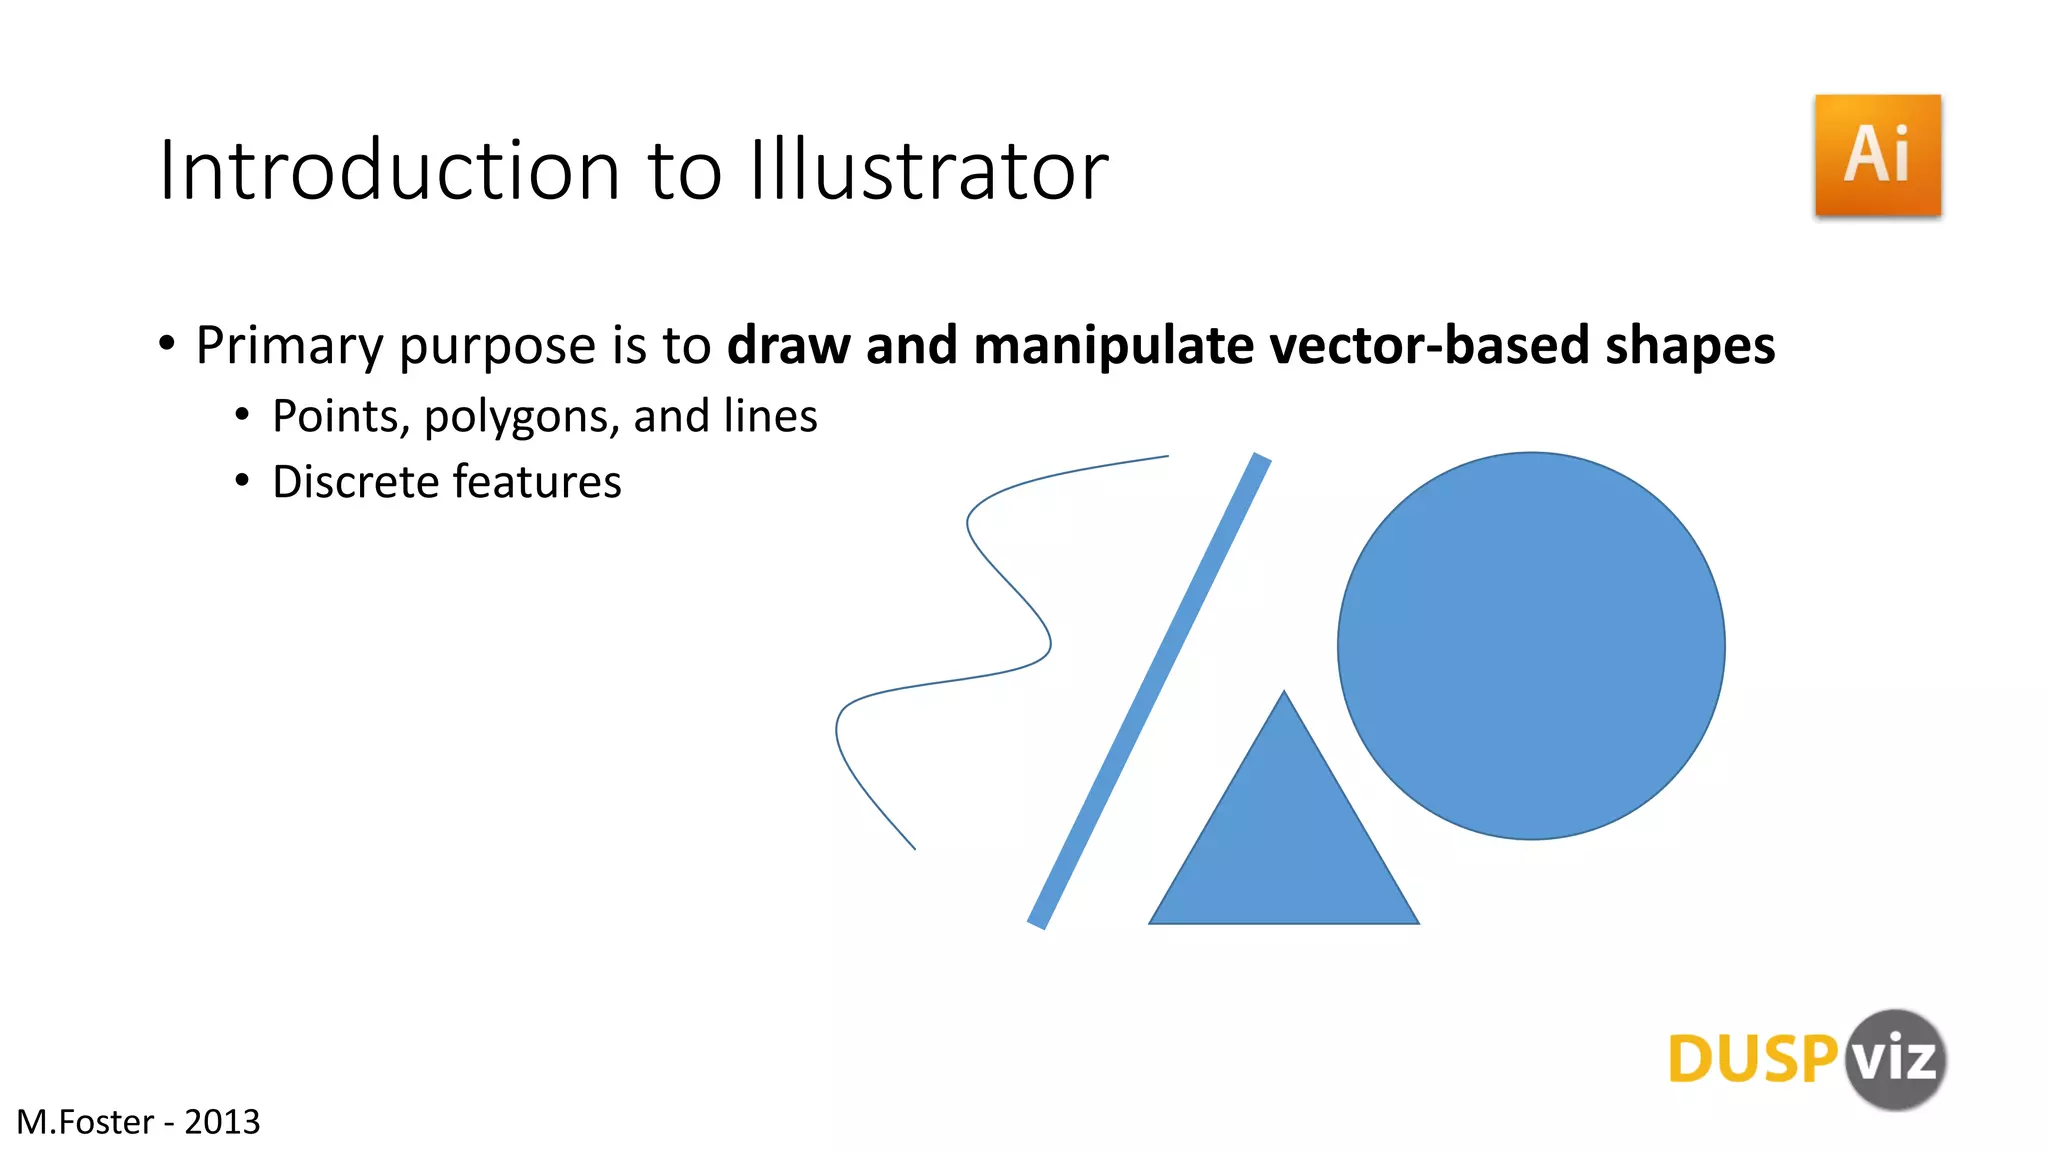
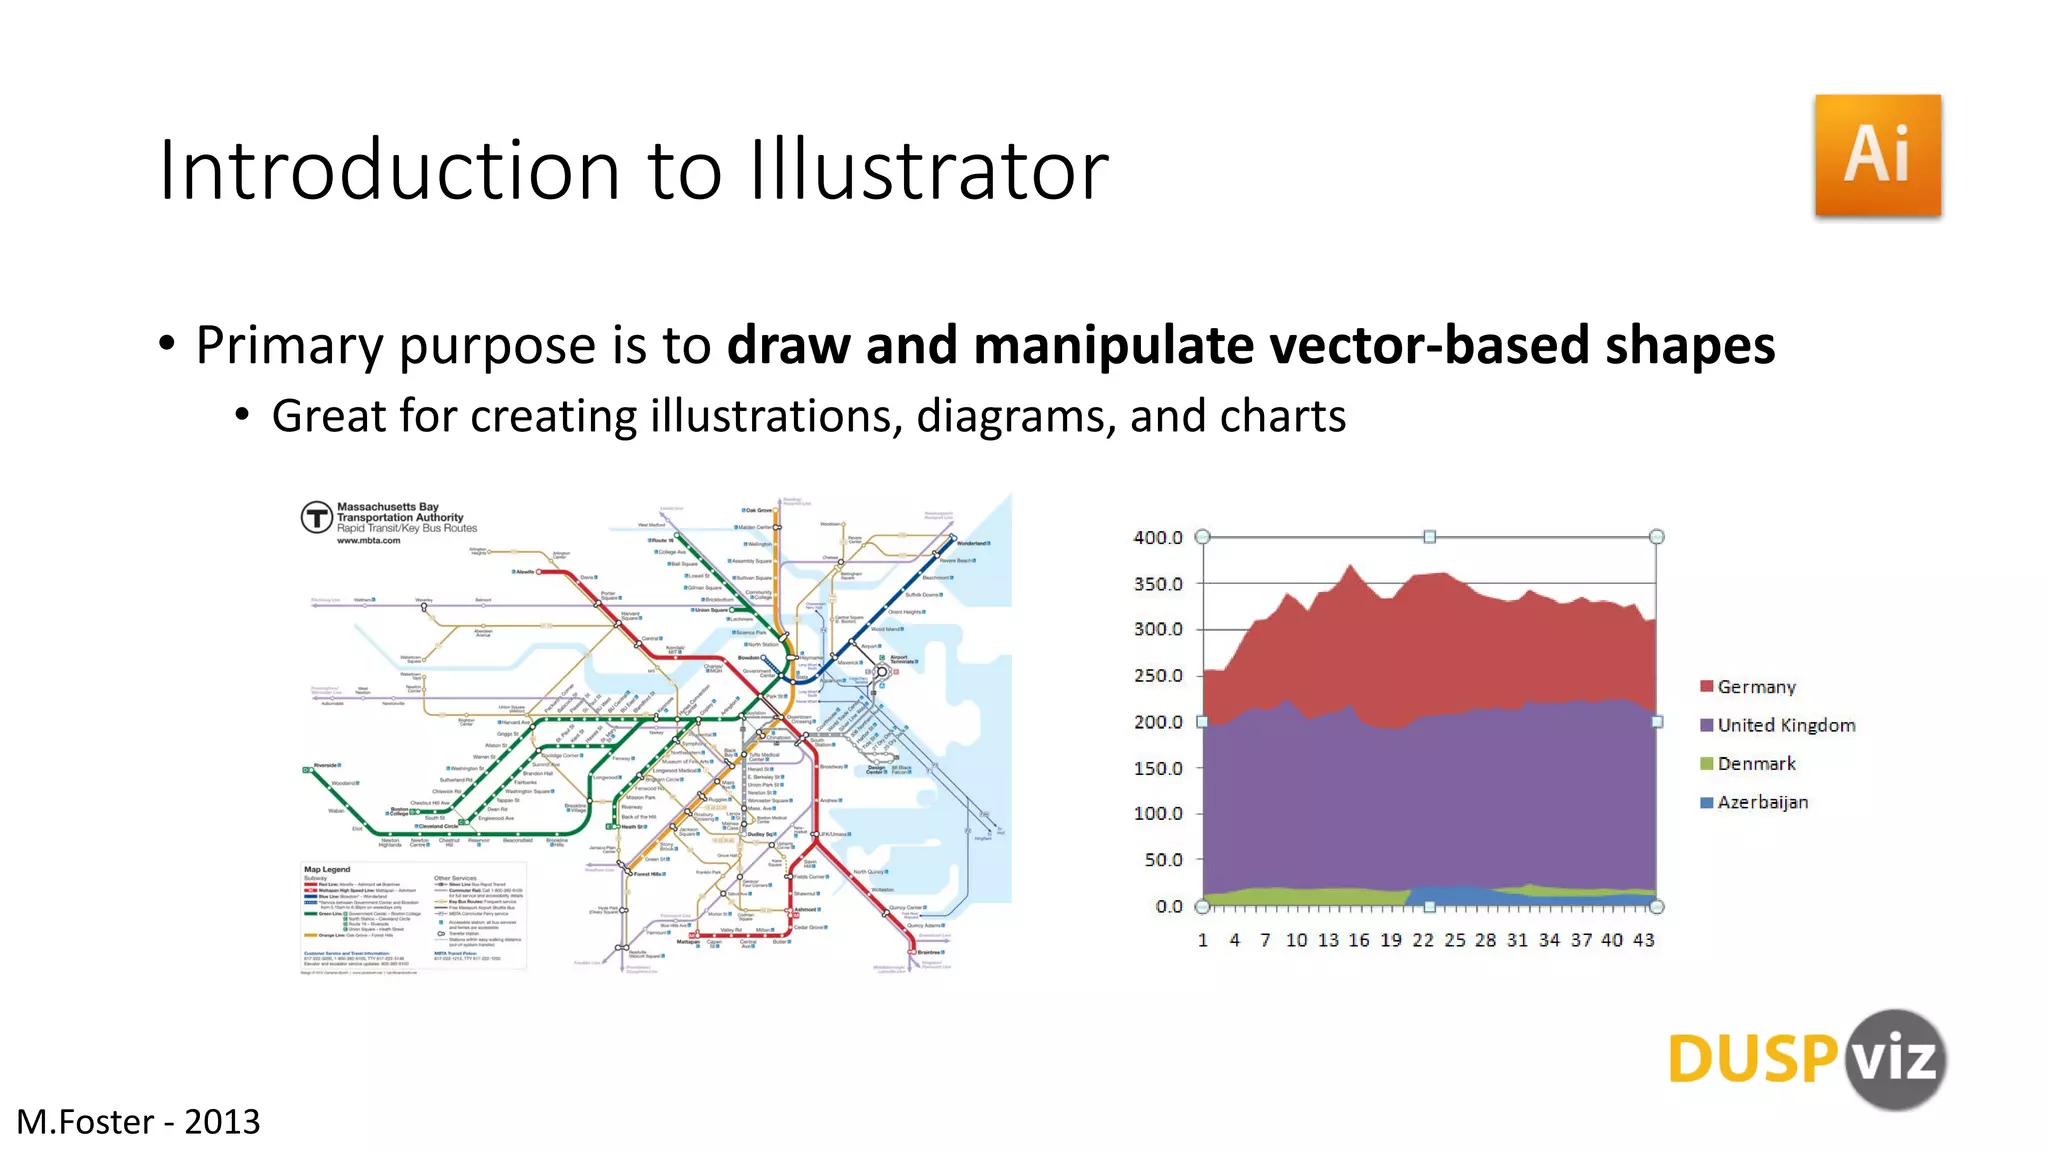
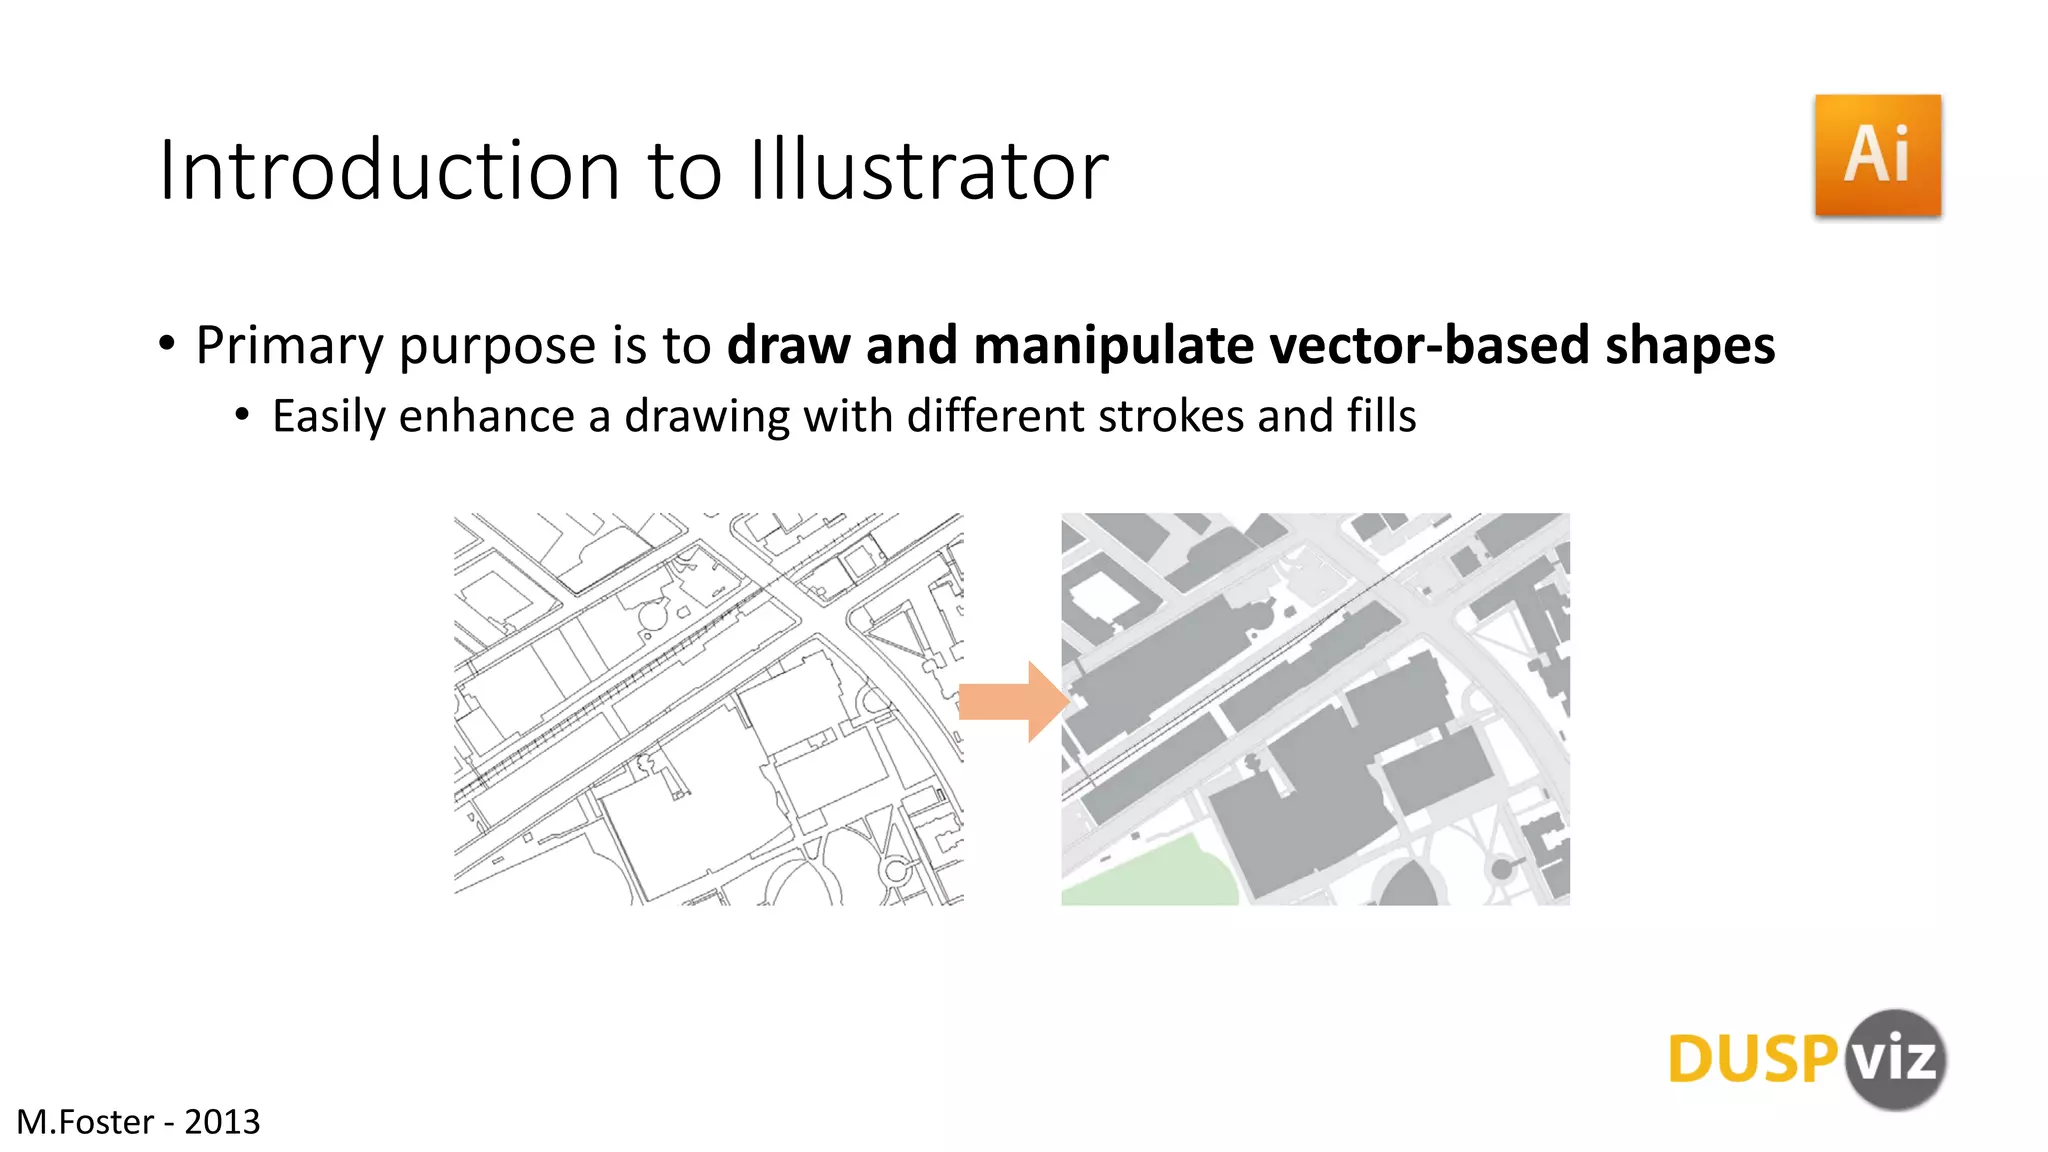
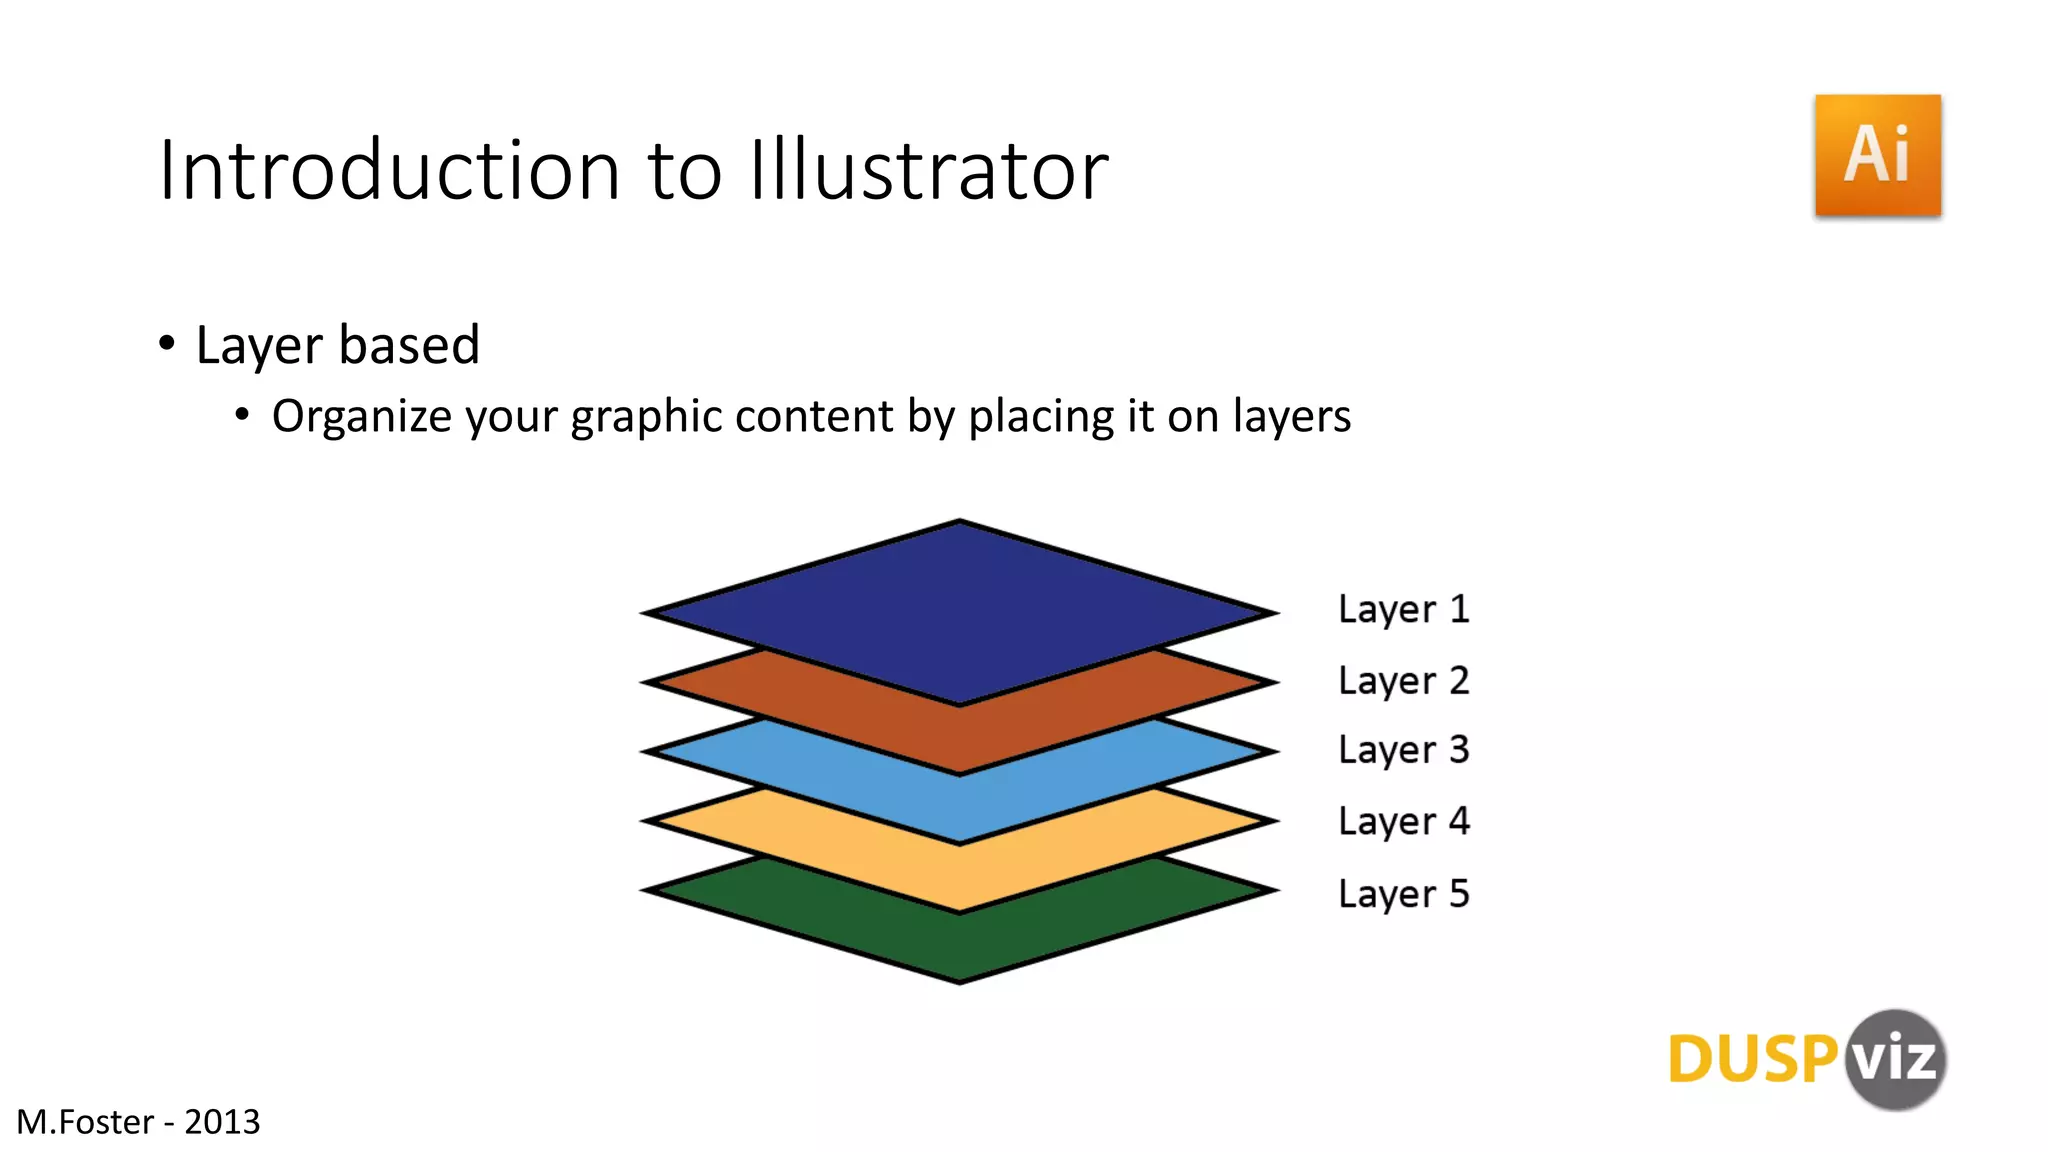
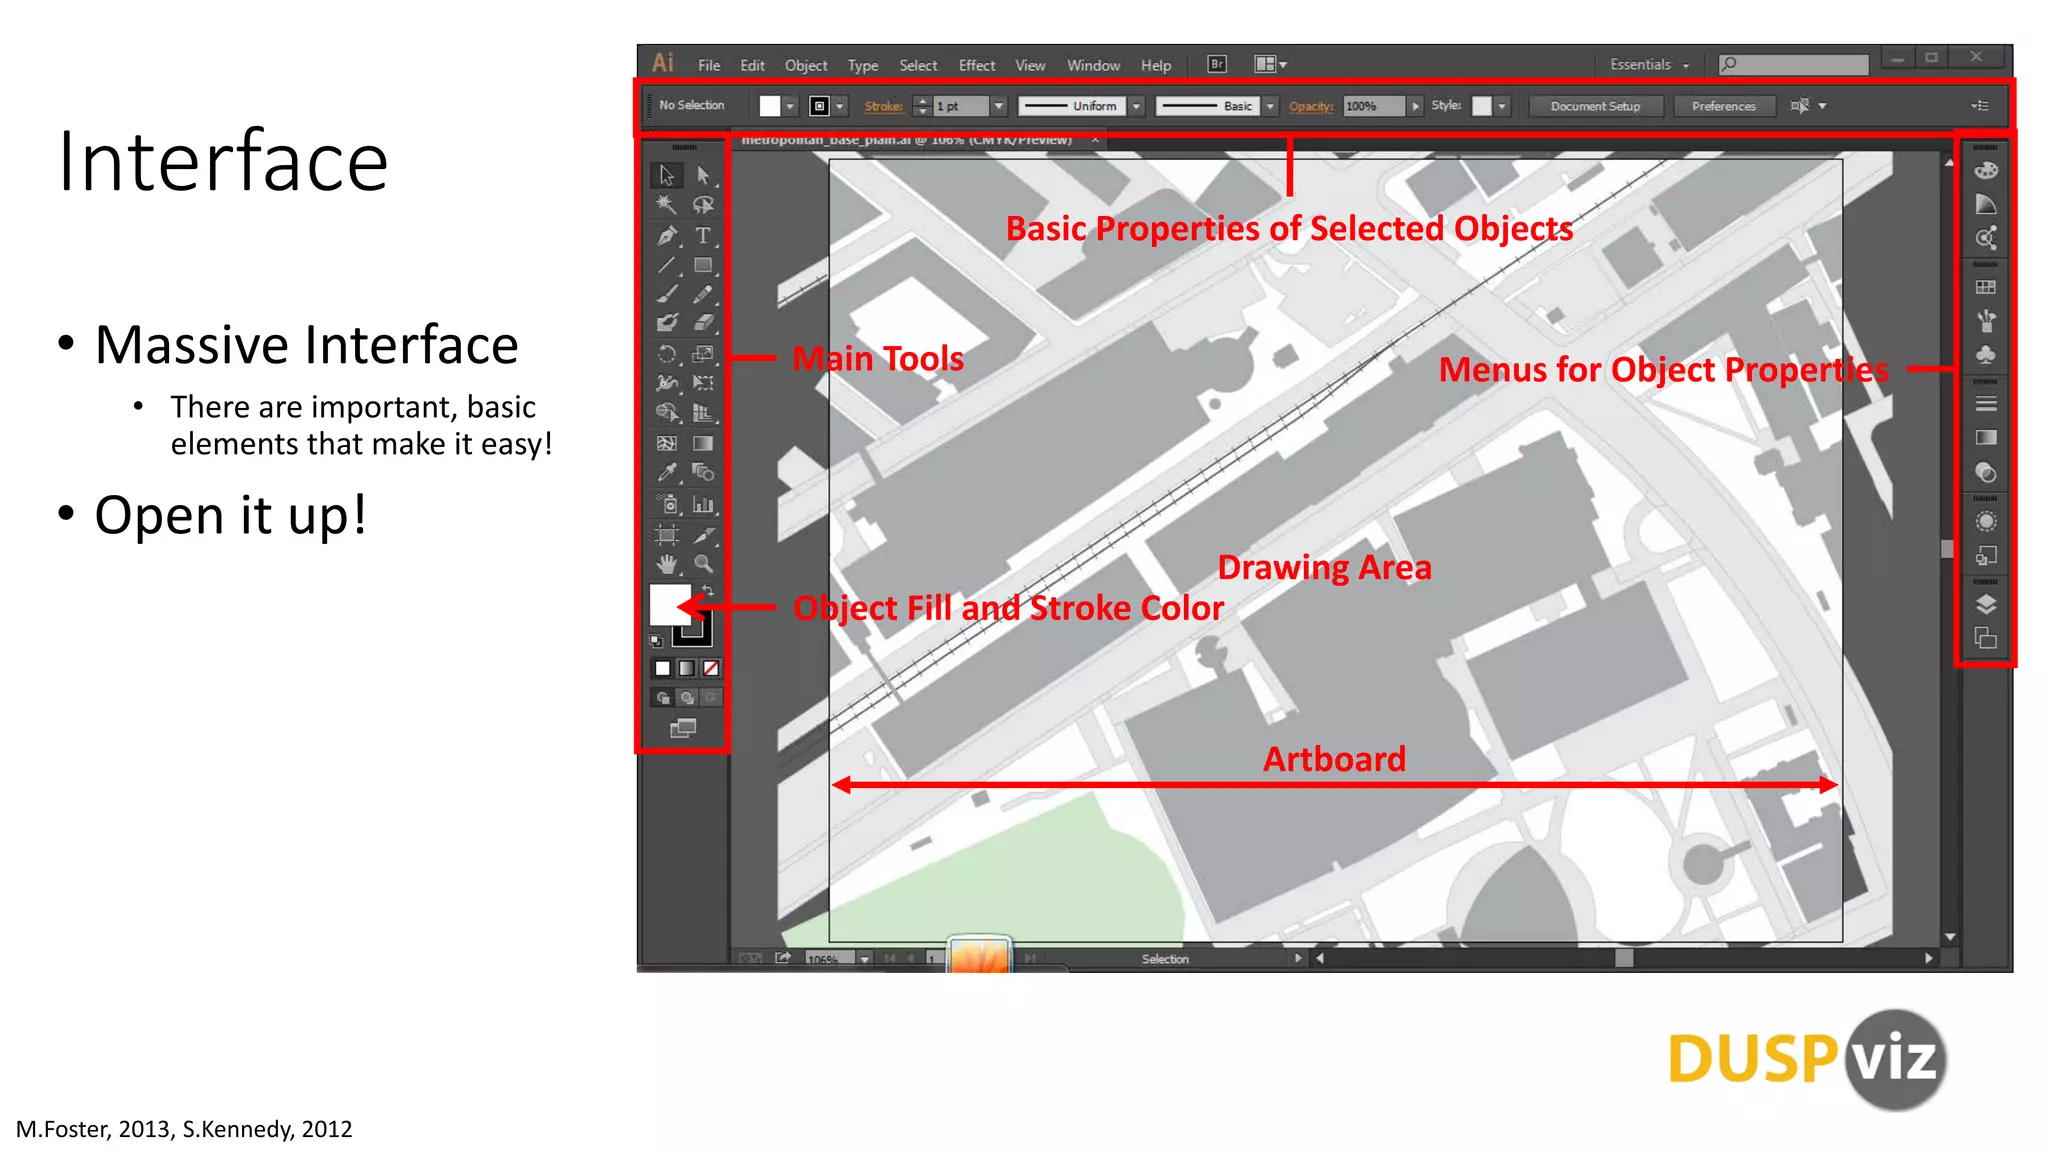
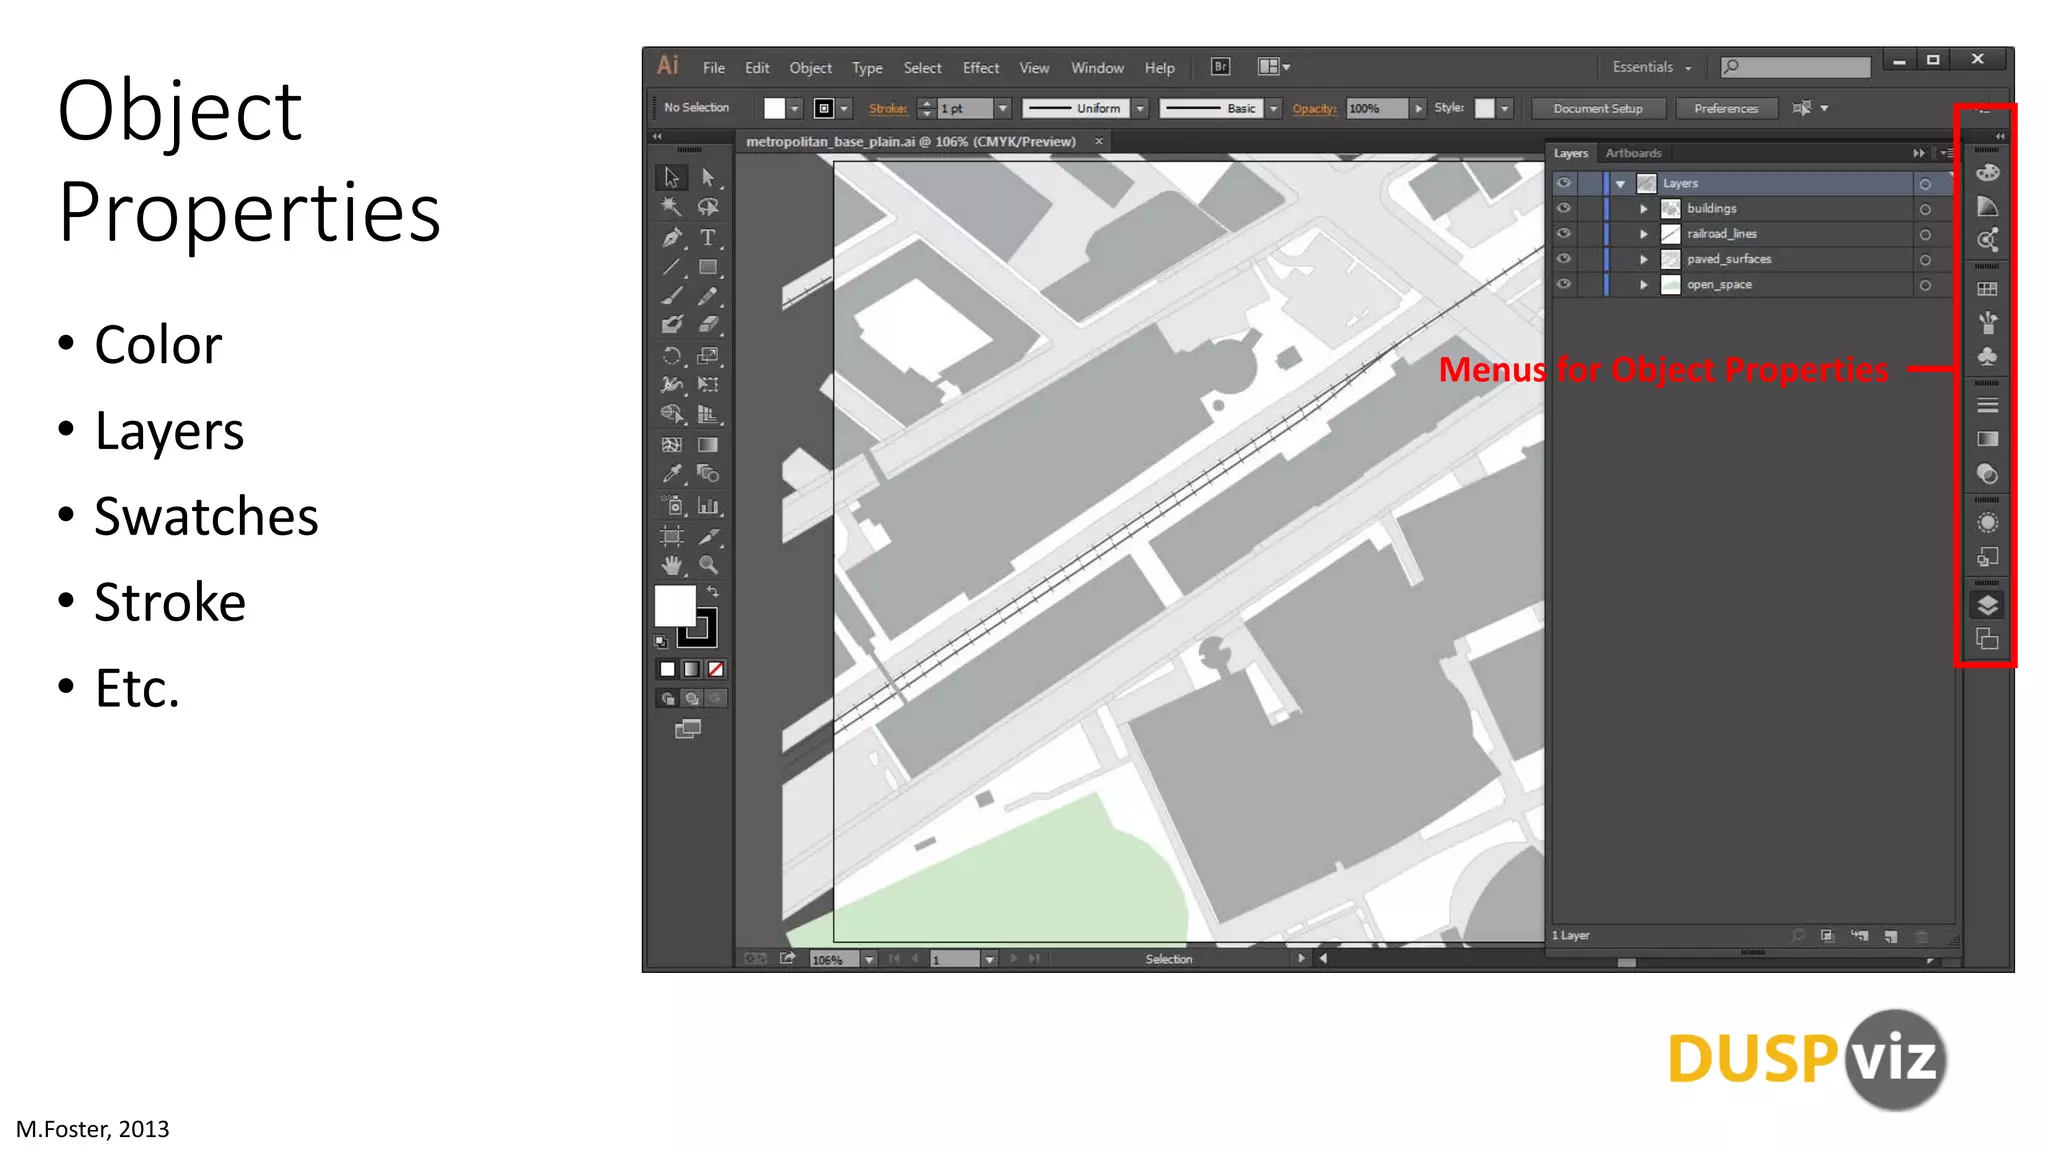
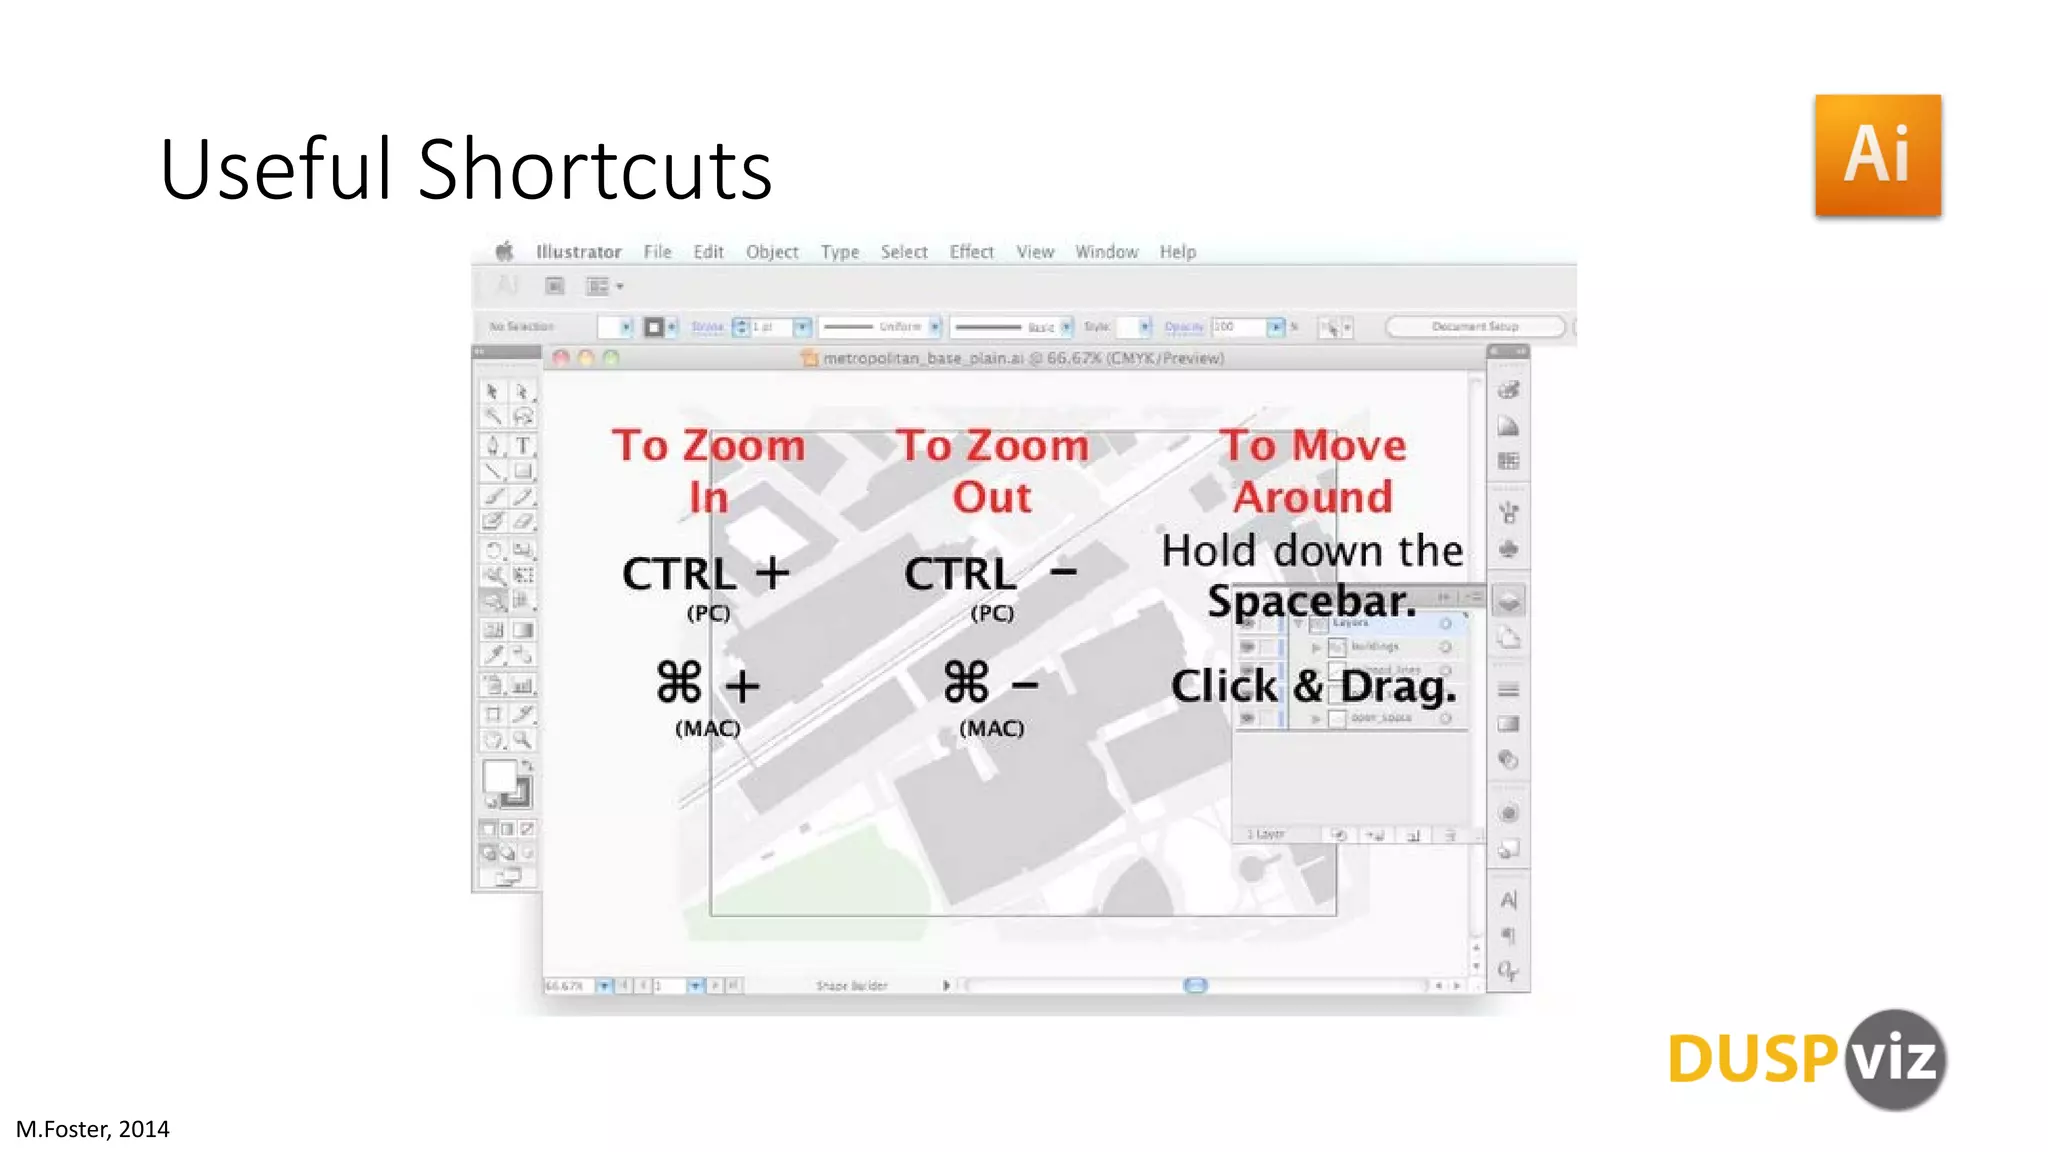
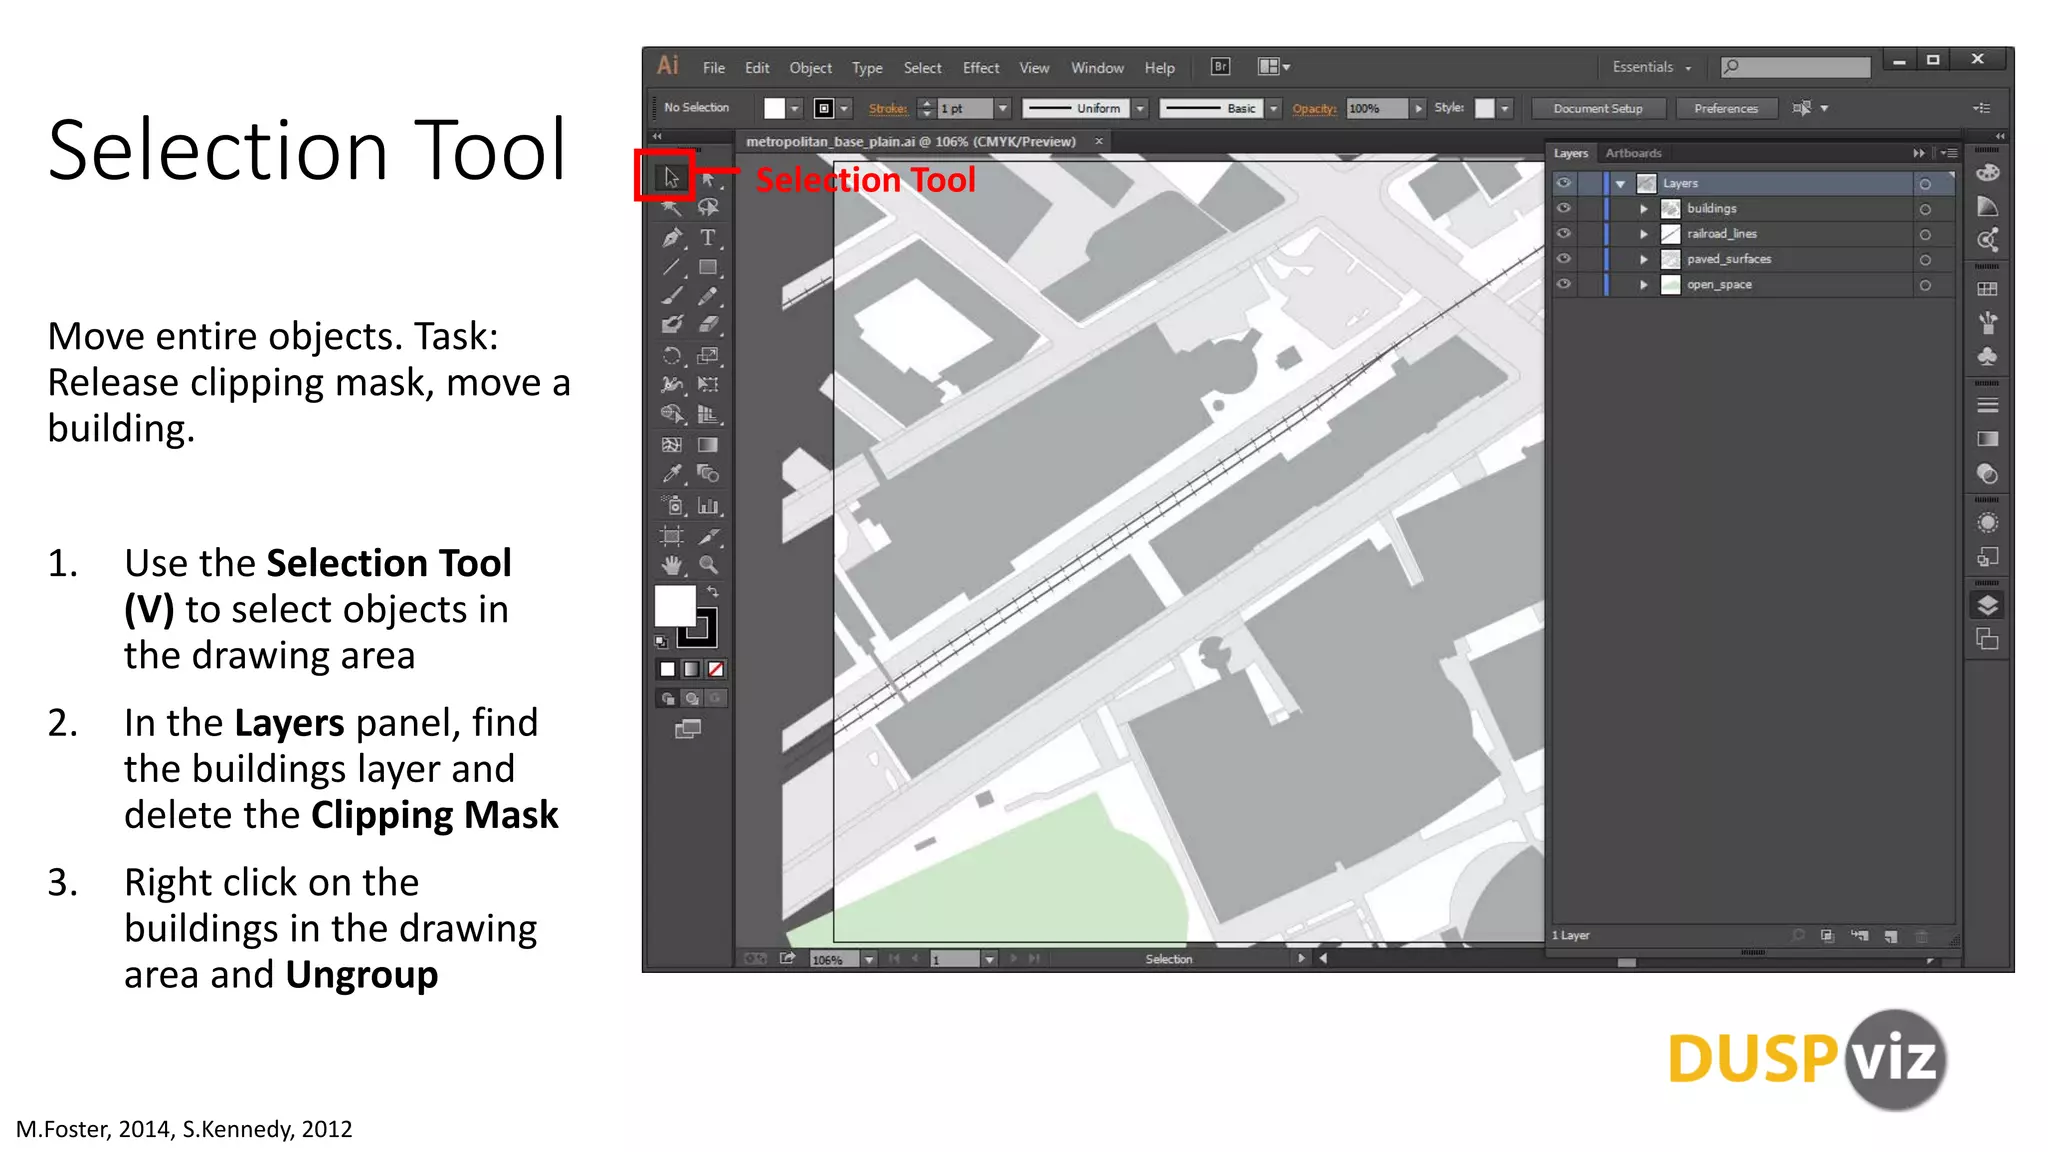
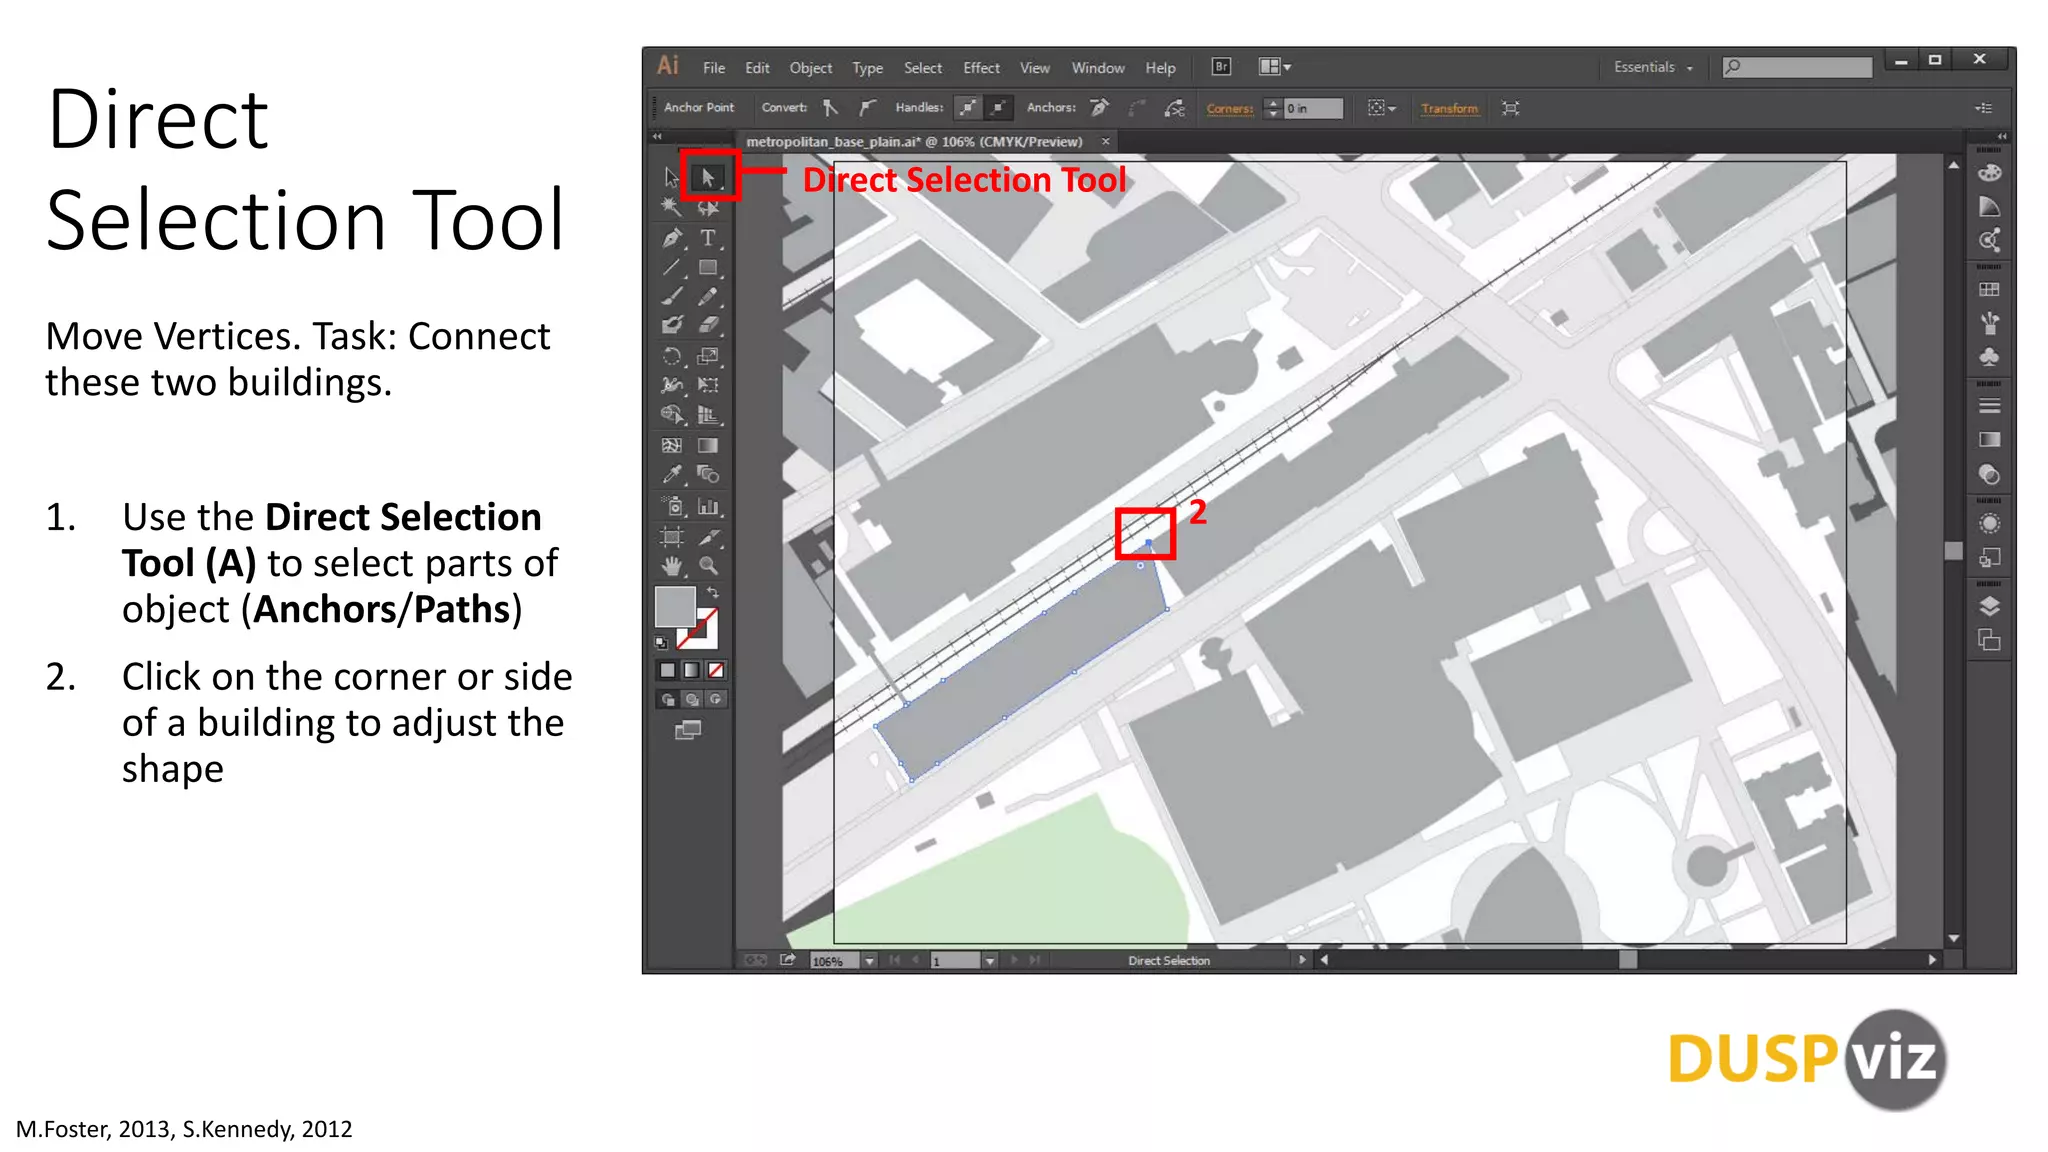
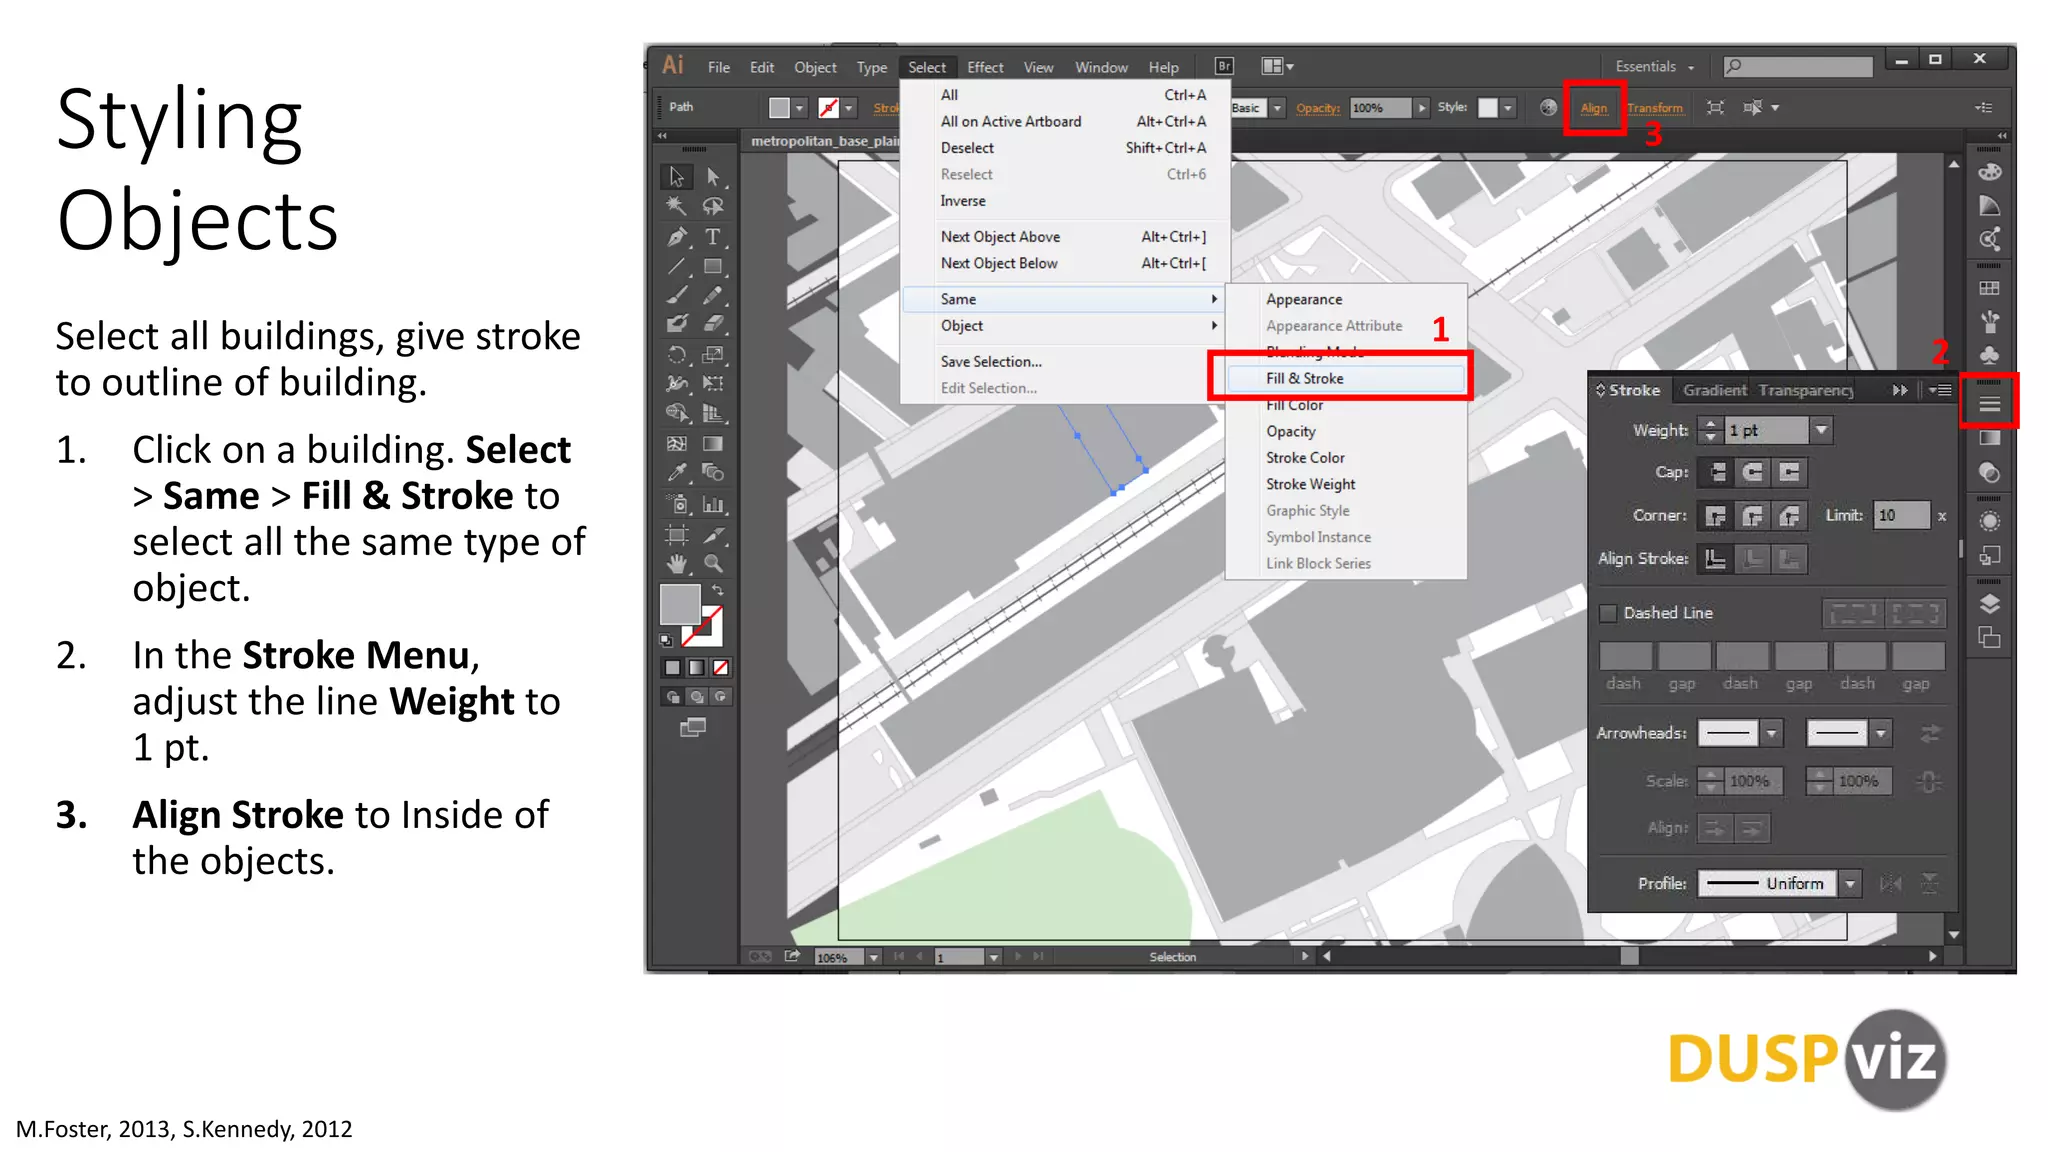
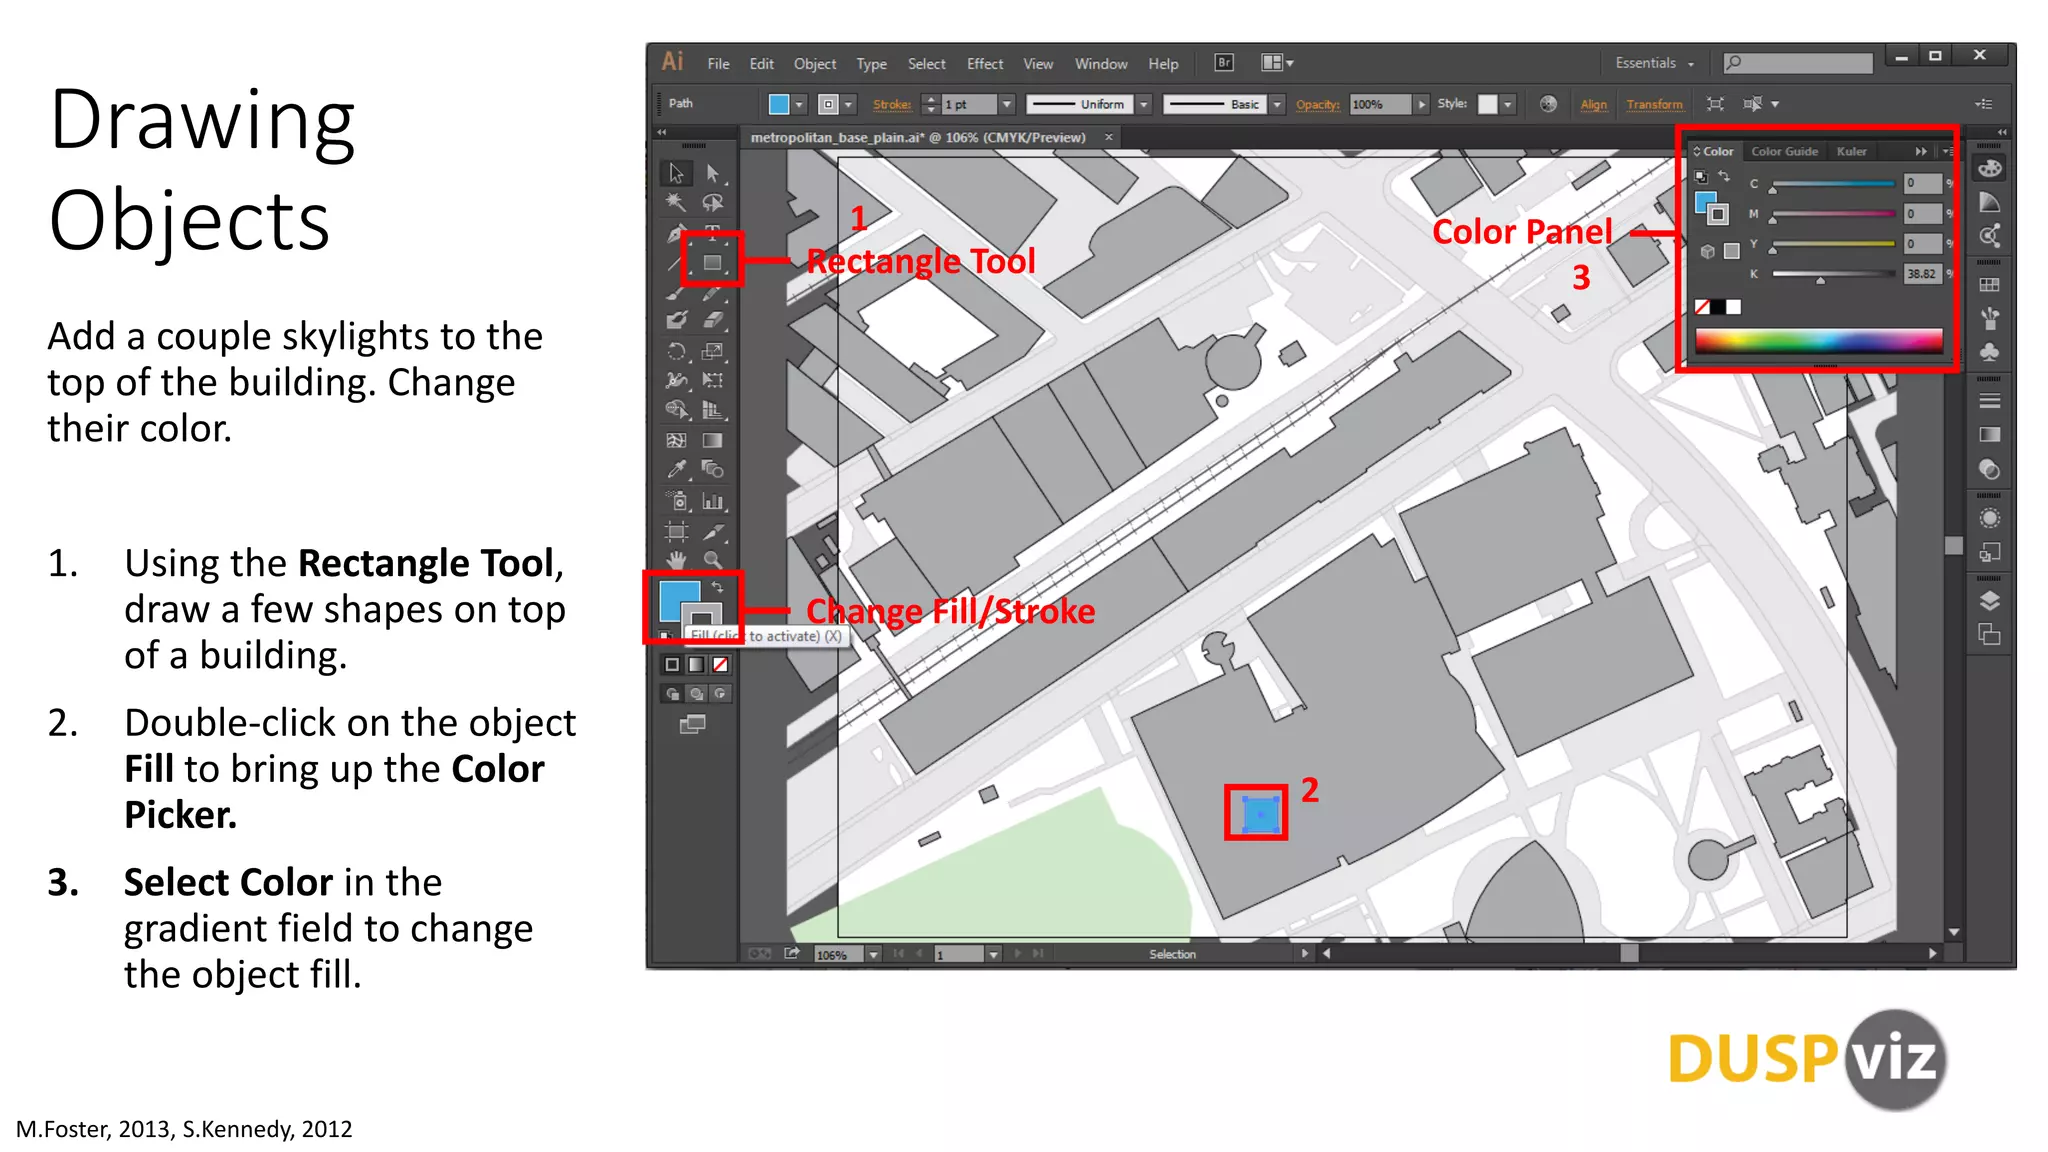
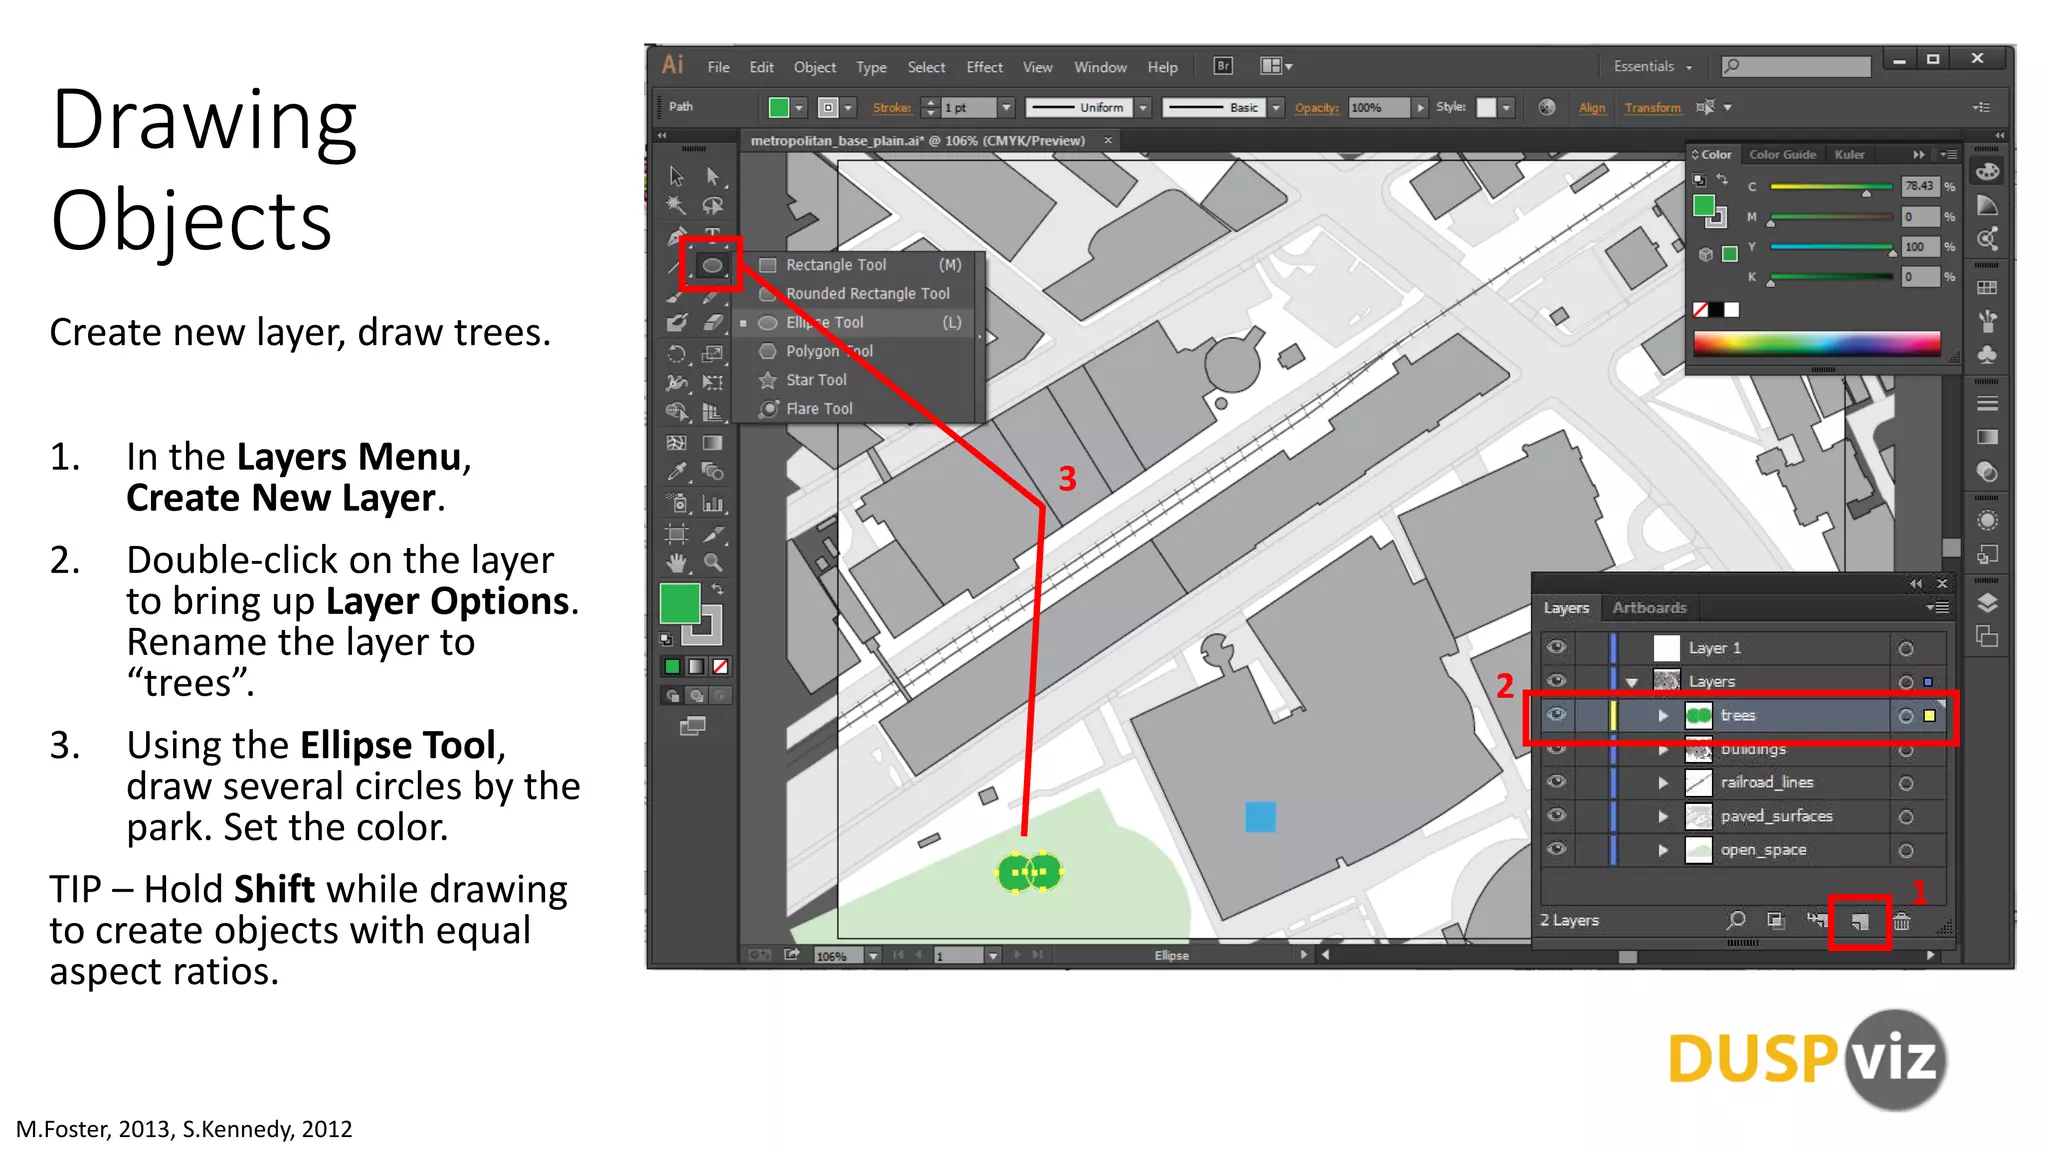
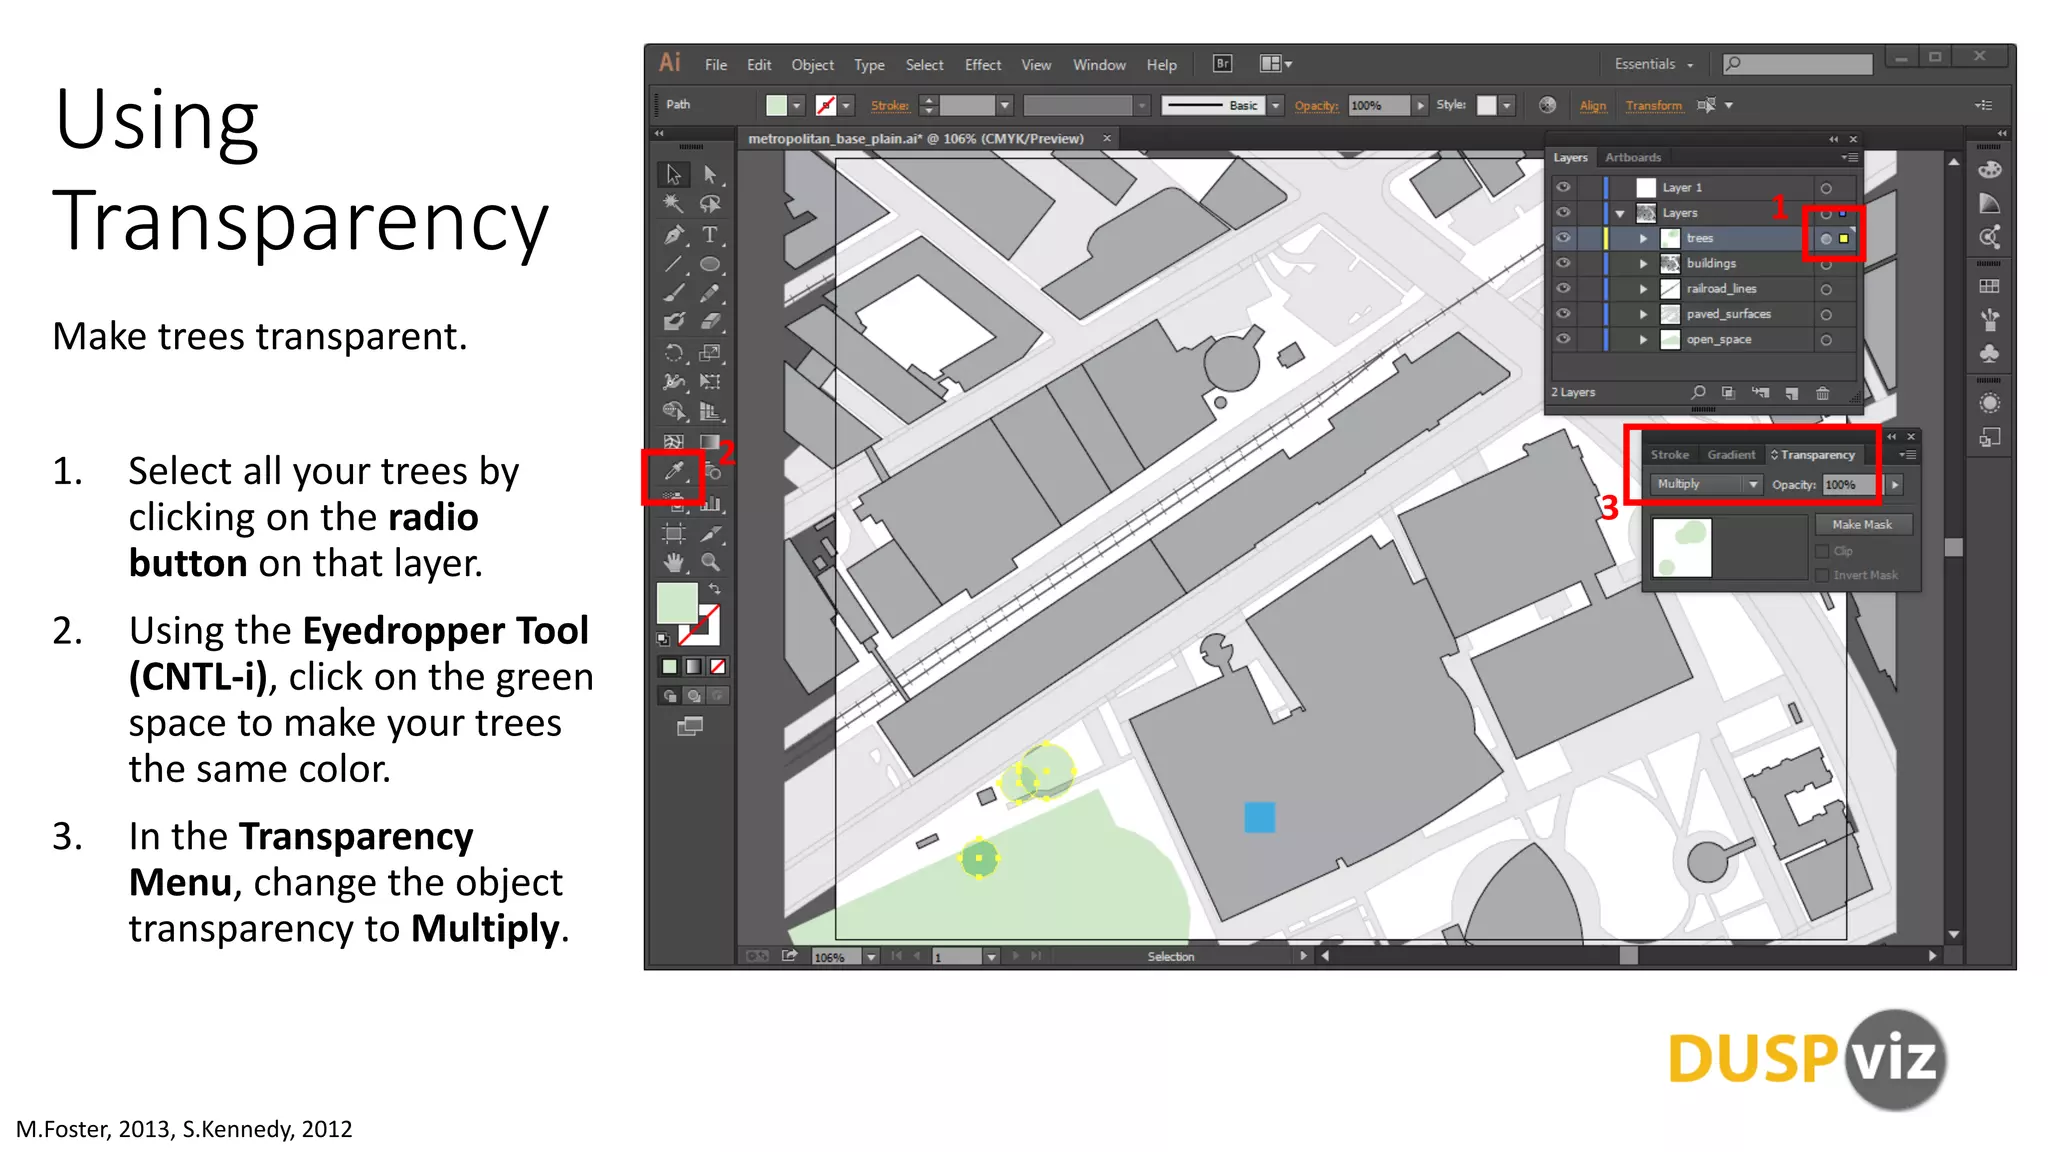
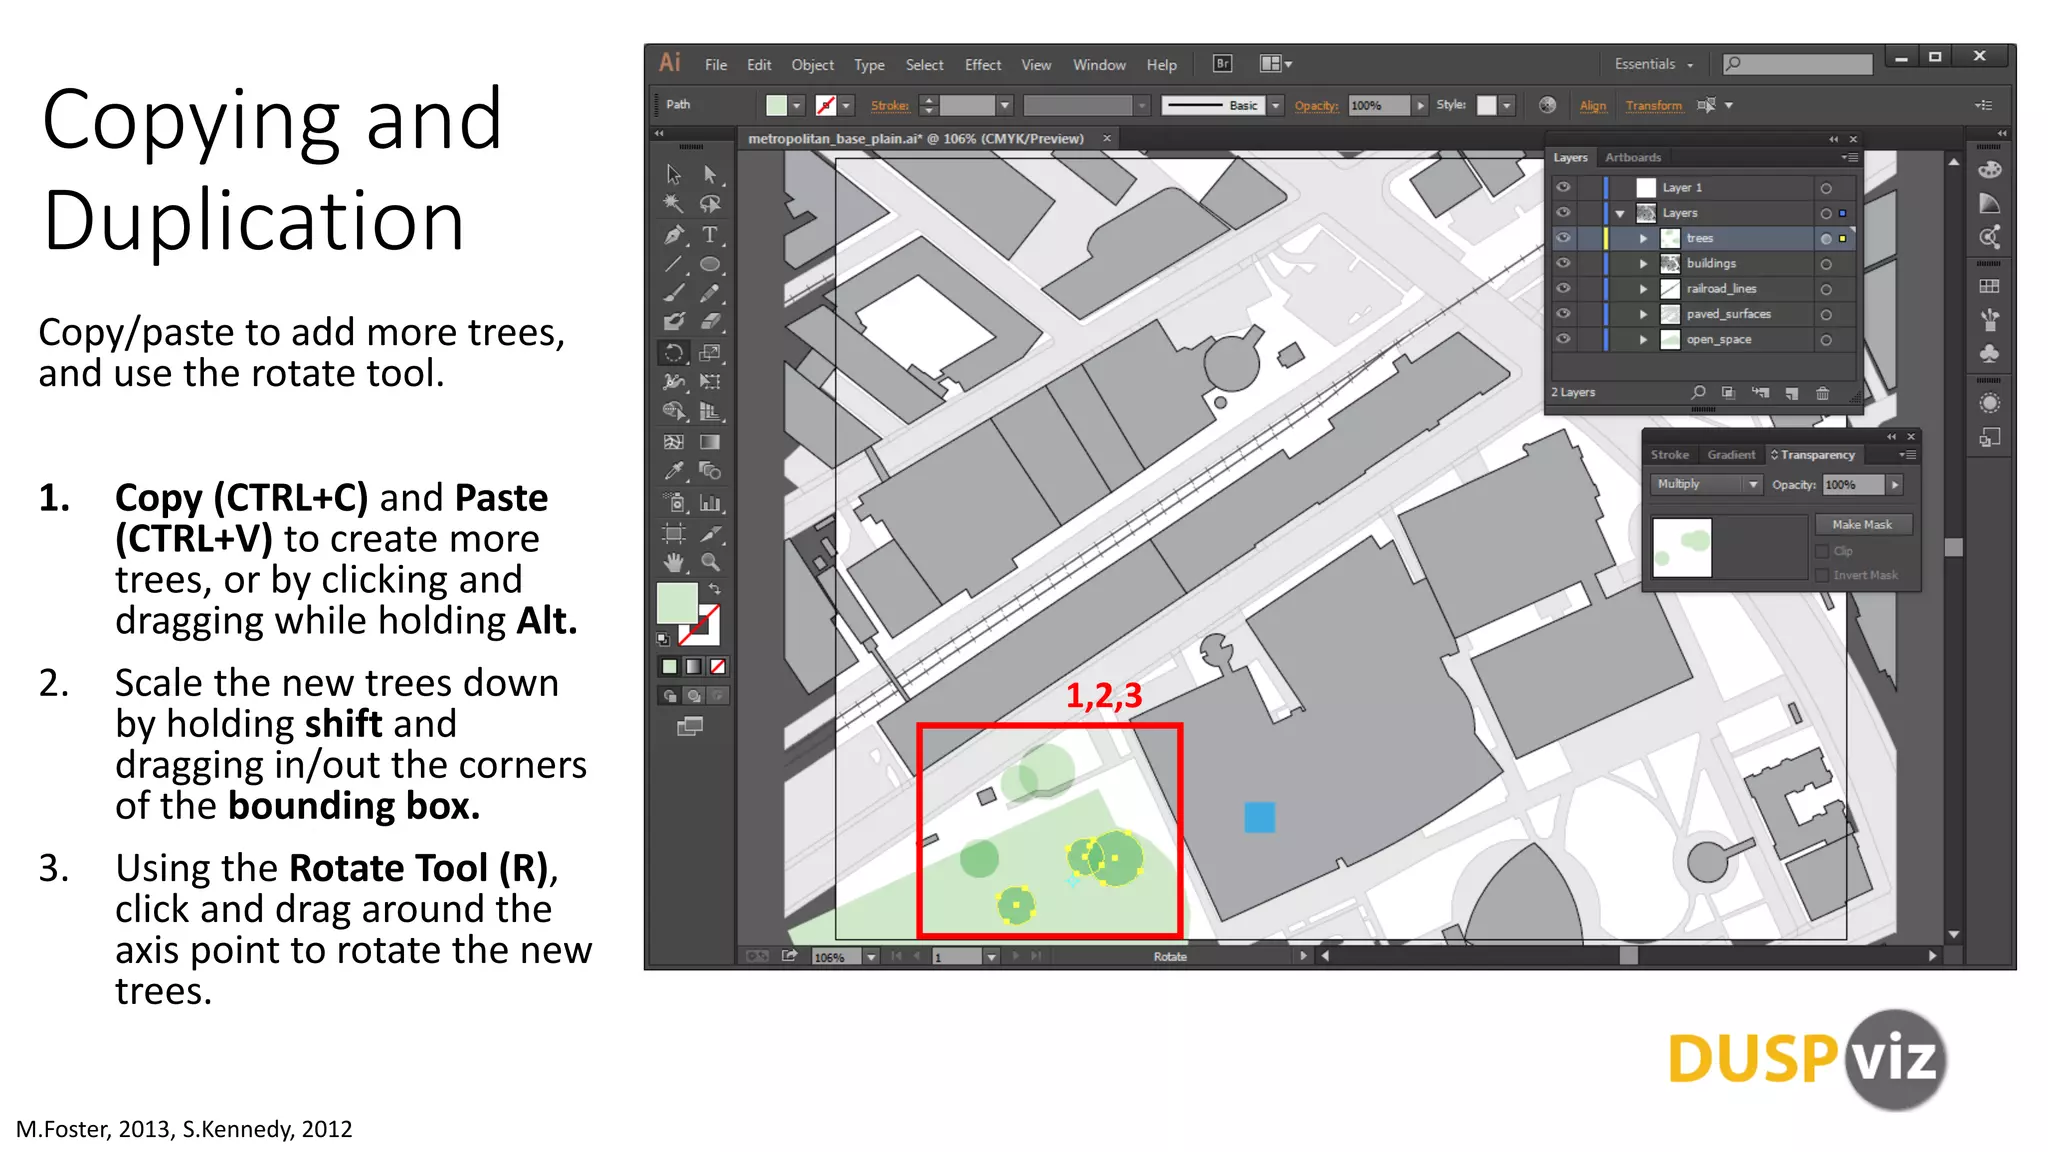
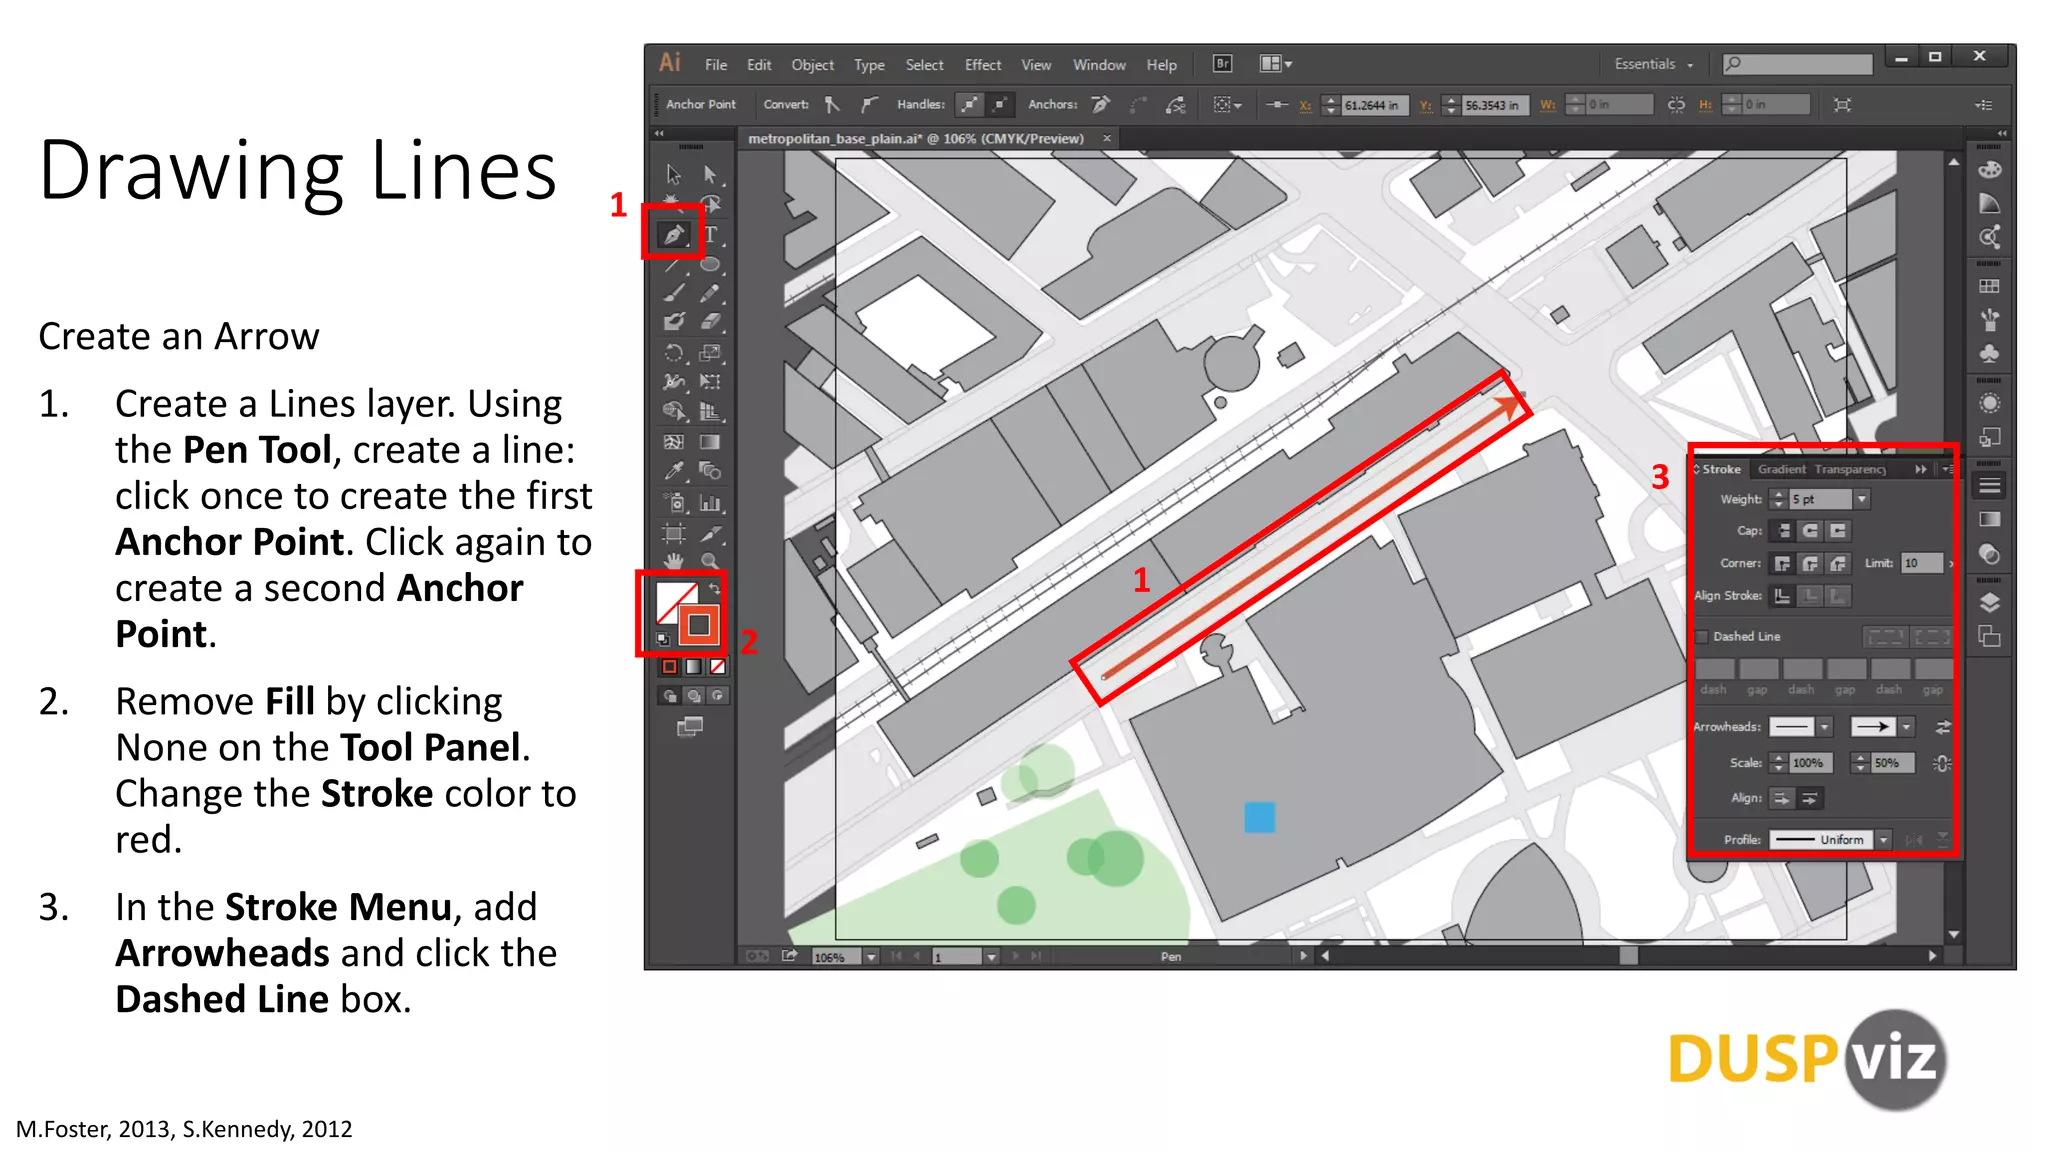

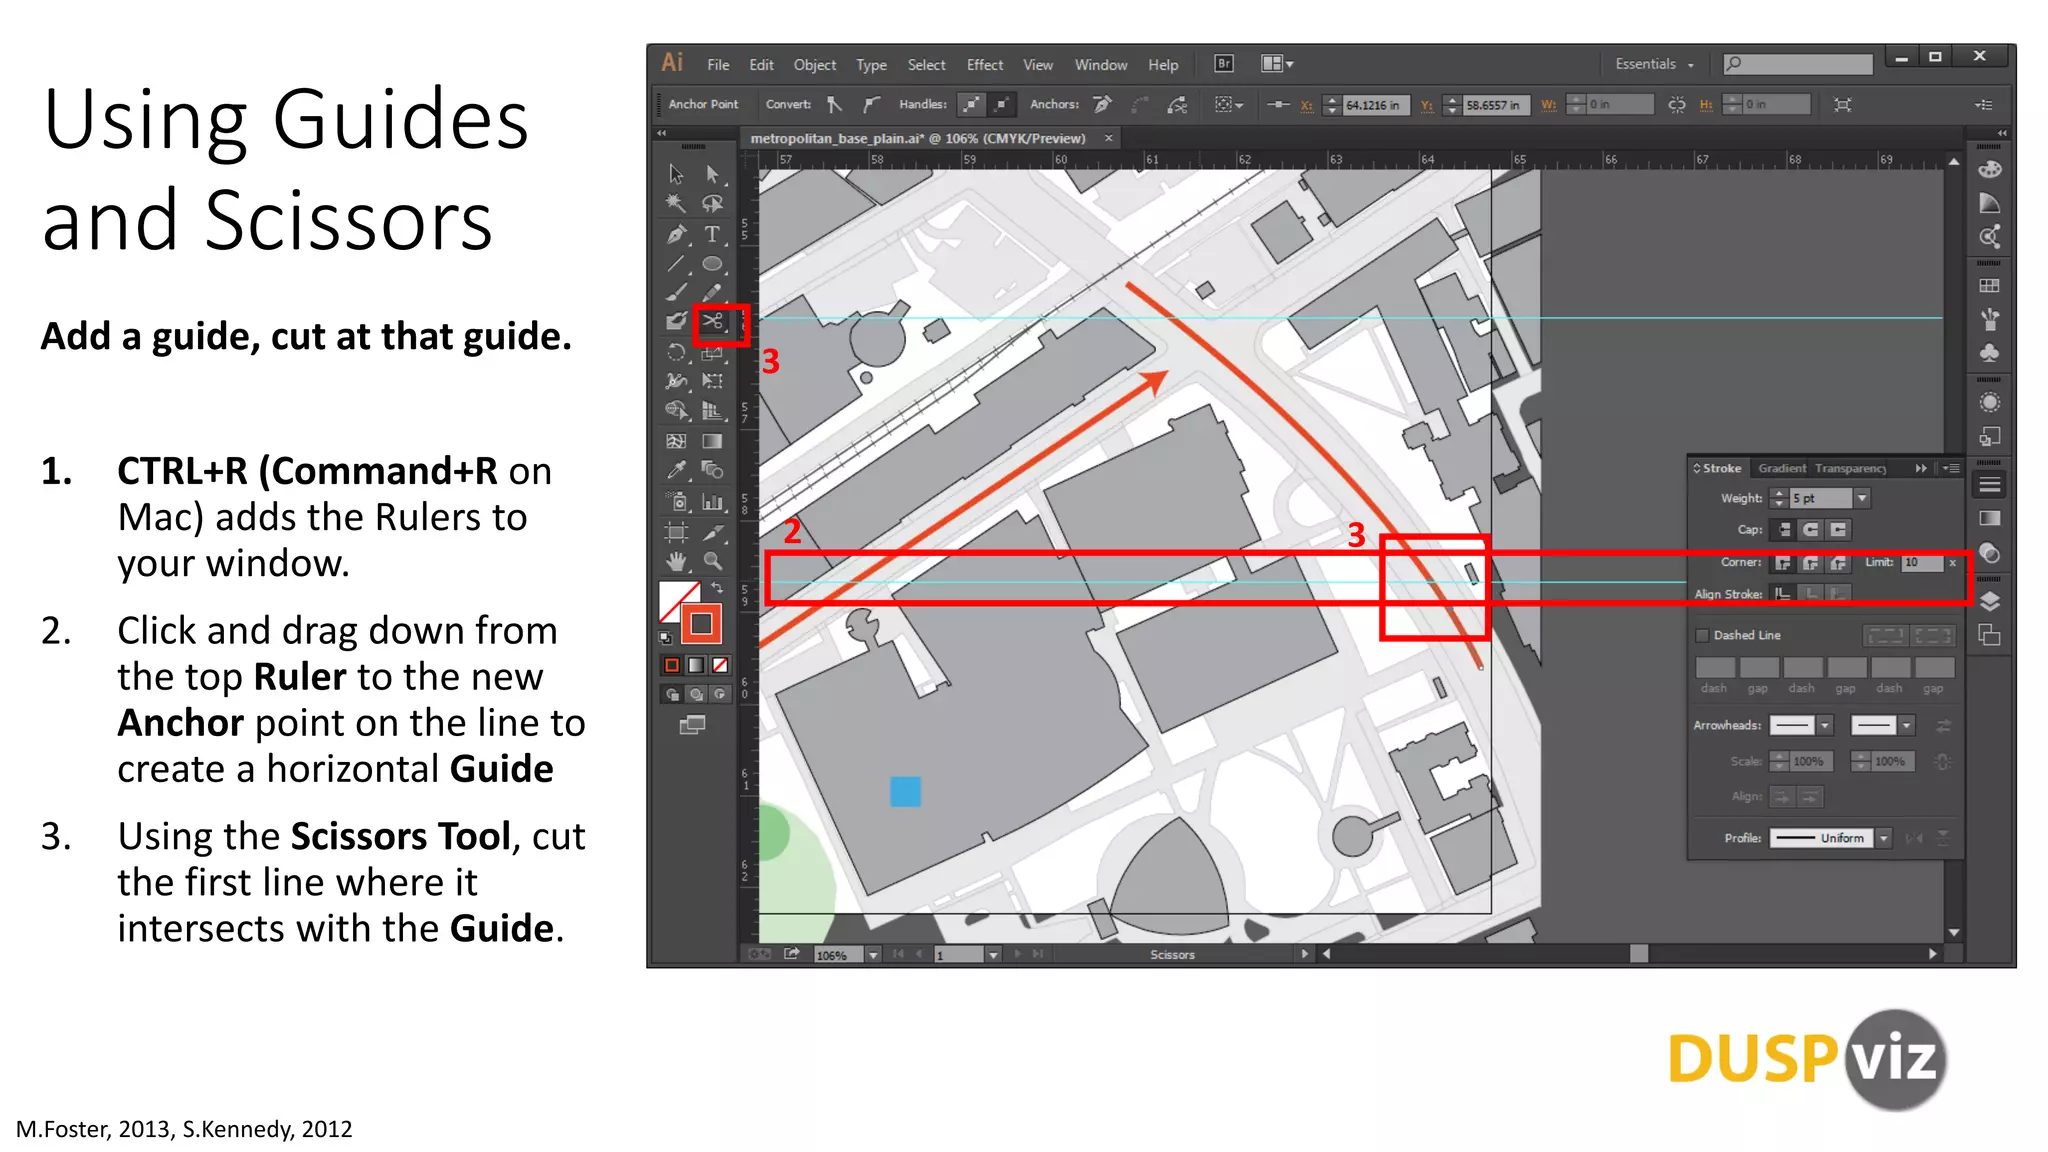
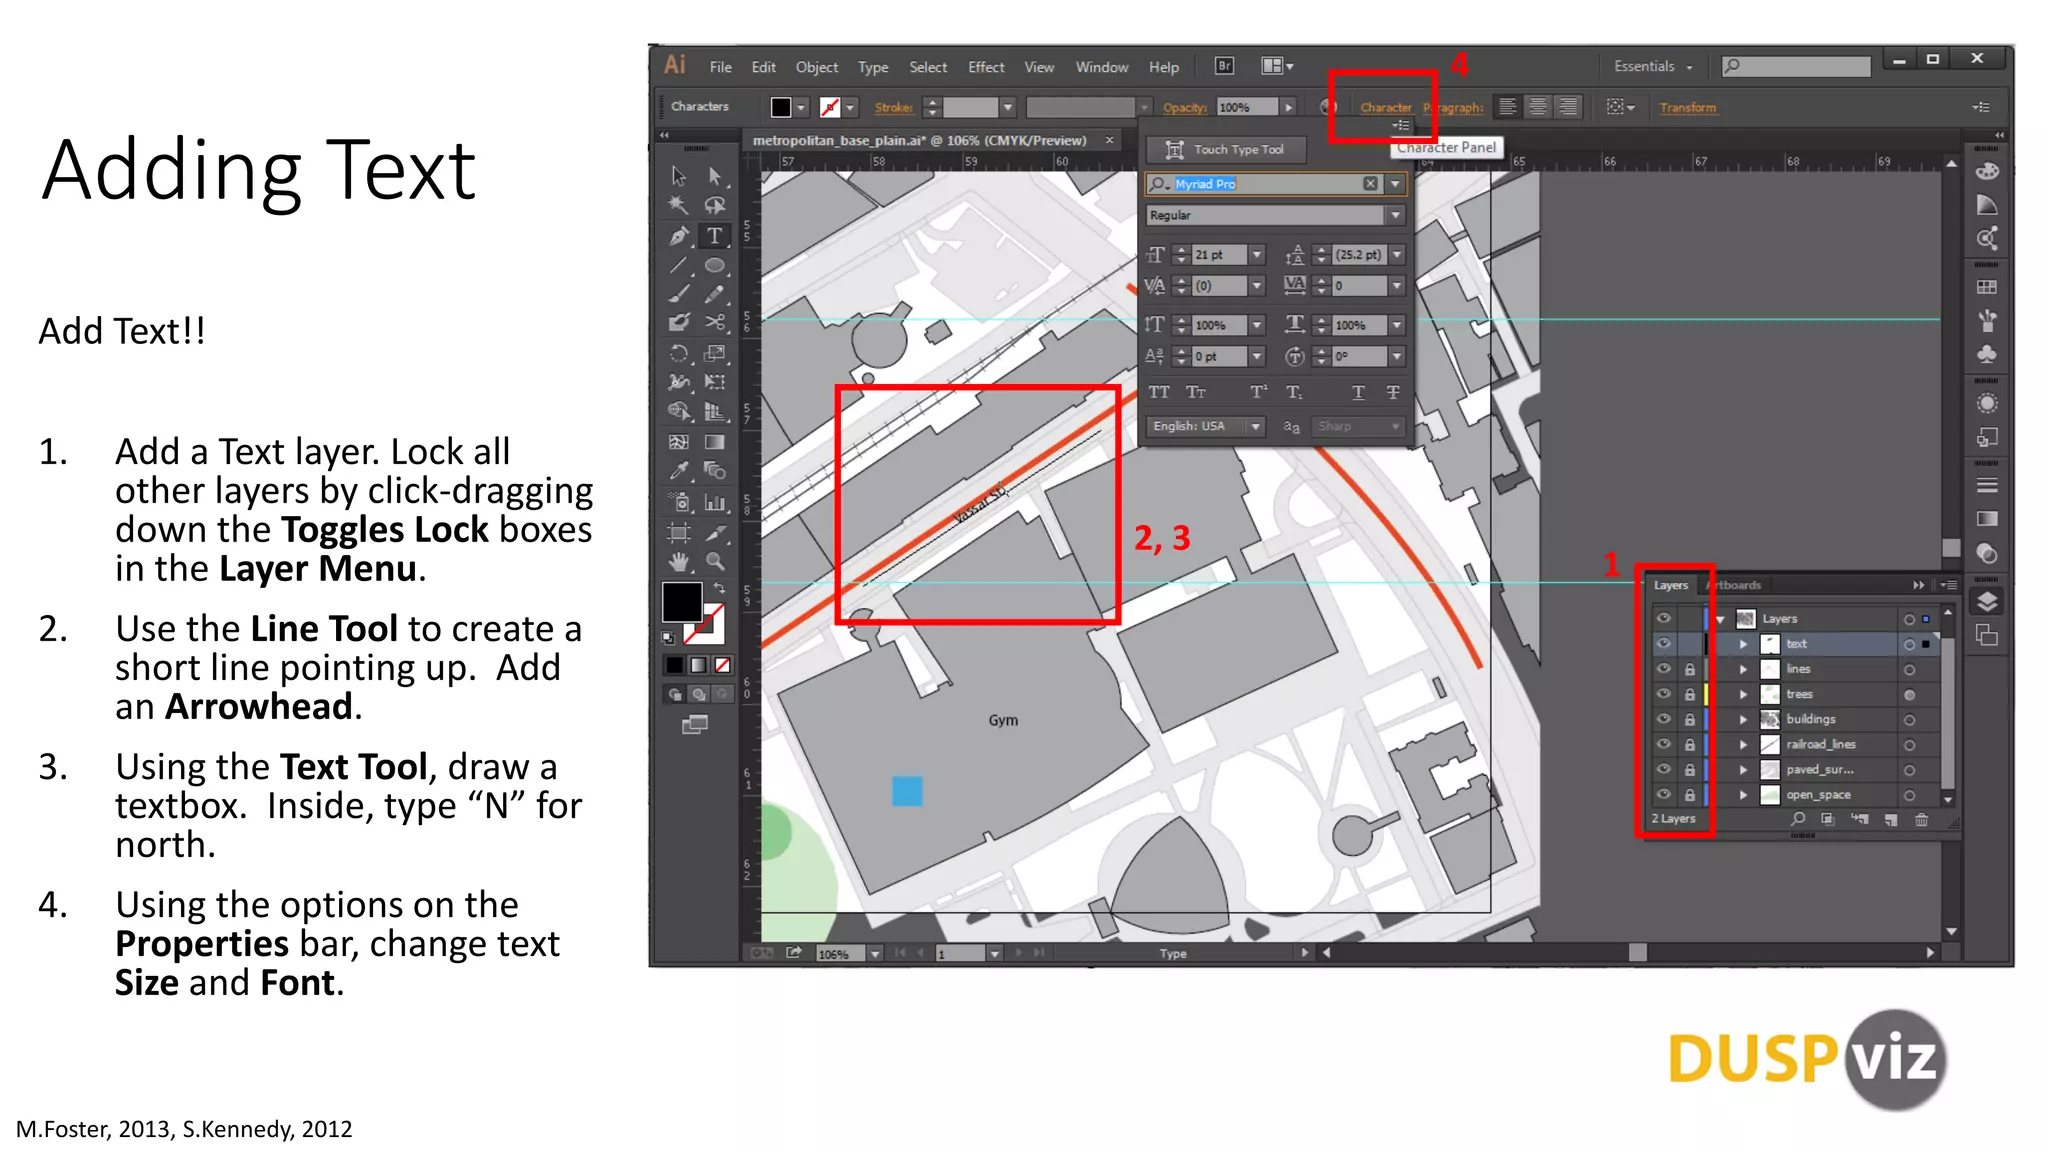
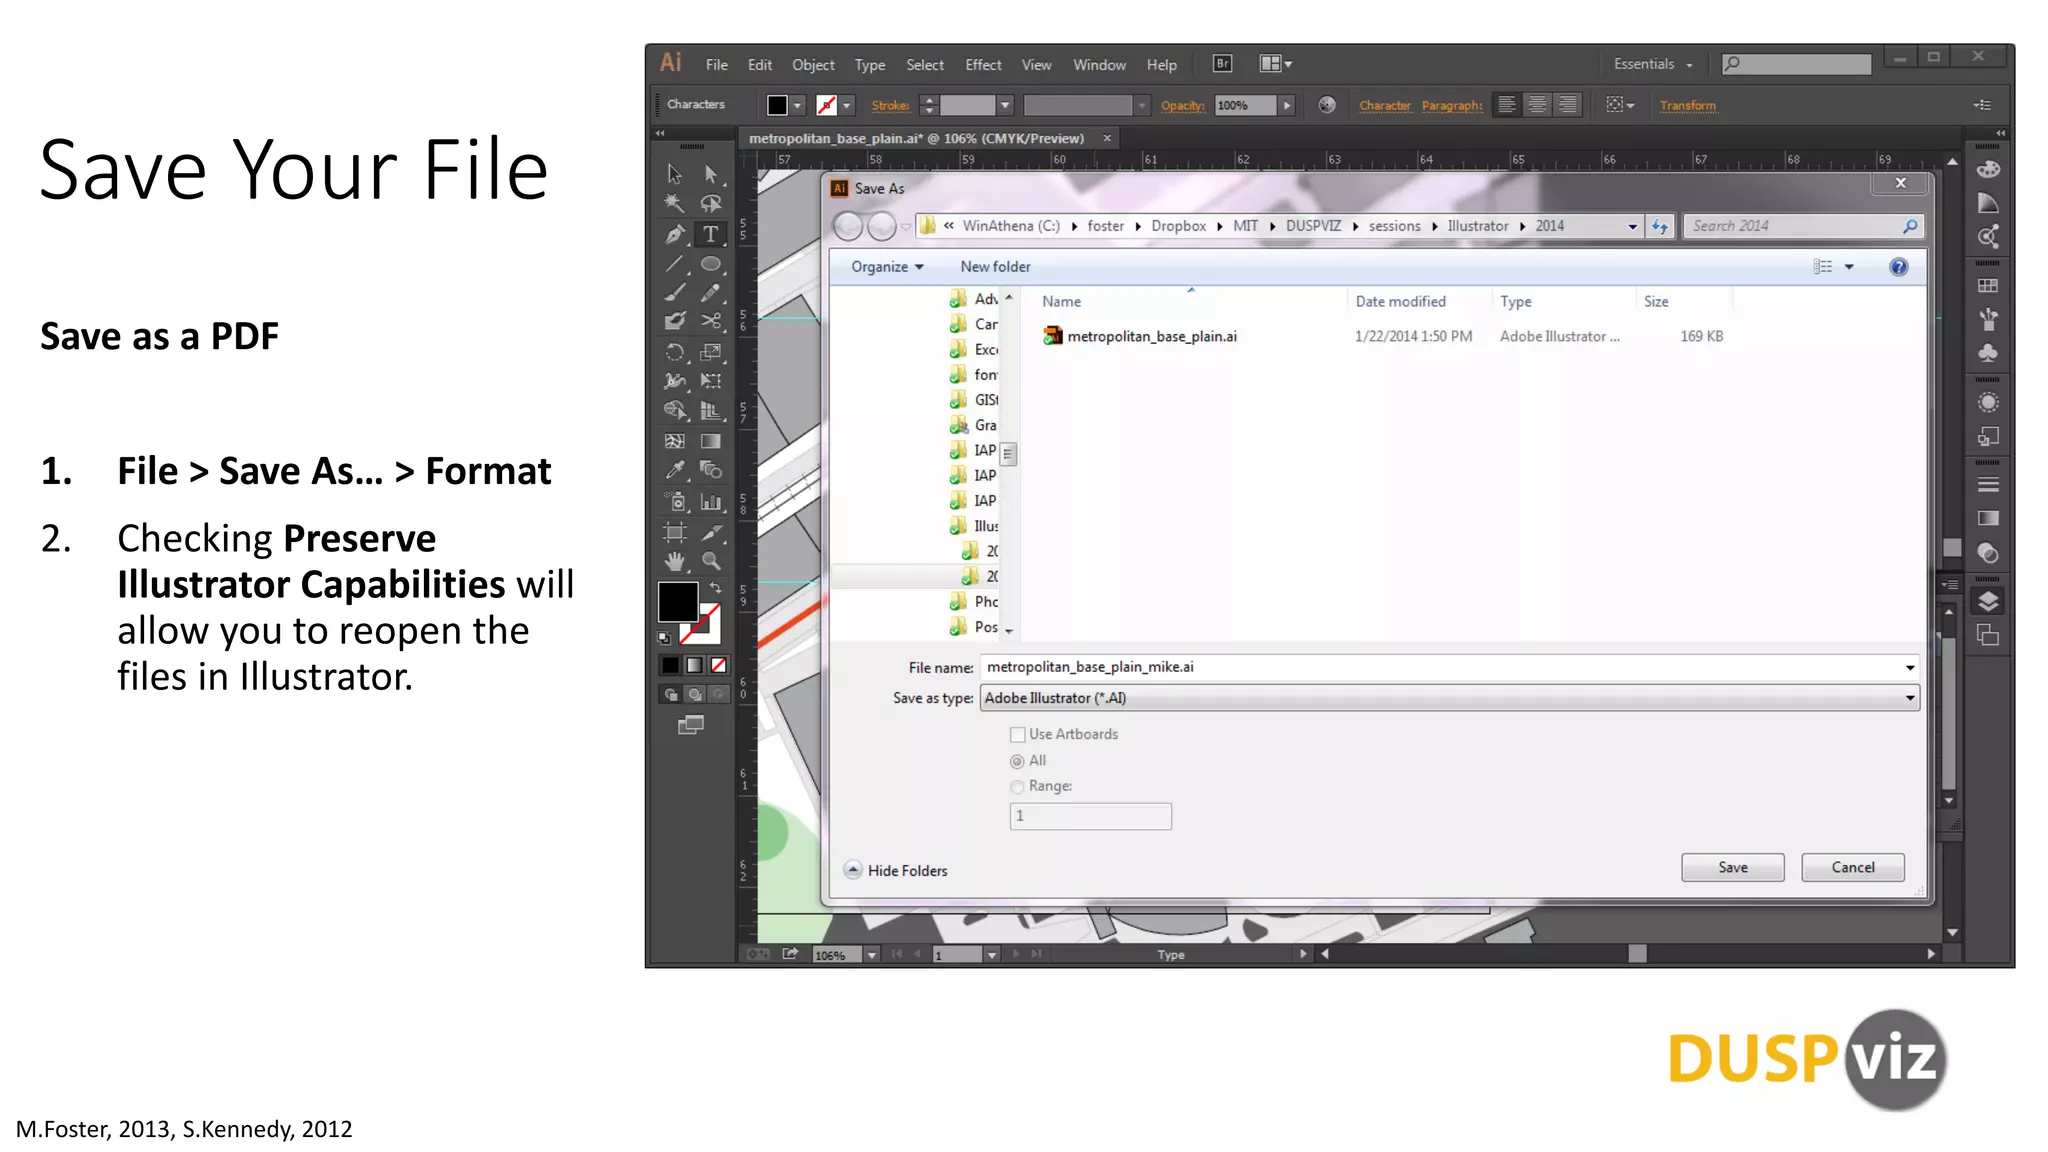

This document provides an introduction and overview of the Adobe Creative Cloud software suite, including Illustrator, Photoshop, and InDesign. It discusses the main components and functions of the Creative Cloud, which is a subscription-based collection of Adobe graphic design programs. The document then focuses on Illustrator, explaining that it is used for vector-based graphics and shapes. It provides tutorials for several basic Illustrator tasks like selecting and moving objects, styling objects, and drawing shapes and text.


![CleanMyMac X v5.2.8 Crack for MacOS Full Version [Latest] pptx](https://cdn.slidesharecdn.com/ss_thumbnails/softwareoverview-251207194121-a81f0142-thumbnail.jpg?width=640&height=640&fit=bounds)
![Moho Pro 14.4 Crack for MacOS Works Until 2050 [Latest] pptx](https://cdn.slidesharecdn.com/ss_thumbnails/softwareoverview-251207192639-797289c4-thumbnail.jpg?width=640&height=640&fit=bounds)

![Wondershare Filmora 15.0.11 Crack for Mac Key Full Download [Latest] pptx](https://cdn.slidesharecdn.com/ss_thumbnails/software-251207184836-1d16ba16-thumbnail.jpg?width=640&height=640&fit=bounds)
![WinRAR Crack 7.13 Final Mac Keygen 2026 Download [Latest] Software.pptx](https://cdn.slidesharecdn.com/ss_thumbnails/software-251207185858-eb450678-thumbnail.jpg?width=640&height=640&fit=bounds)


