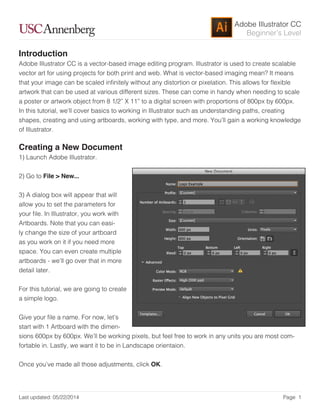
- Adobe Illustrator is a vector graphics program that allows for scalable images without distortion or pixelation.
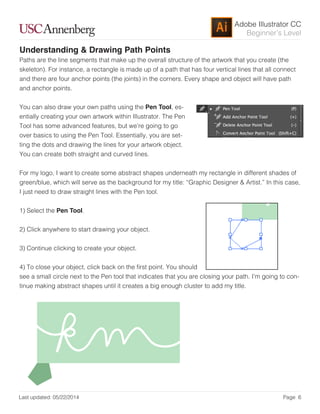
- The document introduces basic Illustrator tools like shapes, strokes, fills, and paths to create a logo. Key tools covered are the rectangle, paintbrush, and pen tools.
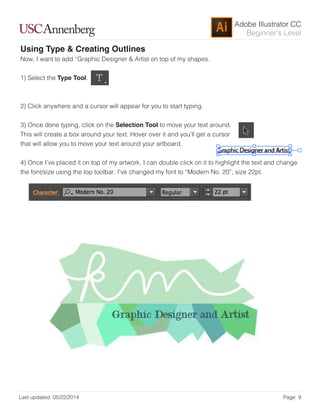
- An example logo is created with initials on a rectangle with additional shapes below, demonstrating how to adjust paths and add/move anchor points. Text is also integrated and converted to outlines for manipulation.
- The summary covers exporting the finalized logo by using the artboard parameters to maintain the intended size and shape.