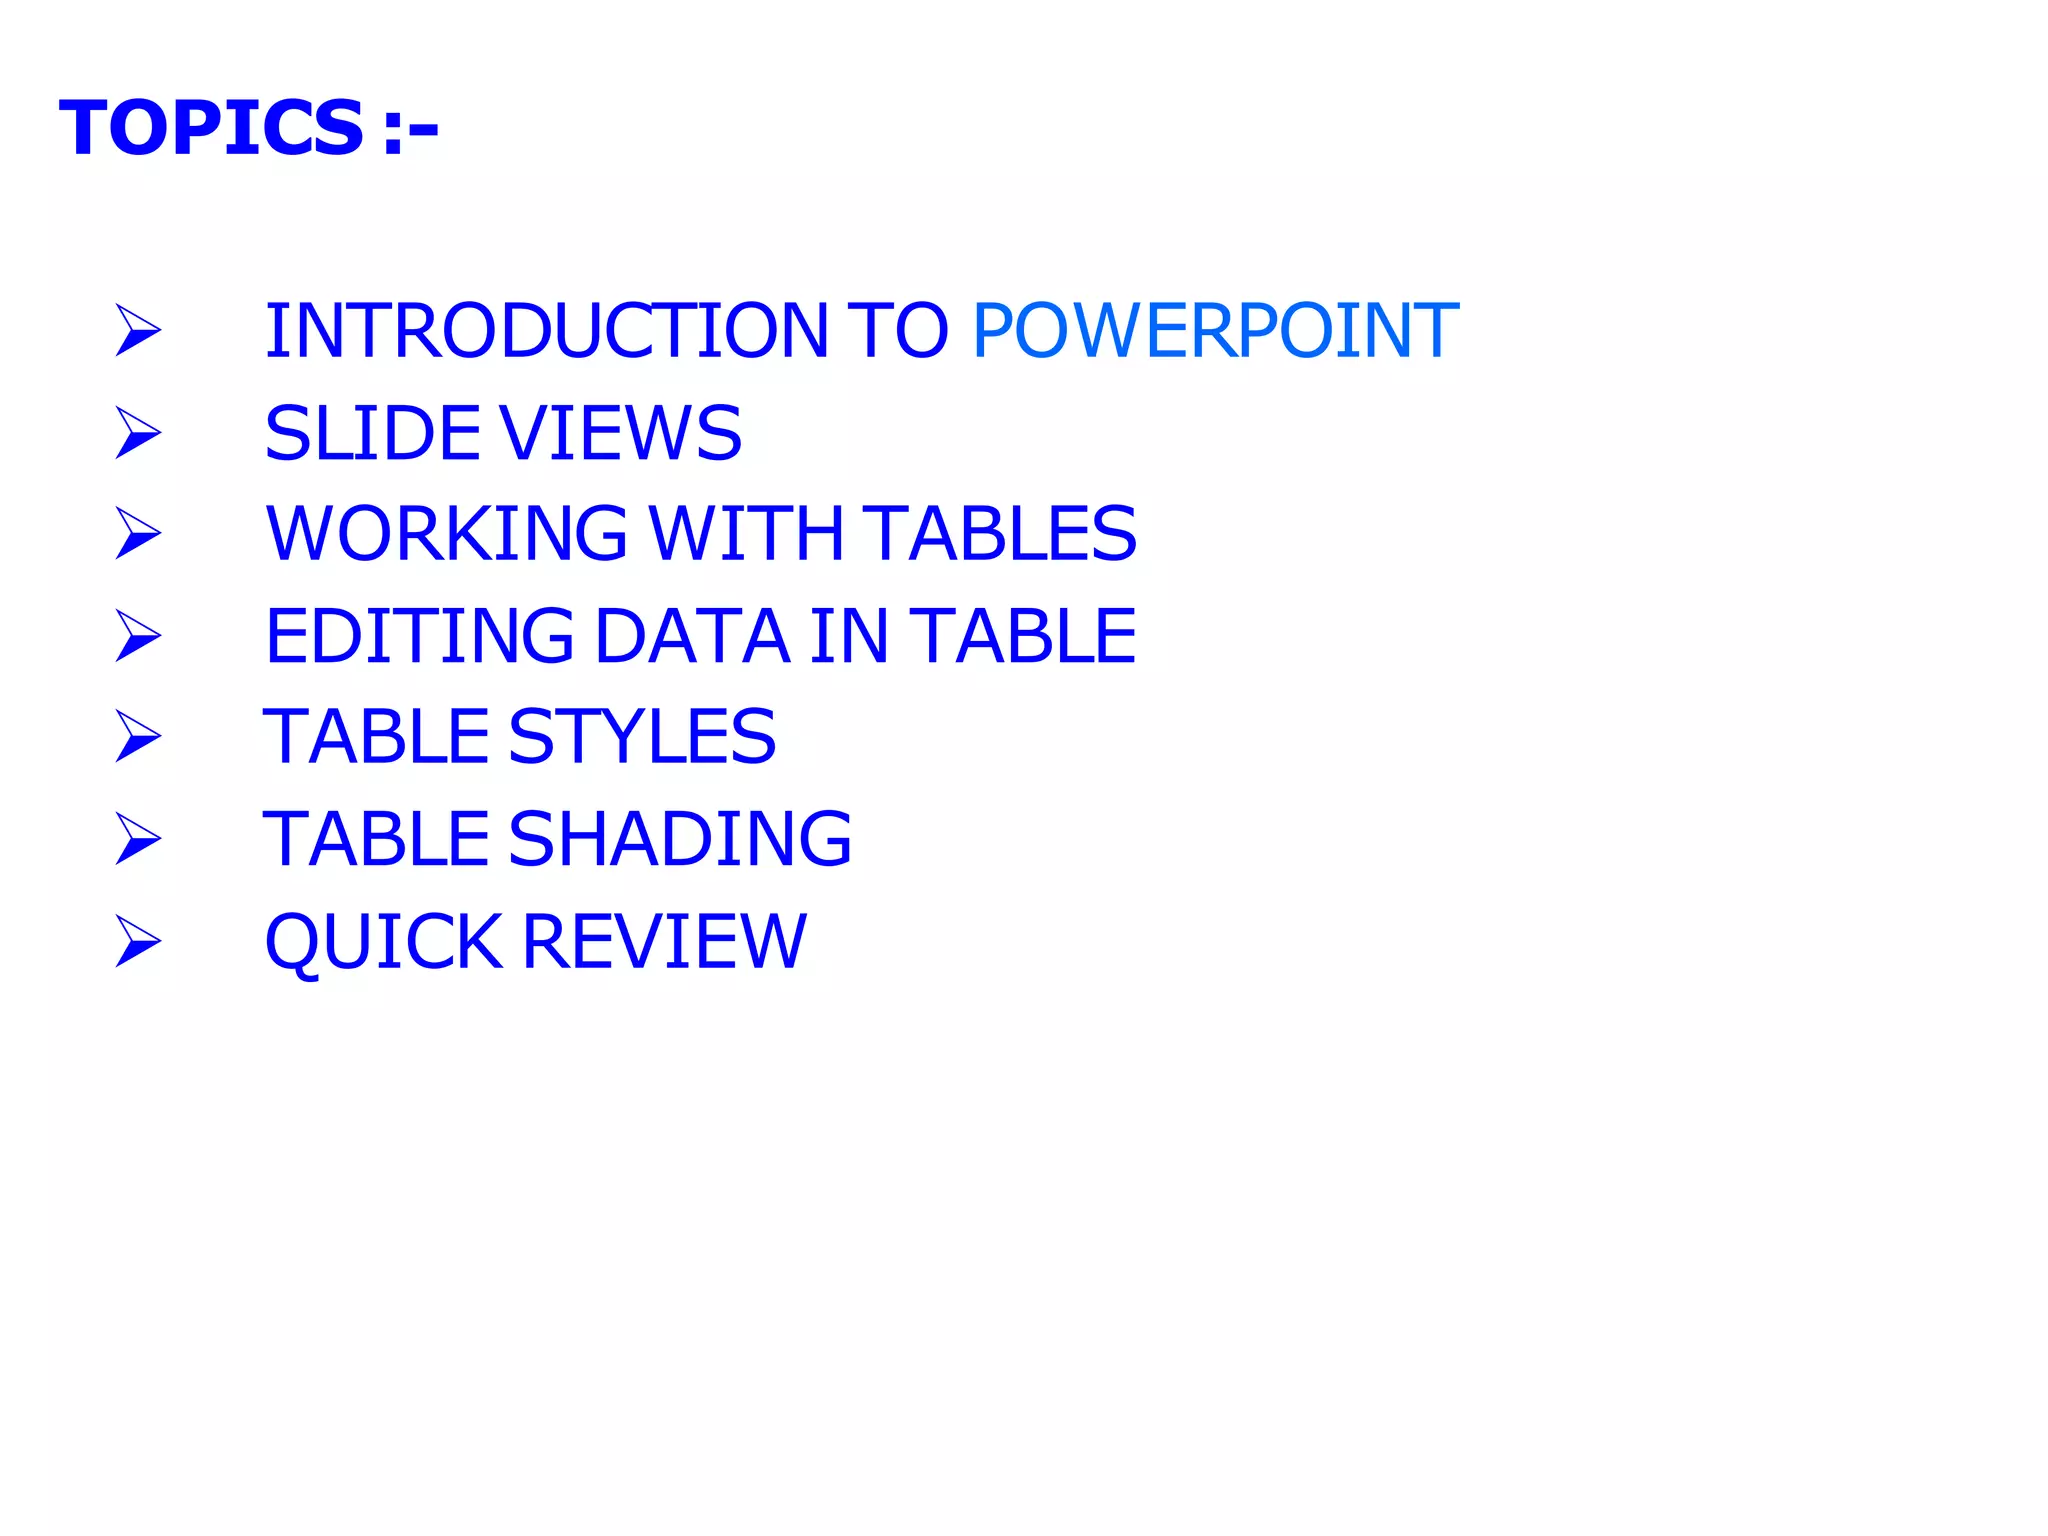
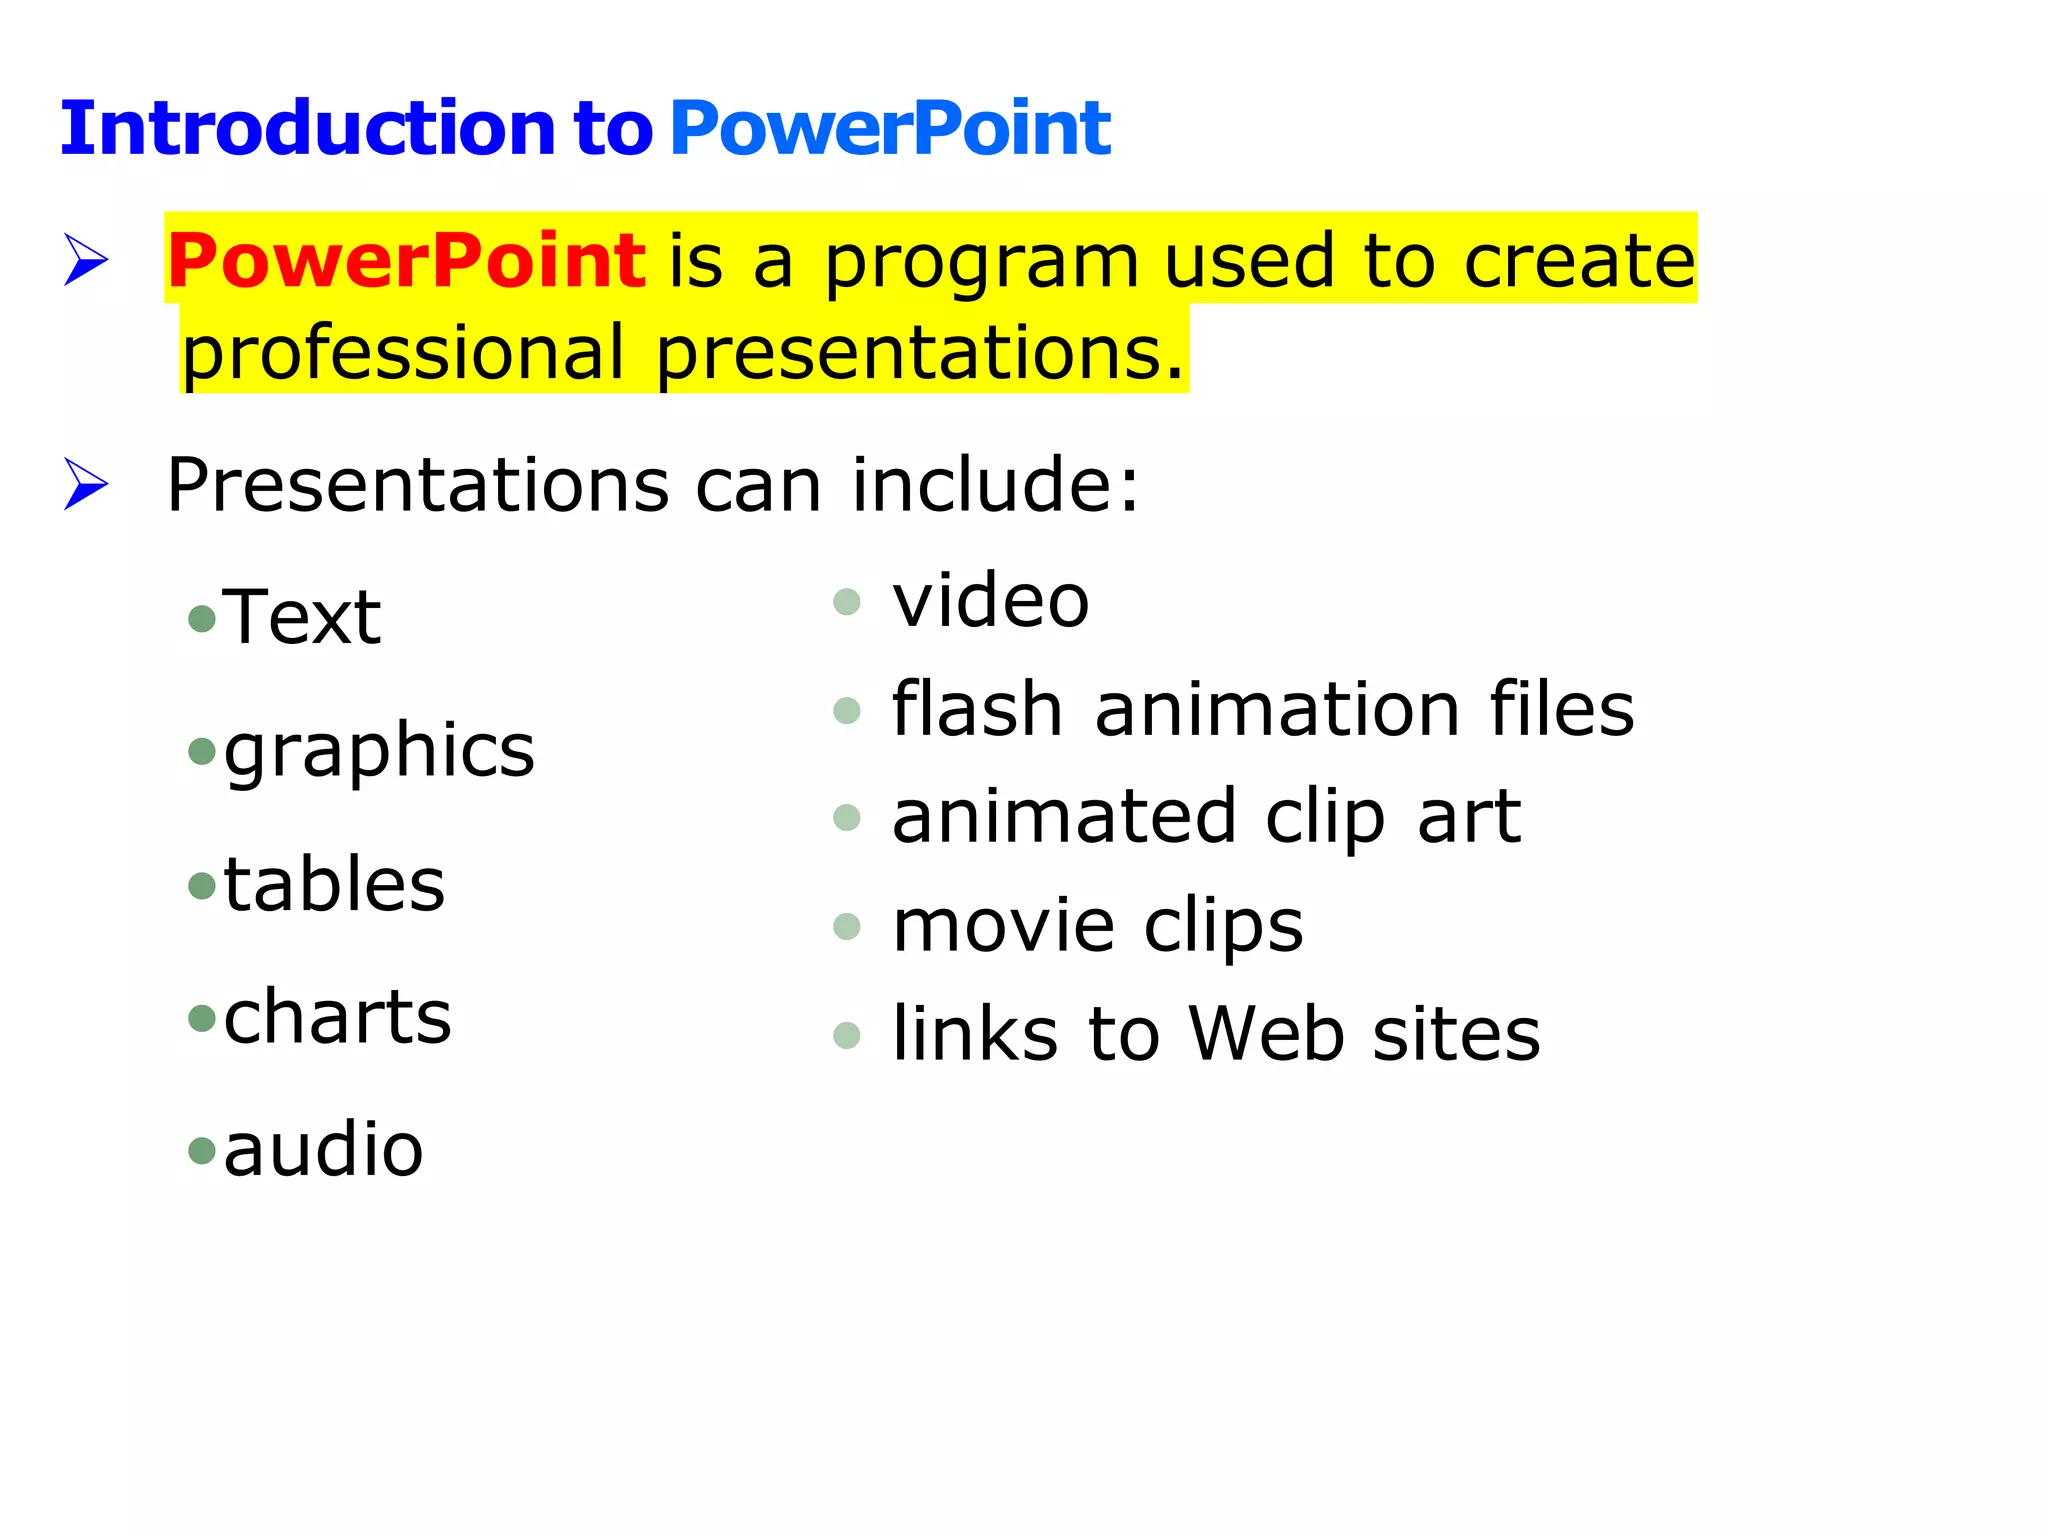
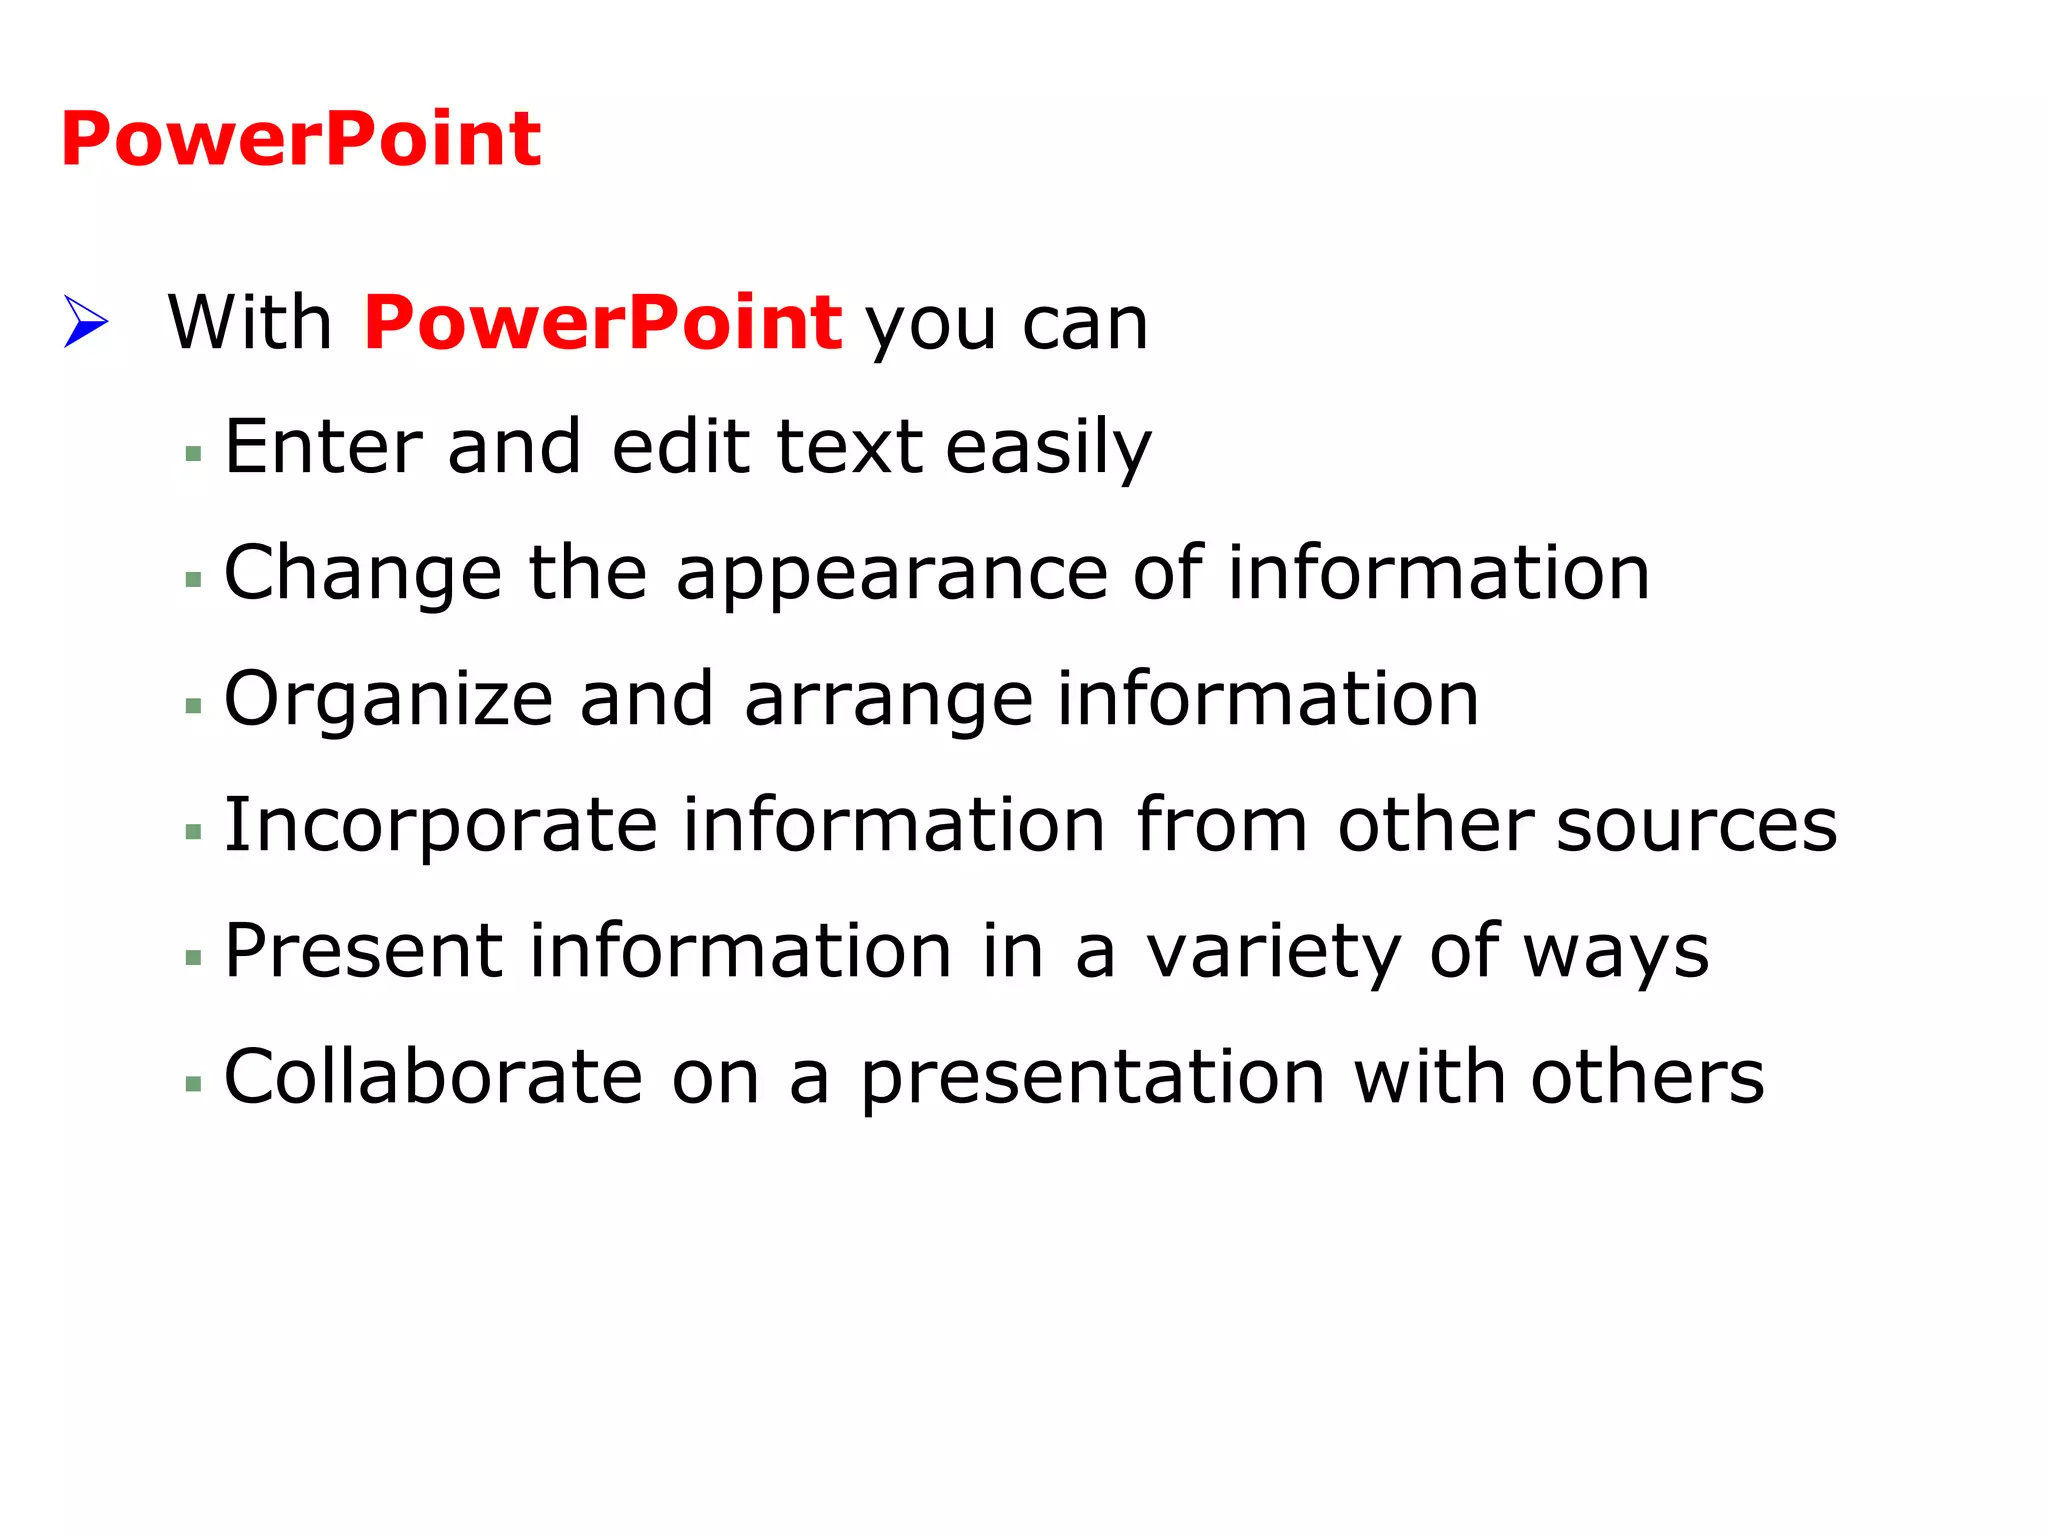
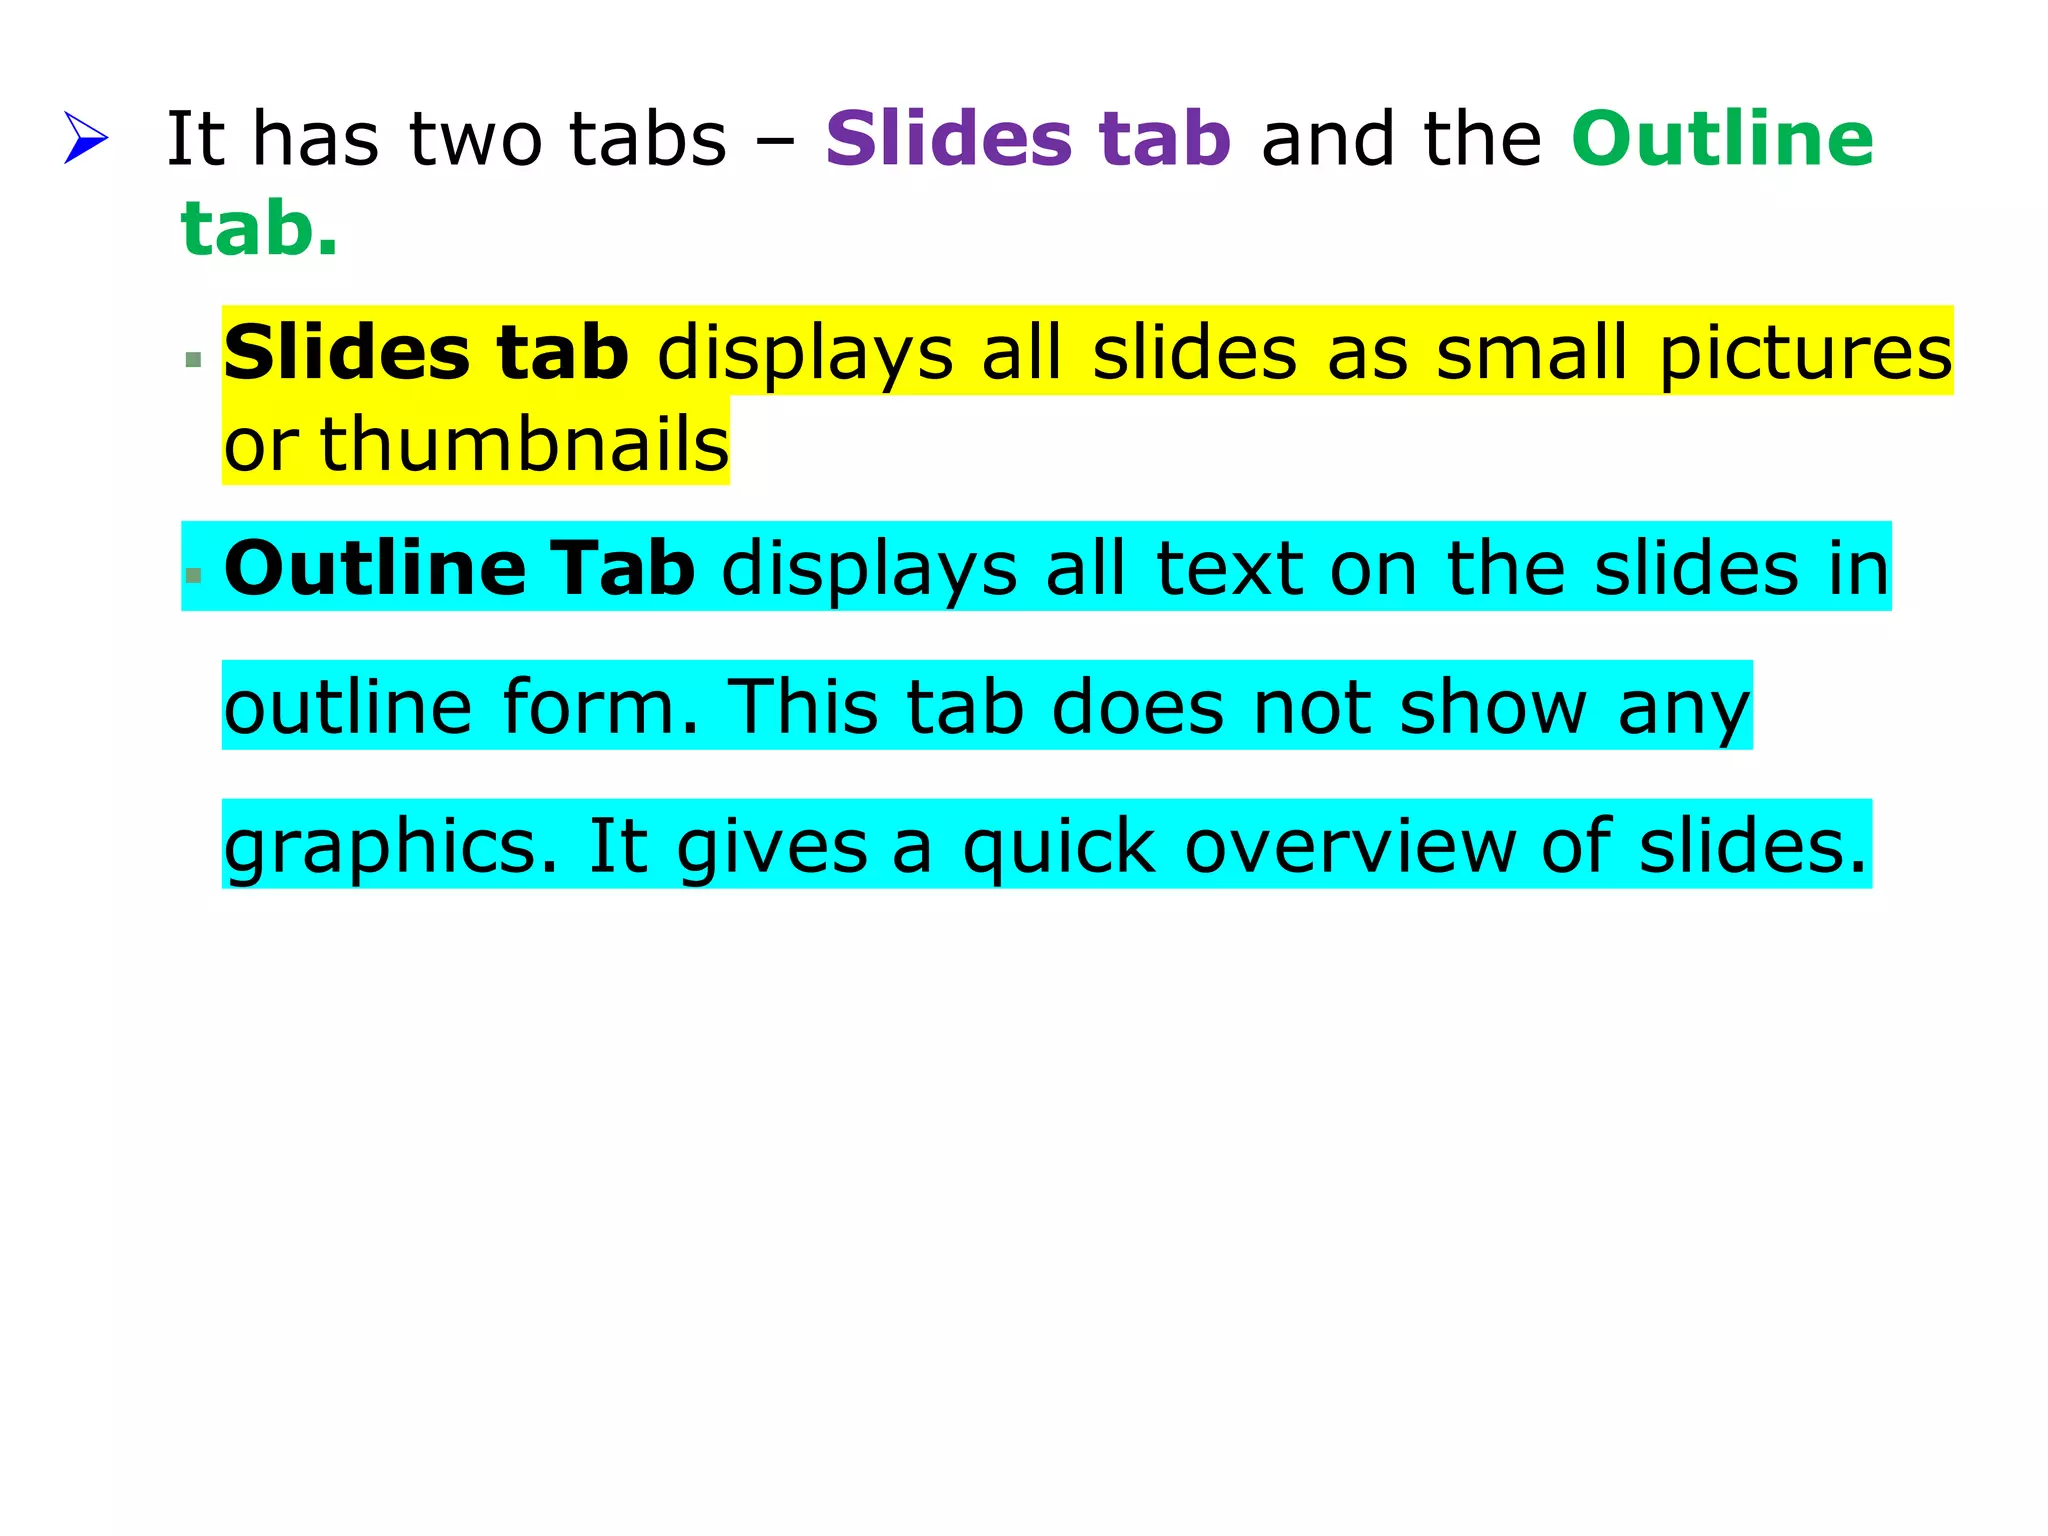
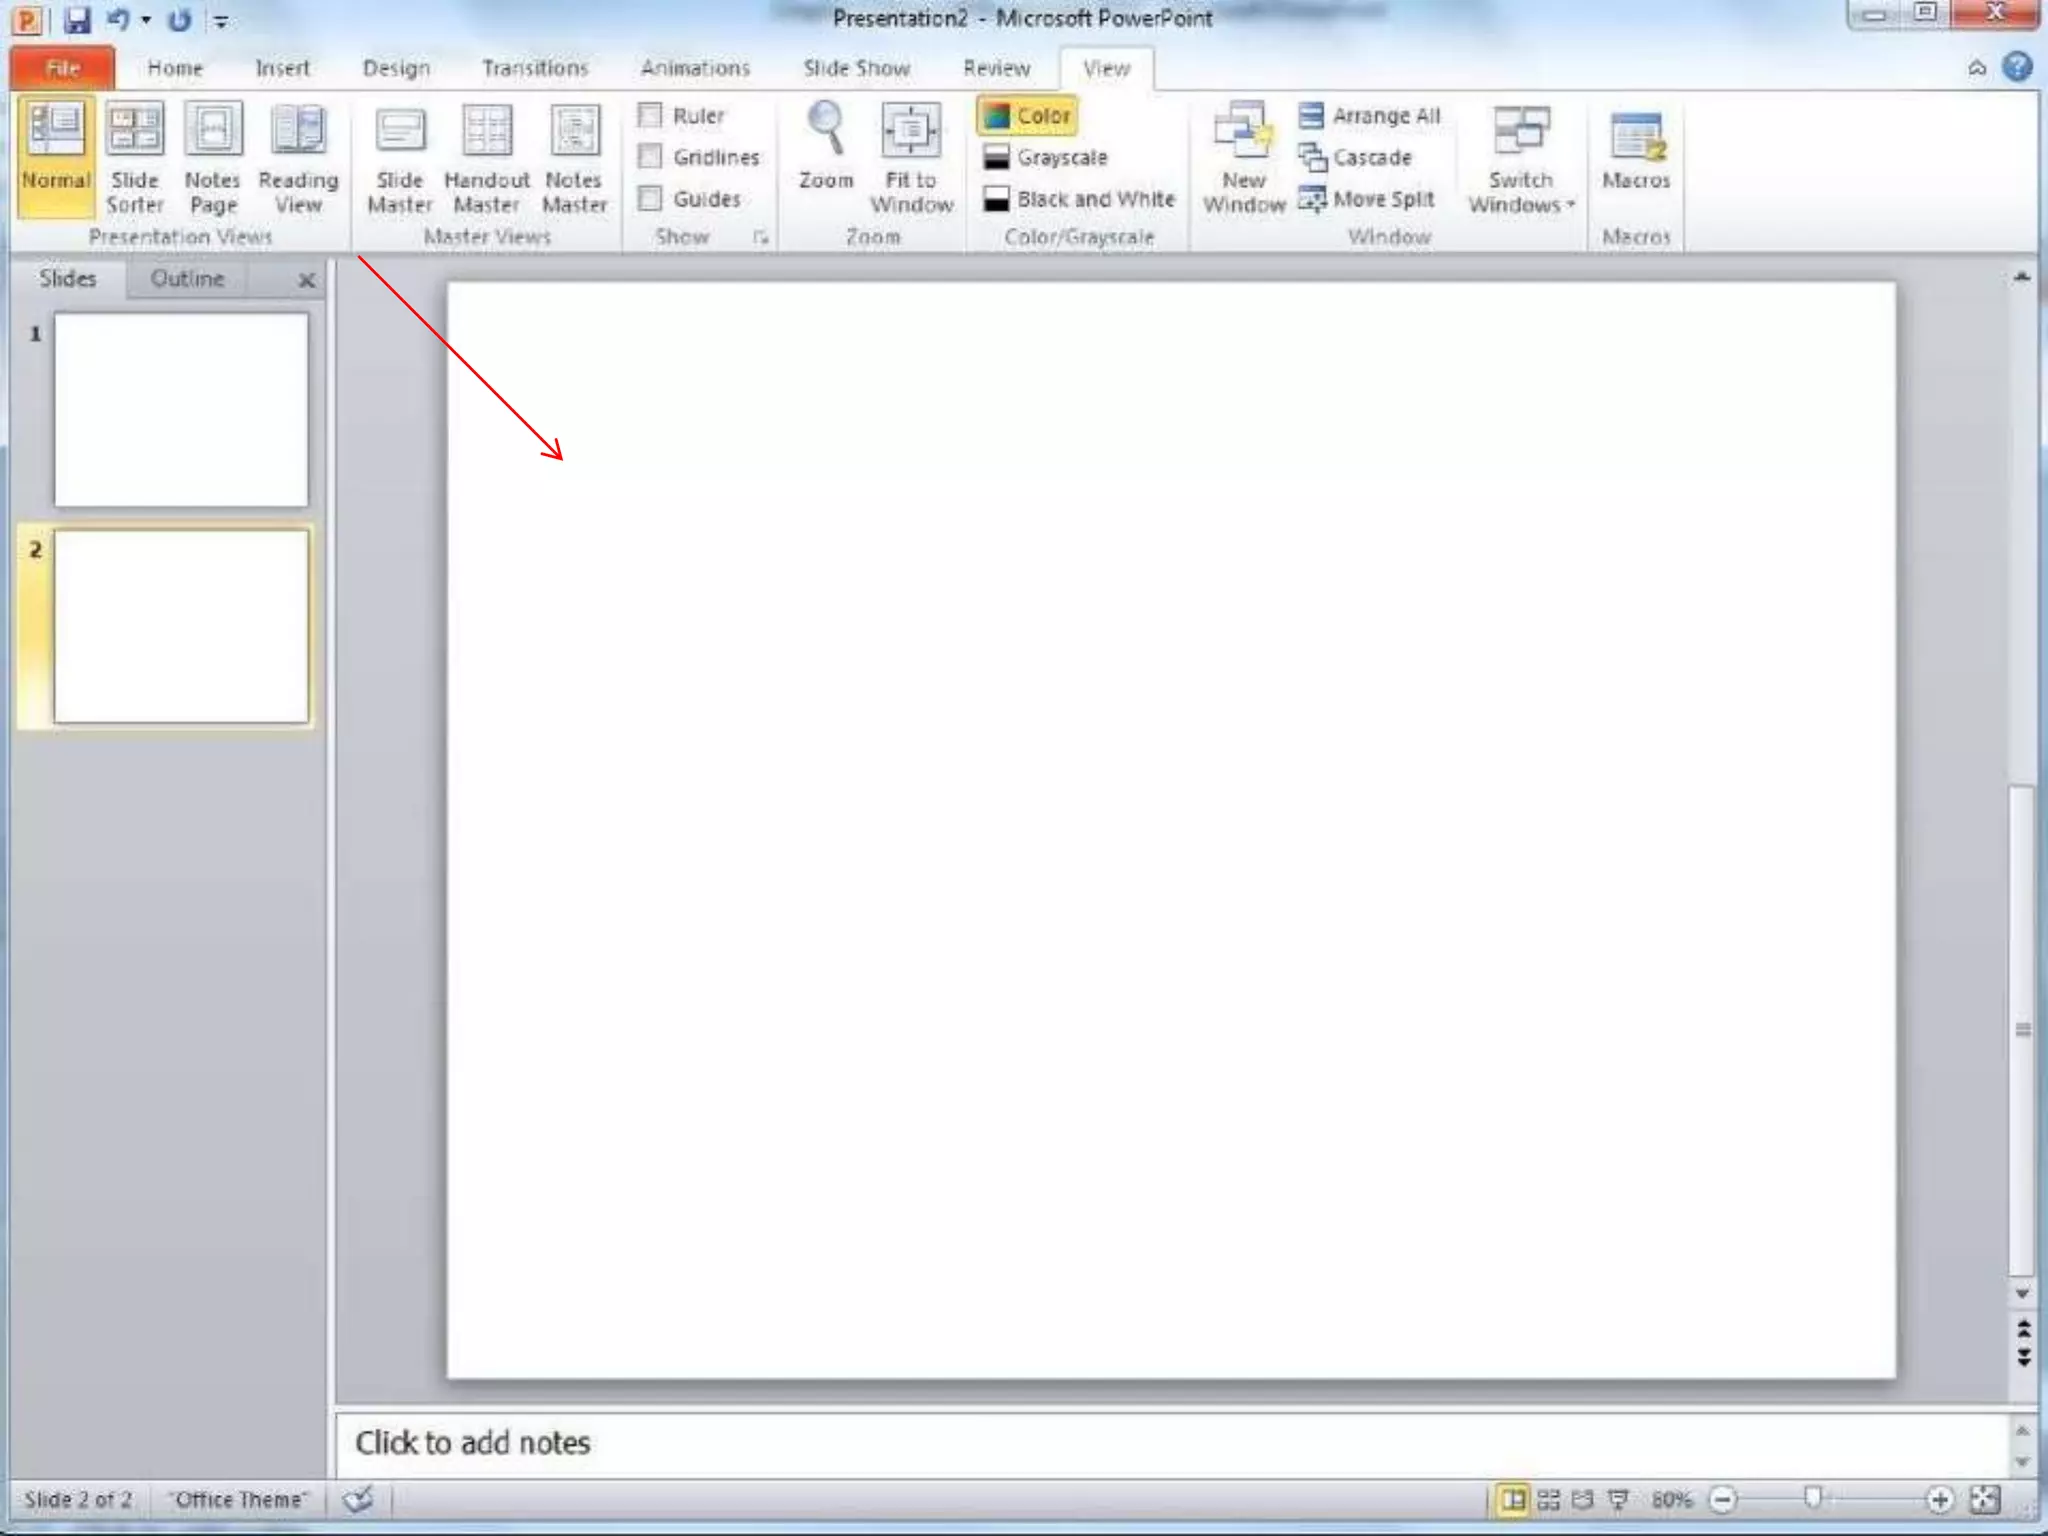
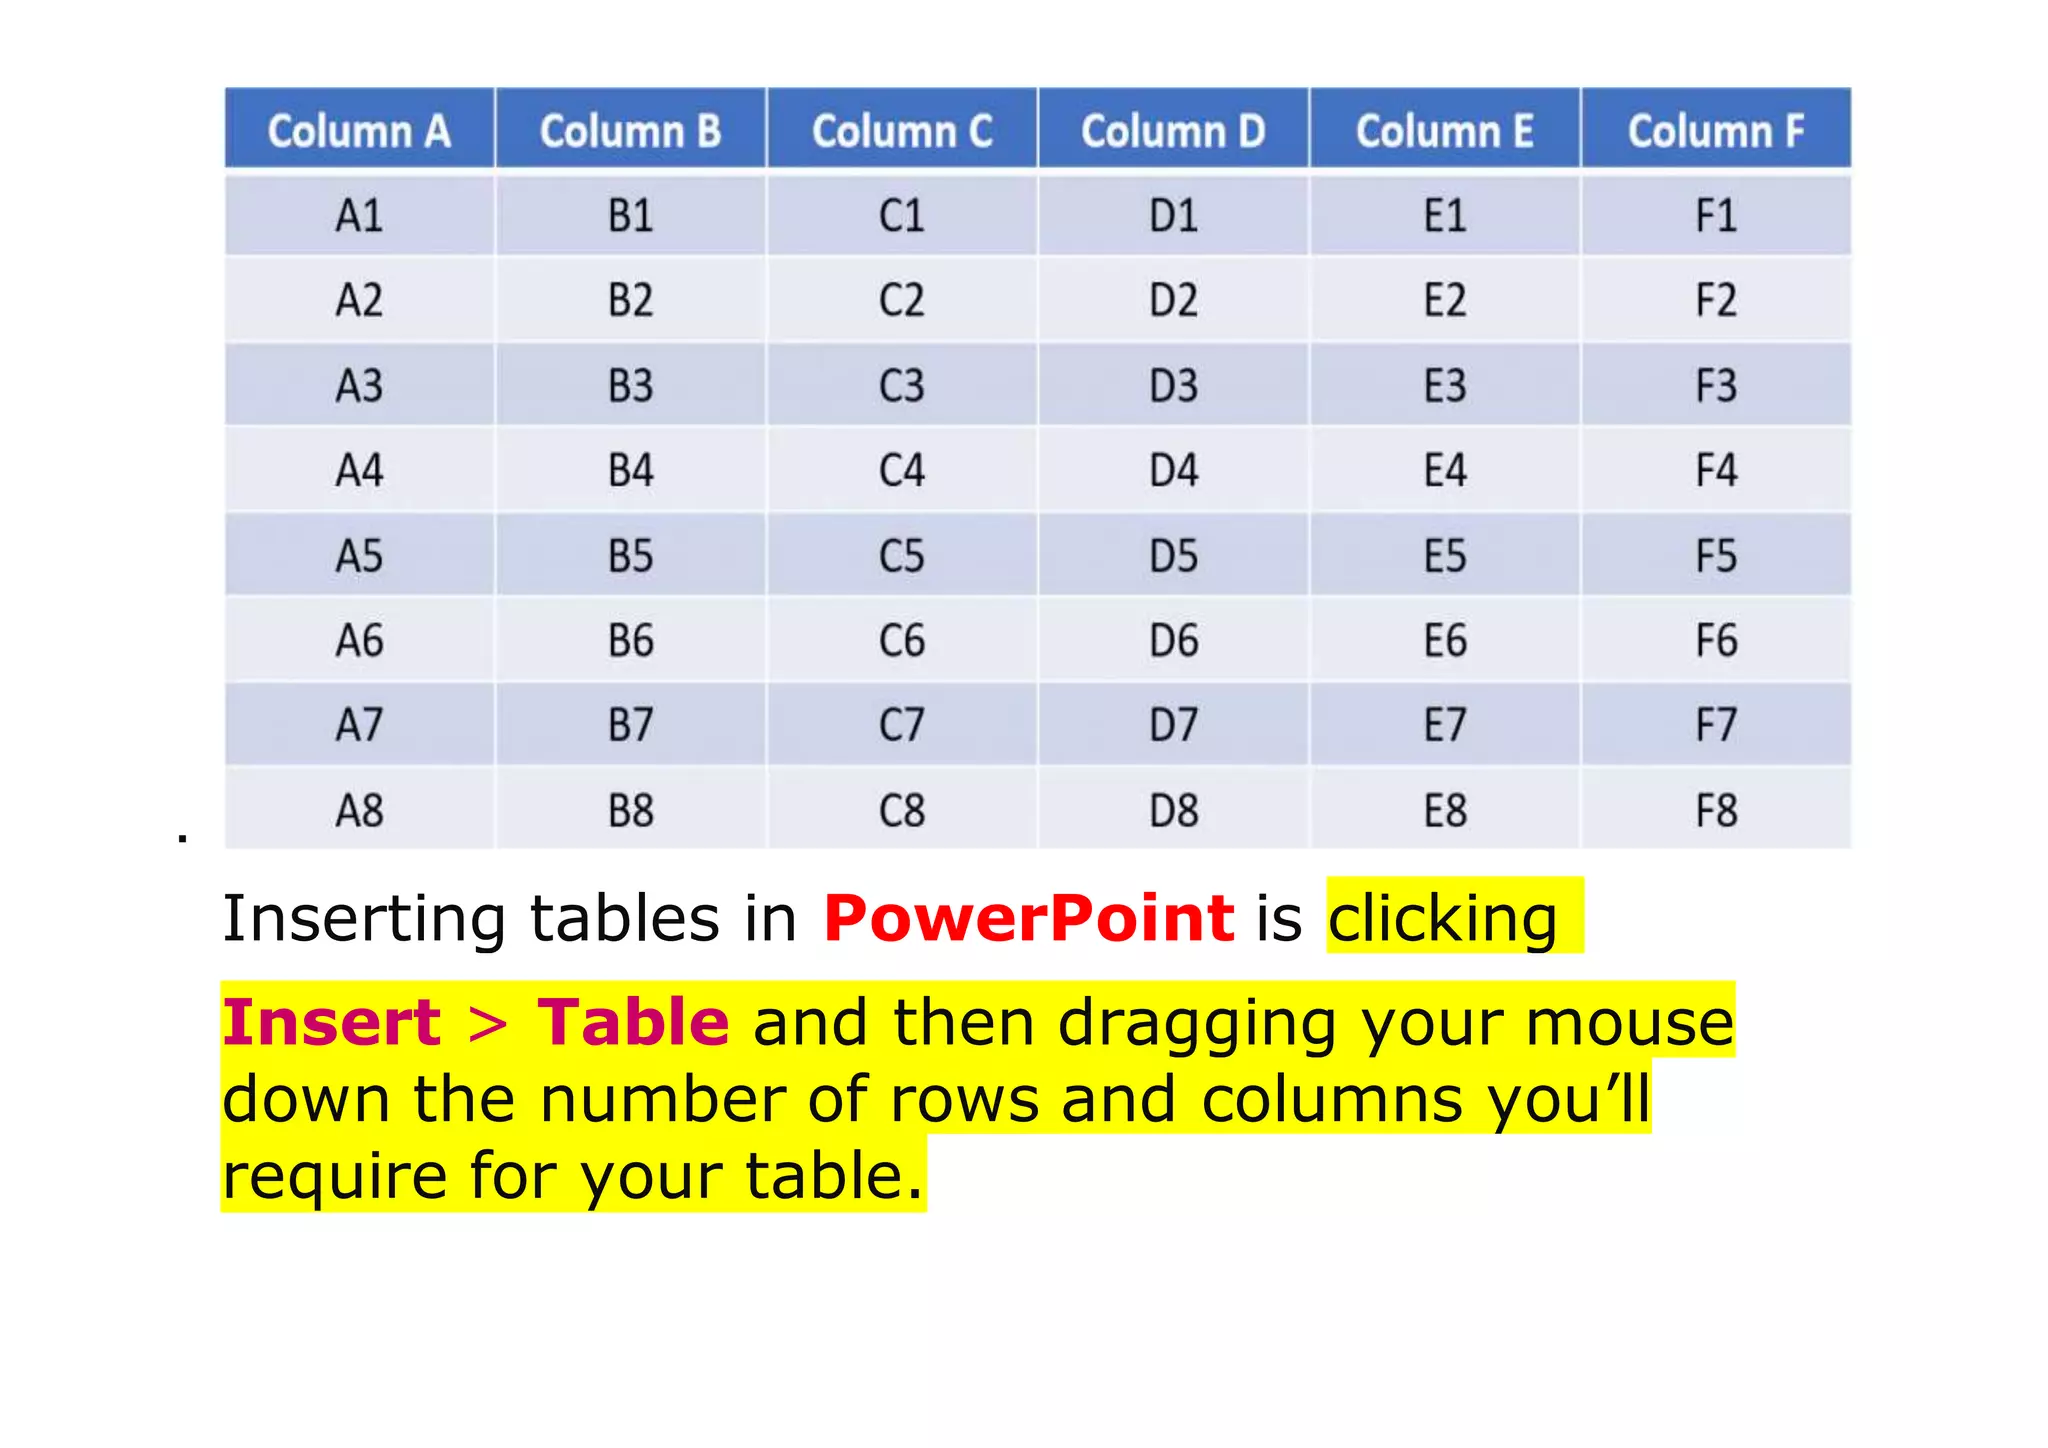
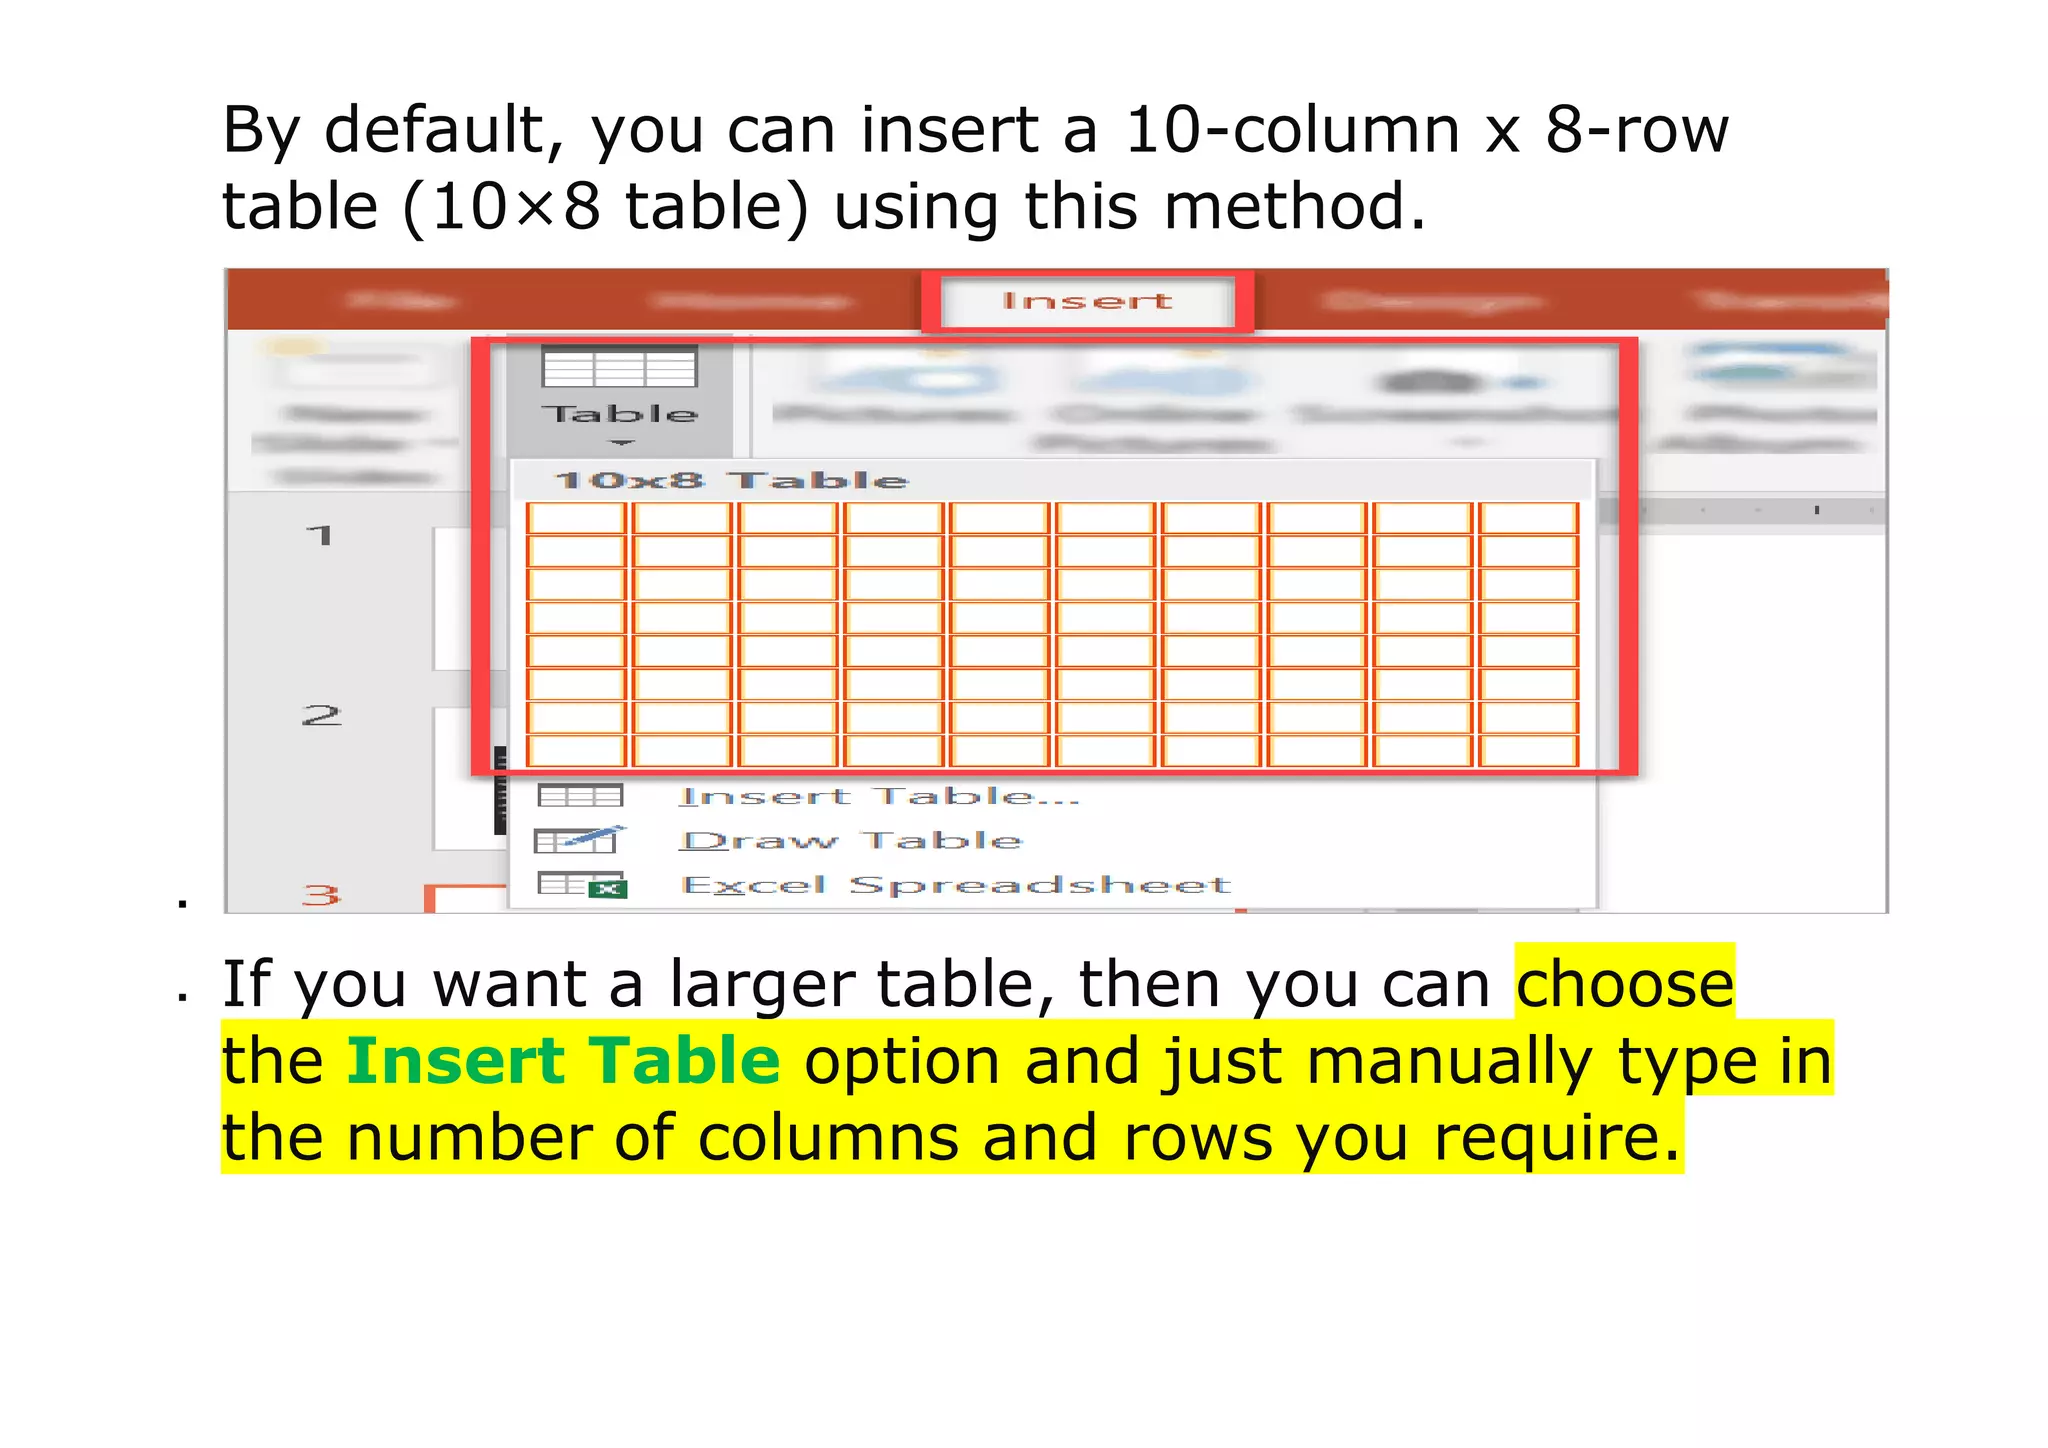
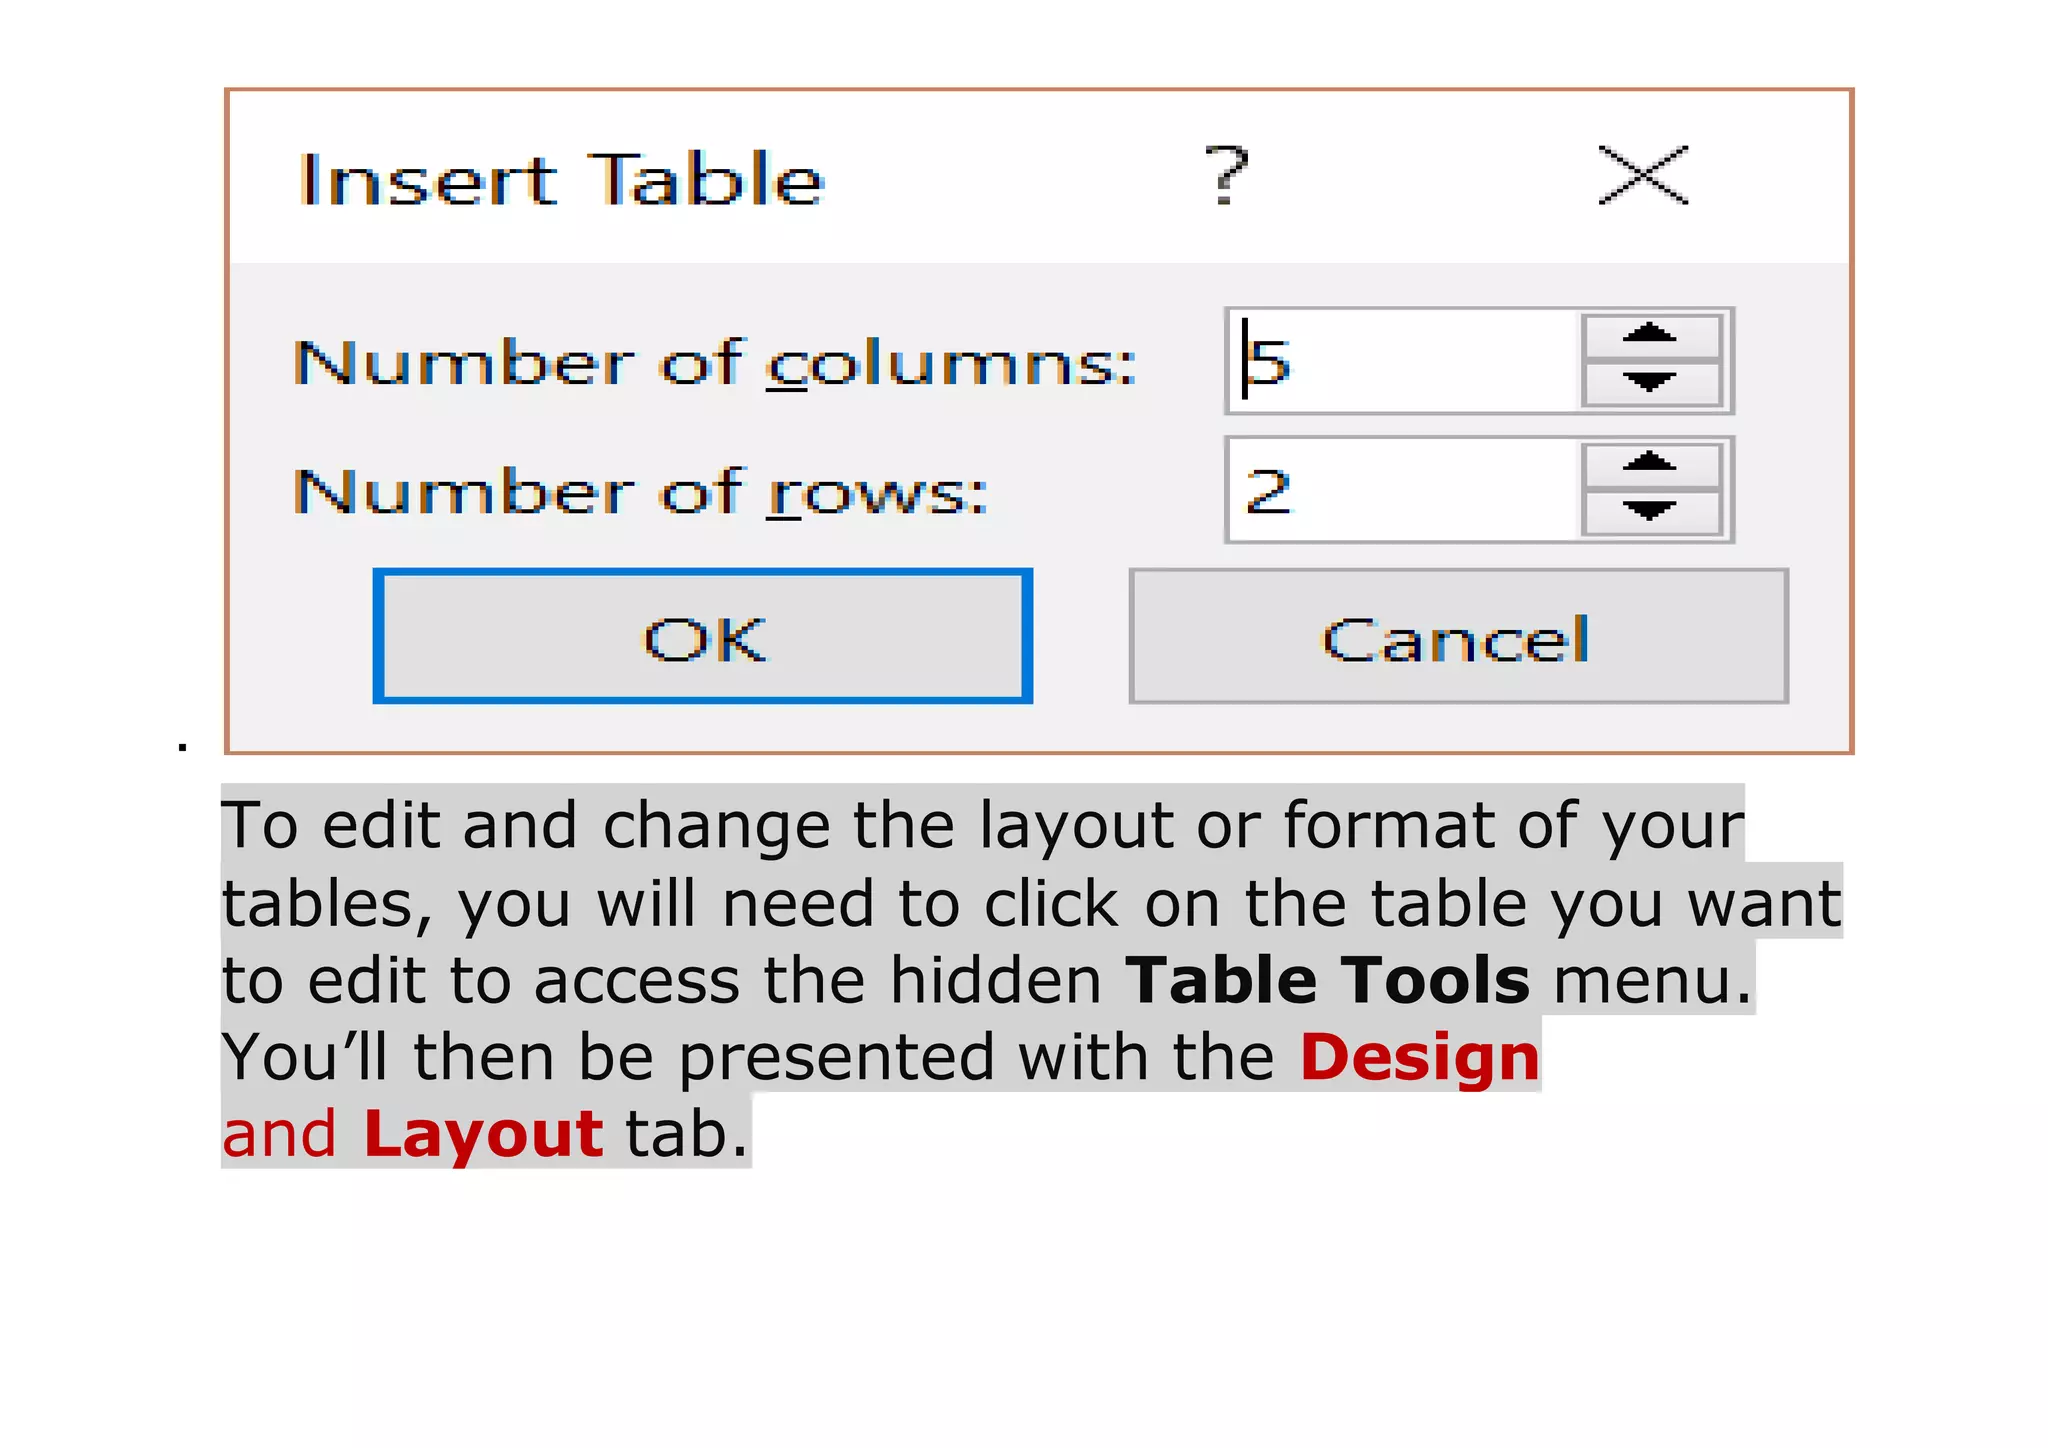
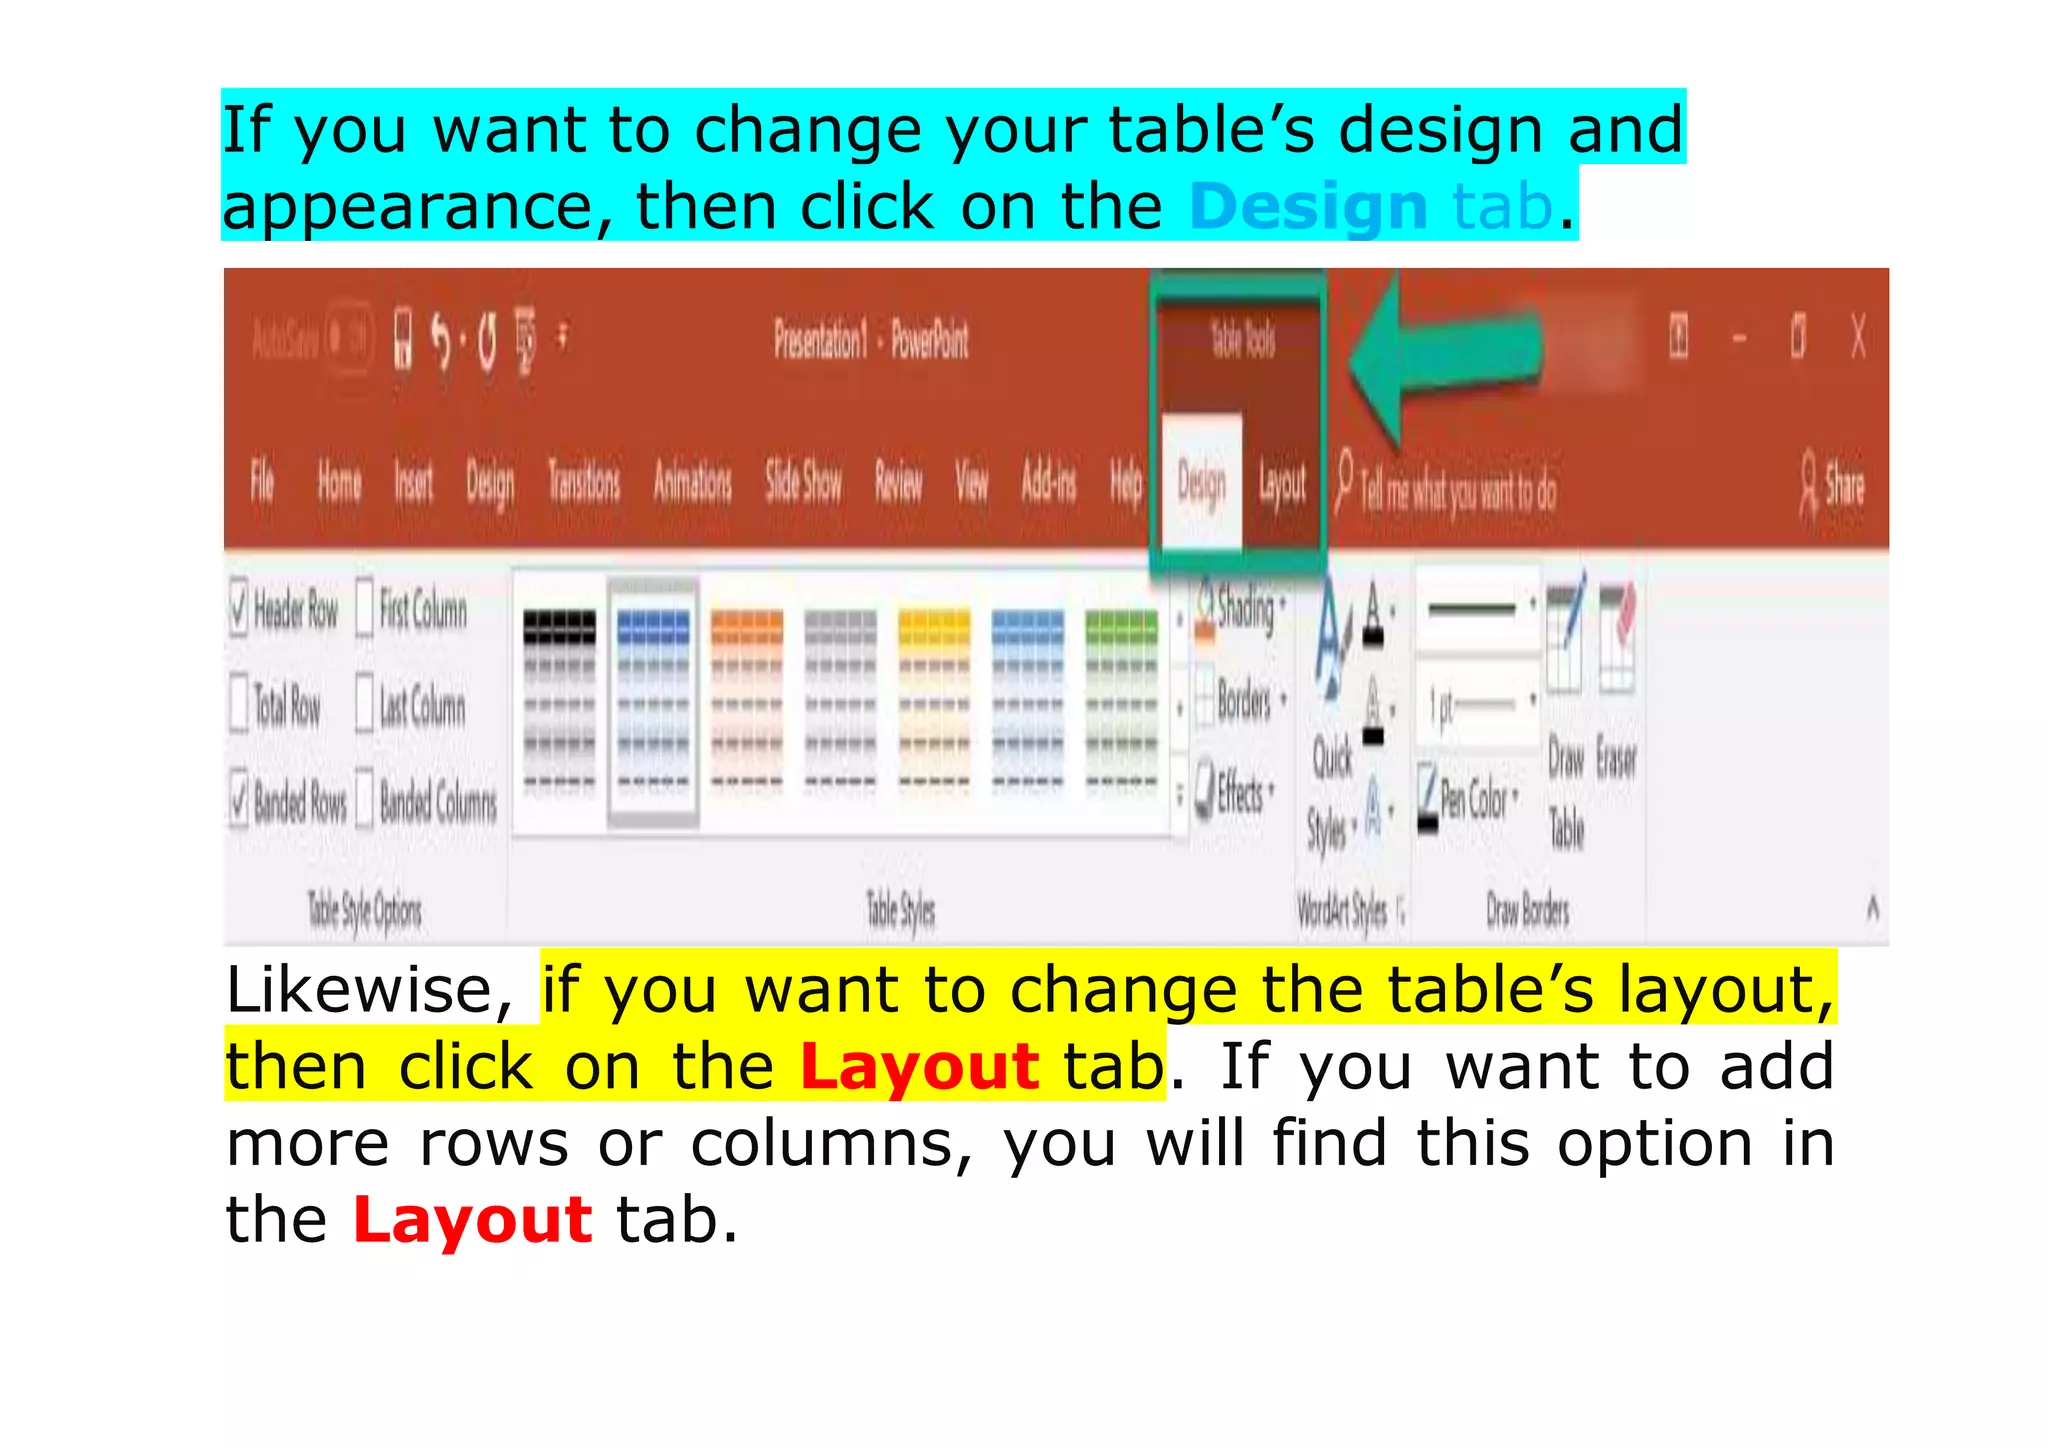
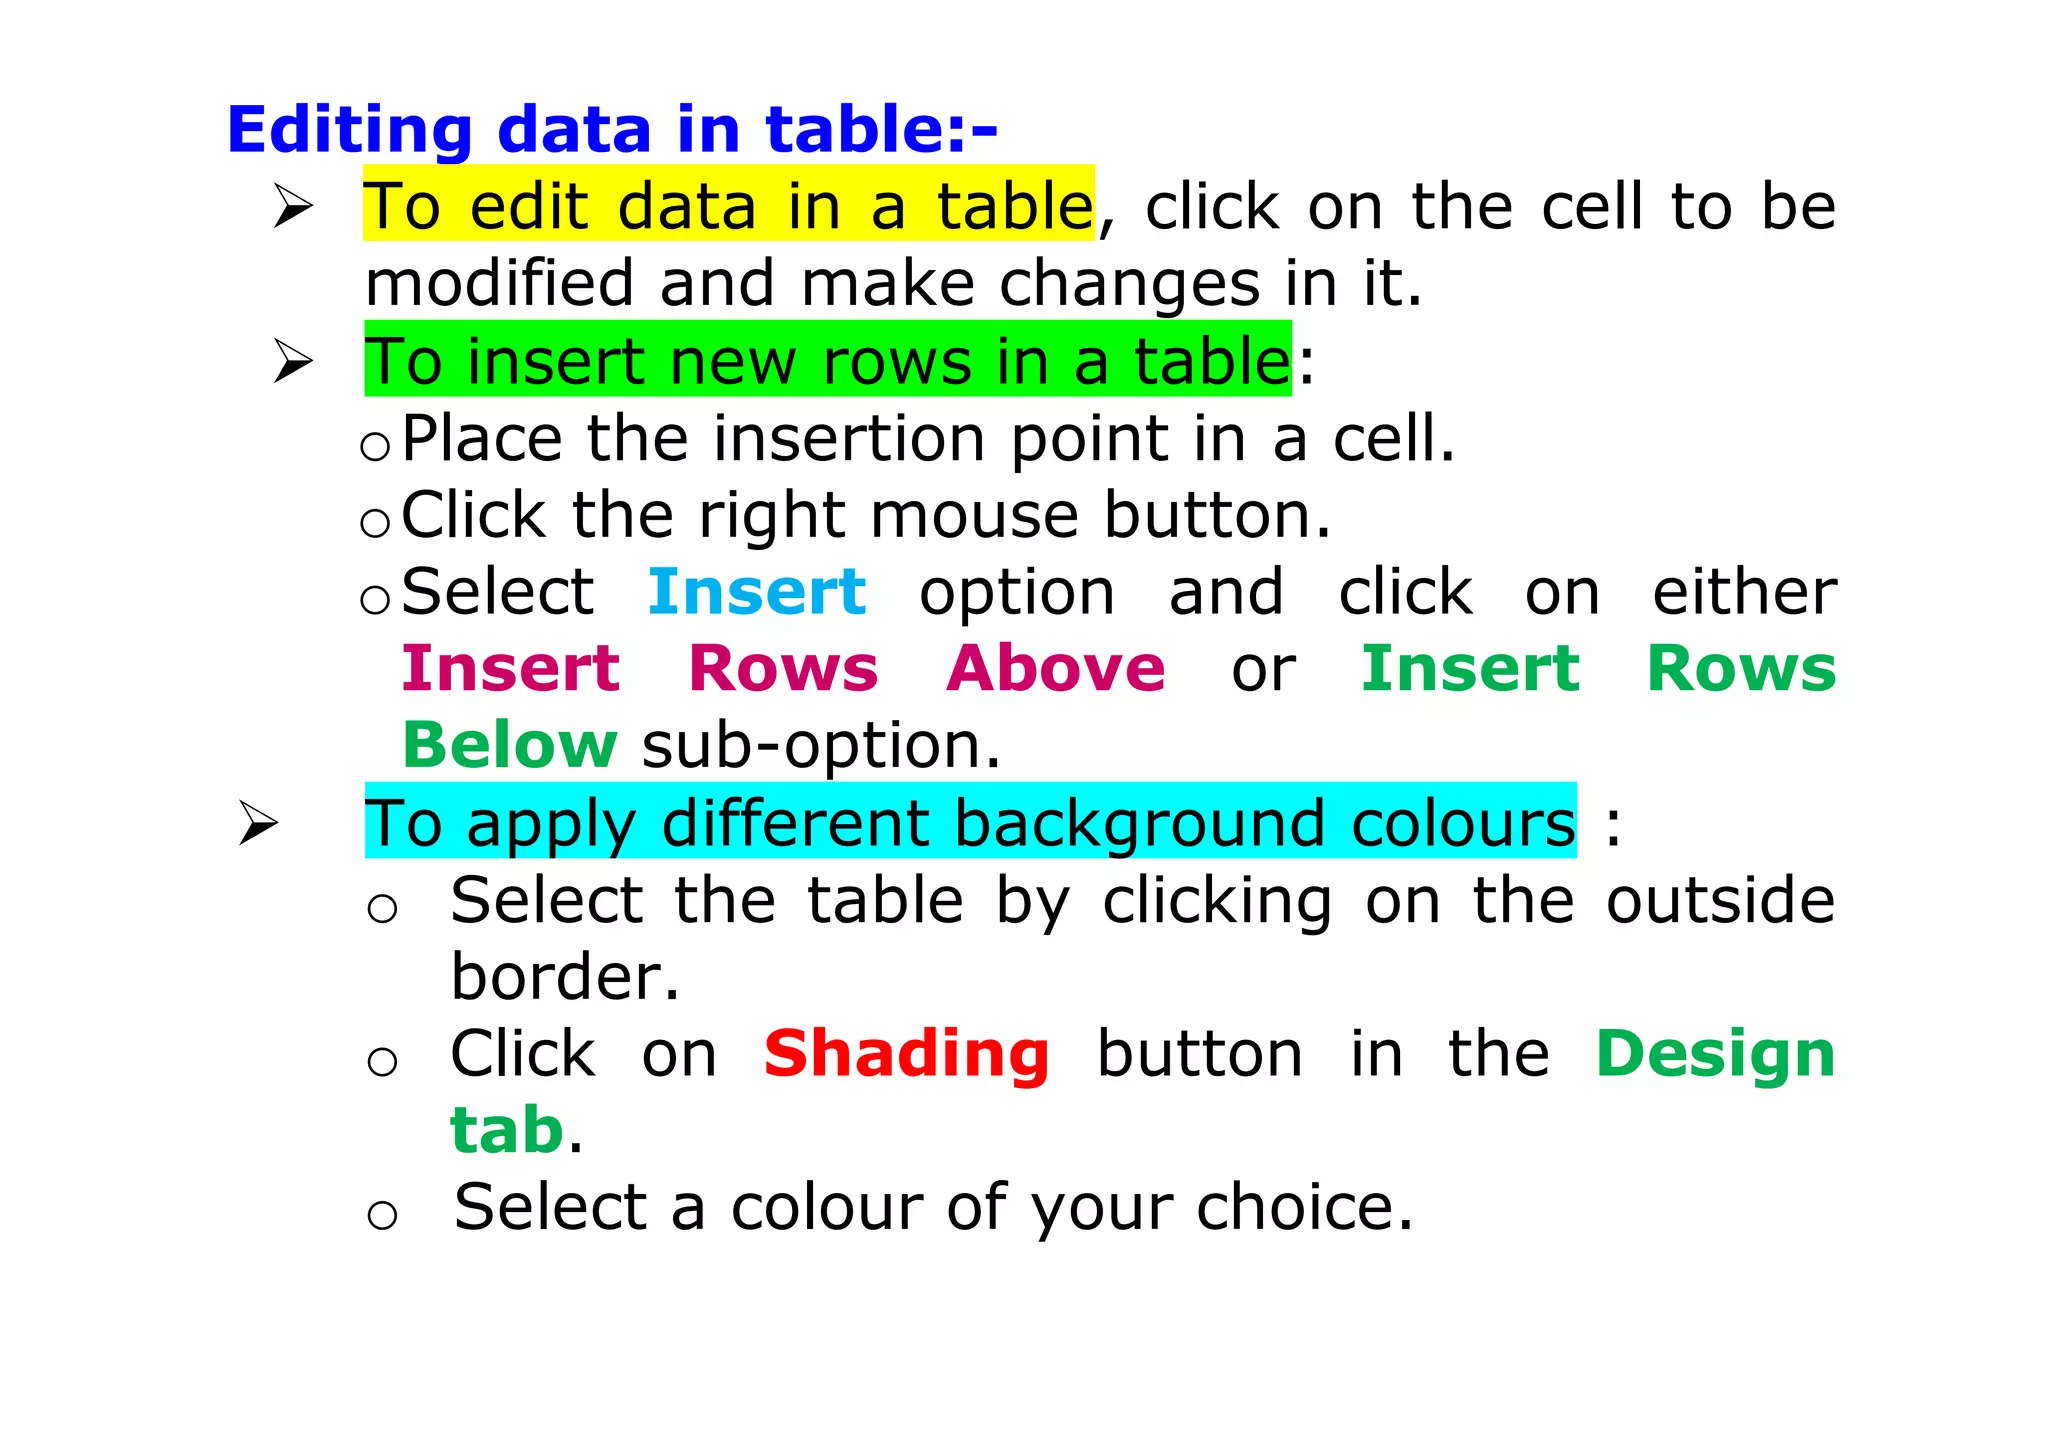
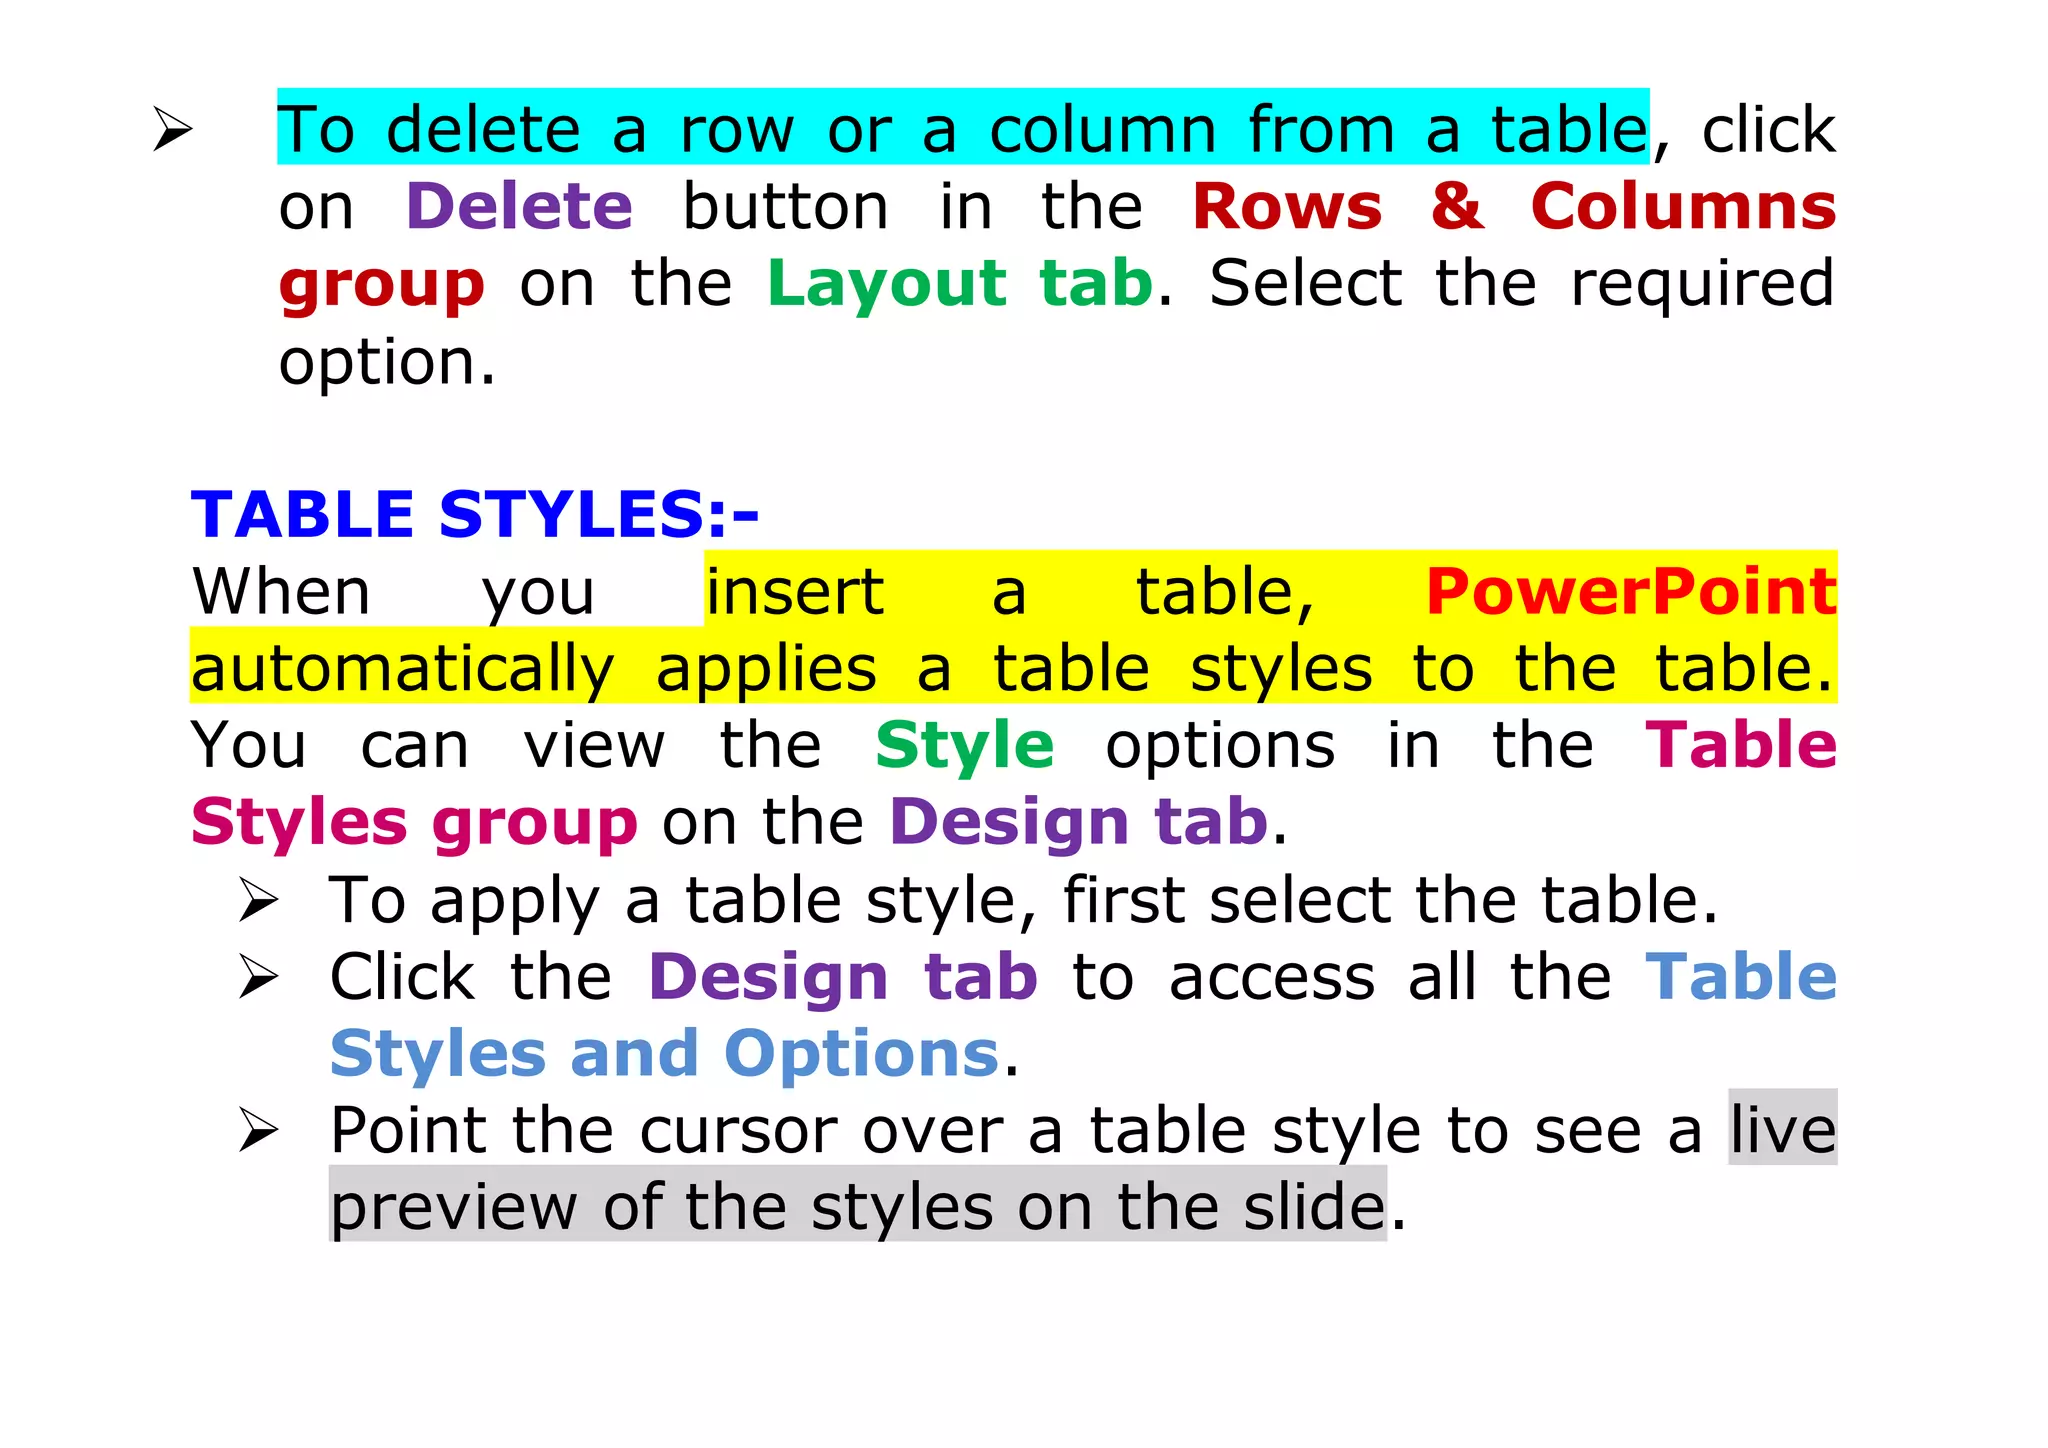
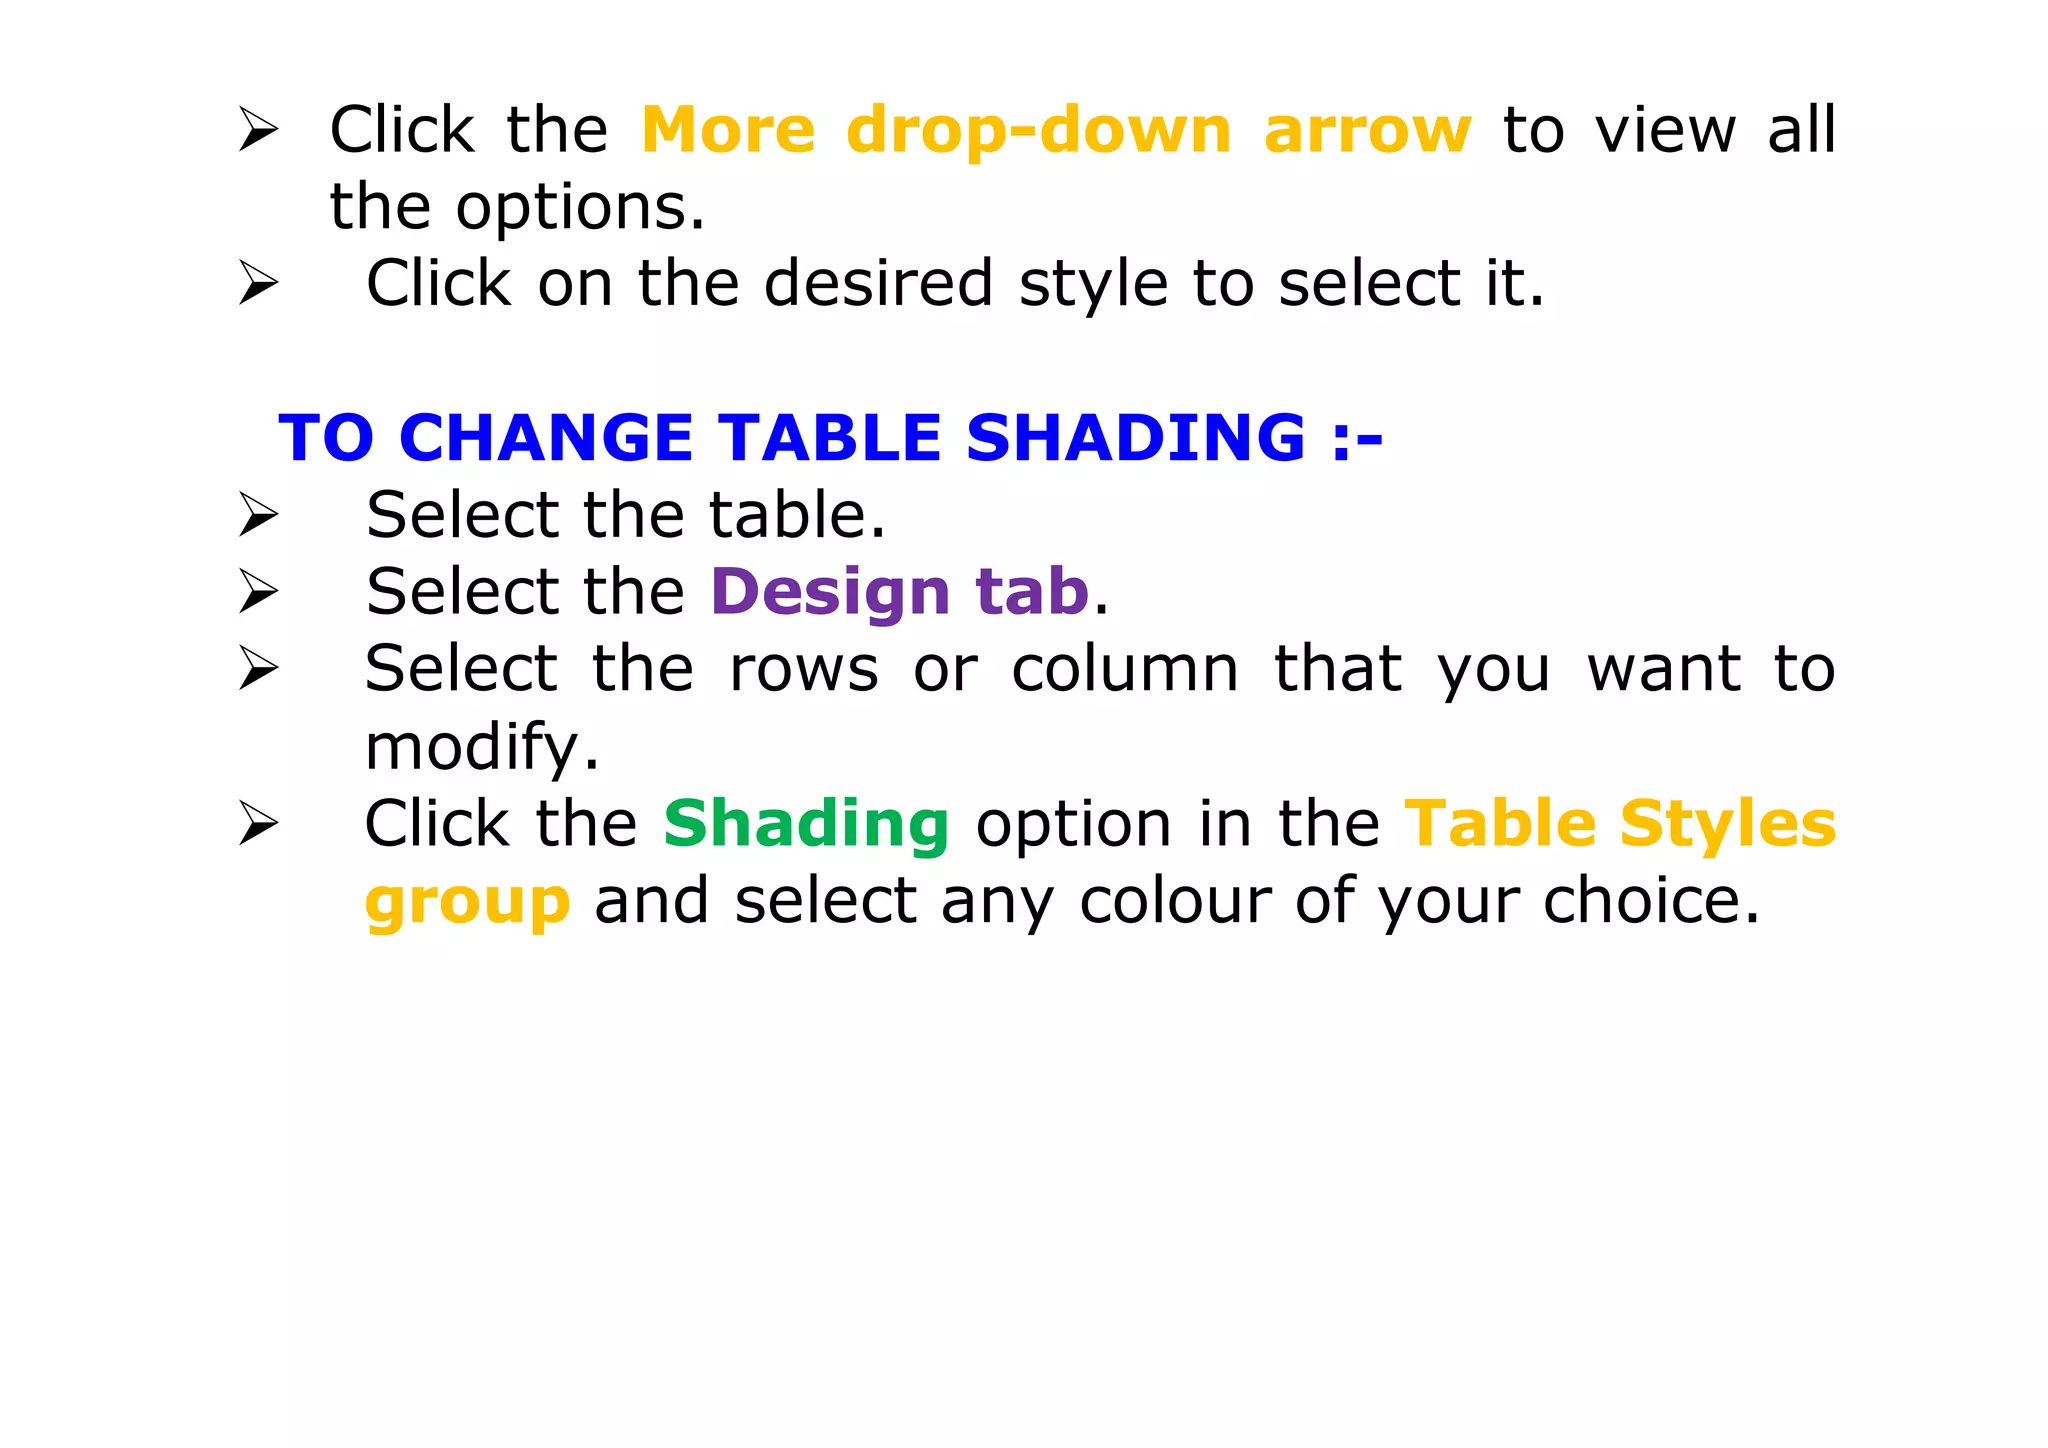
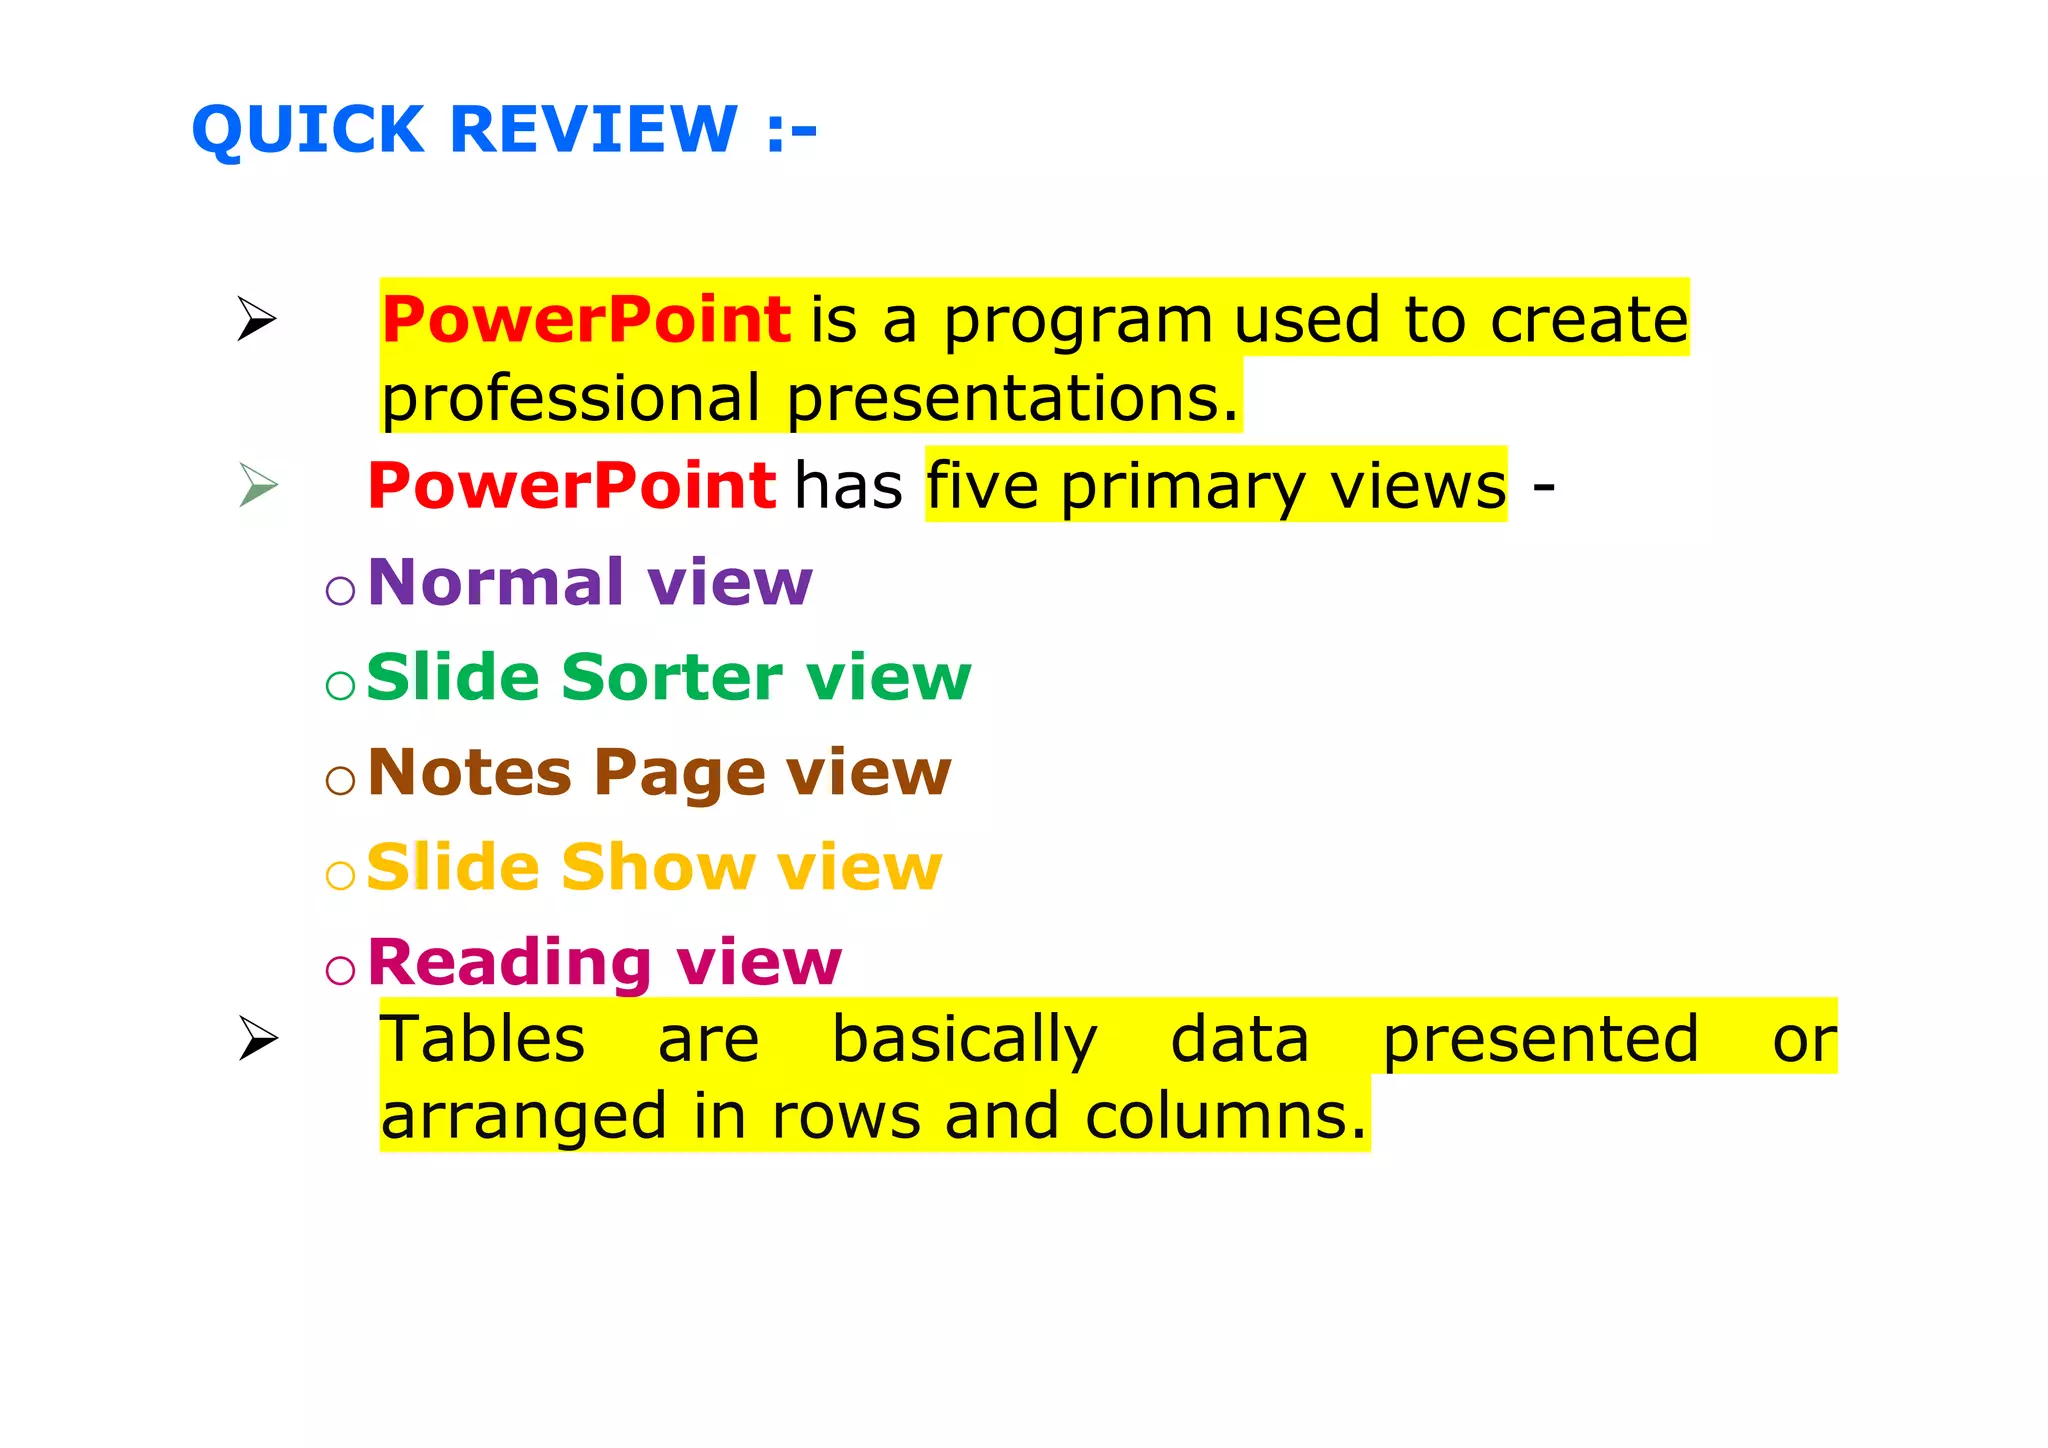
TOPICS :-
 INTRODUCTION TO POWERPOINT
 SLIDE VIEWS
 WORKING WITH TABLES
 EDITING DATA IN TABLE
 TABLE STYLES
 TABLE SHADING
 QUICK REVIEW
Introduction toPowerPoint
 PowerPoint is a program used to create
professional presentations.
 Presentations can include:
•Text
•graphics
•tables
•charts
•audio
• video
• flash animation files
• animated clip art
• movie clips
• links to Web sites
PowerPoint
 With PowerPoint you can
 Enter and edit text easily
 Change the appearance of information
 Organize and arrange information
 Incorporate information from other sources
 Present information in a variety of ways
 Collaborate on a presentation with others
 It has two tabs – Slides tab and the Outline
tab.
 Slides tab displays all slides as small pictures
or thumbnails
 Outline Tab displays all text on the slides in
outline form. This tab does not show any
graphics. It gives a quick overview of slides.
Slide Views
Presentations can be viewed in a variety of
manners. On the View tab, the Presentation
Views group allows you to view the slides
as Normal, Slide Sorter, Notes Page, Slide
Show, Slide Master, Handout Master, and
Notes Master.
PowerPoint has five primary views -
 Normal view
 Slide Sorter view
 Notes Page view
 Slide Show view
 Reading view
Normal View: This is the default view where you
create and edit your slides. We can also move
slides in Slides tab in the pane on the left.
Slide Sorter View: In this view, miniature slides
are arranged on the screen. You can drag and
drop slides to easily reorder them, and see more
slides at one time.
 Notes Page view
Notes Page option available on View tab. It
displays the notes page for the selected slide,
where you can create additional notes for the
current slide.
 Reading View: This view fills most of the
computer screen with a preview of your
presentation. Unlike Slide Show View, it includes
easily accessible buttons for navigation, located at
the bottom right.
 Slide Show View: This view completely fills the
computer screen, and is what the audience will
see when they view the presentation.
Working With Tables :-
Tables are basically data presented or arranged in
rows and columns. You can present various forms of
data in tables.

Inserting tables in PowerPoint is clicking
Insert > Table and then dragging your mouse
down the number of rows and columns you’ll
require for your table.
By default, you can insert a 10-column x 8-row
table (10×8 table) using this method.

 If you want a larger table, then you can choose
the Insert Table option and just manually type in
the number of columns and rows you require.

To edit and change the layout or format of your
tables, you will need to click on the table you want
to edit to access the hidden Table Tools menu.
You’ll then be presented with the Design
and Layout tab.
If you want to change your table’s design and
appearance, then click on the Design tab.
Likewise, if you want to change the table’s layout,
then click on the Layout tab. If you want to add
more rows or columns, you will find this option in
the Layout tab.
Editing data in table:-
 To edit data in a table, click on the cell to be
modified and make changes in it.
 To insert new rows in a table:
oPlace the insertion point in a cell.
oClick the right mouse button.
oSelect Insert option and click on either
Insert Rows Above or Insert Rows
Below sub-option.
 To apply different background colours :
o Select the table by clicking on the outside
border.
o Click on Shading button in the Design
tab.
o Select a colour of your choice.
 To delete a row or a column from a table, click
on Delete button in the Rows & Columns
group on the Layout tab. Select the required
option.
TABLE STYLES:-
When you insert a table, PowerPoint
automatically applies a table styles to the table.
You can view the Style options in the Table
Styles group on the Design tab.
 To apply a table style, first select the table.
 Click the Design tab to access all the Table
Styles and Options.
 Point the cursor over a table style to see a live
preview of the styles on the slide.
 Click the More drop-down arrow to view all
the options.
 Click on the desired style to select it.
TO CHANGE TABLE SHADING :-
 Select the table.
 Select the Design tab.
 Select the rows or column that you want to
modify.
 Click the Shading option in the Table Styles
group and select any colour of your choice.
QUICK REVIEW :-
 PowerPoint is a program used to create
professional presentations.
 PowerPoint has five primary views -
oNormal view
oSlide Sorter view
oNotes Page view
oSlide Show view
oReading view
 Tables are basically data presented or
arranged in rows and columns.
Power point & table

Power point & table

  • 2.
    TOPICS :-  INTRODUCTIONTO POWERPOINT  SLIDE VIEWS  WORKING WITH TABLES  EDITING DATA IN TABLE  TABLE STYLES  TABLE SHADING  QUICK REVIEW
  • 3.
    Introduction toPowerPoint  PowerPointis a program used to create professional presentations.  Presentations can include: •Text •graphics •tables •charts •audio • video • flash animation files • animated clip art • movie clips • links to Web sites
  • 4.
    PowerPoint  With PowerPointyou can  Enter and edit text easily  Change the appearance of information  Organize and arrange information  Incorporate information from other sources  Present information in a variety of ways  Collaborate on a presentation with others
  • 5.
     It hastwo tabs – Slides tab and the Outline tab.  Slides tab displays all slides as small pictures or thumbnails  Outline Tab displays all text on the slides in outline form. This tab does not show any graphics. It gives a quick overview of slides.
  • 7.
    Slide Views Presentations canbe viewed in a variety of manners. On the View tab, the Presentation Views group allows you to view the slides as Normal, Slide Sorter, Notes Page, Slide Show, Slide Master, Handout Master, and Notes Master.
  • 8.
    PowerPoint has fiveprimary views -  Normal view  Slide Sorter view  Notes Page view  Slide Show view  Reading view Normal View: This is the default view where you create and edit your slides. We can also move slides in Slides tab in the pane on the left.
  • 9.
    Slide Sorter View:In this view, miniature slides are arranged on the screen. You can drag and drop slides to easily reorder them, and see more slides at one time.  Notes Page view Notes Page option available on View tab. It displays the notes page for the selected slide, where you can create additional notes for the current slide.  Reading View: This view fills most of the computer screen with a preview of your
  • 10.
    presentation. Unlike SlideShow View, it includes easily accessible buttons for navigation, located at the bottom right.  Slide Show View: This view completely fills the computer screen, and is what the audience will see when they view the presentation. Working With Tables :- Tables are basically data presented or arranged in rows and columns. You can present various forms of data in tables.
  • 11.
     Inserting tables inPowerPoint is clicking Insert > Table and then dragging your mouse down the number of rows and columns you’ll require for your table.
  • 12.
    By default, youcan insert a 10-column x 8-row table (10×8 table) using this method.   If you want a larger table, then you can choose the Insert Table option and just manually type in the number of columns and rows you require.
  • 13.
     To edit andchange the layout or format of your tables, you will need to click on the table you want to edit to access the hidden Table Tools menu. You’ll then be presented with the Design and Layout tab.
  • 14.
    If you wantto change your table’s design and appearance, then click on the Design tab. Likewise, if you want to change the table’s layout, then click on the Layout tab. If you want to add more rows or columns, you will find this option in the Layout tab.
  • 15.
    Editing data intable:-  To edit data in a table, click on the cell to be modified and make changes in it.  To insert new rows in a table: oPlace the insertion point in a cell. oClick the right mouse button. oSelect Insert option and click on either Insert Rows Above or Insert Rows Below sub-option.  To apply different background colours : o Select the table by clicking on the outside border. o Click on Shading button in the Design tab. o Select a colour of your choice.
  • 16.
     To deletea row or a column from a table, click on Delete button in the Rows & Columns group on the Layout tab. Select the required option. TABLE STYLES:- When you insert a table, PowerPoint automatically applies a table styles to the table. You can view the Style options in the Table Styles group on the Design tab.  To apply a table style, first select the table.  Click the Design tab to access all the Table Styles and Options.  Point the cursor over a table style to see a live preview of the styles on the slide.
  • 17.
     Click theMore drop-down arrow to view all the options.  Click on the desired style to select it. TO CHANGE TABLE SHADING :-  Select the table.  Select the Design tab.  Select the rows or column that you want to modify.  Click the Shading option in the Table Styles group and select any colour of your choice.
  • 18.
    QUICK REVIEW :- PowerPoint is a program used to create professional presentations.  PowerPoint has five primary views - oNormal view oSlide Sorter view oNotes Page view oSlide Show view oReading view  Tables are basically data presented or arranged in rows and columns.