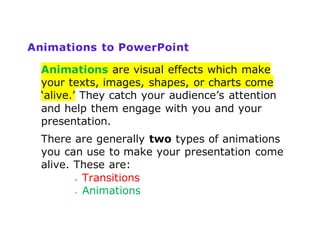
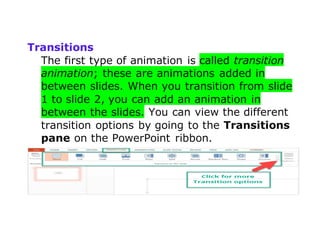
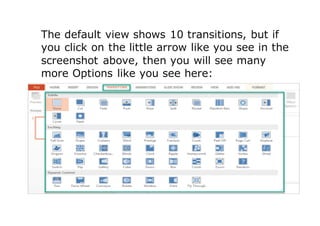
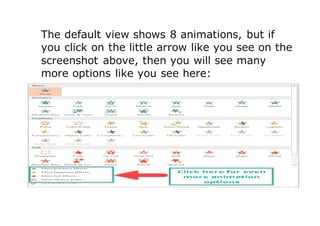
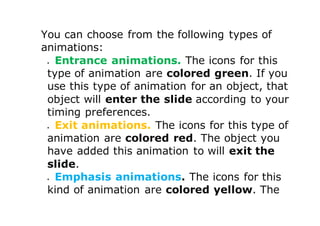
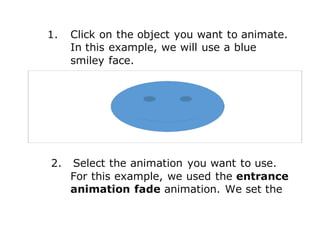
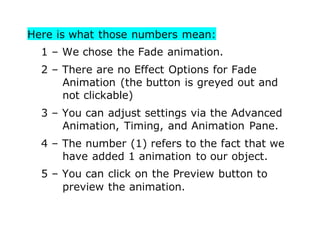
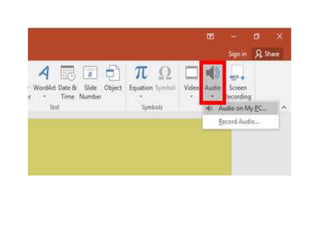
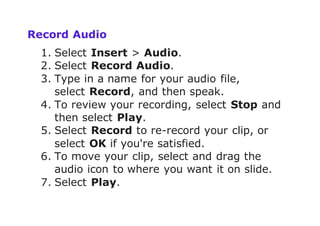
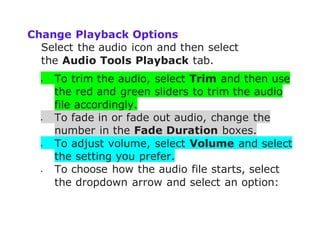
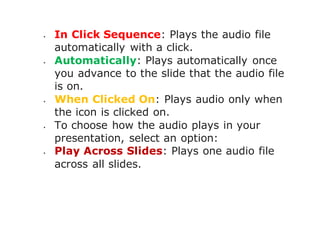
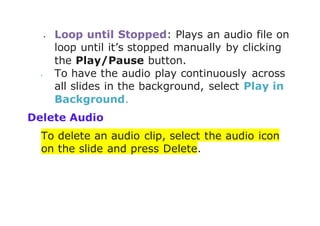
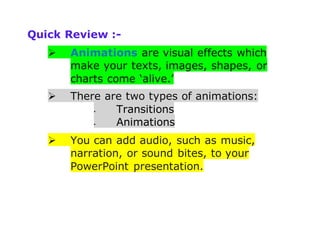
TOPIC :-
 Introduction
 Types of Animation
 Add Animation to Presentation
 Audio
 Add
 Insert Recorded Audio
 Playback Options
 Delete
 Quick Review
Animations to PowerPoint
Animations are visual effects which make
your texts, images, shapes, or charts come
‘alive.’ They catch your audience’s attention
and help them engage with you and your
presentation.
There are generally two types of animations
you can use to make your presentation come
alive. These are:
 Transitions
 Animations
Transitions
The first type of animation is called transition
animation; these are animations added in
between slides. When you transition from slide
1 to slide 2, you can add an animation in
between the slides. You can view the different
transition options by going to the Transitions
pane on the PowerPoint ribbon.
The default view shows 10 transitions, but if
you click on the little arrow like you see in the
screenshot above, then you will see many
more Options like you see here:
Transition animations have additional effect
options. You will notice this when you click on
the transition you want to use. The Effect
Options button will not be greyed out, and
you can select additional settings.
For example, I selected ‘Reveal’ as my
transition animation. Available effect options
would be:
 Smoothly from right
 Smoothly from left
 Through black from right
 Through black from left
Here is a screenshot of what it looks like:
You can also adjust the timing and duration of
each transition as well as set how you want
the slides to advance so that the transition
can take place.
Feel free to play around with the transition
animations and effect options that work best
with your presentation.
Animations
The second type of animations brings the
objects or elements within your slide to life. If
you want to animate text, an image, shape,
graph or chart, this is the type of animation
you select.
You first to have to click on the object you
want to animate, then click on the
Animations tab.
The default view shows 8 animations, but if
you click on the little arrow like you see on the
screenshot above, then you will see many
more options like you see here:
You can choose from the following types of
animations:
 Entrance animations. The icons for this
type of animation are colored green. If you
use this type of animation for an object, that
object will enter the slide according to your
timing preferences.
 Exit animations. The icons for this type of
animation are colored red. The object you
have added this animation to will exit the
slide.
 Emphasis animations. The icons for this
kind of animation are colored yellow. The
object will not enter or exit the slide (unless
you have added that particular animation to
the same object) but will emphasize and
draw attention to that object.
 Motion path animations. This type of
animation will allow you to move an object
from one spot to another. You can specify
or draw the path you want the object to
take.
Add Animations to PowerPoint
To add entrance animations to any object in
PowerPoint, here is what you need to do:
1. Click on the object you want to animate.
In this example, we will use a blue
smiley face.
2. Select the animation you want to use.
For this example, we used the entrance
animation fade animation. We set the
duration to 2.75 seconds. You will notice
in the screenshot below that the fade
animation has no effect options (the
button is greyed out).
Here is what those numbers mean:
1 – We chose the Fade animation.
2 – There are no Effect Options for Fade
Animation (the button is greyed out and
not clickable)
3 – You can adjust settings via the Advanced
Animation, Timing, and Animation Pane.
4 – The number (1) refers to the fact that we
have added 1 animation to our object.
5 – You can click on the Preview button to
preview the animation.
Add or Delete Audio in Presentation
You can add audio, such as music, narration, or
sound bites, to your PowerPoint presentation.
To record and hear any audio, your computer
must be equipped with a sound card,
microphone, and speakers.
Add audio from your PC
1. Select Insert > Audio.
2. Select Audio on My PC.
3. In the Insert Audio dialog box, select the
audio file you want to add.
4. Select Insert.
Record Audio
1. Select Insert > Audio.
2. Select Record Audio.
3. Type in a name for your audio file,
select Record, and then speak.
4. To review your recording, select Stop and
then select Play.
5. Select Record to re-record your clip, or
select OK if you're satisfied.
6. To move your clip, select and drag the
audio icon to where you want it on slide.
7. Select Play.
Change Playback Options
Select the audio icon and then select
the Audio Tools Playback tab.
 To trim the audio, select Trim and then use
the red and green sliders to trim the audio
file accordingly.
 To fade in or fade out audio, change the
number in the Fade Duration boxes.
 To adjust volume, select Volume and select
the setting you prefer.
 To choose how the audio file starts, select
the dropdown arrow and select an option:
 In Click Sequence: Plays the audio file
automatically with a click.
 Automatically: Plays automatically once
you advance to the slide that the audio file
is on.
 When Clicked On: Plays audio only when
the icon is clicked on.
 To choose how the audio plays in your
presentation, select an option:
 Play Across Slides: Plays one audio file
across all slides.
 Loop until Stopped: Plays an audio file on
loop until it’s stopped manually by clicking
the Play/Pause button.
 To have the audio play continuously across
all slides in the background, select Play in
Background.
Delete Audio
To delete an audio clip, select the audio icon
on the slide and press Delete.
Quick Review :-
 Animations are visual effects which
make your texts, images, shapes, or
charts come ‘alive.’
 There are two types of animations:
 Transitions
 Animations
 You can add audio, such as music,
narration, or sound bites, to your
PowerPoint presentation.
Animation in powerpoint part 1

Animation in powerpoint part 1

  • 2.
    TOPIC :-  Introduction Types of Animation  Add Animation to Presentation  Audio  Add  Insert Recorded Audio  Playback Options  Delete  Quick Review
  • 3.
    Animations to PowerPoint Animationsare visual effects which make your texts, images, shapes, or charts come ‘alive.’ They catch your audience’s attention and help them engage with you and your presentation. There are generally two types of animations you can use to make your presentation come alive. These are:  Transitions  Animations
  • 4.
    Transitions The first typeof animation is called transition animation; these are animations added in between slides. When you transition from slide 1 to slide 2, you can add an animation in between the slides. You can view the different transition options by going to the Transitions pane on the PowerPoint ribbon.
  • 5.
    The default viewshows 10 transitions, but if you click on the little arrow like you see in the screenshot above, then you will see many more Options like you see here:
  • 6.
    Transition animations haveadditional effect options. You will notice this when you click on the transition you want to use. The Effect Options button will not be greyed out, and you can select additional settings. For example, I selected ‘Reveal’ as my transition animation. Available effect options would be:  Smoothly from right  Smoothly from left  Through black from right  Through black from left
  • 7.
    Here is ascreenshot of what it looks like: You can also adjust the timing and duration of each transition as well as set how you want
  • 8.
    the slides toadvance so that the transition can take place. Feel free to play around with the transition animations and effect options that work best with your presentation.
  • 9.
    Animations The second typeof animations brings the objects or elements within your slide to life. If you want to animate text, an image, shape, graph or chart, this is the type of animation you select. You first to have to click on the object you want to animate, then click on the Animations tab.
  • 10.
    The default viewshows 8 animations, but if you click on the little arrow like you see on the screenshot above, then you will see many more options like you see here:
  • 11.
    You can choosefrom the following types of animations:  Entrance animations. The icons for this type of animation are colored green. If you use this type of animation for an object, that object will enter the slide according to your timing preferences.  Exit animations. The icons for this type of animation are colored red. The object you have added this animation to will exit the slide.  Emphasis animations. The icons for this kind of animation are colored yellow. The
  • 12.
    object will notenter or exit the slide (unless you have added that particular animation to the same object) but will emphasize and draw attention to that object.  Motion path animations. This type of animation will allow you to move an object from one spot to another. You can specify or draw the path you want the object to take. Add Animations to PowerPoint To add entrance animations to any object in PowerPoint, here is what you need to do:
  • 13.
    1. Click onthe object you want to animate. In this example, we will use a blue smiley face. 2. Select the animation you want to use. For this example, we used the entrance animation fade animation. We set the
  • 14.
    duration to 2.75seconds. You will notice in the screenshot below that the fade animation has no effect options (the button is greyed out).
  • 15.
    Here is whatthose numbers mean: 1 – We chose the Fade animation. 2 – There are no Effect Options for Fade Animation (the button is greyed out and not clickable) 3 – You can adjust settings via the Advanced Animation, Timing, and Animation Pane. 4 – The number (1) refers to the fact that we have added 1 animation to our object. 5 – You can click on the Preview button to preview the animation.
  • 16.
    Add or DeleteAudio in Presentation You can add audio, such as music, narration, or sound bites, to your PowerPoint presentation. To record and hear any audio, your computer must be equipped with a sound card, microphone, and speakers. Add audio from your PC 1. Select Insert > Audio. 2. Select Audio on My PC. 3. In the Insert Audio dialog box, select the audio file you want to add. 4. Select Insert.
  • 18.
    Record Audio 1. SelectInsert > Audio. 2. Select Record Audio. 3. Type in a name for your audio file, select Record, and then speak. 4. To review your recording, select Stop and then select Play. 5. Select Record to re-record your clip, or select OK if you're satisfied. 6. To move your clip, select and drag the audio icon to where you want it on slide. 7. Select Play.
  • 19.
    Change Playback Options Selectthe audio icon and then select the Audio Tools Playback tab.  To trim the audio, select Trim and then use the red and green sliders to trim the audio file accordingly.  To fade in or fade out audio, change the number in the Fade Duration boxes.  To adjust volume, select Volume and select the setting you prefer.  To choose how the audio file starts, select the dropdown arrow and select an option:
  • 20.
     In ClickSequence: Plays the audio file automatically with a click.  Automatically: Plays automatically once you advance to the slide that the audio file is on.  When Clicked On: Plays audio only when the icon is clicked on.  To choose how the audio plays in your presentation, select an option:  Play Across Slides: Plays one audio file across all slides.
  • 21.
     Loop untilStopped: Plays an audio file on loop until it’s stopped manually by clicking the Play/Pause button.  To have the audio play continuously across all slides in the background, select Play in Background. Delete Audio To delete an audio clip, select the audio icon on the slide and press Delete.
  • 22.
    Quick Review :- Animations are visual effects which make your texts, images, shapes, or charts come ‘alive.’  There are two types of animations:  Transitions  Animations  You can add audio, such as music, narration, or sound bites, to your PowerPoint presentation.