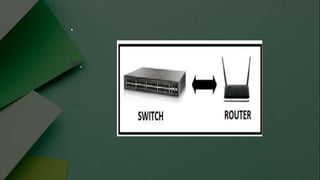
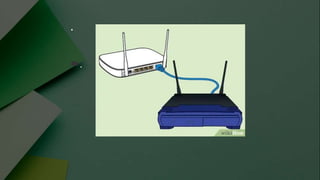
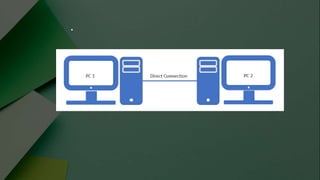
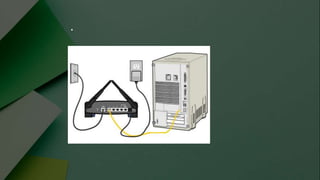
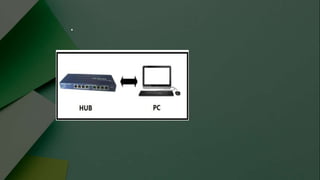
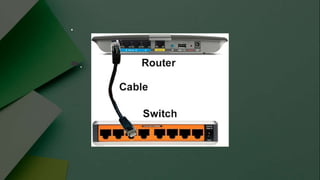
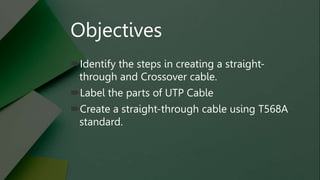
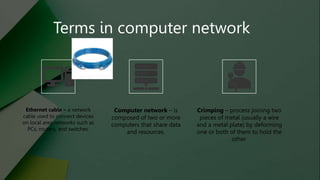
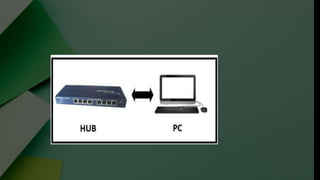
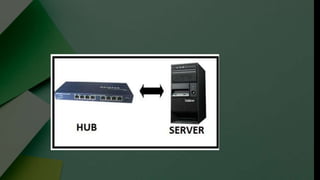
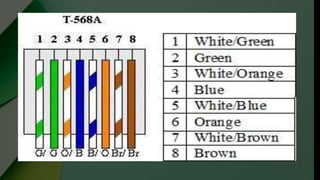
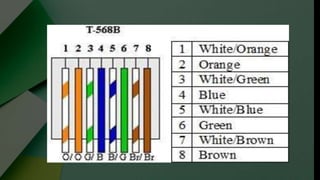
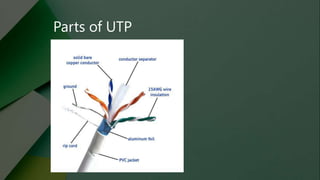
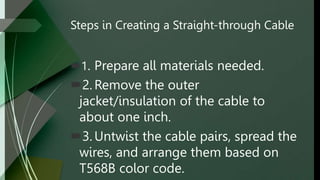
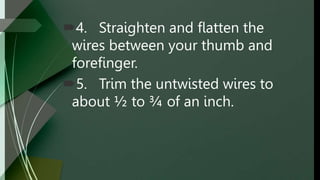
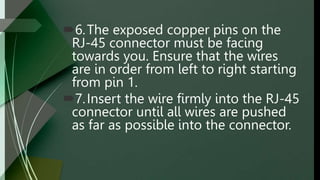
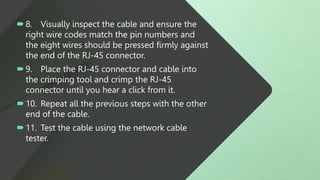
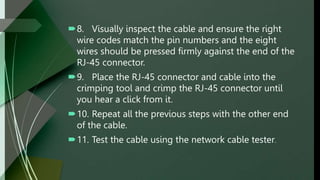
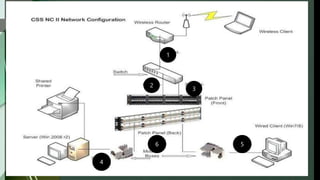
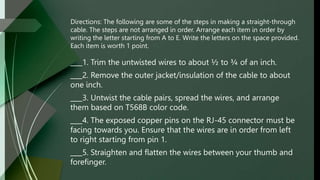
Network Cabling: Straight-through
Cables And Crossover Cables
.
Identify the following connection if it
is straight through or crossover.
.
.
.
.
.
.
.
.
.
.
.
.
.
.
.
.
.
.
Identify the steps in creating a straight-
through and Crossover cable.
Label the parts of UTP Cable
Create a straight-through cable using T568A
standard.
Objectives
Terms in computer network
Ethernet cable – a network
cable used to connect devices
on local area networks such as
PCs, routers, and switches.
Computer network – is
composed of two or more
computers that share data
and resources.
Crimping – process joining two
pieces of metal (usually a wire
and a metal plate) by deforming
one or both of them to hold the
other.
Terms in computer network
Local Area
(LAN) – a group of
interconnected
computers that are
under the same
administrative
control.
Pin - piece of
metal used to
fasten two
things
together..
Ethernet/LAN Cabling
the process of creating cable
used to create a network that
interconnects computers and
other network devices.
Types of Ethernet/LAN Cables
1. Straight-through Cable
2.Crossover Cable
Straight-through cable
a type of twisted pair cable that is
used in local area networks to connect
a computer to a network hub such as a
router.
these are the connections that use
straight-through cable
Crossover Cables
An Ethernet crossover cable is a network cable used to
connect two Ethernet network devices directly, such as
two computers without a switch or router in between.
They are used to send and receive data by enabling
complex data transfers between computers, routers, and
networks. Ethernet crossover cables are similar to
straight-through cable except that they have pairs of
wires that crisscross.
Crossover Cables
Color Coding network standard
1. T568A
2. T568B
Parts of UTP
Safety Precautions:
• Avoid horse playing
• Use the proper tool
• Always be on task
• Be vigilant
Steps in Creating a Straight-through Cable
1. Prepare all materials needed.
2. Remove the outer
jacket/insulation of the cable to
about one inch.
3. Untwist the cable pairs, spread the
wires, and arrange them based on
T568B color code.
4. Straighten and flatten the
wires between your thumb and
forefinger.
5. Trim the untwisted wires to
about ½ to ¾ of an inch.
6.The exposed copper pins on the
RJ-45 connector must be facing
towards you. Ensure that the wires
are in order from left to right starting
from pin 1.
7.Insert the wire firmly into the RJ-45
connector until all wires are pushed
as far as possible into the connector.
8. Visually inspect the cable and ensure the
right wire codes match the pin numbers and
the eight wires should be pressed firmly against
the end of the RJ-45 connector.
9. Place the RJ-45 connector and cable into
the crimping tool and crimp the RJ-45
connector until you hear a click from it.
10. Repeat all the previous steps with the other
end of the cable.
11. Test the cable using the network cable
tester.
8. Visually inspect the cable and ensure the right
wire codes match the pin numbers and the eight
wires should be pressed firmly against the end of the
RJ-45 connector.
9. Place the RJ-45 connector and cable into the
crimping tool and crimp the RJ-45 connector until
you hear a click from it.
10. Repeat all the previous steps with the other end
of the cable.
11. Test the cable using the network cable tester.
1
2
3
5
4
6
Directions: The following are some of the steps in making a straight-through
cable. The steps are not arranged in order. Arrange each item in order by
writing the letter starting from A to E. Write the letters on the space provided.
Each item is worth 1 point.
1. Trim the untwisted wires to about ½ to ¾ of an inch.
2. Remove the outer jacket/insulation of the cable to about
one inch.
3. Untwist the cable pairs, spread the wires, and arrange
them based on T568B color code.
4. The exposed copper pins on the RJ-45 connector must be
facing towards you. Ensure that the wires are in order from left
to right starting from pin 1.
5. Straighten and flatten the wires between your thumb and
forefinger.
Directions: label the parts of UTP cable
1.
4
5
2.
3.
7.
6.

Network Cabling in set up computer system servicing.pptx

  • 1.
  • 2.
    . Identify the followingconnection if it is straight through or crossover.
  • 3.
  • 4.
  • 5.
  • 6.
  • 7.
  • 8.
  • 9.
  • 10.
  • 11.
  • 12.
    Identify the stepsin creating a straight- through and Crossover cable. Label the parts of UTP Cable Create a straight-through cable using T568A standard. Objectives
  • 13.
    Terms in computernetwork Ethernet cable – a network cable used to connect devices on local area networks such as PCs, routers, and switches. Computer network – is composed of two or more computers that share data and resources. Crimping – process joining two pieces of metal (usually a wire and a metal plate) by deforming one or both of them to hold the other.
  • 14.
    Terms in computernetwork Local Area (LAN) – a group of interconnected computers that are under the same administrative control. Pin - piece of metal used to fasten two things together..
  • 15.
    Ethernet/LAN Cabling the processof creating cable used to create a network that interconnects computers and other network devices.
  • 16.
    Types of Ethernet/LANCables 1. Straight-through Cable 2.Crossover Cable
  • 17.
    Straight-through cable a typeof twisted pair cable that is used in local area networks to connect a computer to a network hub such as a router.
  • 18.
    these are theconnections that use straight-through cable
  • 23.
    Crossover Cables An Ethernetcrossover cable is a network cable used to connect two Ethernet network devices directly, such as two computers without a switch or router in between. They are used to send and receive data by enabling complex data transfers between computers, routers, and networks. Ethernet crossover cables are similar to straight-through cable except that they have pairs of wires that crisscross.
  • 24.
  • 25.
    Color Coding networkstandard 1. T568A 2. T568B
  • 28.
  • 29.
    Safety Precautions: • Avoidhorse playing • Use the proper tool • Always be on task • Be vigilant
  • 30.
    Steps in Creatinga Straight-through Cable 1. Prepare all materials needed. 2. Remove the outer jacket/insulation of the cable to about one inch. 3. Untwist the cable pairs, spread the wires, and arrange them based on T568B color code.
  • 31.
    4. Straighten andflatten the wires between your thumb and forefinger. 5. Trim the untwisted wires to about ½ to ¾ of an inch.
  • 32.
    6.The exposed copperpins on the RJ-45 connector must be facing towards you. Ensure that the wires are in order from left to right starting from pin 1. 7.Insert the wire firmly into the RJ-45 connector until all wires are pushed as far as possible into the connector.
  • 33.
    8. Visually inspectthe cable and ensure the right wire codes match the pin numbers and the eight wires should be pressed firmly against the end of the RJ-45 connector. 9. Place the RJ-45 connector and cable into the crimping tool and crimp the RJ-45 connector until you hear a click from it. 10. Repeat all the previous steps with the other end of the cable. 11. Test the cable using the network cable tester.
  • 34.
    8. Visually inspectthe cable and ensure the right wire codes match the pin numbers and the eight wires should be pressed firmly against the end of the RJ-45 connector. 9. Place the RJ-45 connector and cable into the crimping tool and crimp the RJ-45 connector until you hear a click from it. 10. Repeat all the previous steps with the other end of the cable. 11. Test the cable using the network cable tester.
  • 35.
  • 36.
    Directions: The followingare some of the steps in making a straight-through cable. The steps are not arranged in order. Arrange each item in order by writing the letter starting from A to E. Write the letters on the space provided. Each item is worth 1 point. 1. Trim the untwisted wires to about ½ to ¾ of an inch. 2. Remove the outer jacket/insulation of the cable to about one inch. 3. Untwist the cable pairs, spread the wires, and arrange them based on T568B color code. 4. The exposed copper pins on the RJ-45 connector must be facing towards you. Ensure that the wires are in order from left to right starting from pin 1. 5. Straighten and flatten the wires between your thumb and forefinger.
  • 37.
    Directions: label theparts of UTP cable 1. 4 5 2. 3. 7. 6.