L13 CSS STRUCTURED CABLING SYSTEM
At the end of this module the learners will be able to . . .
○ Describe the role of different LAN cable in computer network according to its type.
○ Explain and enumerate the different types of LAN cable and its use.
○ List the standardization organization in computer networking and structured cabling system.
○ List the evolution and characteristic of computer cabling standardization.
CSS L15 - CRIMPING ETHERNET CABLE AND RJ45Marvin Bronoso
CSS L15 - CRIMPING ETHERNET CABLE AND RJ45
At the end of this learning module the student are able to:
○Crimp Ethernet wire and RJ-45 to establish computer network connection.
○Understand the differences straight through and crossover type of network cabling.
○Learn the T568A and T568B pin out of twisted pair wiring.
Program/Course : Computer System Servicing NC II
Unit of Competency : Set-up Computer Networks
Module : Install Network Cables
Learning Outcome 01: Installing Network Cables
for full compilation just visit my website.
http://computersystemsolution.com/
After this module the learners will be able to . . .
○ Enumerate and discuss the tools and equipment use in computer networking.
○ Discuss the color scheme of T568A and T568B standardization of network cabling system.
Competency Code: TLE_IACSS9-12UHT-IIIa-17
After reading this lesson , you should be able to:
1. Identify the different tools and equipment used in computer systems and networks
2. Determine the different use and functions of these tools and equipment’s
At the end of this learning module the student are able to:
○ Crimp Ethernet wire and RJ-45 to establish computer network connection.
○ Understand the differences straight through and crossover type of network cabling.
○ Learn the T568A and T568B pin out of twisted pair wiring.
A tool is a handheld device that aids in accomplishing a tasks. Tools range from a traditional metal cutting part of a machine to an element of a computer program that activates and controls a particular function.
For more course tutorials visit
www.tutorialrank.com
Chapter 1-Questions
1-3: Discuss the relationship between network architecture and protocol
1-5: Define the following terms: protocol, connection-orientated protocols, connectionless protocols, and protocol stacks.
1-11: Briefly describe the seven layers of the OSI protocol hierarchy
For more course tutorials visit
www.newtonhelp.com
Chapter 1-Questions
1-3: Discuss the relationship between network architecture and protocol
1-5: Define the following terms: protocol, connection-orientated protocols, connectionless protocols, and protocol stacks.
This topic is will help you to regarding competency base curriculum and will give you an idea to what will do with the competency base curriculum and will give you also tips to make the competency base curriculum to help a lot with the teachers, trainers, and trainee as an educator, will help you also when you were plan to take the assessment and will give you also an idea with your review that will make you easy to understand what will you to do.
Peripherals are additional devices that are attached to the computer they can be classified as input, output, input-output or network as discussed in the previous unit.
Ports offer standard connection points between the motherboard and external devices.
TLE CES NC II Y2 - Module 3 - Interpreting Technical Drawing.docGirlyPedregosa1
TLE CES NC II
CBLM
Y2 - Module 3 - Interpreting Technical Drawing
Unit of Competency: PERFORMING MENSURATION AND CALCULATION
Module No. 2 Module Title: PERFORMING MENSURATION AND CALCULATION
Welcome to the Module “Performing Mensuration and Calculation”. This module contains training materials and activities for you to complete.
The unit of competency “Perform Mensuration and Calculation” contains the knowledge, skills and attitudes required for Consumer Electronic Servicing required to obtain the National Certificate (NC) level II.
You are required to go through a series of learning activities in order to complete each of the learning outcomes of the module. In each learning outcome there are Information Sheets and Activity Sheets. Do these activities on your own and answer the Self-Check at the end of each learning activity.
UiPath Test Automation using UiPath Test Suite series, part 3DianaGray10
Welcome to UiPath Test Automation using UiPath Test Suite series part 3. In this session, we will cover desktop automation along with UI automation.
Topics covered:
UI automation Introduction,
UI automation Sample
Desktop automation flow
Pradeep Chinnala, Senior Consultant Automation Developer @WonderBotz and UiPath MVP
Deepak Rai, Automation Practice Lead, Boundaryless Group and UiPath MVP
LF Energy Webinar: Electrical Grid Modelling and Simulation Through PowSyBl -...DanBrown980551
Do you want to learn how to model and simulate an electrical network from scratch in under an hour?
Then welcome to this PowSyBl workshop, hosted by Rte, the French Transmission System Operator (TSO)!
During the webinar, you will discover the PowSyBl ecosystem as well as handle and study an electrical network through an interactive Python notebook.
PowSyBl is an open source project hosted by LF Energy, which offers a comprehensive set of features for electrical grid modelling and simulation. Among other advanced features, PowSyBl provides:
- A fully editable and extendable library for grid component modelling;
- Visualization tools to display your network;
- Grid simulation tools, such as power flows, security analyses (with or without remedial actions) and sensitivity analyses;
The framework is mostly written in Java, with a Python binding so that Python developers can access PowSyBl functionalities as well.
What you will learn during the webinar:
- For beginners: discover PowSyBl's functionalities through a quick general presentation and the notebook, without needing any expert coding skills;
- For advanced developers: master the skills to efficiently apply PowSyBl functionalities to your real-world scenarios.
Generating a custom Ruby SDK for your web service or Rails API using Smithyg2nightmarescribd
Have you ever wanted a Ruby client API to communicate with your web service? Smithy is a protocol-agnostic language for defining services and SDKs. Smithy Ruby is an implementation of Smithy that generates a Ruby SDK using a Smithy model. In this talk, we will explore Smithy and Smithy Ruby to learn how to generate custom feature-rich SDKs that can communicate with any web service, such as a Rails JSON API.
Elevating Tactical DDD Patterns Through Object CalisthenicsDorra BARTAGUIZ
After immersing yourself in the blue book and its red counterpart, attending DDD-focused conferences, and applying tactical patterns, you're left with a crucial question: How do I ensure my design is effective? Tactical patterns within Domain-Driven Design (DDD) serve as guiding principles for creating clear and manageable domain models. However, achieving success with these patterns requires additional guidance. Interestingly, we've observed that a set of constraints initially designed for training purposes remarkably aligns with effective pattern implementation, offering a more ‘mechanical’ approach. Let's explore together how Object Calisthenics can elevate the design of your tactical DDD patterns, offering concrete help for those venturing into DDD for the first time!
JMeter webinar - integration with InfluxDB and GrafanaRTTS
Watch this recorded webinar about real-time monitoring of application performance. See how to integrate Apache JMeter, the open-source leader in performance testing, with InfluxDB, the open-source time-series database, and Grafana, the open-source analytics and visualization application.
In this webinar, we will review the benefits of leveraging InfluxDB and Grafana when executing load tests and demonstrate how these tools are used to visualize performance metrics.
Length: 30 minutes
Session Overview
-------------------------------------------
During this webinar, we will cover the following topics while demonstrating the integrations of JMeter, InfluxDB and Grafana:
- What out-of-the-box solutions are available for real-time monitoring JMeter tests?
- What are the benefits of integrating InfluxDB and Grafana into the load testing stack?
- Which features are provided by Grafana?
- Demonstration of InfluxDB and Grafana using a practice web application
To view the webinar recording, go to:
https://www.rttsweb.com/jmeter-integration-webinar
Accelerate your Kubernetes clusters with Varnish CachingThijs Feryn
A presentation about the usage and availability of Varnish on Kubernetes. This talk explores the capabilities of Varnish caching and shows how to use the Varnish Helm chart to deploy it to Kubernetes.
This presentation was delivered at K8SUG Singapore. See https://feryn.eu/presentations/accelerate-your-kubernetes-clusters-with-varnish-caching-k8sug-singapore-28-2024 for more details.
Essentials of Automations: Optimizing FME Workflows with ParametersSafe Software
Are you looking to streamline your workflows and boost your projects’ efficiency? Do you find yourself searching for ways to add flexibility and control over your FME workflows? If so, you’re in the right place.
Join us for an insightful dive into the world of FME parameters, a critical element in optimizing workflow efficiency. This webinar marks the beginning of our three-part “Essentials of Automation” series. This first webinar is designed to equip you with the knowledge and skills to utilize parameters effectively: enhancing the flexibility, maintainability, and user control of your FME projects.
Here’s what you’ll gain:
- Essentials of FME Parameters: Understand the pivotal role of parameters, including Reader/Writer, Transformer, User, and FME Flow categories. Discover how they are the key to unlocking automation and optimization within your workflows.
- Practical Applications in FME Form: Delve into key user parameter types including choice, connections, and file URLs. Allow users to control how a workflow runs, making your workflows more reusable. Learn to import values and deliver the best user experience for your workflows while enhancing accuracy.
- Optimization Strategies in FME Flow: Explore the creation and strategic deployment of parameters in FME Flow, including the use of deployment and geometry parameters, to maximize workflow efficiency.
- Pro Tips for Success: Gain insights on parameterizing connections and leveraging new features like Conditional Visibility for clarity and simplicity.
We’ll wrap up with a glimpse into future webinars, followed by a Q&A session to address your specific questions surrounding this topic.
Don’t miss this opportunity to elevate your FME expertise and drive your projects to new heights of efficiency.
Connector Corner: Automate dynamic content and events by pushing a buttonDianaGray10
Here is something new! In our next Connector Corner webinar, we will demonstrate how you can use a single workflow to:
Create a campaign using Mailchimp with merge tags/fields
Send an interactive Slack channel message (using buttons)
Have the message received by managers and peers along with a test email for review
But there’s more:
In a second workflow supporting the same use case, you’ll see:
Your campaign sent to target colleagues for approval
If the “Approve” button is clicked, a Jira/Zendesk ticket is created for the marketing design team
But—if the “Reject” button is pushed, colleagues will be alerted via Slack message
Join us to learn more about this new, human-in-the-loop capability, brought to you by Integration Service connectors.
And...
Speakers:
Akshay Agnihotri, Product Manager
Charlie Greenberg, Host
De-mystifying Zero to One: Design Informed Techniques for Greenfield Innovati...
Network Cable Splicing LP
1. Republic of the Philippines
Department of Education
Region IX, Zamboanga Peninsula
Division of Pagadian City
STA. LUCIA NATIONAL HIGH SCHOOL
LESSON PLAN IN COMPUTER SYSTEMS SERVICING
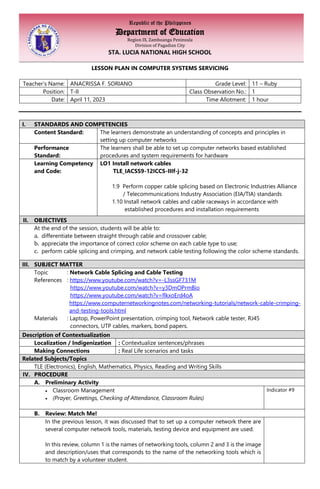
Teacher’s Name: ANACRISSA F. SORIANO Grade Level: 11 – Ruby
Position: T-II Class Observation No.: 1
Date: April 11, 2023 Time Allotment: 1 hour
I. STANDARDS AND COMPETENCIES
Content Standard: The learners demonstrate an understanding of concepts and principles in
setting up computer networks
Performance
Standard:
The learners shall be able to set up computer networks based established
procedures and system requirements for hardware
Learning Competency
and Code:
LO1 Install network cables
TLE_IACSS9-12ICCS-IIIf-j-32
1.9 Perform copper cable splicing based on Electronic Industries Alliance
/ Telecommunications Industry Association (EIA/TIA) standards
1.10 Install network cables and cable raceways in accordance with
established procedures and installation requirements
II. OBJECTIVES
At the end of the session, students will be able to:
a. differentiate between straight through cable and crossover cable;
b. appreciate the importance of correct color scheme on each cable type to use;
c. perform cable splicing and crimping, and network cable testing following the color scheme standards.
III. SUBJECT MATTER
Topic : Network Cable Splicing and Cable Testing
References : https://www.youtube.com/watch?v=-L3ssGF731M
https://www.youtube.com/watch?v=y3DmOPrmBio
https://www.youtube.com/watch?v=flkxoErd4oA
https://www.computernetworkingnotes.com/networking-tutorials/network-cable-crimping-
and-testing-tools.html
Materials : Laptop, PowerPoint presentation, crimping tool, Network cable tester, RJ45
connectors, UTP cables, markers, bond papers.
Description of Contextualization
Localization / Indigenization : Contextualize sentences/phrases
Making Connections : Real Life scenarios and tasks
Related Subjects/Topics
TLE (Electronics), English, Mathematics, Physics, Reading and Writing Skills
IV. PROCEDURE
A. Preliminary Activity
• Classroom Management
• (Prayer, Greetings, Checking of Attendance, Classroom Rules)
Indicator #9
B. Review: Match Me!
In the previous lesson, it was discussed that to set up a computer network there are
several computer network tools, materials, testing device and equipment are used.
In this review, column 1 is the names of networking tools, column 2 and 3 is the image
and description/uses that corresponds to the name of the networking tools which is
to match by a volunteer student.
2. Networking
tools
Picture Description / uses
1. Crimper
(Crimping
tool)
a device used to crimp the RJ45 connector to
the UTP cable. The result of the tool's work is
called a crimp.
2. RJ45
Connector an 8-pin connection used for Ethernet network
adapters. Short for Registered Jack-45
3. Network
Cable
a popular type of cable used in computer
networking that consists of two shielded wires
twisted around each other. Also known as
Unshielded Twisted Pair (UTP).
4. Network
Cable
Tester
A device that is used to test the strength and
connectivity of a particular type of cable or
other wired assemblies.
Assessment (Diagnostic): Review. Use to assess learners’ strength and knowledge achievement of the
objective from the previous lesson. Indicator #9
Using puzzled picture card and working together enhance learner achievement in learners’ literacy
skills through identifying and matching with picture’s description. It also enhances learner achievement
in numeracy skills through the puzzles play by exploring on how and where one puzzle piece fits with
another to make pictures, this type involves spatial reasoning which supports learners’ understanding
of math and science. Indicator #2
Indicator #9
Indicator #2
C. Motivation
• Show pictures of network cable attached in some network equipment and let
students volunteer to explain or describe what they understood about the pictures
shown based on their personal experience and what they already know.
The picture shown displays network cable splicing, untwisting cable, network cable
testing, and the use of LAN Cable to establish network between and among devices in
different circumstances.
Processing Questions:
1. Are the pictures shown familiar to you?
2. Based on the pictures, do you have personal experiences about it, be it in your
learning or your daily life?
3. What do you think will be our topic for today?
A Constructivist Approach to Learning: Students are encouraged to actively participate and share their
ideas in non-traditional ways. Learners construct knowledge based on their beliefs and experiences
rather than passively take in information. Indicator #3. Assessment (Formative): Recitation. Use to
identify learners’ knowledge and skills that can build on or need to improve. Indicator #9.
Indicator #3
Indicator #9
3. D. Introduction (Reading of learning objectives)
E. Lesson Proper
• ACTIVITY (Find the details in Me!)
- The class will be grouped into four (4).
- Each group is given an information sheet.
- Each group representative will pick a strip of paper written the information on
what details to search for or find from the information sheet provided.
- Answer the graphic organizer (Idea Web) provided.
- Each group will choose a reporter to discuss their answer and is given 2 minutes.
Indicator #3
Indicator #9
4. Students work in groups and are encouraged to actively participate. There is an emphasis on collaboration
and exchange of ideas through brainstorming. In this activity, each group are guided by the questions that
will lead them to develop their own output. Indicator #3
Assessment (Formative): Indicator #9
* Teacher should commend and give constructive feedback to every presenter and to the group through
verbal with non-verbal gestures. This helps them improve “knowledge and skill acquisition” as well as
motivate learning.
• ANALYSIS
Processing questions:
1. How did you come up with your choices and ideas?
2. Are you familiar with the straight through and crossover cable? How about
the color schemes or color coding?
3. Have you ever tried doing a task wherein color coding is involved? Can you
state your experience and the situation?
Grade 7 and 8 (Perform Mensuration and Calculation)
Resistor Color Codes: What Do the Color Bands Mean?
The electronics industry standardized a common color-coding system that allowed
equipment designers to identify resistors and other components at a glance.
The color-coding chart:
COLORS 1st
Band 2nd
Band Multiplier Tolerance
BLACK 0 0 x 1
BROWN 1 1 x 10 ± 1%
RED 2 2 x 10²
± 2%
ORANGE 3 3 x 10³
± 3%
YELLOW 4 4 x 10⁴
± 4%
GREEN 5 5 x 10⁵
± 0.5%
BLUE 6 6 x 10⁶
± 0.25%
VIOLET 7 7 x 10⁷
± 0.1%
GRAY 8 8 x 10⁸
± 0.05%
WHITE 9 9 x 10⁹
GOLD x 10-1
or 0.1 ± 5%
SILVER x 10-2
or 0.01 ± 10%
Example: Brown – Black – Brown – Gold
1 0 10 ± 5%
Therefore, 10 x 10 = 100 ohms ± 5%
Yellow – Violet – Yellow – Silver
4 7 10000 ± 10%
Therefore, 47 x 10000 = 470,000 ohms ± 10% or 470k ohms ± 10%
Green – Black – Orange – Gold
5 0 1000 ± 5%
Therefore, 50 x 1000 = 50000 ohms ± 5% or 50k ohms ± 5%
What is the color of the tolerance representing ± 5%? Ans. Gold
Within curriculum teaching area: Electronics (exploration for grade 7 and 8)
Across curriculum teaching area: Mathematics (calculation) Indicator #1
Interpreting the color code using the standard color-coding chart and computing the color value for
resistors supports the learners’ achievement in literacy and numeracy skills. Indicator #2
Assessment (Formative): Indicator #9
Indicator #1
Indicator #2
Indicator #9
5. • ABSTRACTION
- Present the lesson through video presentation on how to do network cable
splicing and testing.
https://www.youtube.com/watch?v=-L3ssGF731M https://www.youtube.com/watch?v=y3DmOPrmBio
Using video tutorials about the topic have a positive effect not only on the students' motivation to
learn but also on students' ability to learn independently. Also, this allows students with different
learning abilities to retain information in a method more suited to them and will improve a
student's comprehension, cognitive ability, or social-emotional skills. Indicator #6 and #8
- Ask the following questions:
1. What does the video clip tell about?
2. How does network cable created?
3. If you are to evaluate yourself now, can you perform network cable splicing
and crimping and cable testing following the color scheme standards?
Assessment (Formative): Indicator #9
Indicator #6
Indicator #8
Indicator #9
• APPLICATION
The class will be grouped into four (4).
• GROUP 1 is assigned to “perform network cable splicing and testing” (straight
through and crossover cable).
• GROUP 2 is assigned to “discovering working cables”.
- The teacher will distribute spliced cables: crossover cable, straight through
cable (T568A), straight through cable (T568B), and not working cable
(unfunctional).
- Guide questions:
1. Identify the type of network cables. How did you identify each cable?
2. Which cable is unfunctional? What could be the possible reason/s?
3. When you conduct the cable testing, what is the light indicator order
of the tester both left and right when inserted?
• GROUP 3 is assigned to “compare and contrast” straight through and cross-over
cable using the Venn Diagram.
Indicator #1
Indicator #2
Indicator #3
Indicator #6
• GROUP 4 is assigned to “steps in network cable splicing and crimping, and network cable testing”
using a sequence diagram.
Strip the UTP cable
using the wire stripper.
Straighten the twisted
wires.
Arrange the untwisted
wires from left to right
based on the network
cable standards to use.
Trim the untwisted wires
to appropriate length.
(1 inch). Keep the wires
flat and in order.
Insert the RJ45 to the
trimmed untwisted
wires.
Make sure all the ends
of the untwisted wires
are placed properly
inside the RJ45.
Use the Crimping tool
to press the RJ45 to the
untwisted wires for a
perfect fit.
Inspect the revealed
wires to any cuts.
Copper wire inside
should not be expose.
Test the cable. Make
sure that light indicator
is ON from light
indicator 1 to 8.
Connects computer to
computer directly.
Both ends: uses two
different wiring standards
Use for connecting
alike devices
Not often used
Ethernet
cables
Color
coded
Network
Connectivity
Use for connecting
unlike devices
Connects computer to
a network hub.
Both ends: uses one
wiring standards
Widely used and popular
6. This approach enhances learner achievement in numeracy skills through the use of mathematical
formulation for the event sequence diagram wherein students’ explore on the first event happen. Ind. #2
Across curriculum teaching area: Reading and Writing Skills (Distinguished between and among techniques
in selecting and organizing information – Graphic Organizer. Indicator #1
Enable students to exercise higher-level thinking skills and better retain knowledge, construct their own
self-directed learning process and develops critical and creative thinking through collaboration and
exchange of ideas (brainstorming), hands-on activity, exploration, analysis, and discovery. Ind. #3 and #6
ASSESSMENT RUBRIC
Assessment (Summative): Skills demonstration and Group presentations. Using rubrics to assess learners’
success in attaining mastery of the lesson. Indicator #9
Criteria 5 3 1
1. Cooperation
All members
participated actively
One or two
members become
inactive in
participation
Majority of group
members become
inactive in the
participation
2. Work Quality
The output was
neatly done without
errors and mistakes.
The output was
neatly done but with
minimal errors and
mistakes.
The output was
unpleasant with
errors and mistakes.
3. Safeness
Always applied
safety handling of all
tools and materials.
Sometimes applied
safety handling of all
tools and materials.
No application of
safety handling of all
the tools and
materials.
4. Timeliness
Finished the task
before the given
time limit.
Finished the task on
the given time limit.
Needs more time to
finish the given task.
F. Generalization
Reading of Learning Objectives:
a. Differentiate between straight through cable and crossover cable.
Can you now differentiate straight through cable and crossover cable?
Ans: Venn Diagram (compare and contrast)
b. Appreciate the importance of correct color scheme on each cable type to used.
How important it is to consider the correct cable type to use based on network needs?
Possible answers:
- Expenses
- Ease of use
c. Perform cable splicing and crimping, and network cable testing following the color scheme
standards.
Ans. Sequence Diagram, outputs, and evaluation
V. EVALUATION
Instruction: Choose the best answer from the given choices.
1. A network cable standard with the following color configuration; white orange, orange, white green
blue, white blue, green, white brown, brown.
A. T568A color scheme
B. T568B color scheme
C. T568C color scheme
7. 2. Which of the statements below is NOT TRUE?
A. A crossover cable has a different end.
B. Crossover cable is most often used to connect two devices of different type.
C. Crossover cable is used to connect computing devices together directly.
3. A type of twisted pair cable that is used in local area networks to connect a computer to a network hub
such as a router.
A. Crossover cable
B. Internet cable
C. Straight through
4. Which of the statements below is TRUE?
A. A crossover cable has an identical end.
B. A straight through cable has different ends.
C. A straight through is used as a patch cord in Ethernet connections.
5. A type of twisted pair cable that is used to connect computing devices together directly.
A. Crossover cable
B. Patch cable
C. Straight through
Arrange the procedures below as to which comes first in network cable splicing and crimping, and cable
testing.
3 1. Straighten the twisted wires.
7 2. Make sure all the ends of the untwisted wires are placed properly inside the RJ45.
5 3. Trim the untwisted wires to appropriate length (1 inch). Keep the wires flat and in order.
1 4. Strip the UTP cable using the wire stripper.
6 5. Insert the RJ45 to the trimmed untwisted wires.
2 6. Inspect the revealed wires to any cuts. Copper wire inside should not be expose.
4 7. Arrange the untwisted wires from left to right based on the network cable standards to use.
9 8. Test the cable. Make sure that light indicator is ON from light indicator 1 to 8.
8 9. Use the Crimping tool to press the RJ45 to the untwisted wires for a perfect fit.
Assessment (Summative): Written work (quiz). Use to identify learners’ achievement of the objective of the lesson. Indicator #9
VI. ADDITIONAL ACTIVITY
Which one should I choose, straight through cable or cross over cable? Write your answer in your
reflection notebook.