Downloaded 184 times


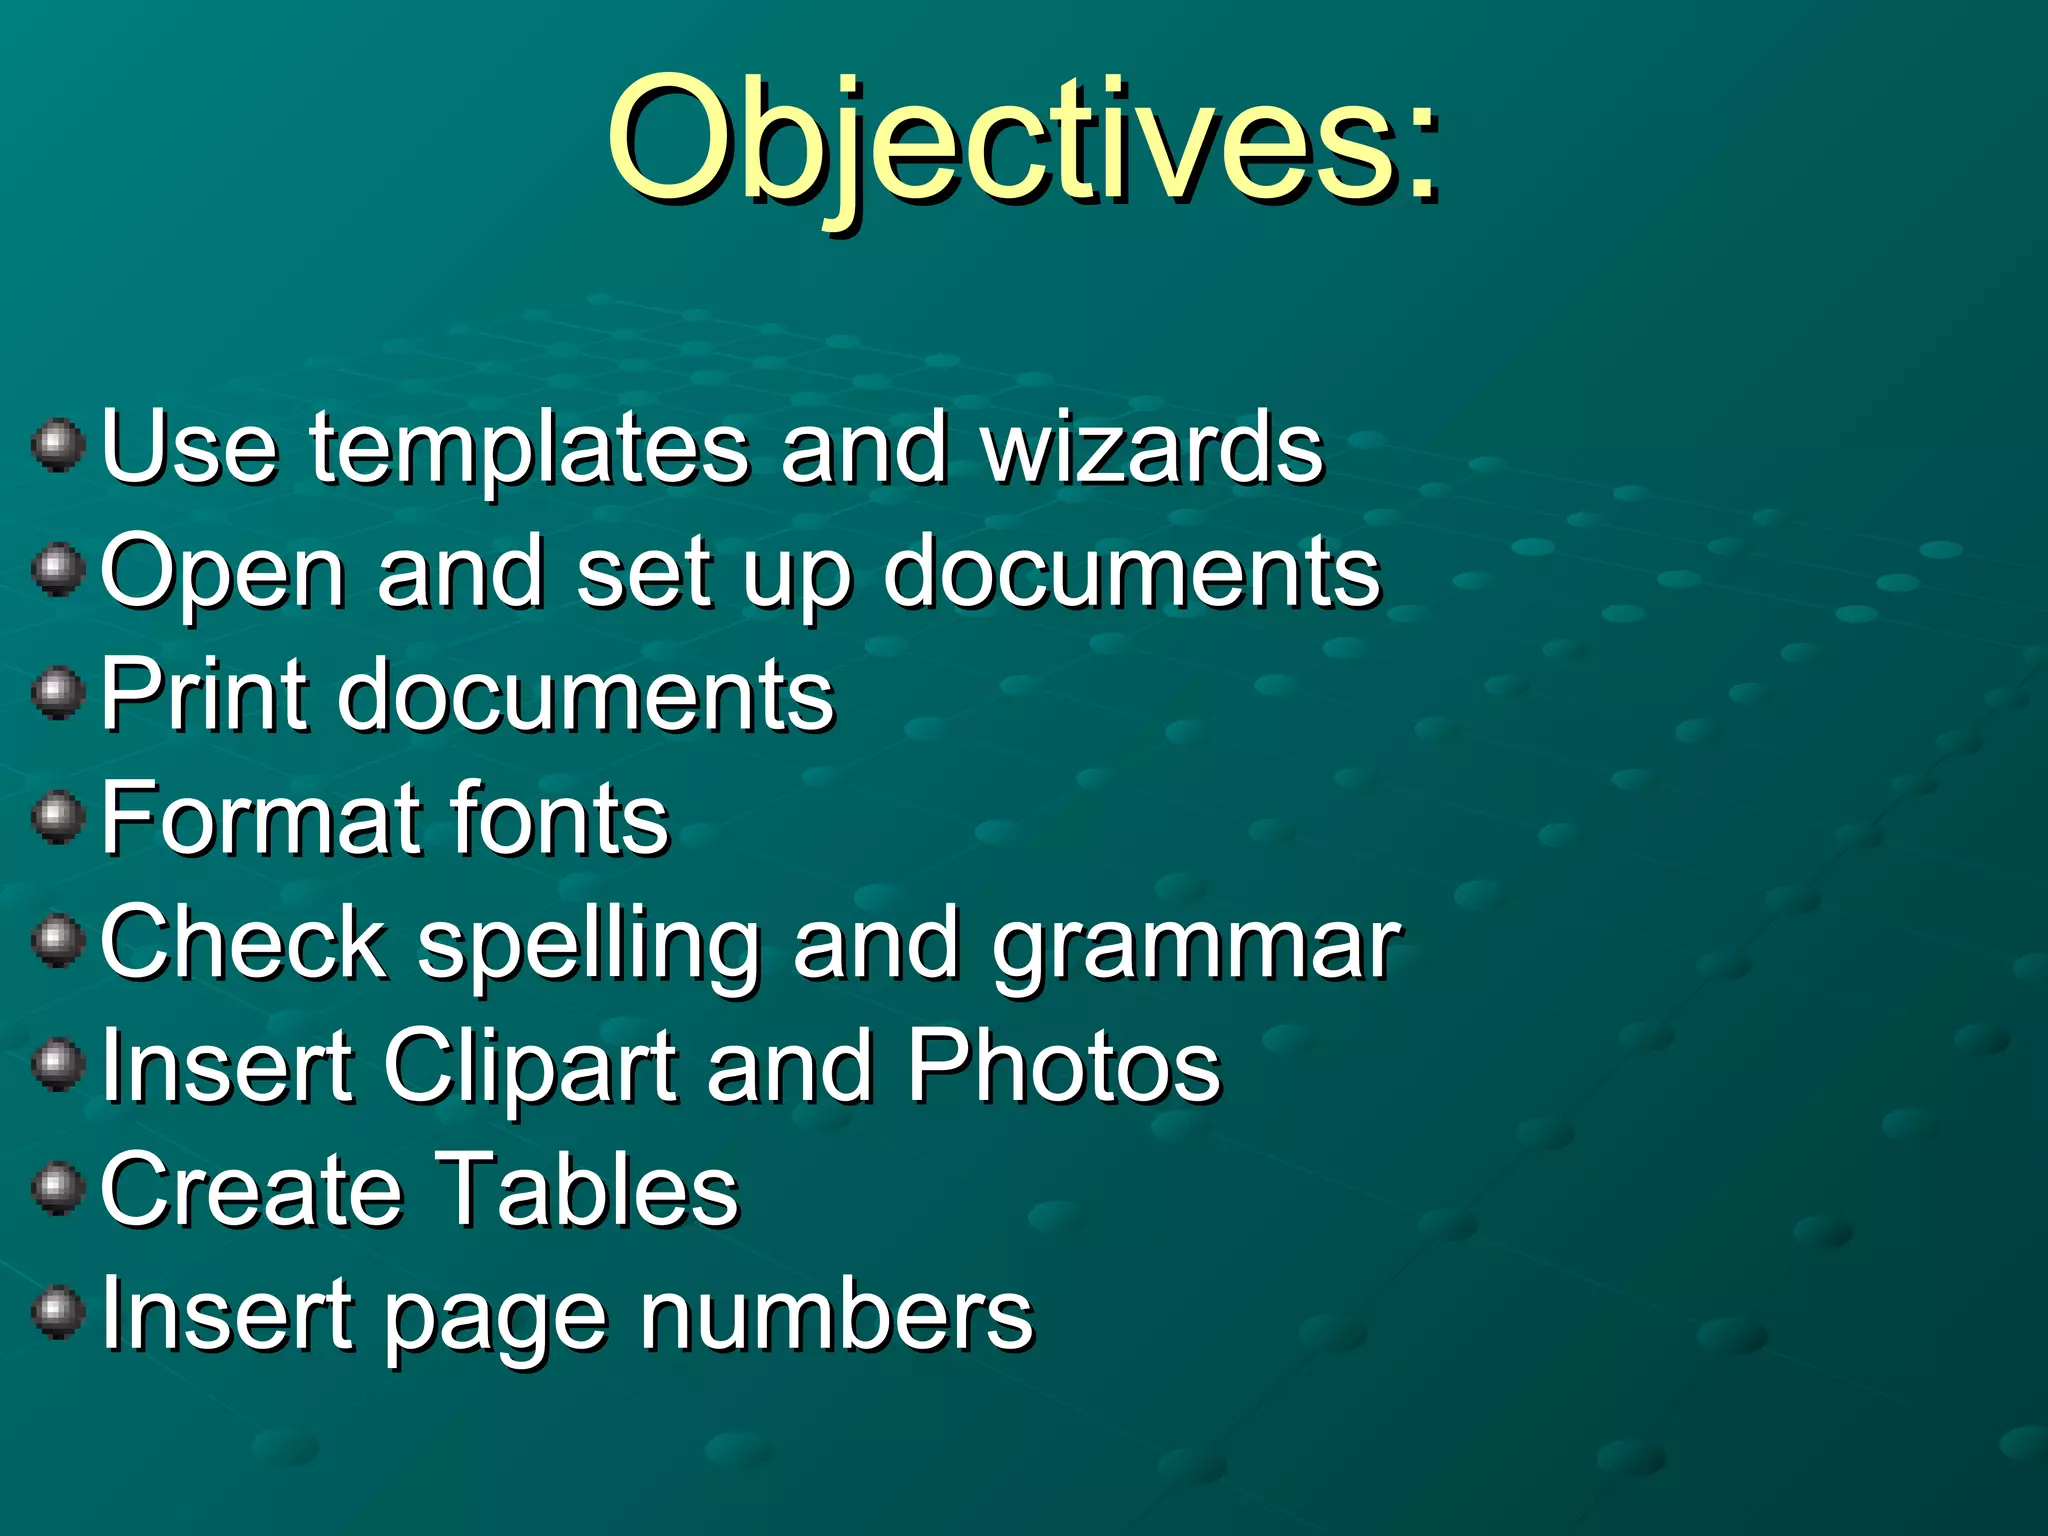
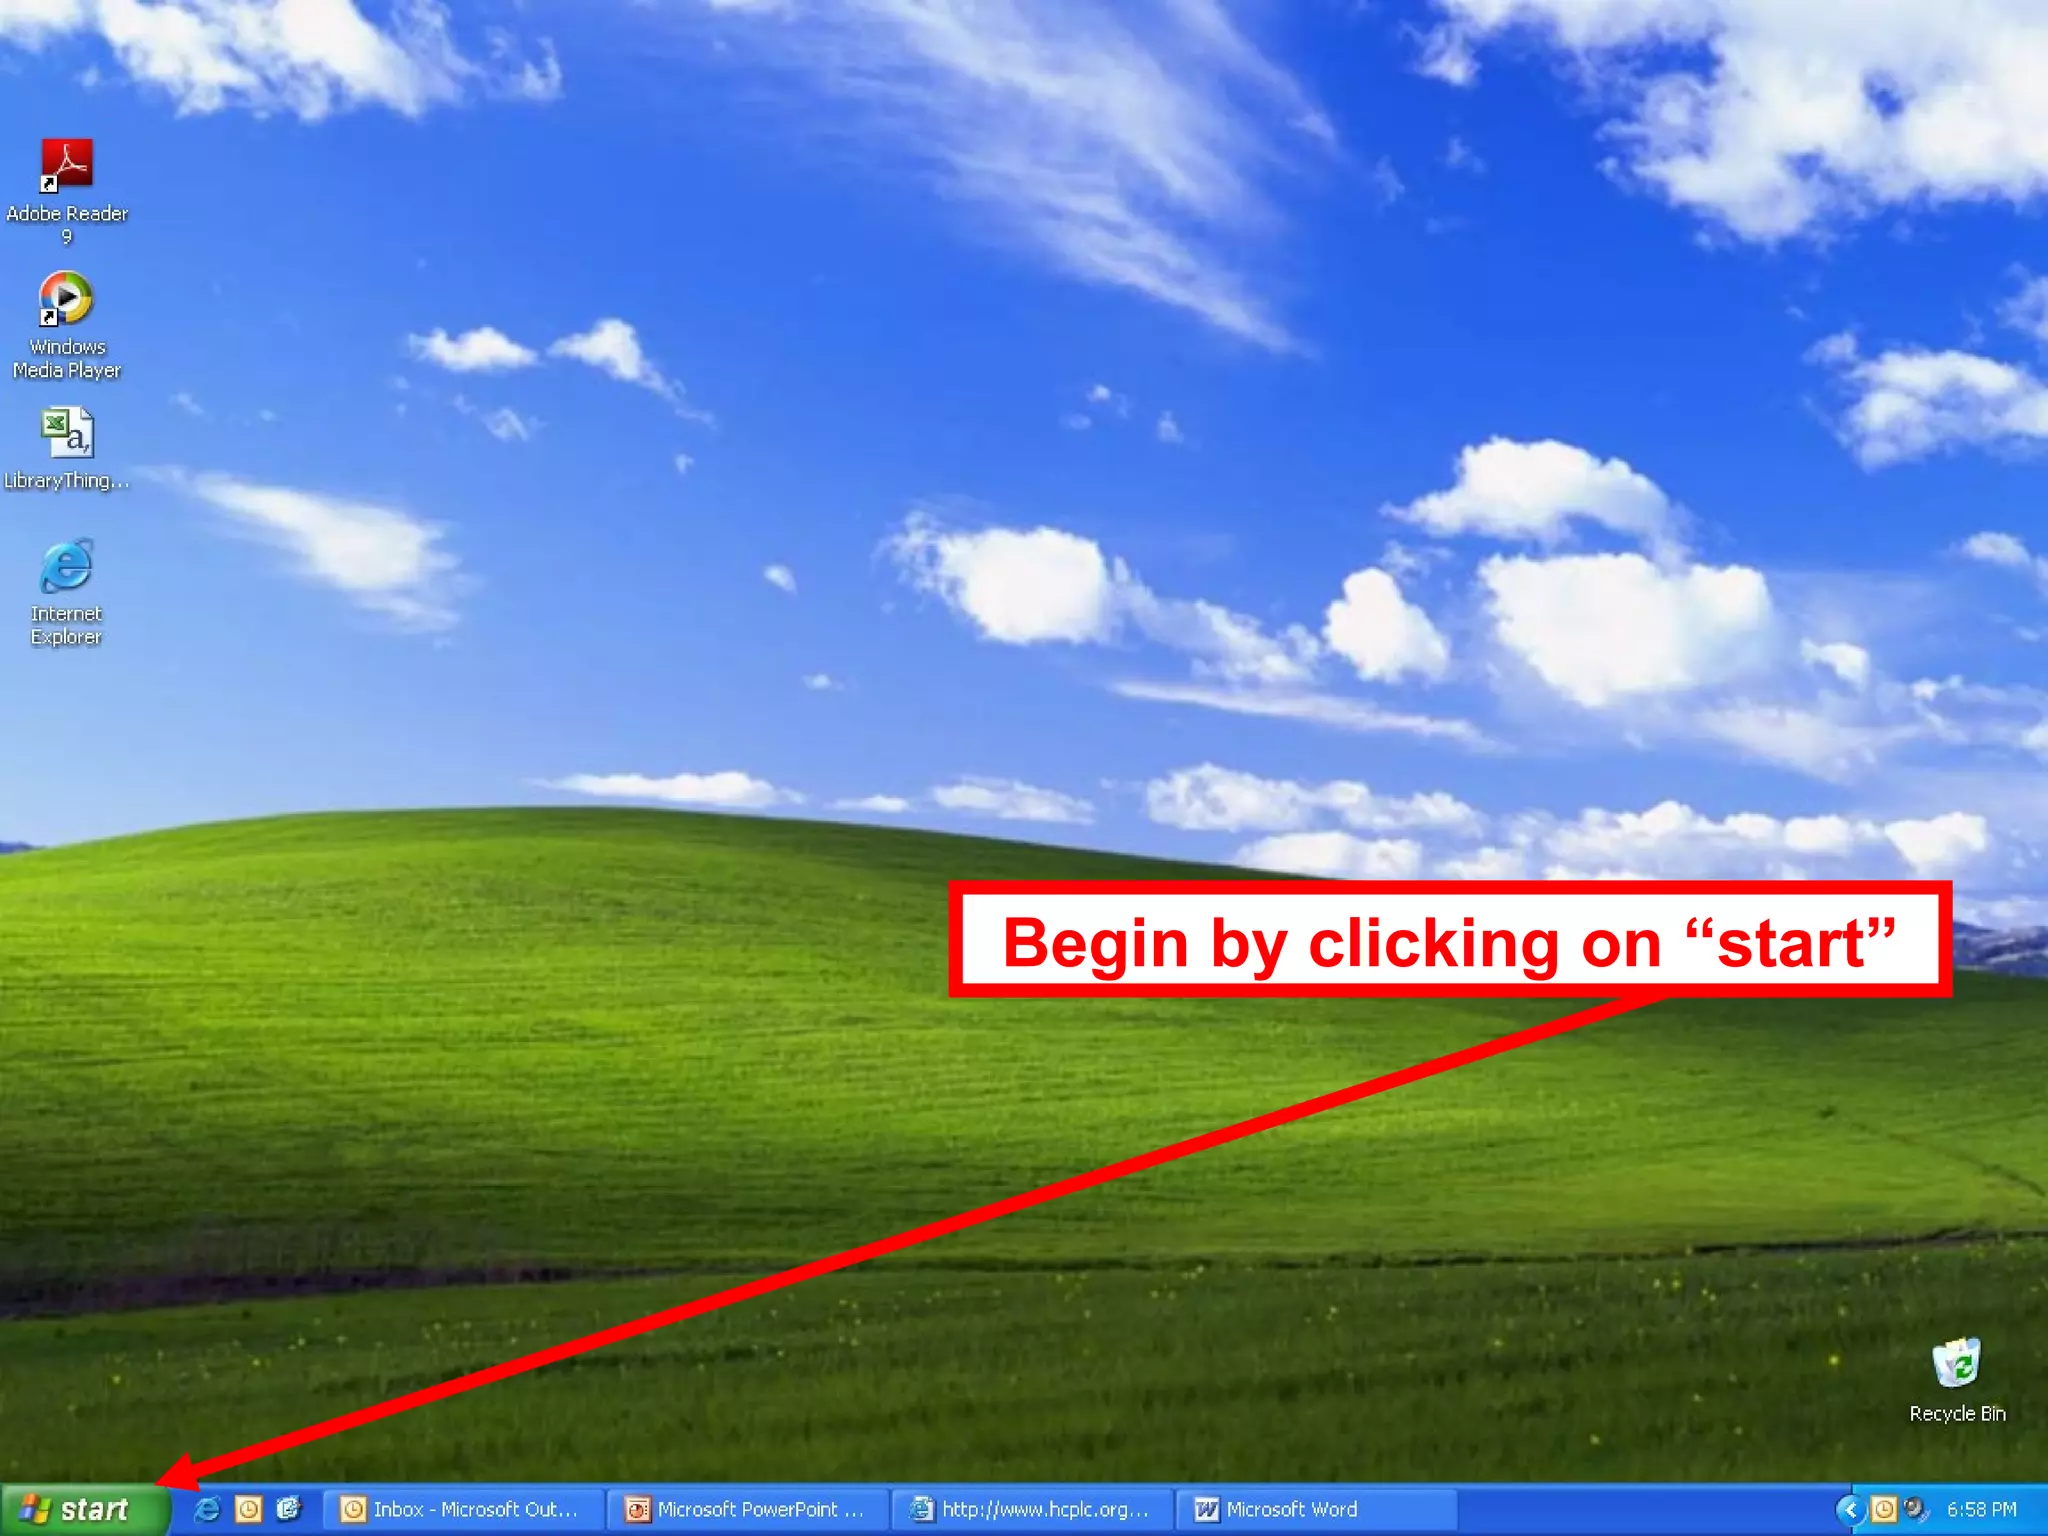
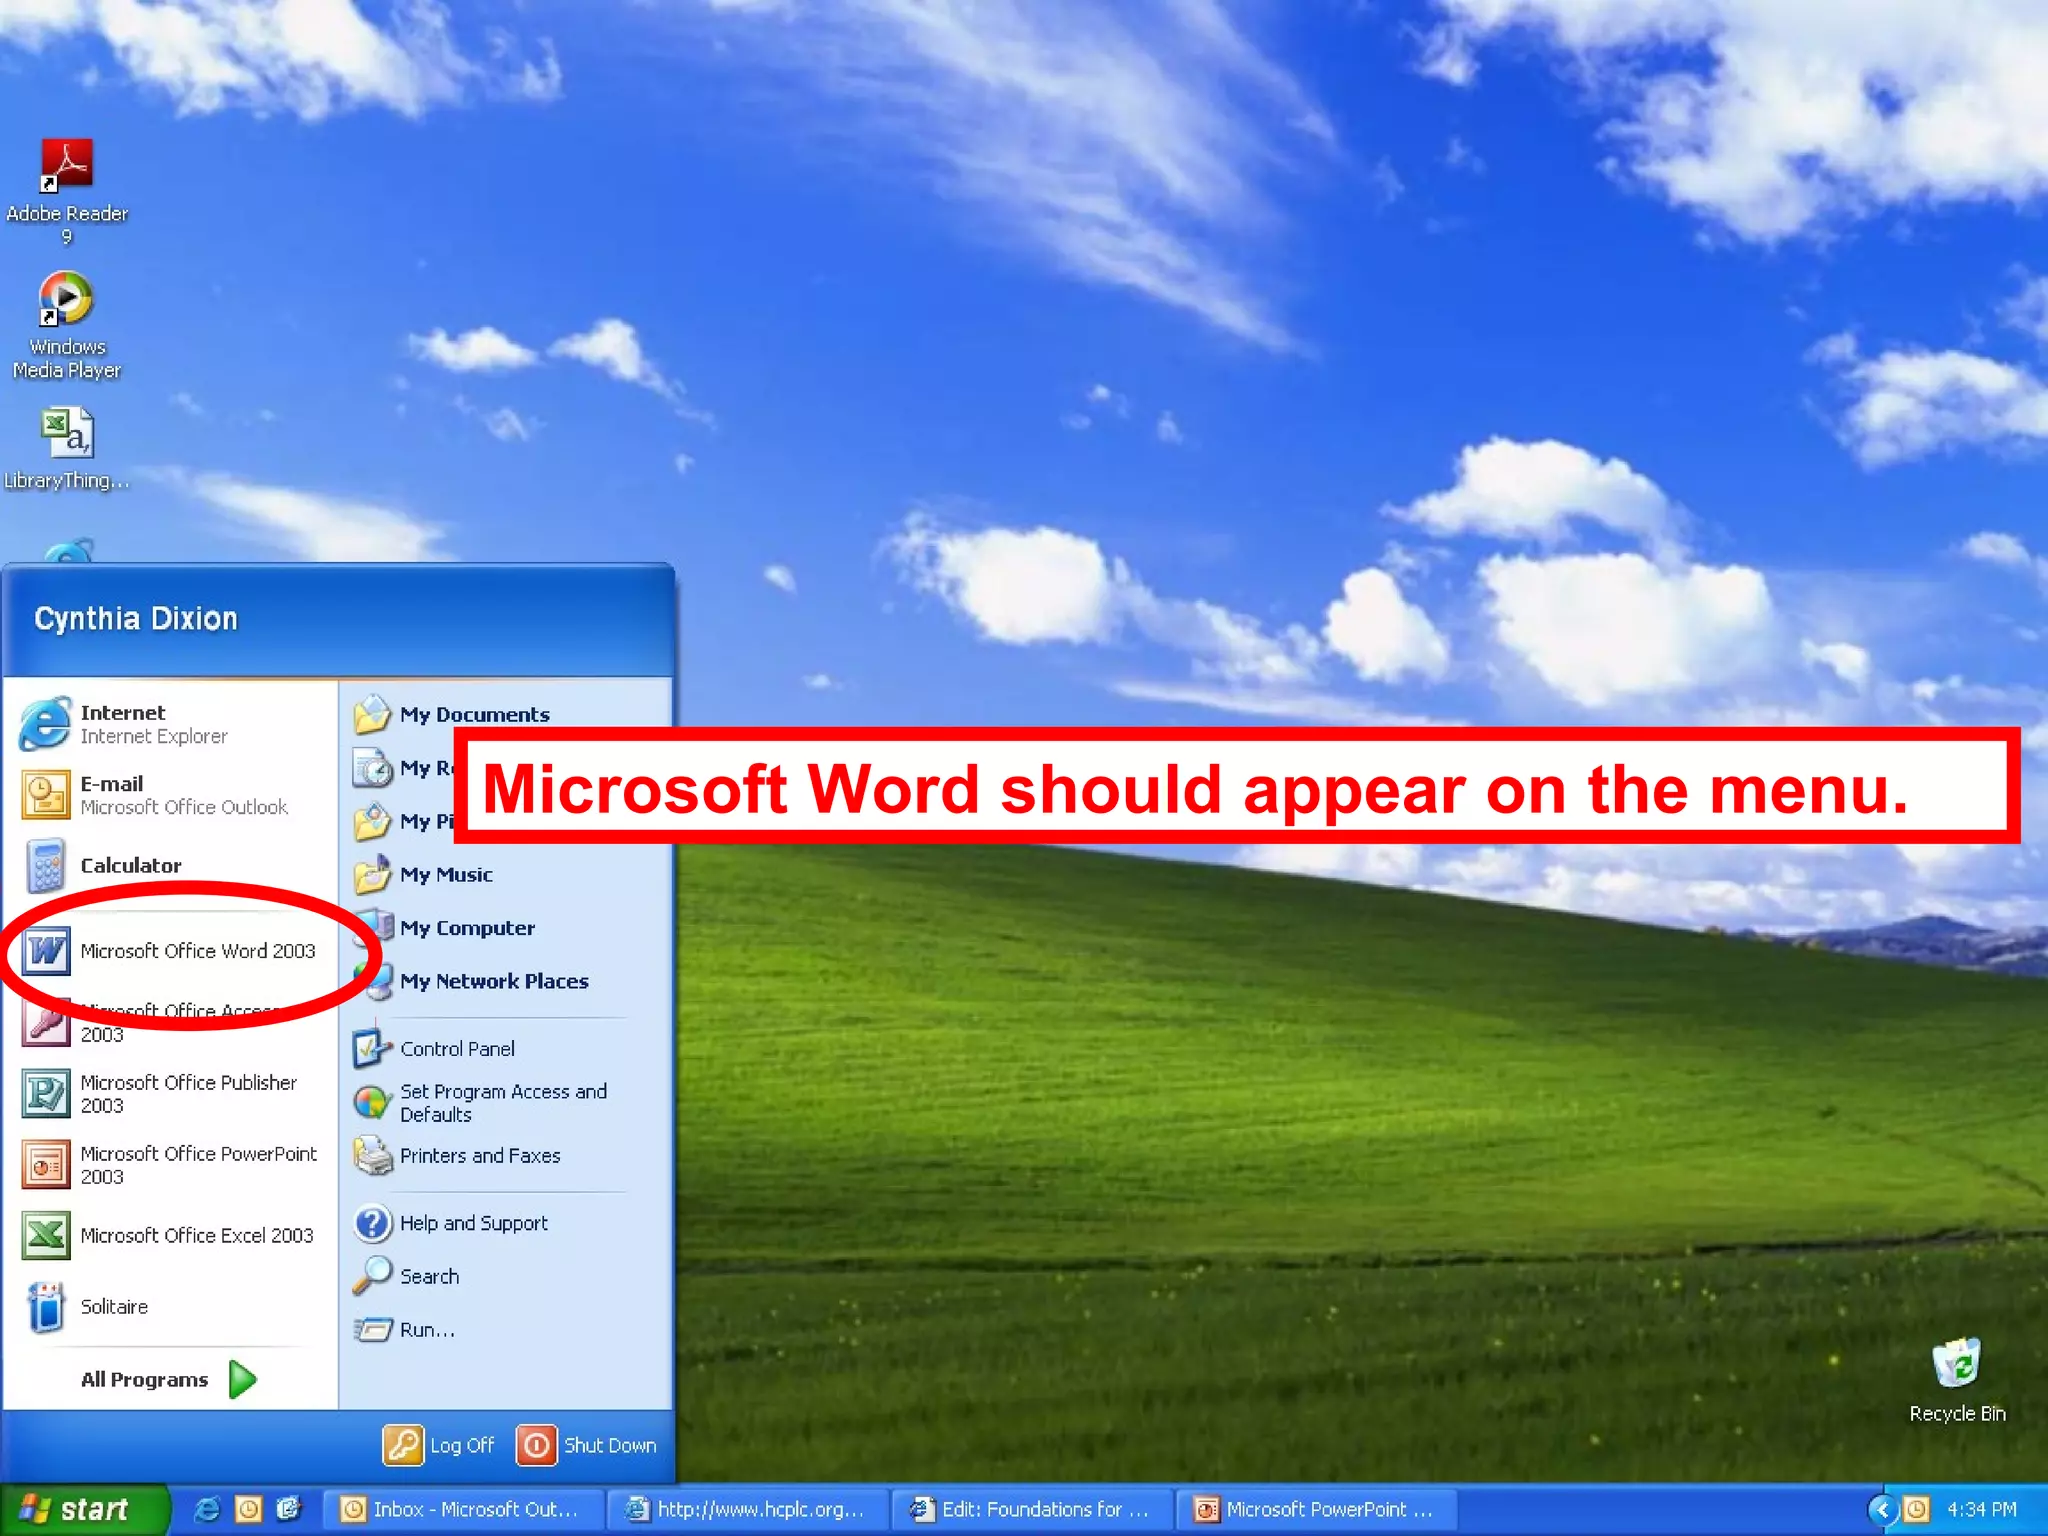
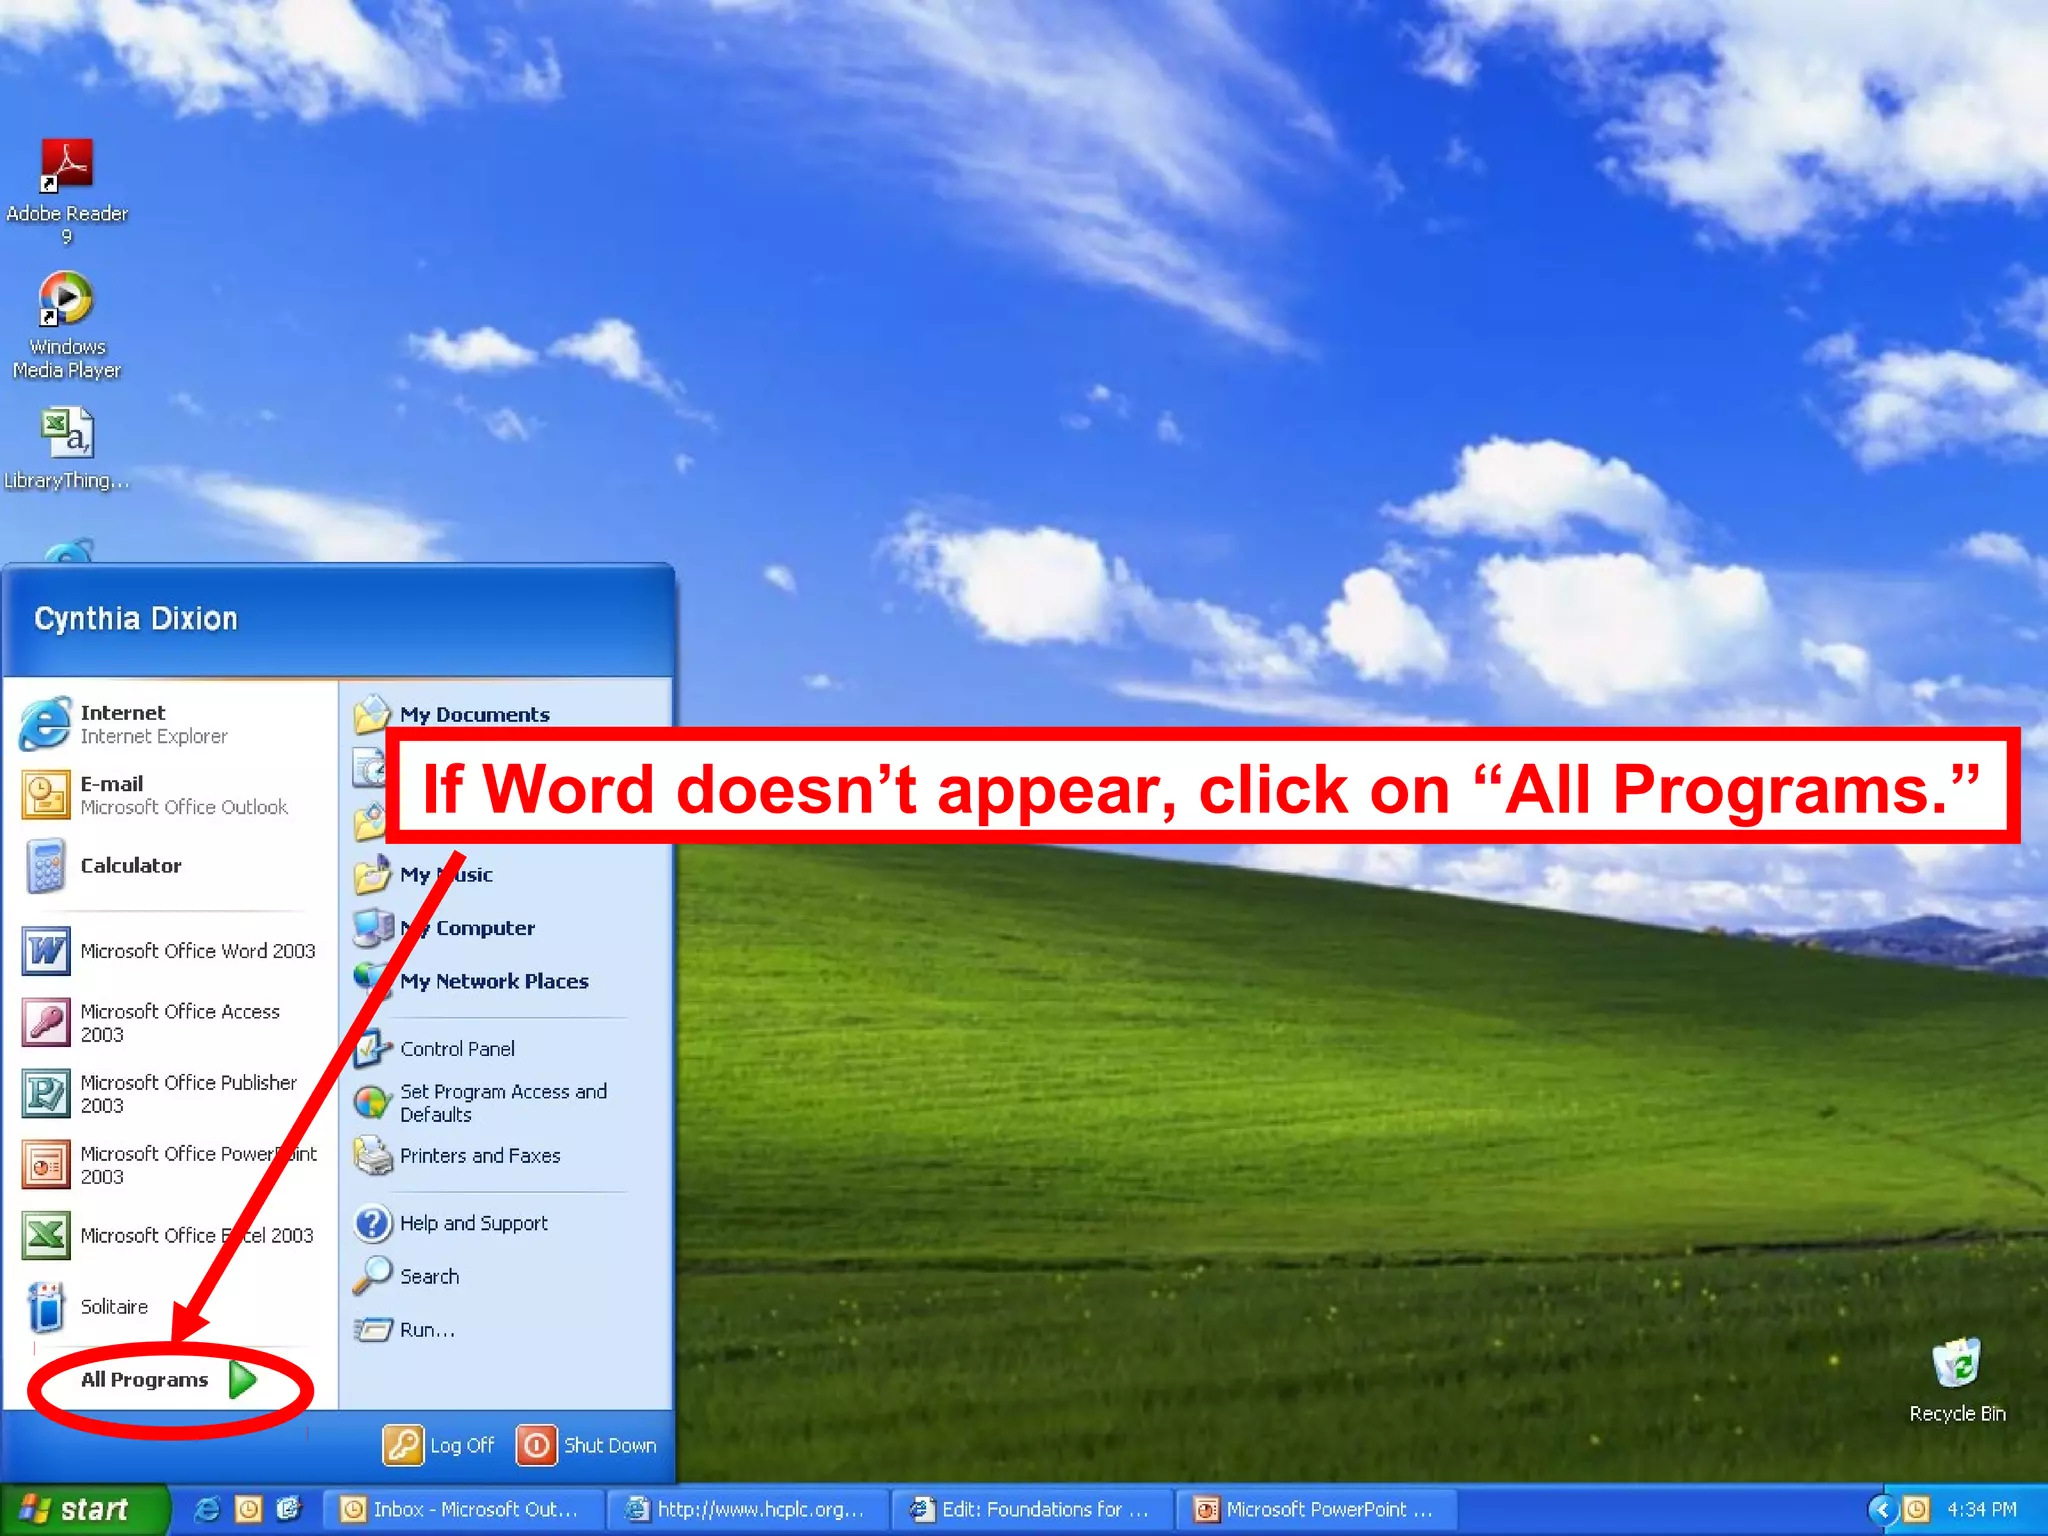
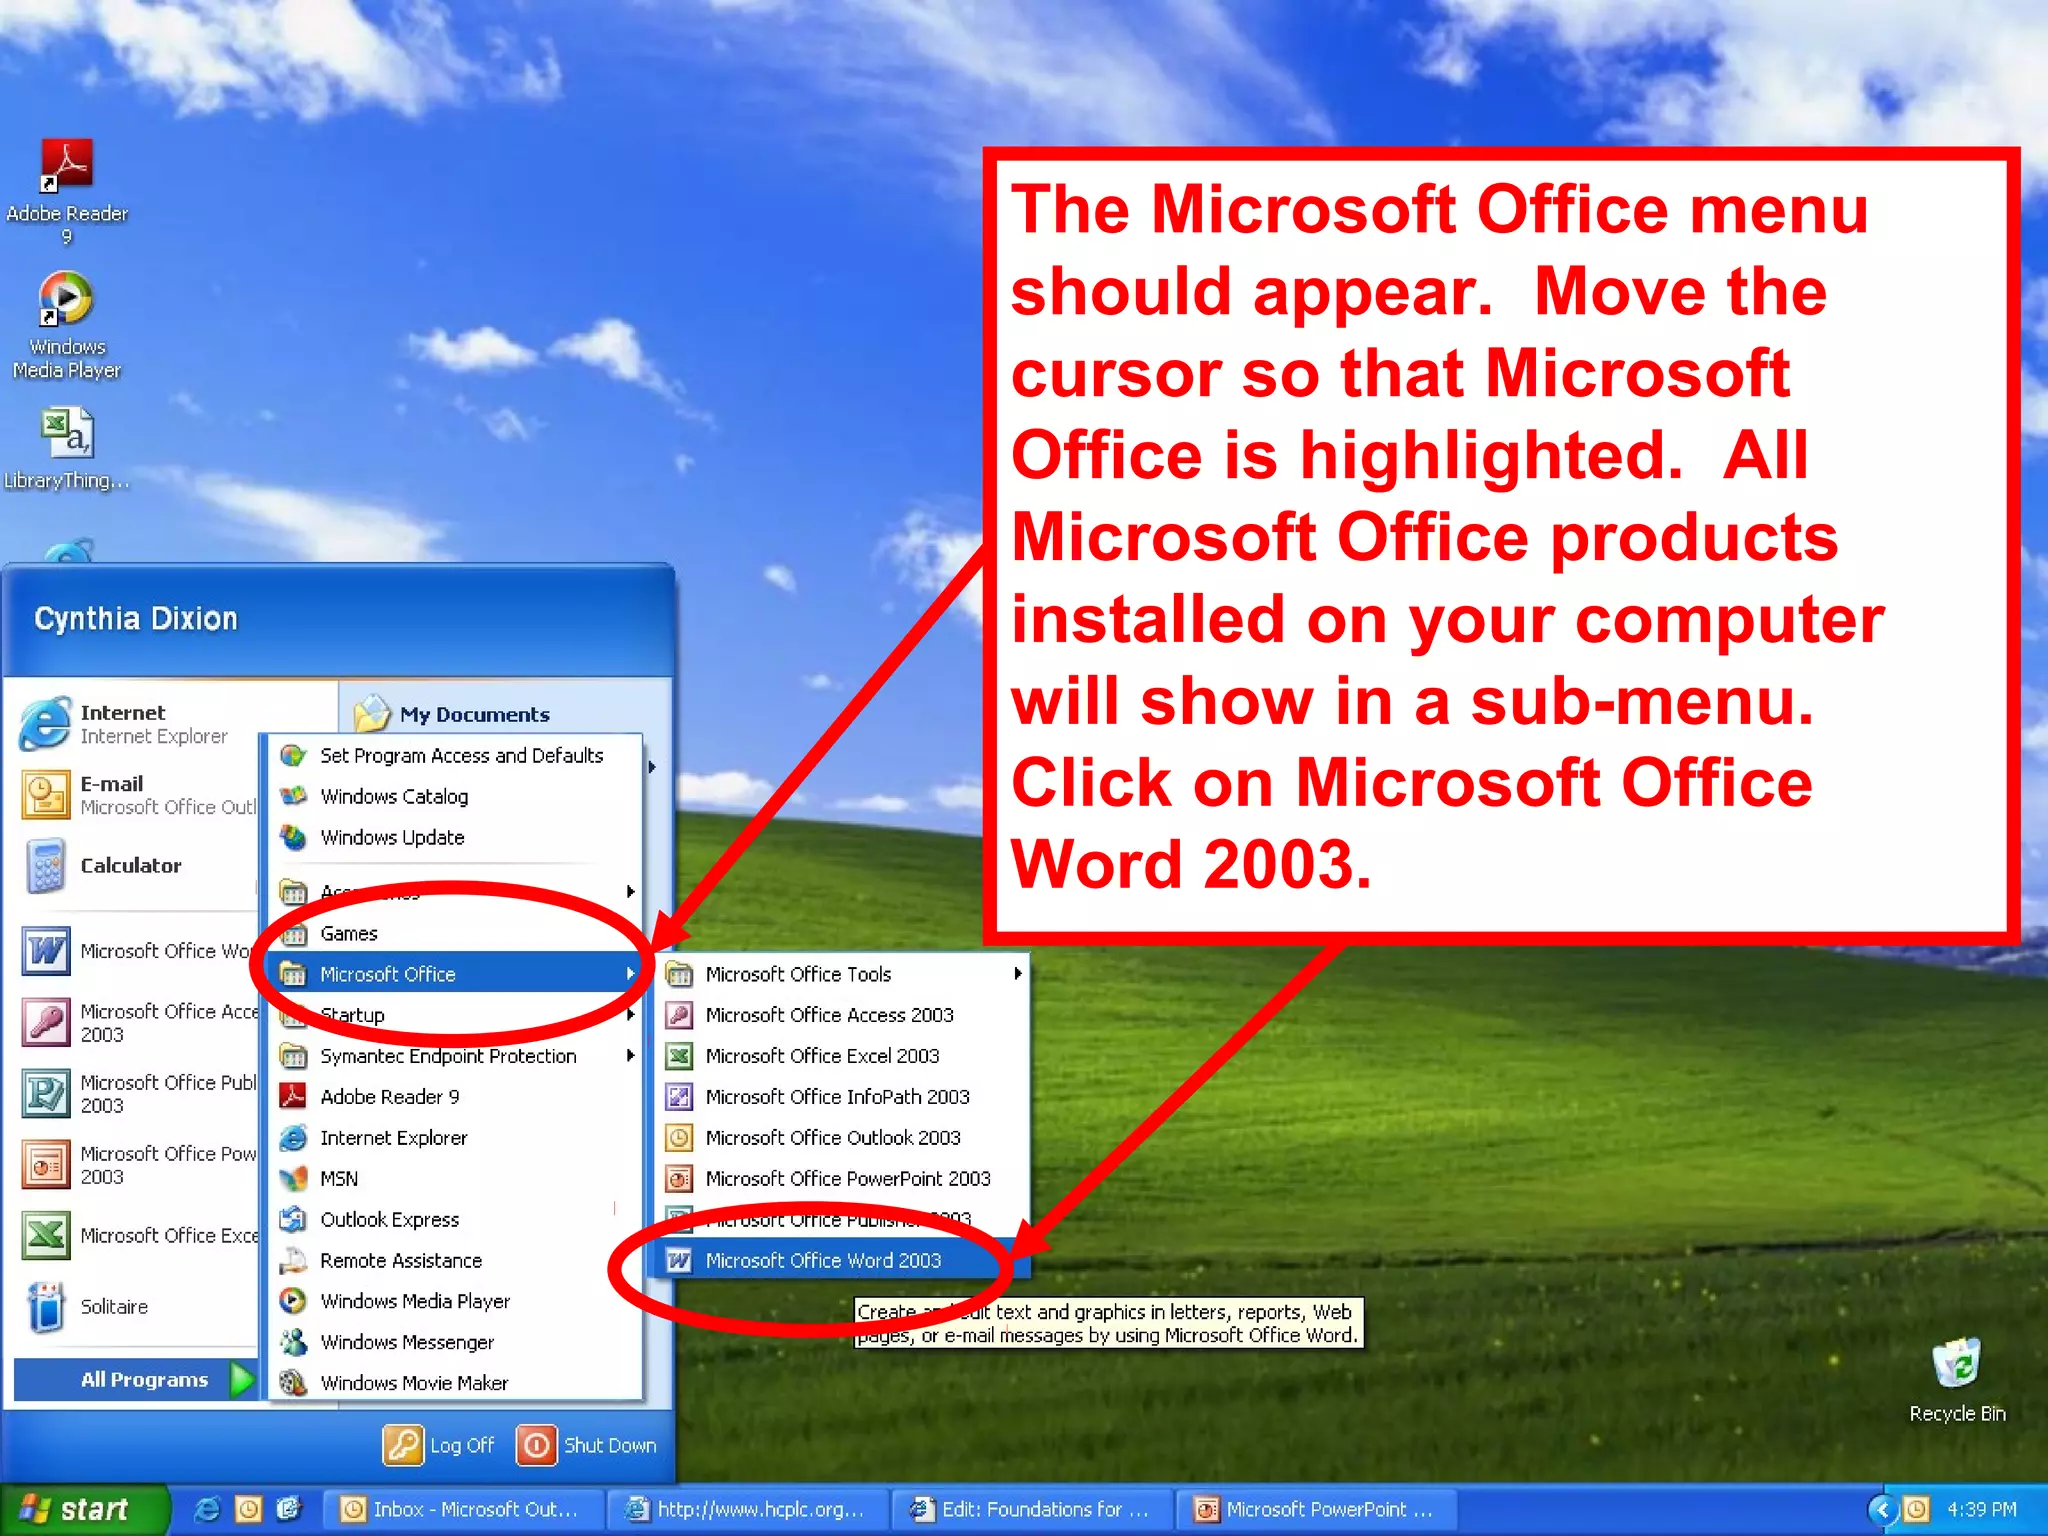
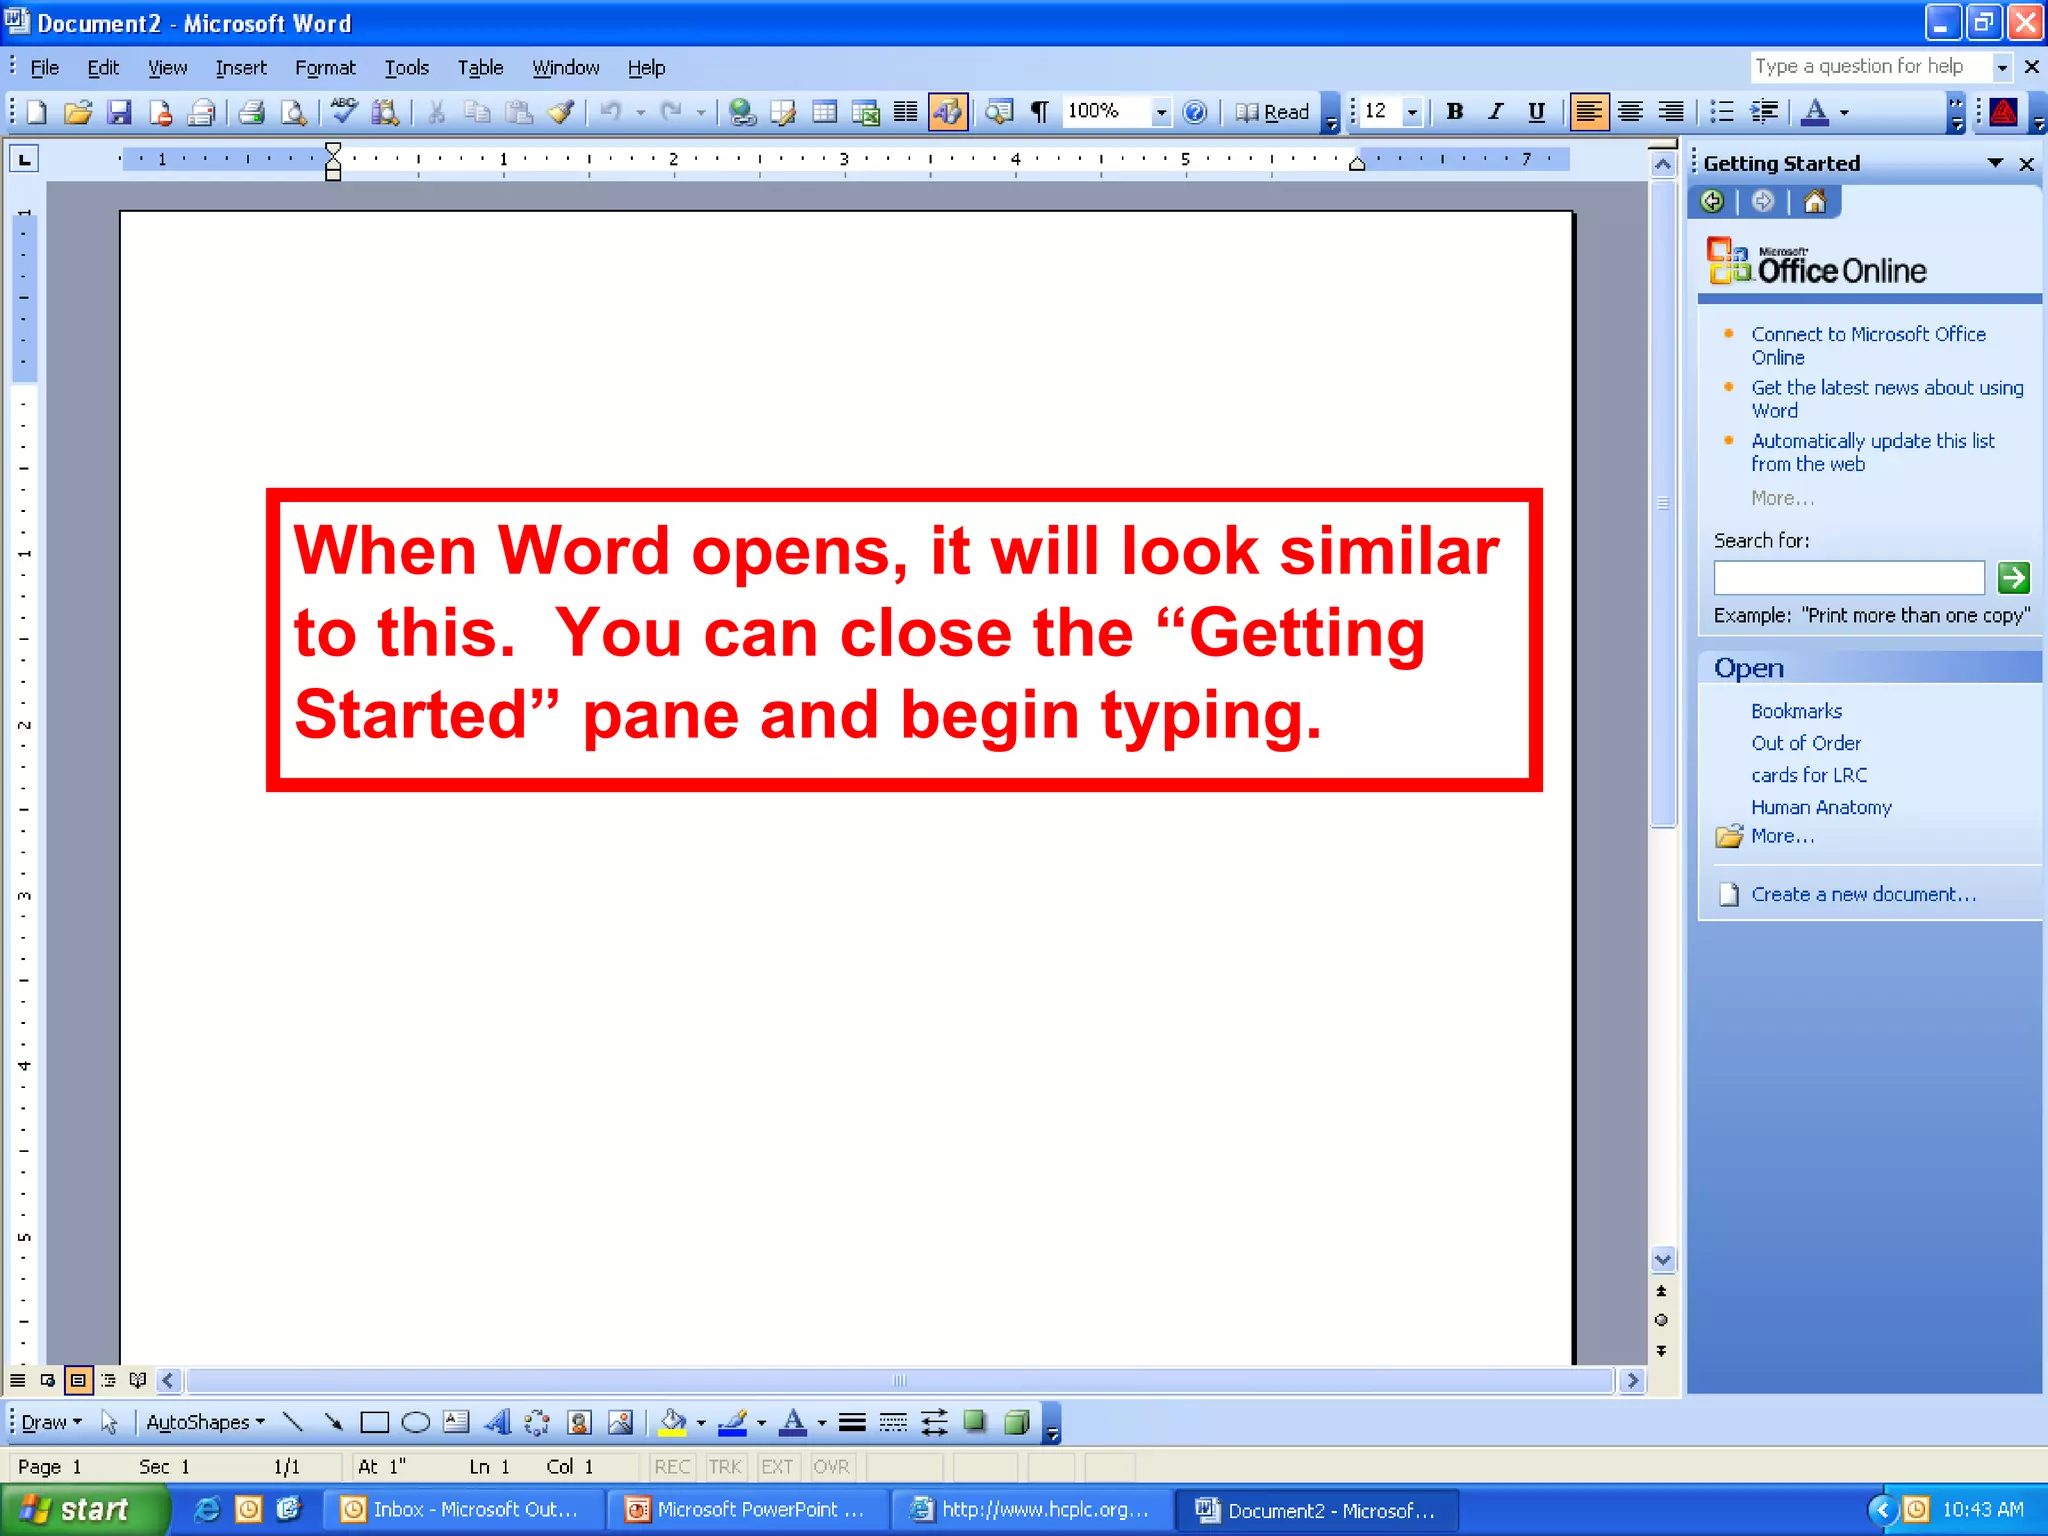
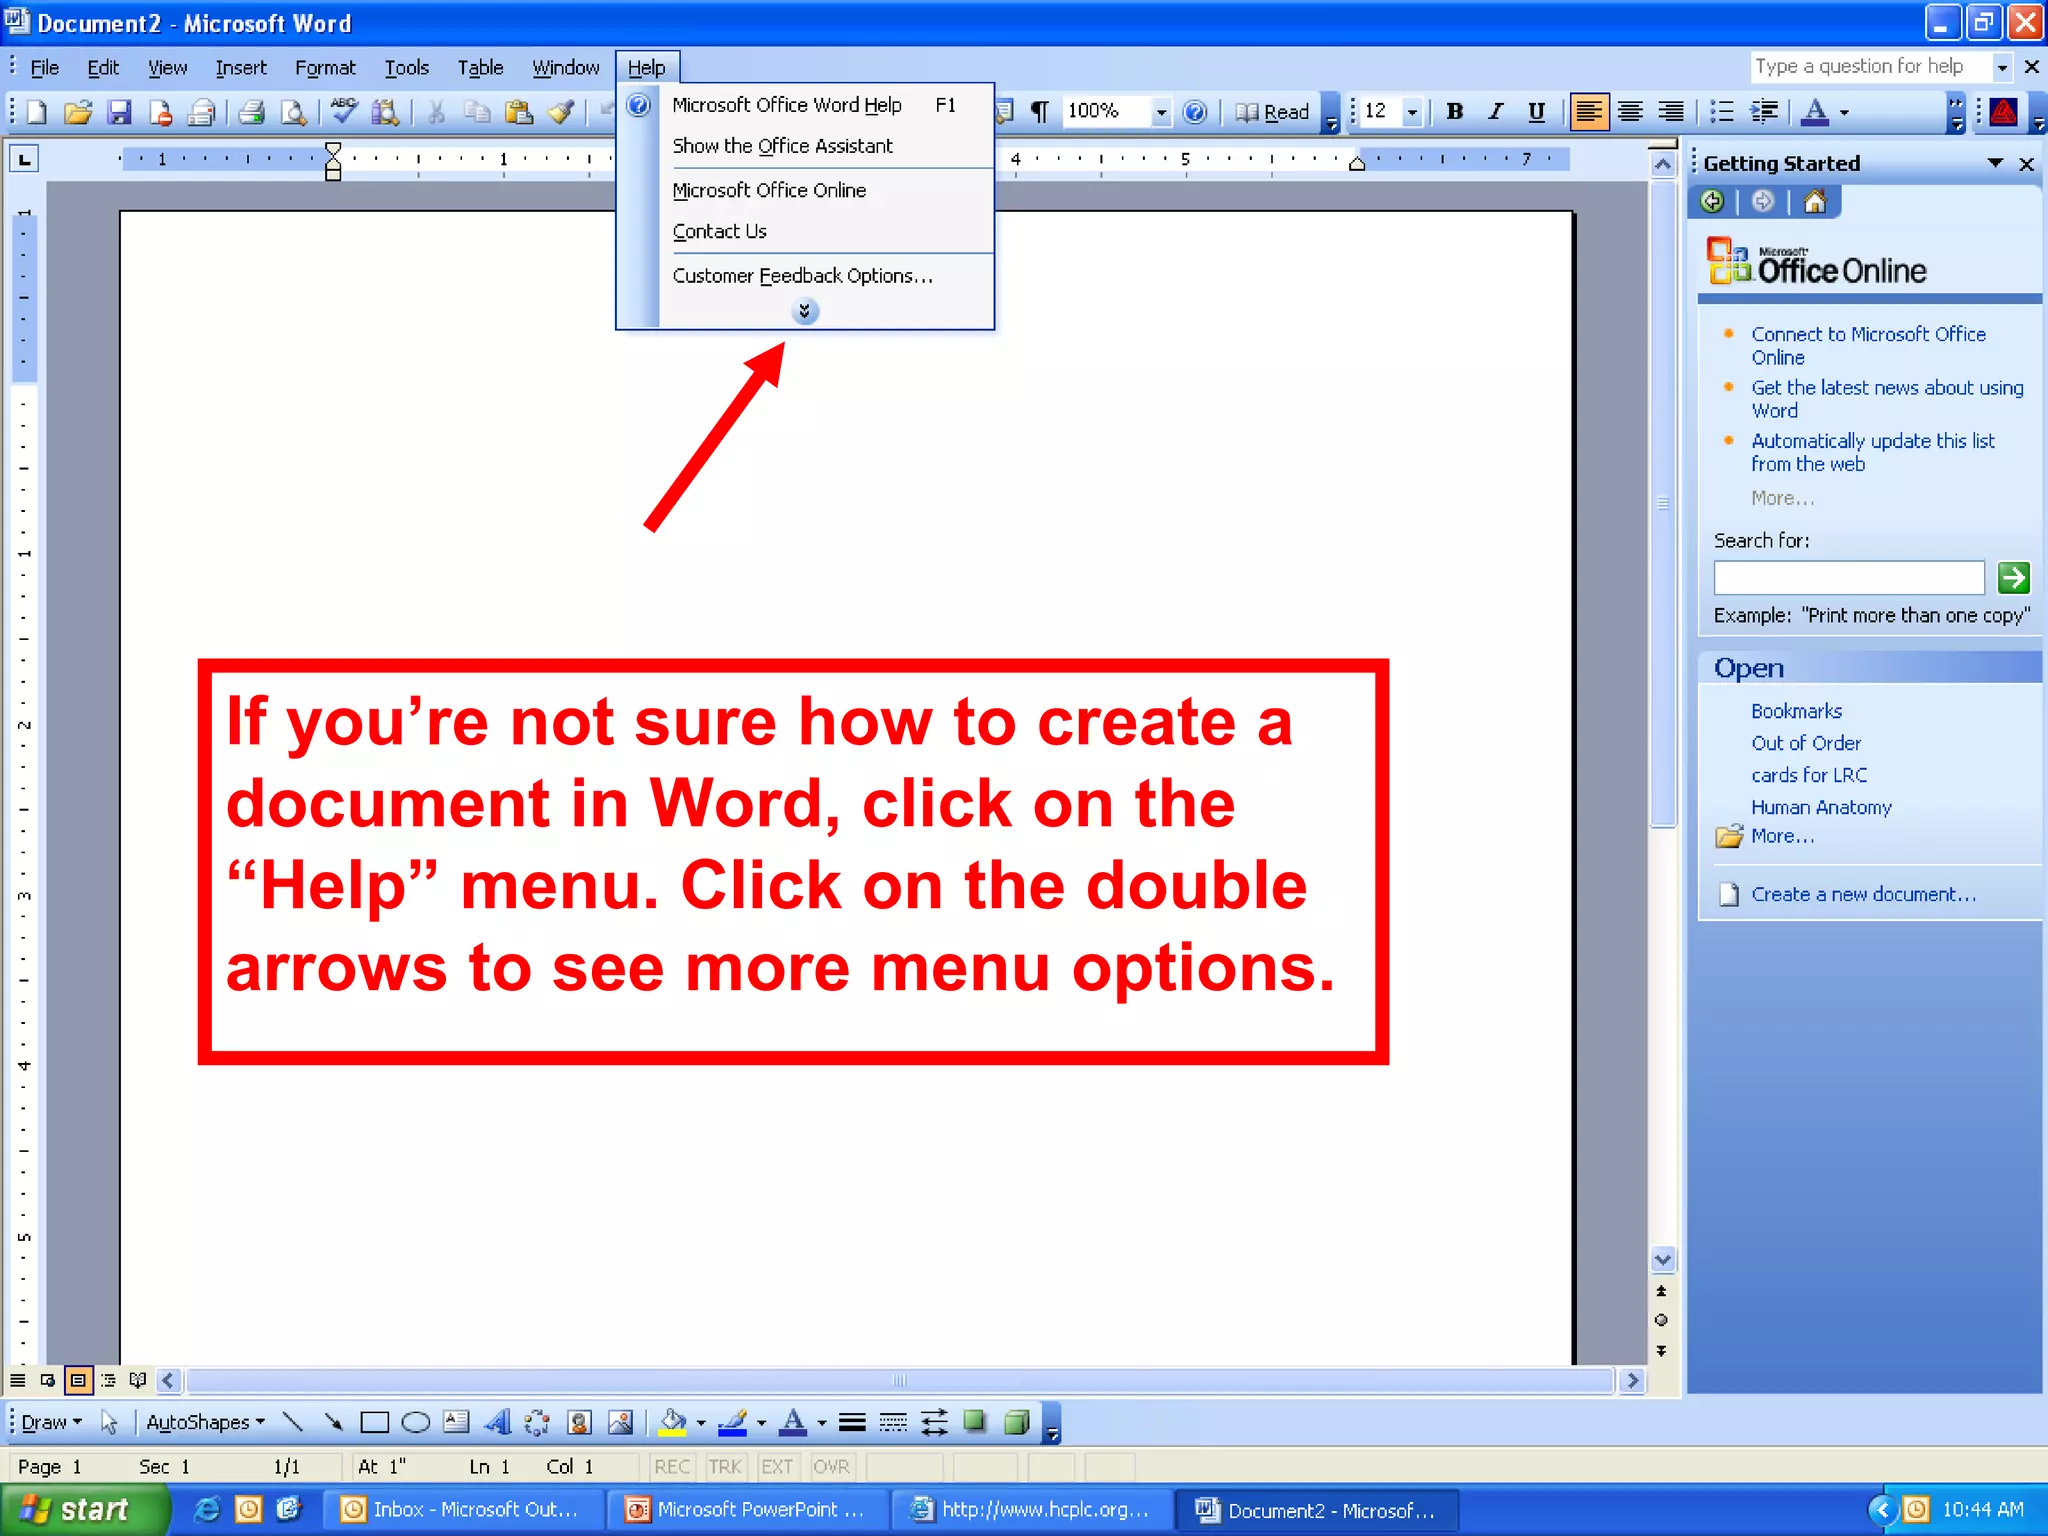
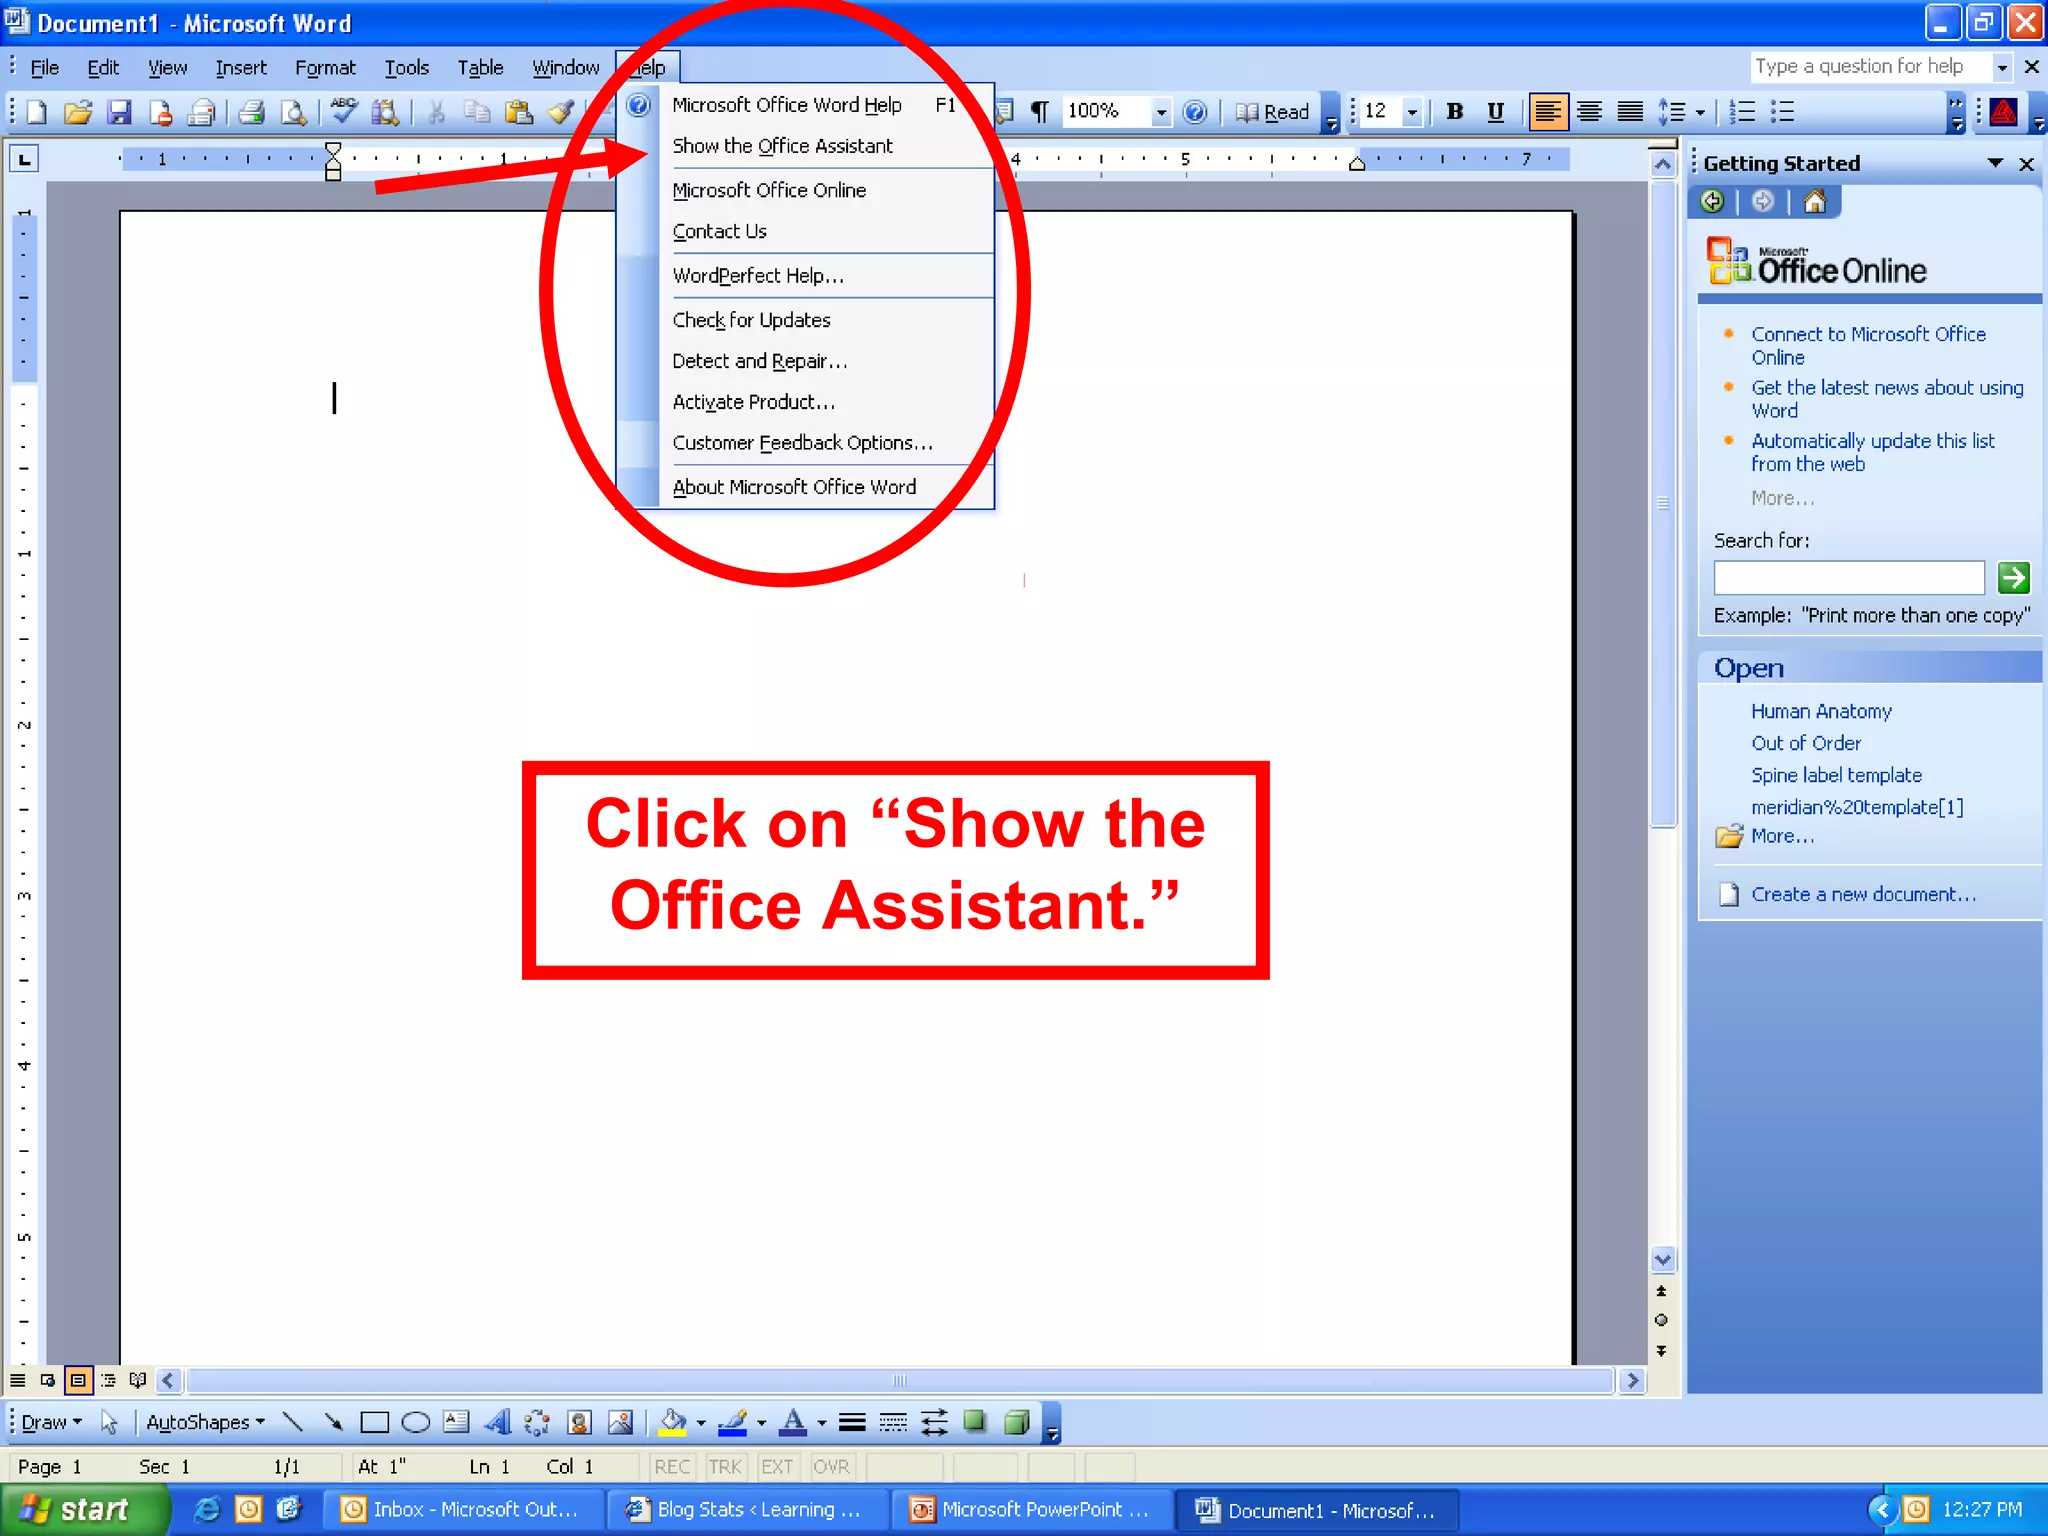
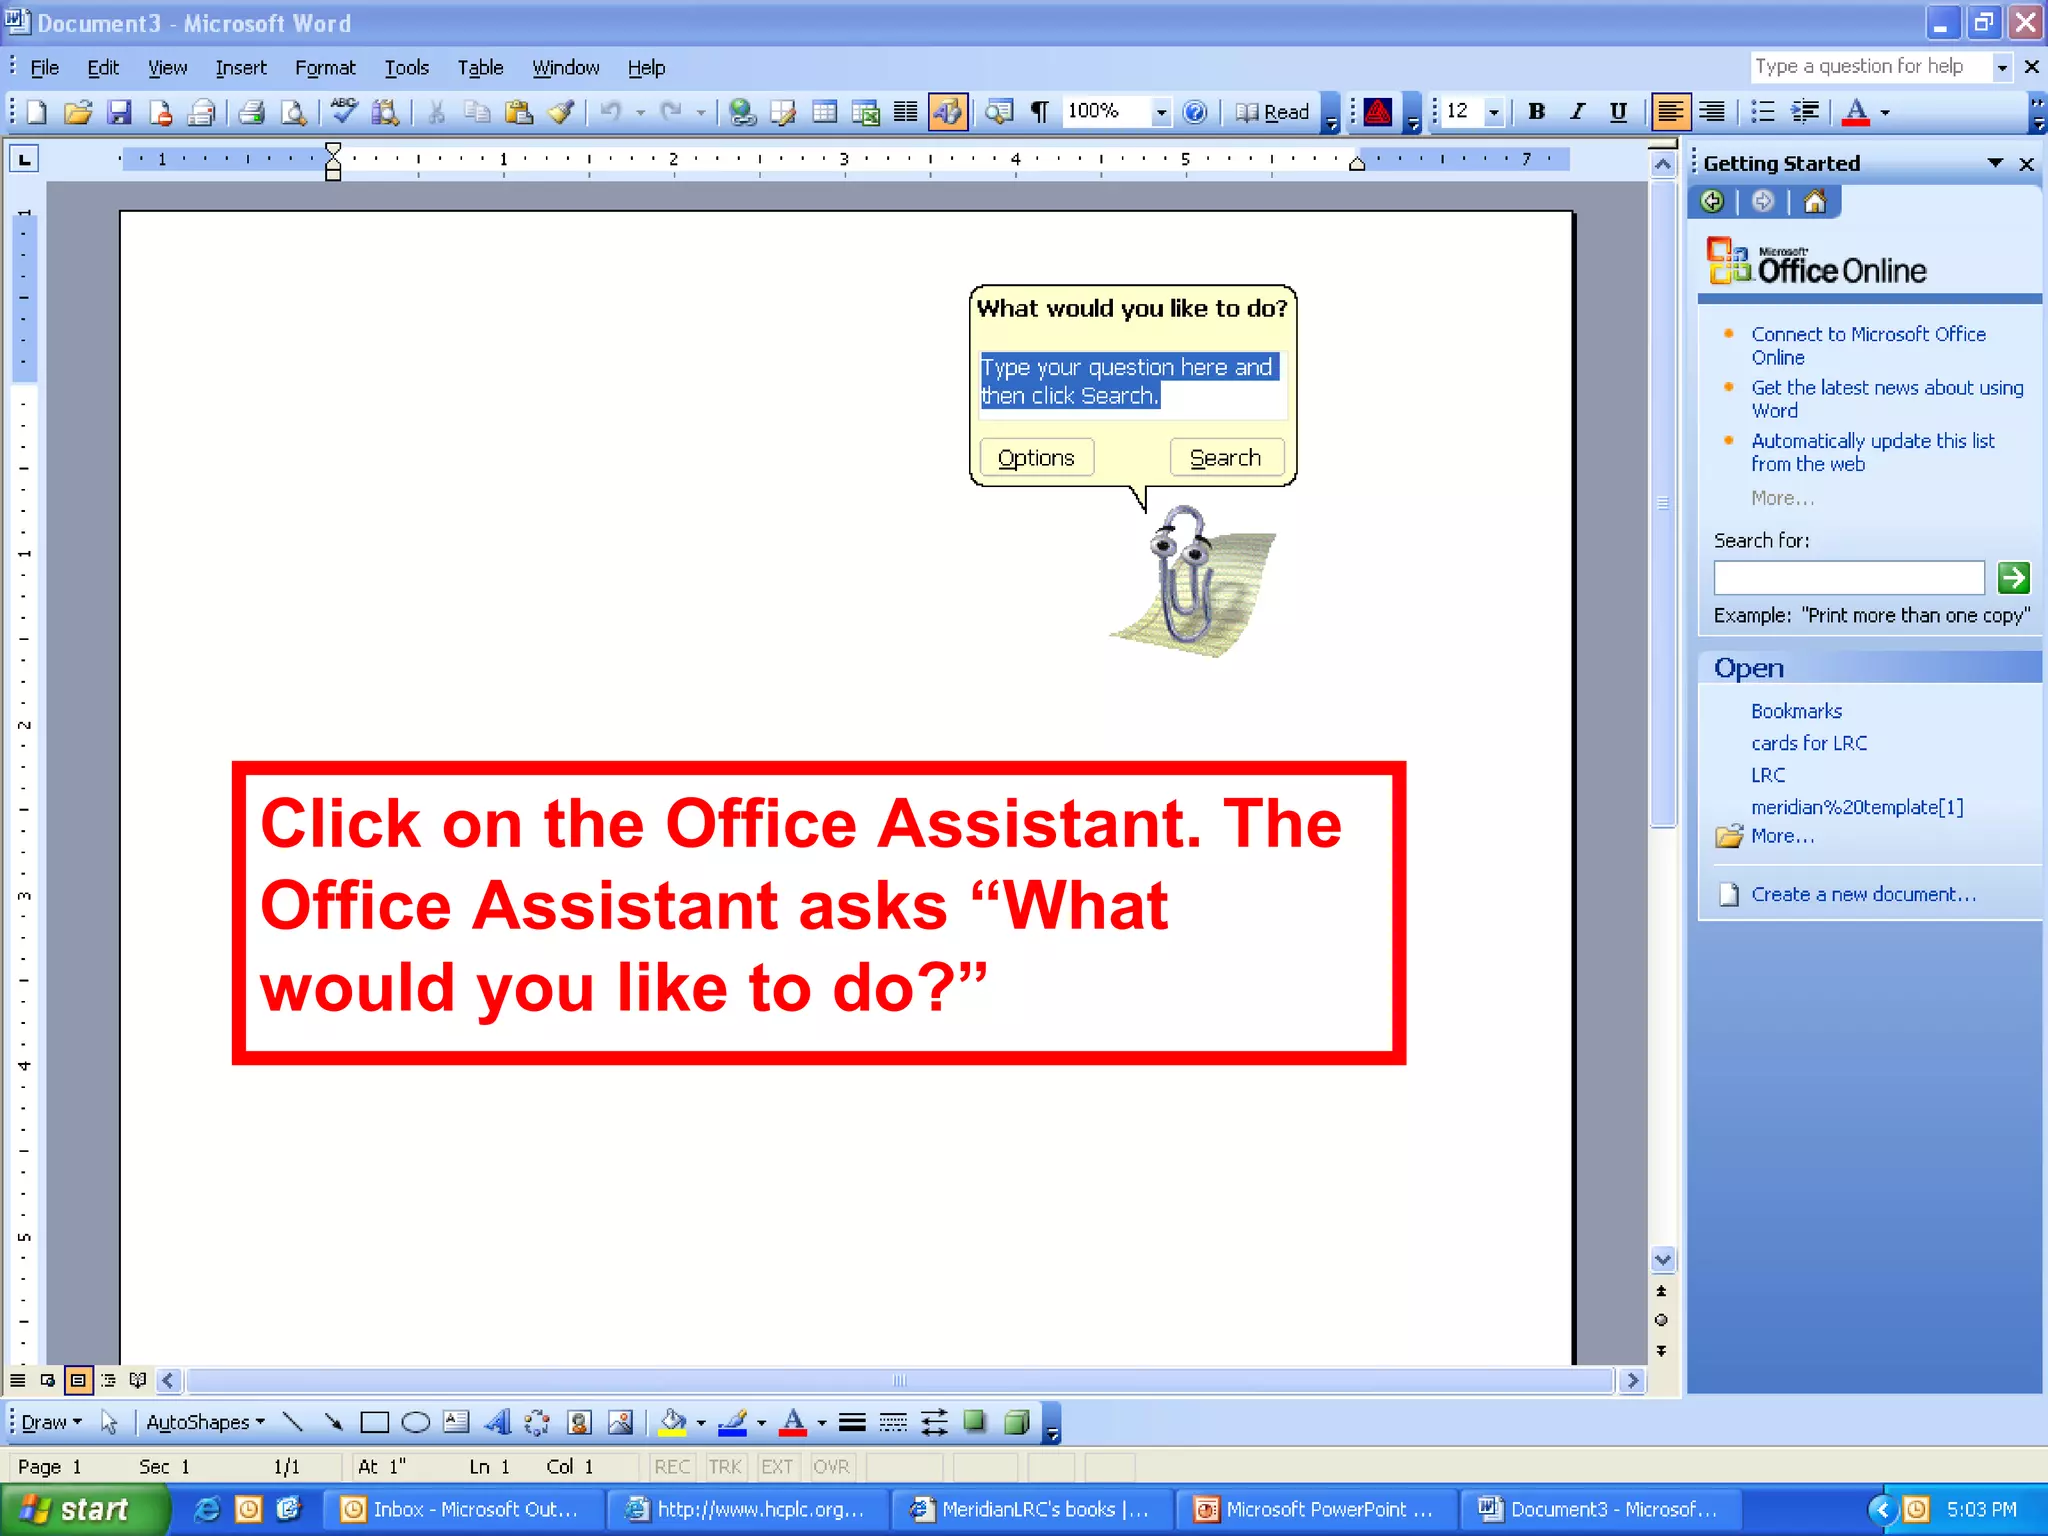
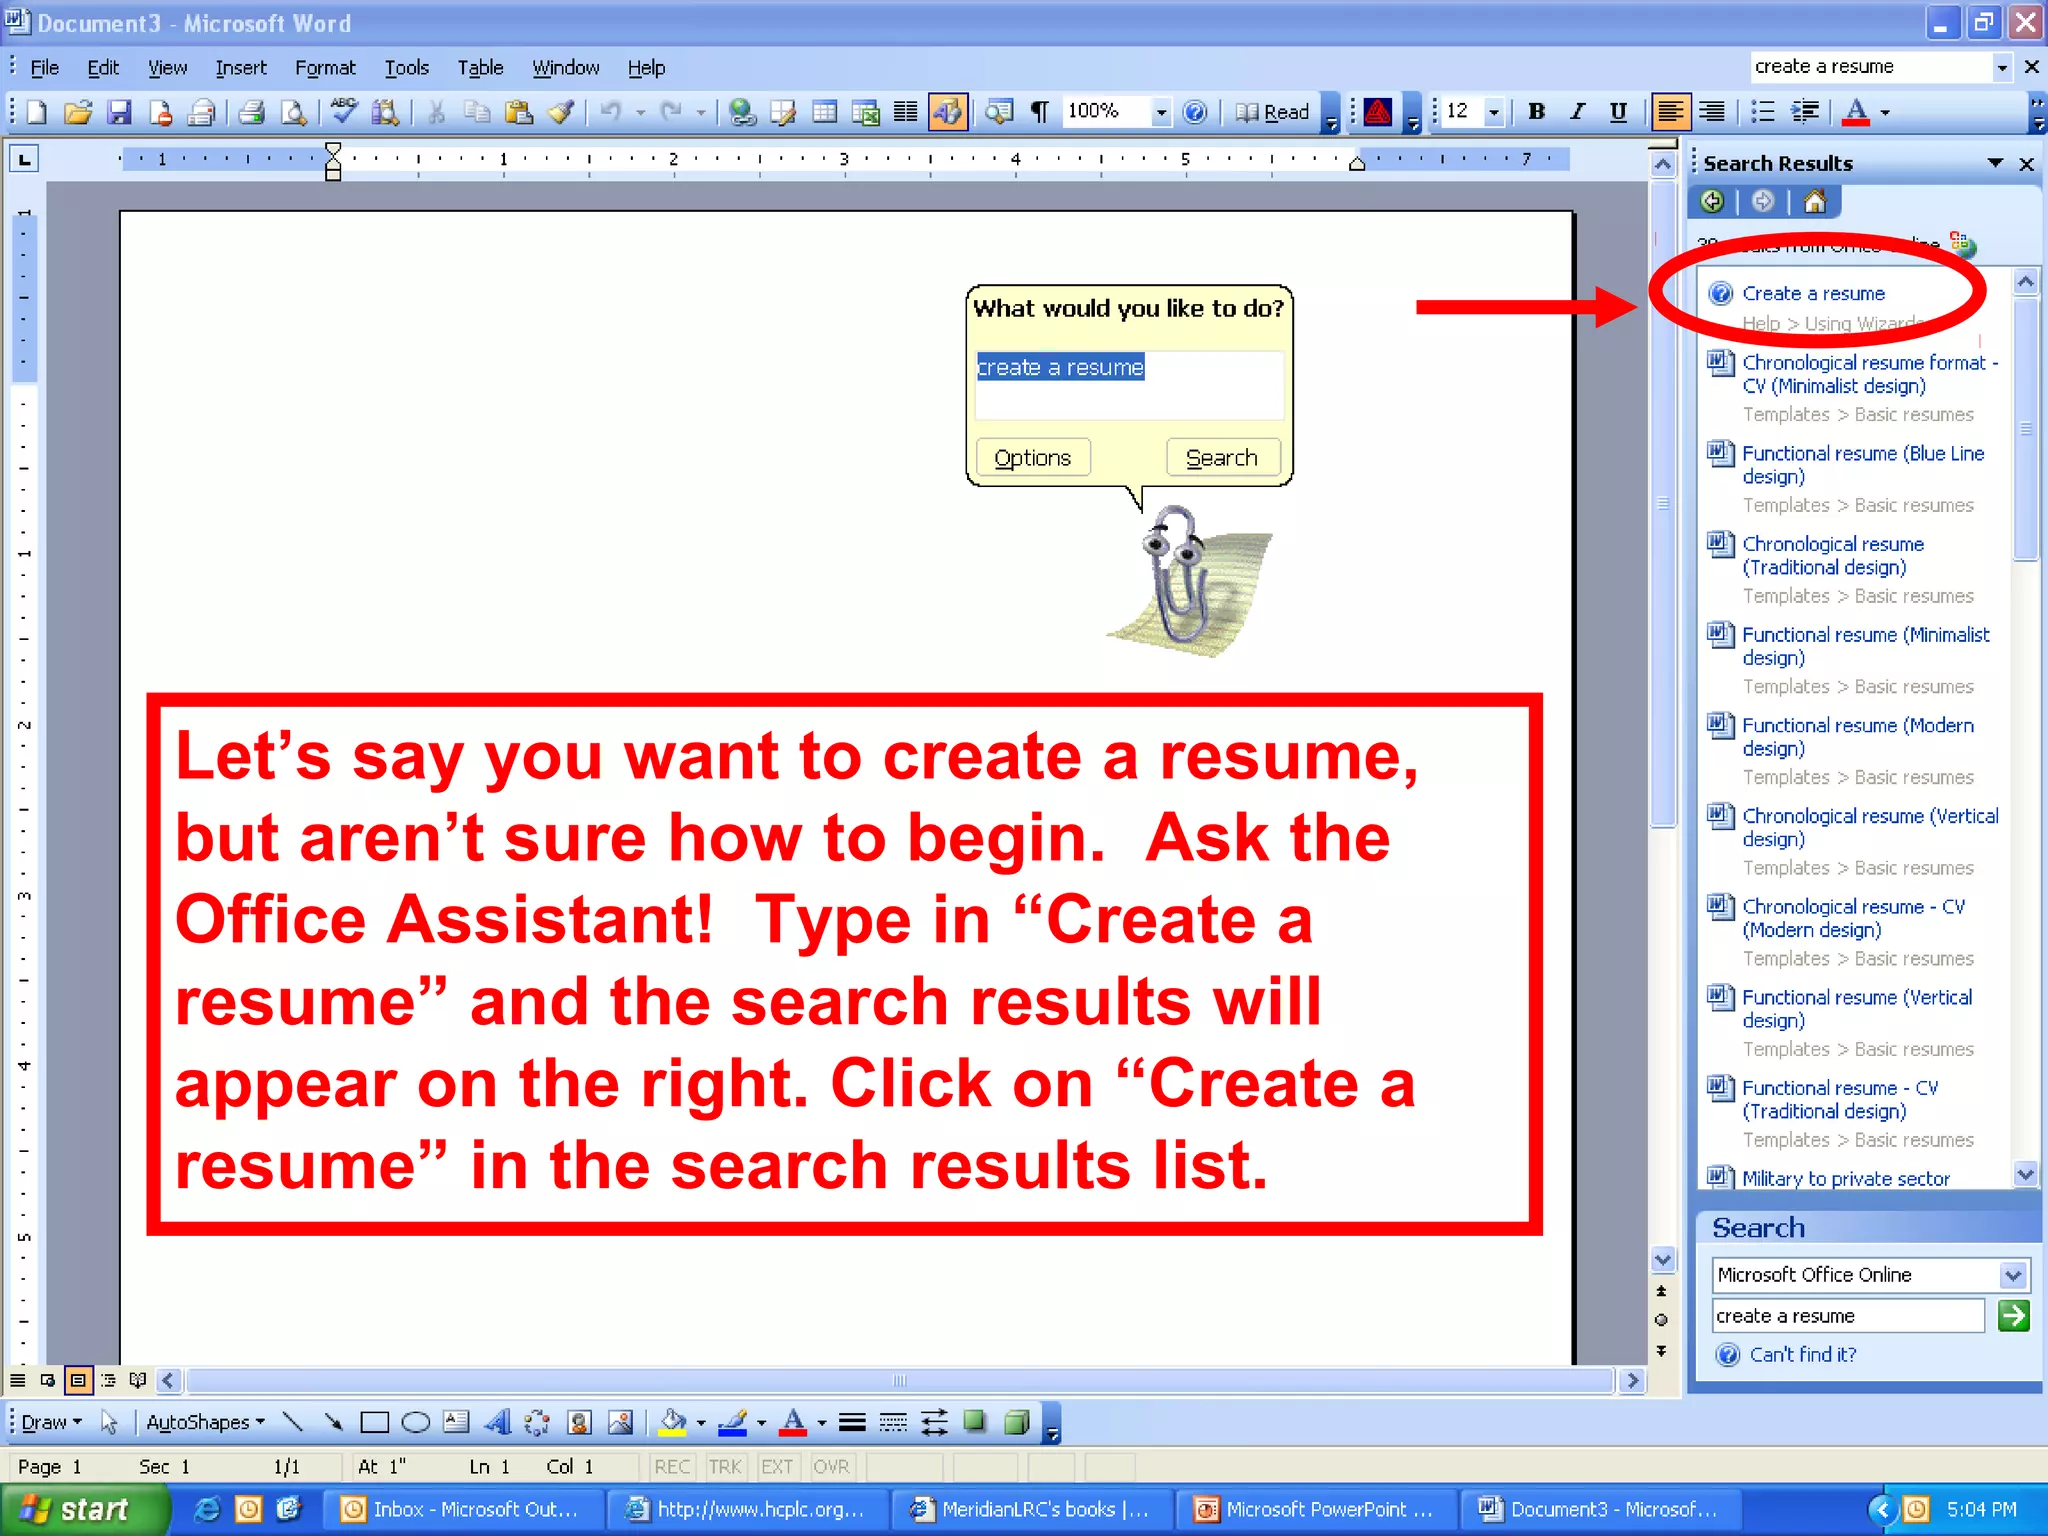
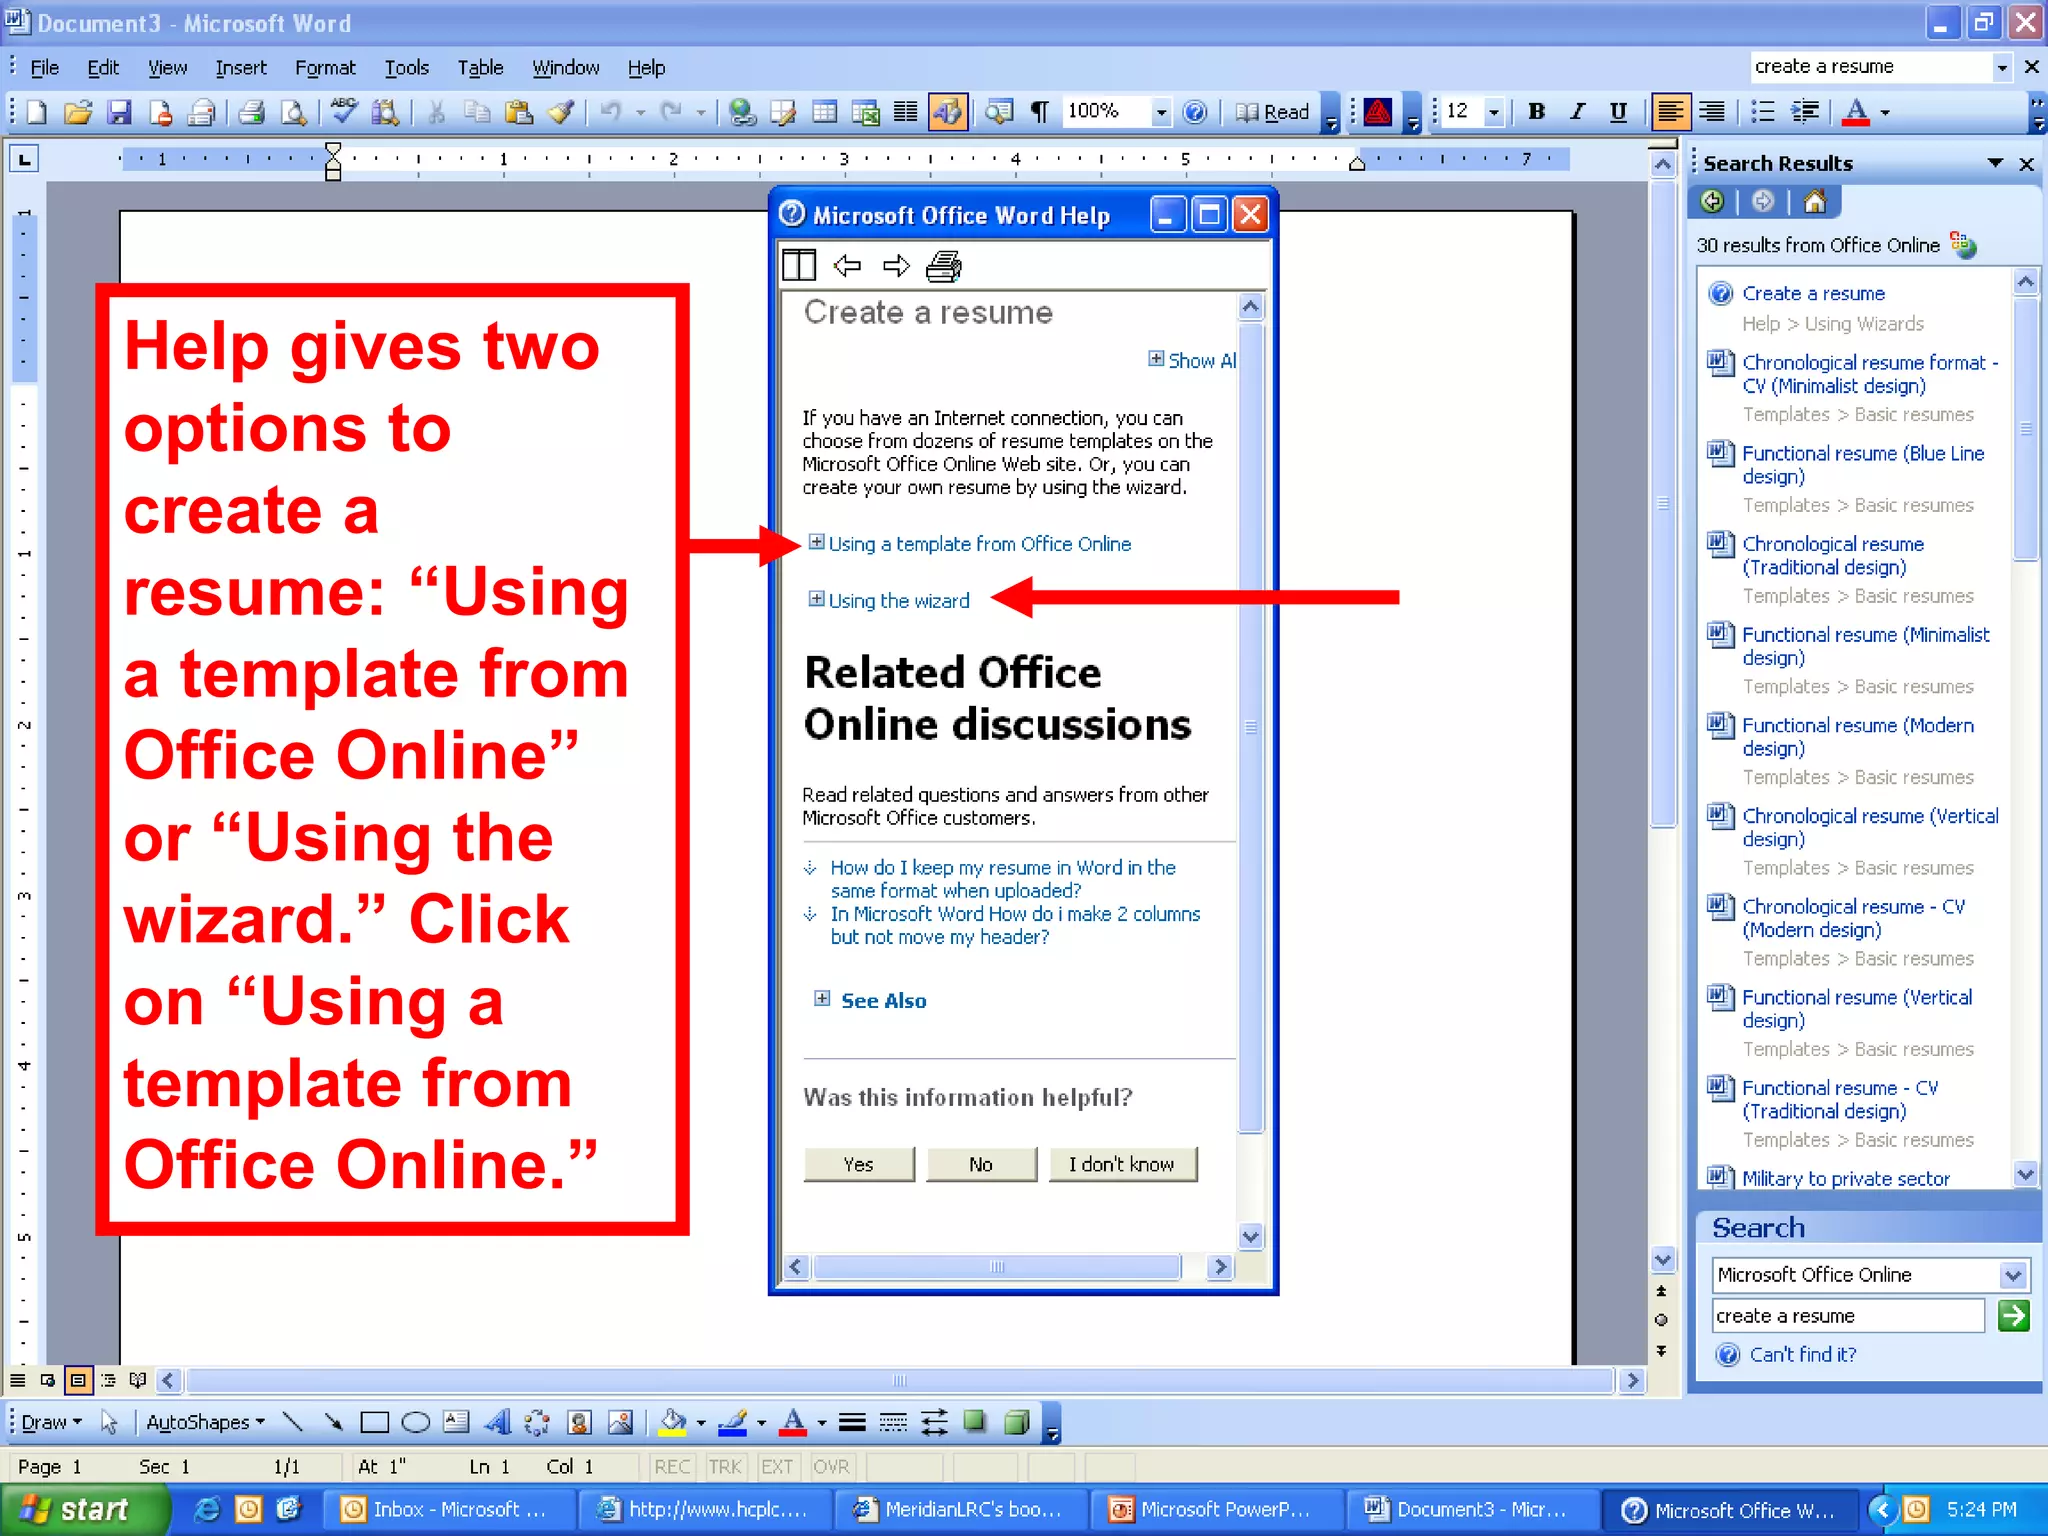
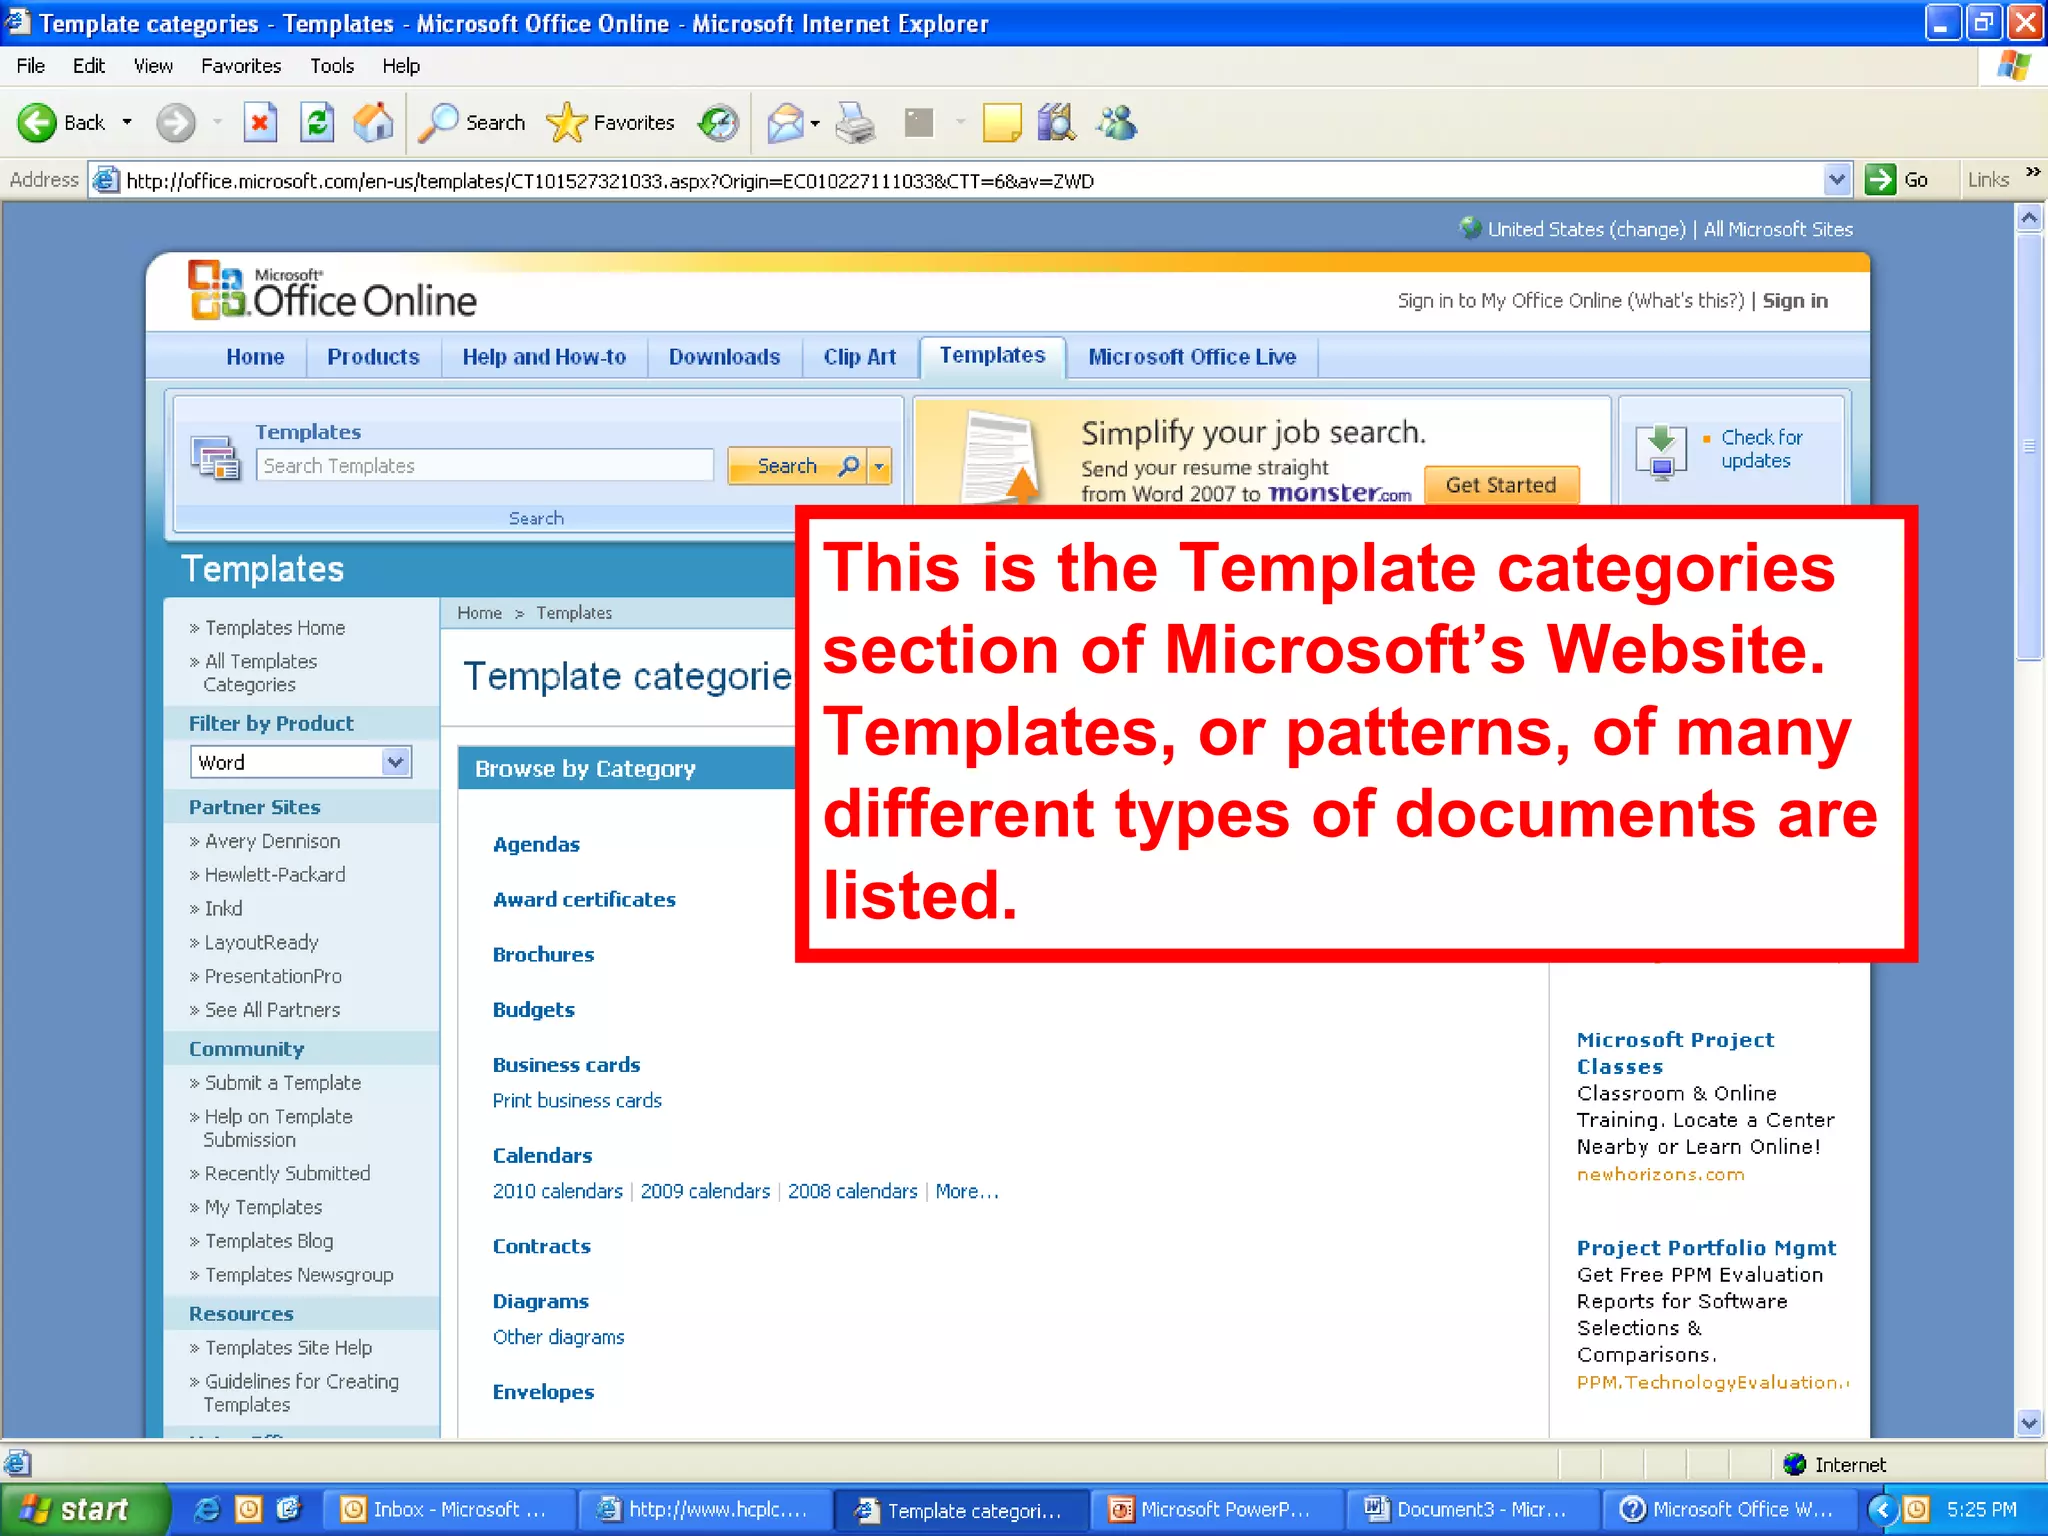
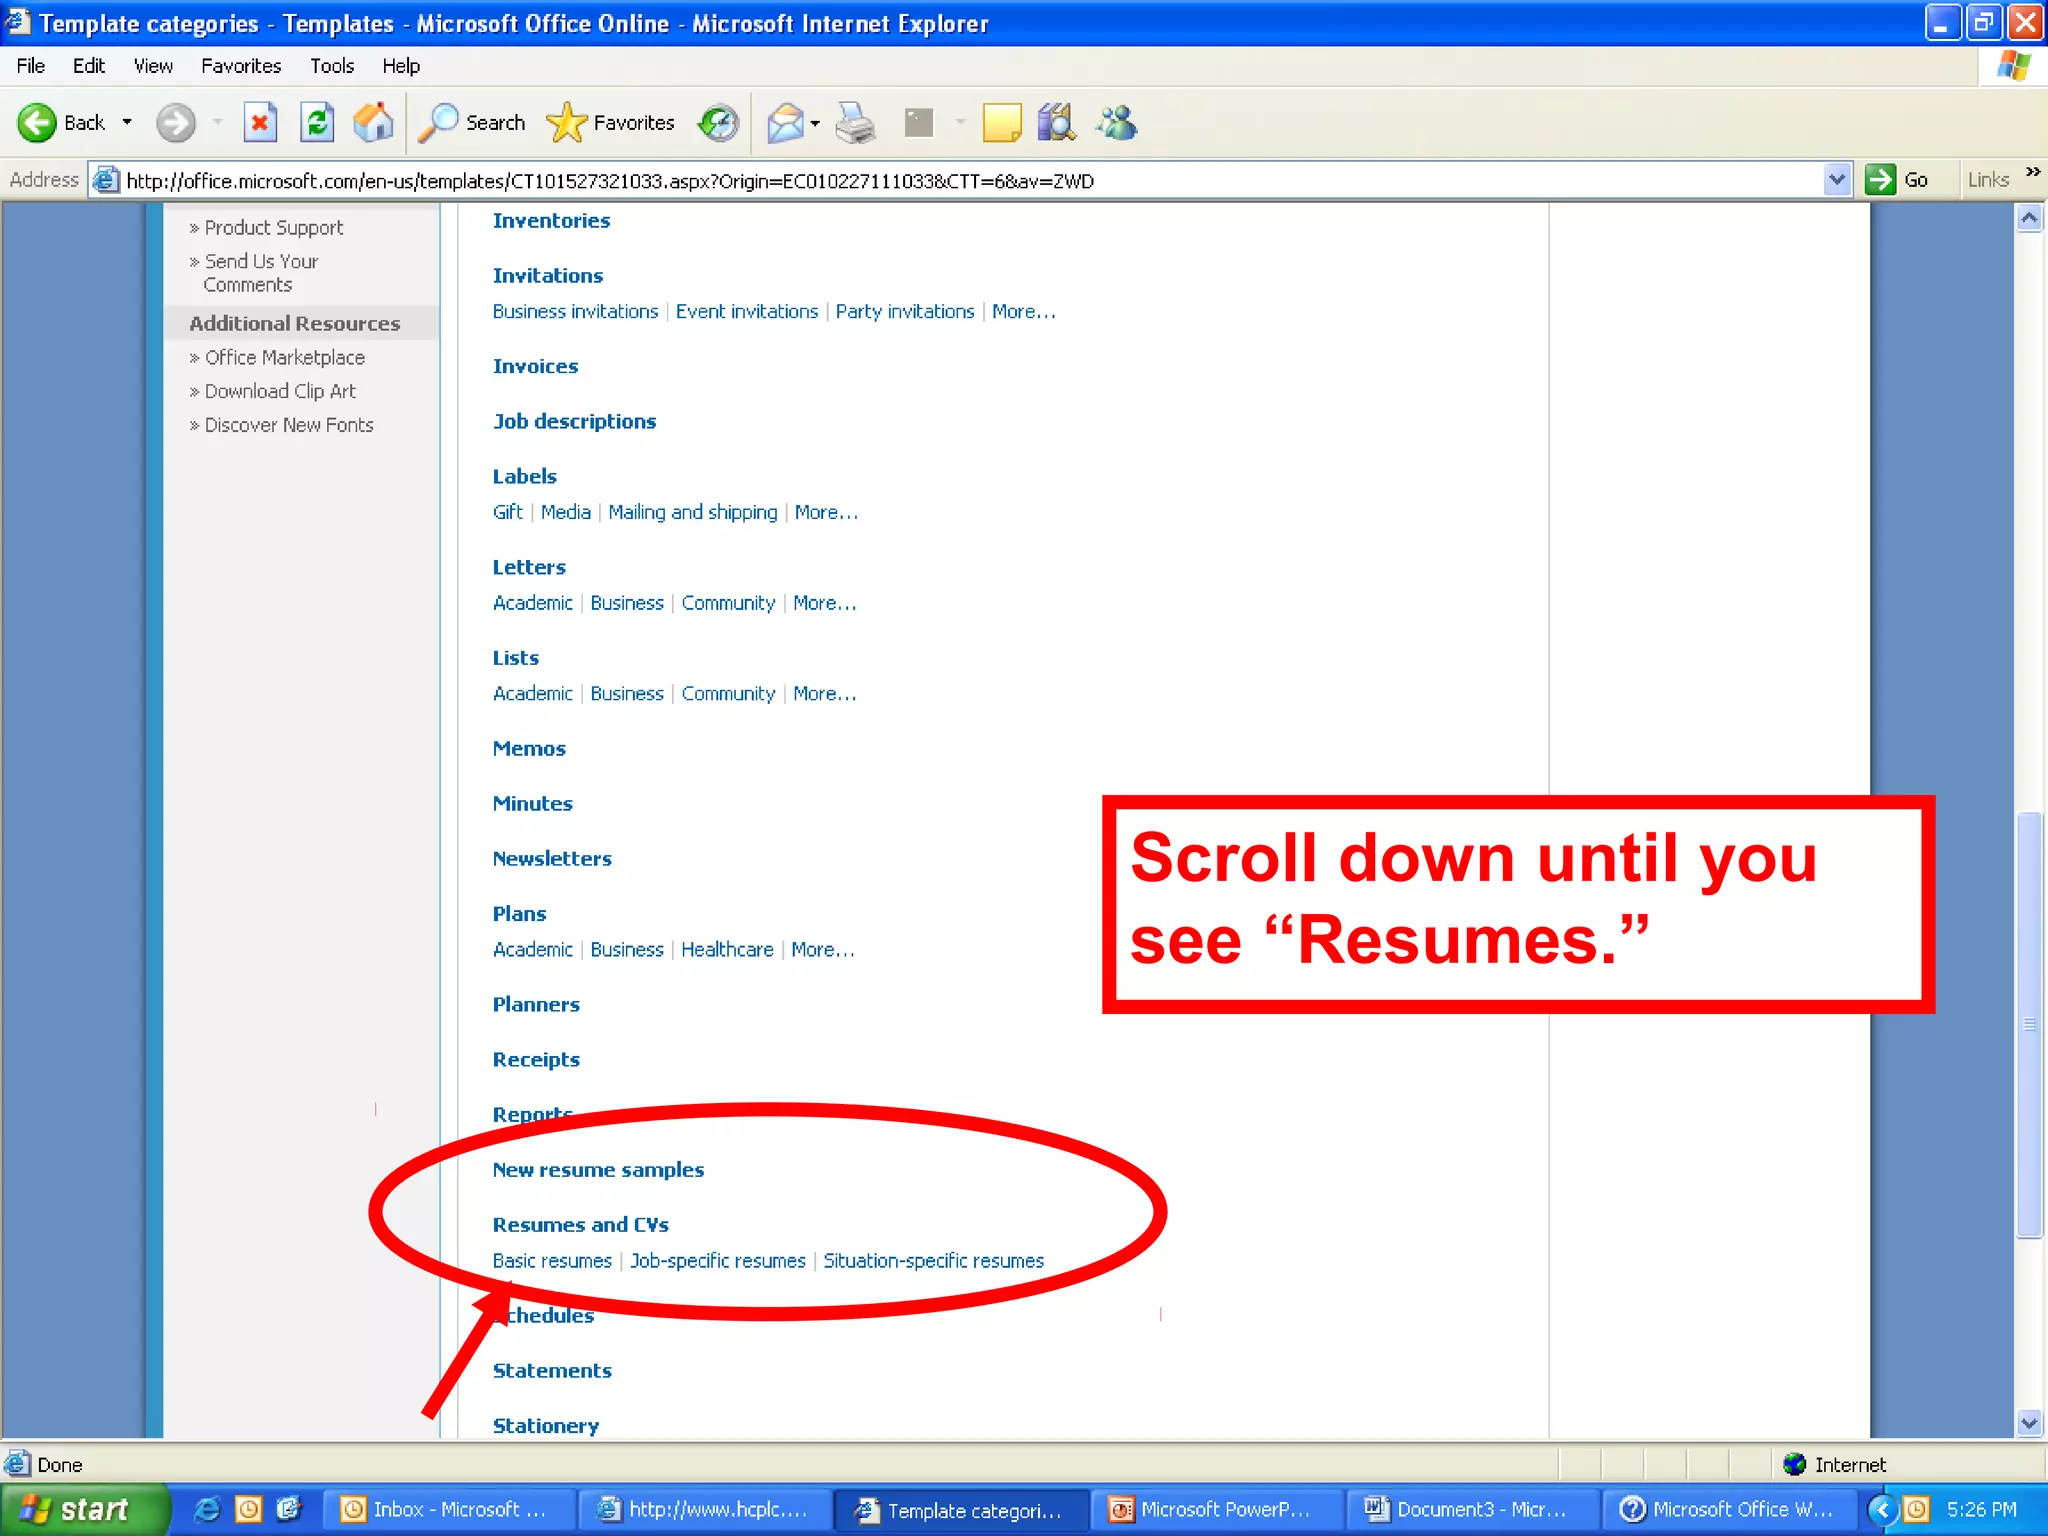
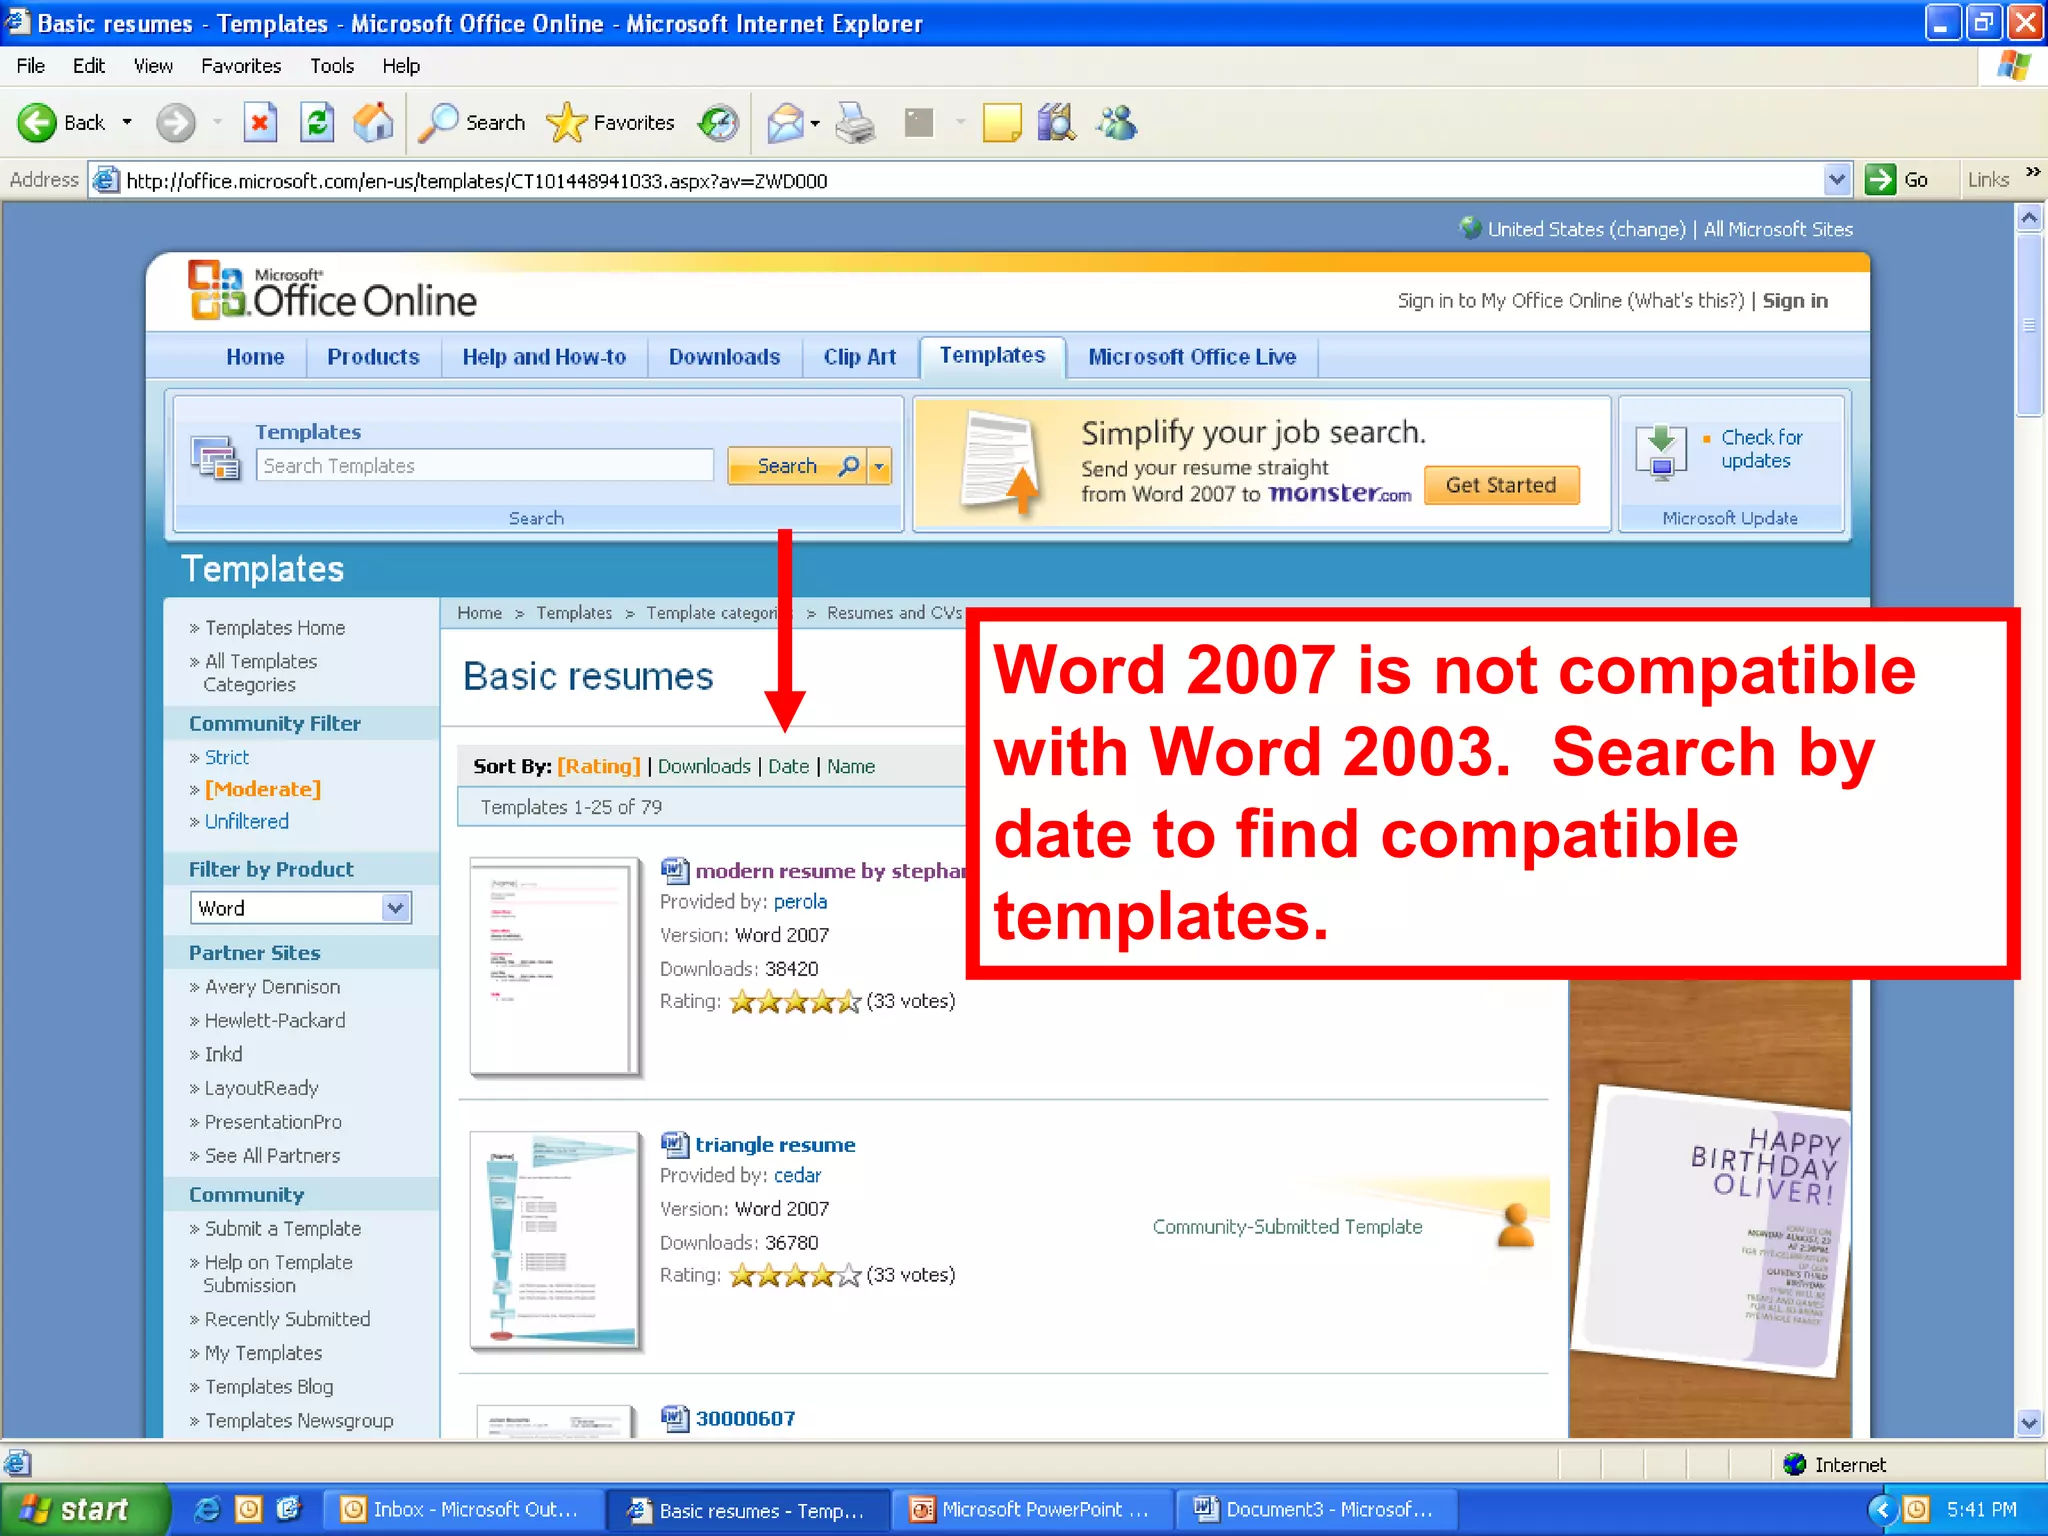
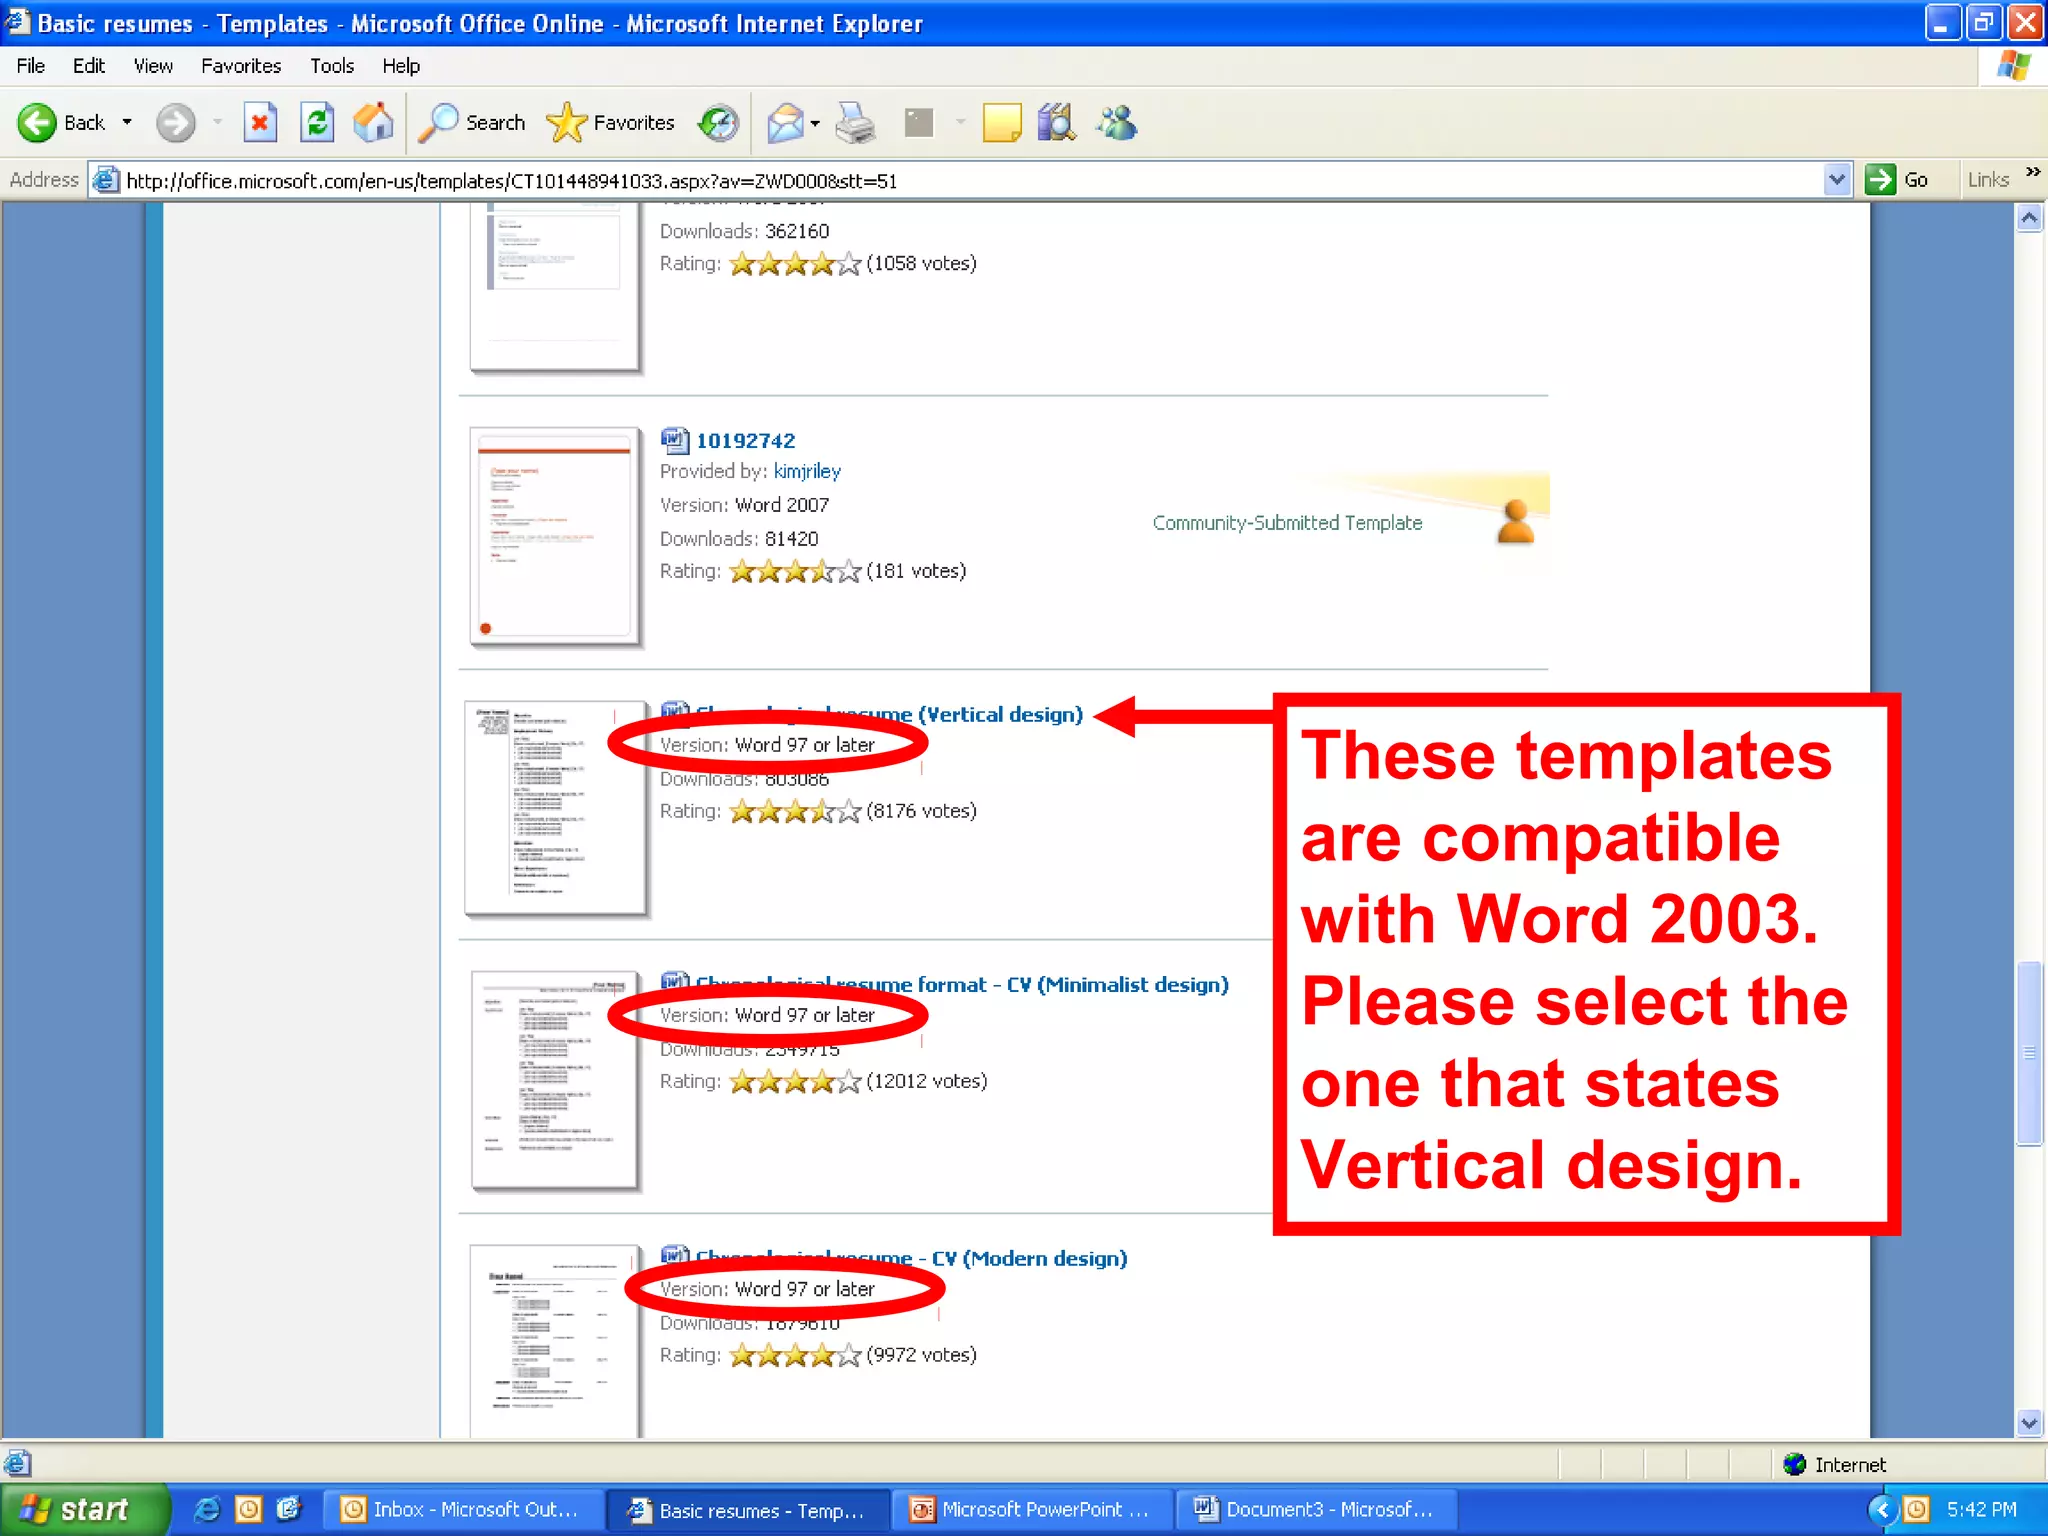
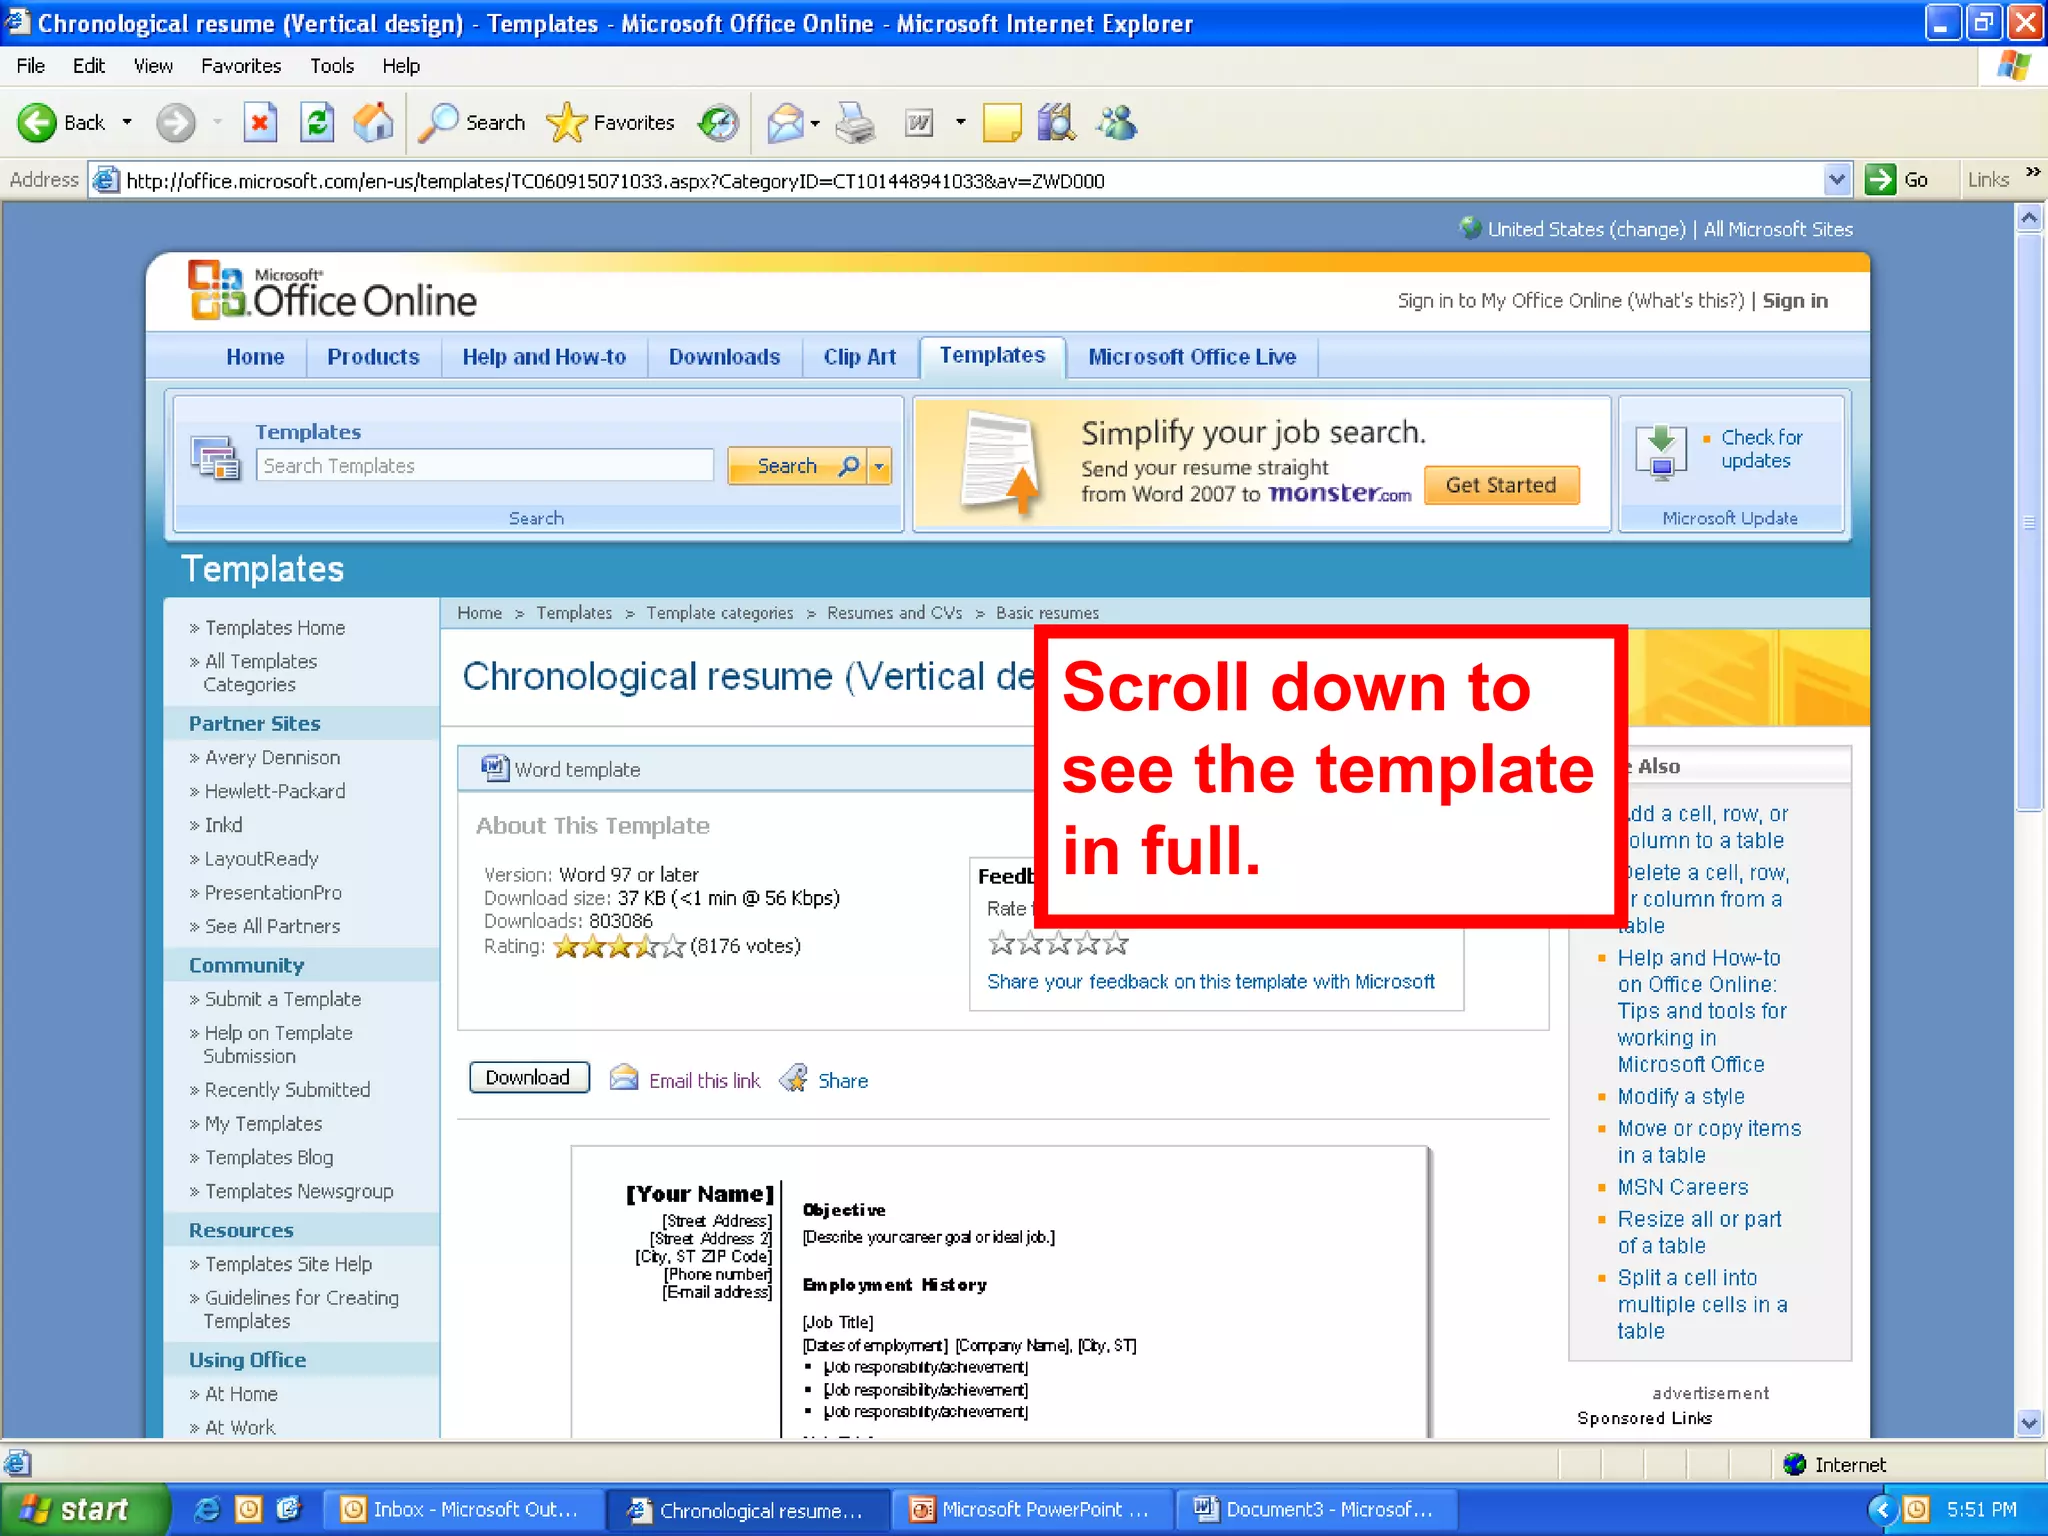
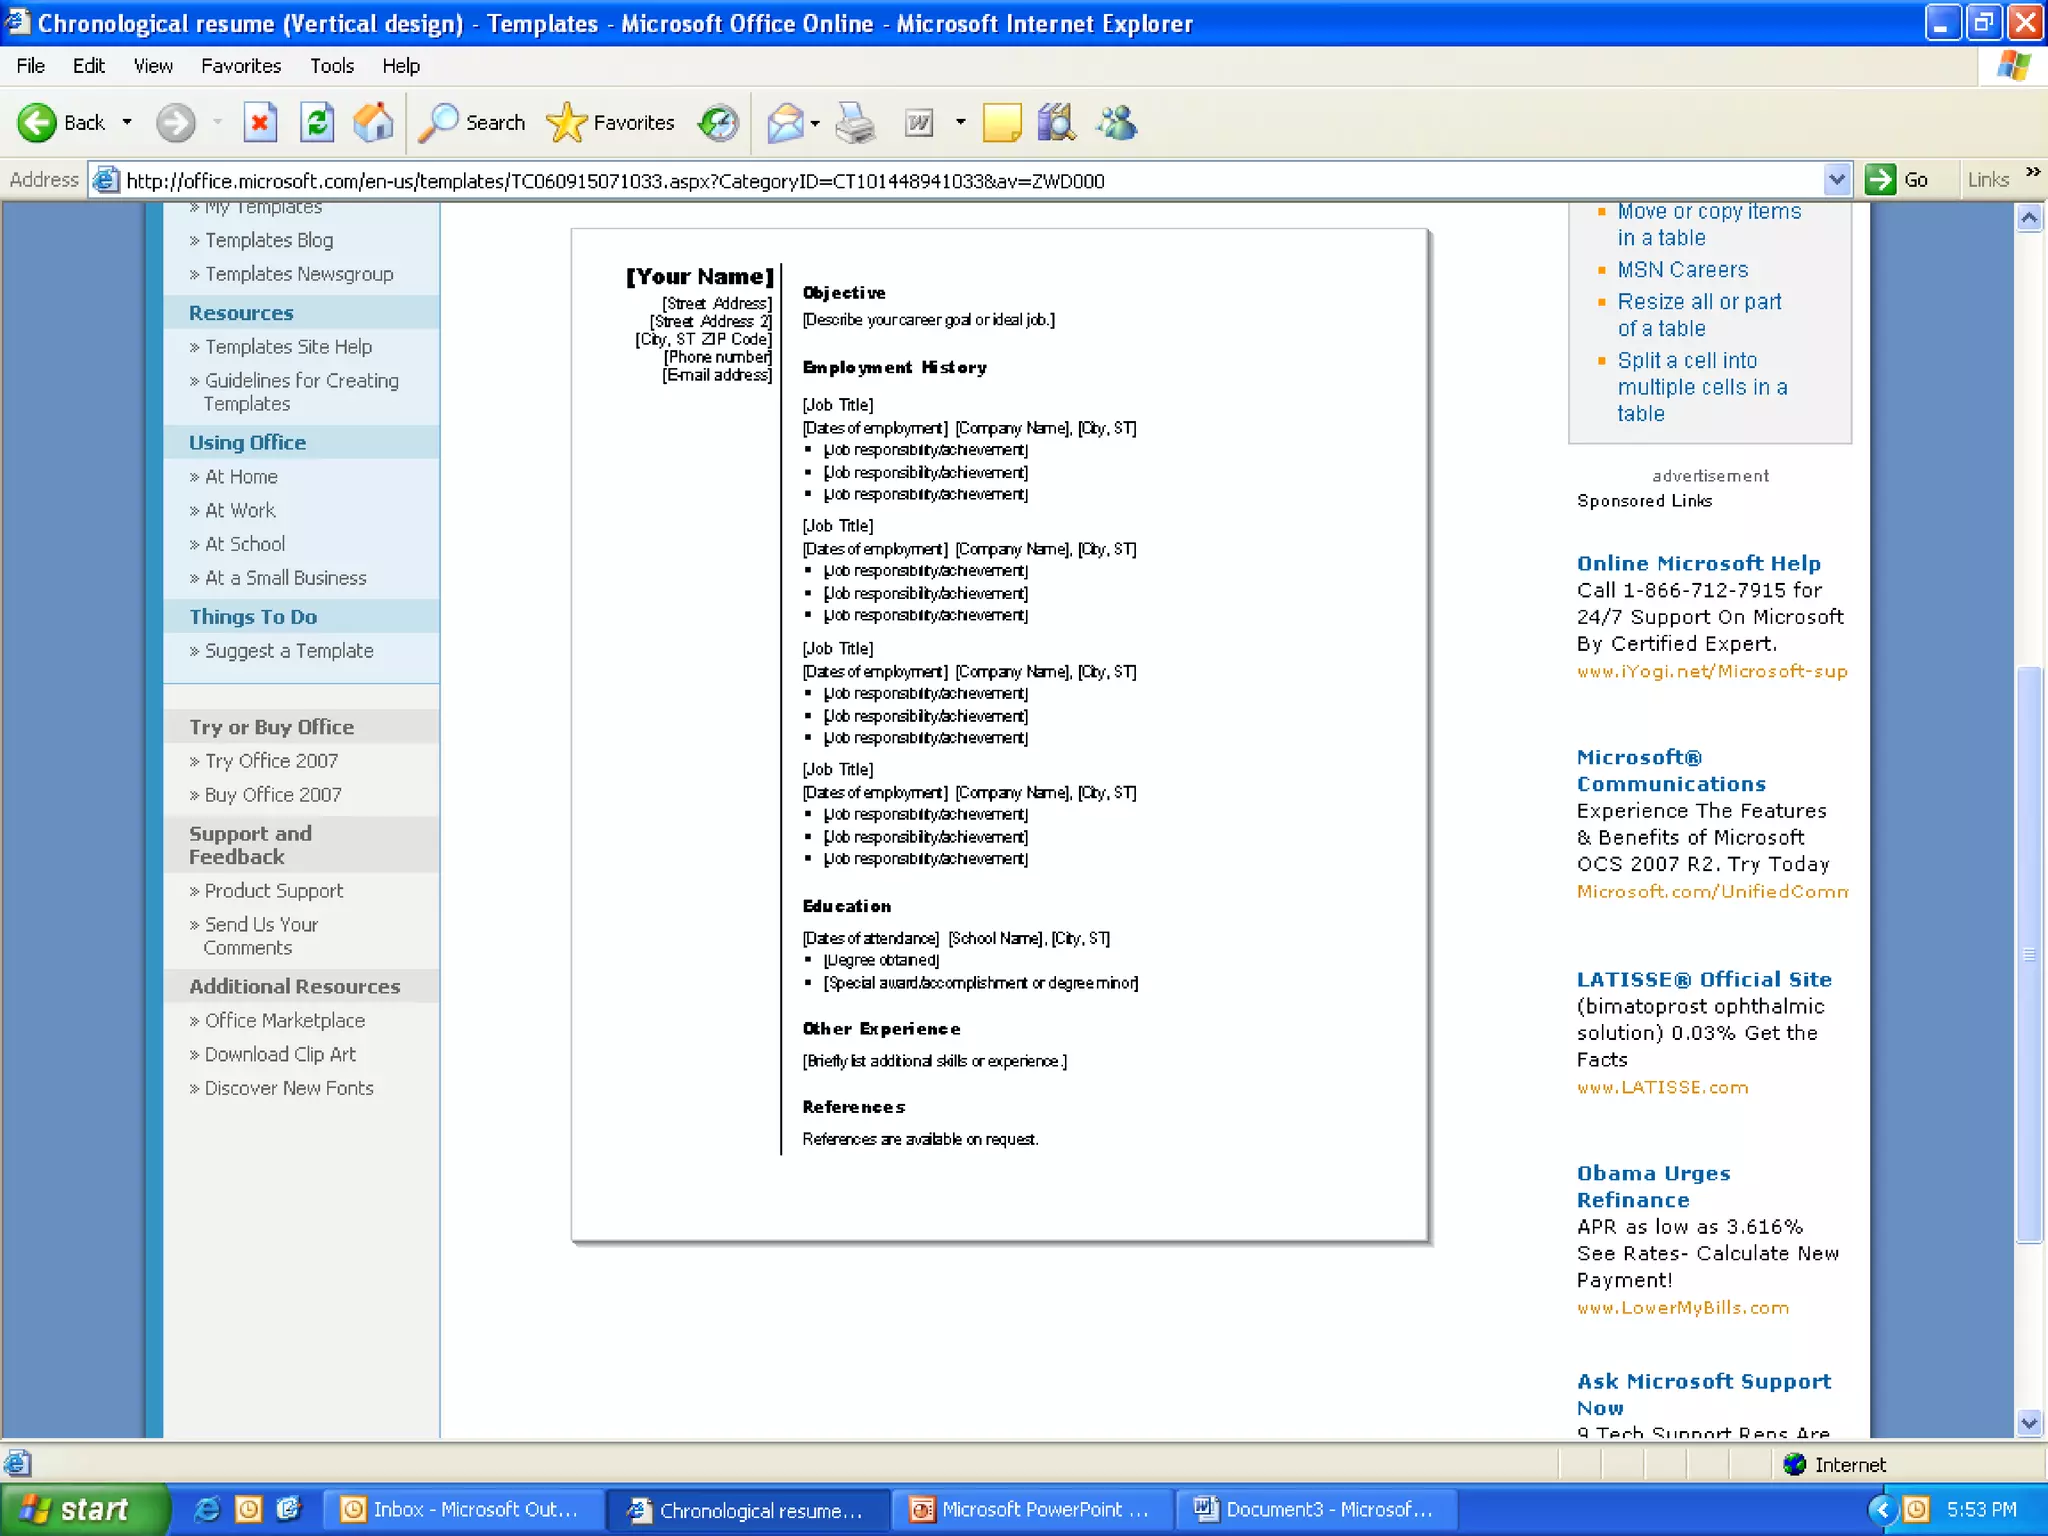
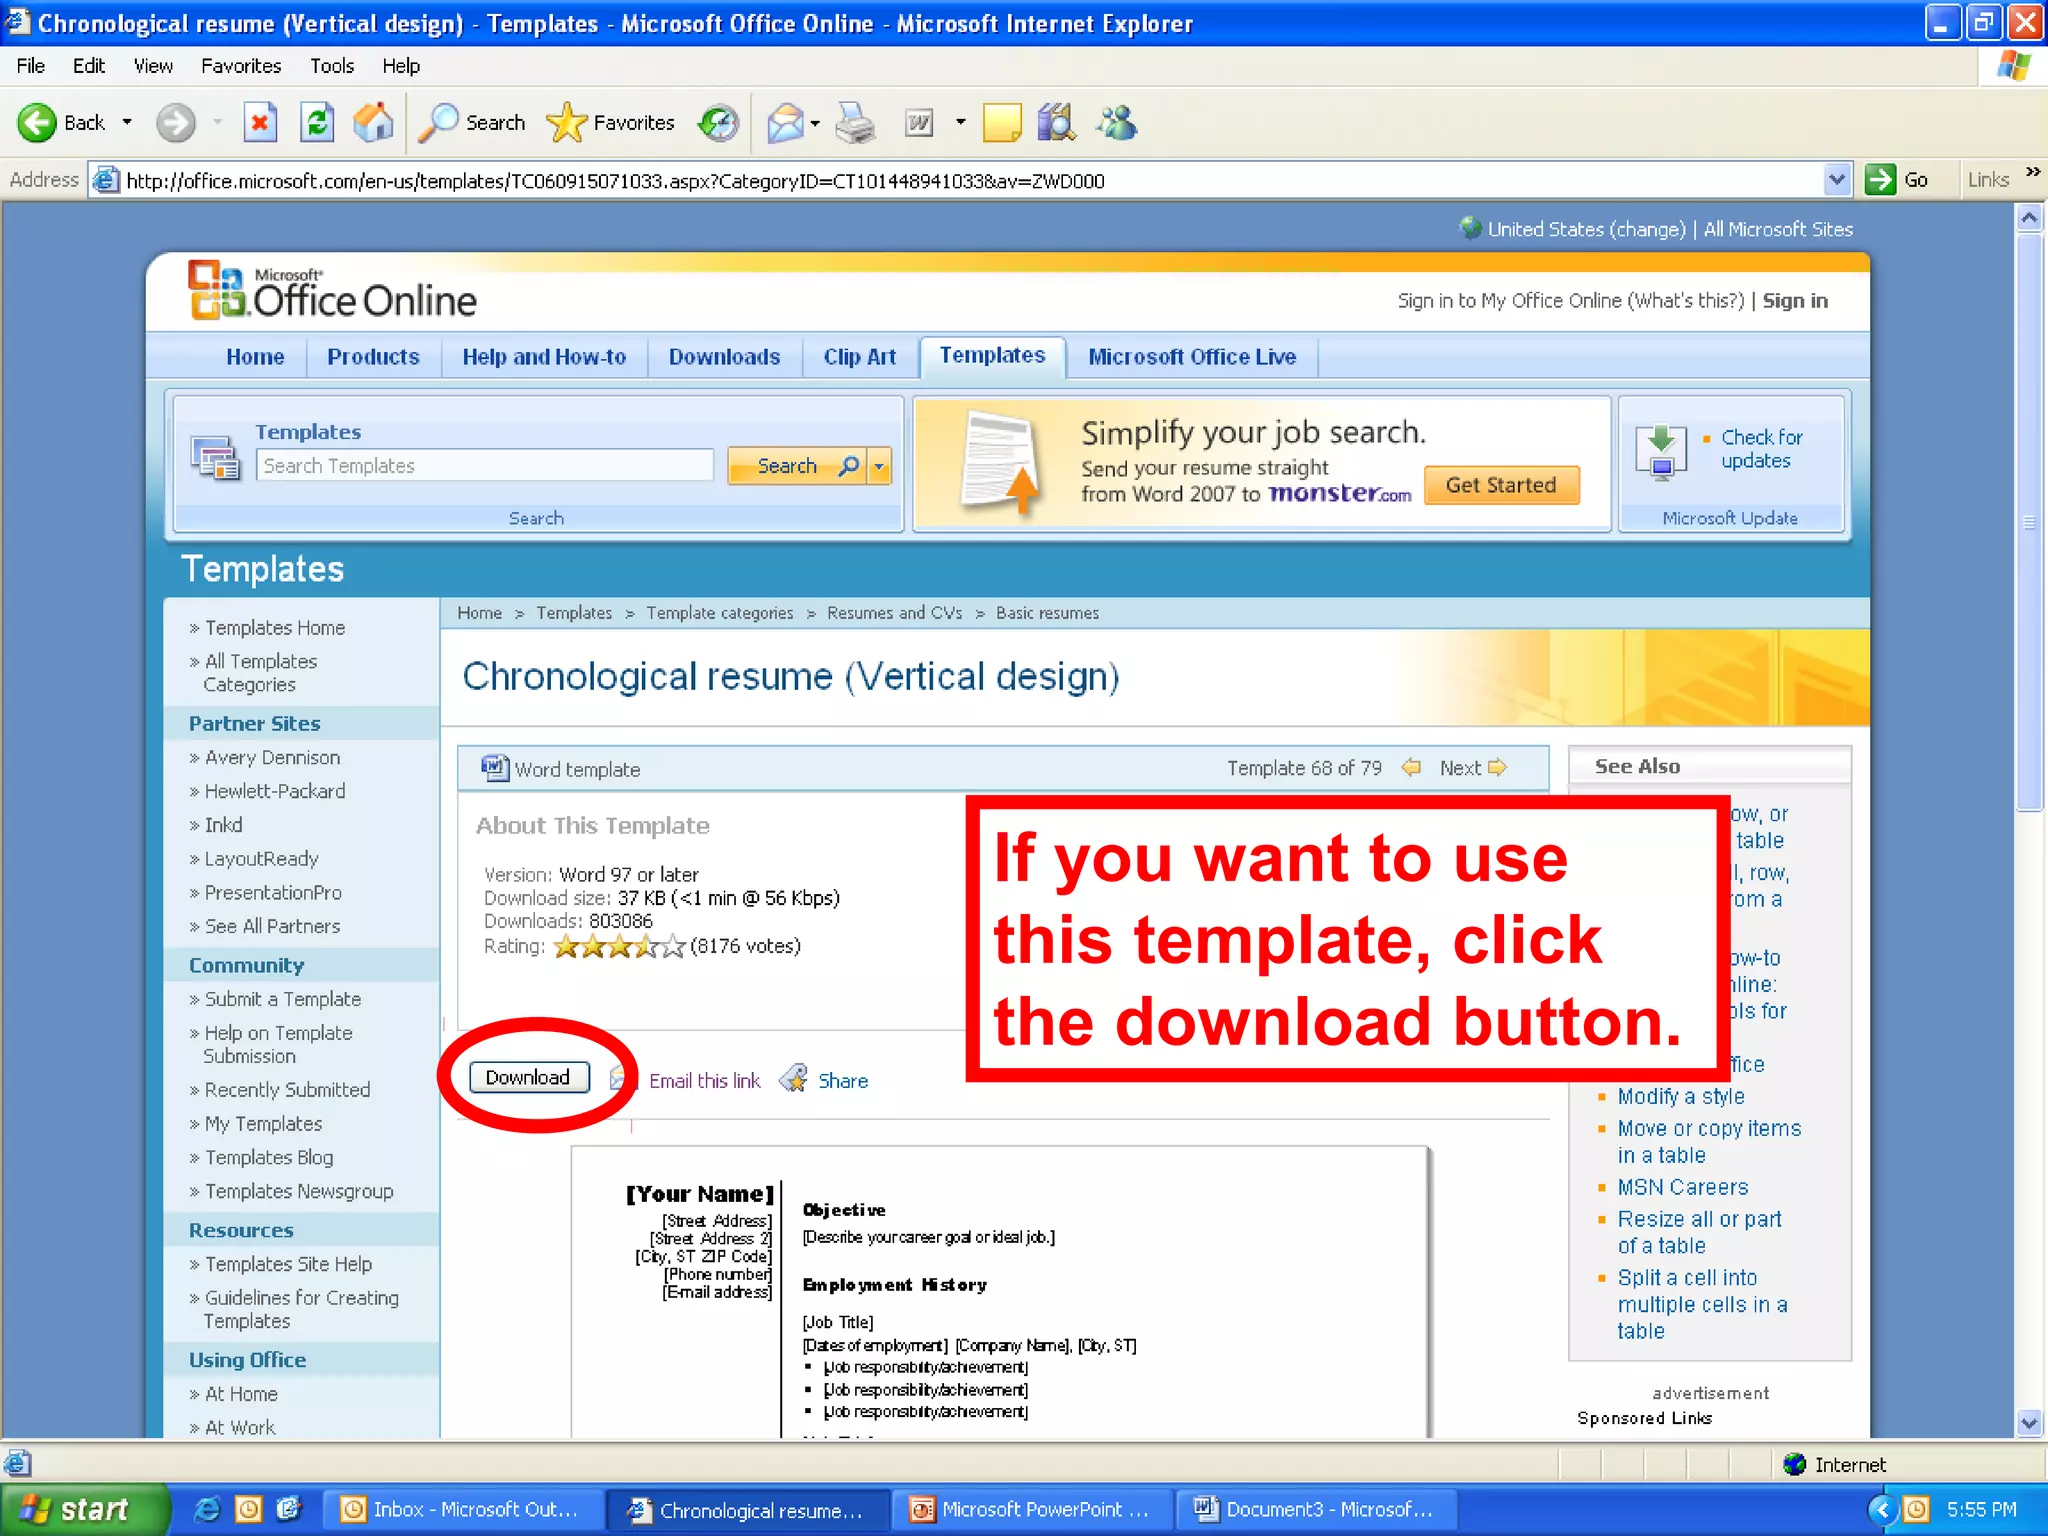

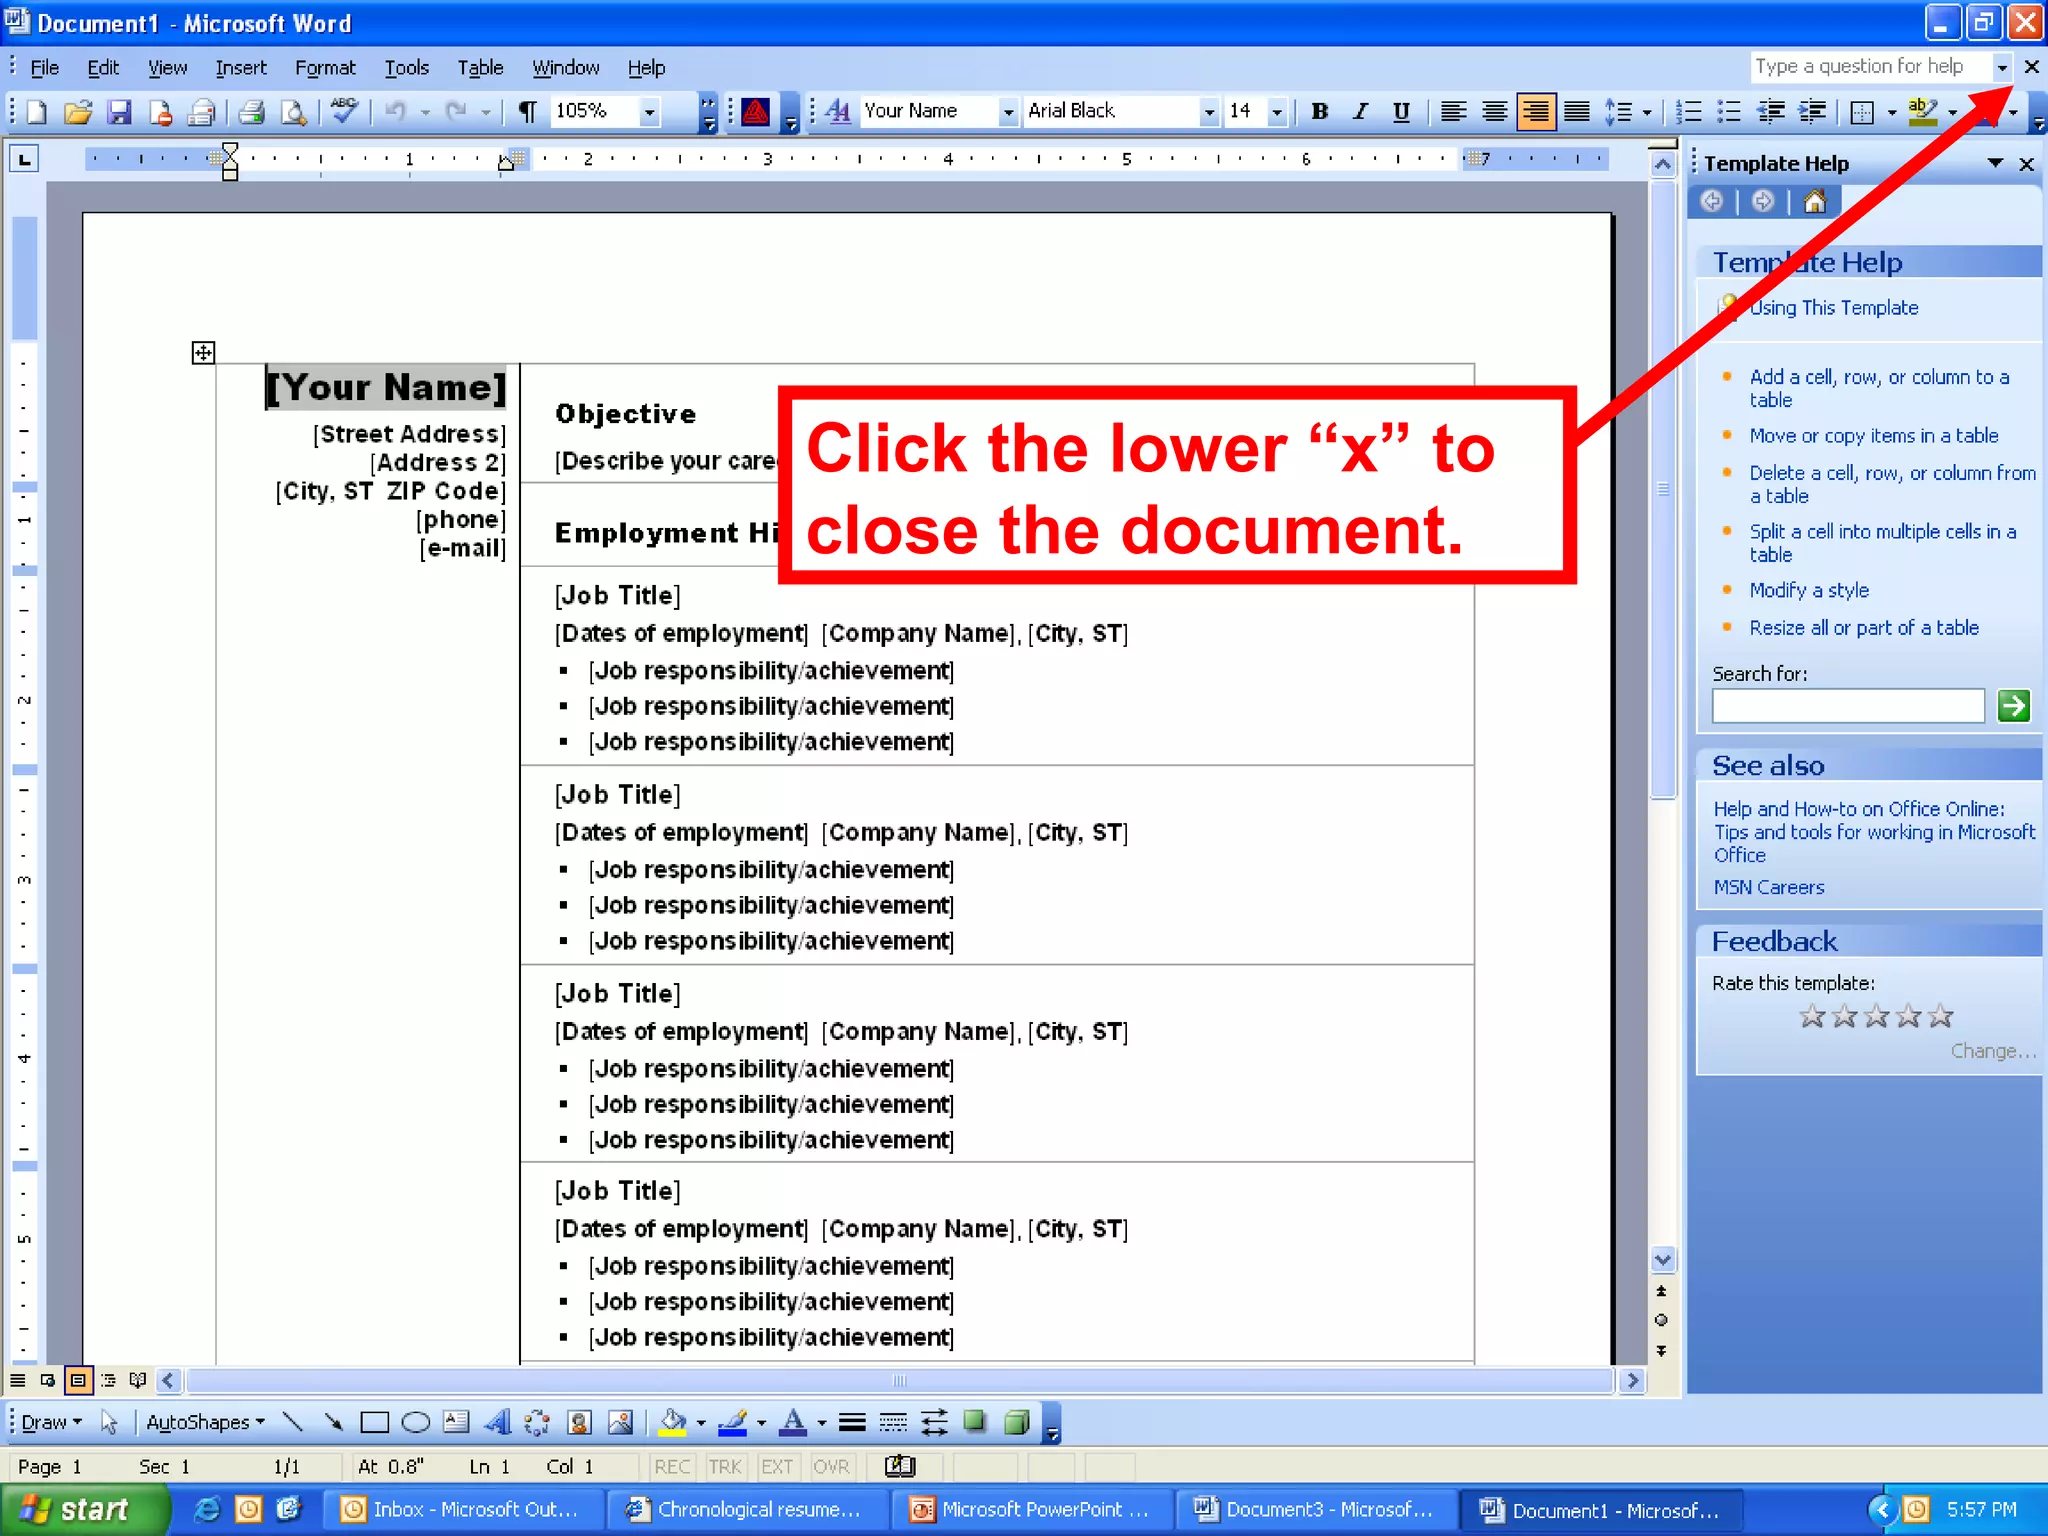
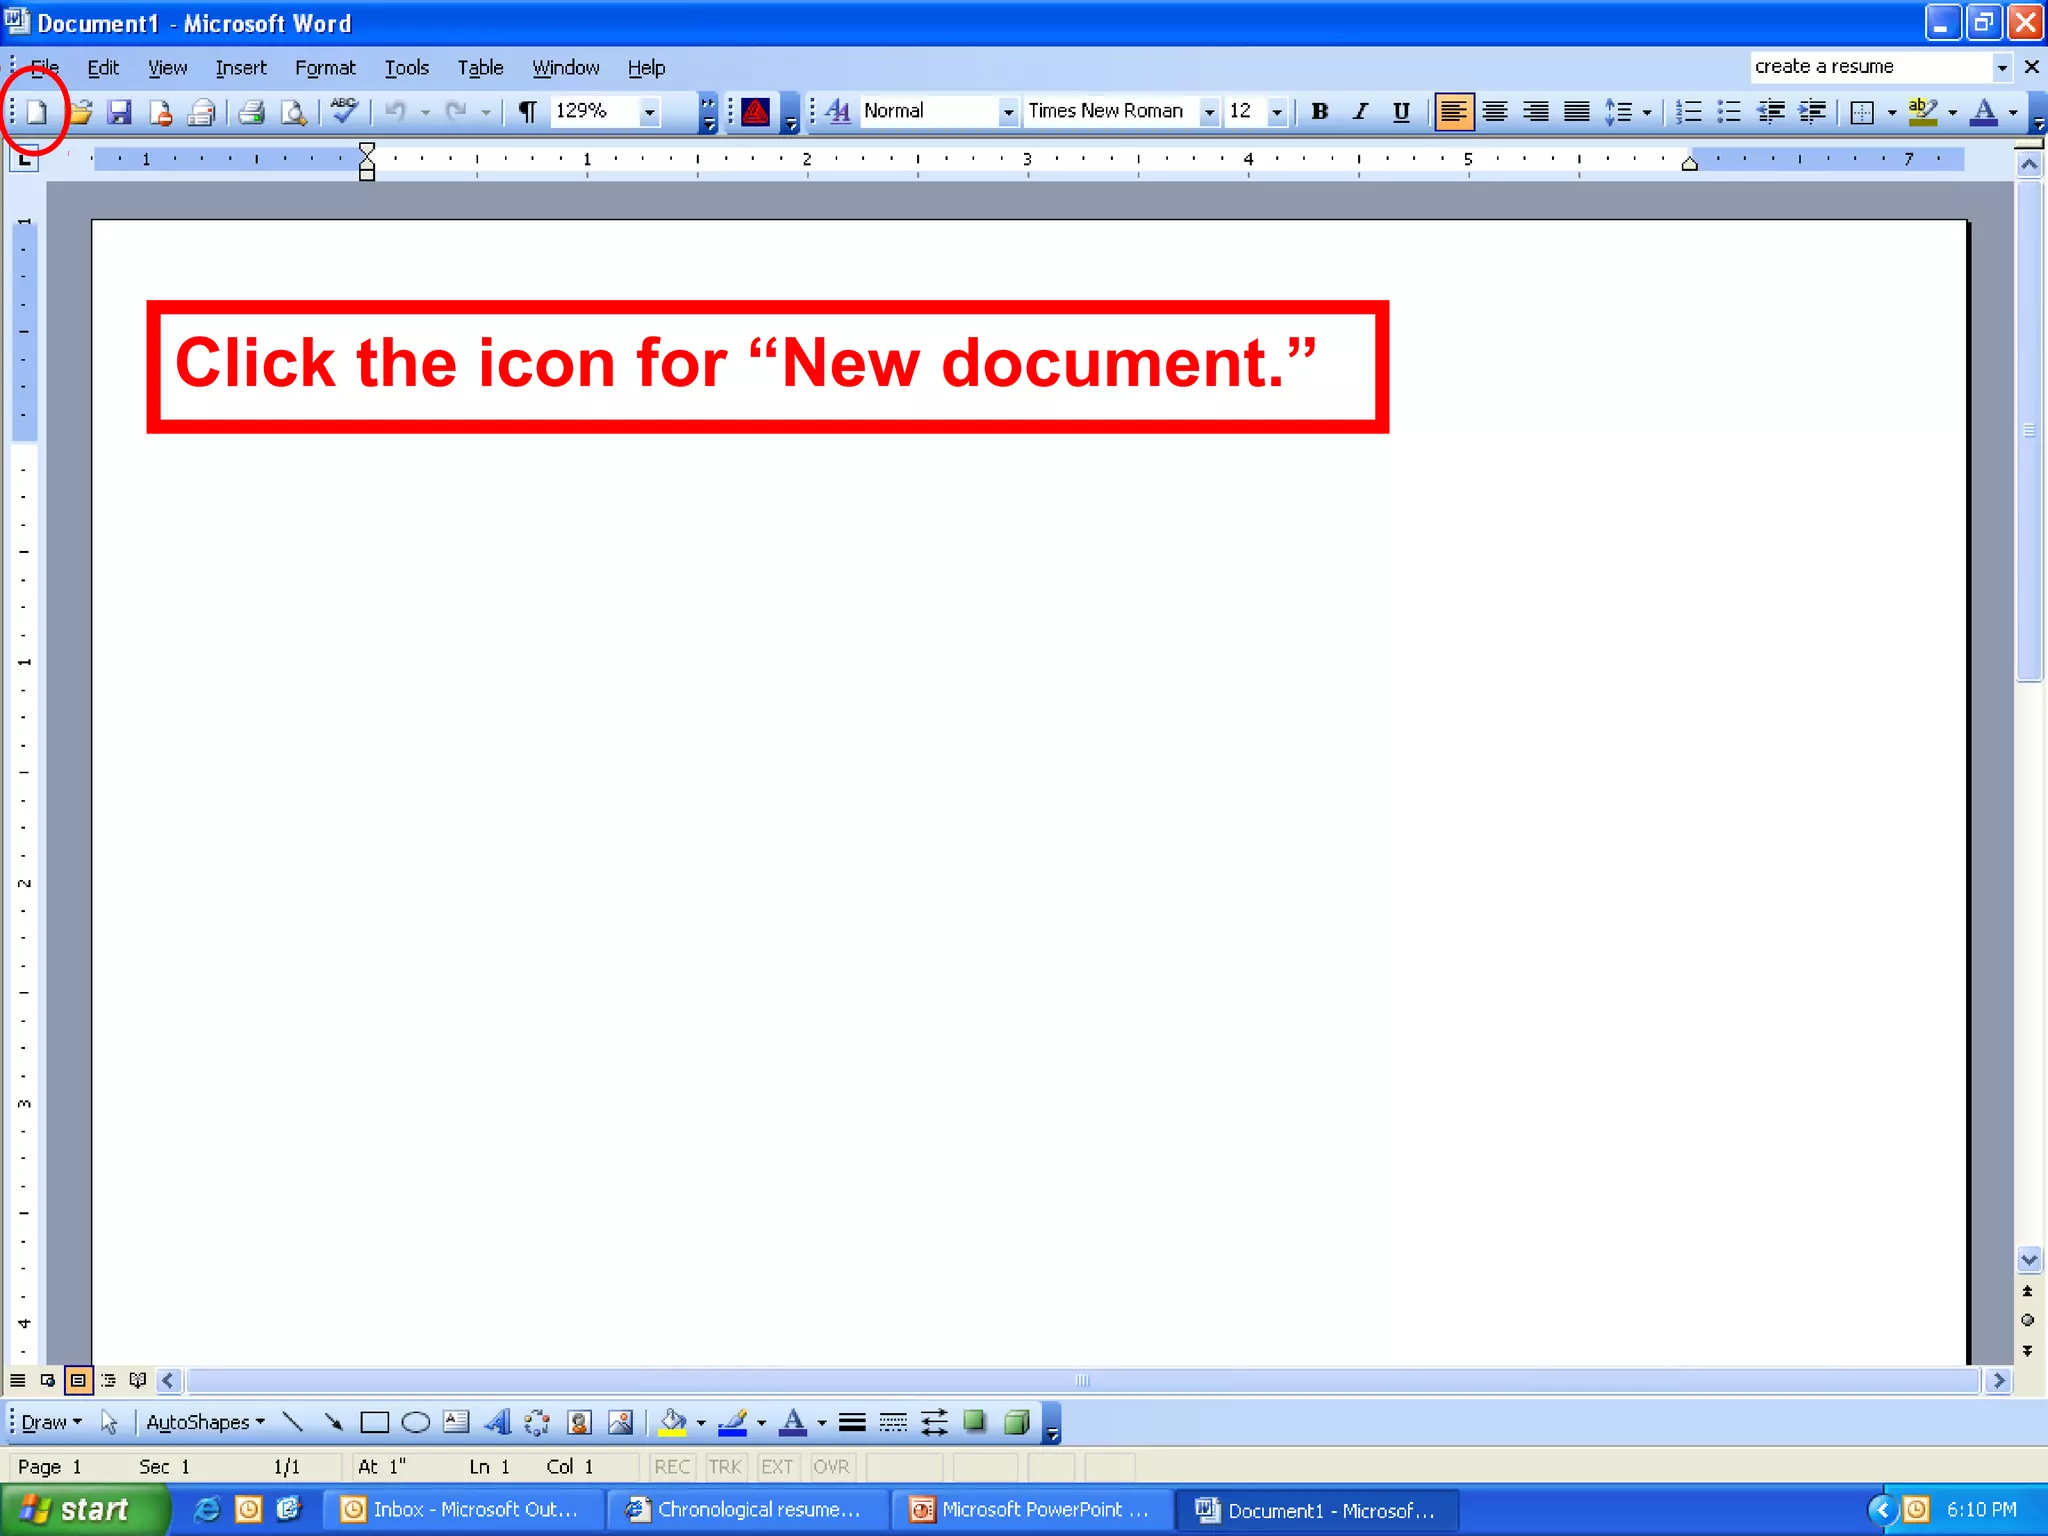
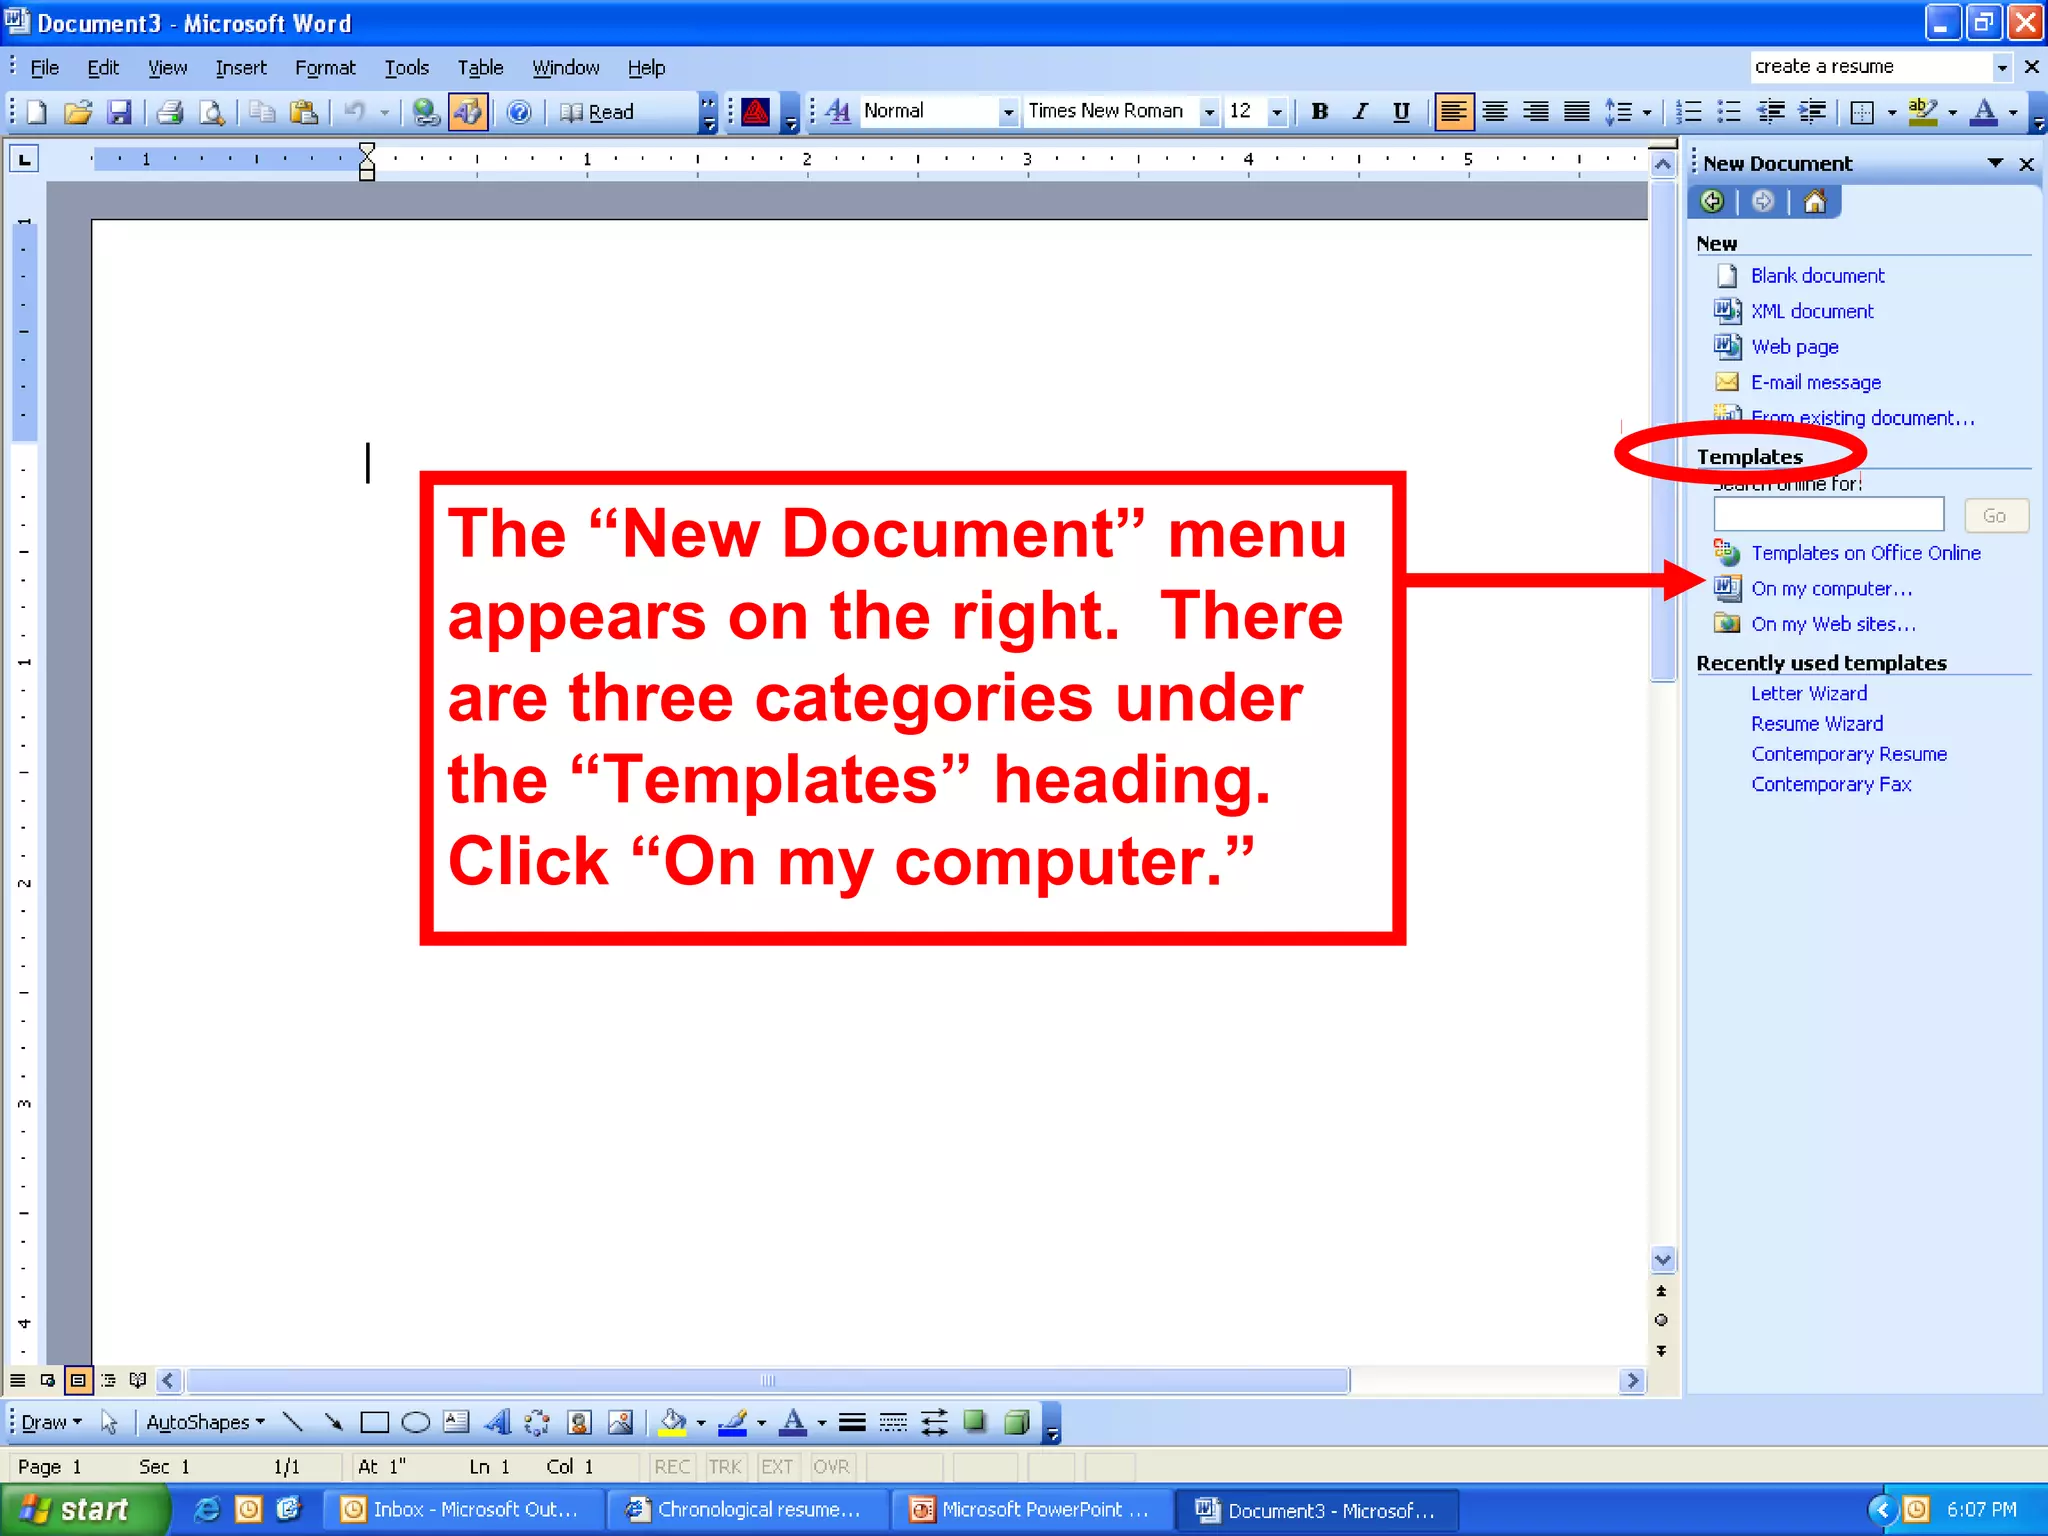
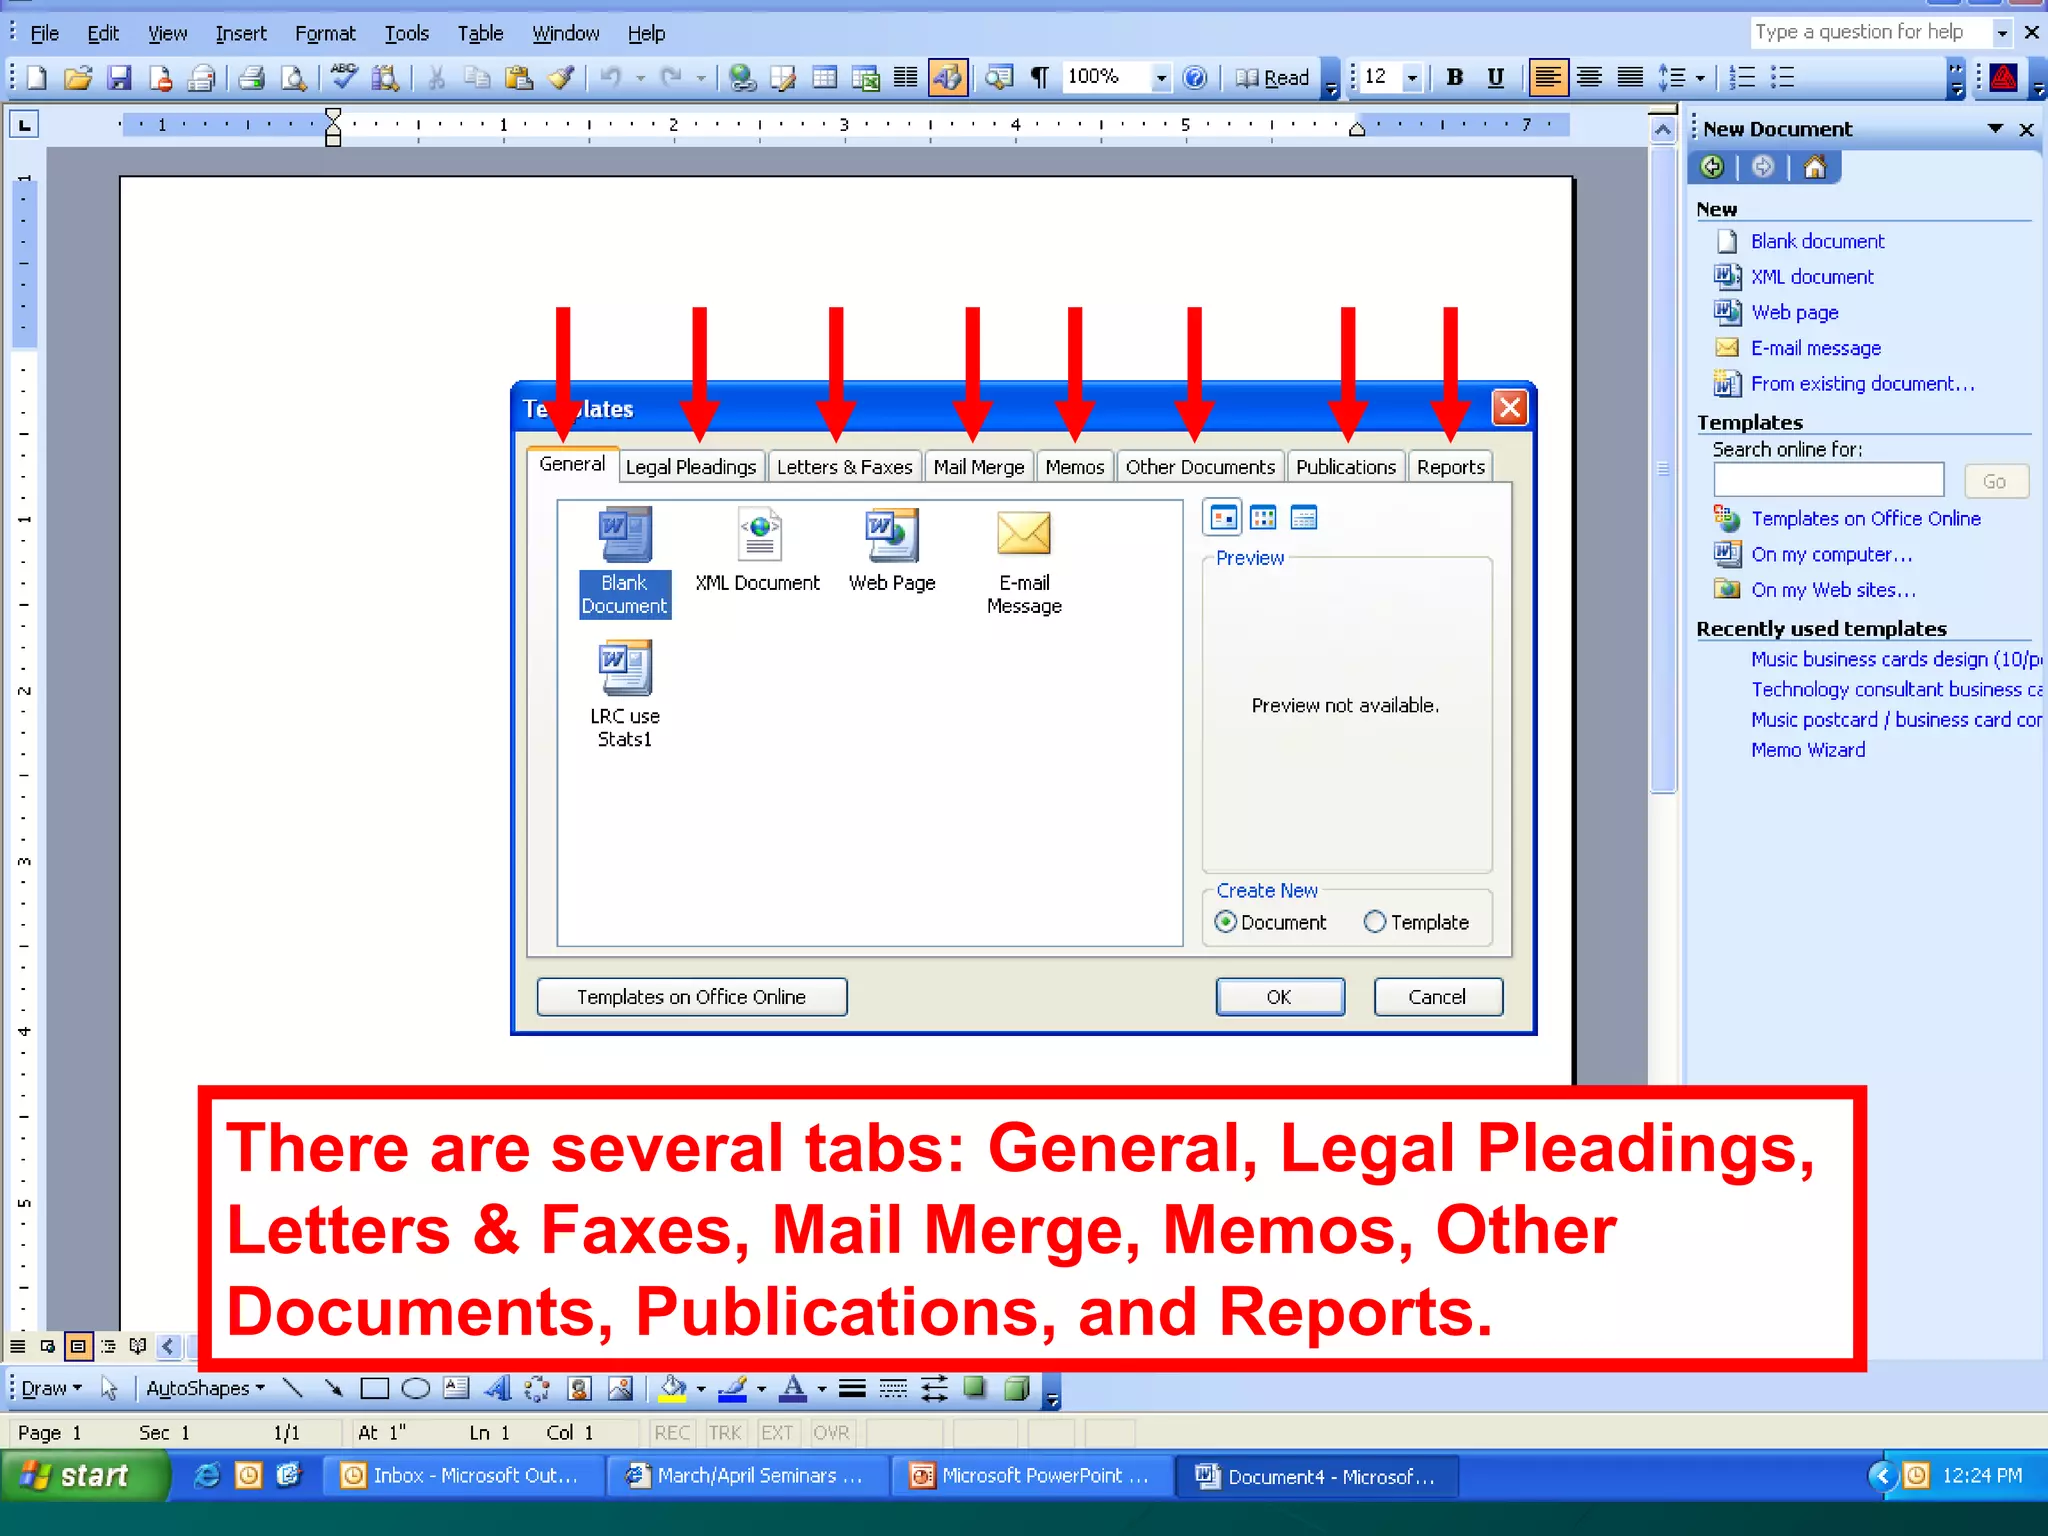
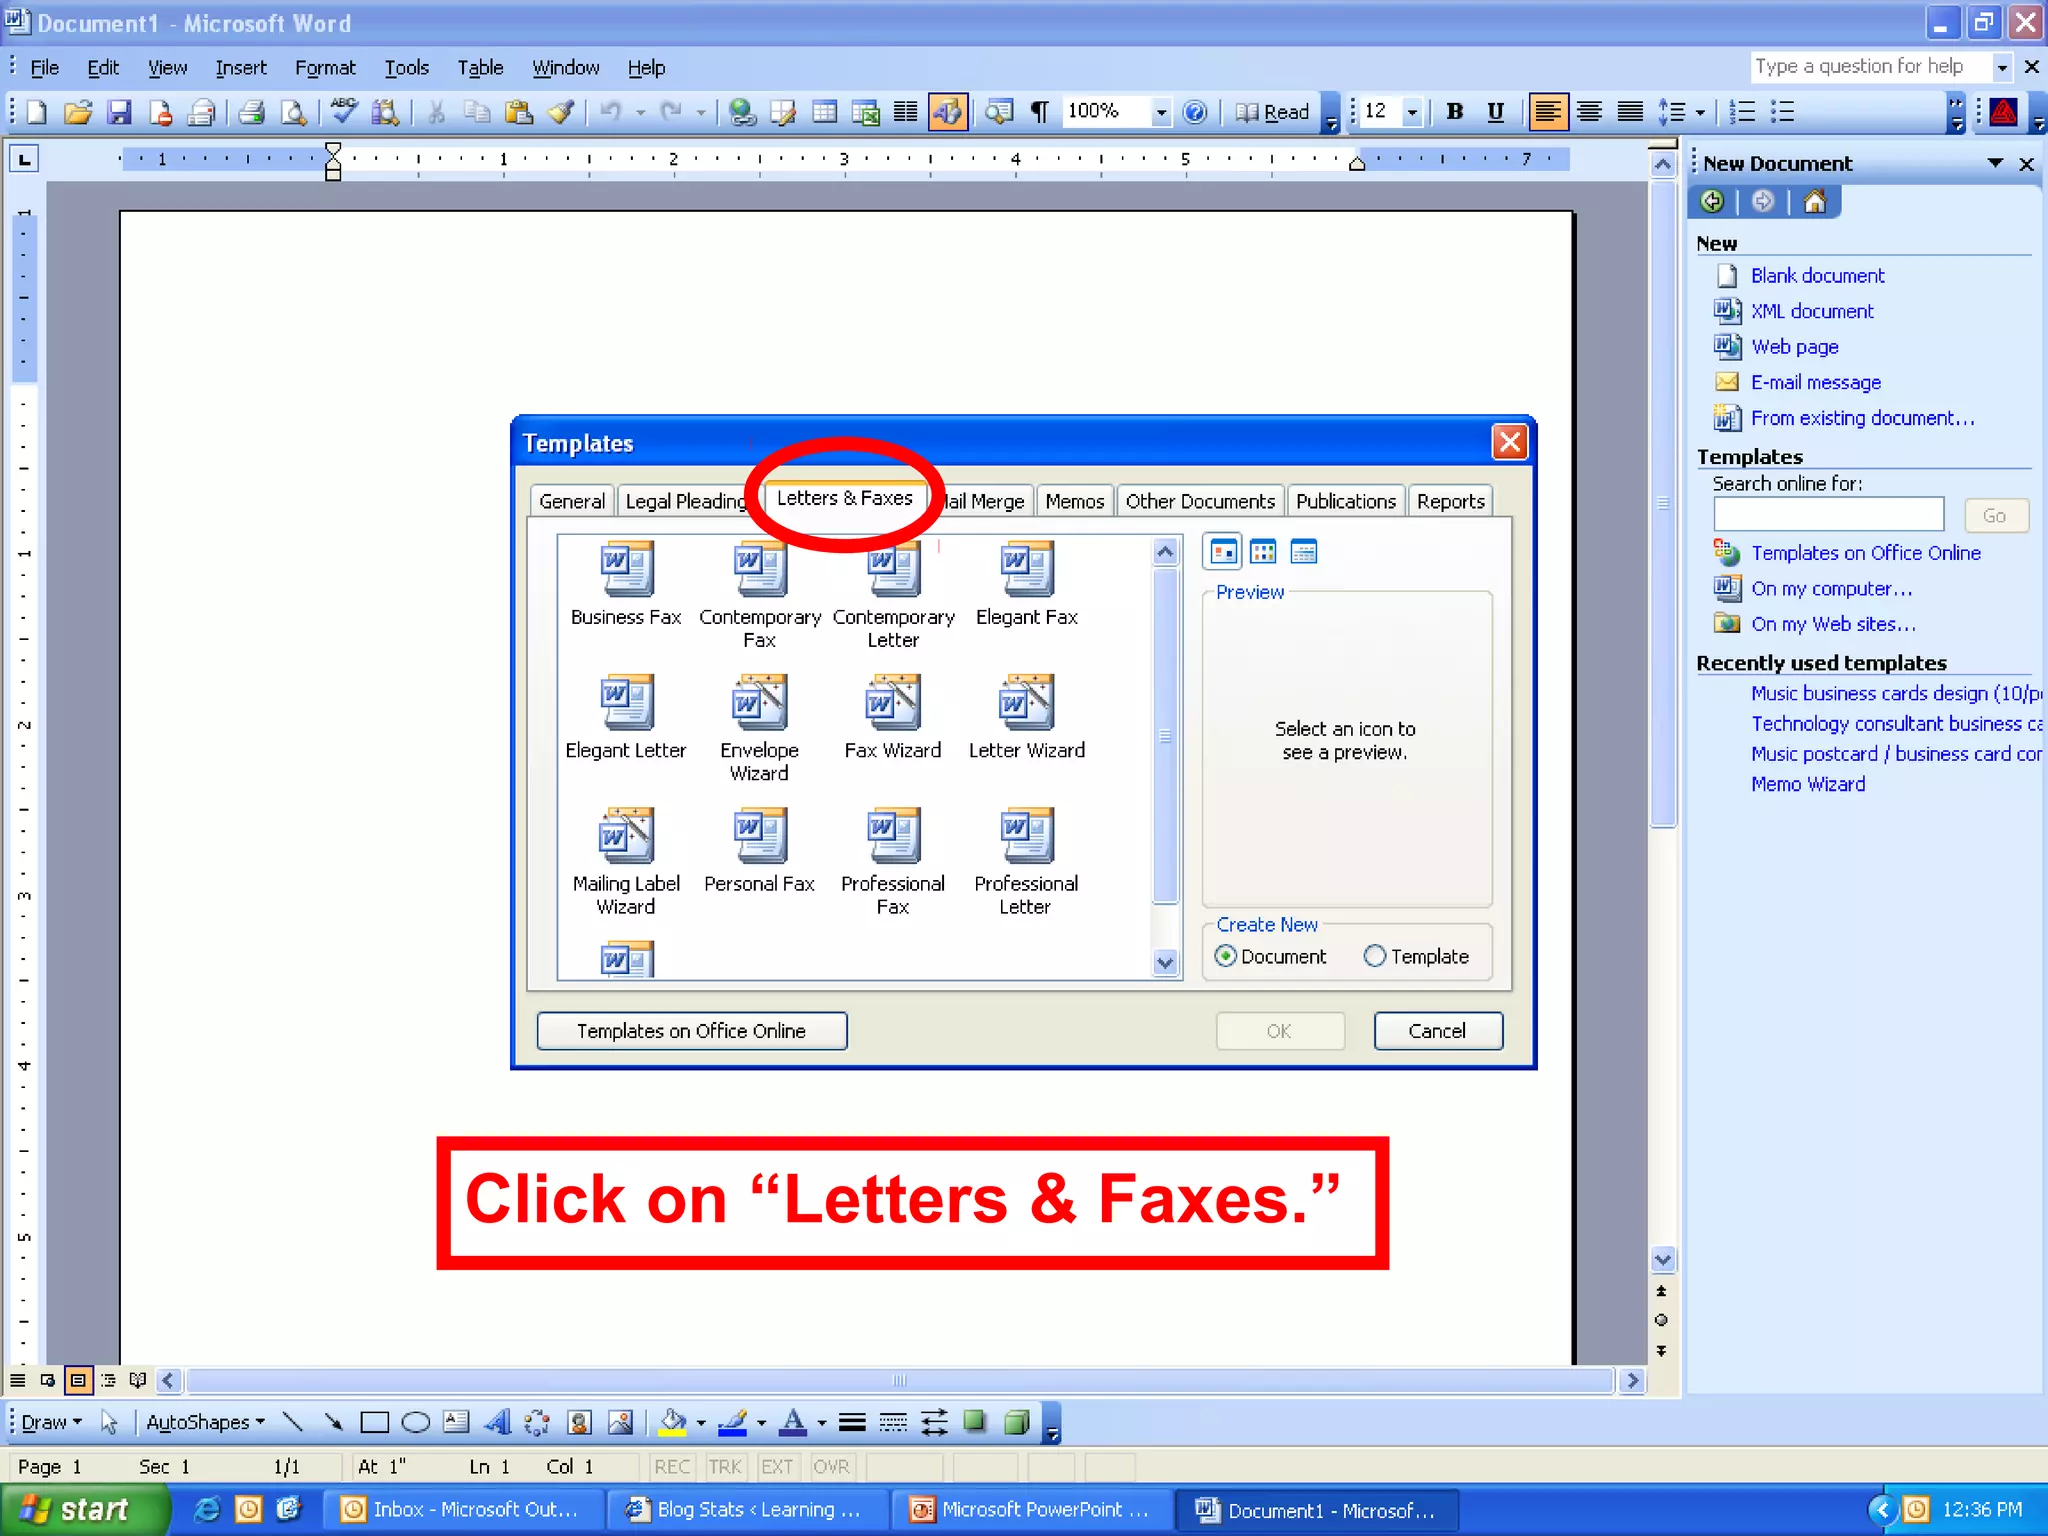
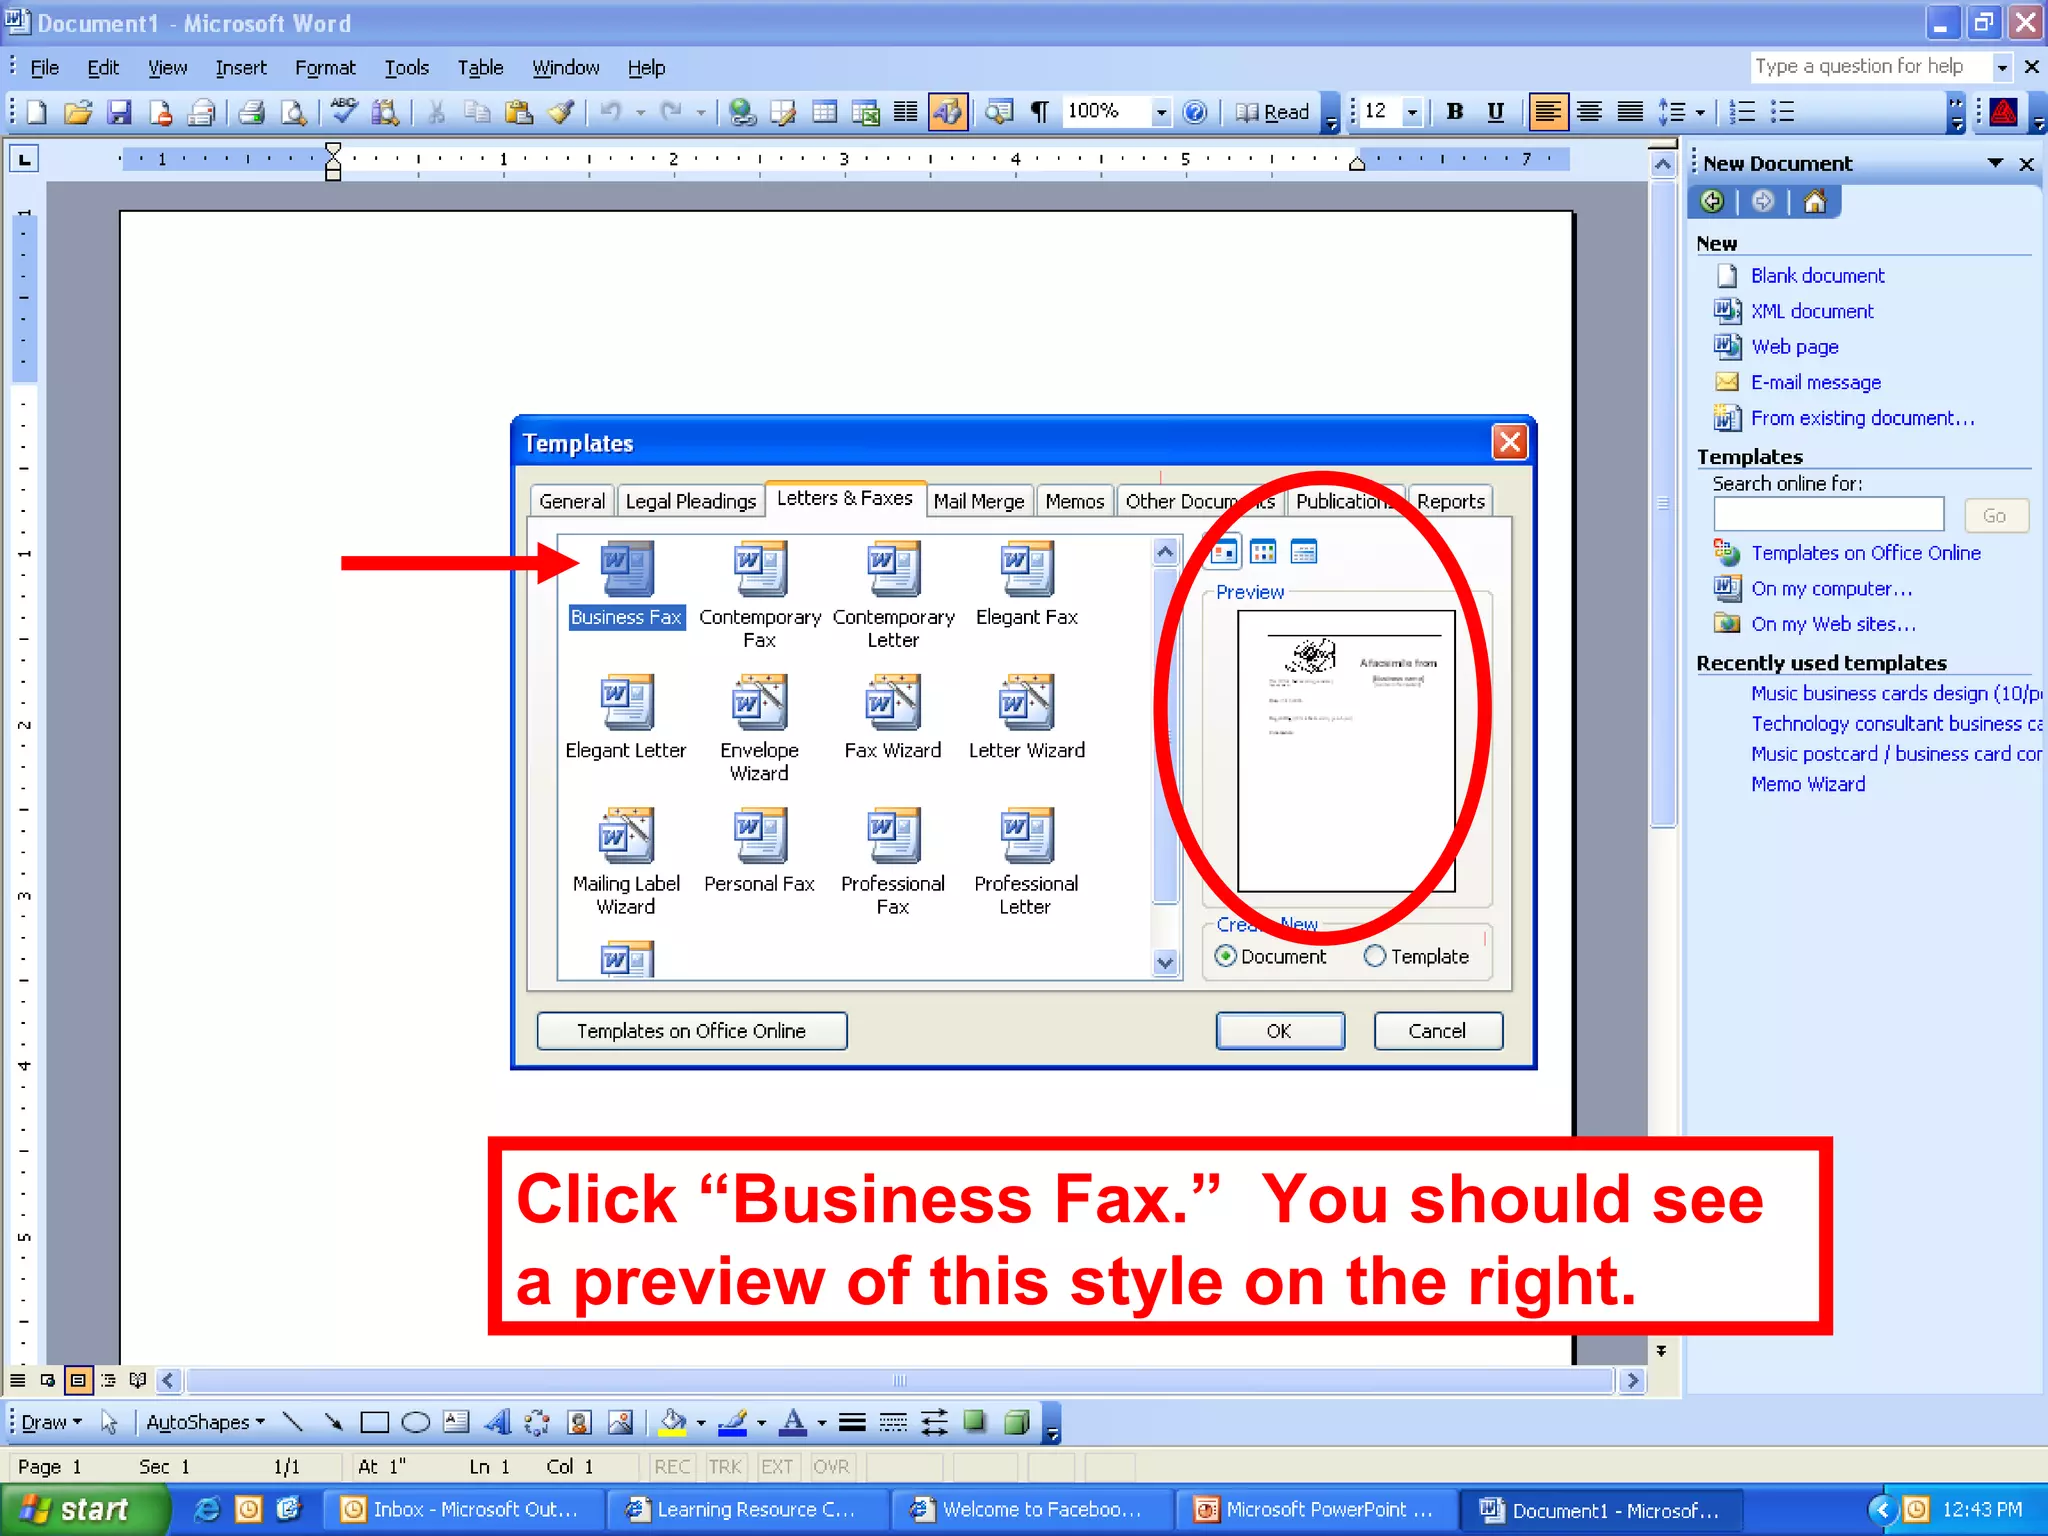
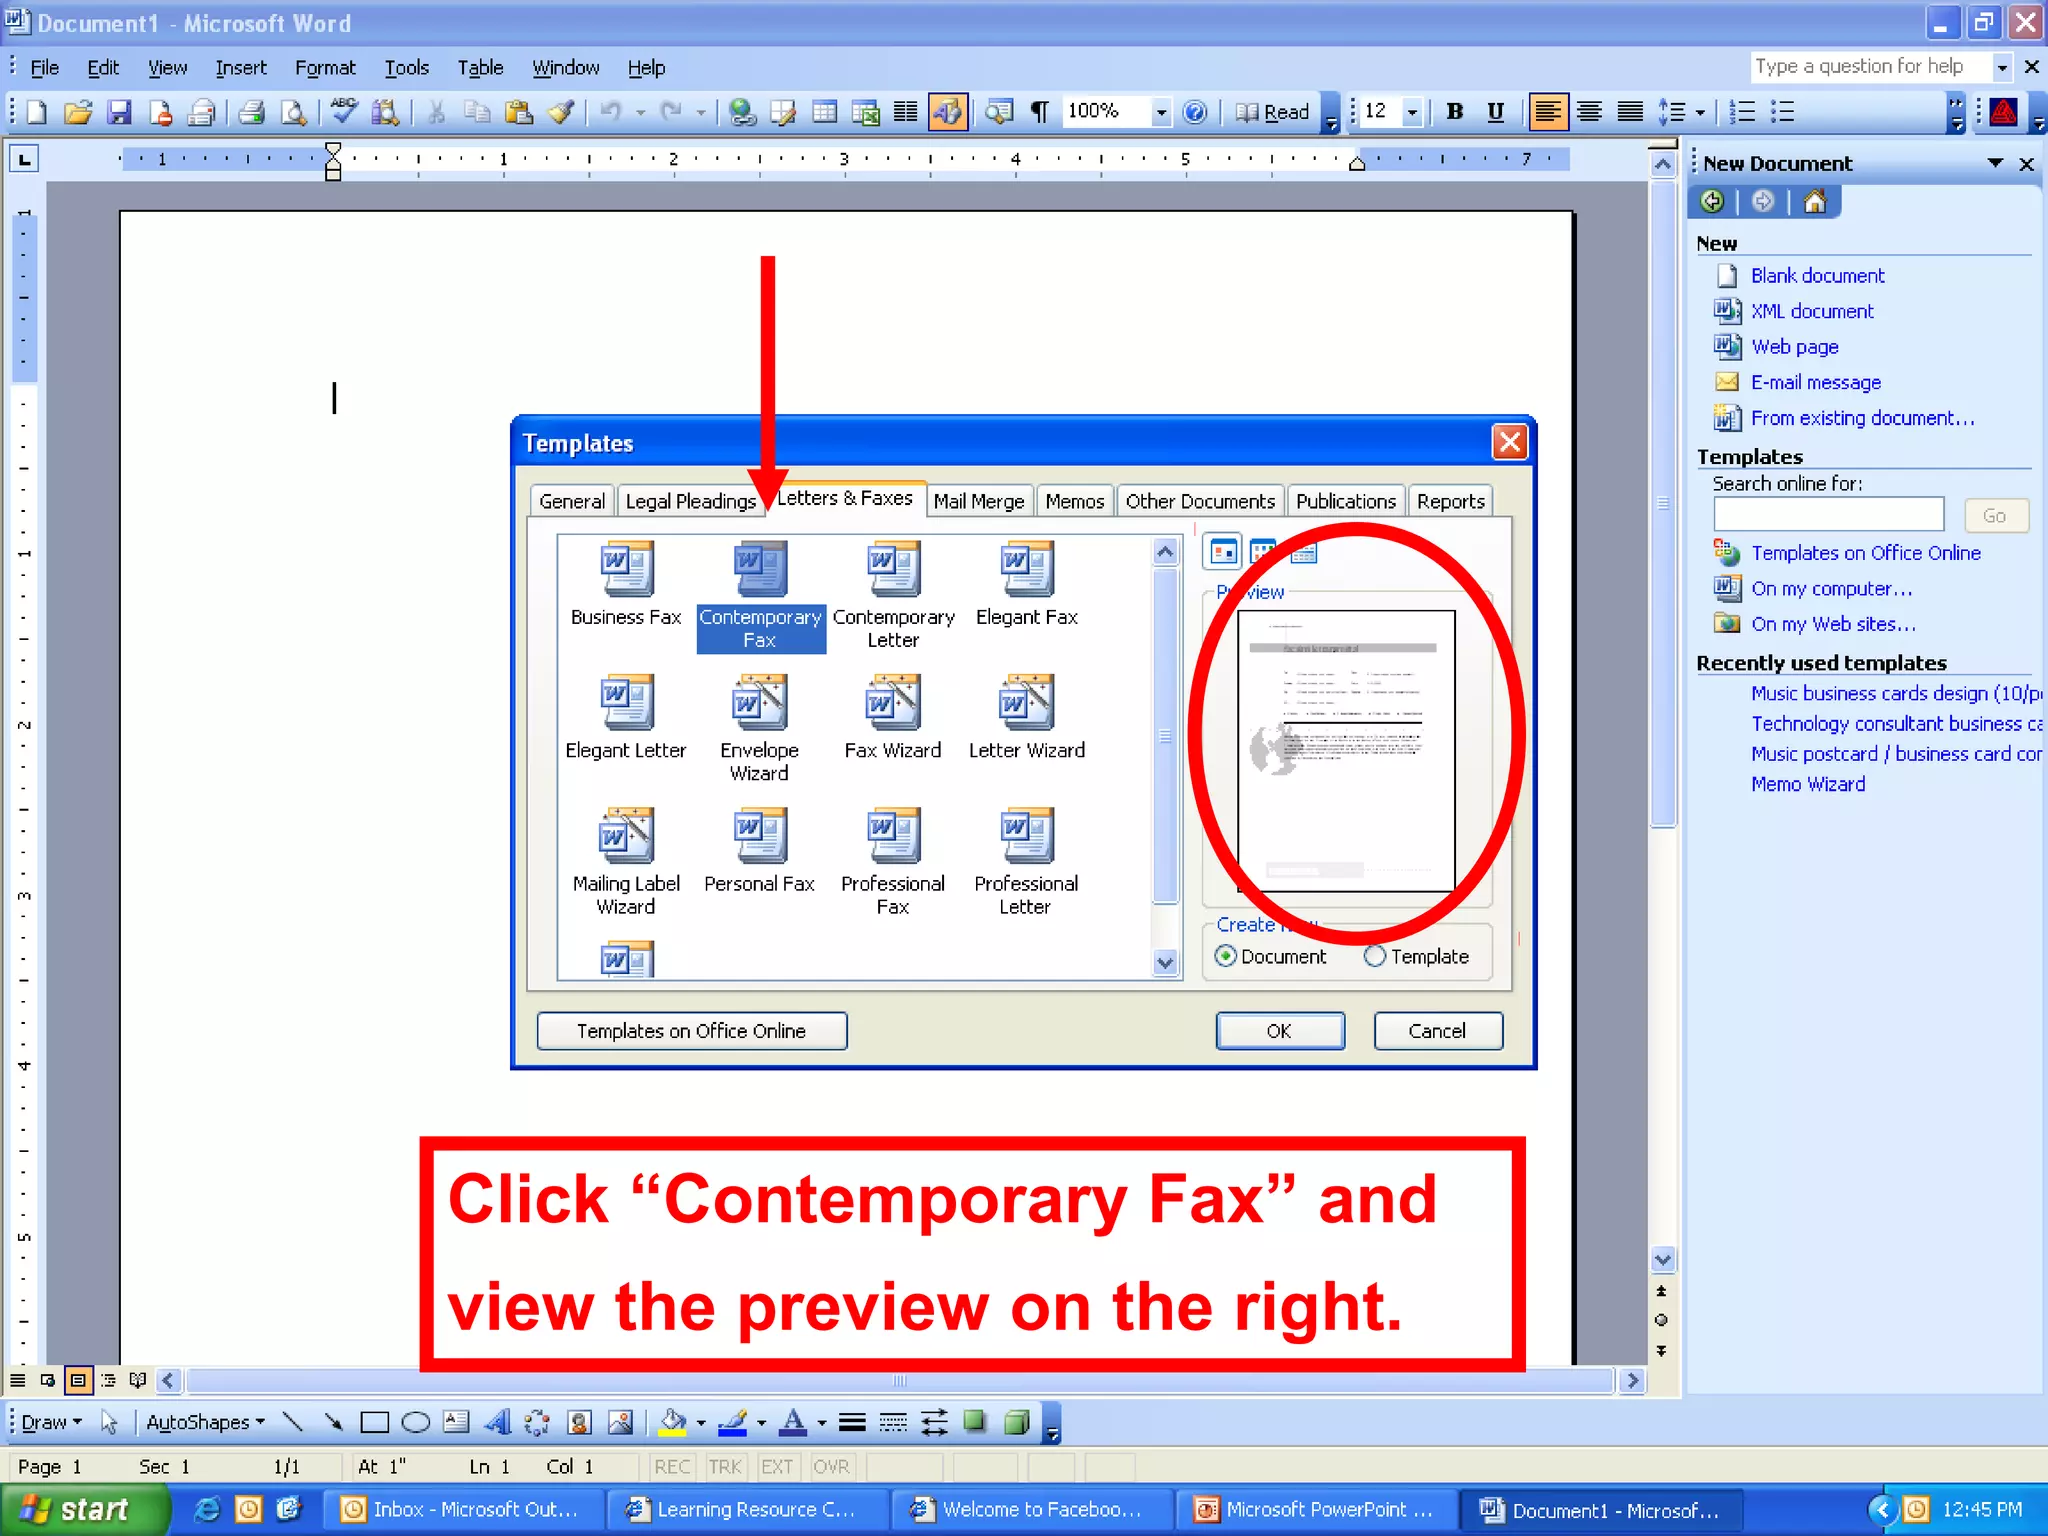

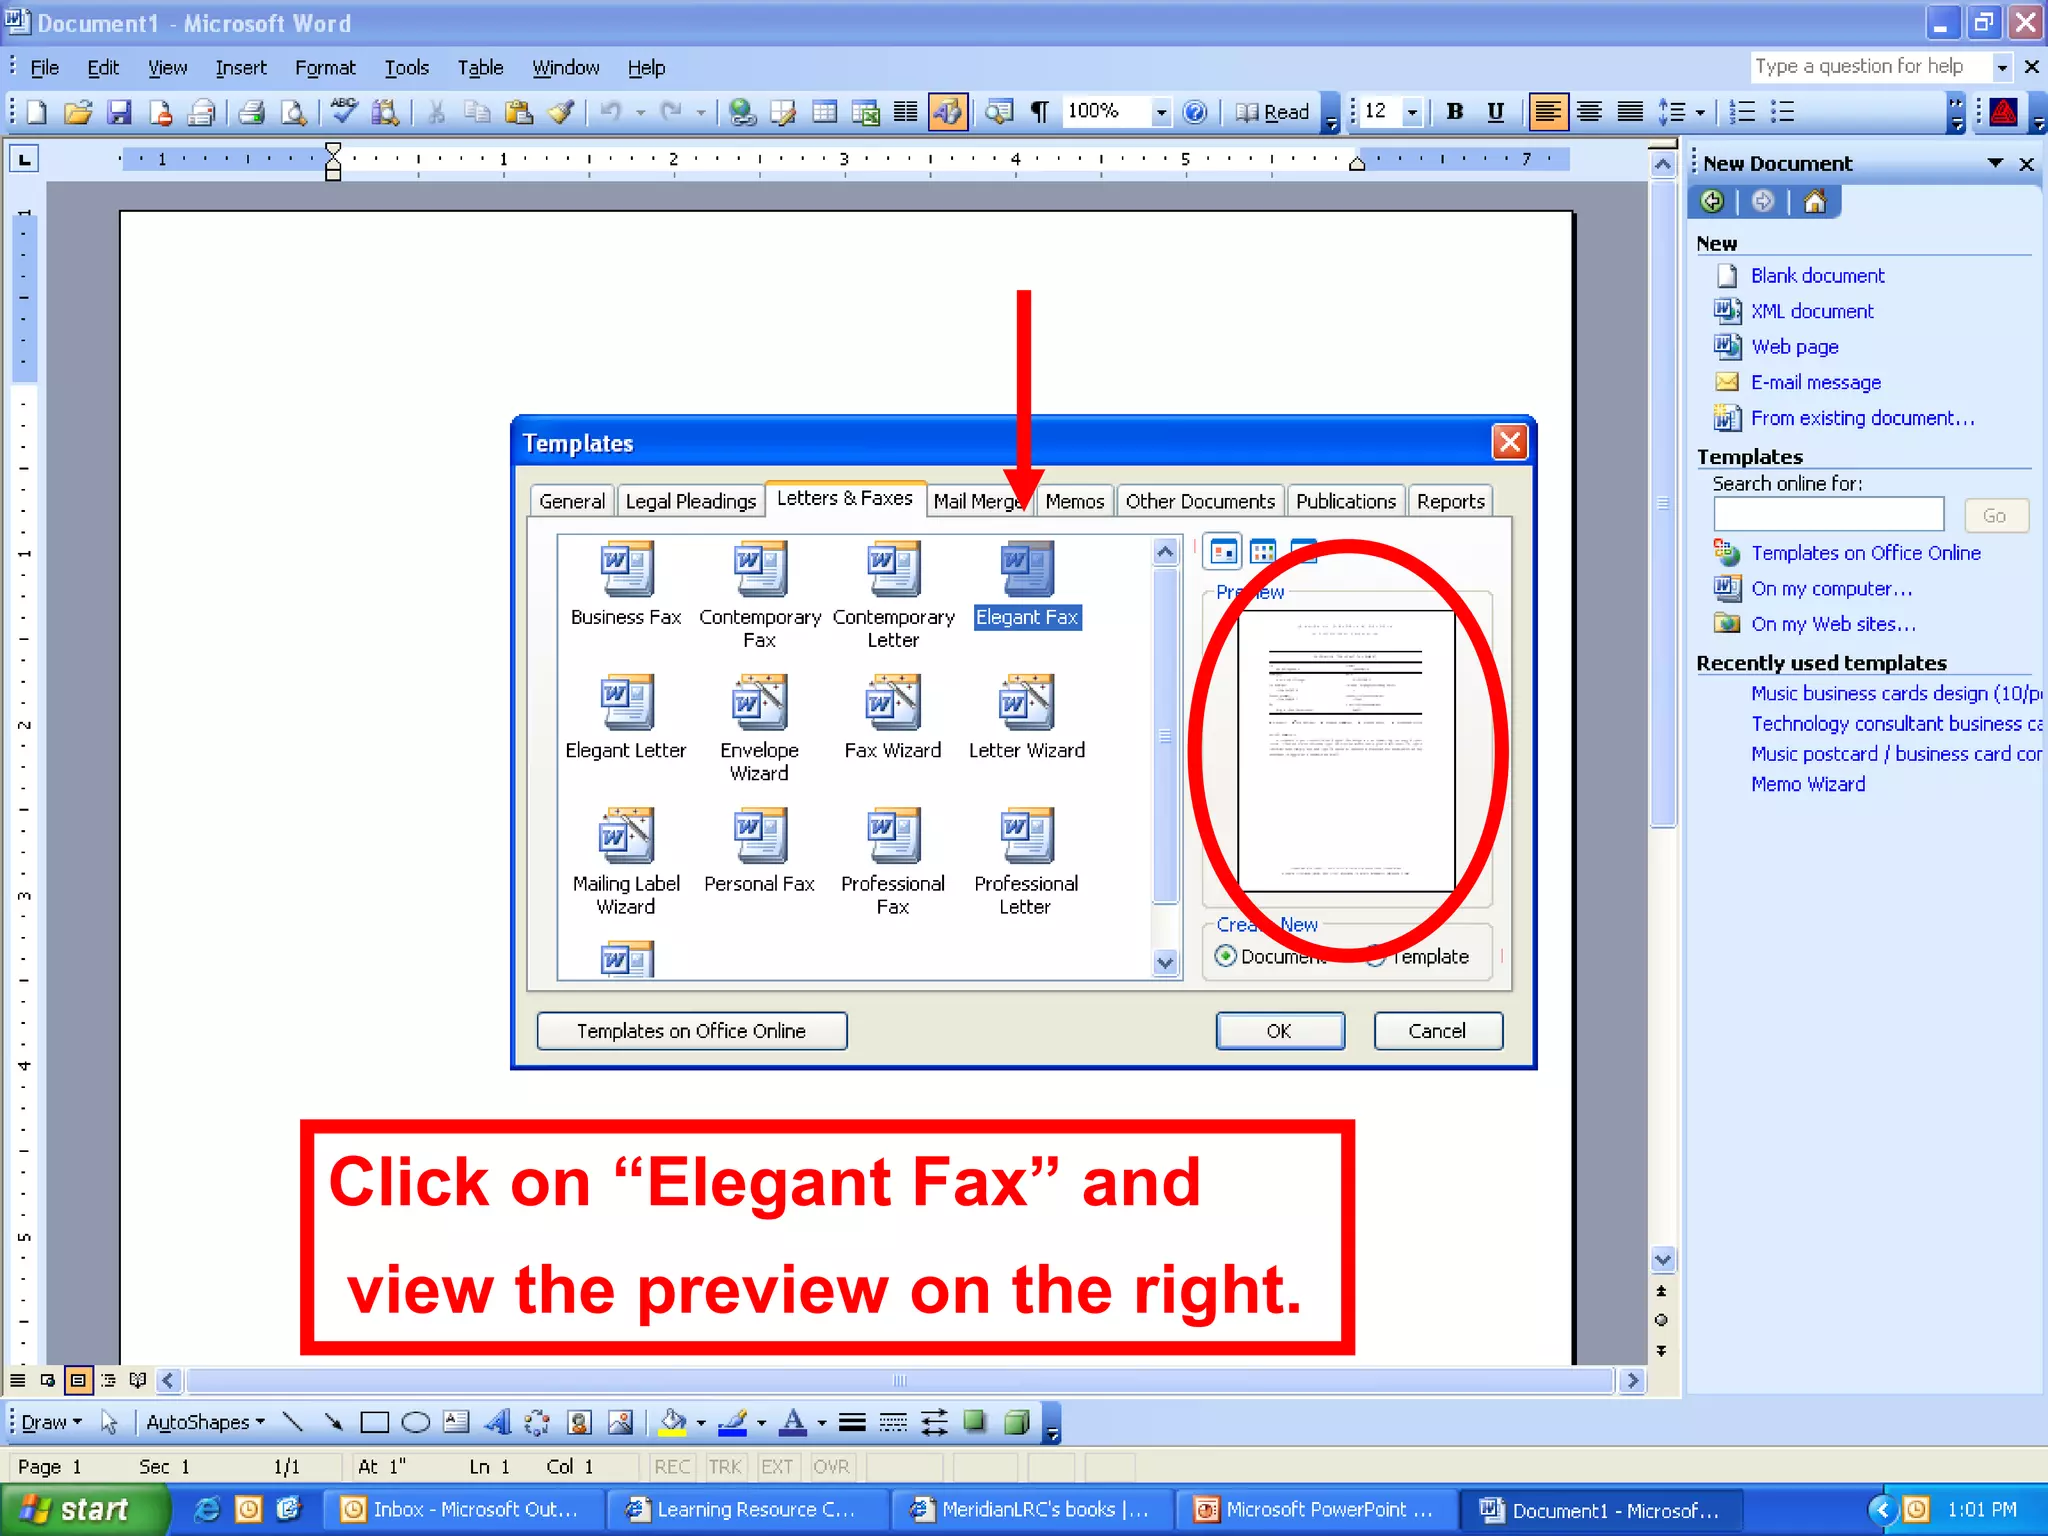
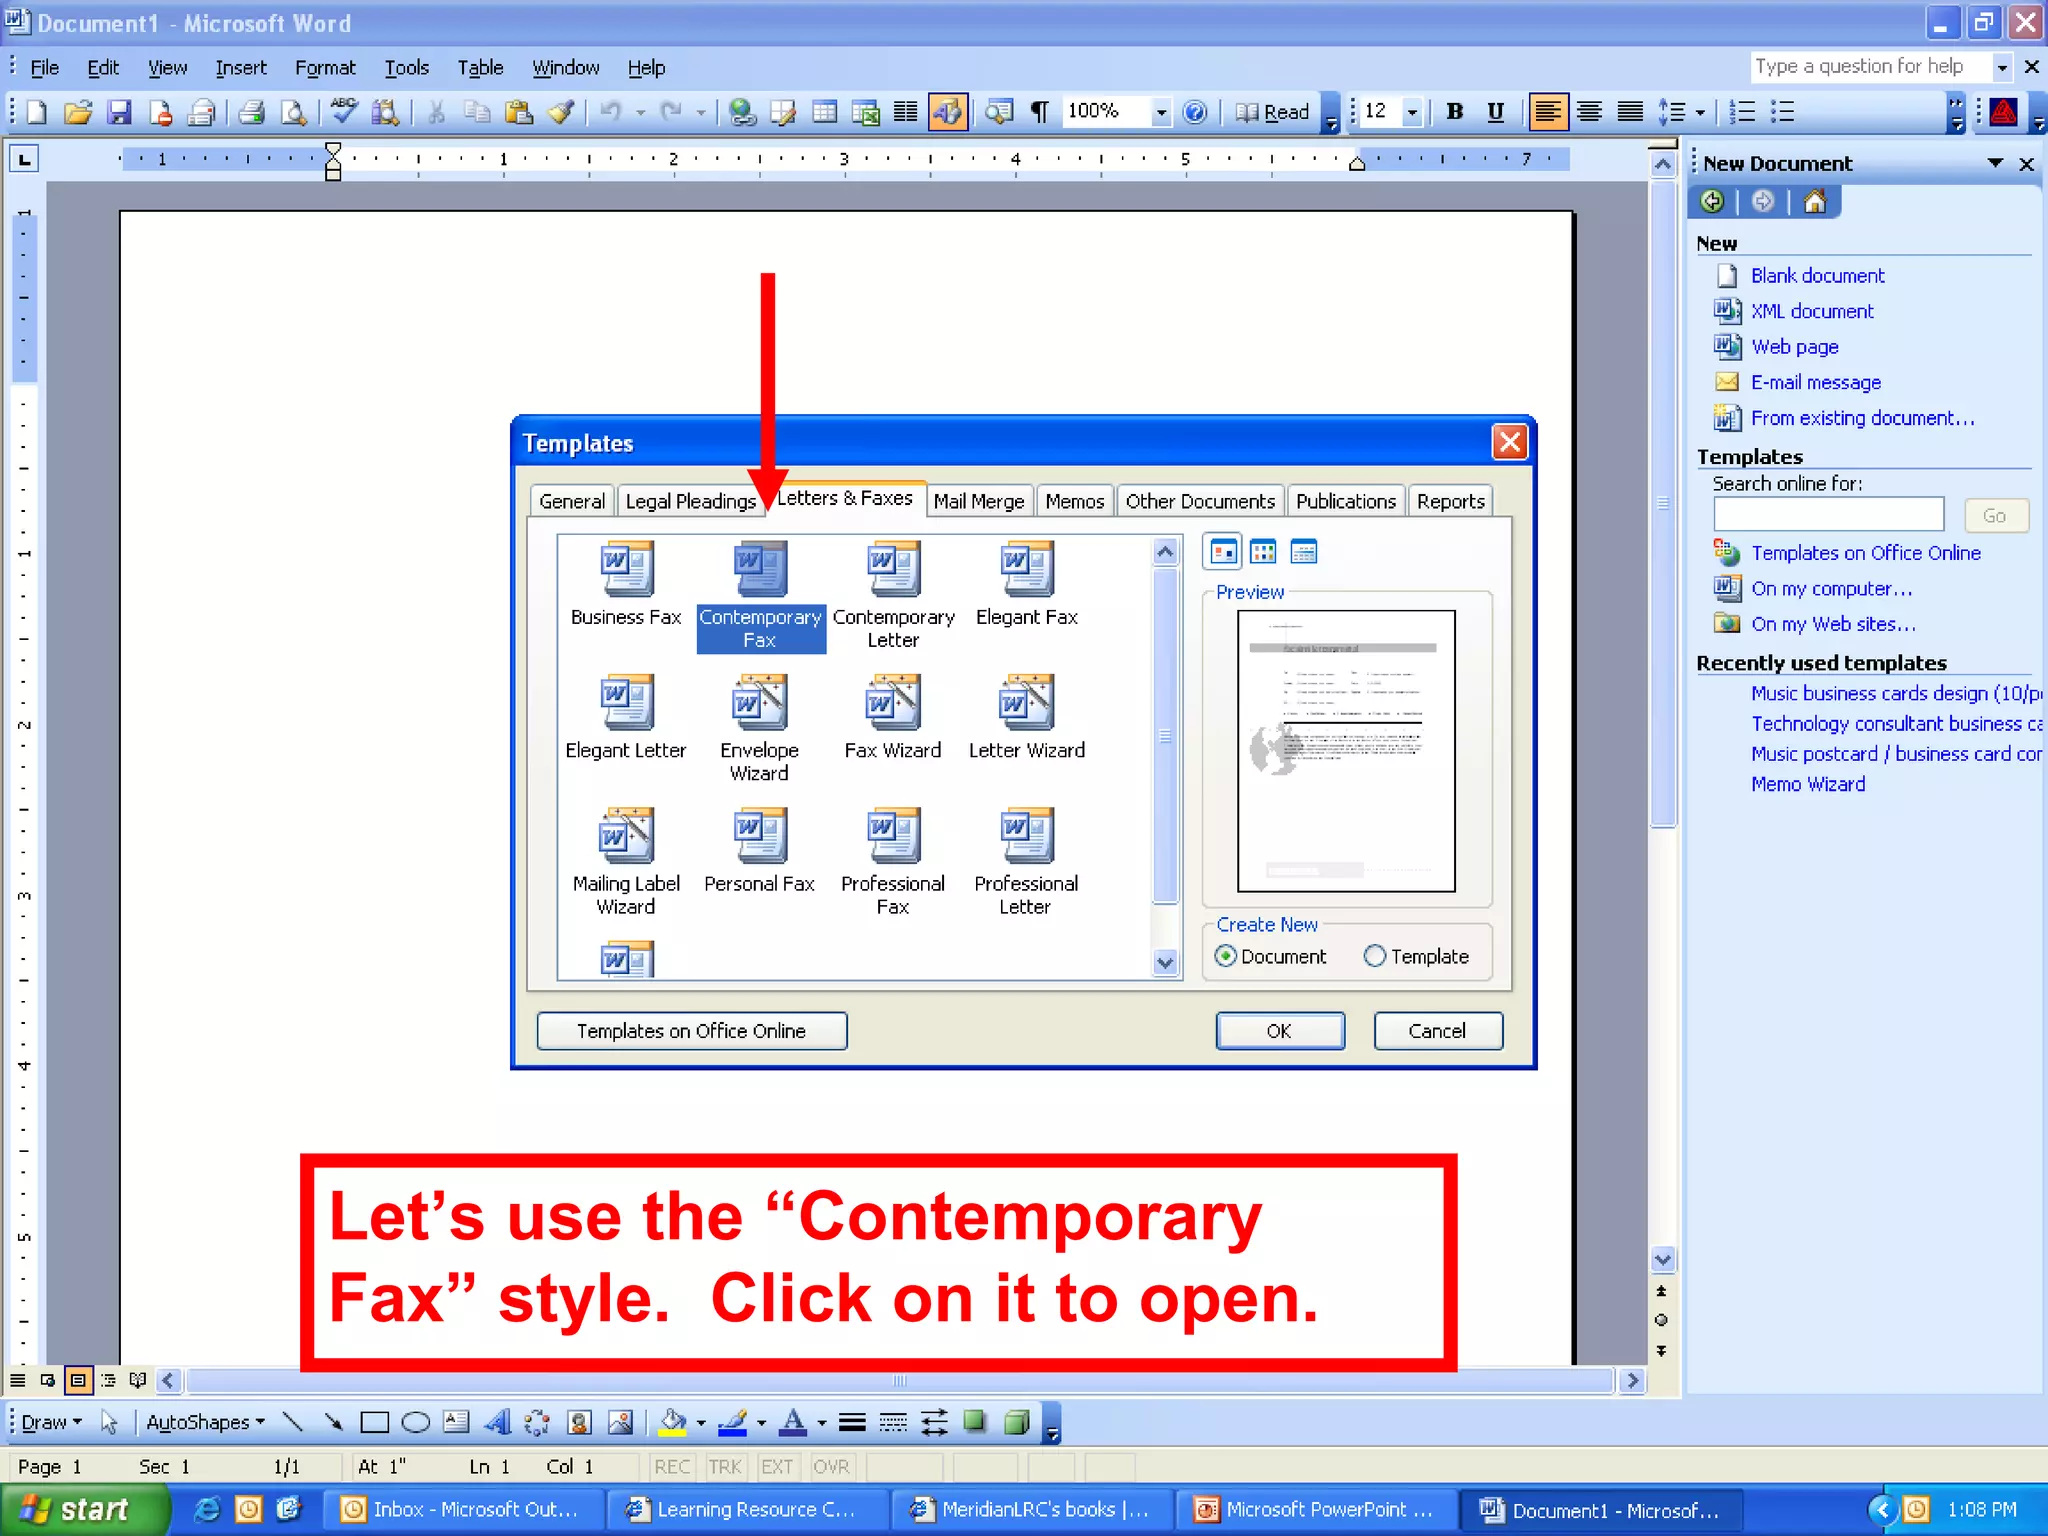
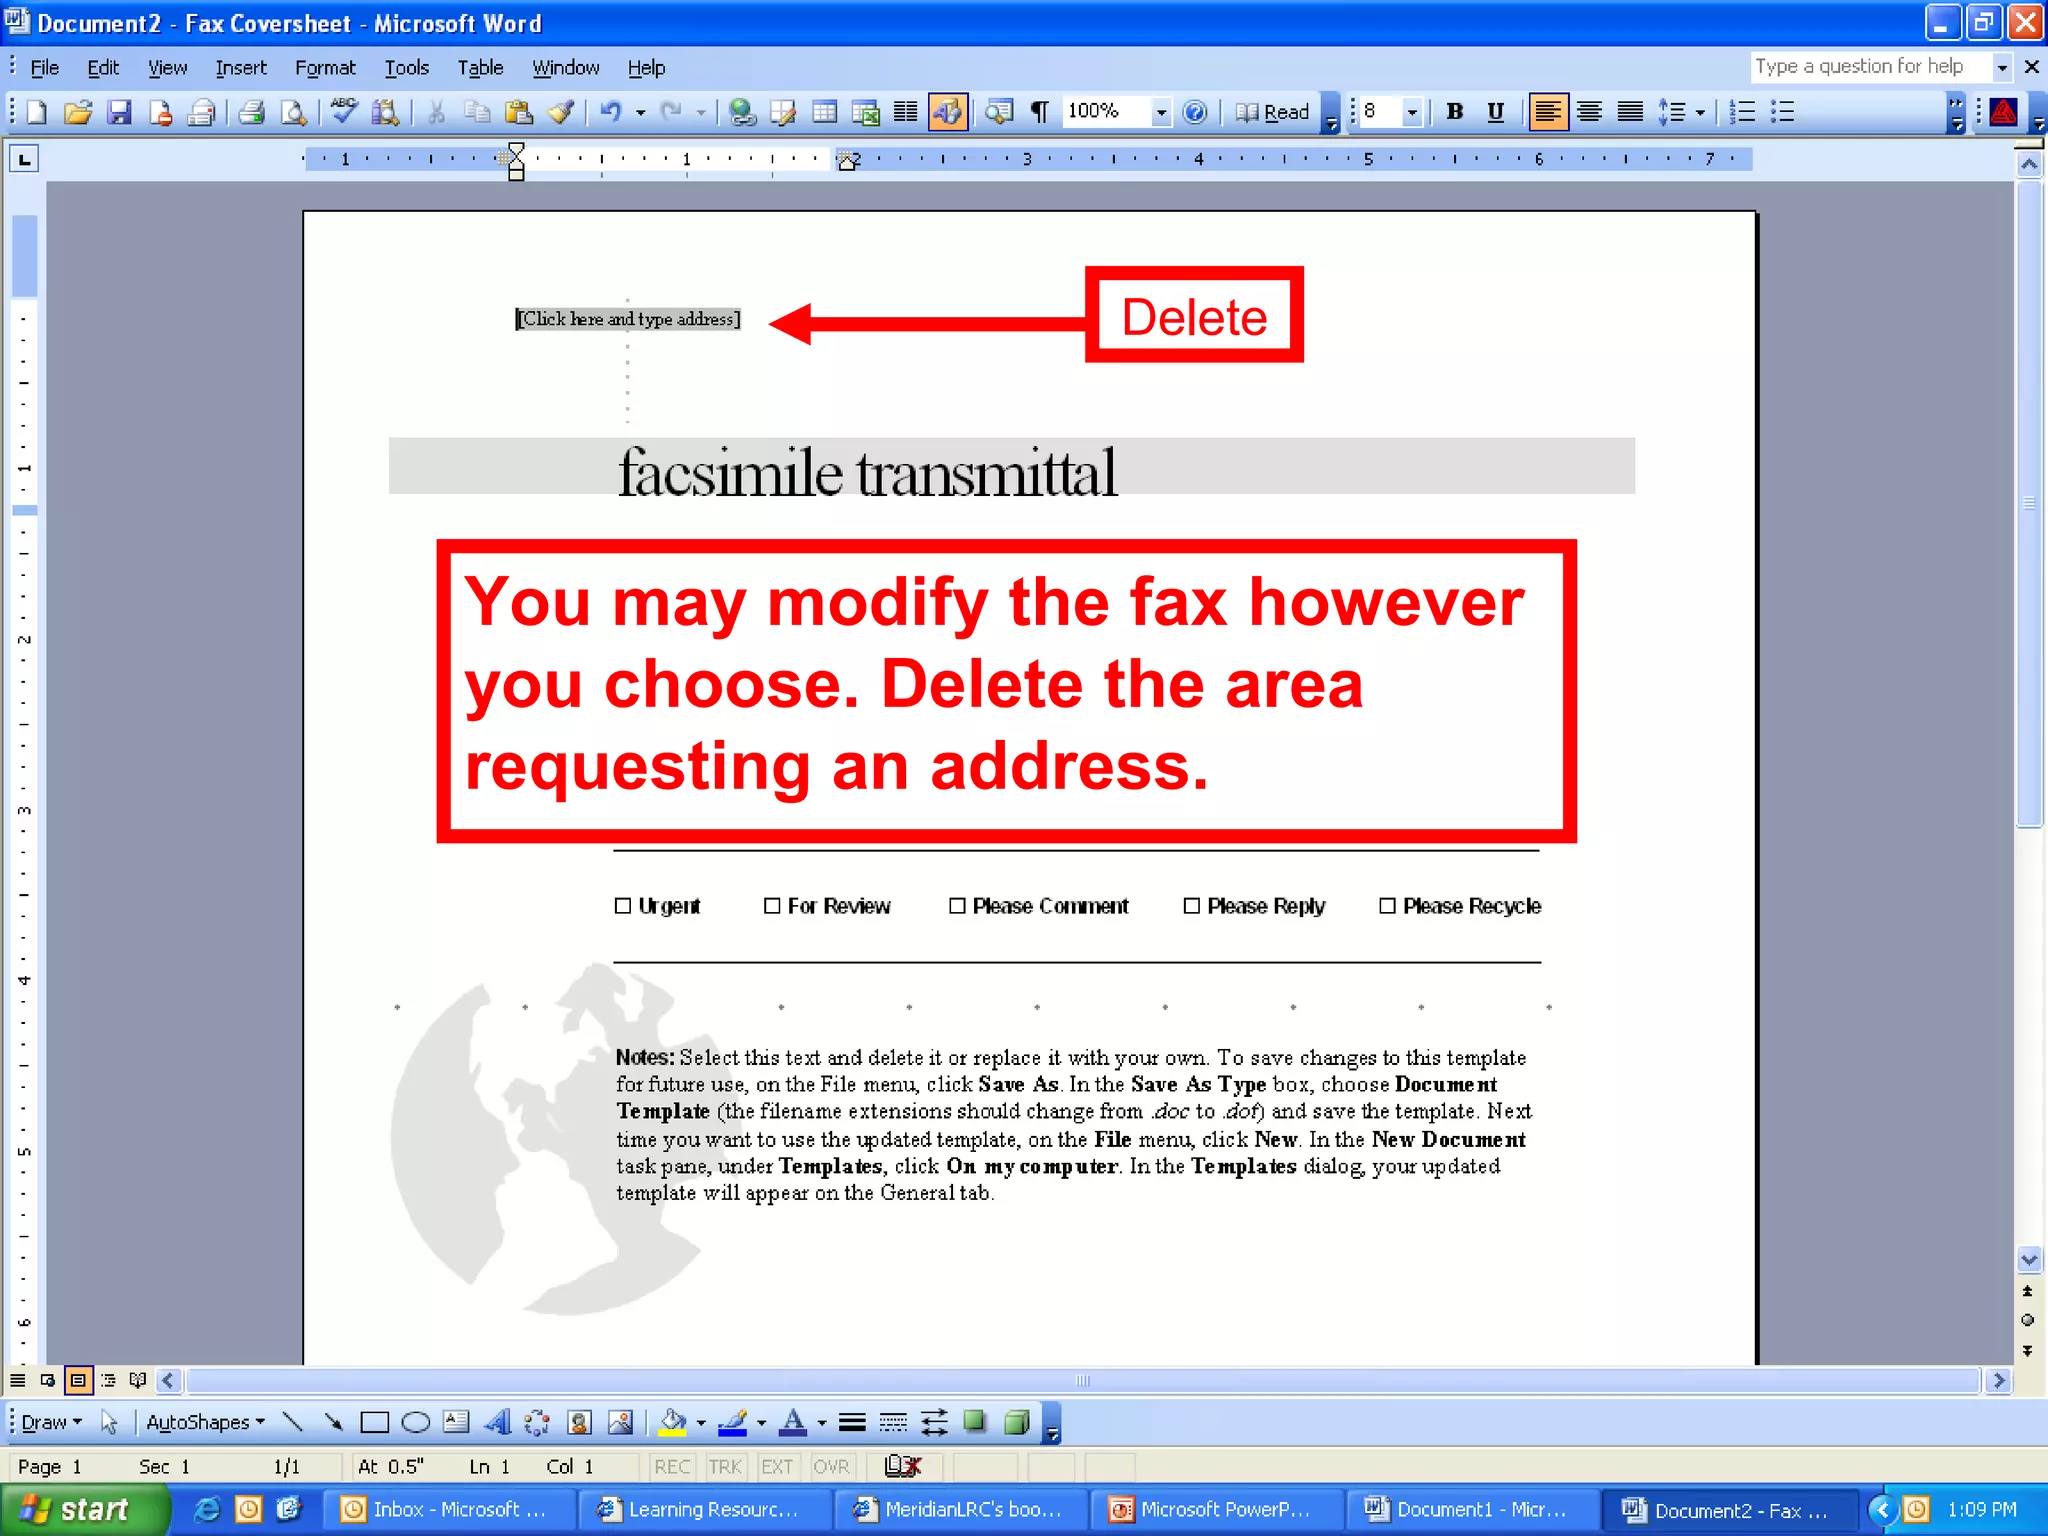
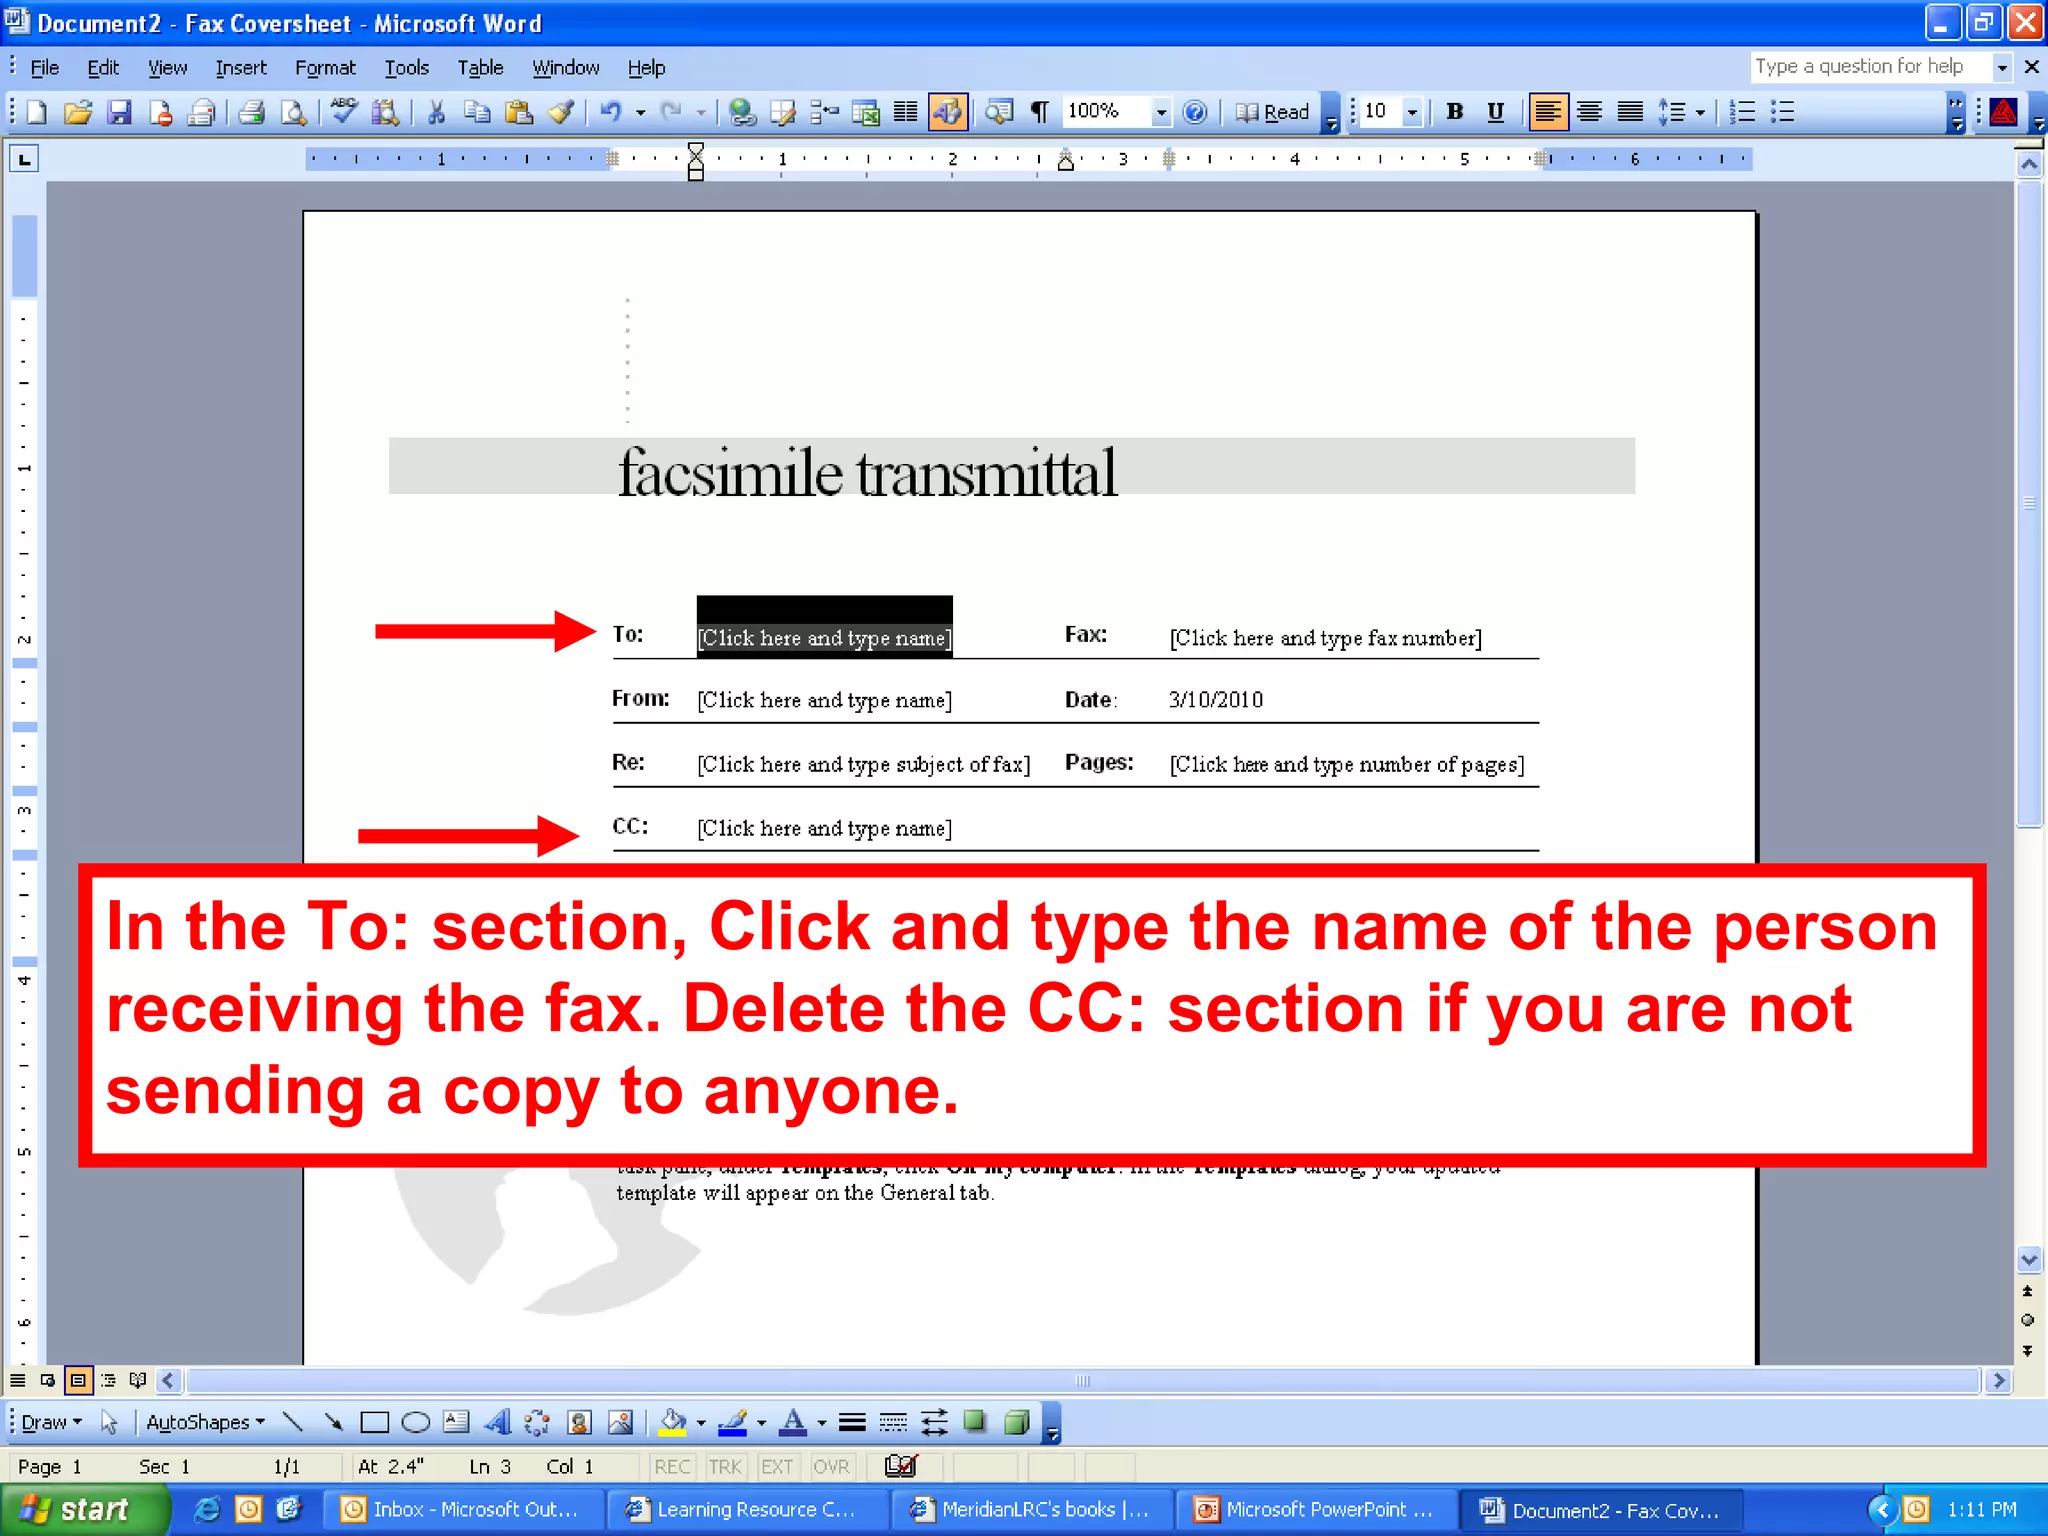
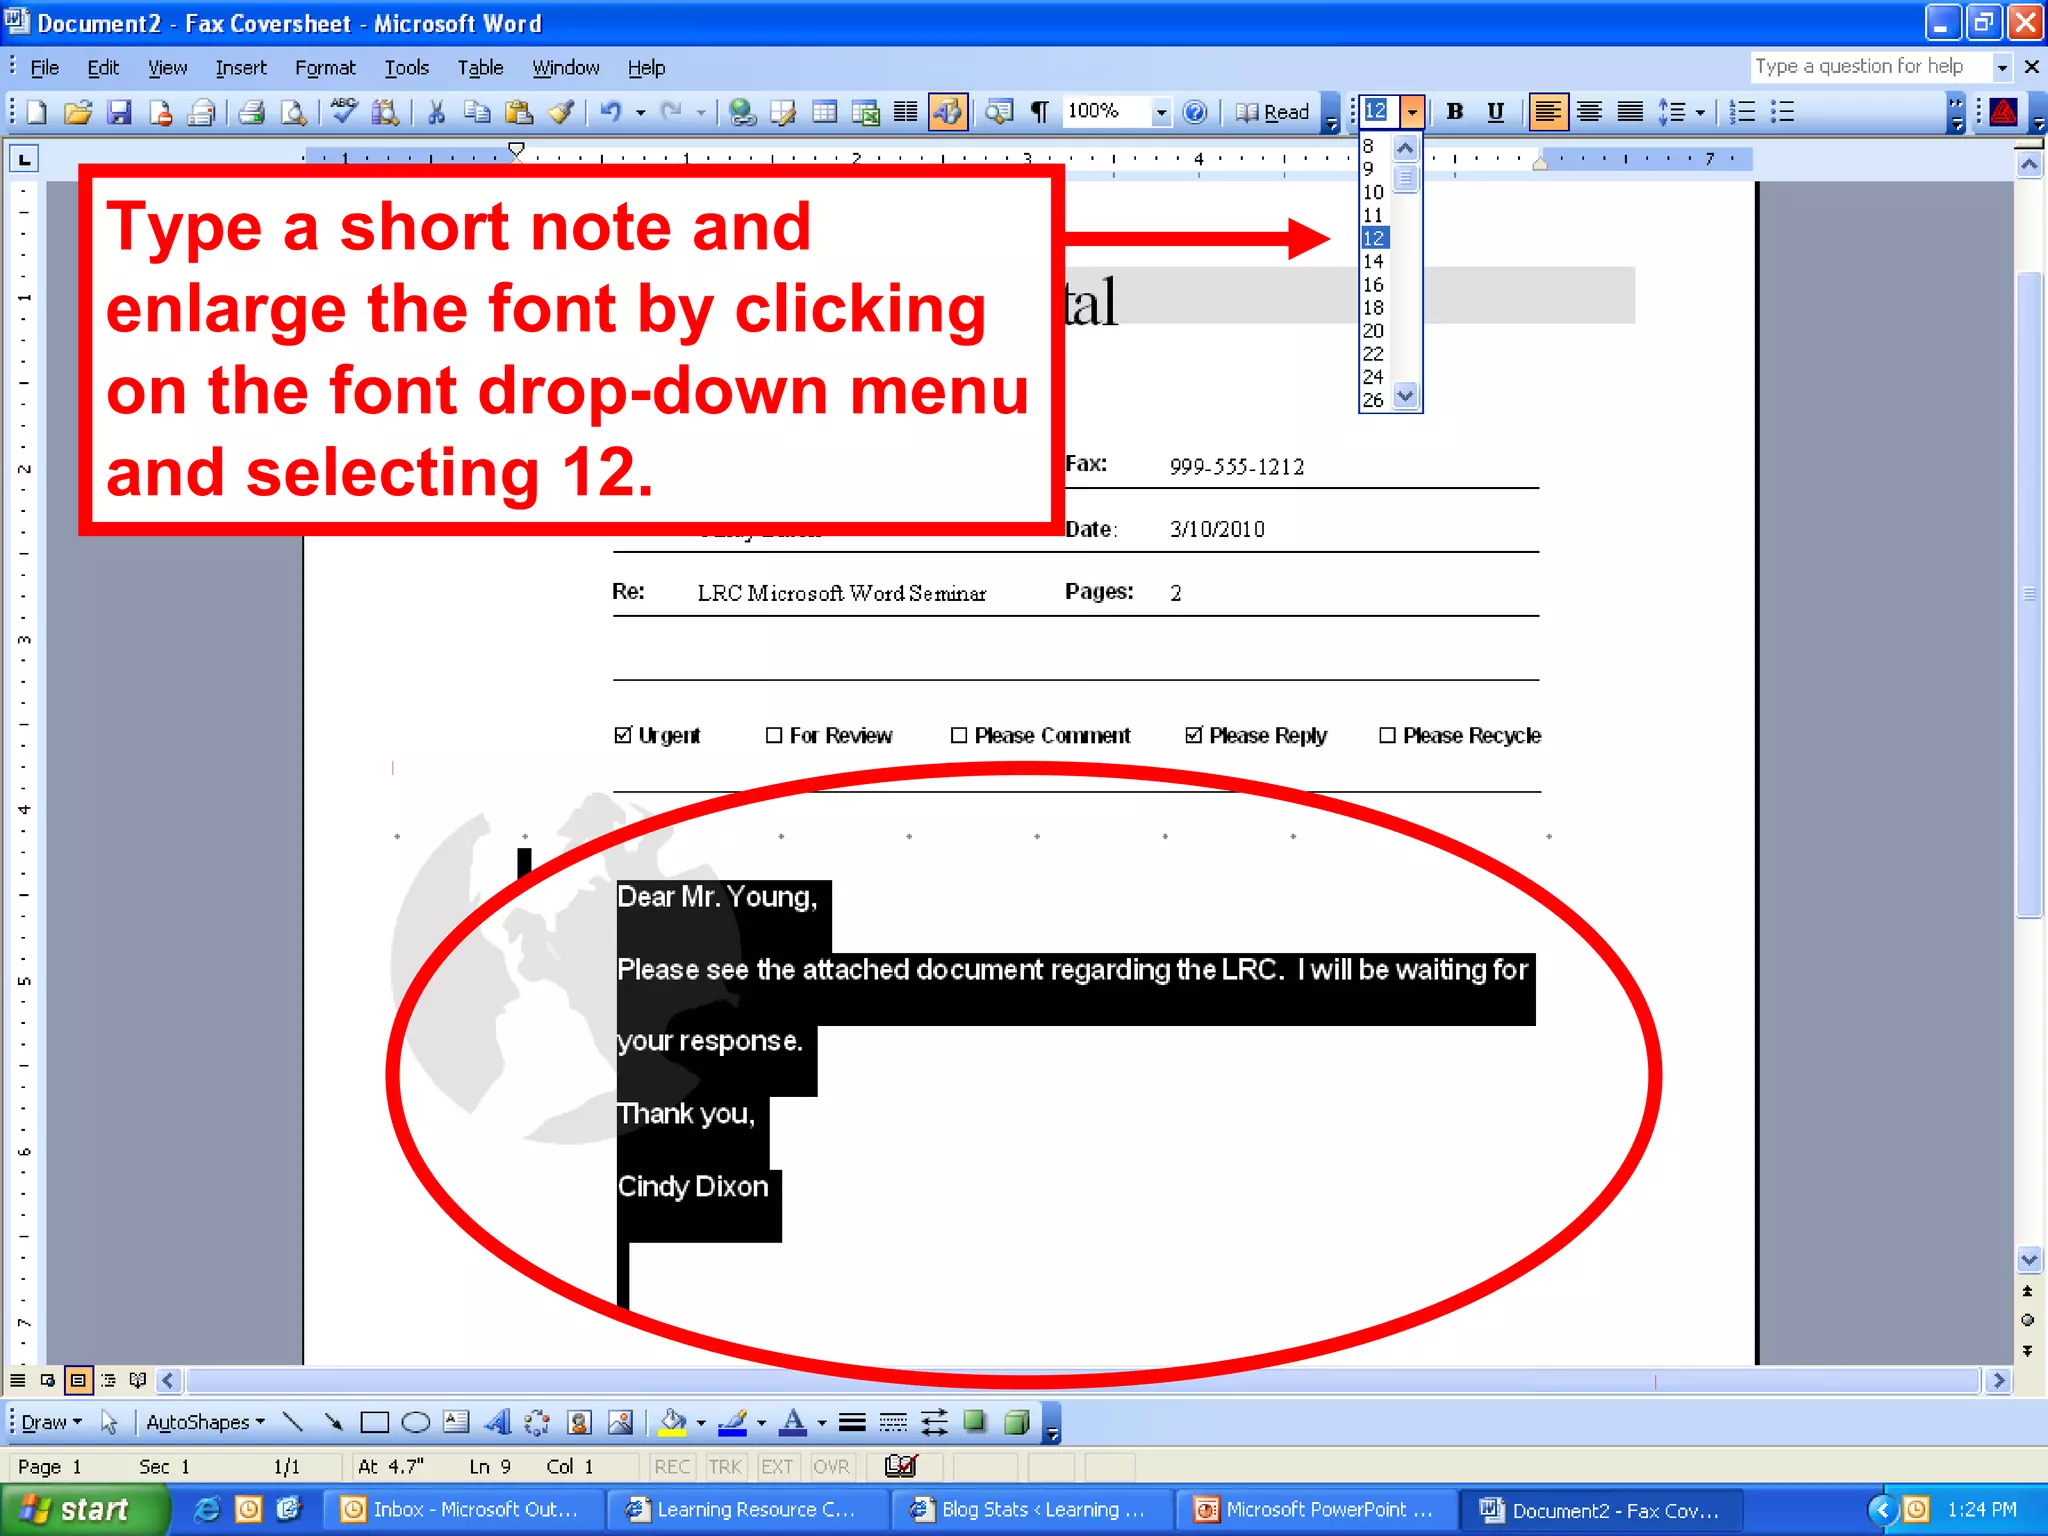

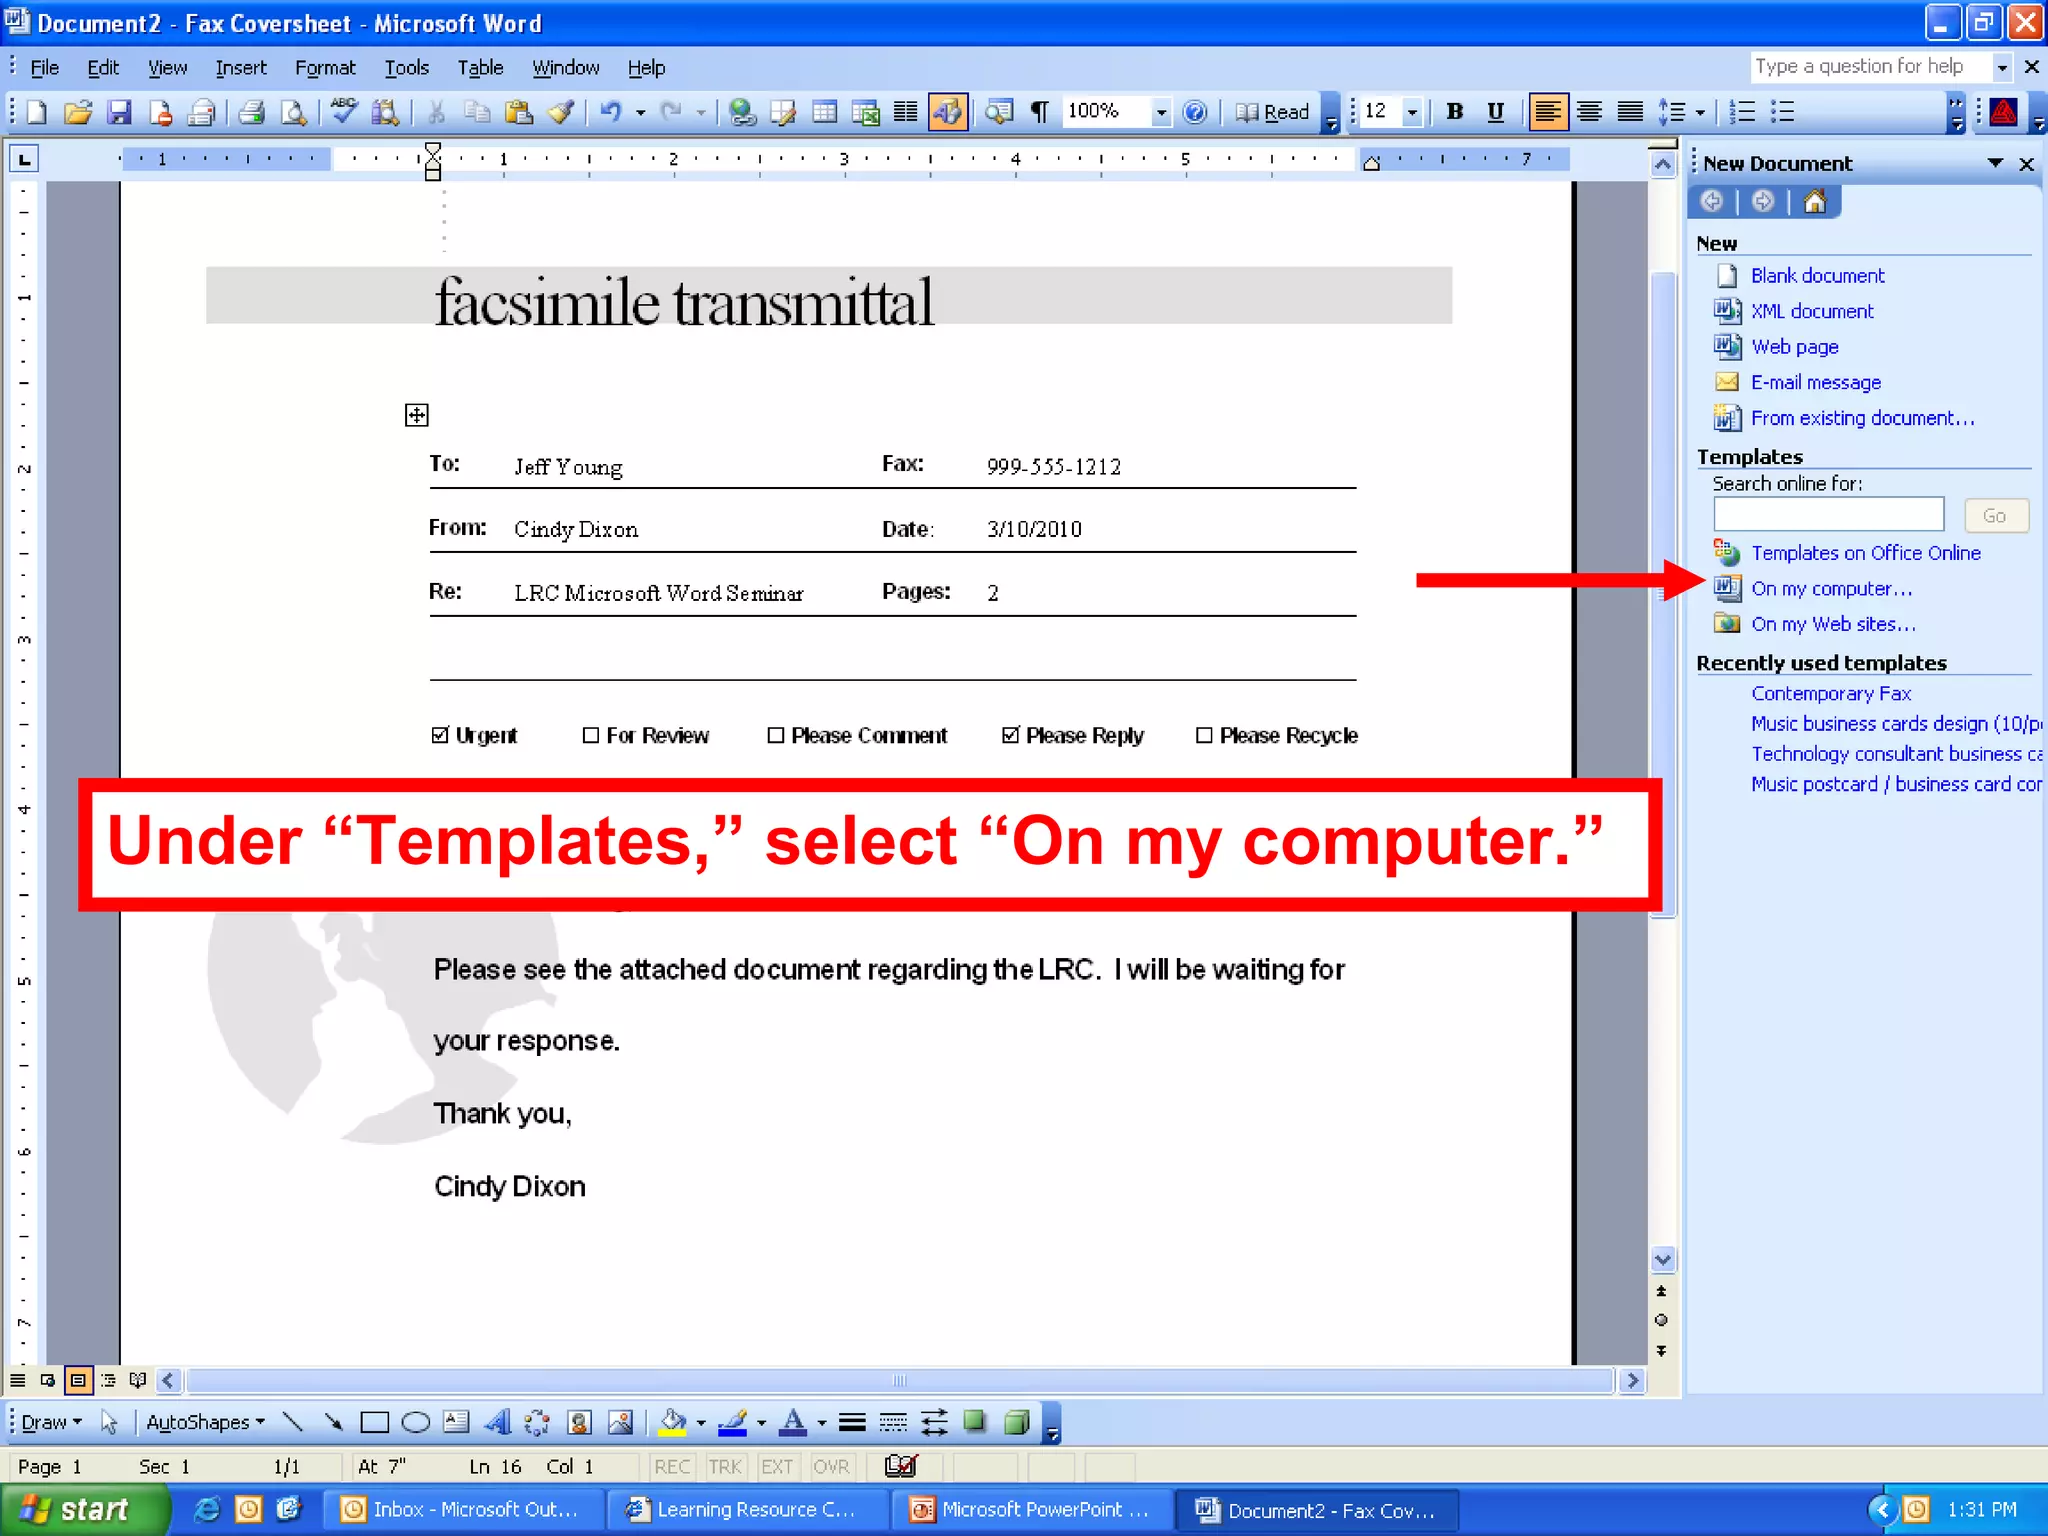
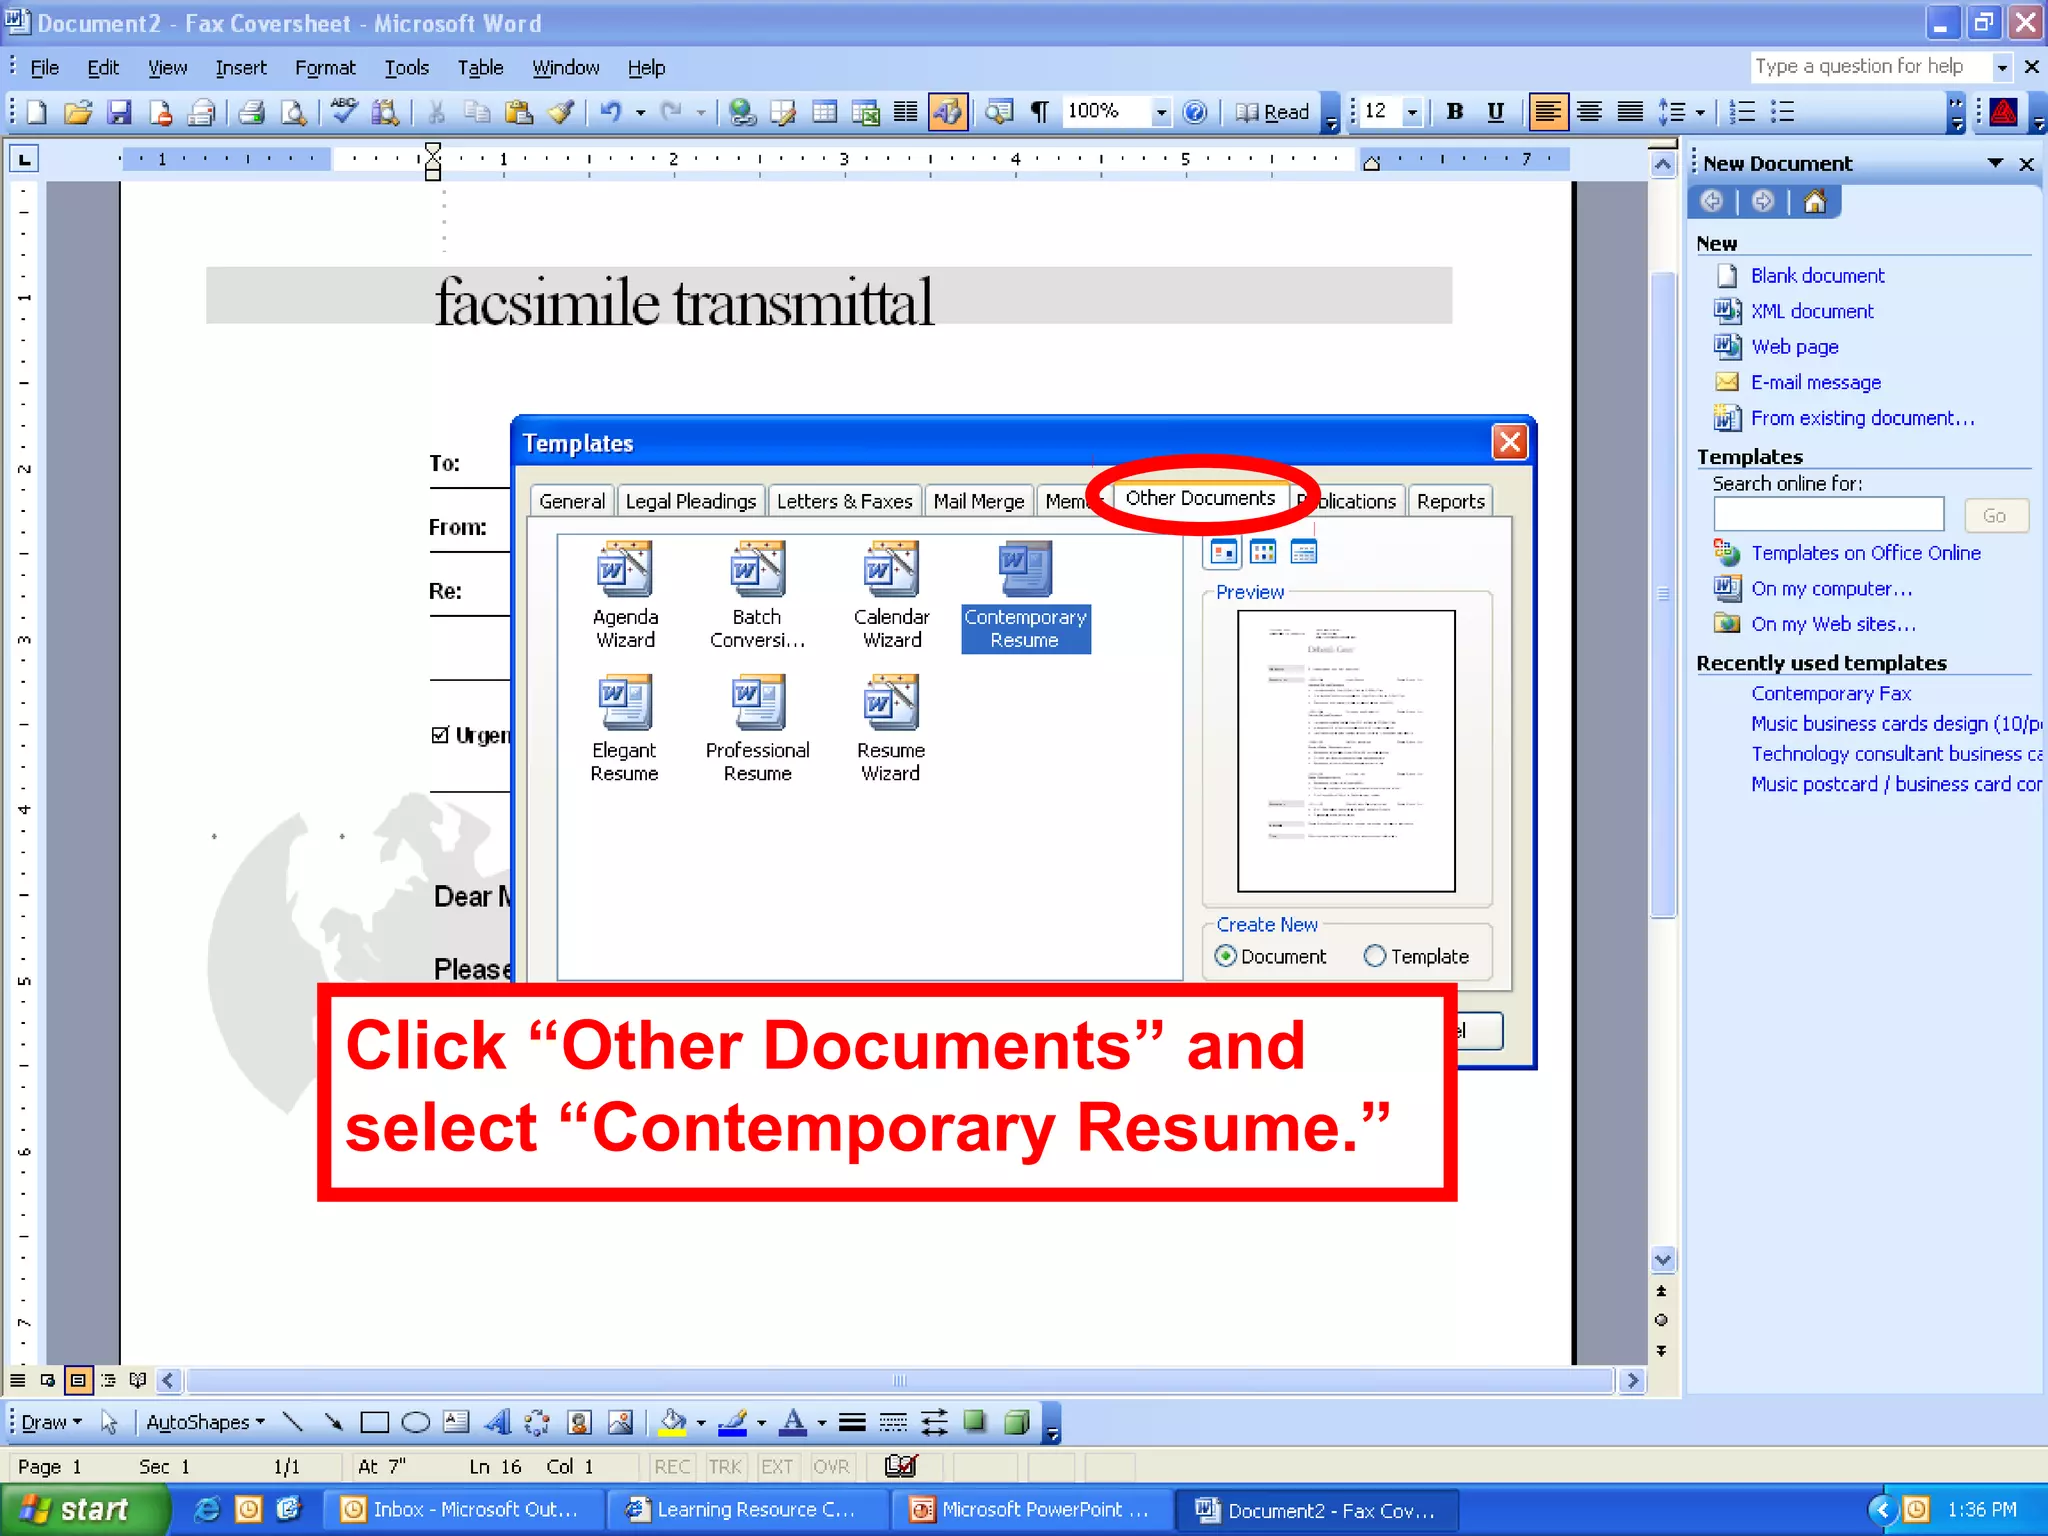
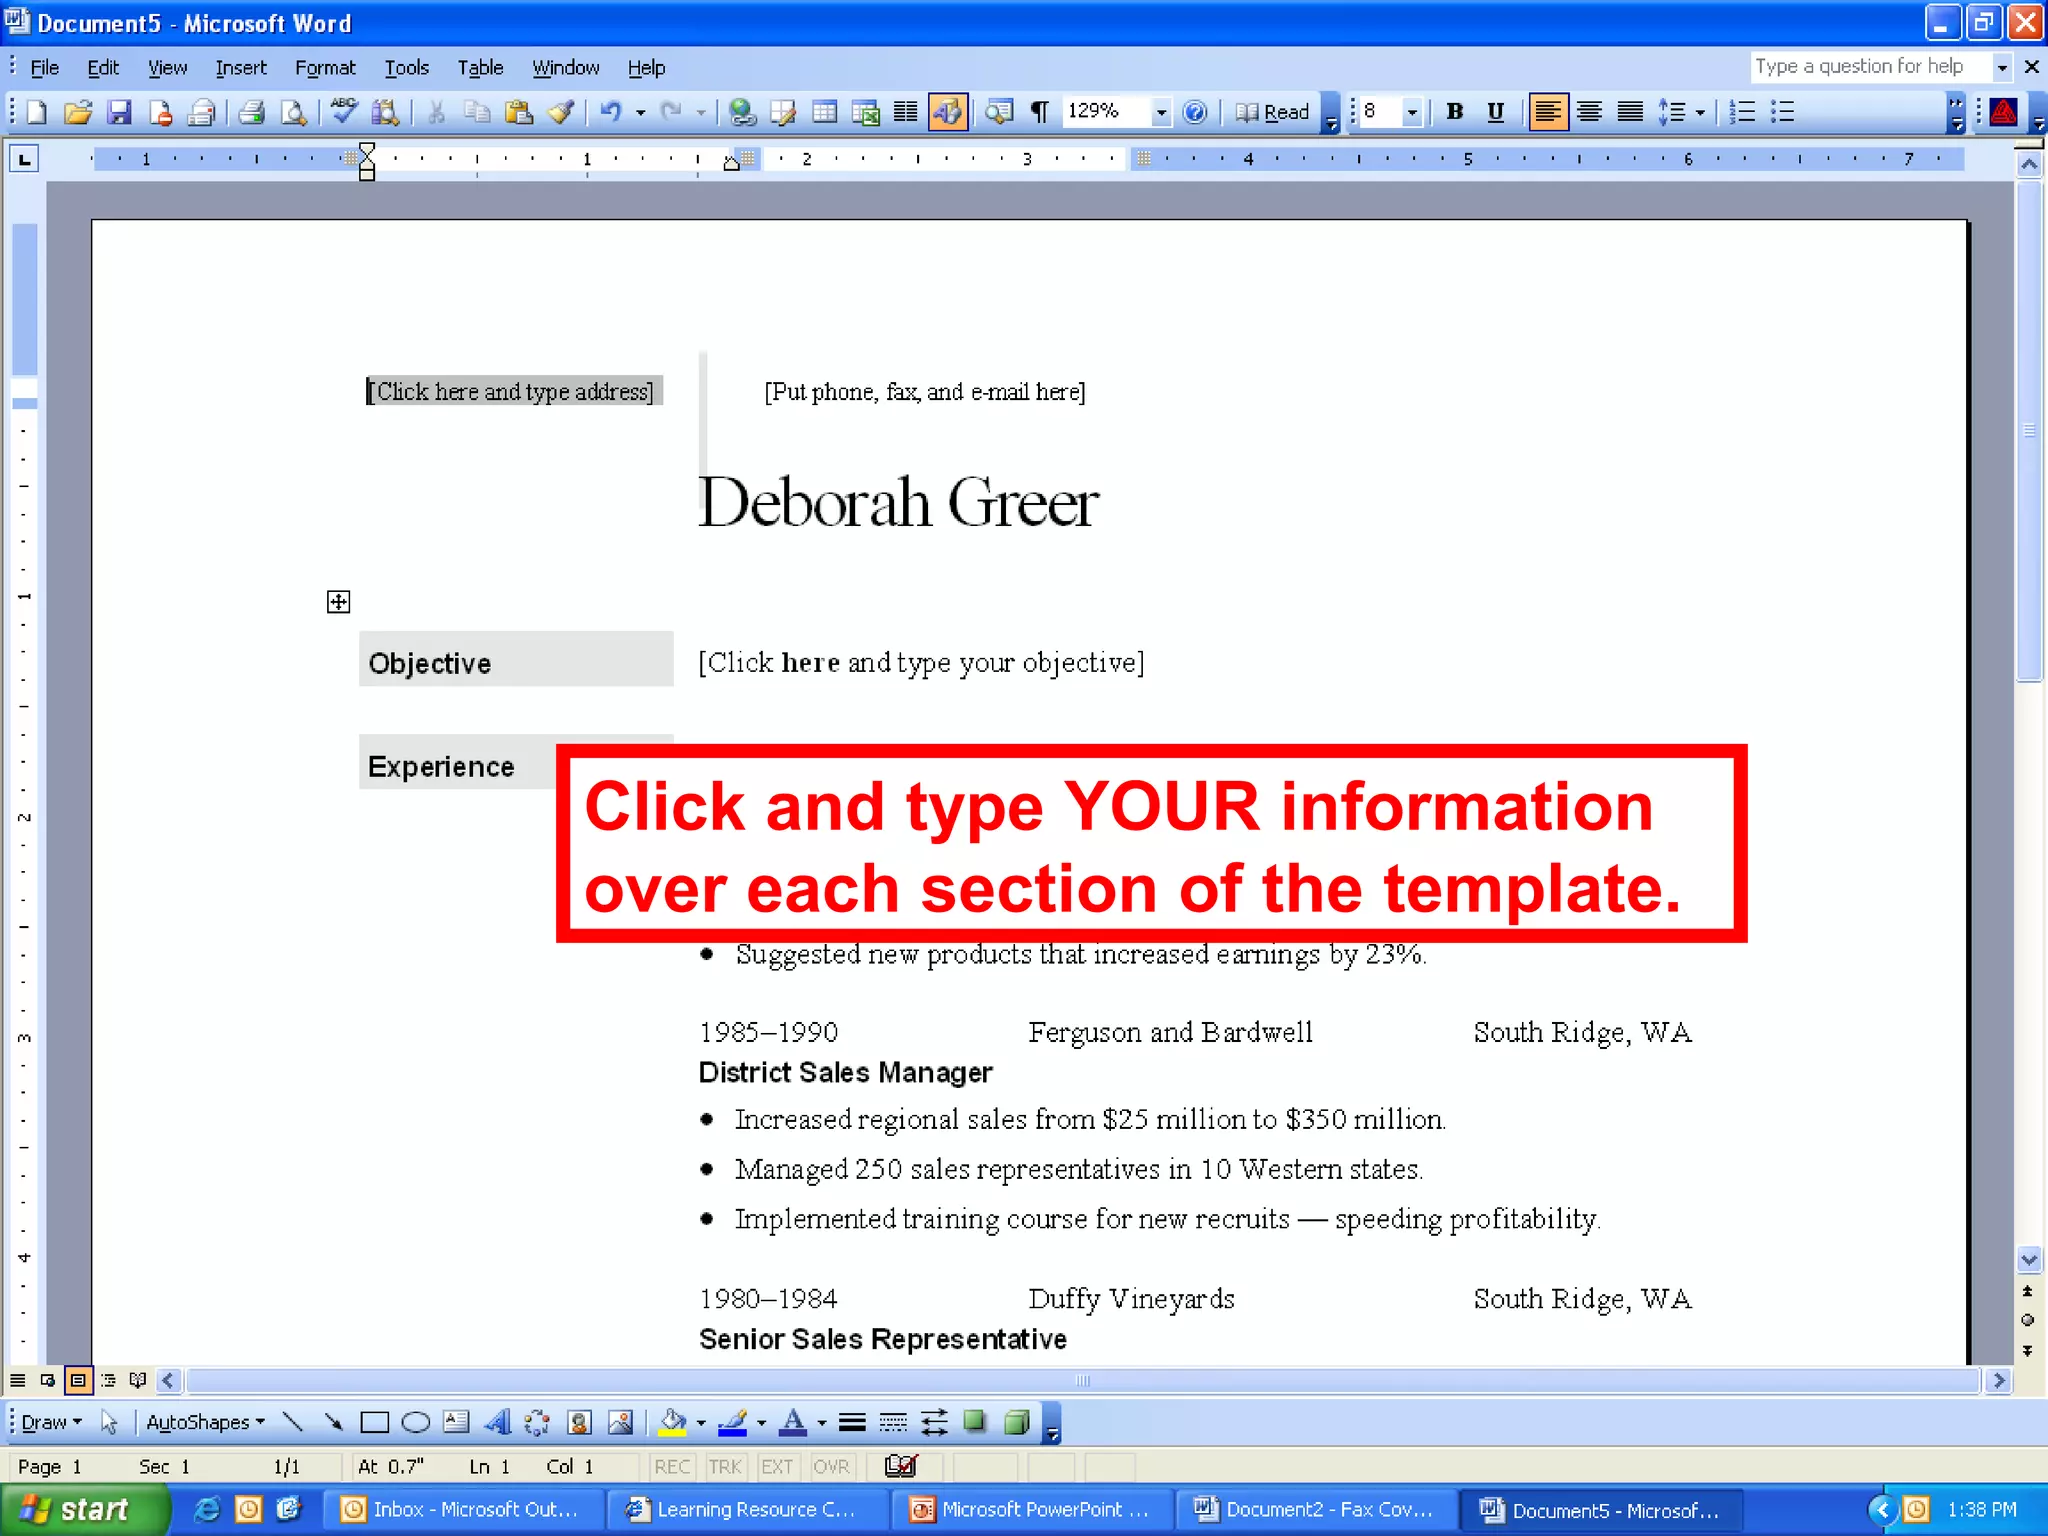
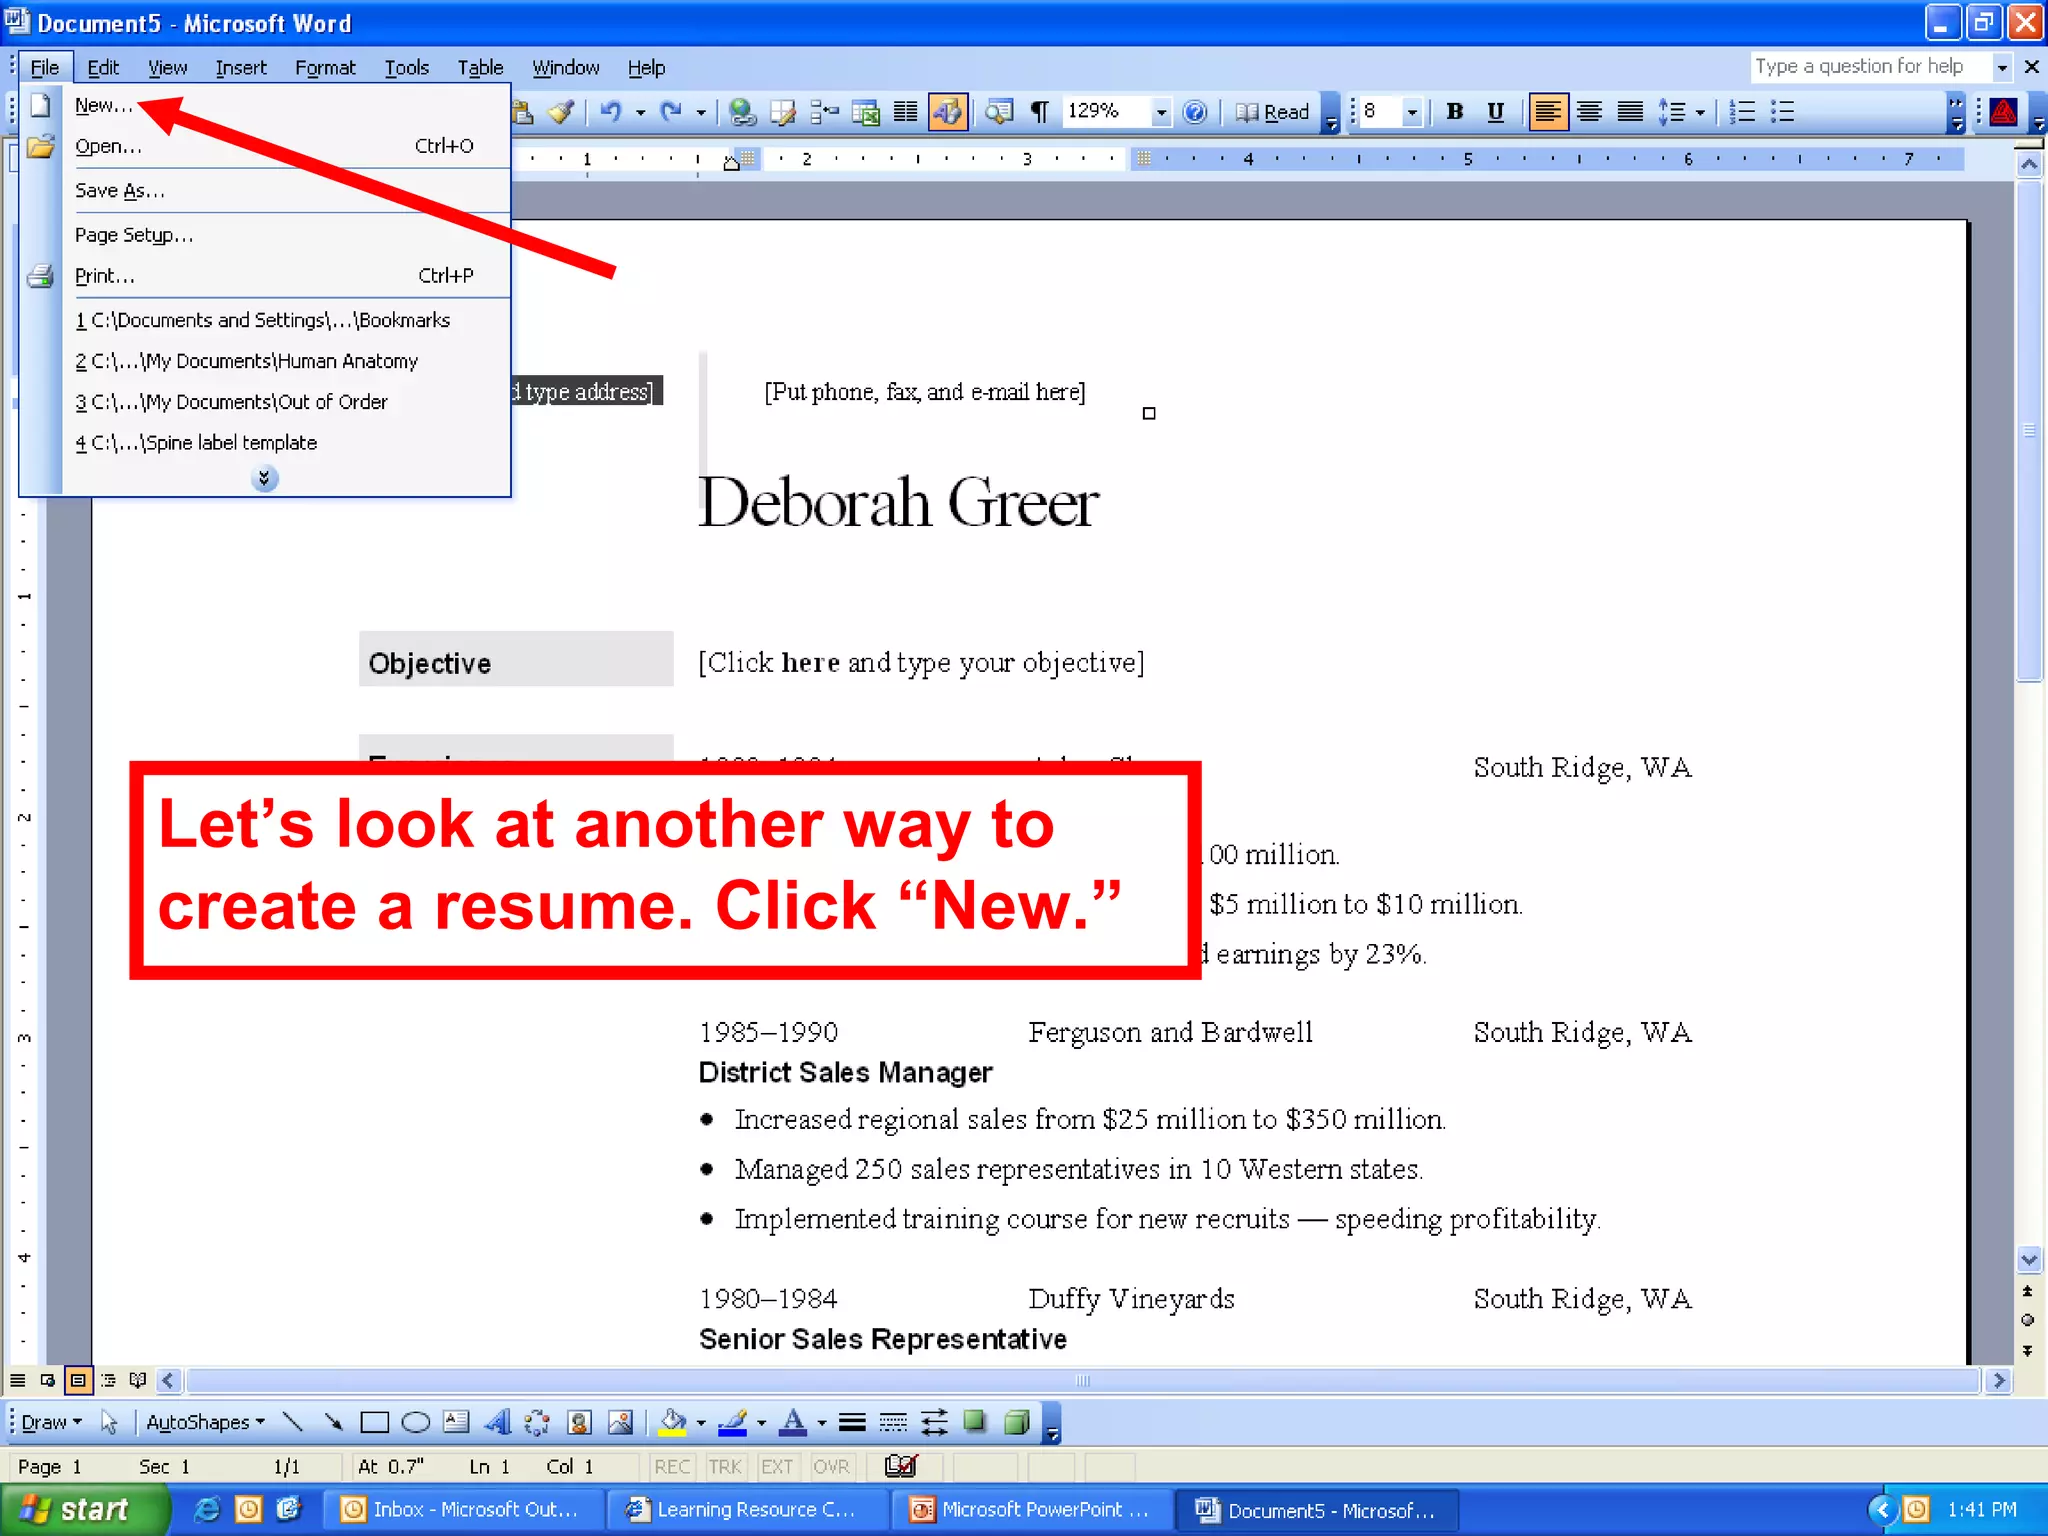
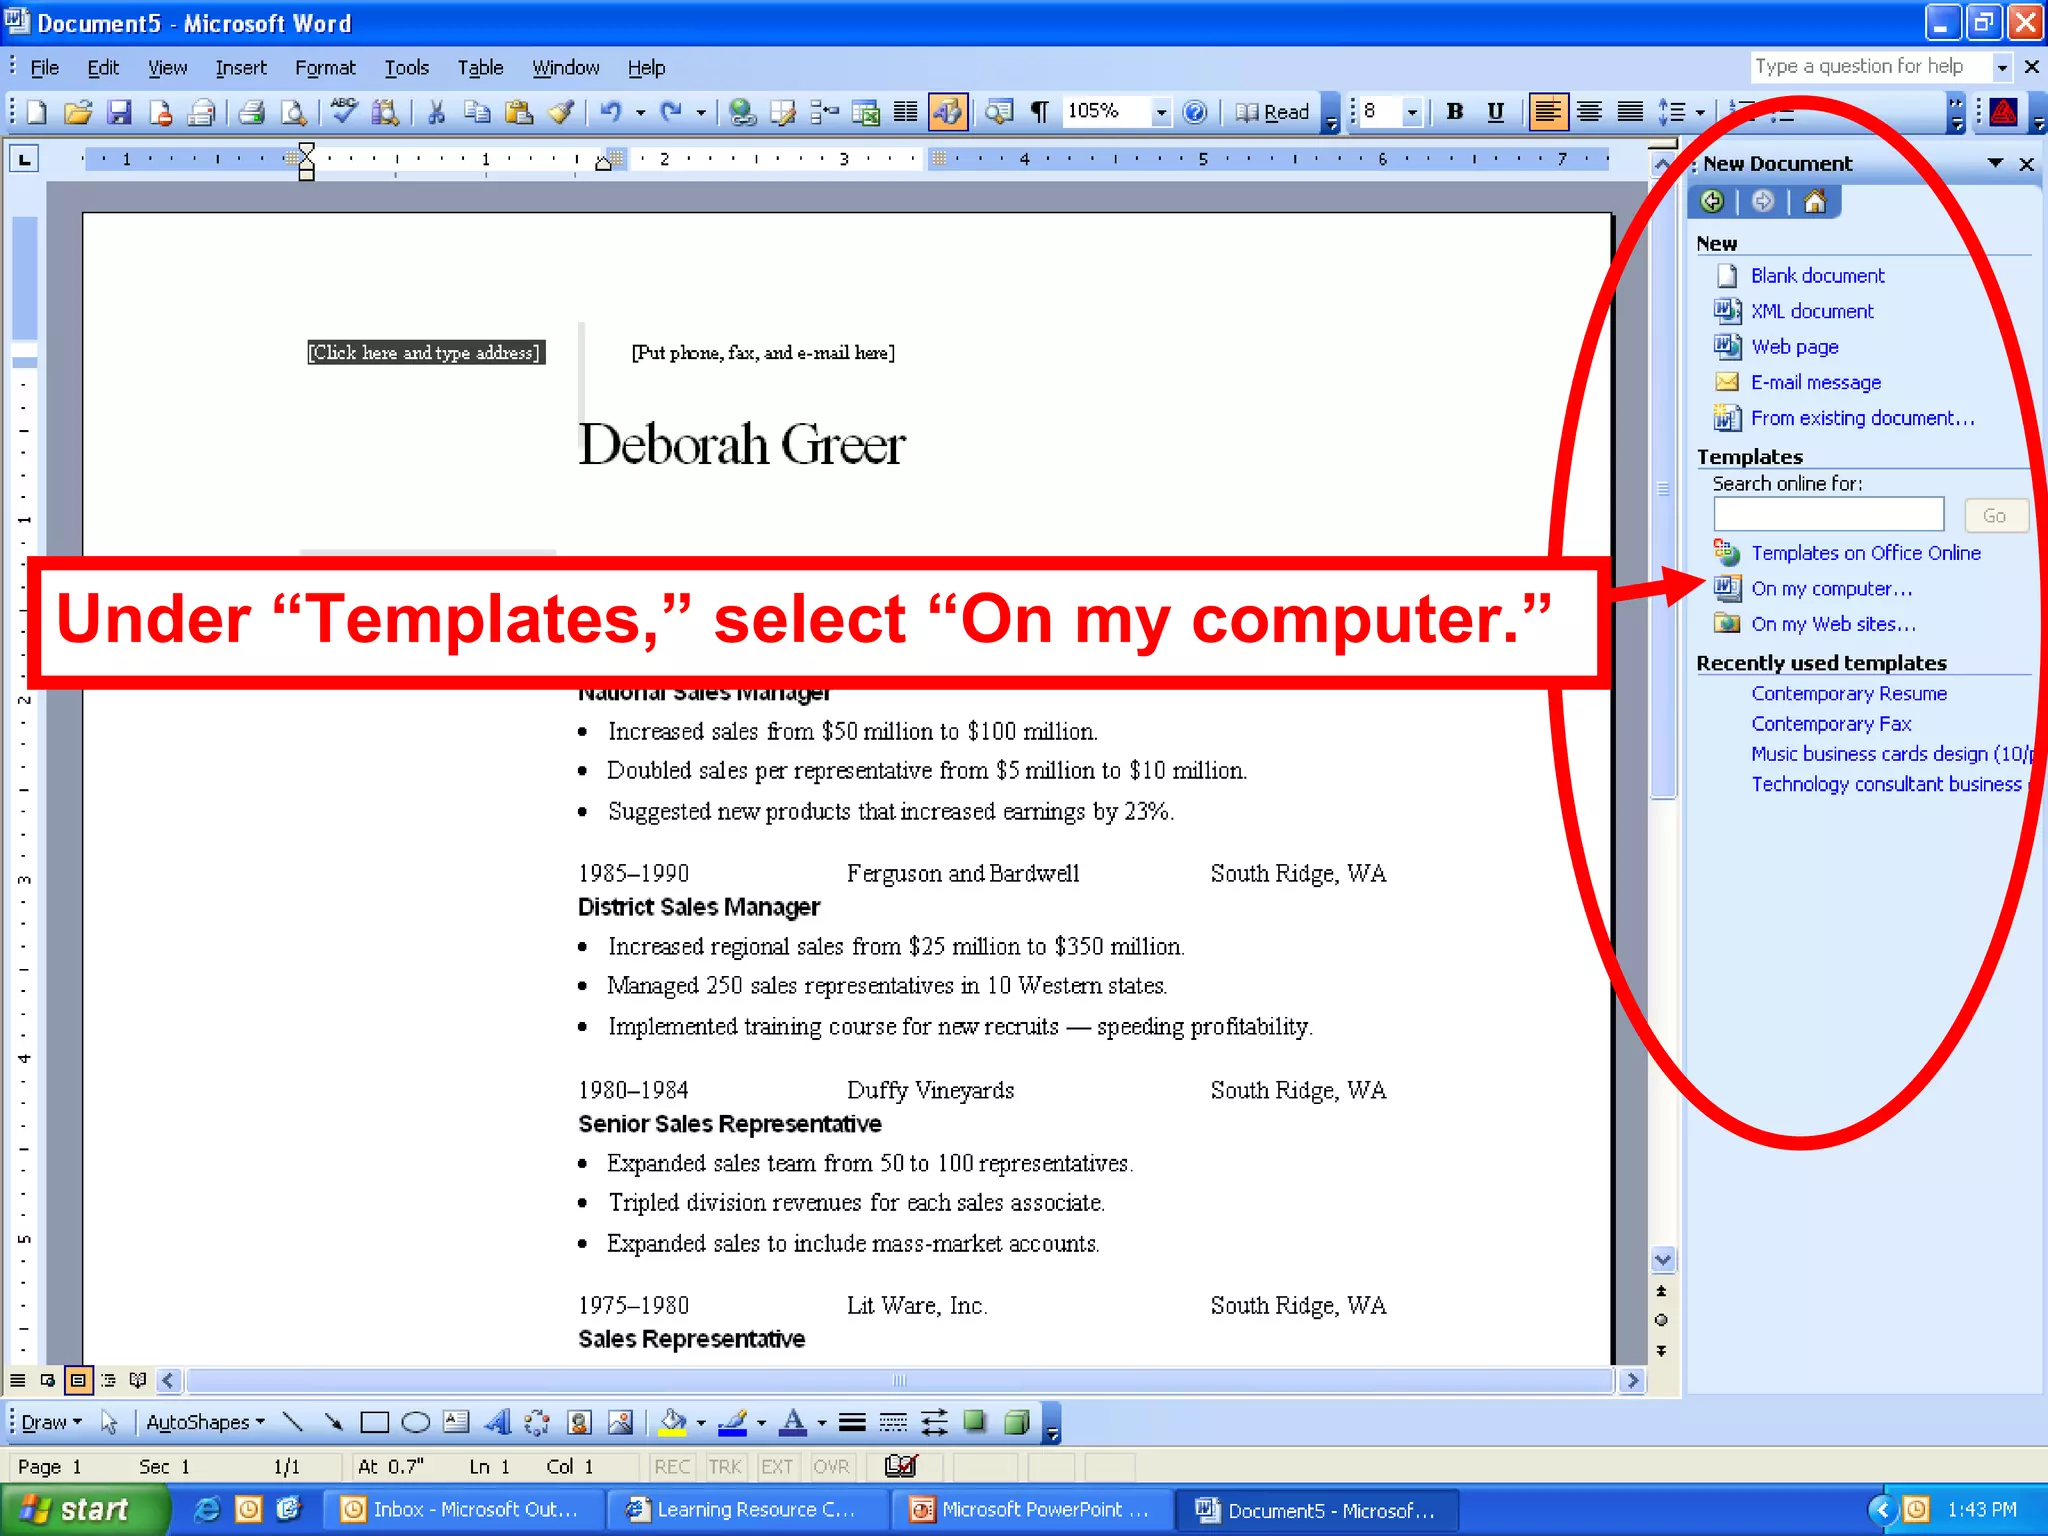
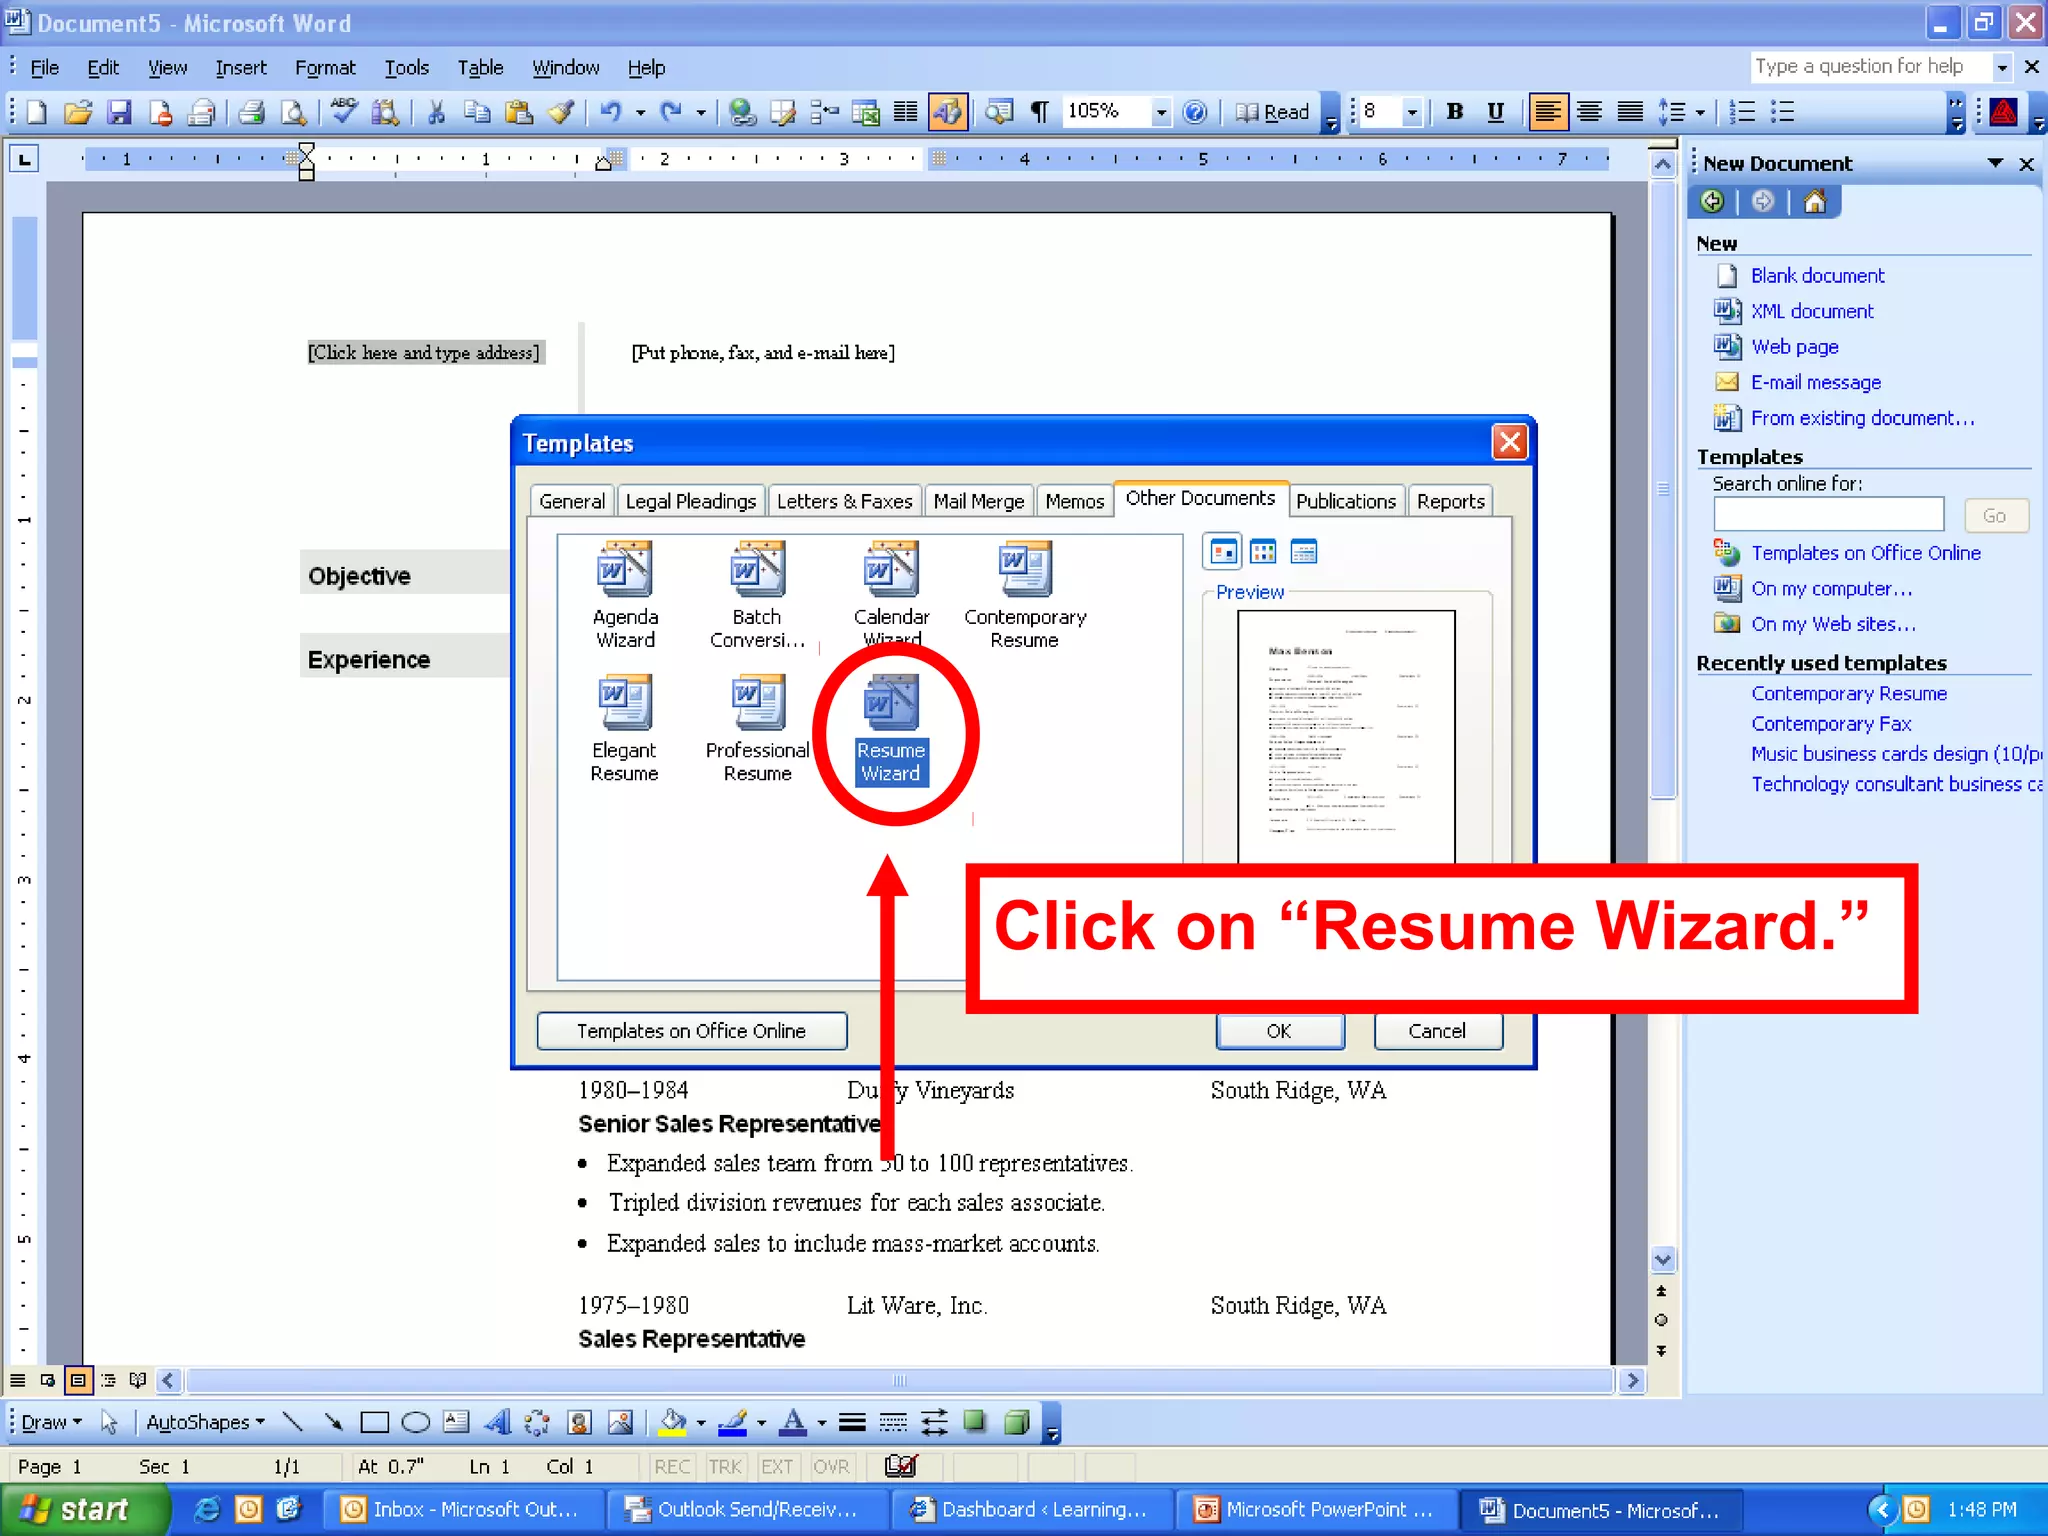
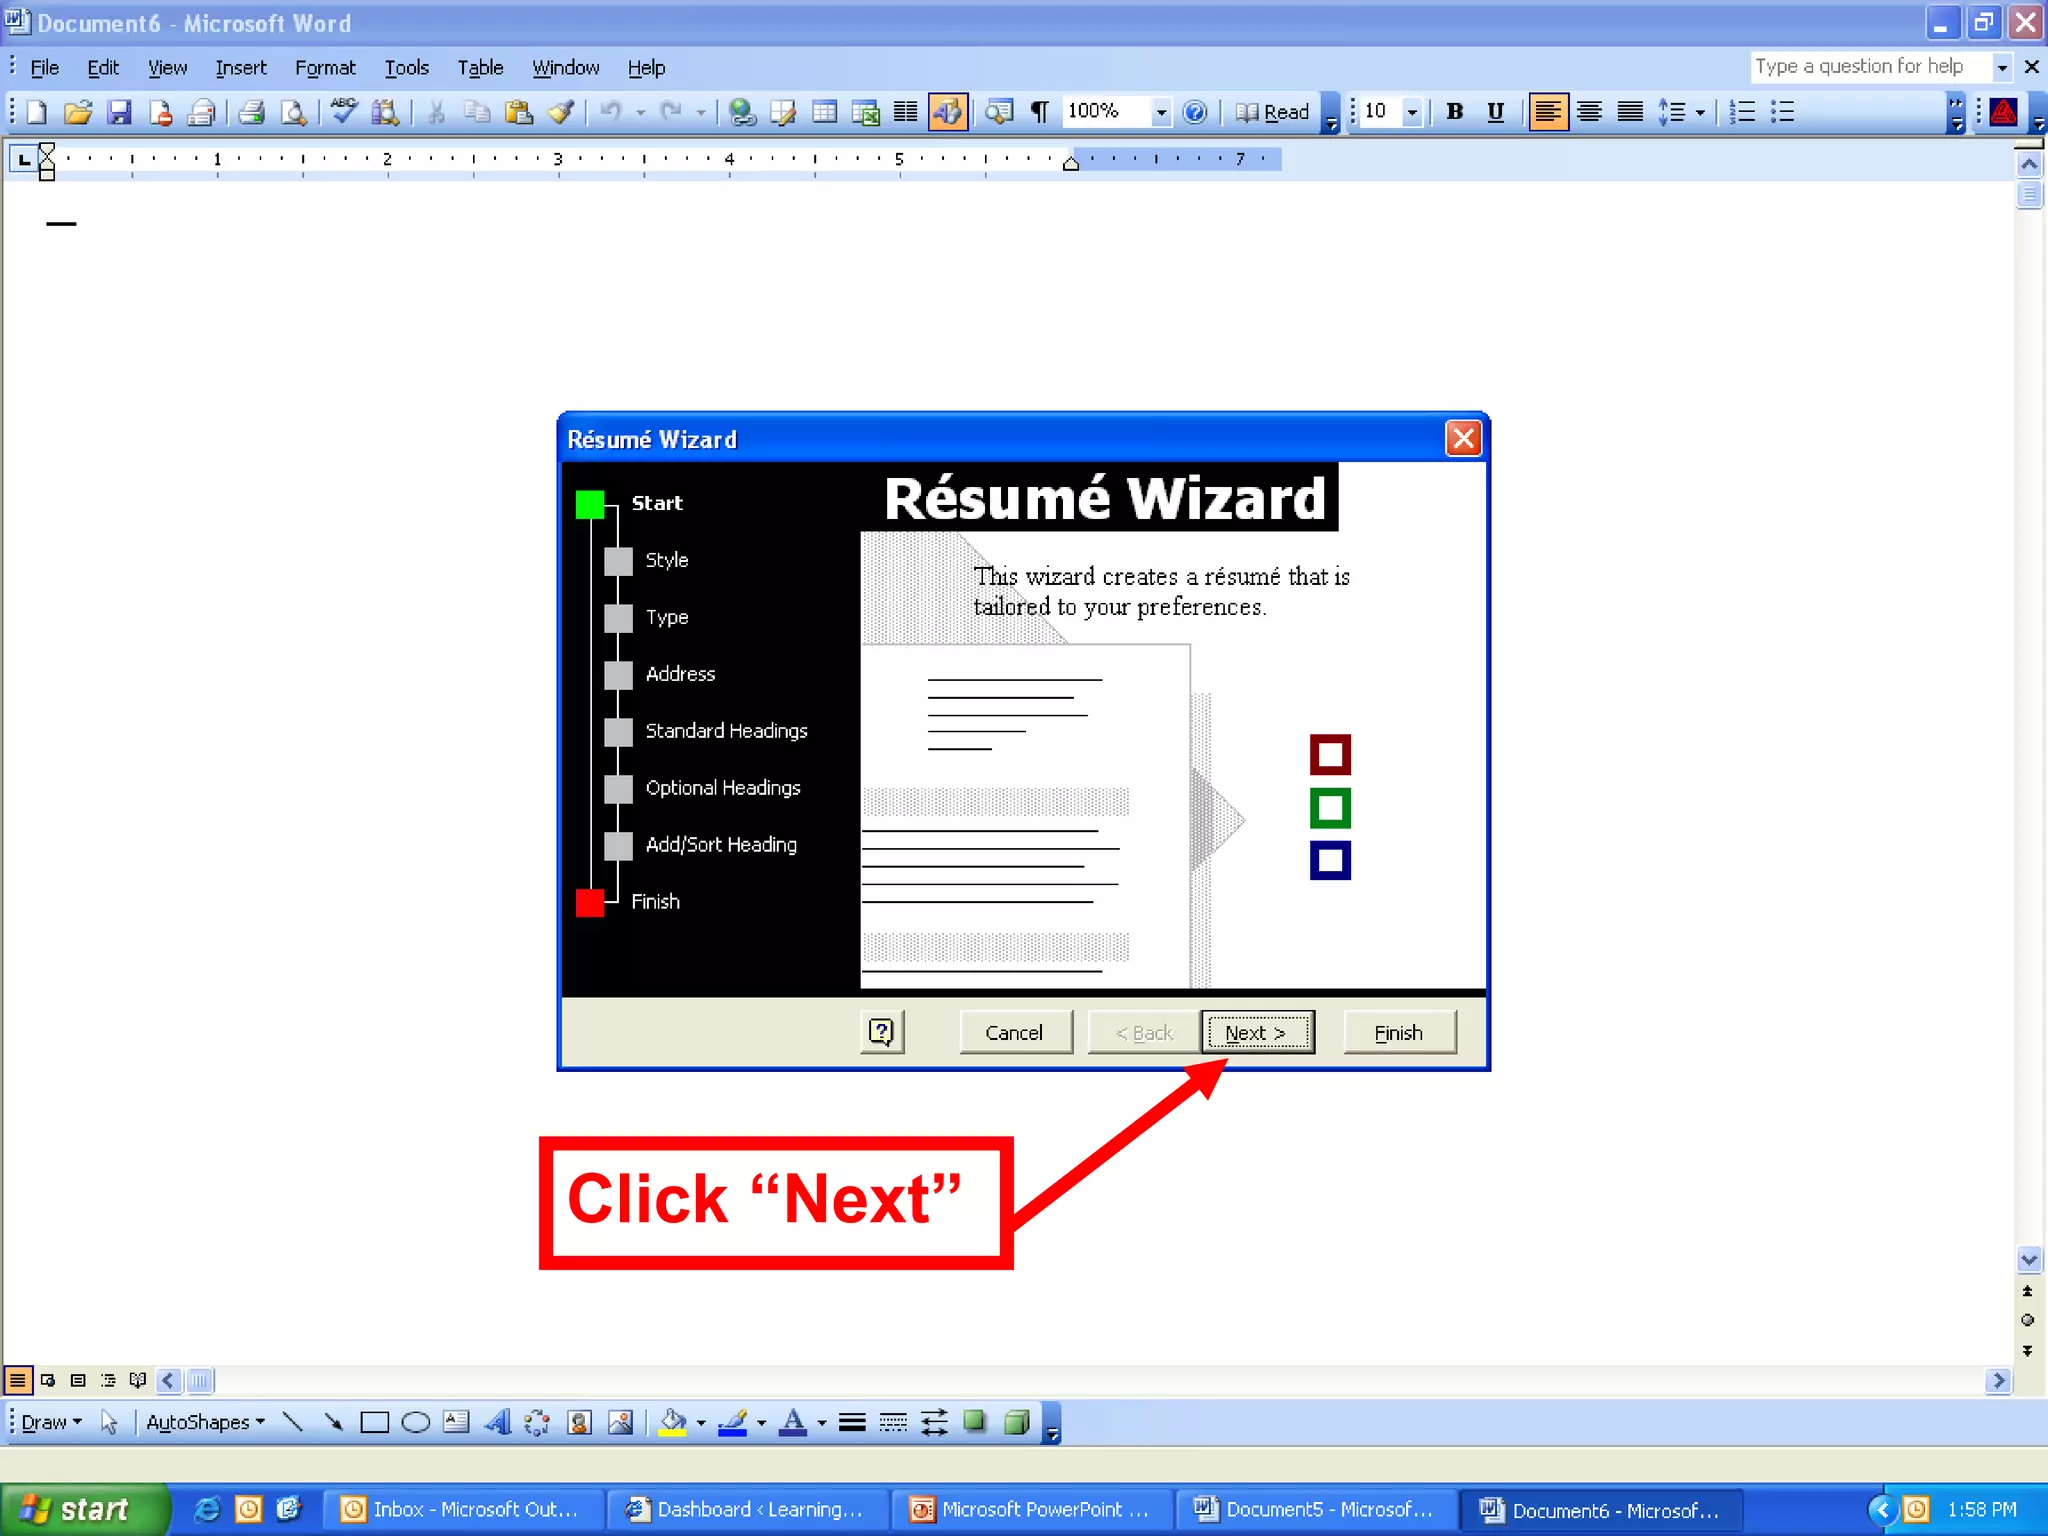
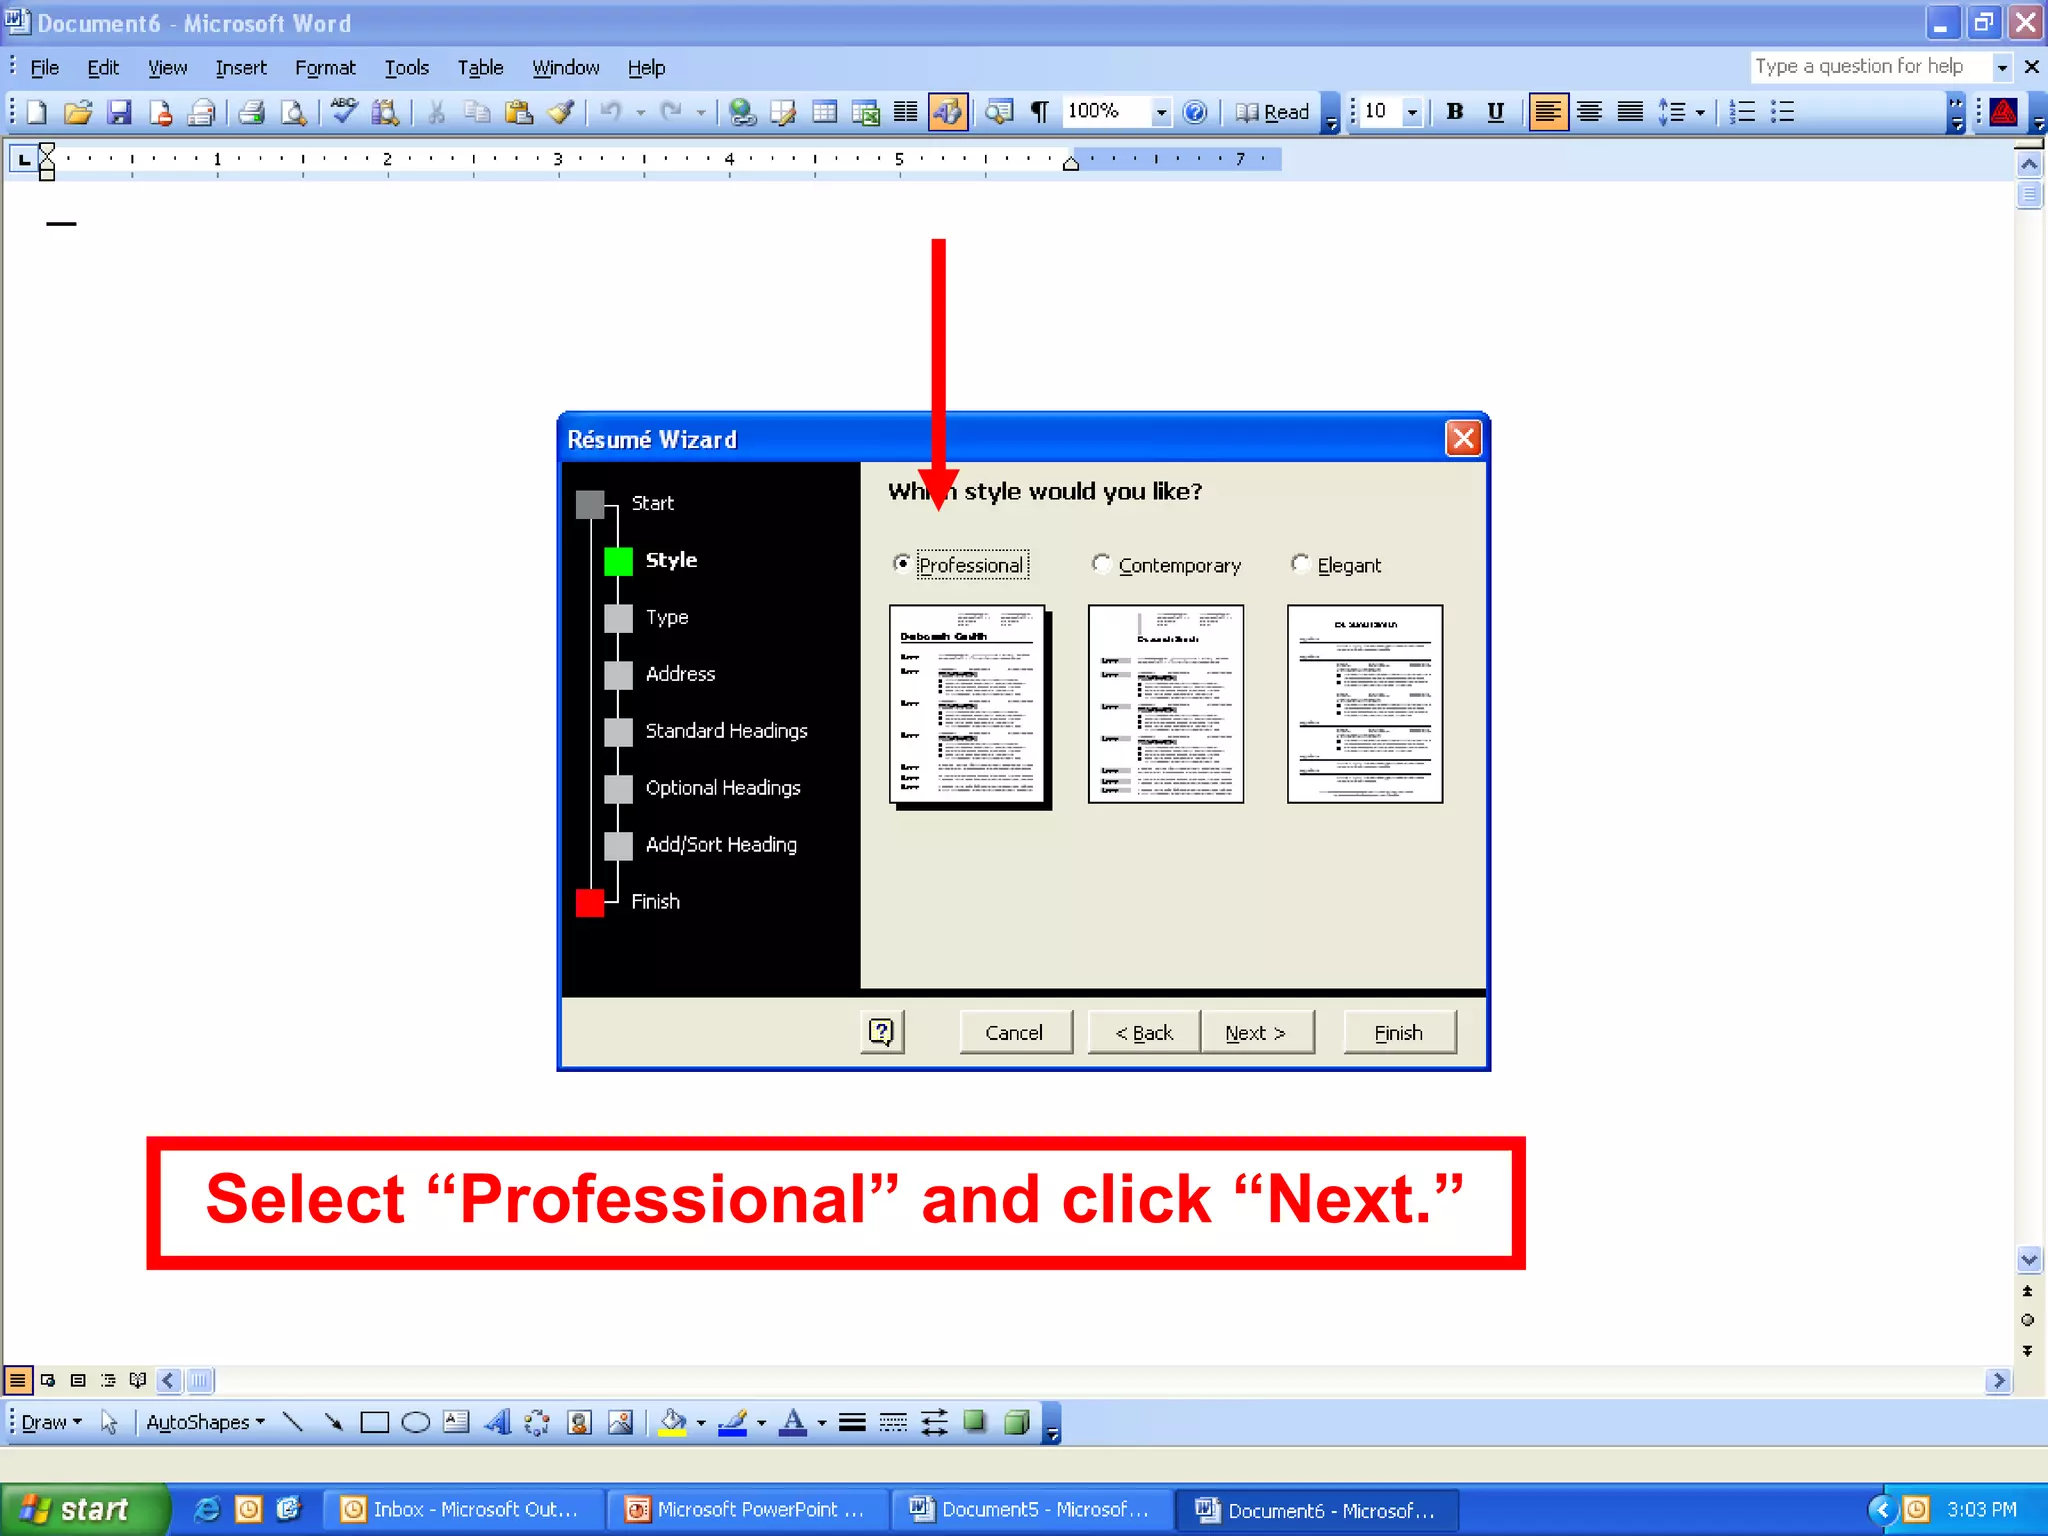
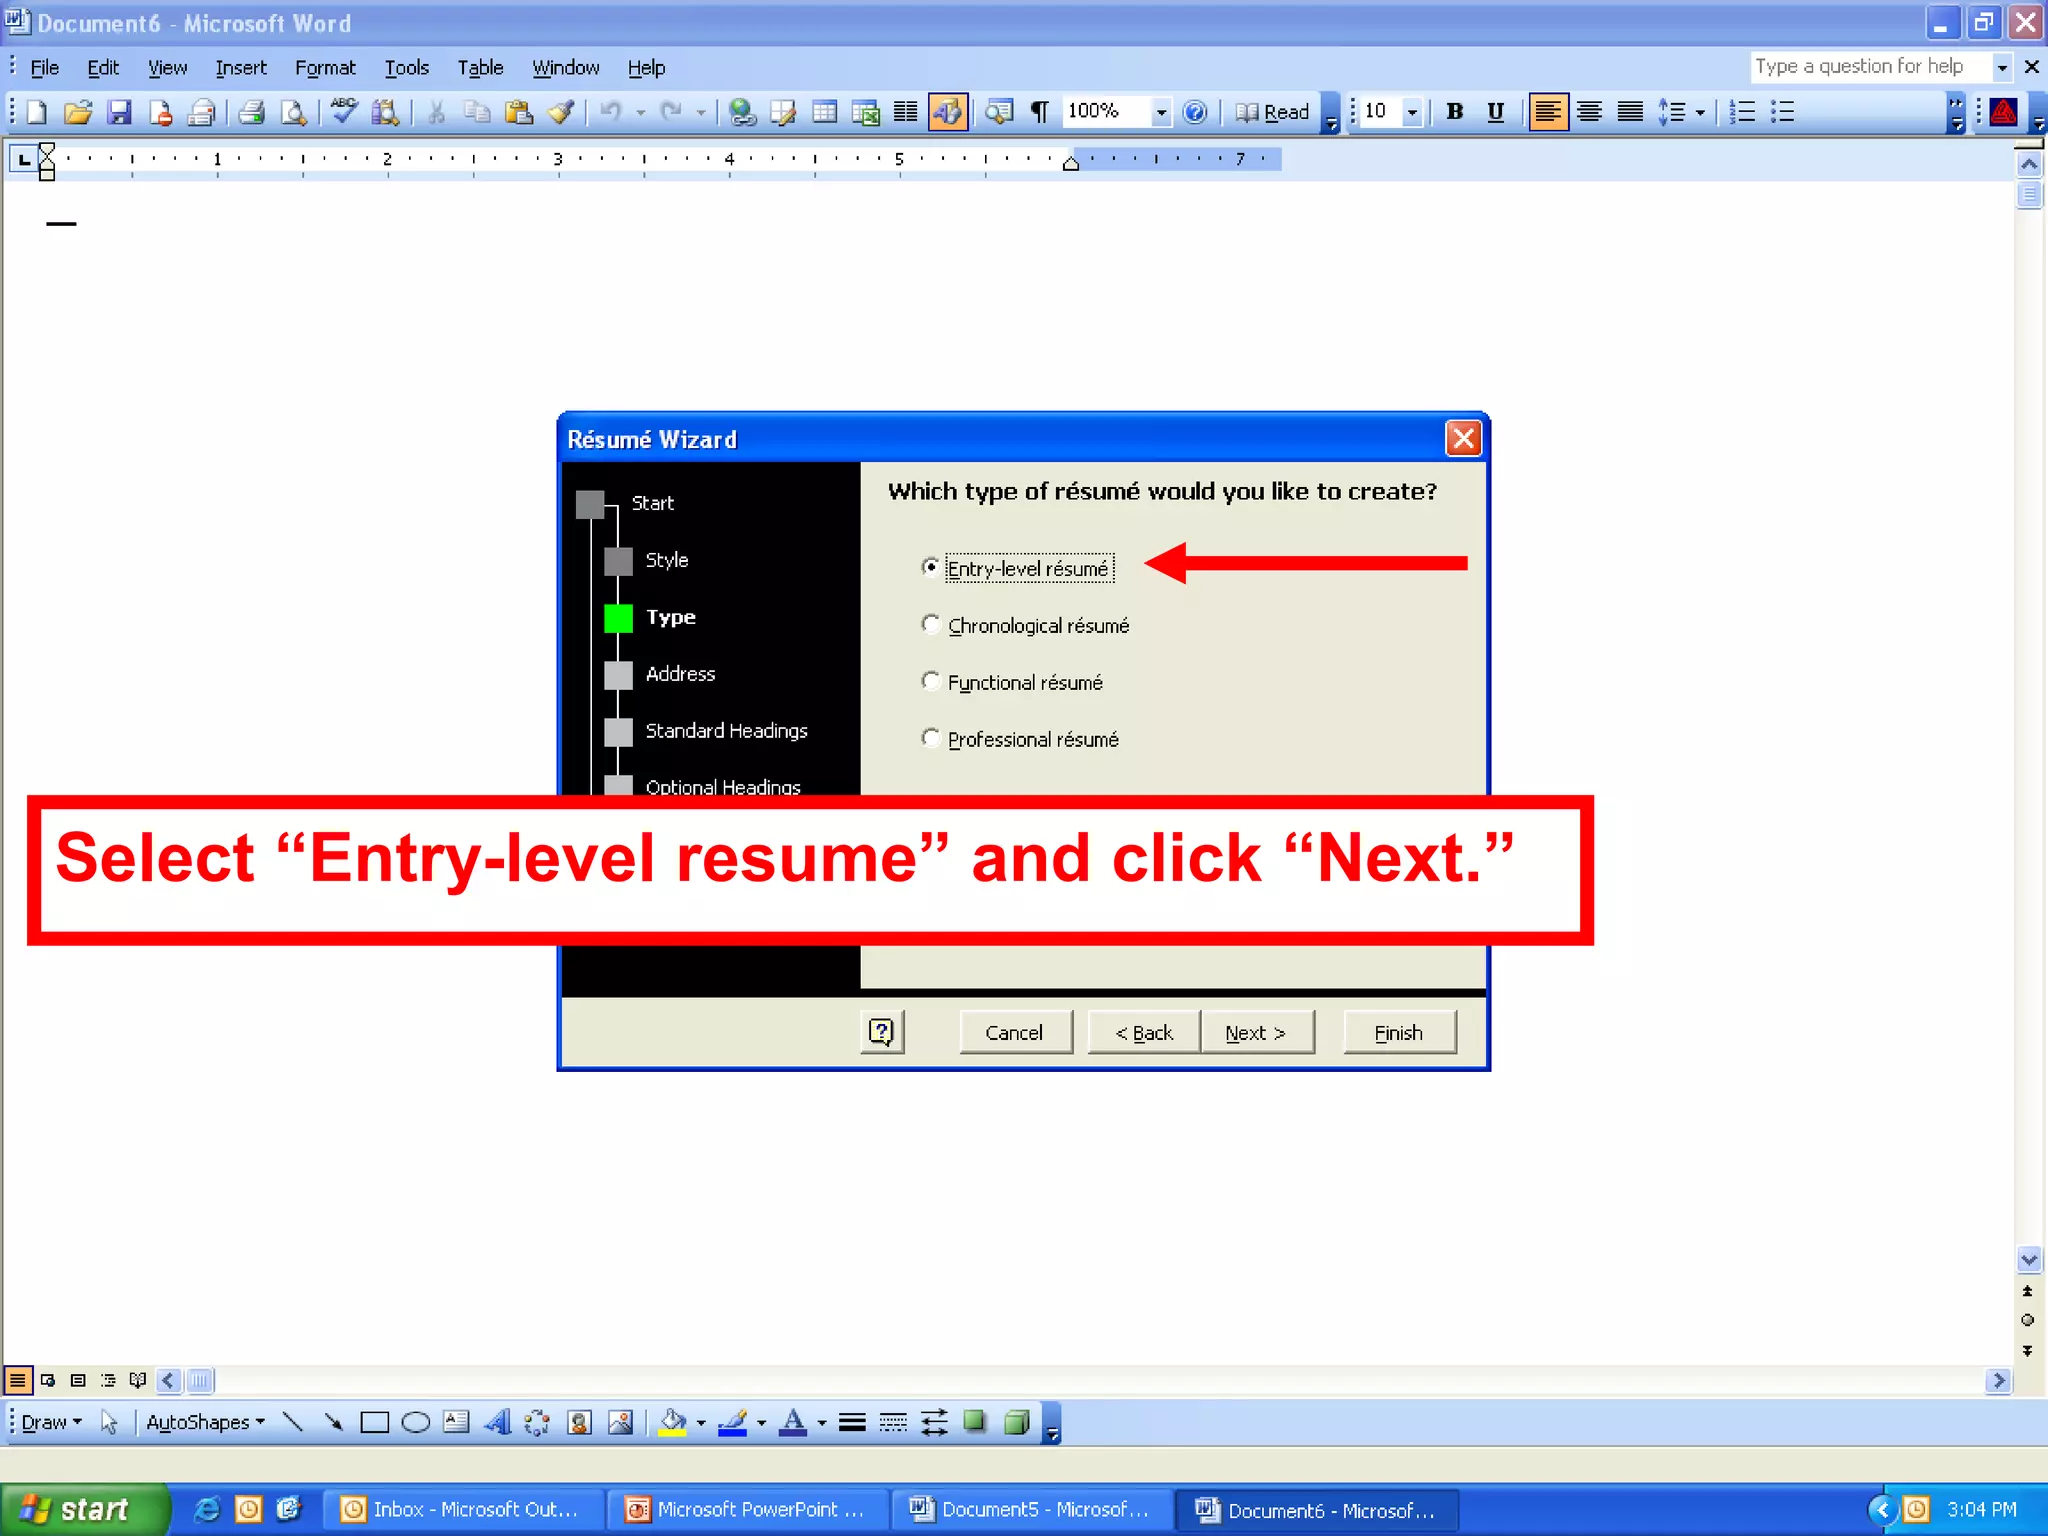
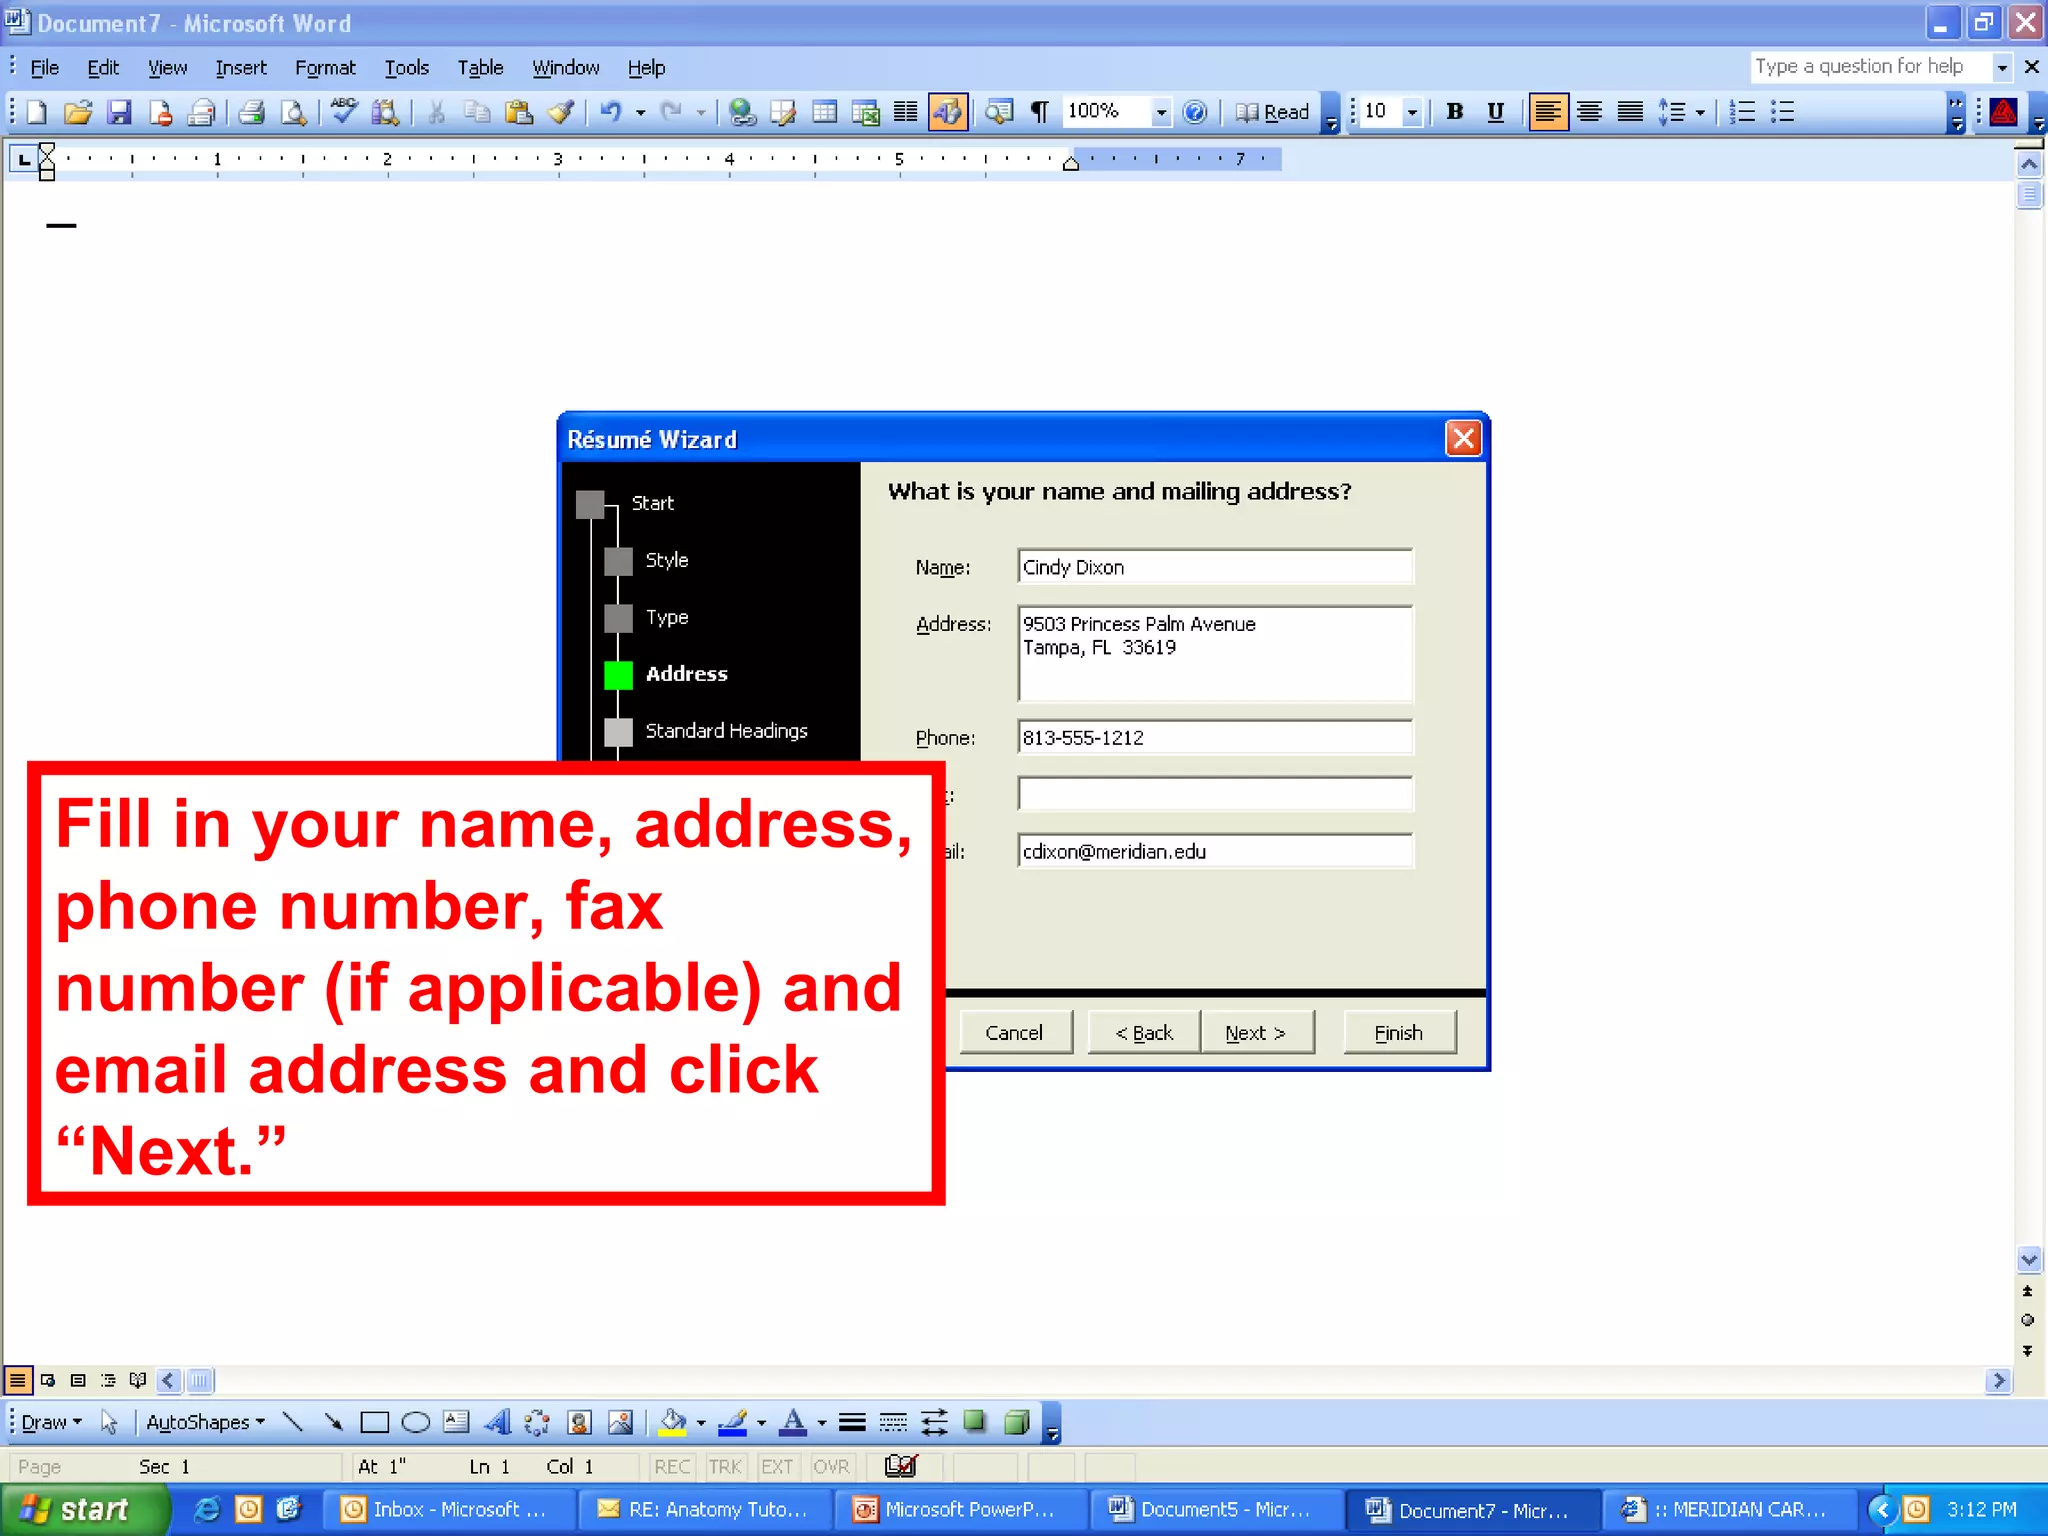
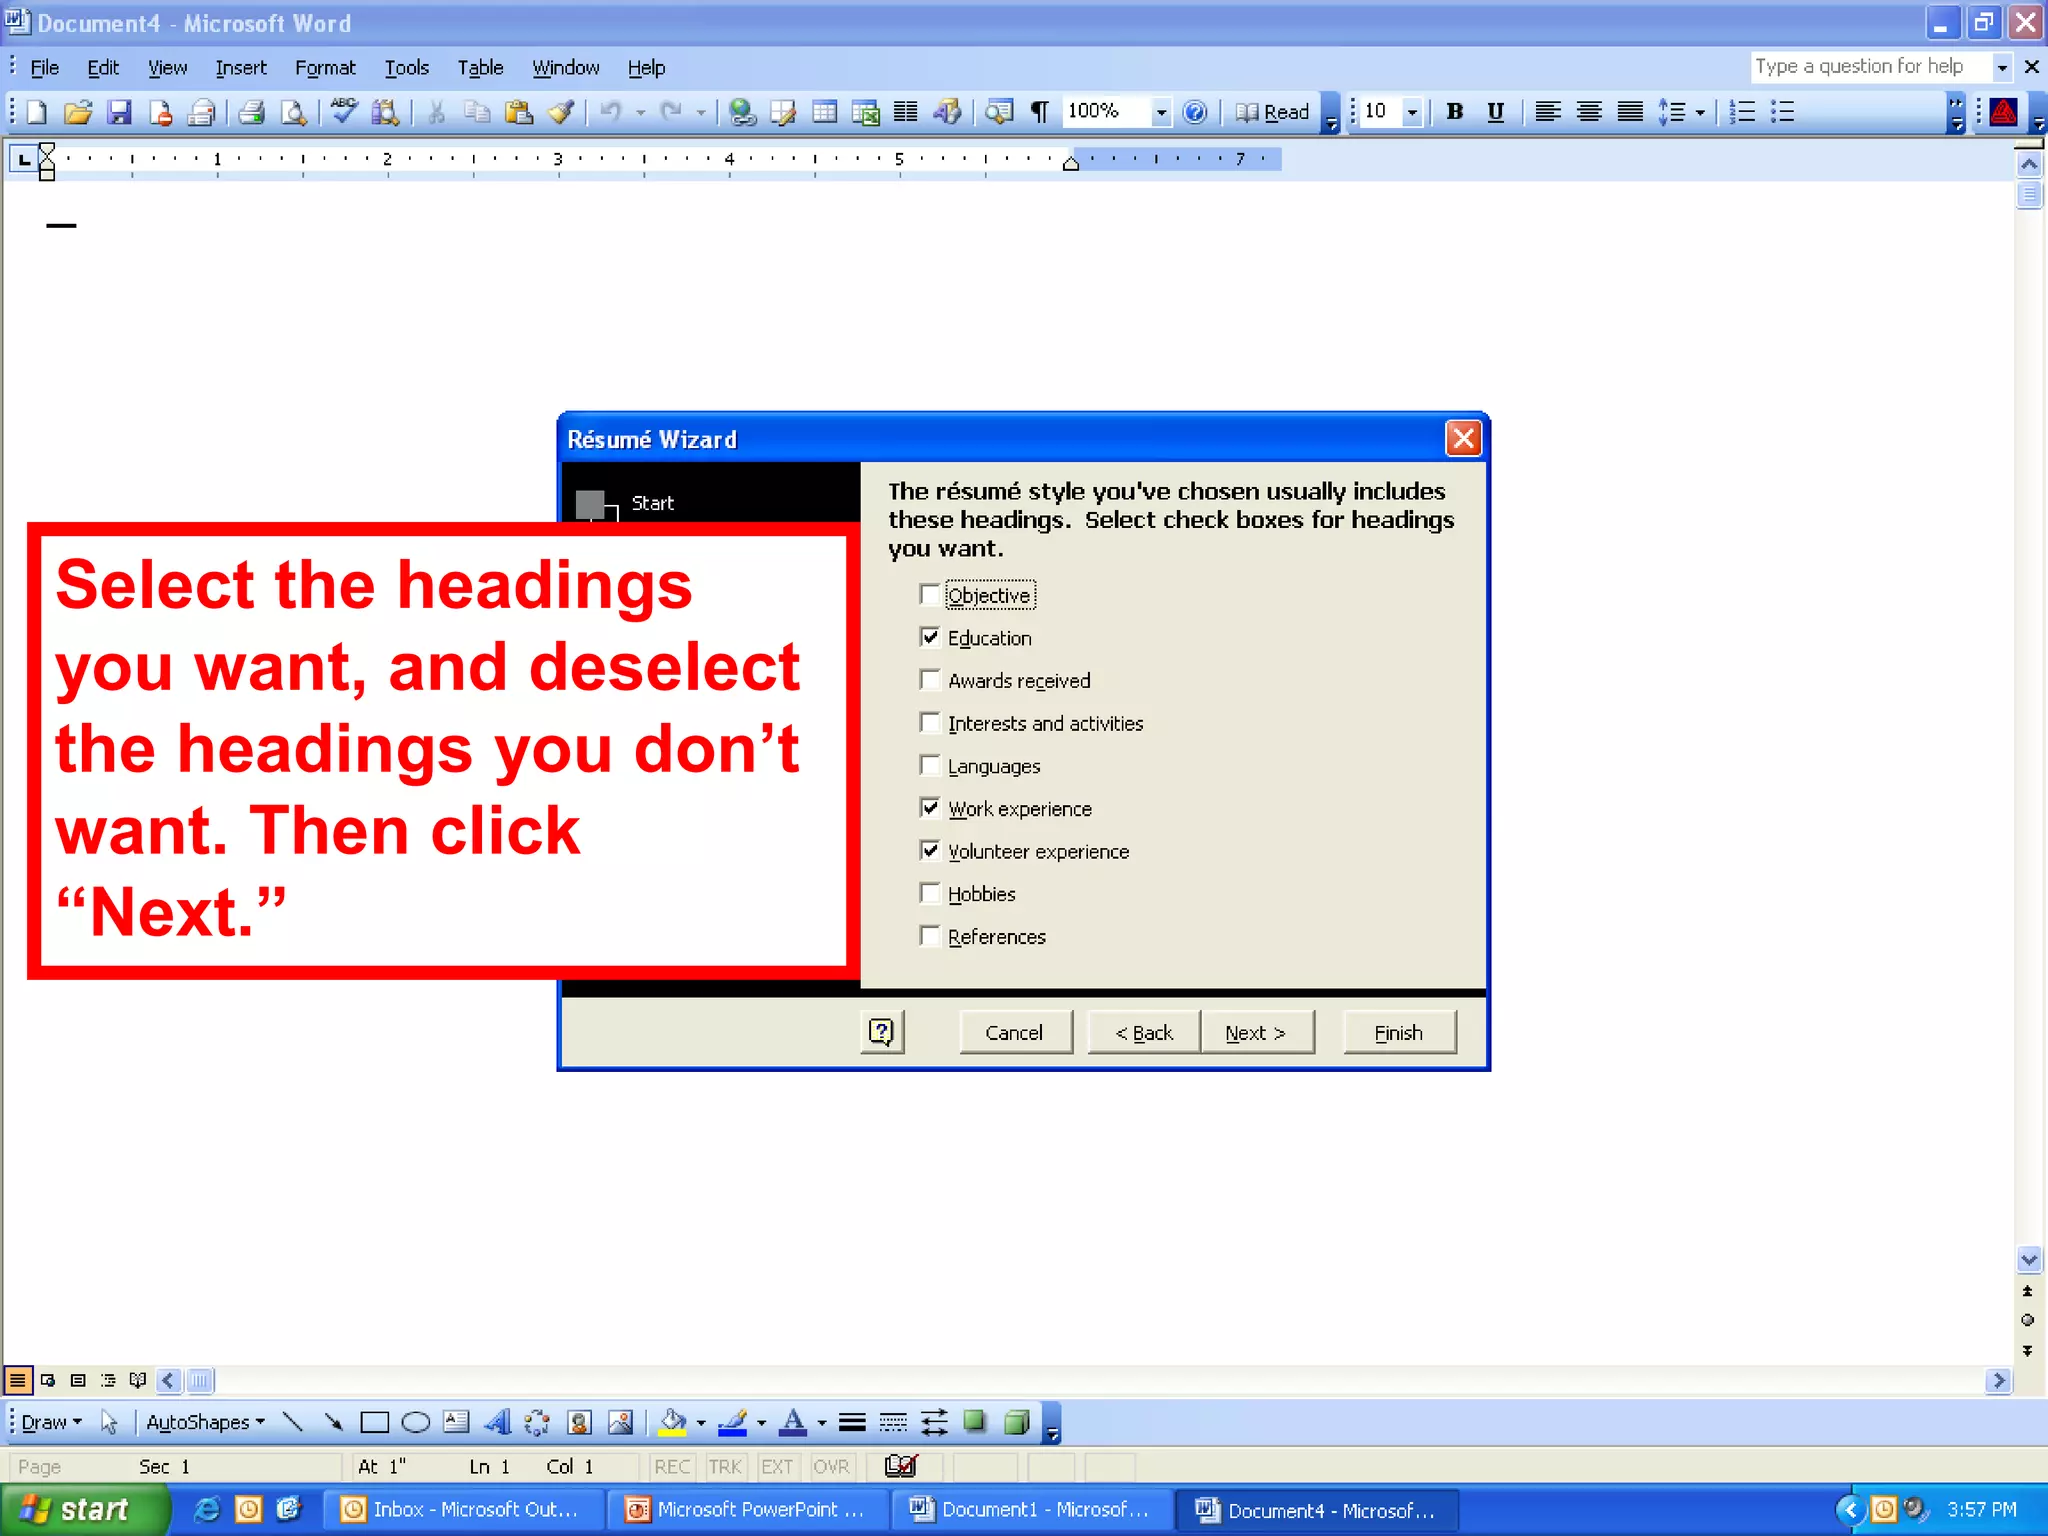
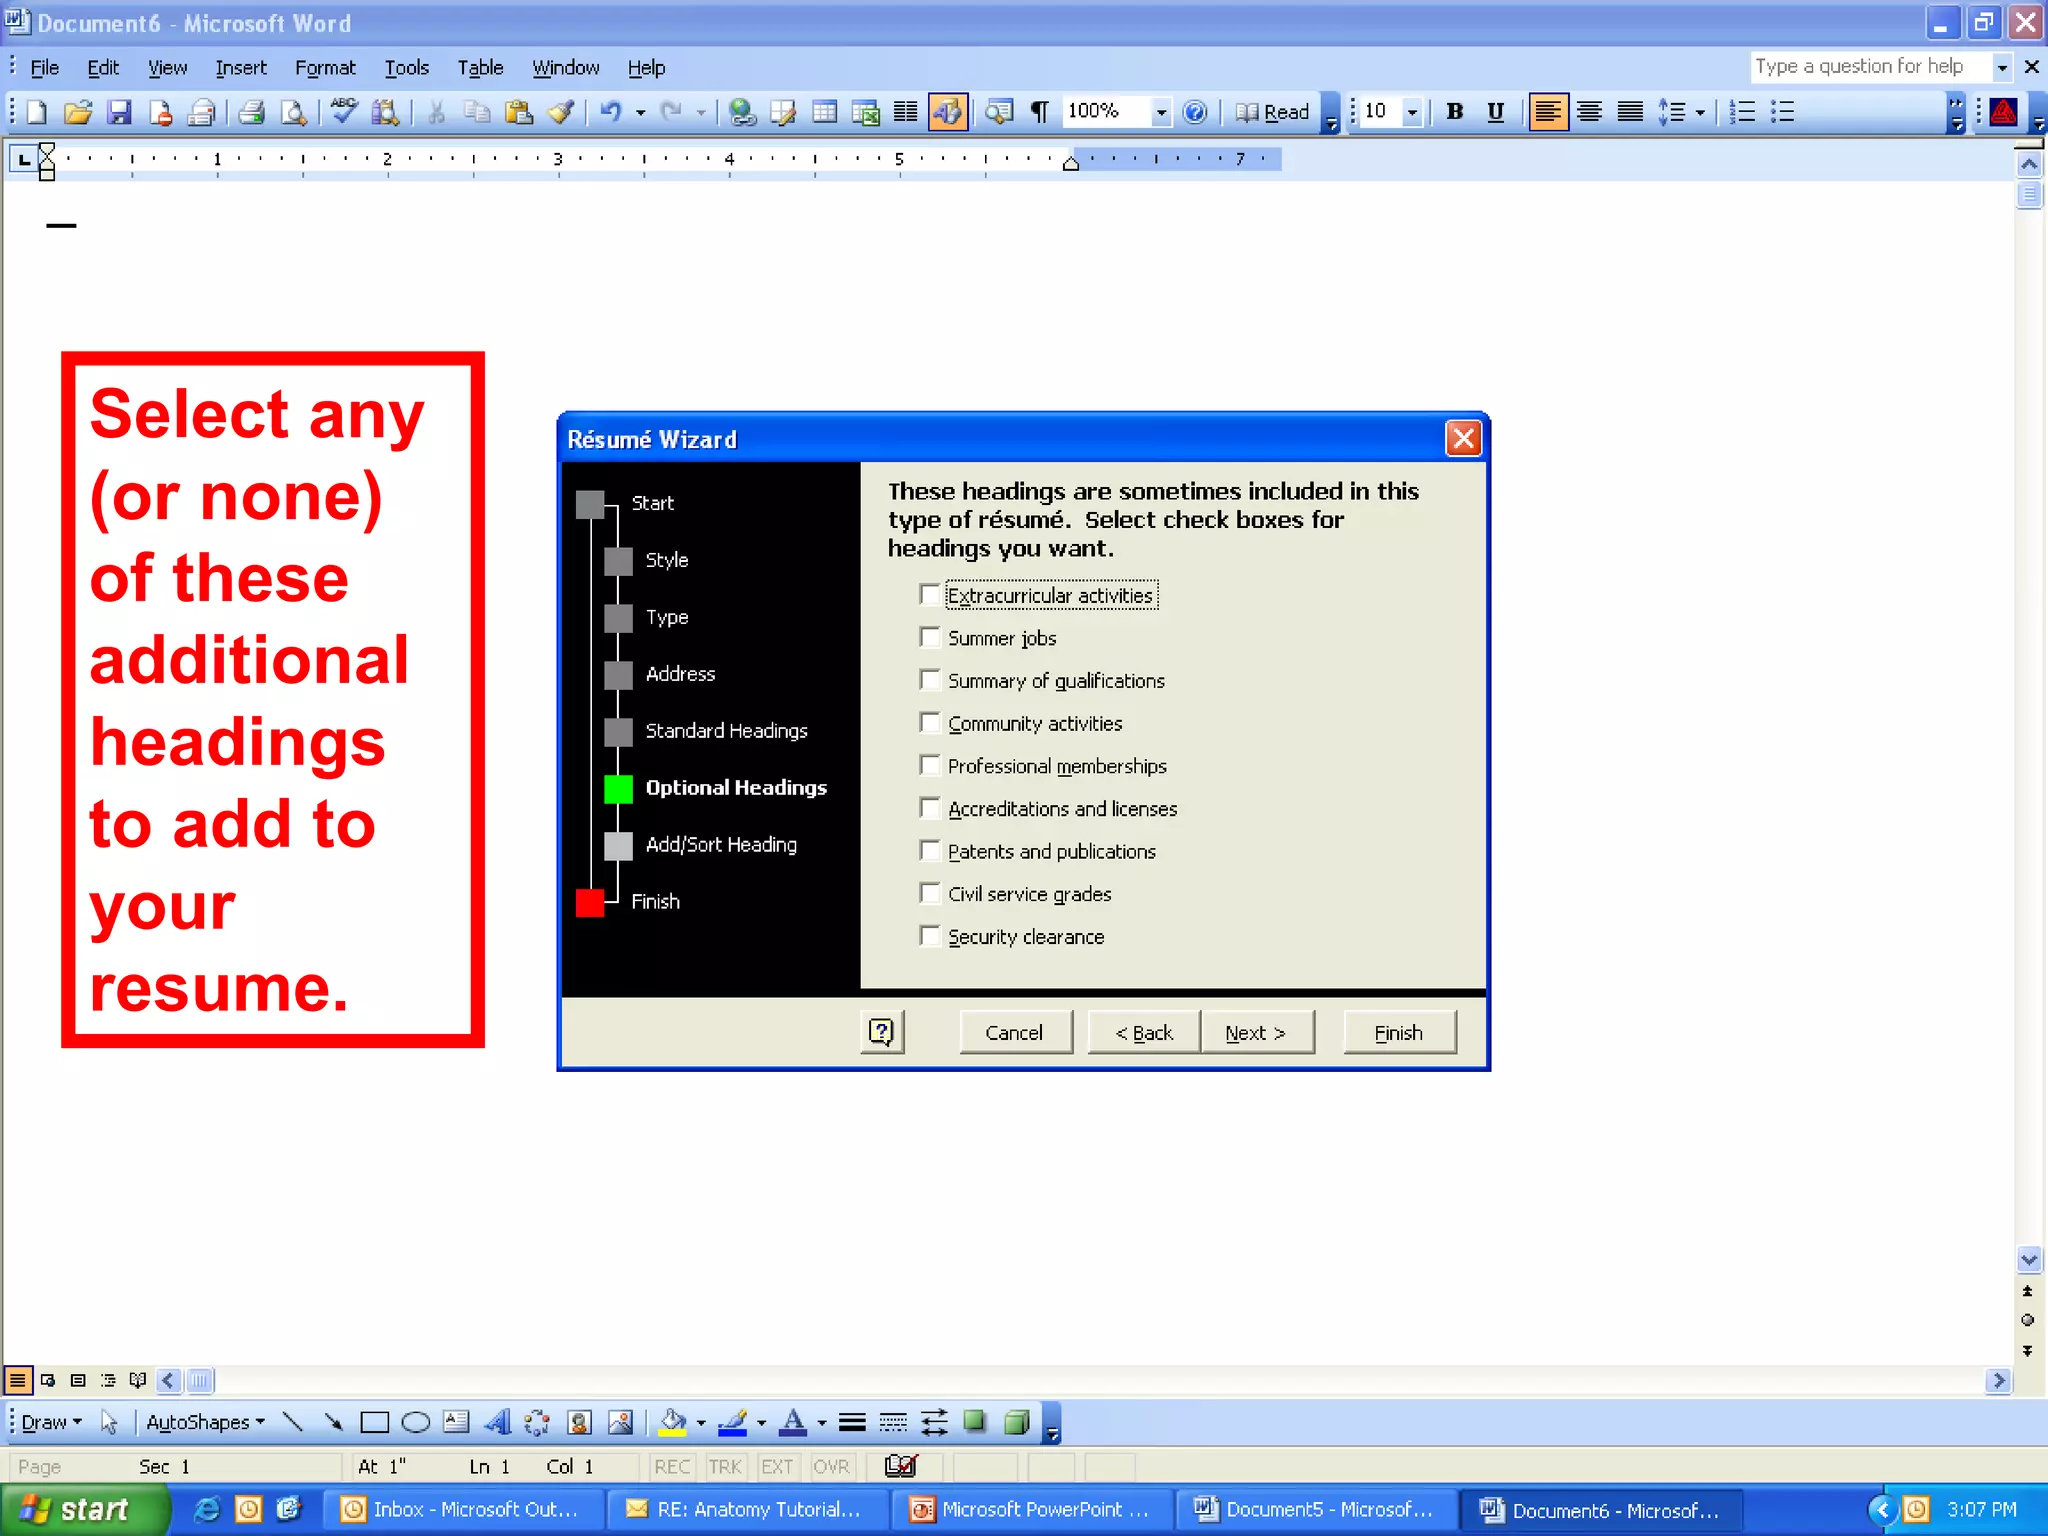

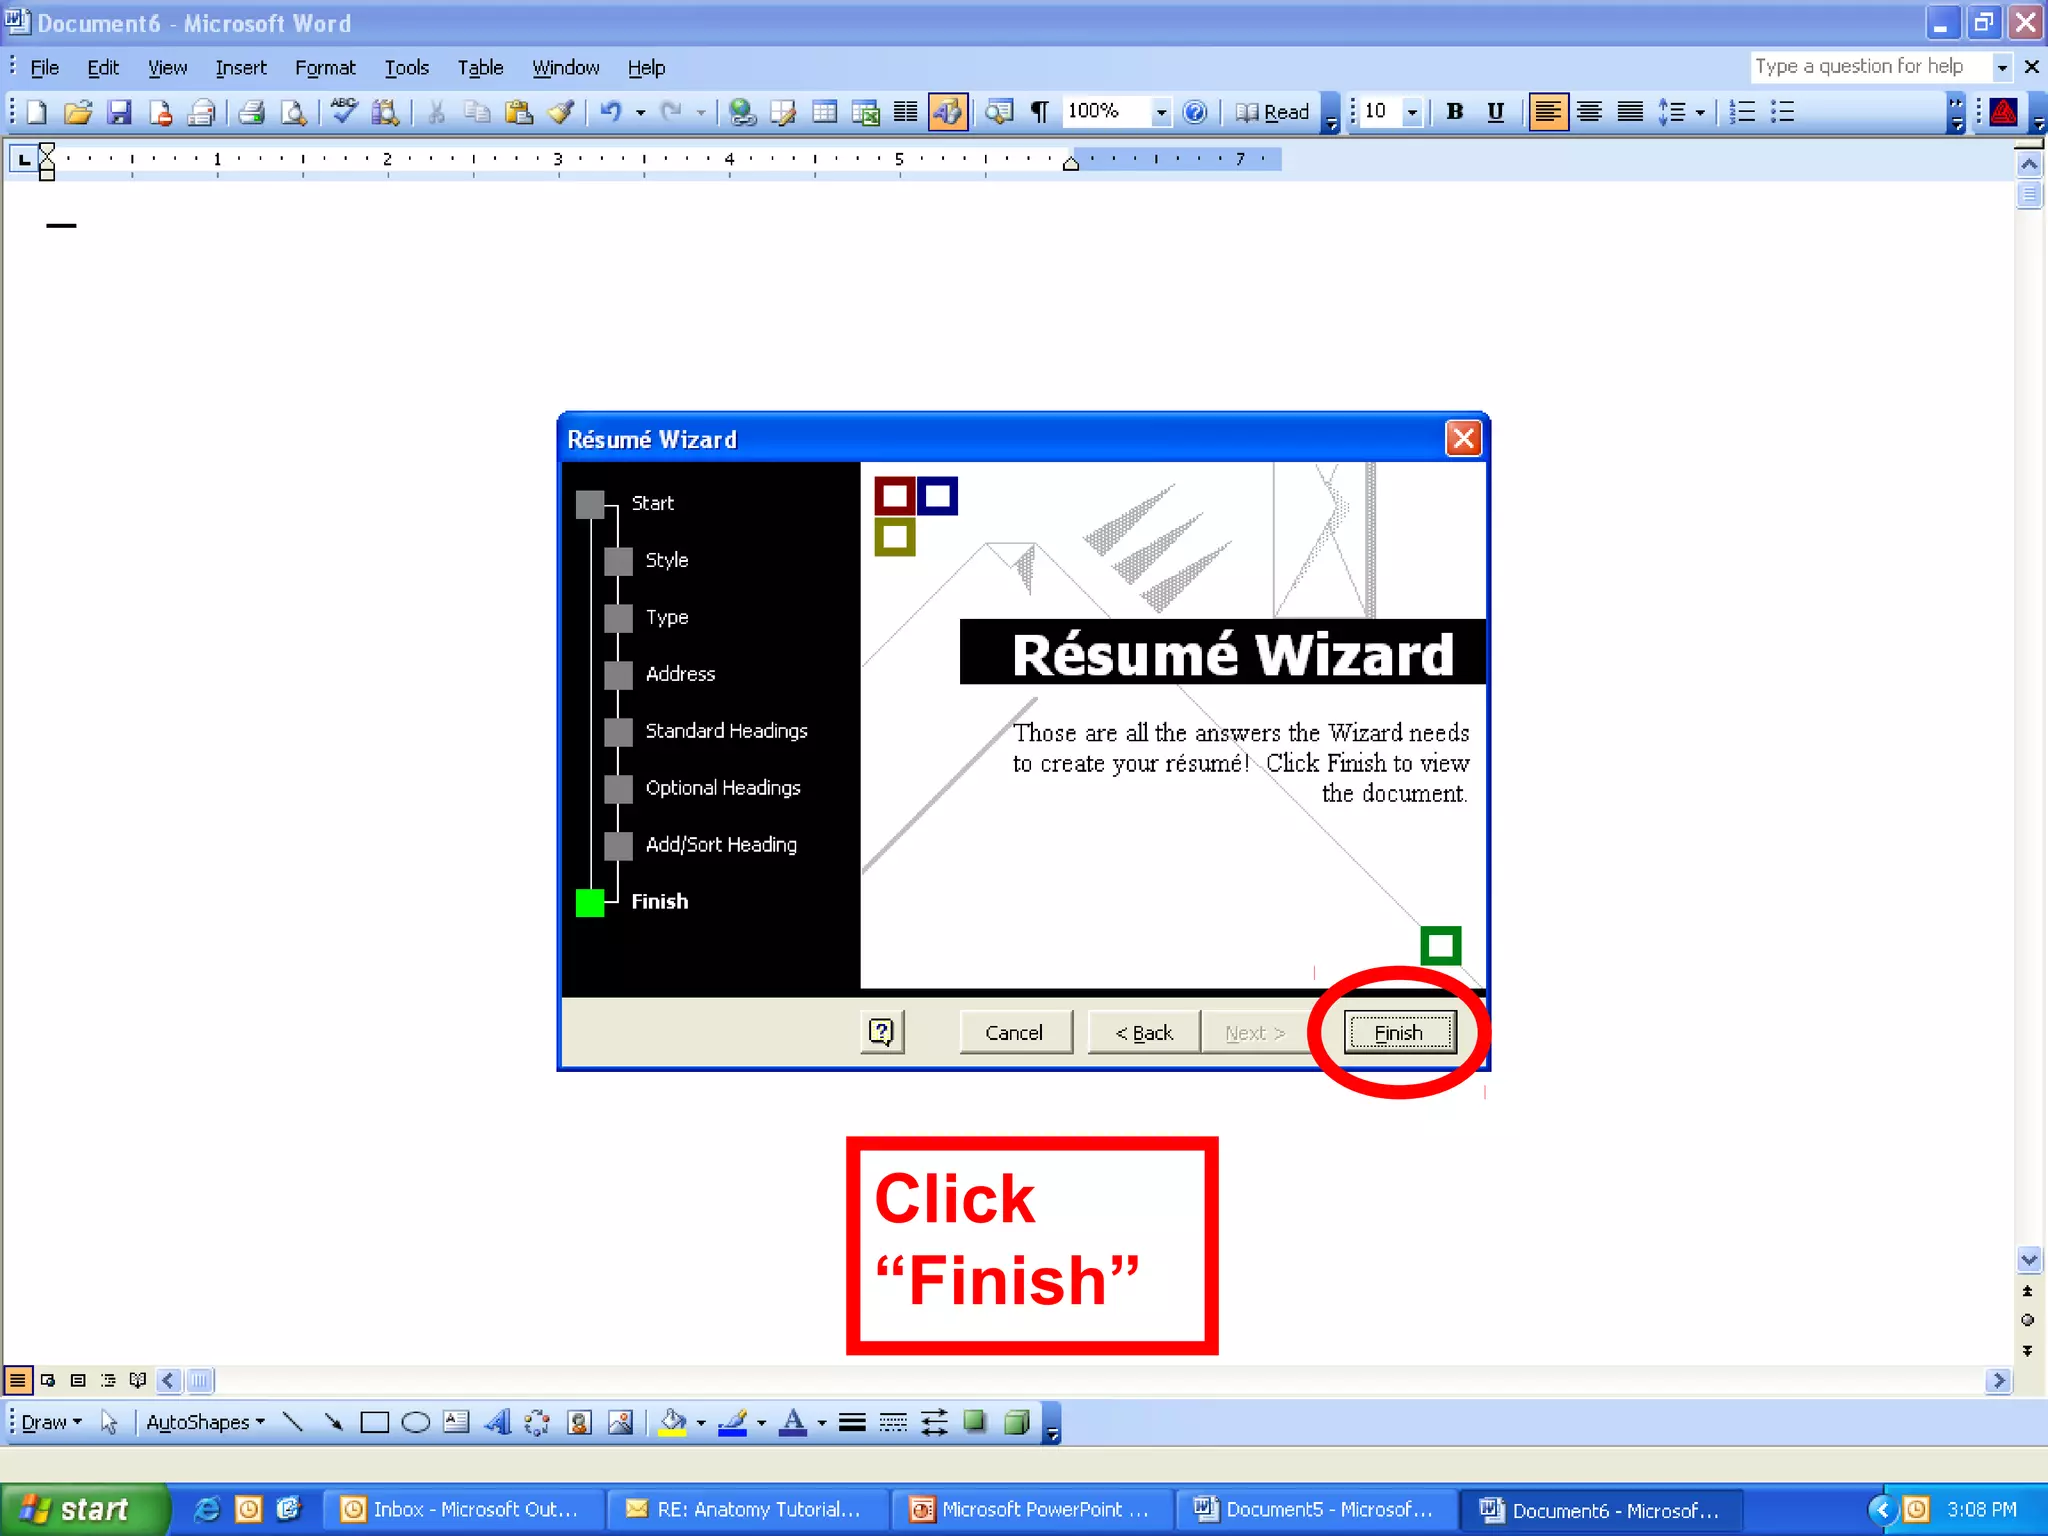
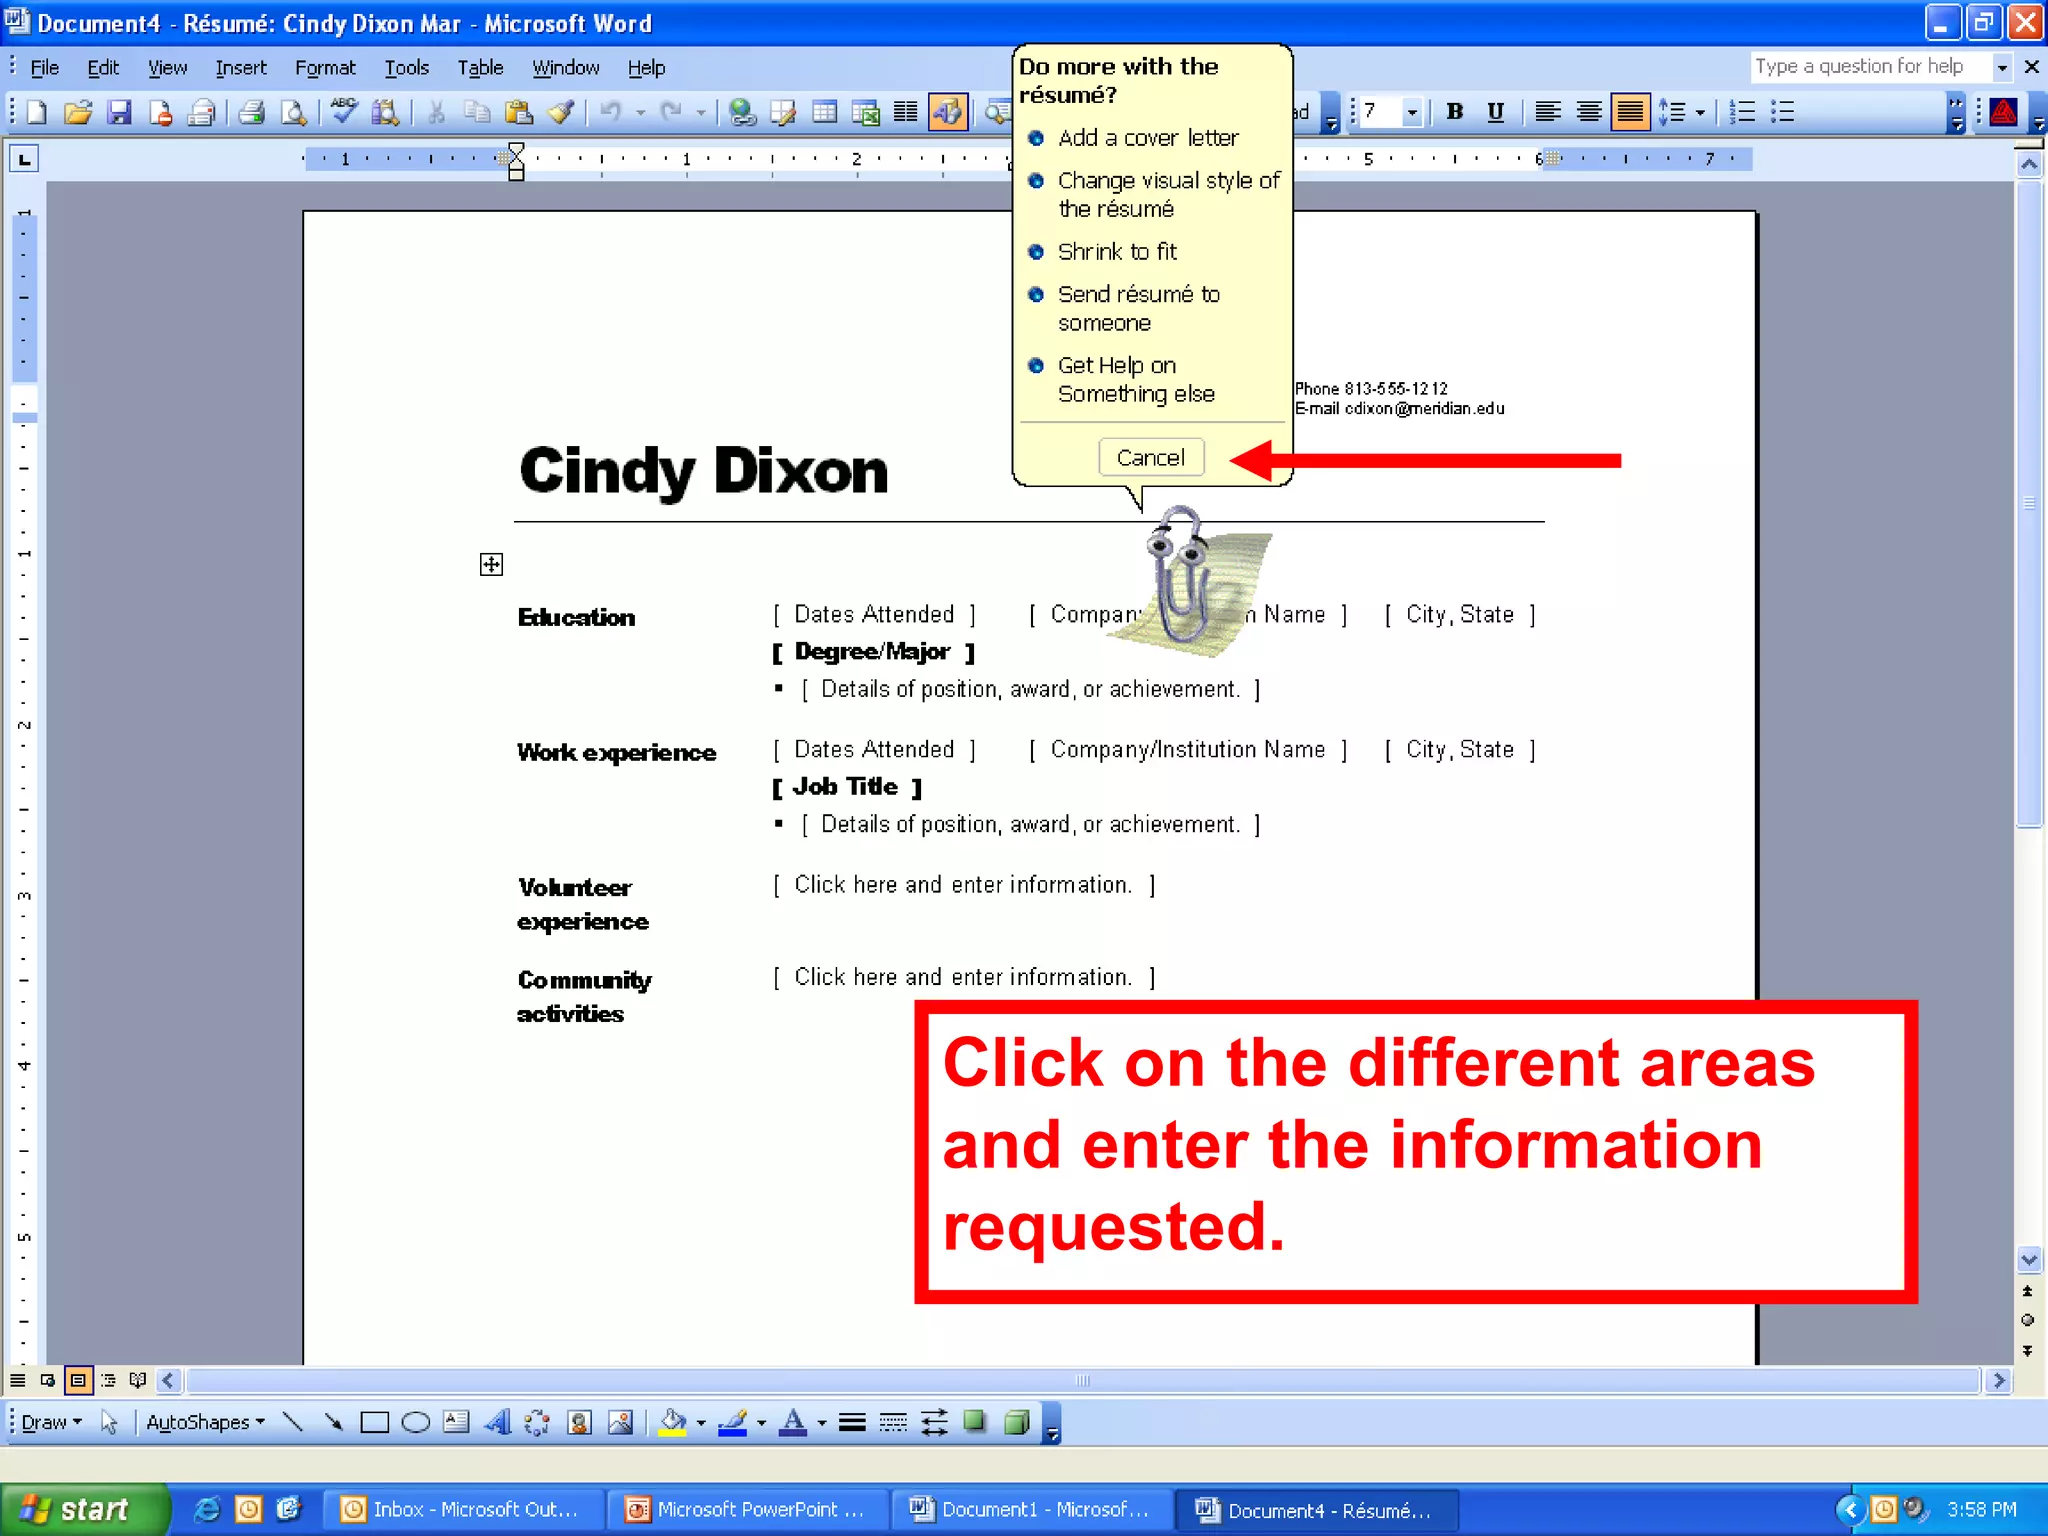
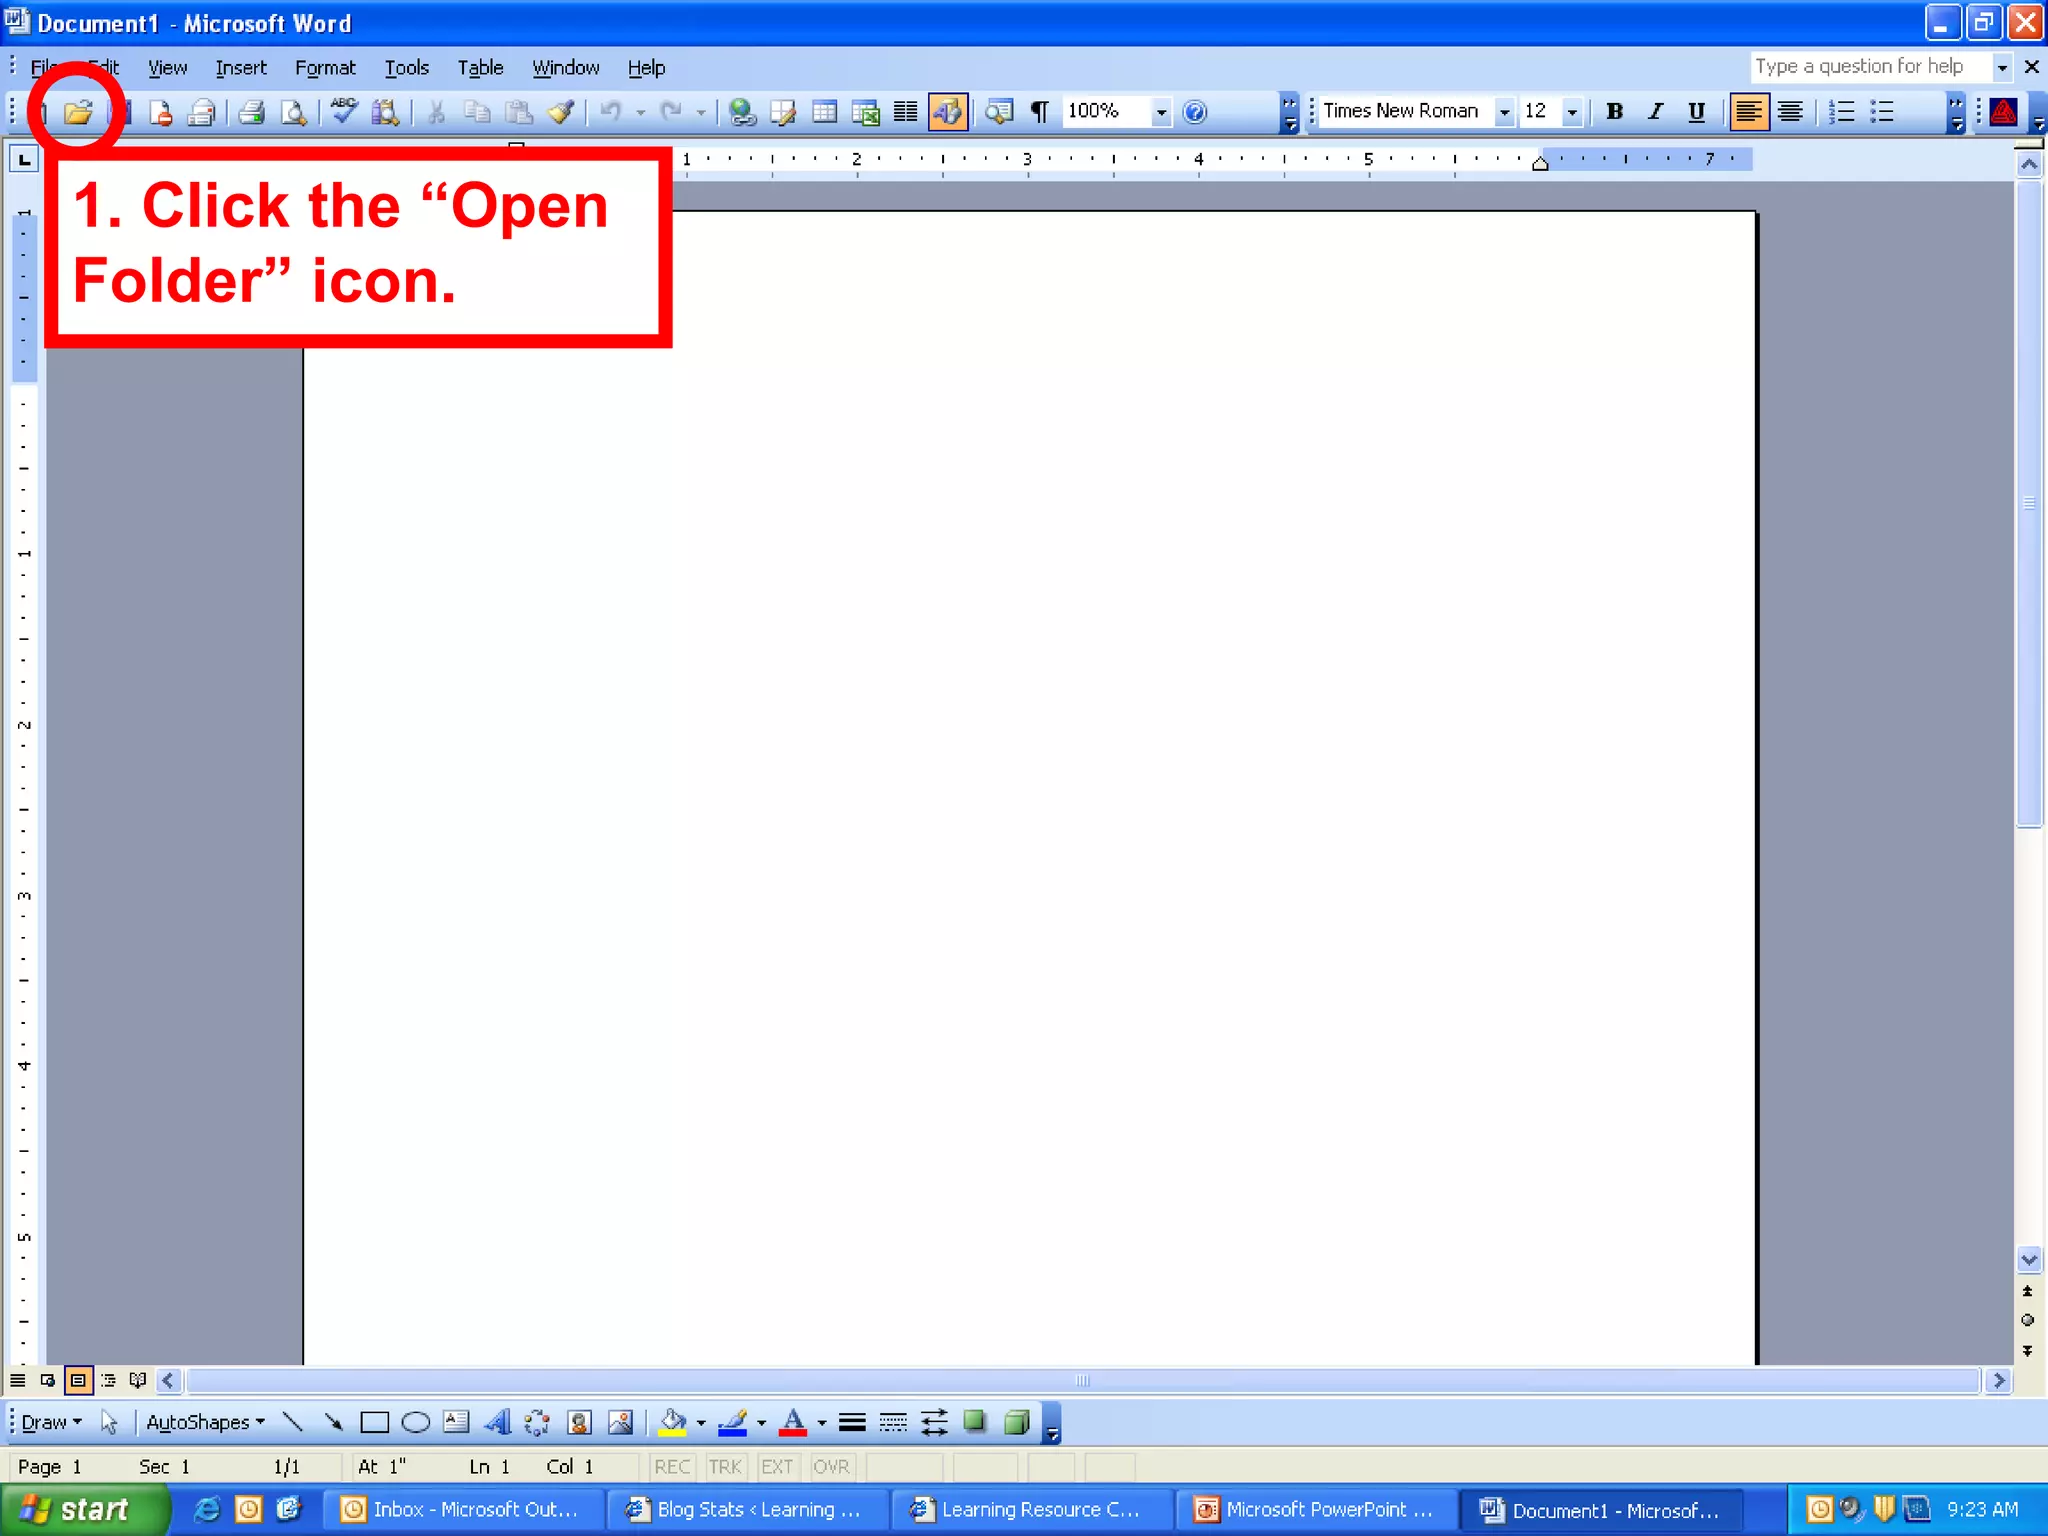
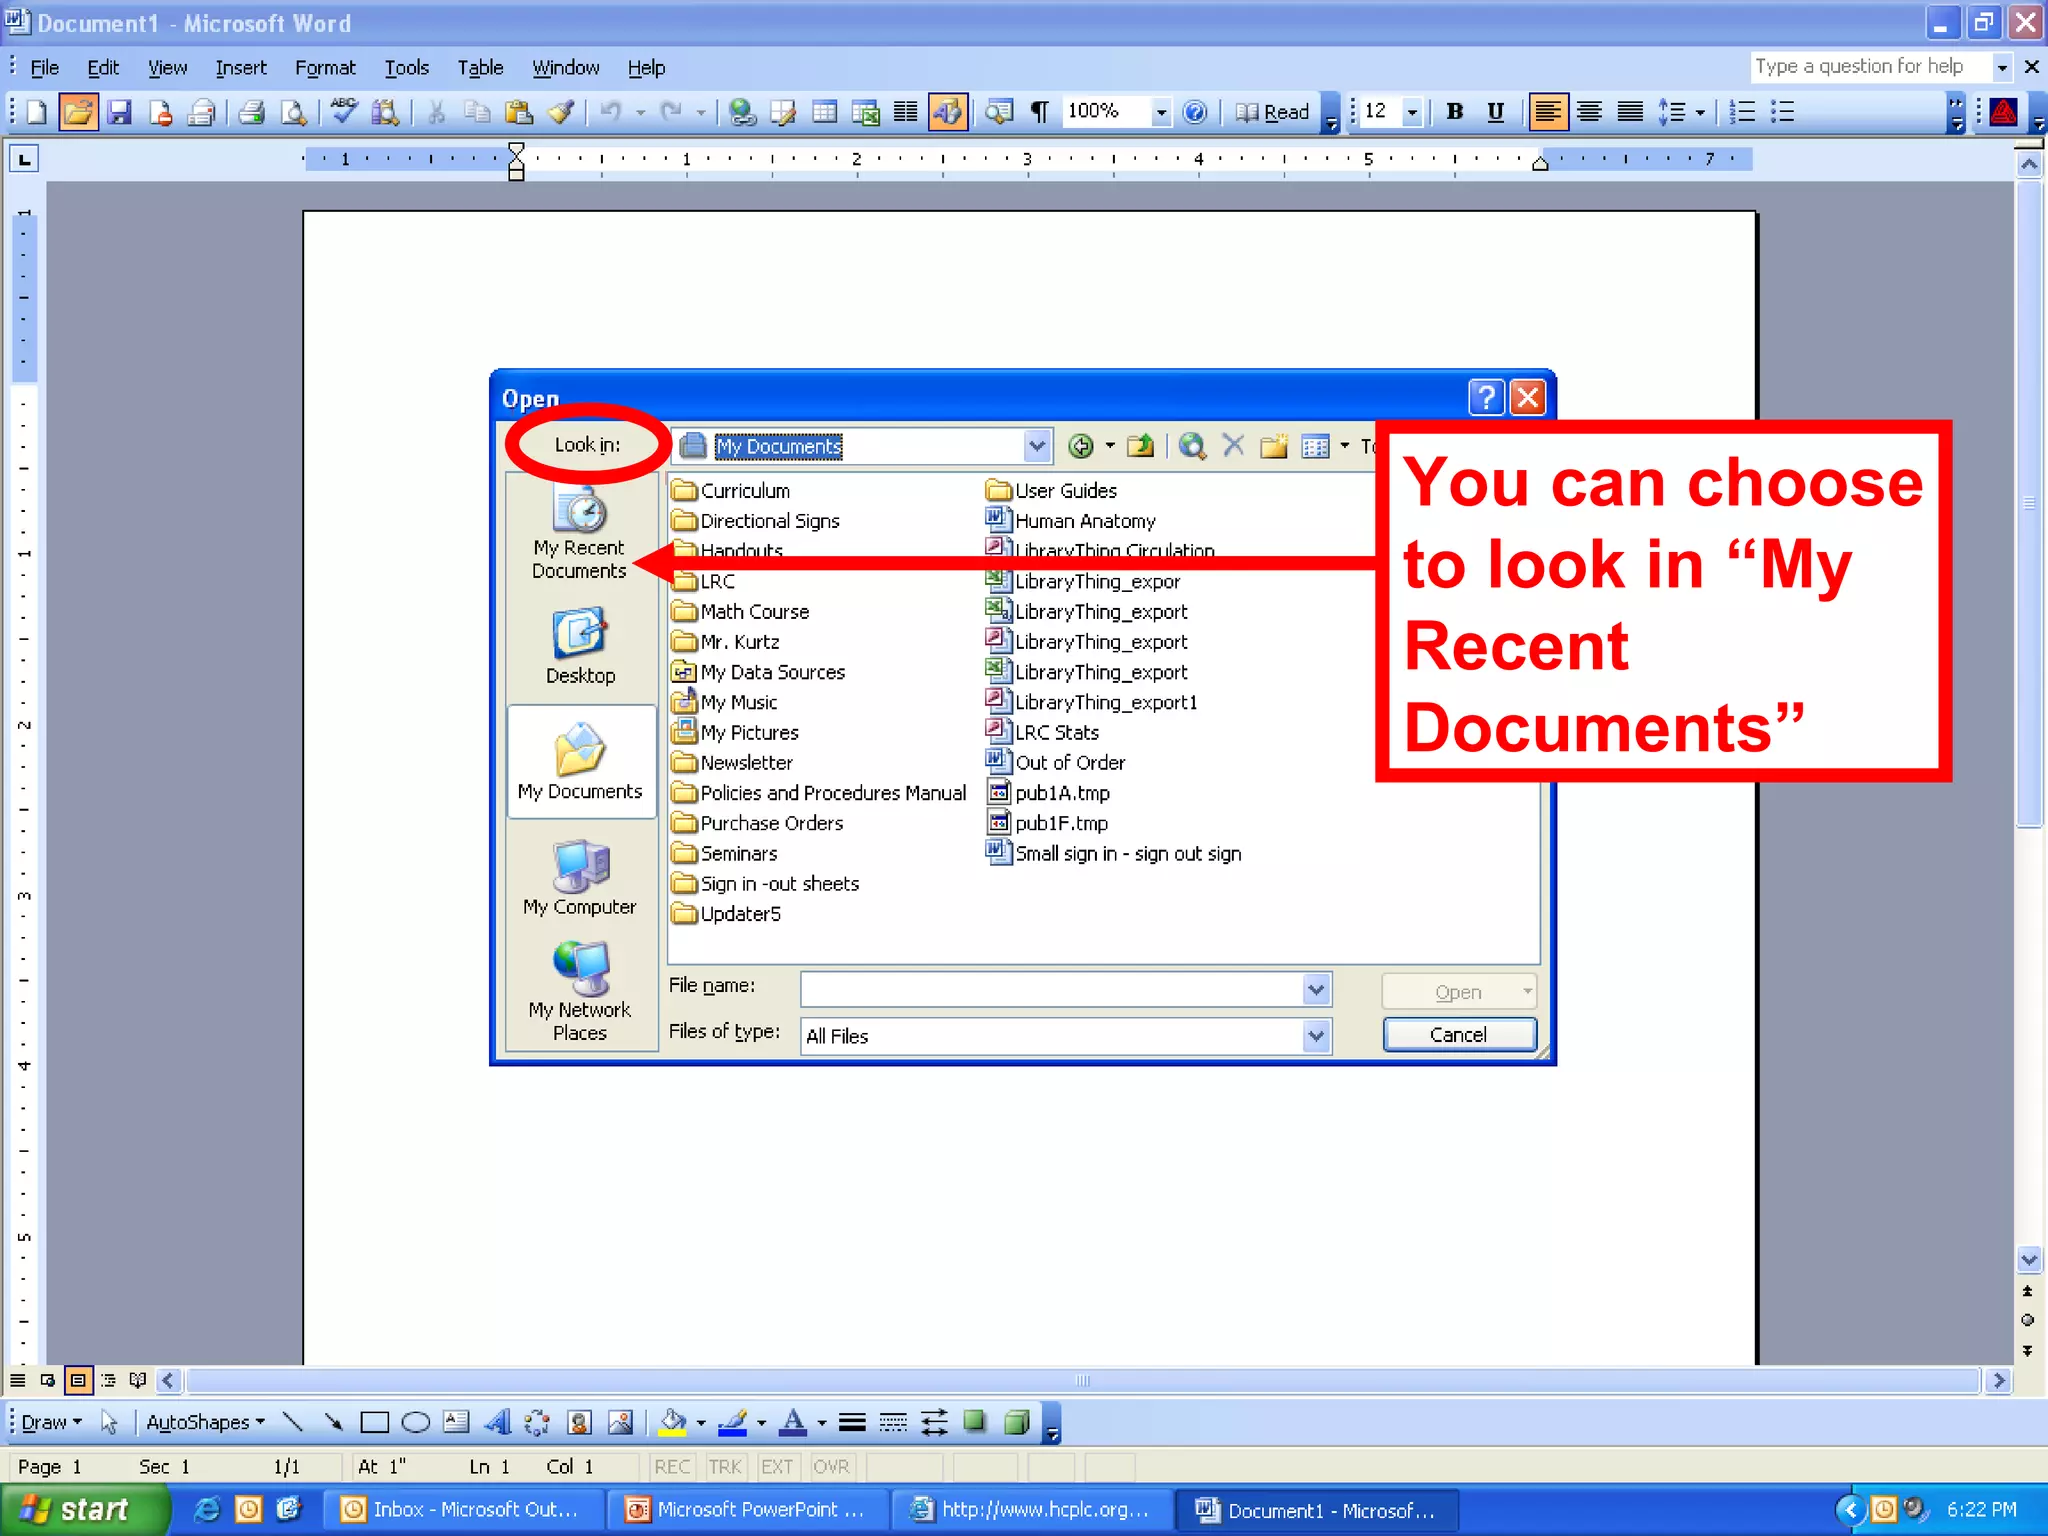
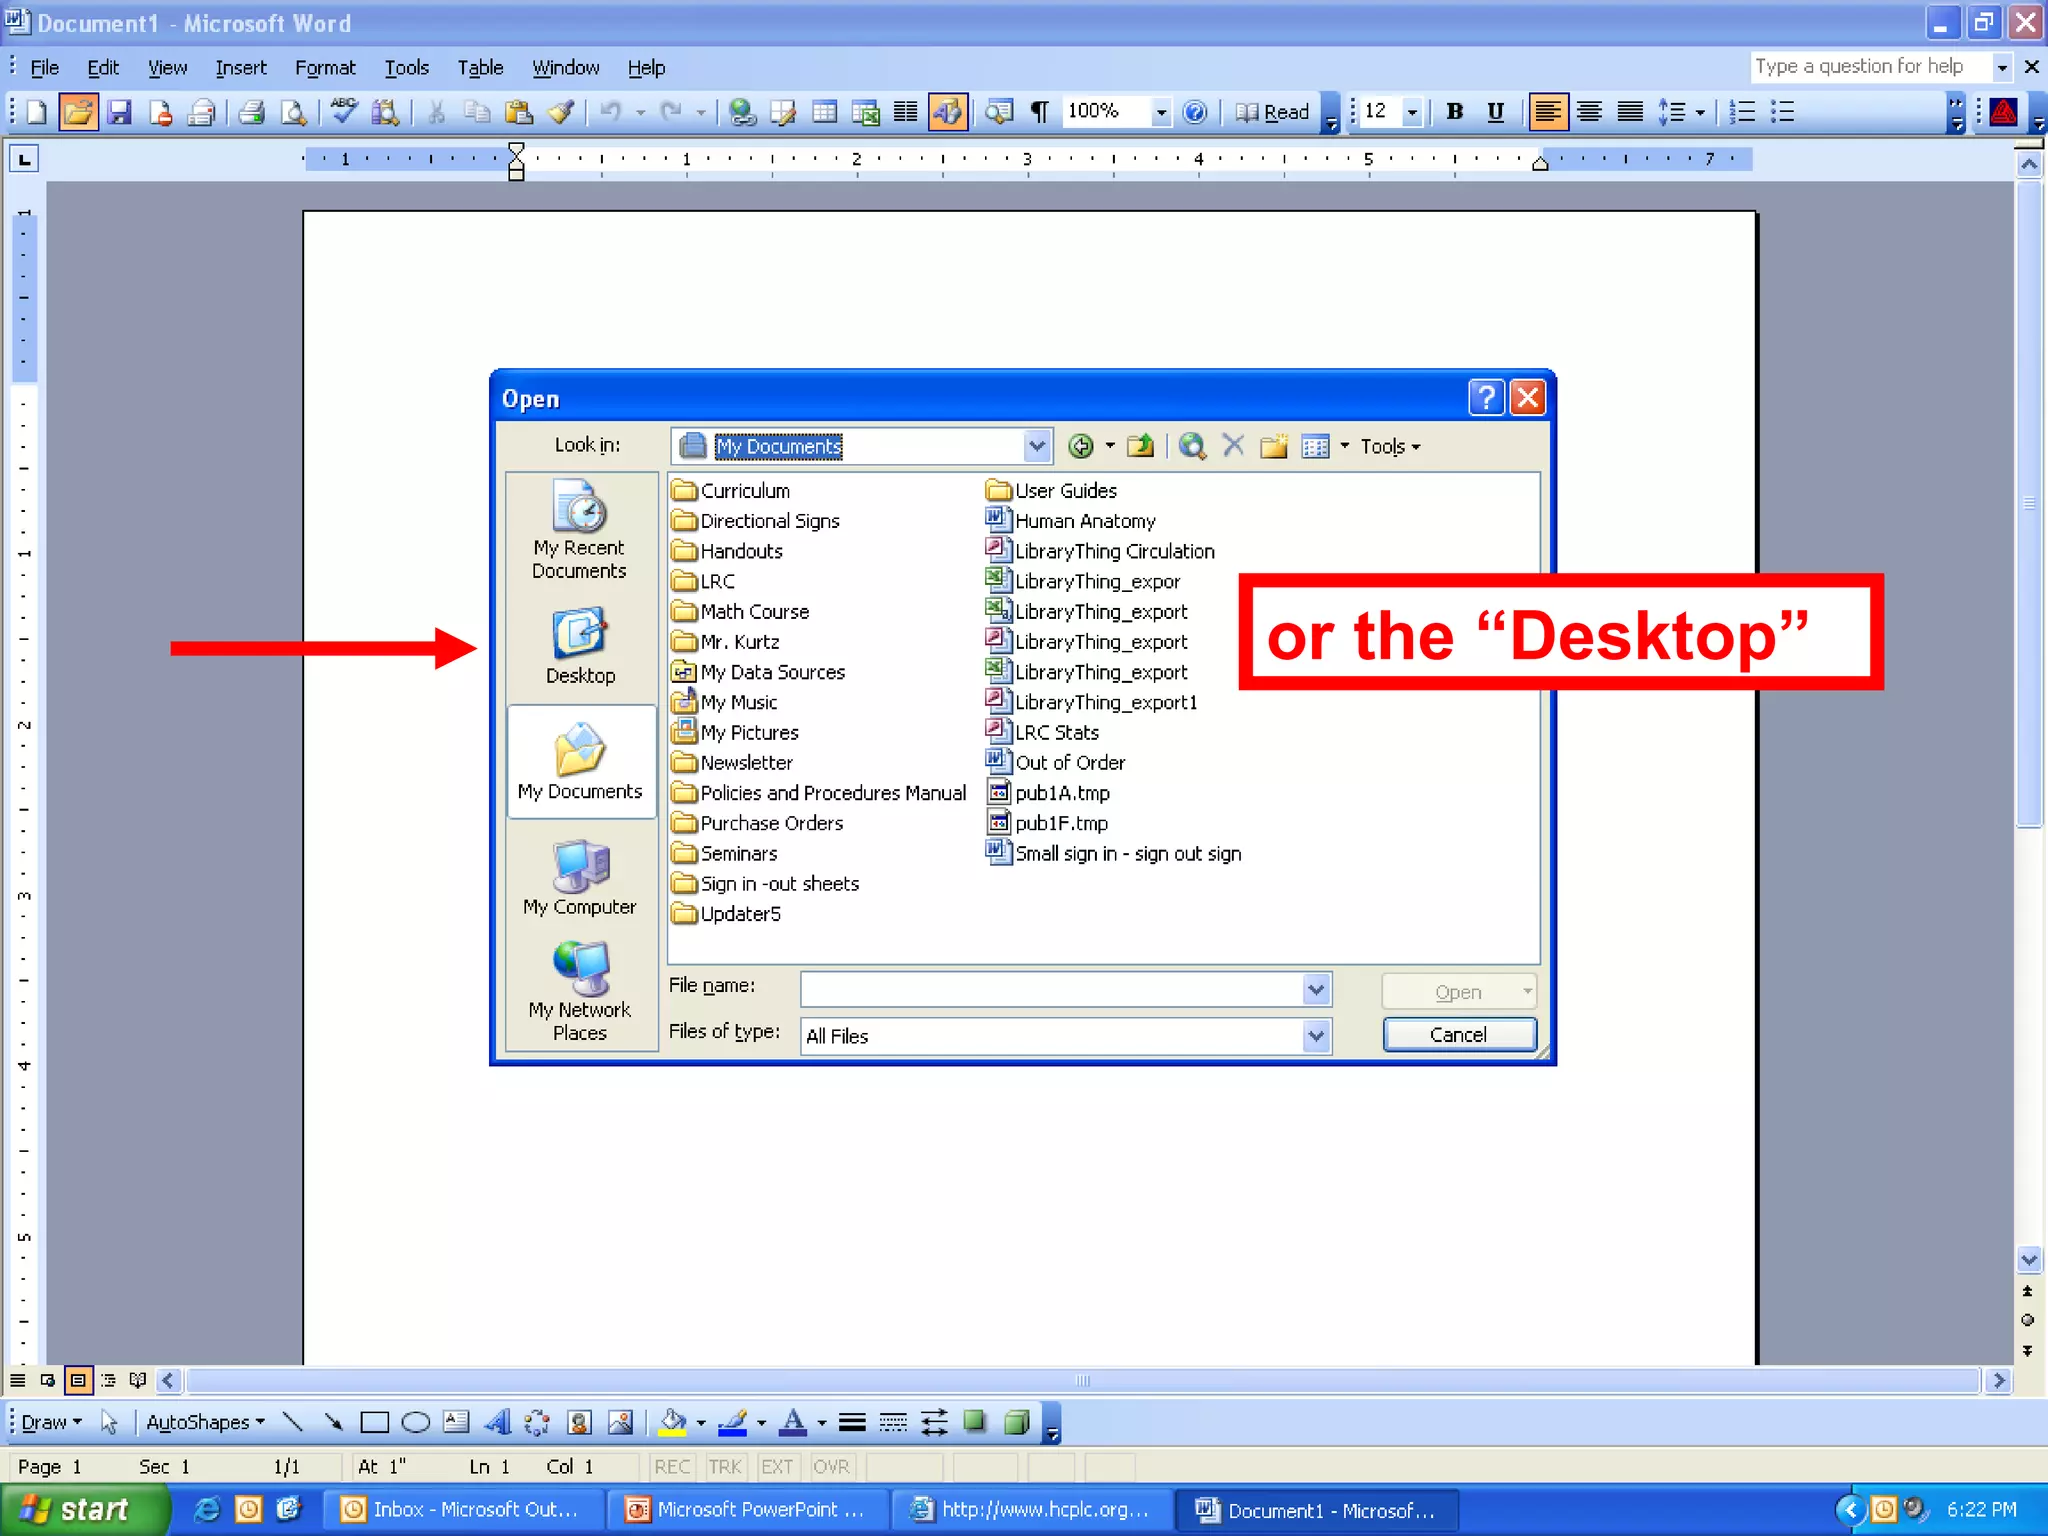
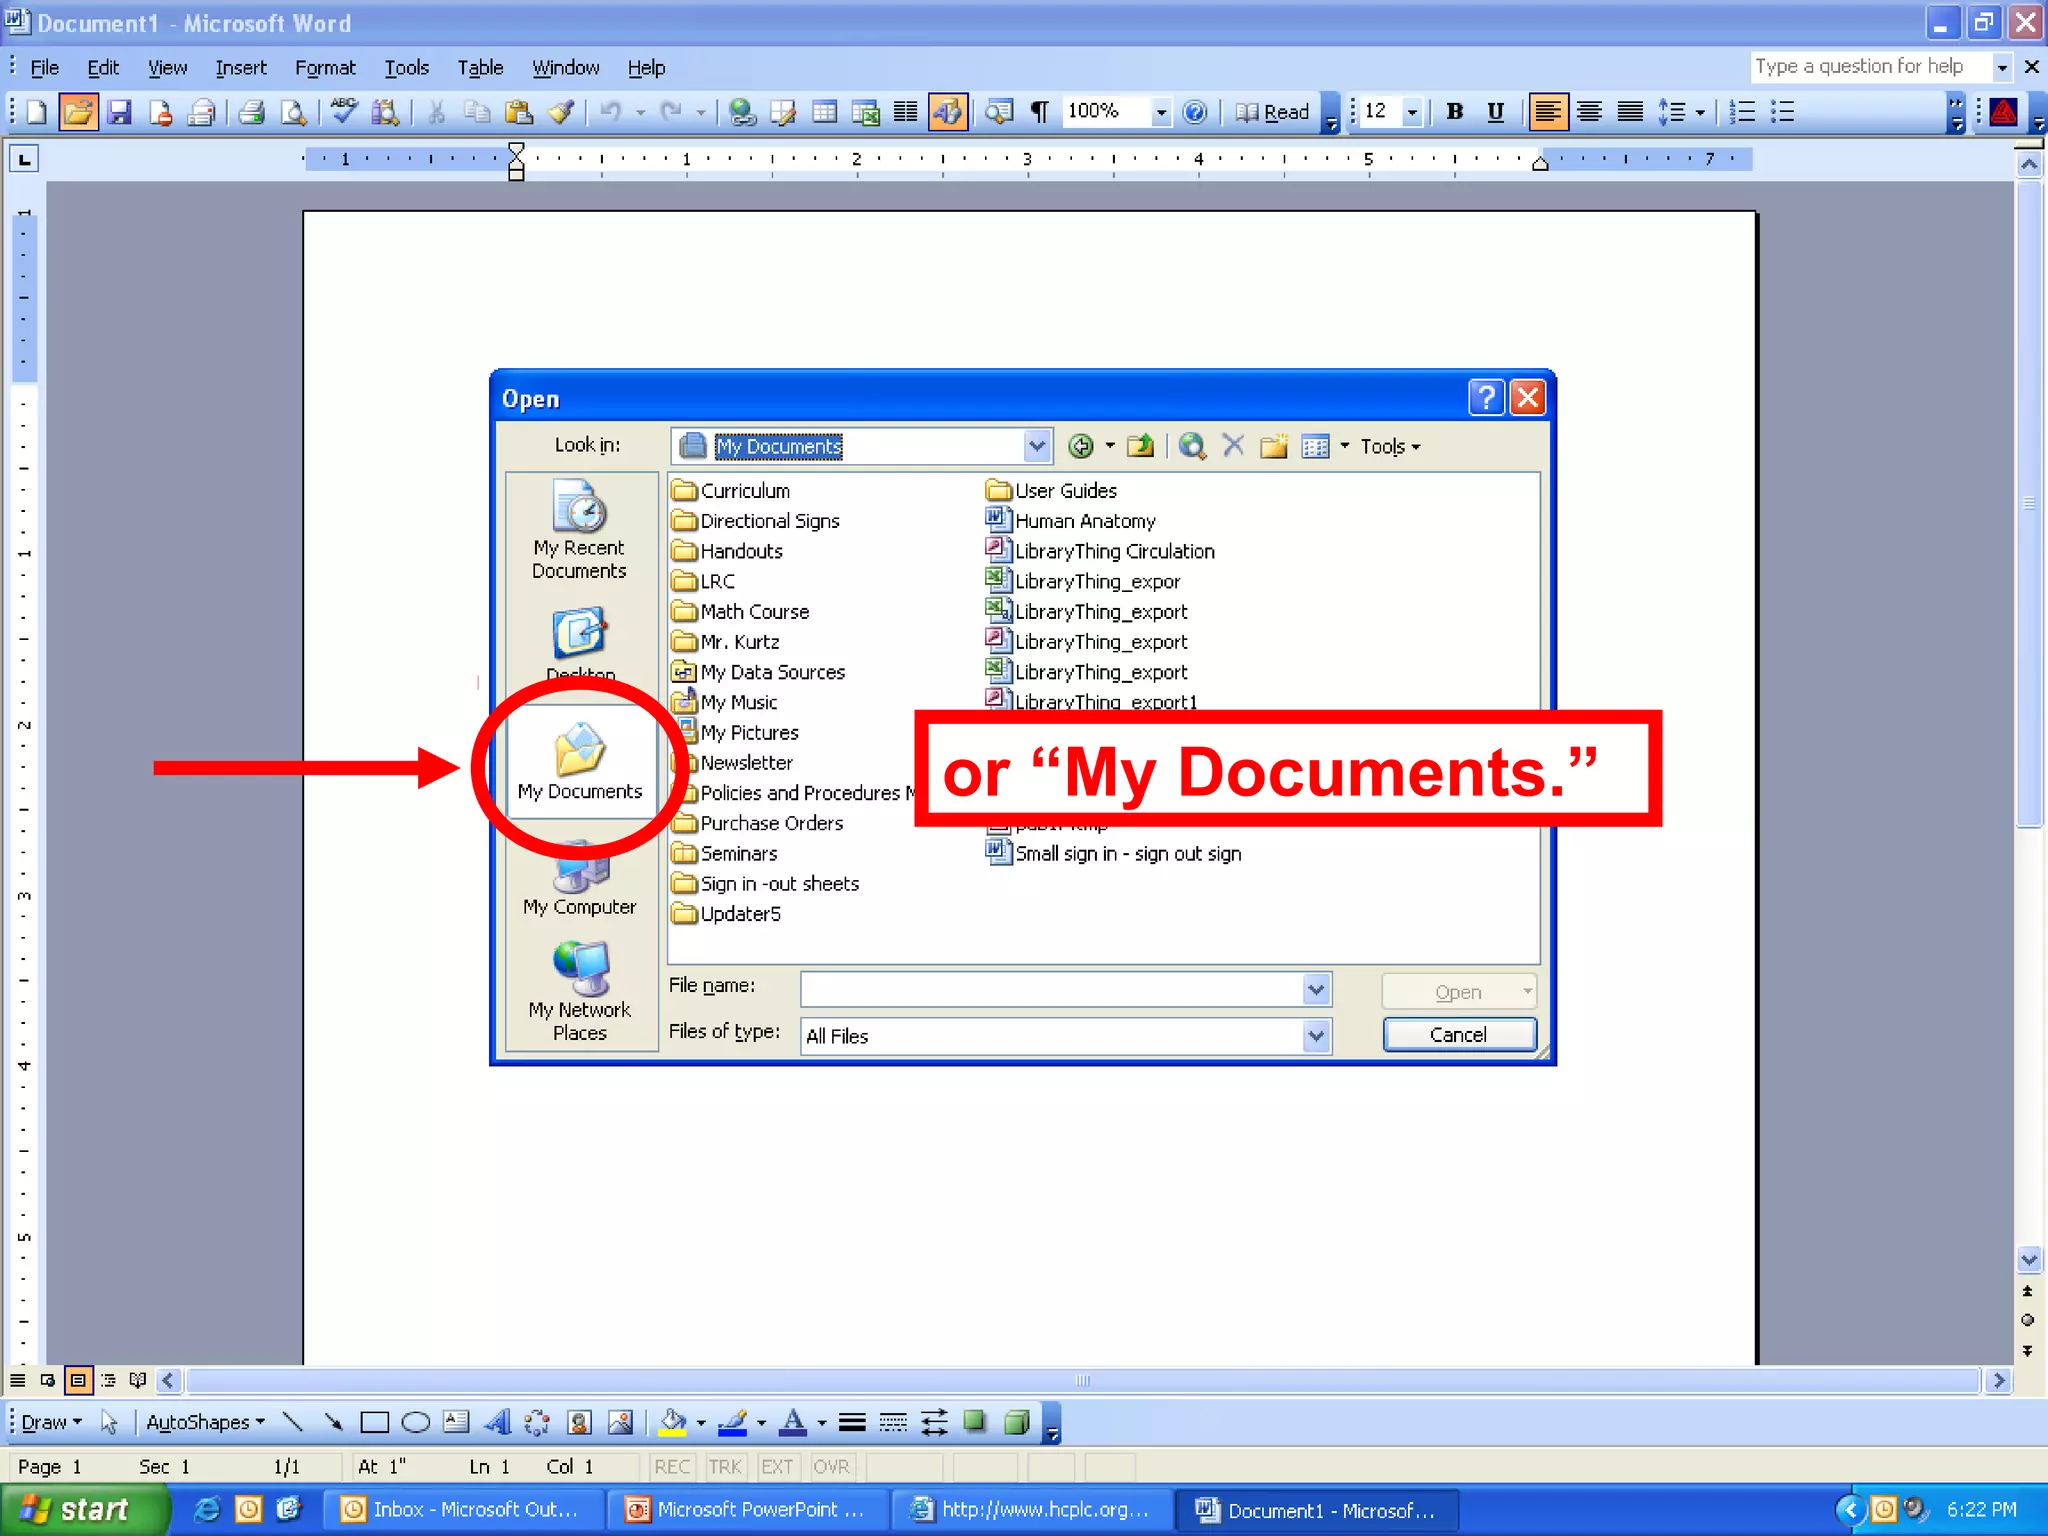

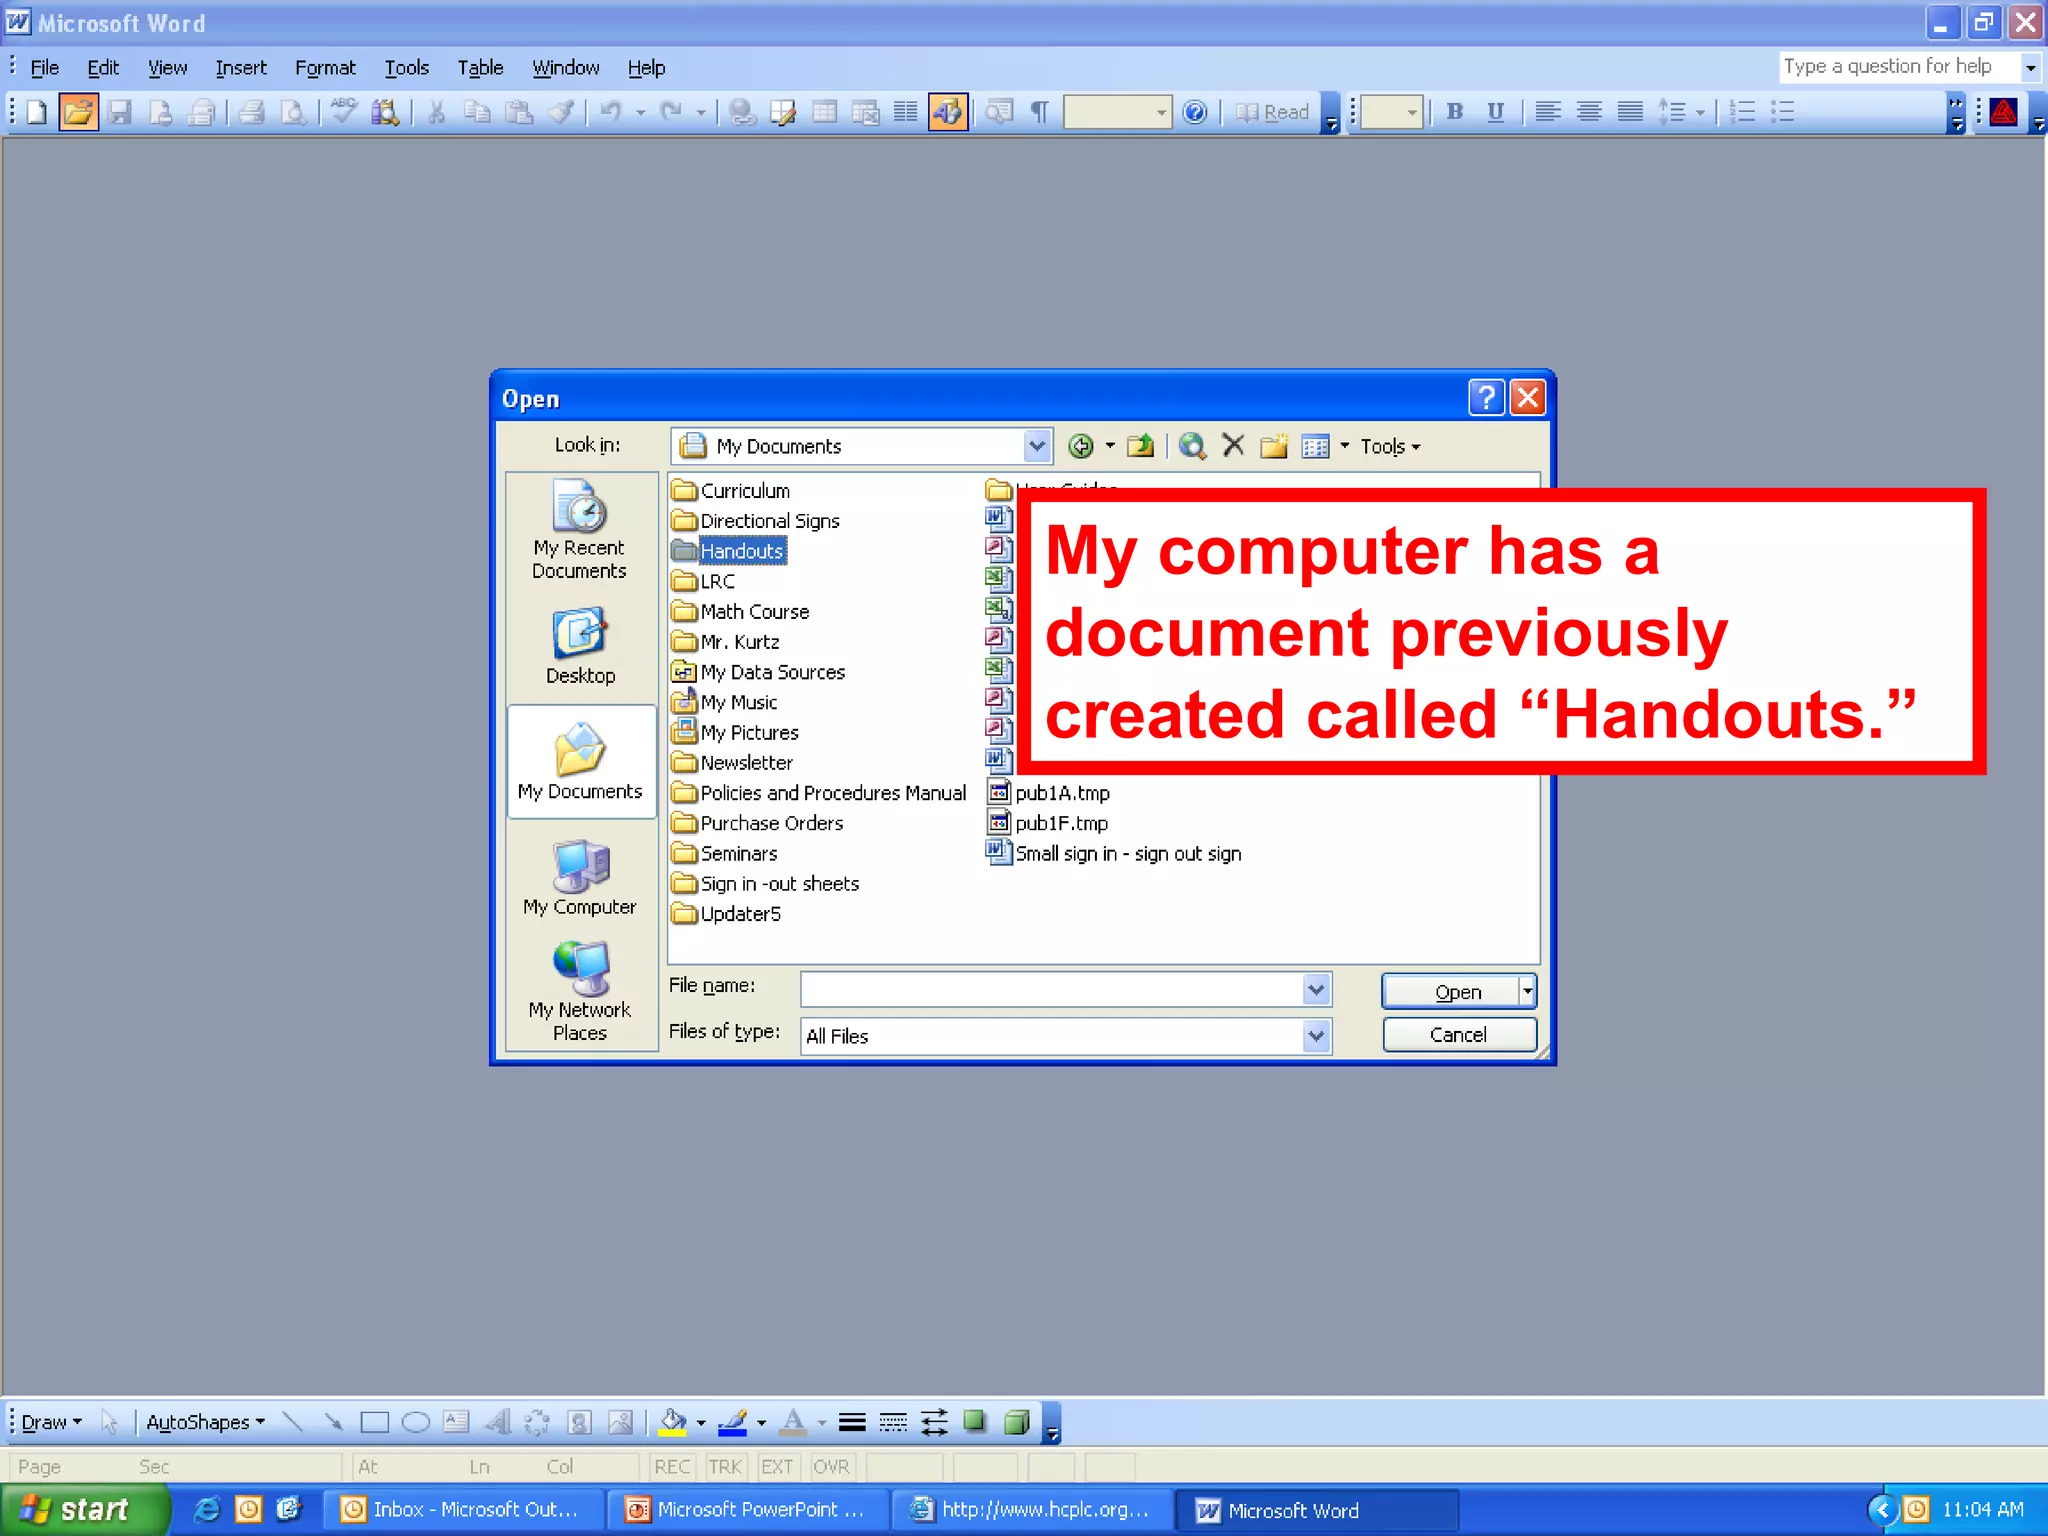
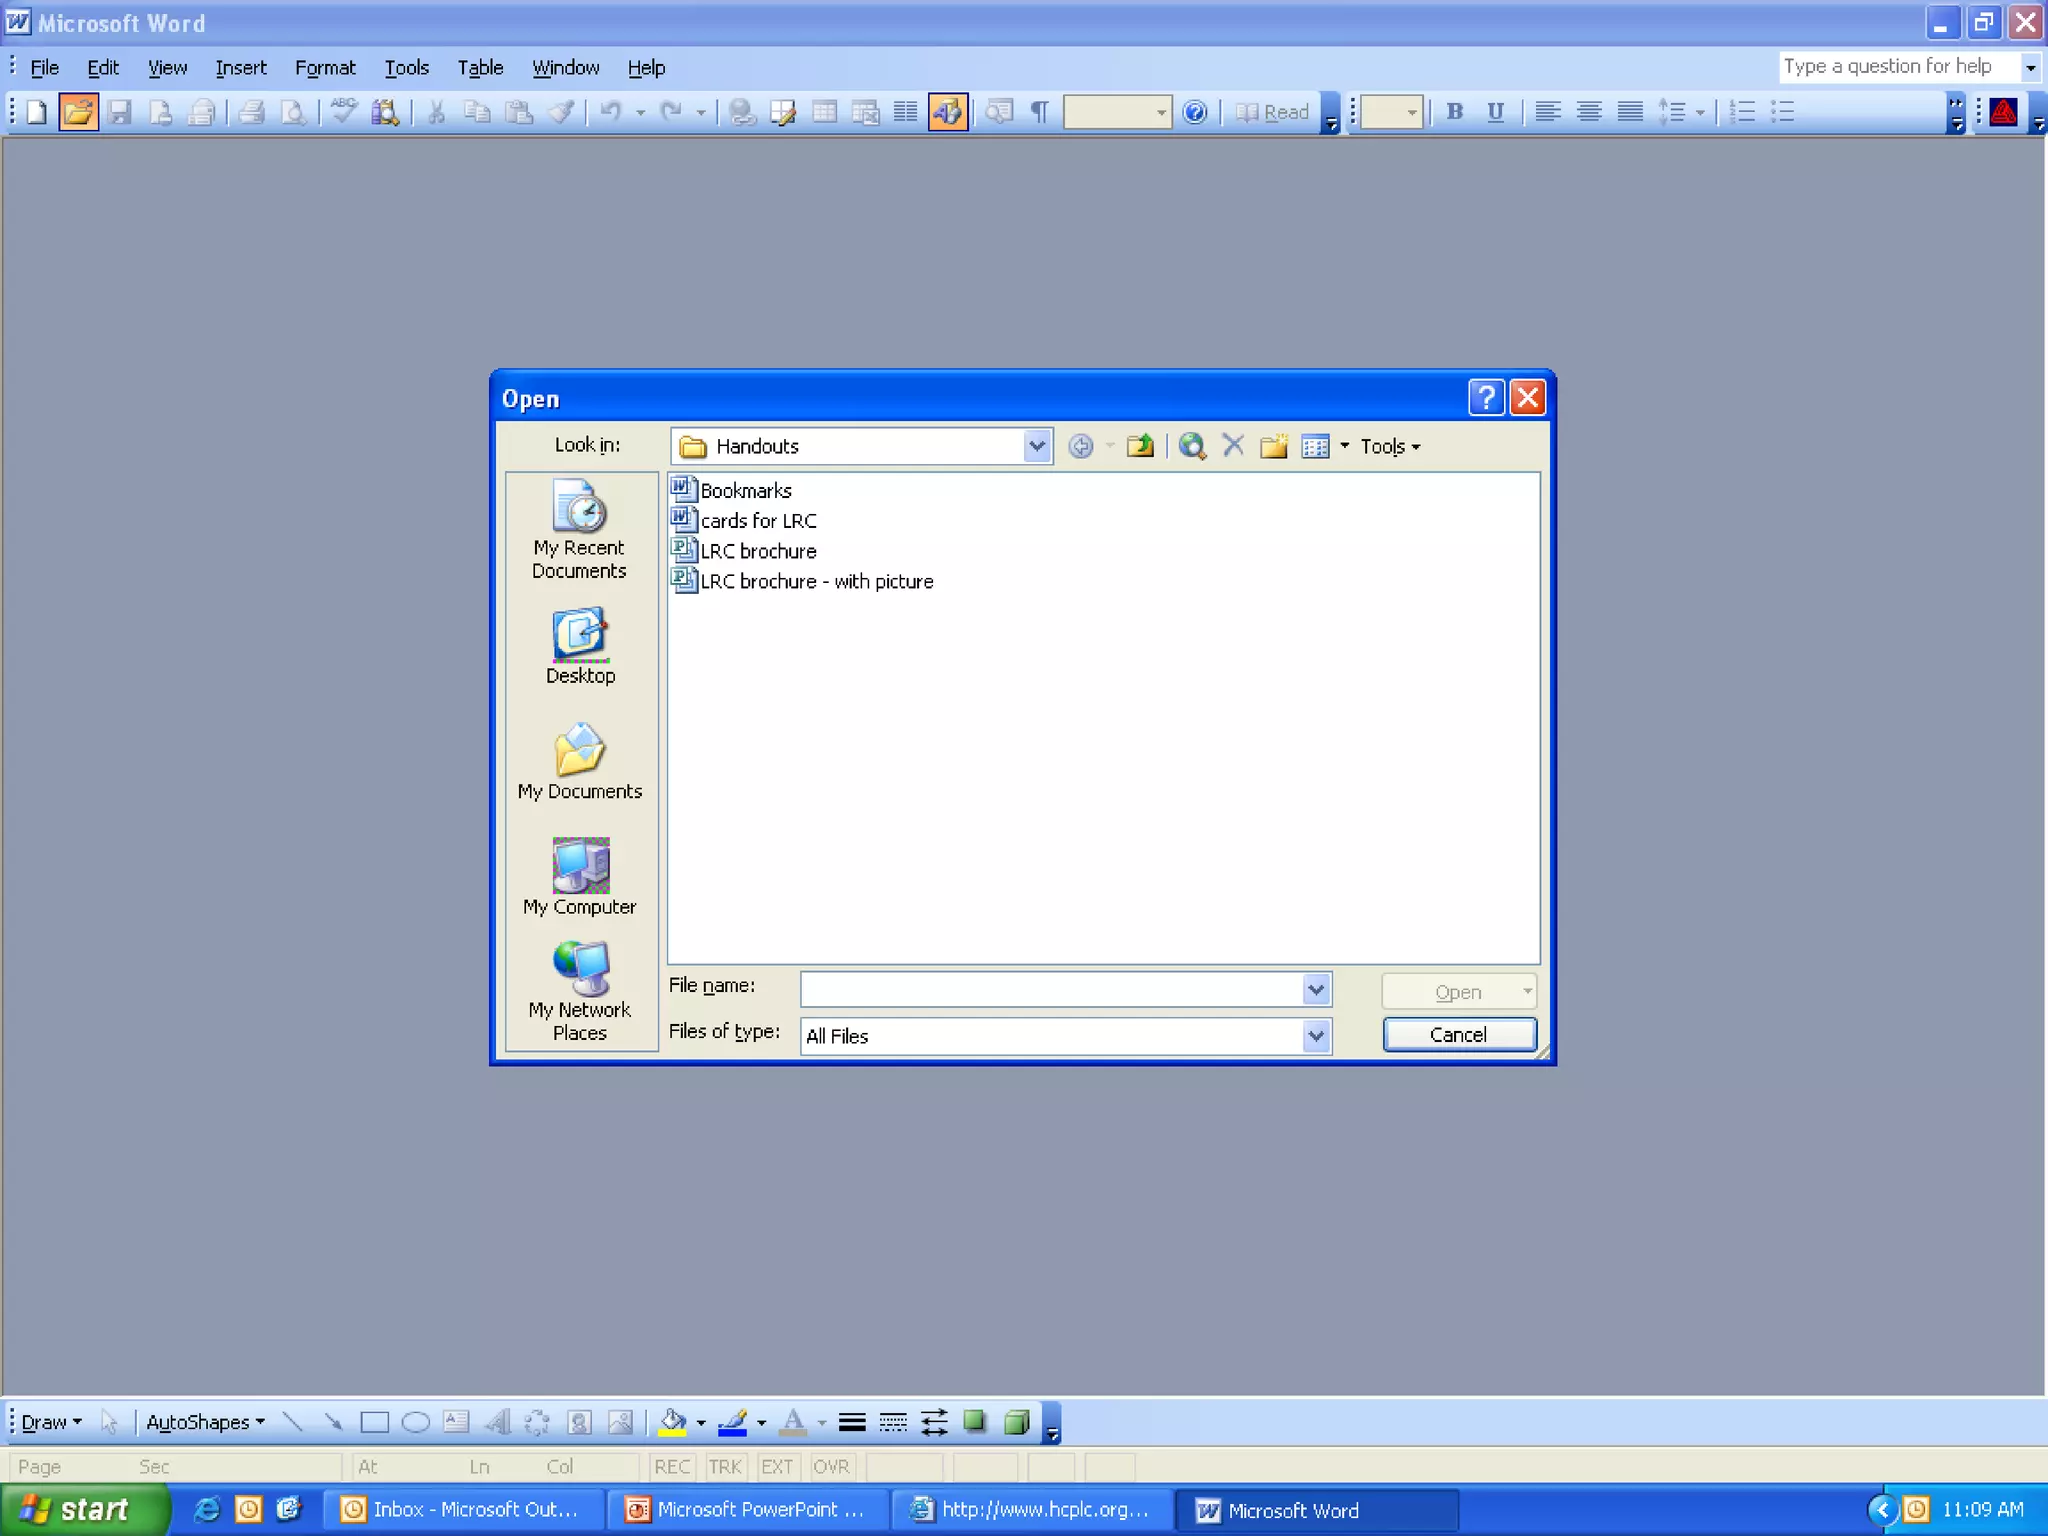
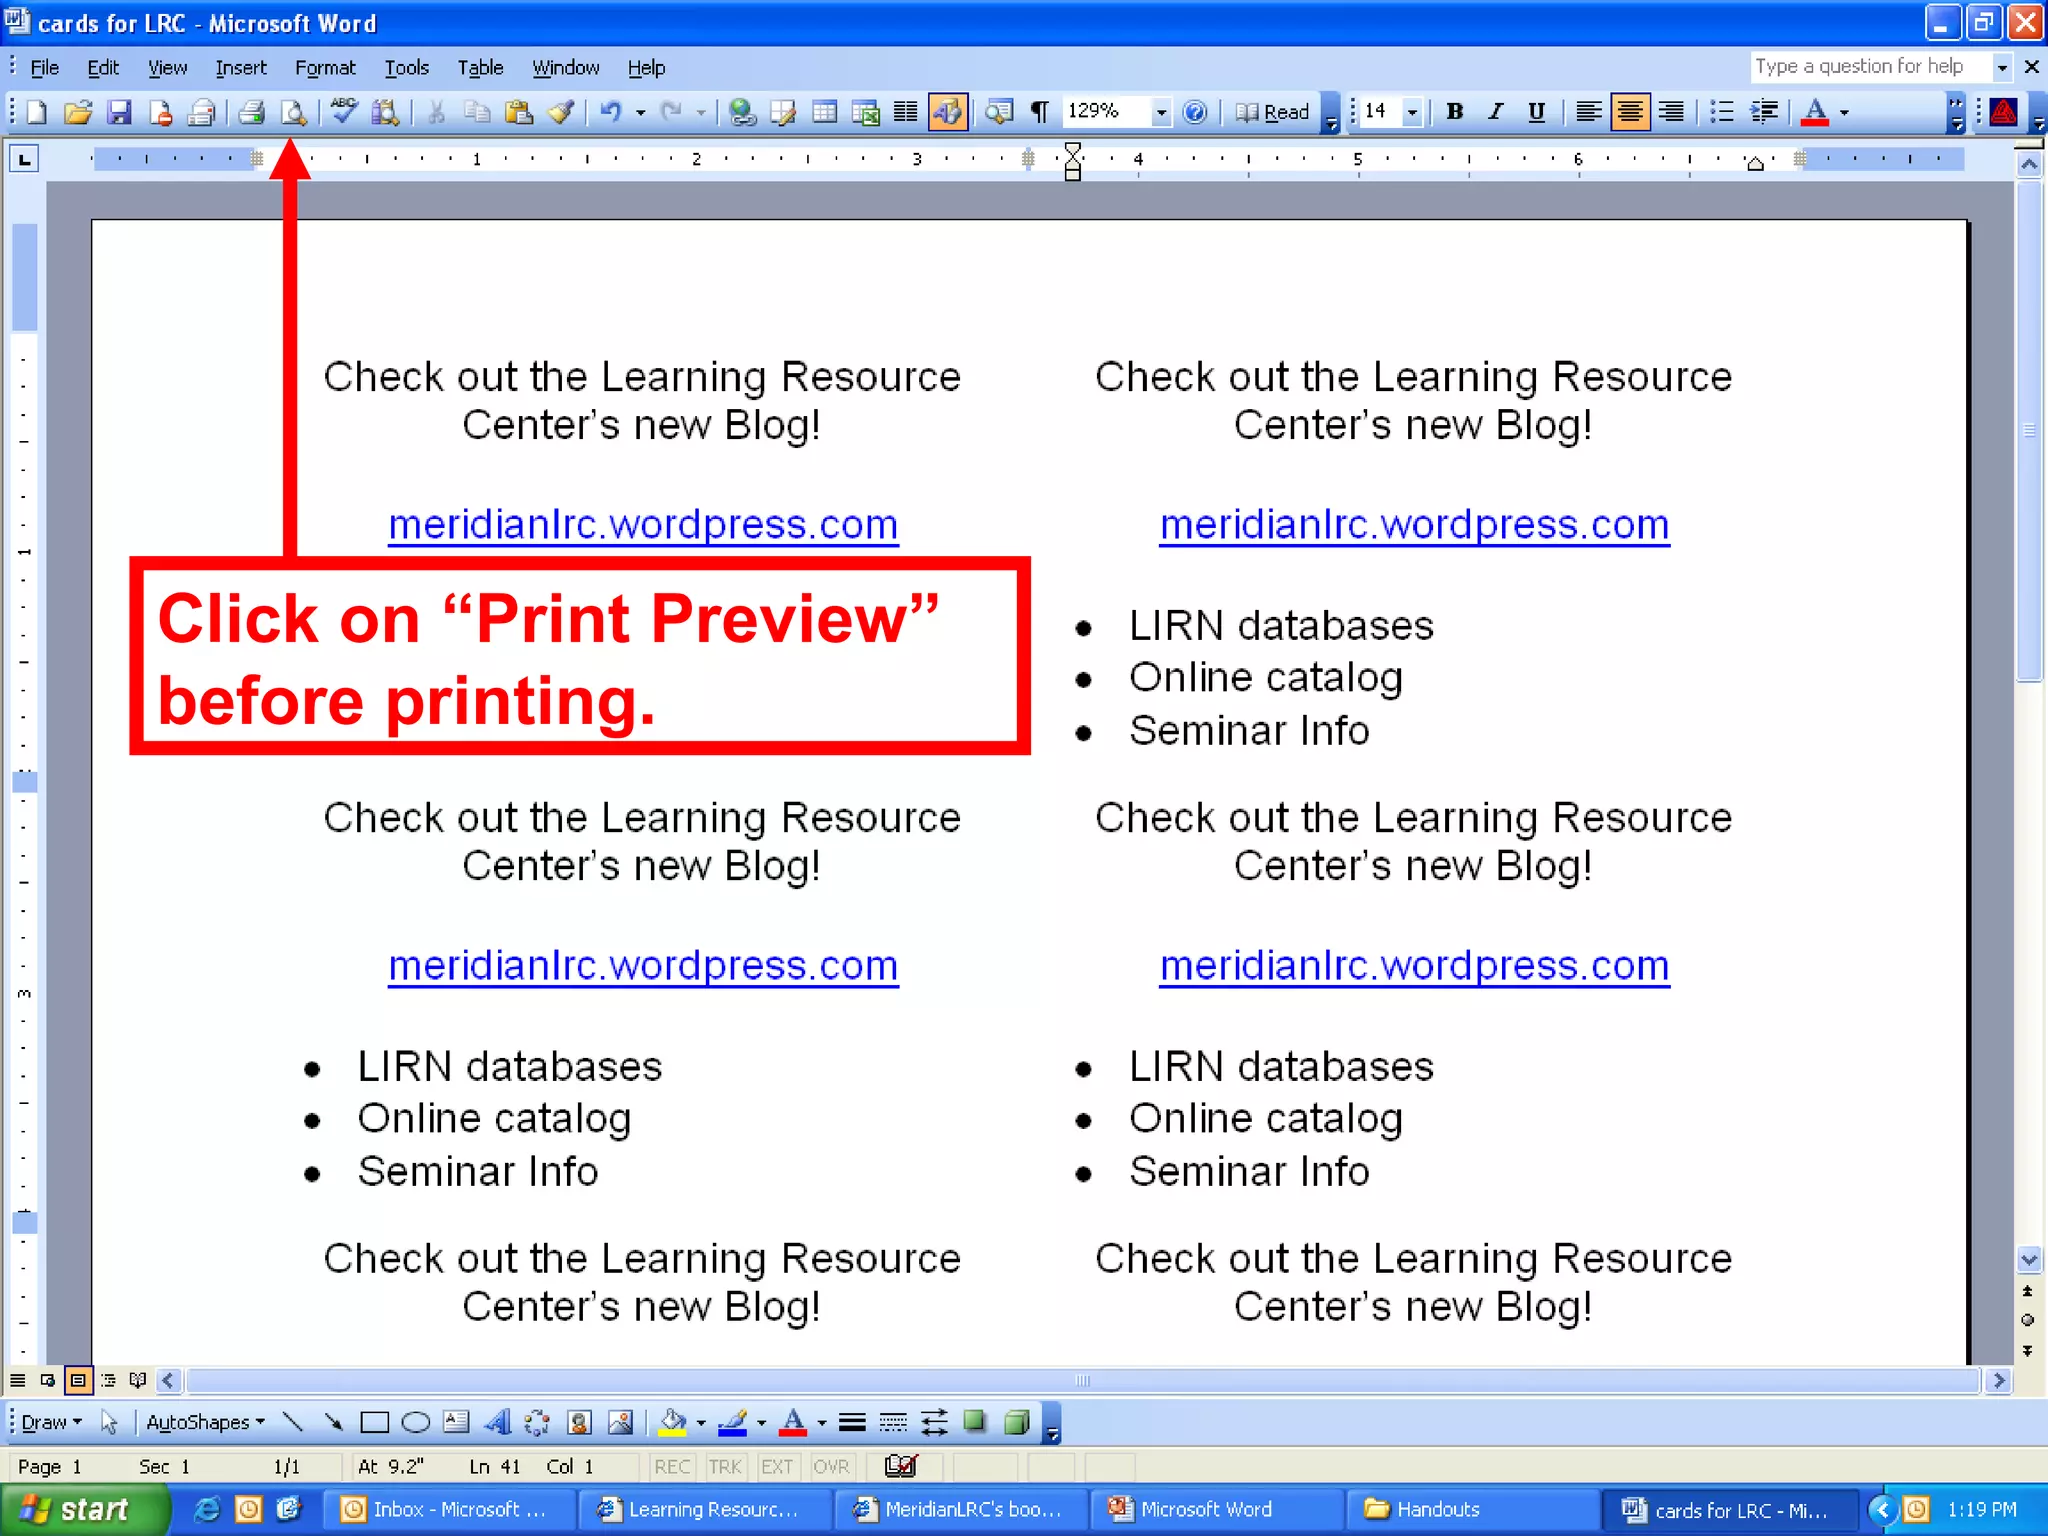
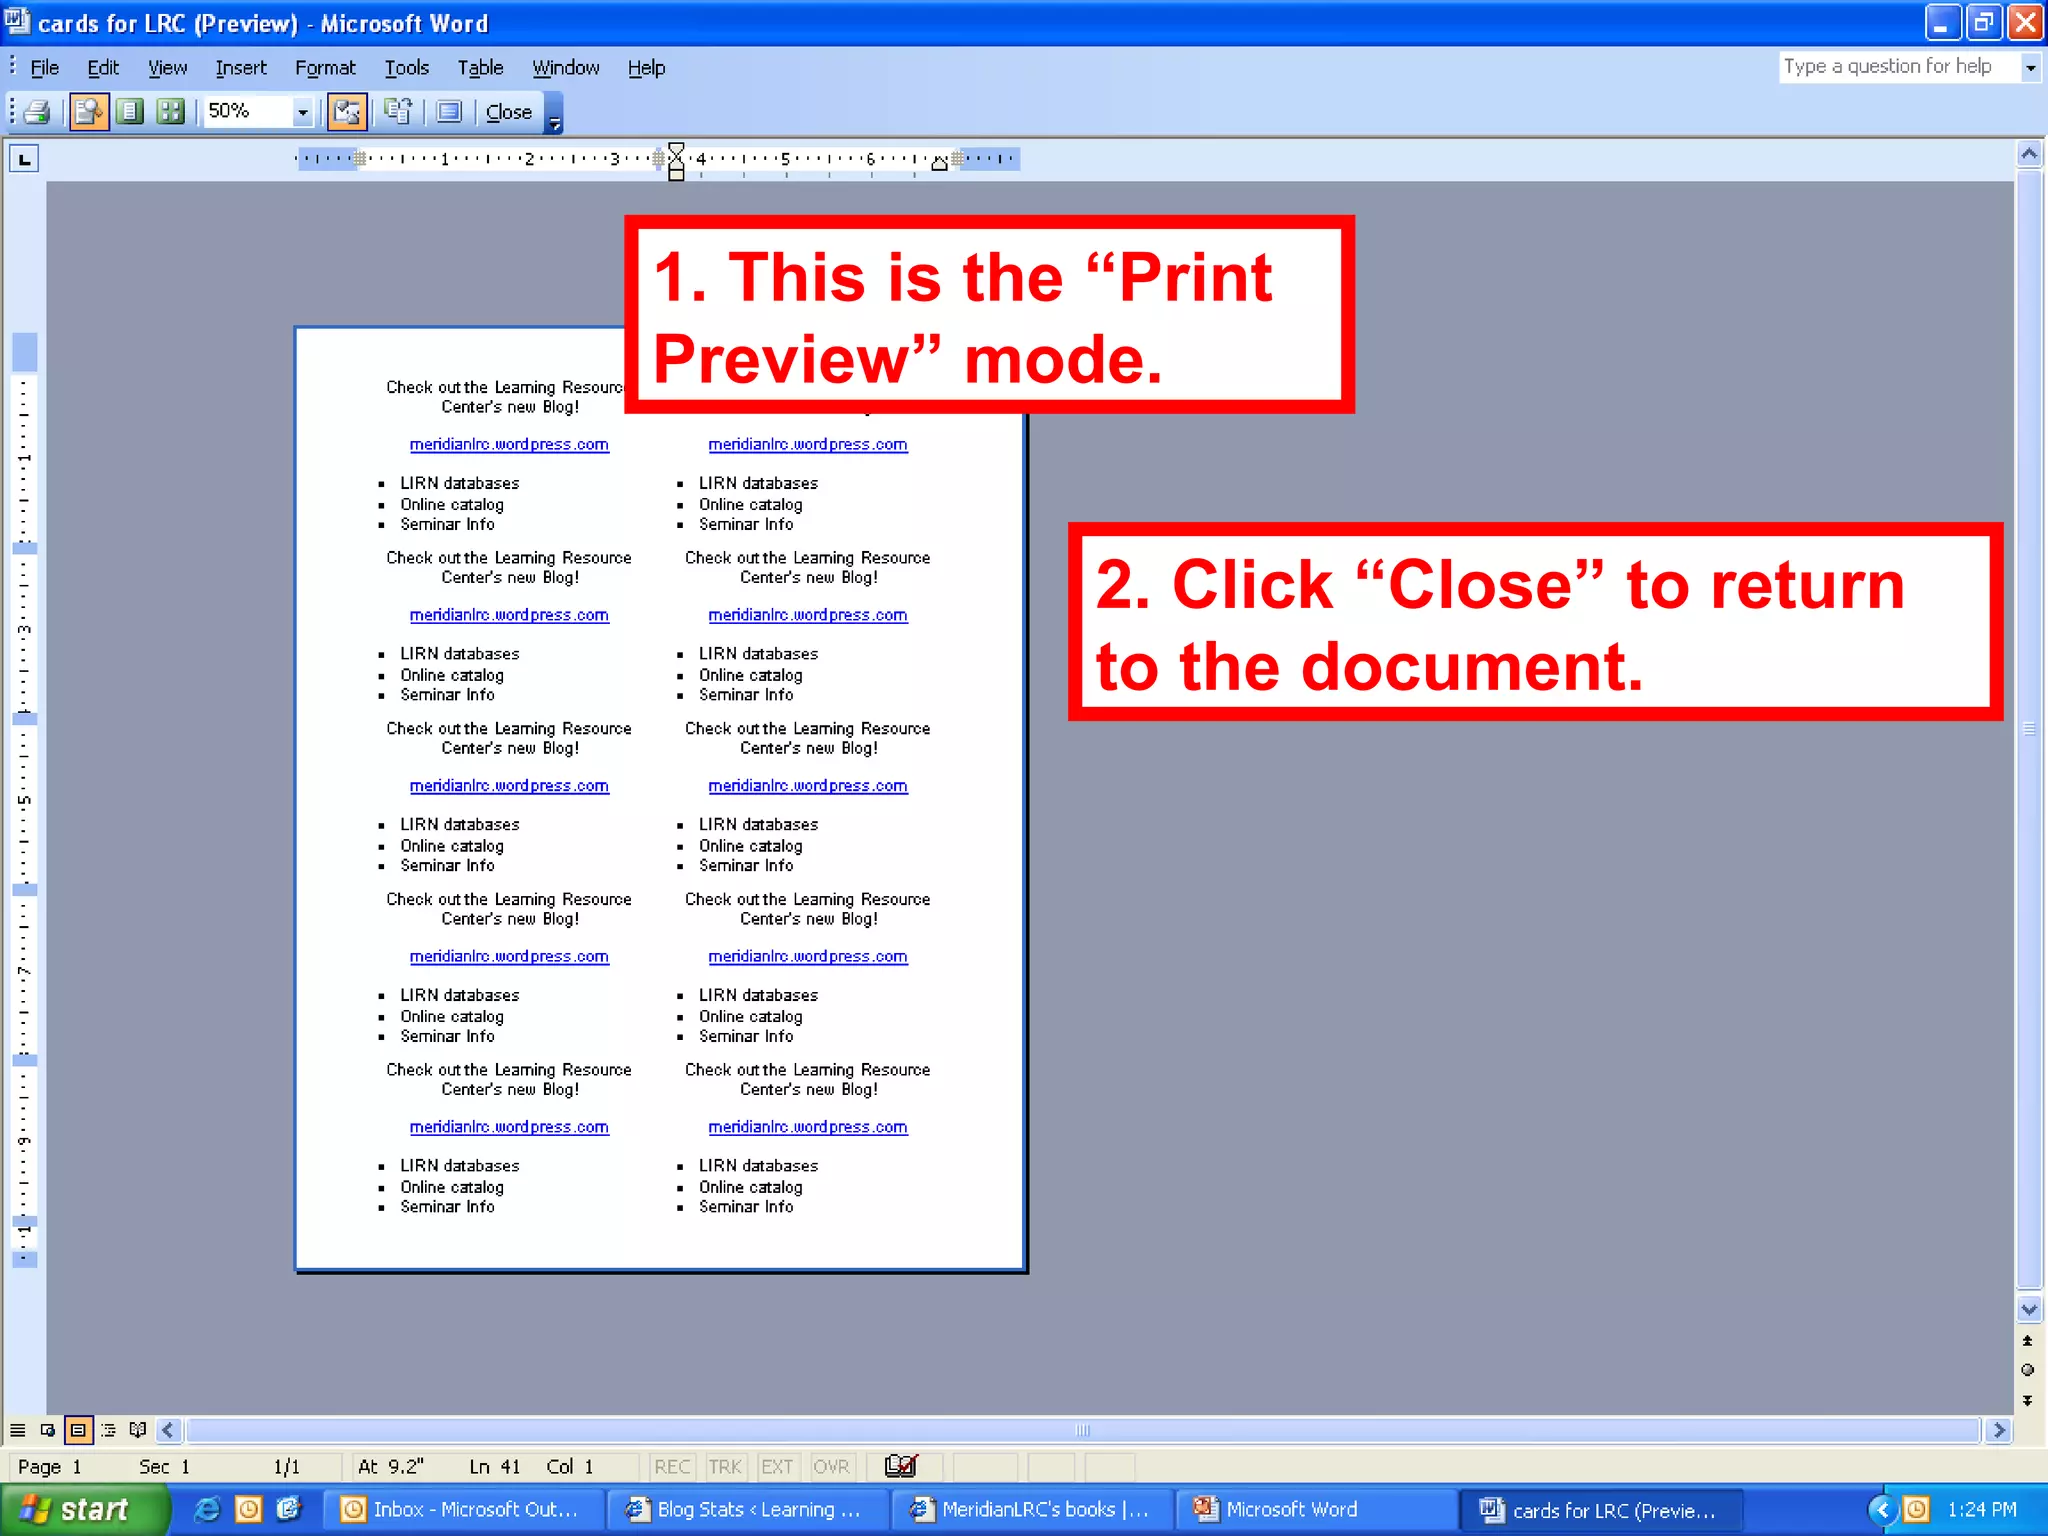
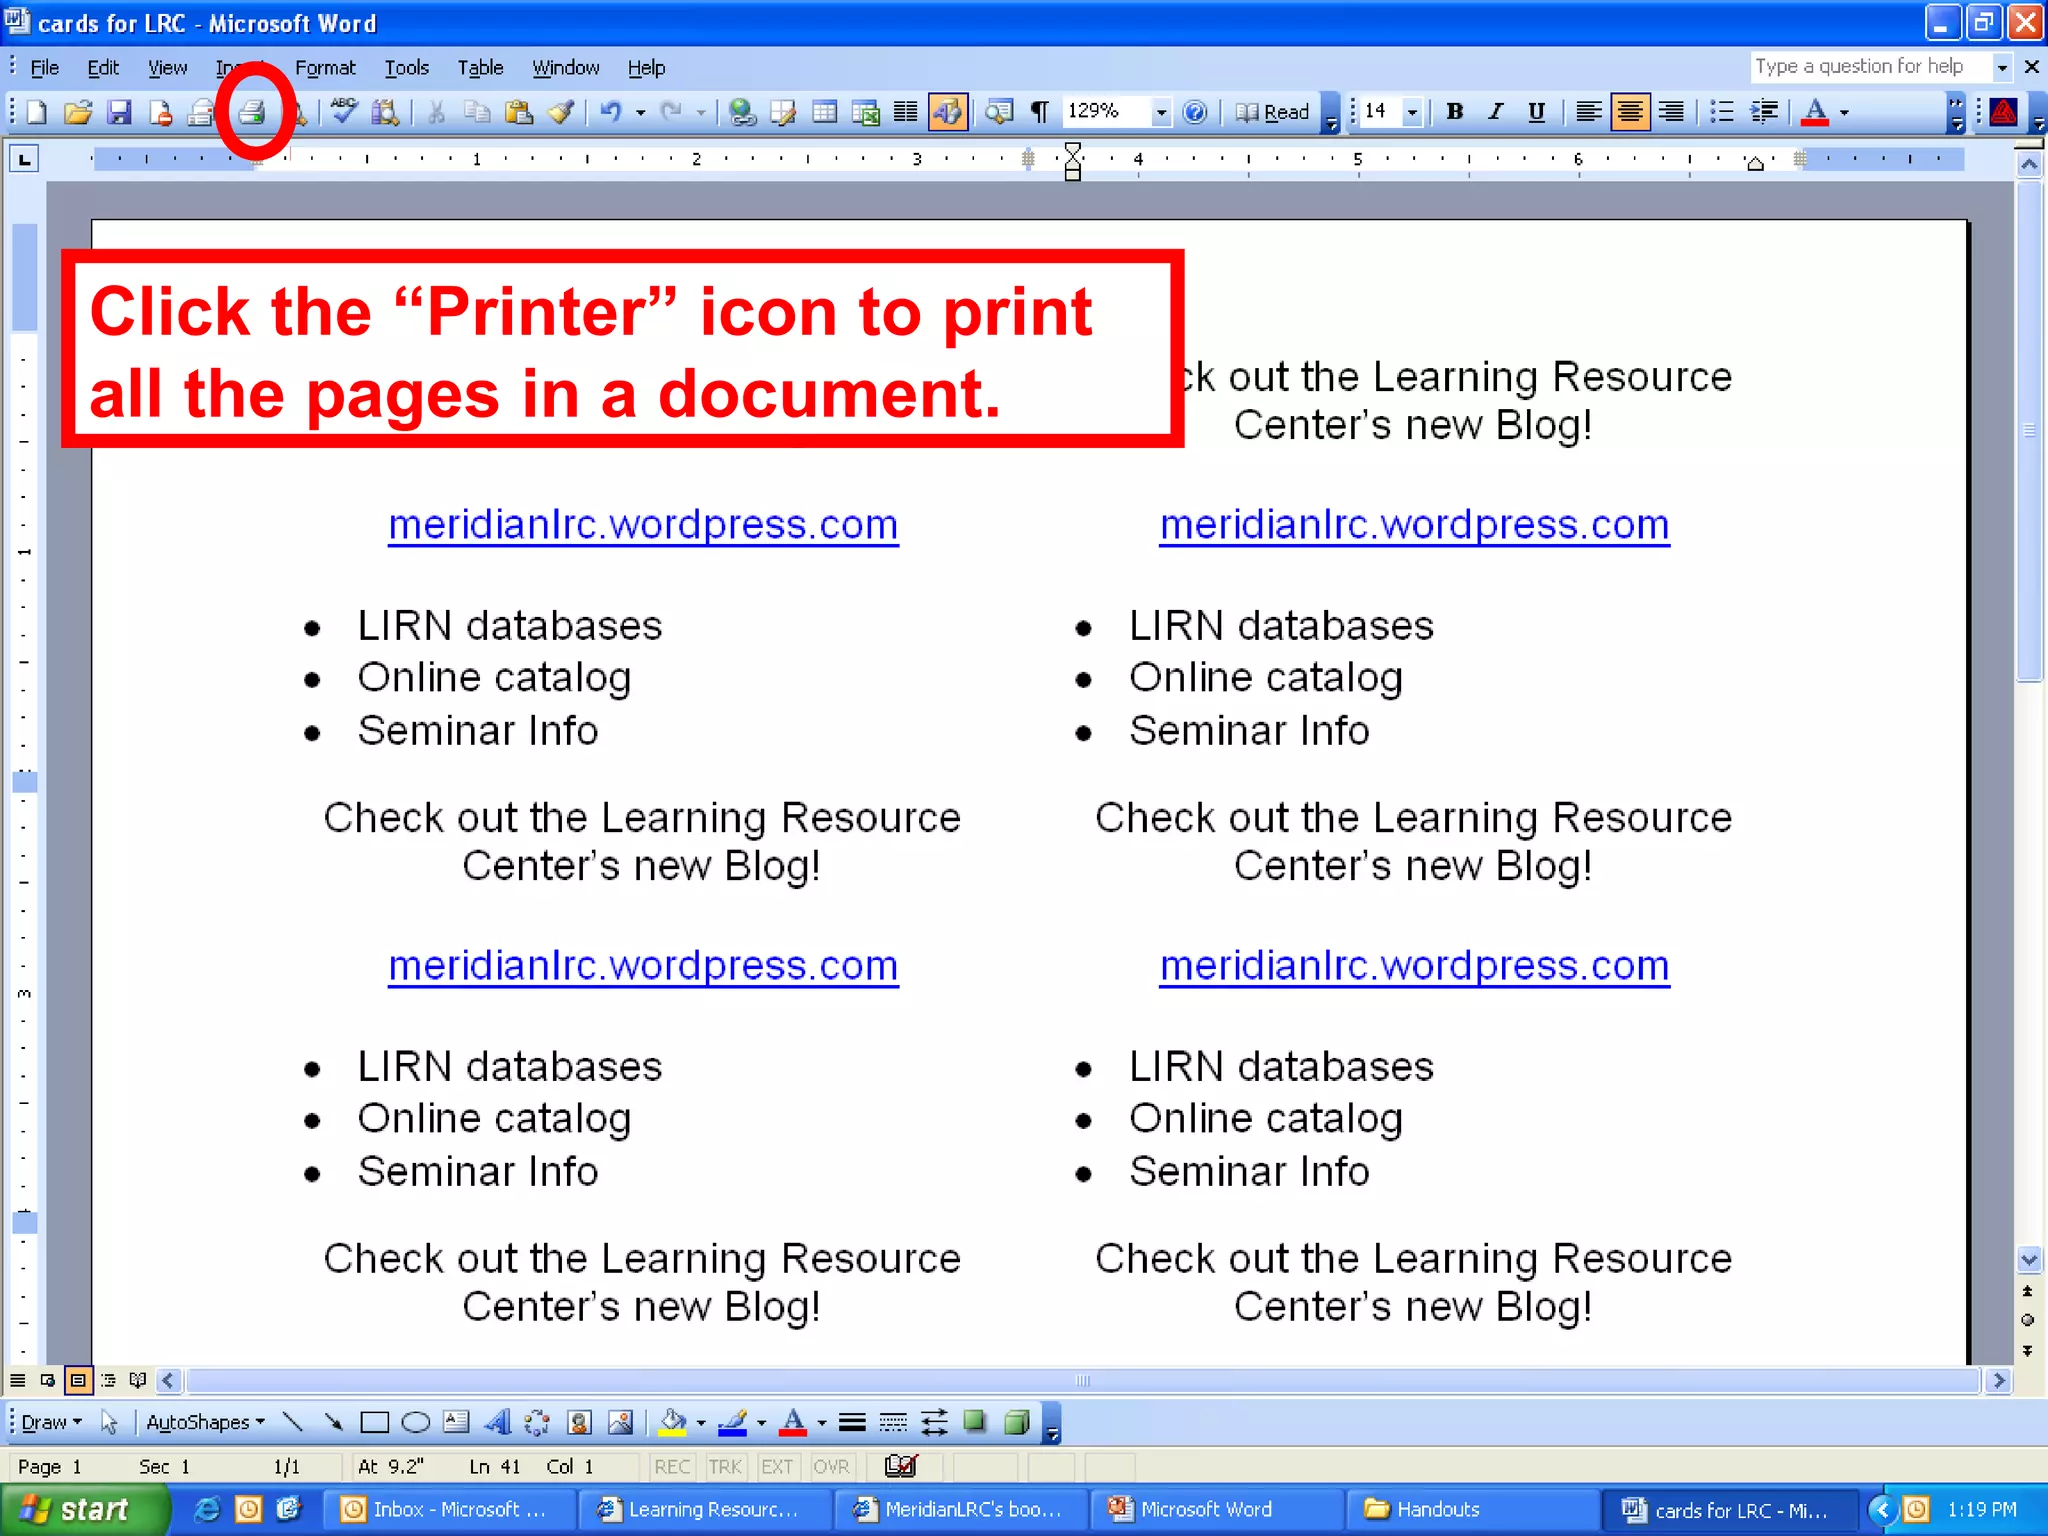

The document provides instructions for creating and formatting documents using Microsoft Word. It discusses how to [1] open Word and create new documents using templates and wizards, [2] format fonts, insert images and tables, and add page numbers, and [3] print documents and preview before printing. Step-by-step instructions are provided for making a resume using templates and the resume wizard.