The document is a comprehensive guide to using PowerPoint 2007, covering essential functionalities such as creating presentations, inserting slides and various objects, and using animations and transitions. It also includes tips for advanced techniques like hyperlinking, embedding YouTube videos, and enabling text input during presentations. The guide is structured with a clear table of contents and provides practical advice for enhancing presentation effectiveness.

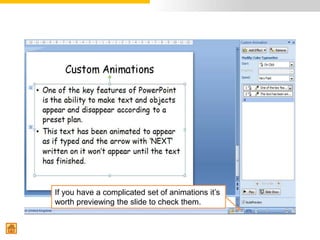
![Once you have added your animation, you can
edit how your object appears, the order of your
animations and whether the animation starts on
click, with previous [animation] or after.
This brings up more advanced
animation options –
experiment with these!
This means that you will see a
preview of your animation as
you add it.
3](https://image.slidesharecdn.com/introductiontopowerpoint-110714041828-phpapp01/85/Introduction-to-PowerPoint-2007-18-320.jpg)