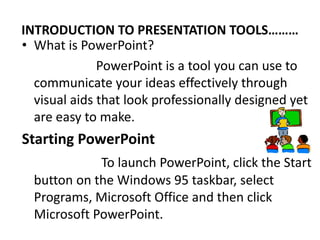
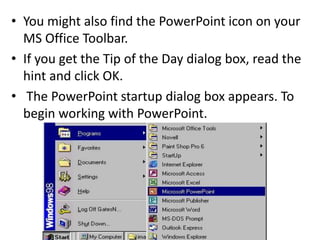
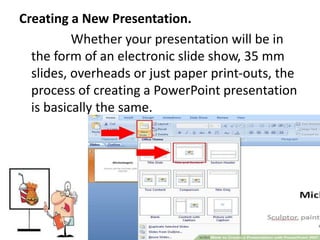
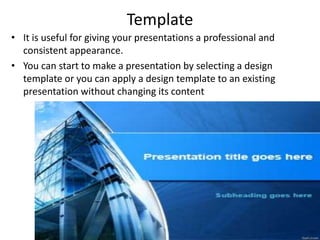
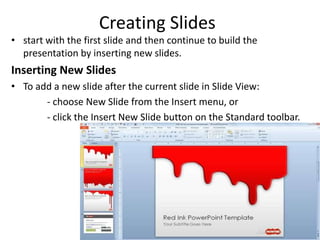
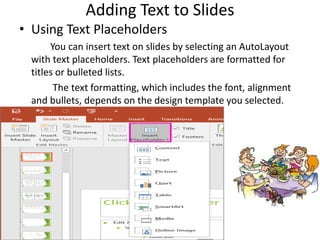
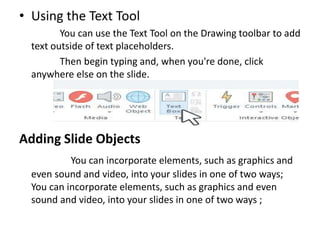
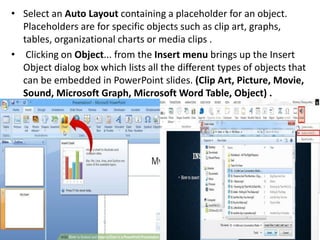
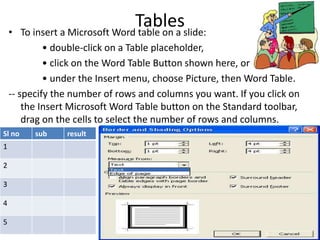
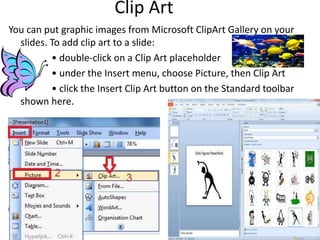
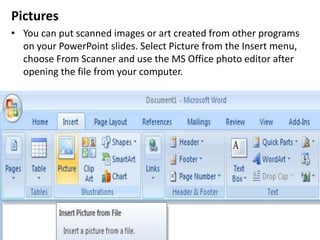
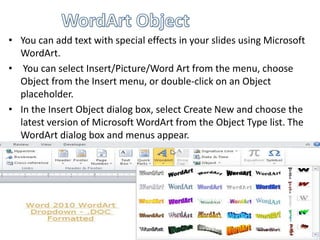
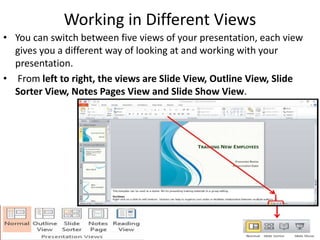
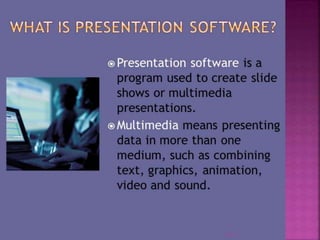
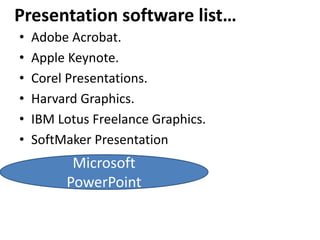
PowerPoint is a presentation tool used to create slideshows and communicate ideas visually. It allows users to create new presentations from templates, add text, images, tables and other media to slides. The document discusses how to start PowerPoint, use various templates to create presentations, insert slides, add objects, work in different views and some other presentation software alternatives to PowerPoint.
This is a guide to PowerPoint 2007 that I created for staff INSET. It covers lots of things from the very basics to the more complex features of the developer tab. I spent a while on this so I thought I would share in case anyone else would find this use
Need the very basics for Microsoft Powerpoint? Look no further! We've taken our Microsoft Powerpoint class and moved it online, available 24/7, so anyone needing a brief rundown of the uses for Powerpoint, the windows and ribbons, and some helpful tips can get to it.
Ribbon Toolbar & Formatting
Inserting and Adding Objects
Creating Theme Color
Creating a Hyperlink
Slide Transitions
Slide Animation
Starting a Slide Show
Printing Slide
Microsoft Office Templates
An Introduction to MS word, Its Tools and Features, fonts, ribbons, and many more features of microsoft word. Adding up new templates and starting of MS Word.
Introduction to Microsoft PowerPoint 2010 for Microsoft Windows SlidesSaide OER Africa
This HIBB begins with explaining the basics of Microsoft PowerPoint, including how to start a new presentation, open an existing presentation, and save a presentation. It discusses the Ribbon toolbar and how to use it. The HIBB gives the viewer an introduction to many customizing options PowerPoint has available. The HIBB concludes with describing how to view outlines, print handouts, and view the slideshow.
At the end of this HIBB, students will be able to create a slideshow presentation with many customized features including but not limited to formatting fonts and pictures, inserting images, tables, and hyperlinks, and adding slide designs and transitions. Students will be able to view the slideshows they create and print the presentation handouts.
This was a presentation that was prepared by myself along with 2 more peer students in my group for a university assignment (COMP1900 at the University of Queensland, Australia). The assignment was to compare and contrast the use of Spreadsheets and Databases to come to a conclusion as to which one is a better option.
This presentation gives you eight simple tips on how to make your PowerPoint presentation slides more visually engaging, creative and fun. Try out these advice and you will make your best PowerPoint presentation ever.
This presentation was created by my powerpoint design agency Slides. We are based in Spain but have clients worldwide.
Drop me an email and we will discuss your project.
Learn the basics of Microsoft PowerPoint from scratch along with Advanced PowerPoint with in-depth explanation in simple words.
Step by step instructions to make visually appealing, professional looking presentations perfect for office meetings and school assignments.
I would recommend you to download the presentation first and then go through it because SlideShare does not allow animations in the preview mode.
Thank You
Impress is the presentation (slide show) program included in LibreOffice. You can create slides that contain many different elements, including text, bulleted and numbered lists, tables, charts, and a wide range of graphic objects such as clip-art, drawings and photographs. Impress also includes a spelling checker, a thesaurus, text styles, and background styles.
What is Impress?
Starting a presentation.
Formatting a presentation.
Design a presentation.
Working with templates.
This is a tutorial that shows you the basics of how to use OpenOffice Impress. OpenOffice Impress is a free multmedia presentation equivalent to Microsoft PowerPoint.
Model Attribute Check Company Auto PropertyCeline George
In Odoo, the multi-company feature allows you to manage multiple companies within a single Odoo database instance. Each company can have its own configurations while still sharing common resources such as products, customers, and suppliers.
We all have good and bad thoughts from time to time and situation to situation. We are bombarded daily with spiraling thoughts(both negative and positive) creating all-consuming feel , making us difficult to manage with associated suffering. Good thoughts are like our Mob Signal (Positive thought) amidst noise(negative thought) in the atmosphere. Negative thoughts like noise outweigh positive thoughts. These thoughts often create unwanted confusion, trouble, stress and frustration in our mind as well as chaos in our physical world. Negative thoughts are also known as “distorted thinking”.
Ethnobotany and Ethnopharmacology:
Ethnobotany in herbal drug evaluation,
Impact of Ethnobotany in traditional medicine,
New development in herbals,
Bio-prospecting tools for drug discovery,
Role of Ethnopharmacology in drug evaluation,
Reverse Pharmacology.
How to Split Bills in the Odoo 17 POS ModuleCeline George
Bills have a main role in point of sale procedure. It will help to track sales, handling payments and giving receipts to customers. Bill splitting also has an important role in POS. For example, If some friends come together for dinner and if they want to divide the bill then it is possible by POS bill splitting. This slide will show how to split bills in odoo 17 POS.
How to Make a Field invisible in Odoo 17Celine George
It is possible to hide or invisible some fields in odoo. Commonly using “invisible” attribute in the field definition to invisible the fields. This slide will show how to make a field invisible in odoo 17.
The Roman Empire A Historical Colossus.pdfkaushalkr1407
The Roman Empire, a vast and enduring power, stands as one of history's most remarkable civilizations, leaving an indelible imprint on the world. It emerged from the Roman Republic, transitioning into an imperial powerhouse under the leadership of Augustus Caesar in 27 BCE. This transformation marked the beginning of an era defined by unprecedented territorial expansion, architectural marvels, and profound cultural influence.
The empire's roots lie in the city of Rome, founded, according to legend, by Romulus in 753 BCE. Over centuries, Rome evolved from a small settlement to a formidable republic, characterized by a complex political system with elected officials and checks on power. However, internal strife, class conflicts, and military ambitions paved the way for the end of the Republic. Julius Caesar’s dictatorship and subsequent assassination in 44 BCE created a power vacuum, leading to a civil war. Octavian, later Augustus, emerged victorious, heralding the Roman Empire’s birth.
Under Augustus, the empire experienced the Pax Romana, a 200-year period of relative peace and stability. Augustus reformed the military, established efficient administrative systems, and initiated grand construction projects. The empire's borders expanded, encompassing territories from Britain to Egypt and from Spain to the Euphrates. Roman legions, renowned for their discipline and engineering prowess, secured and maintained these vast territories, building roads, fortifications, and cities that facilitated control and integration.
The Roman Empire’s society was hierarchical, with a rigid class system. At the top were the patricians, wealthy elites who held significant political power. Below them were the plebeians, free citizens with limited political influence, and the vast numbers of slaves who formed the backbone of the economy. The family unit was central, governed by the paterfamilias, the male head who held absolute authority.
Culturally, the Romans were eclectic, absorbing and adapting elements from the civilizations they encountered, particularly the Greeks. Roman art, literature, and philosophy reflected this synthesis, creating a rich cultural tapestry. Latin, the Roman language, became the lingua franca of the Western world, influencing numerous modern languages.
Roman architecture and engineering achievements were monumental. They perfected the arch, vault, and dome, constructing enduring structures like the Colosseum, Pantheon, and aqueducts. These engineering marvels not only showcased Roman ingenuity but also served practical purposes, from public entertainment to water supply.
The Indian economy is classified into different sectors to simplify the analysis and understanding of economic activities. For Class 10, it's essential to grasp the sectors of the Indian economy, understand their characteristics, and recognize their importance. This guide will provide detailed notes on the Sectors of the Indian Economy Class 10, using specific long-tail keywords to enhance comprehension.
For more information, visit-www.vavaclasses.com
This is a presentation by Dada Robert in a Your Skill Boost masterclass organised by the Excellence Foundation for South Sudan (EFSS) on Saturday, the 25th and Sunday, the 26th of May 2024.
He discussed the concept of quality improvement, emphasizing its applicability to various aspects of life, including personal, project, and program improvements. He defined quality as doing the right thing at the right time in the right way to achieve the best possible results and discussed the concept of the "gap" between what we know and what we do, and how this gap represents the areas we need to improve. He explained the scientific approach to quality improvement, which involves systematic performance analysis, testing and learning, and implementing change ideas. He also highlighted the importance of client focus and a team approach to quality improvement.
2. INTRODUCTION TO PRESENTATION TOOLS………
• What is PowerPoint?
PowerPoint is a tool you can use to
communicate your ideas effectively through
visual aids that look professionally designed yet
are easy to make.
Starting PowerPoint
To launch PowerPoint, click the Start
button on the Windows 95 taskbar, select
Programs, Microsoft Office and then click
Microsoft PowerPoint.
3. • You might also find the PowerPoint icon on your
MS Office Toolbar.
• If you get the Tip of the Day dialog box, read the
hint and click OK.
• The PowerPoint startup dialog box appears. To
begin working with PowerPoint.
4. Creating a New Presentation.
Whether your presentation will be in
the form of an electronic slide show, 35 mm
slides, overheads or just paper print-outs, the
process of creating a PowerPoint presentation
is basically the same.
5. AutoContent Wizard
• The AutoContent Wizard is a series of dialog boxes that gets
you started with creating a new presentation using a template
• On the New Presentation dialog box, click the Presentations
tab, click the icon for AutoContent Wizard and click OK.
• To bypass the wizard, click instead the icon for the template
you want and you'll get the slides directly.
6. Blank Presentation
• The blank presentation template is a design template that
uses the default formatting and design
• (1) select New from the File menu, click the General tab on
the New Presentation dialog box, click the Blank Presentation
icon and click OK
• (2) click the New button on the Standard toolbar. The New
Slide dialog box appears
7. Template
• It is useful for giving your presentations a professional and
consistent appearance.
• You can start to make a presentation by selecting a design
template or you can apply a design template to an existing
presentation without changing its content
8. Creating Slides
• start with the first slide and then continue to build the
presentation by inserting new slides.
Inserting New Slides
• To add a new slide after the current slide in Slide View:
- choose New Slide from the Insert menu, or
- click the Insert New Slide button on the Standard toolbar.
9. Adding Text to Slides
• Using Text Placeholders
You can insert text on slides by selecting an AutoLayout
with text placeholders. Text placeholders are formatted for
titles or bulleted lists.
The text formatting, which includes the font, alignment
and bullets, depends on the design template you selected.
10. • Using the Text Tool
You can use the Text Tool on the Drawing toolbar to add
text outside of text placeholders.
Then begin typing and, when you're done, click
anywhere else on the slide.
Adding Slide Objects
You can incorporate elements, such as graphics and
even sound and video, into your slides in one of two ways;
You can incorporate elements, such as graphics and even
sound and video, into your slides in one of two ways ;
11. • Select an Auto Layout containing a placeholder for an object.
Placeholders are for specific objects such as clip art, graphs,
tables, organizational charts or media clips .
• Clicking on Object... from the Insert menu brings up the Insert
Object dialog box which lists all the different types of objects that
can be embedded in PowerPoint slides. (Clip Art, Picture, Movie,
Sound, Microsoft Graph, Microsoft Word Table, Object) .
12. Tables• To insert a Microsoft Word table on a slide:
• double-click on a Table placeholder,
• click on the Word Table Button shown here, or
• under the Insert menu, choose Picture, then Word Table.
-- specify the number of rows and columns you want. If you click on
the Insert Microsoft Word Table button on the Standard toolbar,
drag on the cells to select the number of rows and columns.
Sl no sub result
1
2
3
4
5
13. Clip Art
You can put graphic images from Microsoft ClipArt Gallery on your
slides. To add clip art to a slide:
• double-click on a Clip Art placeholder
• under the Insert menu, choose Picture, then Clip Art
• click the Insert Clip Art button on the Standard toolbar
shown here.
14. Pictures
• You can put scanned images or art created from other programs
on your PowerPoint slides. Select Picture from the Insert menu,
choose From Scanner and use the MS Office photo editor after
opening the file from your computer.
15. • You can add text with special effects in your slides using Microsoft
WordArt.
• You can select Insert/Picture/Word Art from the menu, choose
Object from the Insert menu, or double-click on an Object
placeholder.
• In the Insert Object dialog box, select Create New and choose the
latest version of Microsoft WordArt from the Object Type list. The
WordArt dialog box and menus appear.
16. Working in Different Views
• You can switch between five views of your presentation, each view
gives you a different way of looking at and working with your
presentation.
• From left to right, the views are Slide View, Outline View, Slide
Sorter View, Notes Pages View and Slide Show View.
17.
18. Presentation software list…
• Adobe Acrobat.
• Apple Keynote.
• Corel Presentations.
• Harvard Graphics.
• IBM Lotus Freelance Graphics.
• SoftMaker Presentation
Microsoft
PowerPoint