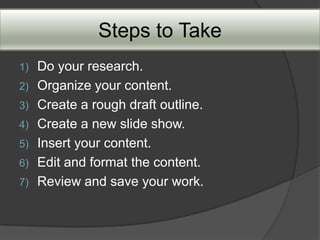
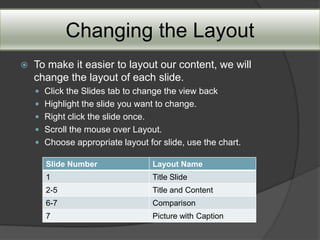
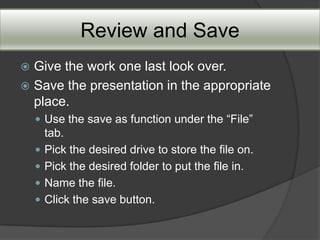
Learn to make your own slide show.
                                 By
                     Dustin McDainel
What is PowerPoint?

 PowerPoint  is presentation
 software that allows you to make
 slide shows. You can easily insert
 text, pictures, clip
 art, graphs, hyperlinks, videos, an
 d even screen capture shots.
Steps to Take
1)   Do your research.
2)   Organize your content.
3)   Create a rough draft outline.
4)   Create a new slide show.
5)   Insert your content.
6)   Edit and format the content.
7)   Review and save your work.
Do Your Research.
   Know the audience.
     Who are you presenting to?
     What is their existing knowledge of the
     subject?
   Research the topic.
     Use the internet, books, and other sources.
     Learn as much as you can about the topic.
     Look for picture that relate to the ideas
     involved.
Organize Your Content.
   Create a new folder in windows.
     Make sure you know the location of that file.


   Store all related pictures, text
    documents, and links in the folder you
    created.
     We will be using them later in our slide
     show.
Create a rough draft outline.
 Rough   Draft
  Use pen and paper to make a quick
   outline of the topic you will be covering.
  Break the topic into smaller ideas.
   ○ These will be the titles for each slide.
  Create bullets from each smaller idea.
   ○ These will become your body in the
     slides.
Create a New Slide Show.
To open PowerPoint click on the following:
Start menu>All programs>Microsoft office>Microsoft
PowerPoint 2010


  You can also click the icon on the desk top or task
               bar that looks like this:
Inserting your content.
   We will start by titling our slide show on
    the first slide (provided already).
     Toward the left side click the outline tab.
     Type in your main title.
   By pushing the Enter key PowerPoint will
    automatically create a new slide.
     For each new slide type the title and push
       Enter to create the next slide.
Changing the Layout
   To make it easier to layout our content, we will
    change the layout of each slide.
     Click the Slides tab to change the view back
     Highlight the slide you want to change.
     Right click the slide once.
     Scroll the mouse over Layout.
     Choose appropriate layout for slide, use the chart.

      Slide Number                  Layout Name
      1                             Title Slide
      2-5                           Title and Content
      6-7                           Comparison
      7                             Picture with Caption
Adding Body Text
Now we will add in the
 body content to each slide.
  Click on the slide view tab.
  Click in a text box.
  Add remaining text to slides.
Inserting Clip Art
 Now   lets insert some pictures.
  First we will use clip art.
   ○ Check the Include
     Office.com content box.
   ○ Drag and drop from the
     menu.
   ○ Move and resize.
Inserting Pictures
 Now   we will insert pictures of our
 own.
  Know where they are located on
   your computer.
  Use the “Insert picture from file”
   button located inside of each text
   box.
  Move and adjust each picture if
   needed
Review and Edit
   Use Spell Check to make corrections.
     Under the Review tab


     Click this icon


     Let the pop-up guide you through
      corrections.
     Make any other changes needed.
Changing the Theme
 Under   the Design tab.
  Use the down arrow to expand
   the theme menu.
  Select the theme named
   “Thatch”
   ○ This will apply a preset theme
     to all the slides in the show.
Some Touch Up
   Now to re-adjust some of text.
     Make the titles stand out more.
      ○ Change font size.
      ○ Change font color.
     Also make appropriate changes to the
     bodies text.
   Move and resize the pictures.
     Highlight each picture.
     Resize and/or move.
Adding Transitions

 Nowto change how the slide show
 goes from one slide to the next.
  Under the “Transitions” tab
  ○ Highlight target slide on left of screen.
  ○ Change the transition for that slide by
    picking one from the drop down menu
    across the top.
  ○ Use the same or different ones for each
    slide.
Review and Save
 Give the work one last look over.
 Save the presentation in the appropriate
  place.
     Use the save as function under the “File”
        tab.
       Pick the desired drive to store the file on.
       Pick the desired folder to put the file in.
       Name the file.
       Click the save button.
Conclusion
This concludes our first PowerPoint
tutorial. You should have a grasp on
some of the basic functions the
program offers and the ability to
create your own slide show from
scratch.

Power point tutorial

  • 1.
    Learn to makeyour own slide show. By Dustin McDainel
  • 2.
    What is PowerPoint? PowerPoint is presentation software that allows you to make slide shows. You can easily insert text, pictures, clip art, graphs, hyperlinks, videos, an d even screen capture shots.
  • 4.
    Steps to Take 1) Do your research. 2) Organize your content. 3) Create a rough draft outline. 4) Create a new slide show. 5) Insert your content. 6) Edit and format the content. 7) Review and save your work.
  • 5.
    Do Your Research.  Know the audience.  Who are you presenting to?  What is their existing knowledge of the subject?  Research the topic.  Use the internet, books, and other sources.  Learn as much as you can about the topic.  Look for picture that relate to the ideas involved.
  • 6.
    Organize Your Content.  Create a new folder in windows.  Make sure you know the location of that file.  Store all related pictures, text documents, and links in the folder you created.  We will be using them later in our slide show.
  • 7.
    Create a roughdraft outline.  Rough Draft  Use pen and paper to make a quick outline of the topic you will be covering.  Break the topic into smaller ideas. ○ These will be the titles for each slide.  Create bullets from each smaller idea. ○ These will become your body in the slides.
  • 8.
    Create a NewSlide Show. To open PowerPoint click on the following: Start menu>All programs>Microsoft office>Microsoft PowerPoint 2010 You can also click the icon on the desk top or task bar that looks like this:
  • 10.
    Inserting your content.  We will start by titling our slide show on the first slide (provided already).  Toward the left side click the outline tab.  Type in your main title.  By pushing the Enter key PowerPoint will automatically create a new slide.  For each new slide type the title and push Enter to create the next slide.
  • 12.
    Changing the Layout  To make it easier to layout our content, we will change the layout of each slide.  Click the Slides tab to change the view back  Highlight the slide you want to change.  Right click the slide once.  Scroll the mouse over Layout.  Choose appropriate layout for slide, use the chart. Slide Number Layout Name 1 Title Slide 2-5 Title and Content 6-7 Comparison 7 Picture with Caption
  • 14.
    Adding Body Text Nowwe will add in the body content to each slide.  Click on the slide view tab.  Click in a text box.  Add remaining text to slides.
  • 16.
    Inserting Clip Art Now lets insert some pictures.  First we will use clip art. ○ Check the Include Office.com content box. ○ Drag and drop from the menu. ○ Move and resize.
  • 18.
    Inserting Pictures  Now we will insert pictures of our own.  Know where they are located on your computer.  Use the “Insert picture from file” button located inside of each text box.  Move and adjust each picture if needed
  • 20.
    Review and Edit  Use Spell Check to make corrections.  Under the Review tab  Click this icon  Let the pop-up guide you through corrections.  Make any other changes needed.
  • 22.
    Changing the Theme Under the Design tab.  Use the down arrow to expand the theme menu.  Select the theme named “Thatch” ○ This will apply a preset theme to all the slides in the show.
  • 24.
    Some Touch Up  Now to re-adjust some of text.  Make the titles stand out more. ○ Change font size. ○ Change font color.  Also make appropriate changes to the bodies text.  Move and resize the pictures.  Highlight each picture.  Resize and/or move.
  • 26.
    Adding Transitions  Nowtochange how the slide show goes from one slide to the next.  Under the “Transitions” tab ○ Highlight target slide on left of screen. ○ Change the transition for that slide by picking one from the drop down menu across the top. ○ Use the same or different ones for each slide.
  • 28.
    Review and Save Give the work one last look over.  Save the presentation in the appropriate place.  Use the save as function under the “File” tab.  Pick the desired drive to store the file on.  Pick the desired folder to put the file in.  Name the file.  Click the save button.
  • 30.
    Conclusion This concludes ourfirst PowerPoint tutorial. You should have a grasp on some of the basic functions the program offers and the ability to create your own slide show from scratch.