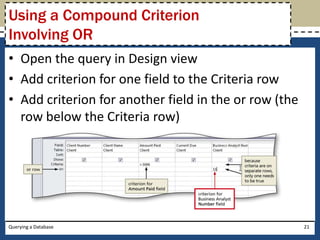
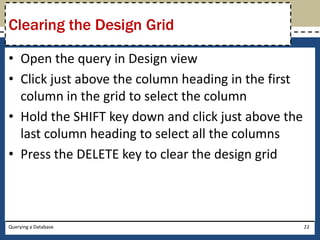
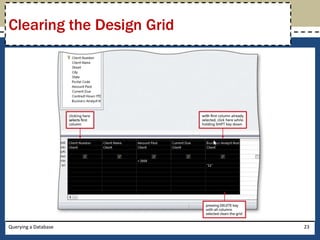
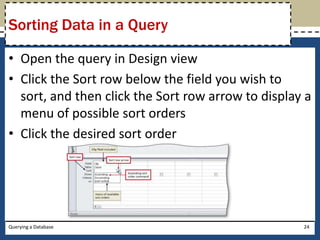
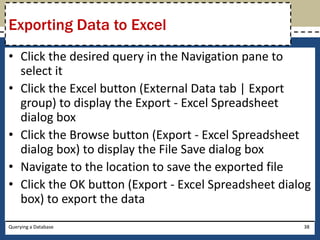
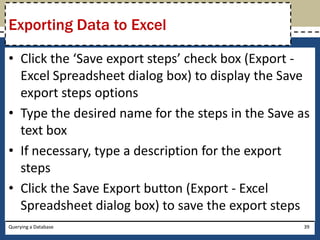
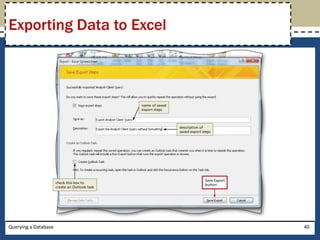
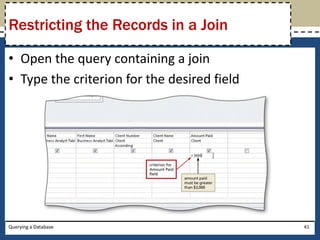
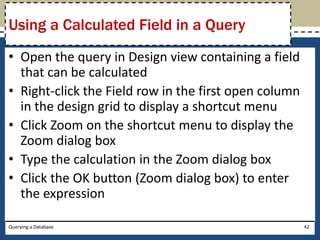
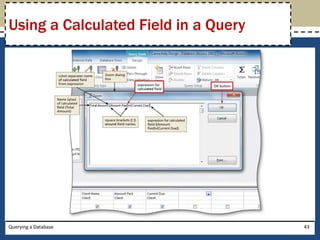
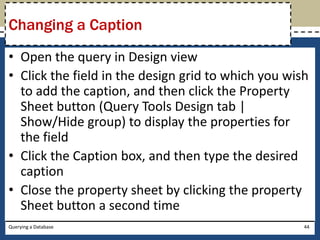
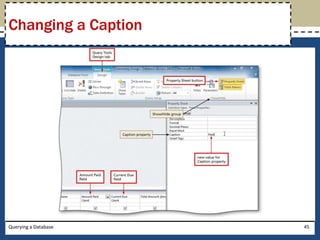
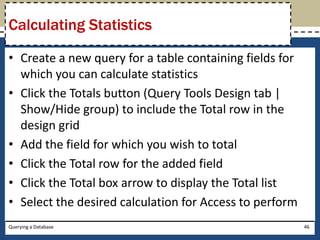
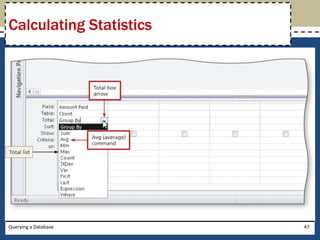
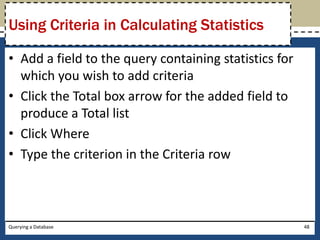
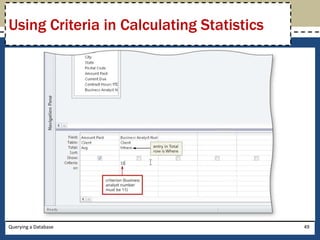
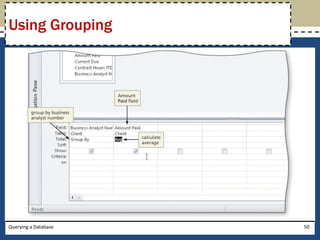
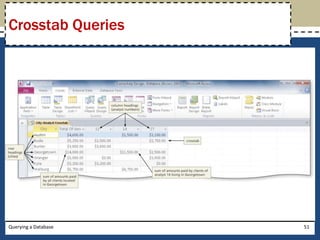
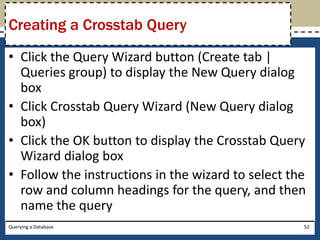
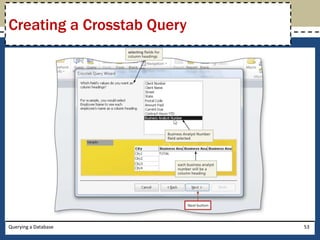
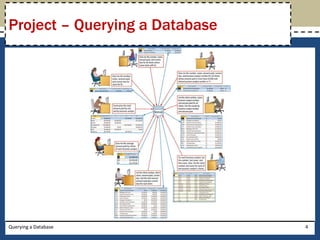
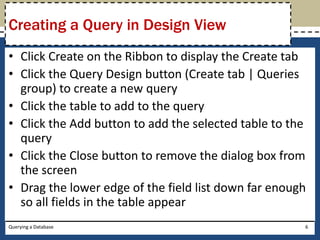
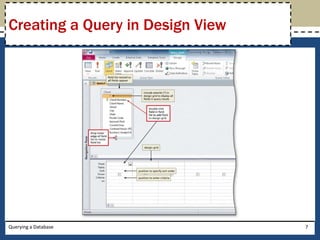
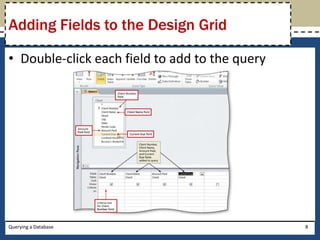
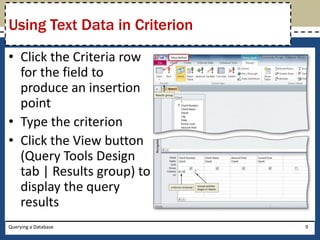
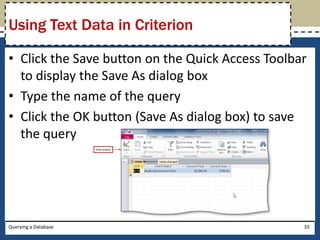
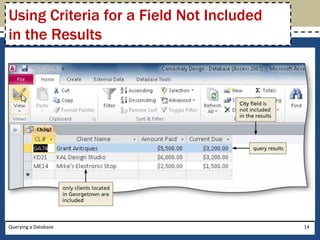
This document provides objectives and instructions for querying a database in Microsoft Access 2010. It covers how to create queries using design view, add fields and criteria, save and use queries, create parameter and join queries, sort data, and perform calculations. It also discusses creating reports, forms, and exporting data from queries, as well as customizing the navigation pane and creating crosstab queries. The overall purpose is to teach how to extract and work with data from an Access database using queries.
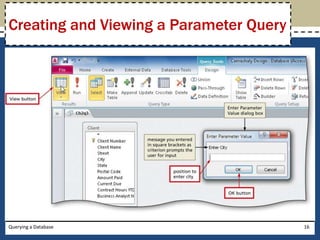
![Creating and Viewing a Parameter Query
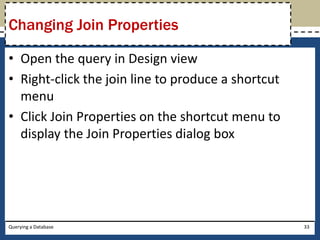
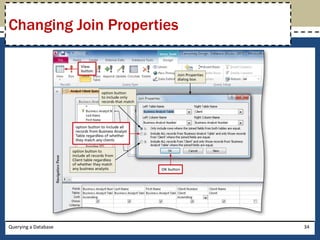
• If necessary, return to Design view and type the
criterion for a parameter query ([Enter City], for
example)
• Run the query
Querying a Database 15](https://image.slidesharecdn.com/acchapter02-121016211246-phpapp02/85/Access-Chapter-02-15-320.jpg)