1. Aimina Zalfa Salsabila – Sasha Y7
For beginners
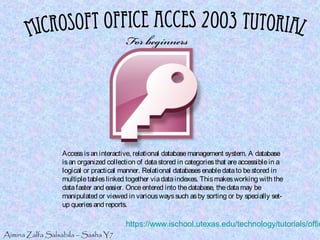
Accessisan interactive, relational databasemanagement system. A database
isan organized collection of datastored in categoriesthat areaccessiblein a
logical or practical manner. Relational databasesenabledatato bestored in
multipletableslinked together viadataindexes. Thismakesworking with the
datafaster and easier. Onceentered into thedatabase, thedatamay be
manipulated or viewed in variouswayssuch asby sorting or by specially set-
up queriesand reports.
https://www.ischool.utexas.edu/technology/tutorials/offic
2. FIRSTLY…..
e green “Start” button, go to “All Programs”, click “Microsoft
arch for “Microsoft Office Access 2003” and click it once.
3. ening Access, you will be presented with the window shown
3. If you want to edit an existing database, you can
either go to “File”, and then click “Open”. There are 2
option. You also can move your cursor to the lower
right – hand side and click “Open”.
4. e a database?
eed to go to “File”, then click “New”, or move your cursor to the lower right side to
e a new file”. And as you can see, you will see this five option menu…
ust to save an Access database before you start working on it. So first, you need to
database…” in the first option. And in the New Database dialogue box, type a name in
” then click “Create”.
And it will be like this (A new database are created)
5. There are 7 Database Components….
1. Tables
• Tables are where the actual data is defined and entered. Tables consist of records (rows) and
fields (columns).
2. Queries
• A query consists of specifications indicating which fields, records, and summaries you want to
see from a database. Queries allow you to extract data based on the criteria you define.
3. Forms
• Forms are designed to ease the data entry process. For example, you can create a data entry
form that looks exactly like a paper form.
4. Reports
• When you want to print a records from your database, first you need to design a report. Access
also have a wizard to help produce mailing labels.
5. Pages
• A data access page is a special type of Web page designed for viewing and working with data
from the Internet or an intranet. This data is stored in a Microsoft Access database or a
Microsoft SQL Server database.
6. Macros
• A macro is a set of one or more actions that each performs a particular operation, such as
opening a form or printing a report. Macros can help you automate common tasks.
6. Creating Tables in Design View…
6. By clicking the Table tab on the left hand side, you will find Access provides three ways to
create a table for which there are icons in the Database window.
• Create Table in Design view will allow you to create the fields of the table.
• Create table by using wizard will step you through the creation of a table.
• Create table by entering data will give you a blank datasheet with unlabelled columns that
looks much like an Excel worksheet.
7. So you need to “double click” on Create table in
Design view displays the “Table Design” screen
where you define fields for your table.
A top pane is for entering the field name,
data type, and an option description of
the field.
A bottom pane for specifying field properties.
7. 8. Every table always consists of fields. For each field, specify the name of the
field, the type of data, and any description needed to determine what data the
field contains. Pressing the Tab key moves the cursor from one column to the
next in the Table Design screen.
9. 4. Each table in your database should have a “primary key.” A primary key is a
field that uniquely identifies each record in the database. To set the primary key
for your table, highlight the key field and choose “Primary Key” from the Edit
menu. 10. When the primary key is set, you should find a
little key icon next to the field name on the left
side.
8. 11. As a final step, the table must be saved.
Pull down the File Menu to choose Save. Then
click OK
you already created a new table and it’s already. Then you
o Access main screen by pulling down the File menu and c
And it will be like this…
9. Now, how to enter the data??
14. So for example, the result will be like this. To
enter the data, all you need to do now is click the
mouse in the field you want to enter and type it.
Press the “Tab” key to move from field to field.
When you are in the last field of a record, pressing
13. After you have defined fields in the table, you
can enter data. Highlight the table, choose “Open”
from the database windows menu bar.
10. 15. Use the “Datasheet View” to add, delete, and
move records.
16. To save your new data, pull down the “File” menu and
click “Save”. Or to navigate the other records in the table, use
the navigation bar at the bottom of the screen.
How to sorting and searching your records????
1. Sorting Records
*To sort records by a particular field, select the field you want to sort. From the Records
menu, select “Quick Sort” then choose either Ascending or Descending order.
2. Finding Records
If you want to locate a record that contains a certain name or date use the Find command
on the Edit menu. Type the search string in the Find What box and click Find First. Access
will highlight the first record that contains the search string.
11. Table Relationship
17. Click the“Relationships” button on thetoolbar.
18. From theShow Tablewindow (click theShow Tablebutton on thetoolbar to make
it appear), doubleclick on thenamesof thetablesyou would liketo includein the
relationships. When you havefinished adding tables, click “Close”.
19. To link fieldsin two different tables, click and drag afield from onetableto the
corresponding field on theother tableand releasethemousebutton. The“Edit
Relationships” window will appeared. From thiswindow, select different fieldsand an
option from “EnforceReferential Integrity” if necessary.
20. Check the“EnforceReferential Integrity” box to ensurethat therelationshipsare
valid and that thedataisnot
accidentally deleted when dataisadded, edited, or deleted. Click “Create” to createthe
link.
12. is, as you can see a line now connects the two fields in theRelationships windows. Close th
save the changes to the “Relationships” layout.
How to create the queries?
22. To make a queries, click on the “New” button in the database window . Choose
“Design View”, then click “OK”.
23. In the Show Table dialog box, you will be asked to choose a table for the
query. Select the table you want to query and click “Add”.
13. 24. Add fields from the tables to the new query by double-clicking the field name in
the table boxes or selecting the field from the Field and Table drop-down menus on
the query form.
25. Enter the criteria for the query in the Criteria field. The Expression Builder can
also be used to assist in writing the expressions in the Criteria field.
26. After you have selected all of the fields and tables, click the “Run” button on the
Toolbar.
27. Choose “Save” from the “File” menu to save a query for later execution.