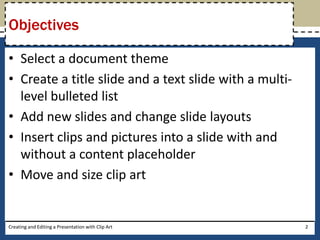
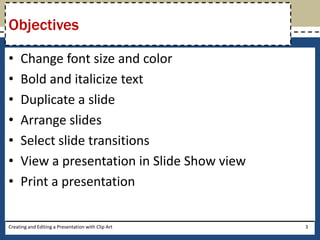
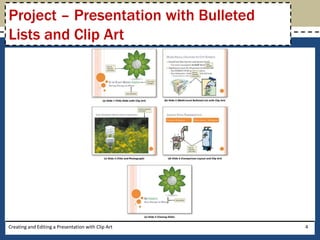
Microsoft
PowerPoint 2010

        Chapter 1

  Creating and Editing a
Presentation with Clip Art
Objectives

• Select a document theme
• Create a title slide and a text slide with a multi-
  level bulleted list
• Add new slides and change slide layouts
• Insert clips and pictures into a slide with and
  without a content placeholder
• Move and size clip art


Creating and Editing a Presentation with Clip Art       2
Objectives

•    Change font size and color
•    Bold and italicize text
•    Duplicate a slide
•    Arrange slides
•    Select slide transitions
•    View a presentation in Slide Show view
•    Print a presentation

Creating and Editing a Presentation with Clip Art   3
Project – Presentation with Bulleted
Lists and Clip Art


Creating and Editing a Presentation with Clip Art   4
General Project Guidelines

•    Find an appropriate theme
•    Choose words for each slide
•    Format specific elements of the text
•    Determine where to save the presentation
•    Determine the best method for distributing the
     presentation


Creating and Editing a Presentation with Clip Art     5
Choosing a Document Theme

• Click Design on the Ribbon to display the Design
  tab
• Click the More button (Design tab | Themes
  group) to expand the gallery, which shows more
  Built-In theme gallery options
• Click the theme to apply


Creating and Editing a Presentation with Clip Art    6
Choosing a Document Theme


Creating and Editing a Presentation with Clip Art   7
Entering the Presentation Title

• Click the label, Click to add title, located inside the
  title text placeholder to select the placeholder
• Type the desired title in the title text placeholder.
  Do not press the ENTER key


Creating and Editing a Presentation with Clip Art       8
Entering the Presentation
Subtitle Paragraph
• Click the label, Click to add subtitle, located inside
  the subtitle text placeholder to select the
  placeholder
• Type the desired subtitle paragraph, but do not
  press the ENTER key


Creating and Editing a Presentation with Clip Art      9
Selecting a Paragraph

• Triple-click the paragraph to select


Creating and Editing a Presentation with Clip Art   10
Italicizing Text

• With the text to italicize selected, click the Italic
  button on the Mini toolbar to italicize that text on
  the slide


Creating and Editing a Presentation with Clip Art     11
Increasing Font Size

• With the text selected, click the Increase Font Size
  button on the Mini toolbar the desired number of
  times to increase the font size of the selected text


Creating and Editing a Presentation with Clip Art    12
Selecting a Word

• Double-click the word to select it


Creating and Editing a Presentation with Clip Art   13
Changing the Text Color

• Select the text, and click the Font Color arrow on
  the Mini toolbar to display the gallery of Theme
  Colors and Standard Colors
• Click the desired color to change the font color
• Click outside the selected text to deselect the
  word


Creating and Editing a Presentation with Clip Art      14
Adding a New Text Slide
with a Bulleted List
• Click Home on the Ribbon to display the Home
  tab
• Click the New Slide button (Home tab | Slides
  group) to insert a new slide with the Title and
  Content layout


Creating and Editing a Presentation with Clip Art   15
Adding a New Text Slide
with a Bulleted List


Creating and Editing a Presentation with Clip Art   16
Typing a Multi-Level Bulleted List

• Click the label, Click to add text, to select the text
  placeholder
• Type the first item in the bulleted list, and then
  press the ENTER key to type the second item
• To create a second-level paragraph, click the
  Increase List Level button (Home tab | Paragraph
  group)
• Click the Decrease List Level button (Home tab |
  Paragraph group) to promote a paragraph
Creating and Editing a Presentation with Clip Art      17
Typing a Multi-Level Bulleted List


Creating and Editing a Presentation with Clip Art   18
Selecting a Group of Words

• Position the mouse pointer immediately to the
  left of the first character of the text to be selected
• Drag the mouse pointer through the last character
  of the text to be selected


Creating and Editing a Presentation with Clip Art     19
Bolding Text

• With the text to bold selected, click the Bold
  button on the Mini toolbar


Creating and Editing a Presentation with Clip Art   20
Adding a Slide with the Title Only Layout

• Click the New Slide arrow (Home tab | Slides
  group) to display the Layout gallery
• Click Title Only to add a new slide and apply that
  layout


Creating and Editing a Presentation with Clip Art      21
Adding a New Slide and Entering a Slide
Title and Headings
• Click the New Slide arrow in the Slides group to
  display the Layout gallery
• Click Comparison
• Type the desired headings in the appropriate
  placeholders


Creating and Editing a Presentation with Clip Art    22
Moving to Another Slide in Normal View

• Position the mouse pointer on the scroll box
• Press and hold down the mouse button and drag
  the scroll box up or down the vertical scroll bar to
  view the different slides
• When you are finished, release the mouse button


Creating and Editing a Presentation with Clip Art   23
Inserting a Clip from the Clip Organizer
into the Title Slide
• Click Insert on the Ribbon to display the Insert tab
• Click the Clip Art button (Insert tab | Images
  group) to display the Clip Art task pane
• Click the Search for text box in the Clip Art task
  pane. If necessary, delete any letters that are
  present and type desired search text for the clip
  art
• If necessary, click the ‘Include Office.com content’
  check box to select it
Creating and Editing a Presentation with Clip Art    24
Inserting a Clip from the Clip Organizer
into the Title Slide
• Click the Go button so that the Microsoft Clip
  Organizer will search for and display all clips
  having the keyword(s)
• If necessary, click the Yes button if a Microsoft Clip
  Organizer dialog box appears asking if you want to
  include additional clip art images from Office.com
• Scroll the list to locate a clip you wish to insert
• Clip the clip to insert it into the slide

Creating and Editing a Presentation with Clip Art     25
Inserting a Clip from the Clip Organizer
into the Title Slide


Creating and Editing a Presentation with Clip Art   26
Inserting a Clip from the Clip Organizer
into a Content Placeholder
• Click the Clip Art icon in the content placeholder
  to select that placeholder and to open the Clip Art
  task pane
• Click the Search for text box in the Clip Art task
  pane, delete any letters that are present, type the
  desired search text in the Search for text box, and
  then click the Go button to search for and display
  all pictures having the keyword(s)
• Scroll the list to locate a clip you wish to insert
• Click the clip to insert it into the slide
Creating and Editing a Presentation with Clip Art   27
Inserting a Clip from the Clip Organizer
into a Content Placeholder


Creating and Editing a Presentation with Clip Art   28
Resizing Clip Art

• Click the clip to select it and display the selection
  rectangle
• Point to the lower-left corner sizing handle on the
  clip so that the mouse pointer changes to a two-
  headed arrow
• Drag the sizing handle diagonally until the clip is
  the desired size
• Release the mouse button

Creating and Editing a Presentation with Clip Art     29
Resizing Clip Art


Creating and Editing a Presentation with Clip Art   30
Moving Clips

• Click the object to select it
• Press and hold down the mouse button and then
  drag the photograph to the desired location


Creating and Editing a Presentation with Clip Art   31
Duplicating a Slide

• With the slide to duplicate selected, click the New
  Slide arrow (Home tab | Slides group) to display
  the layout gallery
• Click Duplicate Selected Slides in the Oriel layout
  gallery to create a duplicate of the slide


Creating and Editing a Presentation with Clip Art   32
Duplicating a Slide


Creating and Editing a Presentation with Clip Art   33
Arranging a Slide

• Drag the slide in the Slides pane to the desired
  location


Creating and Editing a Presentation with Clip Art    34
Deleting Text in a Placeholder

• Position the mouse pointer immediately to the
  left of the first character of the text to be selected
• Drag the mouse pointer through the last character
  of the text to be selected
• Click the Cut button (Home tab | Clipboard group)
  to delete all the selected text


Creating and Editing a Presentation with Clip Art     35
Deleting Text in a Placeholder


Creating and Editing a Presentation with Clip Art   36
Adding a Transition between Slides
• Click the Transitions tab on the Ribbon and then point
  to the More button (Transitions tab | Transition to
  This Slide group)
• Click the More button to expand the Transitions
  gallery
• Click the desired transition in the Transitions gallery
  to apply the transition
• Click the Duration up arrow (Transitions tab | Timing
  group) three times to increase the transition speed
• Click the Preview Transitions button (Transitions tab |
  Preview area) to view the transition and the new
  transition time
Creating and Editing a Presentation with Clip Art      37
Adding a Transition between Slides

• Click the Apply To All button (Transitions tab |
  Timing group) to apply the transition and the
  increased transition time to all slides in the
  presentation


Creating and Editing a Presentation with Clip Art    38
Changing Document Properties
• Click File on the Ribbon to open the Backstage
  view
• If necessary, click the Info tab in the Backstage
  view to display the Info gallery
• Click the Properties button in the right pane of
  the Info gallery to display the Properties menu
• Click Show Document Panel on the Properties
  menu to close the Backstage view and display the
  Document Information Panel in the PowerPoint
  document window
Creating and Editing a Presentation with Clip Art   39
Changing Document Properties

• Type the document properties in the appropriate
  text boxes
• Click the Close the Document Information Panel
  button so that the Document Information Panel
  no longer is displayed


Creating and Editing a Presentation with Clip Art   40
Starting Slide Show View

• Click the Slide 1 thumbnail in the Slides pane to
  select and display Slide 1
• Click the Slide Show button to display the title
  slide


Creating and Editing a Presentation with Clip Art     41
Moving Manually through Slides
in a Slide Show
• Click each slide to move through the slide show
• When the black slide appears with a message
  announcing the end of the slide show, click the
  mouse


Creating and Editing a Presentation with Clip Art   42
Printing a Presentation
• Click File on the Ribbon to open the Backstage view
• Click the Print tab in the Backstage view to display the
  Print gallery
• Verify the printer name that appears on the Printer
  box Status button will print a hard copy of the
  document. If necessary, click the Printer Status
  button to display a list of available printer options
  and then click the desired printer to change the
  currently selected printer
• Click the Print button in the Print gallery to print the
  document on the currently selected printer
• When the printer stops, retrieve the hard copy
Creating and Editing a Presentation with Clip Art       43
Printing a Presentation


Creating and Editing a Presentation with Clip Art   44
Chapter Summary

• Select a document theme
• Create a title slide and a text slide with a multi-
  level bulleted list
• Add new slides and change slide layouts
• Insert clips and pictures into a slide with and
  without a content placeholder
• Move and size clip art


Creating and Editing a Presentation with Clip Art       45
Chapter Summary

•    Change font size and color
•    Bold and italicize text
•    Duplicate a slide
•    Arrange slides
•    Select slide transitions
•    View a presentation in Slide Show view
•    Print a presentation

Creating and Editing a Presentation with Clip Art   46
Microsoft
PowerPoint 2010

 Chapter 1 Complete

PowerPoint Chapter 01

  • 1.
    Microsoft PowerPoint 2010 Chapter 1 Creating and Editing a Presentation with Clip Art
  • 2.
    Objectives • Select adocument theme • Create a title slide and a text slide with a multi- level bulleted list • Add new slides and change slide layouts • Insert clips and pictures into a slide with and without a content placeholder • Move and size clip art Creating and Editing a Presentation with Clip Art 2
  • 3.
    Objectives • Change font size and color • Bold and italicize text • Duplicate a slide • Arrange slides • Select slide transitions • View a presentation in Slide Show view • Print a presentation Creating and Editing a Presentation with Clip Art 3
  • 4.
    Project – Presentationwith Bulleted Lists and Clip Art Creating and Editing a Presentation with Clip Art 4
  • 5.
    General Project Guidelines • Find an appropriate theme • Choose words for each slide • Format specific elements of the text • Determine where to save the presentation • Determine the best method for distributing the presentation Creating and Editing a Presentation with Clip Art 5
  • 6.
    Choosing a DocumentTheme • Click Design on the Ribbon to display the Design tab • Click the More button (Design tab | Themes group) to expand the gallery, which shows more Built-In theme gallery options • Click the theme to apply Creating and Editing a Presentation with Clip Art 6
  • 7.
    Choosing a DocumentTheme Creating and Editing a Presentation with Clip Art 7
  • 8.
    Entering the PresentationTitle • Click the label, Click to add title, located inside the title text placeholder to select the placeholder • Type the desired title in the title text placeholder. Do not press the ENTER key Creating and Editing a Presentation with Clip Art 8
  • 9.
    Entering the Presentation SubtitleParagraph • Click the label, Click to add subtitle, located inside the subtitle text placeholder to select the placeholder • Type the desired subtitle paragraph, but do not press the ENTER key Creating and Editing a Presentation with Clip Art 9
  • 10.
    Selecting a Paragraph •Triple-click the paragraph to select Creating and Editing a Presentation with Clip Art 10
  • 11.
    Italicizing Text • Withthe text to italicize selected, click the Italic button on the Mini toolbar to italicize that text on the slide Creating and Editing a Presentation with Clip Art 11
  • 12.
    Increasing Font Size •With the text selected, click the Increase Font Size button on the Mini toolbar the desired number of times to increase the font size of the selected text Creating and Editing a Presentation with Clip Art 12
  • 13.
    Selecting a Word •Double-click the word to select it Creating and Editing a Presentation with Clip Art 13
  • 14.
    Changing the TextColor • Select the text, and click the Font Color arrow on the Mini toolbar to display the gallery of Theme Colors and Standard Colors • Click the desired color to change the font color • Click outside the selected text to deselect the word Creating and Editing a Presentation with Clip Art 14
  • 15.
    Adding a NewText Slide with a Bulleted List • Click Home on the Ribbon to display the Home tab • Click the New Slide button (Home tab | Slides group) to insert a new slide with the Title and Content layout Creating and Editing a Presentation with Clip Art 15
  • 16.
    Adding a NewText Slide with a Bulleted List Creating and Editing a Presentation with Clip Art 16
  • 17.
    Typing a Multi-LevelBulleted List • Click the label, Click to add text, to select the text placeholder • Type the first item in the bulleted list, and then press the ENTER key to type the second item • To create a second-level paragraph, click the Increase List Level button (Home tab | Paragraph group) • Click the Decrease List Level button (Home tab | Paragraph group) to promote a paragraph Creating and Editing a Presentation with Clip Art 17
  • 18.
    Typing a Multi-LevelBulleted List Creating and Editing a Presentation with Clip Art 18
  • 19.
    Selecting a Groupof Words • Position the mouse pointer immediately to the left of the first character of the text to be selected • Drag the mouse pointer through the last character of the text to be selected Creating and Editing a Presentation with Clip Art 19
  • 20.
    Bolding Text • Withthe text to bold selected, click the Bold button on the Mini toolbar Creating and Editing a Presentation with Clip Art 20
  • 21.
    Adding a Slidewith the Title Only Layout • Click the New Slide arrow (Home tab | Slides group) to display the Layout gallery • Click Title Only to add a new slide and apply that layout Creating and Editing a Presentation with Clip Art 21
  • 22.
    Adding a NewSlide and Entering a Slide Title and Headings • Click the New Slide arrow in the Slides group to display the Layout gallery • Click Comparison • Type the desired headings in the appropriate placeholders Creating and Editing a Presentation with Clip Art 22
  • 23.
    Moving to AnotherSlide in Normal View • Position the mouse pointer on the scroll box • Press and hold down the mouse button and drag the scroll box up or down the vertical scroll bar to view the different slides • When you are finished, release the mouse button Creating and Editing a Presentation with Clip Art 23
  • 24.
    Inserting a Clipfrom the Clip Organizer into the Title Slide • Click Insert on the Ribbon to display the Insert tab • Click the Clip Art button (Insert tab | Images group) to display the Clip Art task pane • Click the Search for text box in the Clip Art task pane. If necessary, delete any letters that are present and type desired search text for the clip art • If necessary, click the ‘Include Office.com content’ check box to select it Creating and Editing a Presentation with Clip Art 24
  • 25.
    Inserting a Clipfrom the Clip Organizer into the Title Slide • Click the Go button so that the Microsoft Clip Organizer will search for and display all clips having the keyword(s) • If necessary, click the Yes button if a Microsoft Clip Organizer dialog box appears asking if you want to include additional clip art images from Office.com • Scroll the list to locate a clip you wish to insert • Clip the clip to insert it into the slide Creating and Editing a Presentation with Clip Art 25
  • 26.
    Inserting a Clipfrom the Clip Organizer into the Title Slide Creating and Editing a Presentation with Clip Art 26
  • 27.
    Inserting a Clipfrom the Clip Organizer into a Content Placeholder • Click the Clip Art icon in the content placeholder to select that placeholder and to open the Clip Art task pane • Click the Search for text box in the Clip Art task pane, delete any letters that are present, type the desired search text in the Search for text box, and then click the Go button to search for and display all pictures having the keyword(s) • Scroll the list to locate a clip you wish to insert • Click the clip to insert it into the slide Creating and Editing a Presentation with Clip Art 27
  • 28.
    Inserting a Clipfrom the Clip Organizer into a Content Placeholder Creating and Editing a Presentation with Clip Art 28
  • 29.
    Resizing Clip Art •Click the clip to select it and display the selection rectangle • Point to the lower-left corner sizing handle on the clip so that the mouse pointer changes to a two- headed arrow • Drag the sizing handle diagonally until the clip is the desired size • Release the mouse button Creating and Editing a Presentation with Clip Art 29
  • 30.
    Resizing Clip Art Creatingand Editing a Presentation with Clip Art 30
  • 31.
    Moving Clips • Clickthe object to select it • Press and hold down the mouse button and then drag the photograph to the desired location Creating and Editing a Presentation with Clip Art 31
  • 32.
    Duplicating a Slide •With the slide to duplicate selected, click the New Slide arrow (Home tab | Slides group) to display the layout gallery • Click Duplicate Selected Slides in the Oriel layout gallery to create a duplicate of the slide Creating and Editing a Presentation with Clip Art 32
  • 33.
    Duplicating a Slide Creatingand Editing a Presentation with Clip Art 33
  • 34.
    Arranging a Slide •Drag the slide in the Slides pane to the desired location Creating and Editing a Presentation with Clip Art 34
  • 35.
    Deleting Text ina Placeholder • Position the mouse pointer immediately to the left of the first character of the text to be selected • Drag the mouse pointer through the last character of the text to be selected • Click the Cut button (Home tab | Clipboard group) to delete all the selected text Creating and Editing a Presentation with Clip Art 35
  • 36.
    Deleting Text ina Placeholder Creating and Editing a Presentation with Clip Art 36
  • 37.
    Adding a Transitionbetween Slides • Click the Transitions tab on the Ribbon and then point to the More button (Transitions tab | Transition to This Slide group) • Click the More button to expand the Transitions gallery • Click the desired transition in the Transitions gallery to apply the transition • Click the Duration up arrow (Transitions tab | Timing group) three times to increase the transition speed • Click the Preview Transitions button (Transitions tab | Preview area) to view the transition and the new transition time Creating and Editing a Presentation with Clip Art 37
  • 38.
    Adding a Transitionbetween Slides • Click the Apply To All button (Transitions tab | Timing group) to apply the transition and the increased transition time to all slides in the presentation Creating and Editing a Presentation with Clip Art 38
  • 39.
    Changing Document Properties •Click File on the Ribbon to open the Backstage view • If necessary, click the Info tab in the Backstage view to display the Info gallery • Click the Properties button in the right pane of the Info gallery to display the Properties menu • Click Show Document Panel on the Properties menu to close the Backstage view and display the Document Information Panel in the PowerPoint document window Creating and Editing a Presentation with Clip Art 39
  • 40.
    Changing Document Properties •Type the document properties in the appropriate text boxes • Click the Close the Document Information Panel button so that the Document Information Panel no longer is displayed Creating and Editing a Presentation with Clip Art 40
  • 41.
    Starting Slide ShowView • Click the Slide 1 thumbnail in the Slides pane to select and display Slide 1 • Click the Slide Show button to display the title slide Creating and Editing a Presentation with Clip Art 41
  • 42.
    Moving Manually throughSlides in a Slide Show • Click each slide to move through the slide show • When the black slide appears with a message announcing the end of the slide show, click the mouse Creating and Editing a Presentation with Clip Art 42
  • 43.
    Printing a Presentation •Click File on the Ribbon to open the Backstage view • Click the Print tab in the Backstage view to display the Print gallery • Verify the printer name that appears on the Printer box Status button will print a hard copy of the document. If necessary, click the Printer Status button to display a list of available printer options and then click the desired printer to change the currently selected printer • Click the Print button in the Print gallery to print the document on the currently selected printer • When the printer stops, retrieve the hard copy Creating and Editing a Presentation with Clip Art 43
  • 44.
    Printing a Presentation Creatingand Editing a Presentation with Clip Art 44
  • 45.
    Chapter Summary • Selecta document theme • Create a title slide and a text slide with a multi- level bulleted list • Add new slides and change slide layouts • Insert clips and pictures into a slide with and without a content placeholder • Move and size clip art Creating and Editing a Presentation with Clip Art 45
  • 46.
    Chapter Summary • Change font size and color • Bold and italicize text • Duplicate a slide • Arrange slides • Select slide transitions • View a presentation in Slide Show view • Print a presentation Creating and Editing a Presentation with Clip Art 46
  • 47.