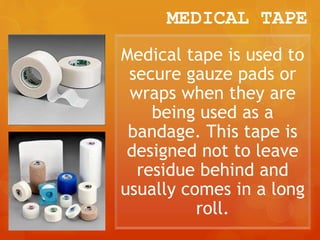
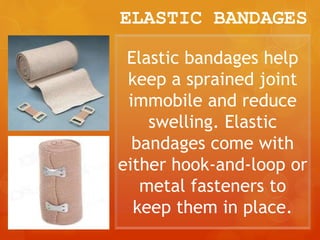
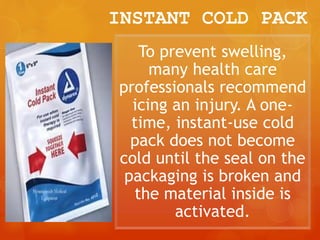
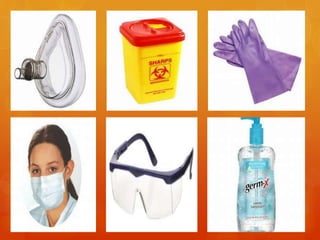
WHAT IS FIRST AID?
The assistance given to an injured or
sick person in need of urgent medical
assistance.
This applies to a broad range of
medical situations and consists both
of specific knowledge and skills
and the ability to assess a situation
and make appropriate decisions.
FIRST AID MANUAL
Every first aid kit
should contain a first
aid manual. The
manual will help you
know how to treat
wounds, sprains, bites,
and other common
health issues.
TWEEZERS
Tweezers are an
important to have in any
first aid kit regardless of
how basic your kit is.
Tweezers can be used to
remove tool debris such
as glass, dirt, or splinters
from a wound. They can
also be used to remove
stingers left behind by
bees.
ANTIBIOTIC OINTMENT
Antibiotic ointment can be
used to treat many types of
conditions and will aid in
the proper healing of the
wound area. Antibiotic
ointment also helps to keep
infection out of the wound
and should be administered
after the injured area has
been thoroughly cleaned.
BANDAGES
Adhesive bandages in
multiple sizes should be
part of a first aid kit.
Traditional size bandages
are needed more often
than the largest and
smallest sizes, so it's a
good idea to add a few
extra of these, just in
case.
GAUZE PADS
Adhesive bandages aren't
always large enough to cover
a wound, which is why it's
crucial to have gauze pads in
a first aid kit. Gauze pads
can be fashioned into a
bandage or used to absorb
blood. Gauze pads come in
many sizes and each kit
should include an
assortment.
MEDICAL TAPE
Medical tape is used to
secure gauze pads or
wraps when they are
being used as a
bandage. This tape is
designed not to leave
residue behind and
usually comes in a long
roll.
ELASTIC BANDAGES
Elastic bandages help
keep a sprained joint
immobile and reduce
swelling. Elastic
bandages come with
either hook-and-loop or
metal fasteners to
keep them in place.
INSTANT COLD PACK
To prevent swelling,
many health care
professionals recommend
icing an injury. A one-
time, instant-use cold
pack does not become
cold until the seal on the
packaging is broken and
the material inside is
activated.
How to Control
Nose Bleeding
1.Sit up straight and tip your head
slightly forward.
2.Use your thumb and forefinger to
firmly pinch the soft part of your nose
shut.
3.Apply an ice pack to your nose and
cheeks. Cold will constrict the blood
vessels and help stop the bleeding.
How to Control Nose
Bleeding
4.Keep pinching for a full 10 minutes. Resist the urge
to peek after a few minutes to see if your nose has
stopped bleeding.
5.Check to see if your nose is still bleeding after 10
minutes. If it is, hold it for 10 more minutes.
6.Put a thin layer of a saline- or water-based nasal
gel, such as NasoGel, or an antiseptic nasal cream
inside your nose. Do not blow your nose or put
anything else inside your nose for at least 12 hours
after the bleeding has stopped.
7.Rest quietly for a few hours.
How to Control Bleeding
Direct
Pressure
Hold
pressure
directly
on the
wound.
How to Control Bleeding
Elevate
Above the
Heart
Elevate
the
wound to
slow
blood
flow.
How to Control Bleeding
Use
Pressure
Points
Pressure
points
should be
between
the
wound
and the
heart.
How to Control Bleeding
Common pressure points:
 Arm between shoulder and
elbow: brachial artery
 Groin area along bikini line:
femoral artery
 Behind the knee: popliteal
artery
COMMON
PRESSURE
POINTS
COMMON
PRESSURE
POINTS
COMMON
PRESSURE
POINTS
How to Control Bleeding
When
Should You
Apply a
Tourniquet?
Tourniquets
should
almost
never be
used.
How to Control Bleeding
Minor Cuts and Scrapes
 Clean It
 Stop the Bleeding
 Cover It
 When to Get the Doctor
Involved?
How to Treat a Burn
Treat it Yourself or Call for Help,
Depending on Severity
1. Flush the burned area with cool
running water for several minutes.
2. Consult the doctor for a severe burn.
3. Apply a burn ointment or spray for
pain.
4. Take ibuprofen or acetaminophen for
pain relief if necessary.
TIPS
1.To understand how deep burns look and
what they do to skin, visit the Gallery of
Burn Pictures.
2.Burns destroy skin and the loss of skin can
lead to infection, dehydration, and
hypothermia (loss of body heat). Make
sure that burn patients get emergency
medical help if experiencing any of the
following:
TIPS
dizziness or confusion
weakness
fever or chills
shivering
cold sweats
3.While the burn is healing, wear loose
natural clothing like silks or light
cottons. Harsher fabrics will irritate
the skin even more.
FIRST
DEGREE
BURN
SECOND
DEGREE
ELECTRICAL
BURN
ROAD RASH
SECOND
DEGREE
GLUE BURN
DEEP
SECOND
DEGREE
BURN
THIRD
DEGREE
BURN
It's Not Like a Car: You Don't
Need a License
The Steps
1. Call an Ambulance
Either call an ambulance yourself or
direct someone else to do it.
2. Push on the chest
Put the heel of your hand directly on
the center of the chest, between the
nipples. Push down about 2 inches (5-
6 cm) at a rate of 100-120/minute,
about 2 pushes per second.
The Steps
2017 HANDS-ONLY CPR
Personal Protective
Equipment
Hand Cleaners Gloves
CPR Masks Face Masks
Eye Protection
Sharps
Container
FIRST AID KIT
Group Activity
Create your own first aid kit.
1.Plan what you will have in your kit.
2.Assign each member to a tool to
bring.
3.In a short bond paper, list the tools
you have and explain why you
choose those tools and what are their
uses.
REFERENCES:
 https://www.overstock.com/guides/top
-10-first-aid-kit-tools
 https://www.verywell.com/personal-
protective-equipment-ppe-1298866
 http://www.webmd.com/first-aid/how-
to-stop-a-
nosebleedhttp://www.webmd.com/firs
t-aid/how-to-stop-a-nosebleed
 https://www.verywell.com/burn-
pictures-4020409

First Aid

  • 3.
    WHAT IS FIRSTAID? The assistance given to an injured or sick person in need of urgent medical assistance. This applies to a broad range of medical situations and consists both of specific knowledge and skills and the ability to assess a situation and make appropriate decisions.
  • 5.
    FIRST AID MANUAL Everyfirst aid kit should contain a first aid manual. The manual will help you know how to treat wounds, sprains, bites, and other common health issues.
  • 6.
    TWEEZERS Tweezers are an importantto have in any first aid kit regardless of how basic your kit is. Tweezers can be used to remove tool debris such as glass, dirt, or splinters from a wound. They can also be used to remove stingers left behind by bees.
  • 7.
    ANTIBIOTIC OINTMENT Antibiotic ointmentcan be used to treat many types of conditions and will aid in the proper healing of the wound area. Antibiotic ointment also helps to keep infection out of the wound and should be administered after the injured area has been thoroughly cleaned.
  • 8.
    BANDAGES Adhesive bandages in multiplesizes should be part of a first aid kit. Traditional size bandages are needed more often than the largest and smallest sizes, so it's a good idea to add a few extra of these, just in case.
  • 9.
    GAUZE PADS Adhesive bandagesaren't always large enough to cover a wound, which is why it's crucial to have gauze pads in a first aid kit. Gauze pads can be fashioned into a bandage or used to absorb blood. Gauze pads come in many sizes and each kit should include an assortment.
  • 10.
    MEDICAL TAPE Medical tapeis used to secure gauze pads or wraps when they are being used as a bandage. This tape is designed not to leave residue behind and usually comes in a long roll.
  • 11.
    ELASTIC BANDAGES Elastic bandageshelp keep a sprained joint immobile and reduce swelling. Elastic bandages come with either hook-and-loop or metal fasteners to keep them in place.
  • 12.
    INSTANT COLD PACK Toprevent swelling, many health care professionals recommend icing an injury. A one- time, instant-use cold pack does not become cold until the seal on the packaging is broken and the material inside is activated.
  • 14.
    How to Control NoseBleeding 1.Sit up straight and tip your head slightly forward. 2.Use your thumb and forefinger to firmly pinch the soft part of your nose shut. 3.Apply an ice pack to your nose and cheeks. Cold will constrict the blood vessels and help stop the bleeding.
  • 15.
    How to ControlNose Bleeding 4.Keep pinching for a full 10 minutes. Resist the urge to peek after a few minutes to see if your nose has stopped bleeding. 5.Check to see if your nose is still bleeding after 10 minutes. If it is, hold it for 10 more minutes. 6.Put a thin layer of a saline- or water-based nasal gel, such as NasoGel, or an antiseptic nasal cream inside your nose. Do not blow your nose or put anything else inside your nose for at least 12 hours after the bleeding has stopped. 7.Rest quietly for a few hours.
  • 16.
    How to ControlBleeding Direct Pressure Hold pressure directly on the wound.
  • 17.
    How to ControlBleeding Elevate Above the Heart Elevate the wound to slow blood flow.
  • 18.
    How to ControlBleeding Use Pressure Points Pressure points should be between the wound and the heart.
  • 19.
    How to ControlBleeding Common pressure points:  Arm between shoulder and elbow: brachial artery  Groin area along bikini line: femoral artery  Behind the knee: popliteal artery
  • 20.
  • 21.
  • 22.
  • 24.
    How to ControlBleeding When Should You Apply a Tourniquet? Tourniquets should almost never be used.
  • 25.
  • 26.
    Minor Cuts andScrapes  Clean It  Stop the Bleeding  Cover It  When to Get the Doctor Involved?
  • 27.
    How to Treata Burn Treat it Yourself or Call for Help, Depending on Severity 1. Flush the burned area with cool running water for several minutes. 2. Consult the doctor for a severe burn. 3. Apply a burn ointment or spray for pain. 4. Take ibuprofen or acetaminophen for pain relief if necessary.
  • 28.
    TIPS 1.To understand howdeep burns look and what they do to skin, visit the Gallery of Burn Pictures. 2.Burns destroy skin and the loss of skin can lead to infection, dehydration, and hypothermia (loss of body heat). Make sure that burn patients get emergency medical help if experiencing any of the following:
  • 29.
    TIPS dizziness or confusion weakness feveror chills shivering cold sweats 3.While the burn is healing, wear loose natural clothing like silks or light cottons. Harsher fabrics will irritate the skin even more.
  • 30.
  • 31.
  • 32.
  • 33.
  • 34.
  • 35.
  • 36.
    It's Not Likea Car: You Don't Need a License
  • 37.
    The Steps 1. Callan Ambulance Either call an ambulance yourself or direct someone else to do it. 2. Push on the chest Put the heel of your hand directly on the center of the chest, between the nipples. Push down about 2 inches (5- 6 cm) at a rate of 100-120/minute, about 2 pushes per second.
  • 38.
  • 39.
  • 40.
    Personal Protective Equipment Hand CleanersGloves CPR Masks Face Masks Eye Protection Sharps Container
  • 43.
    FIRST AID KIT GroupActivity Create your own first aid kit. 1.Plan what you will have in your kit. 2.Assign each member to a tool to bring. 3.In a short bond paper, list the tools you have and explain why you choose those tools and what are their uses.
  • 44.
    REFERENCES:  https://www.overstock.com/guides/top -10-first-aid-kit-tools  https://www.verywell.com/personal- protective-equipment-ppe-1298866 http://www.webmd.com/first-aid/how- to-stop-a- nosebleedhttp://www.webmd.com/firs t-aid/how-to-stop-a-nosebleed  https://www.verywell.com/burn- pictures-4020409