Basic First Aid for Beginners-Africa
• Presented to:
• Scouts of Yei River County
• Presented By:
• Bilazio Angotowa Diaz
• Cert. N, Cert. FA, Dip. MLS, AD HSM
• Health Officer, TRI – SS, South Sudan
Scouts
• The Scouts is an organization for children and
young people which teaches them to be
practical, sensible, and helpful.
• A Scout is a member of the Scouts.
• Scouting provides young people with
opportunities to participate in programs, events,
activities and projects that contribute to their
growth as active citizens.
• Through these initiatives, young people become
agents of positive change who inspire others to
take action.
Outline of the Presentation
• By the end of this Presentation, Participants will
be able to know:
• First Aid and its Aims
• Bandages and bandaging
• Cardio Pulmonary Resuscitation (CPR)
• Bleeding and how to stop it
• Dislocation, sprain, strain and Fracture
• Wounds, Burns and their first aid
• Choking, shock, drowning and their first aid
• Lifting/carrying of causalities
• Snake and Dog Bites
First Aid
•First Aid is the initial assistance given to a
casualty/injured person or sudden ill person
before the arrival of an ambulance, doctor, or
other qualified personnel. Or before the person
is taken to the Hospital/Health Centre.
First Aid is generally performed by the
layperson
•Many people are trained in providing basic
levels of first aid.
Aims of First Aid
• The Four “R”, i.e. to:
• Preserve life
• Prevent the casualty’s condition from
becoming worse
• Promote recovery
• Protect the unconscious
Why do we do First Aid?
• Millions of people are killed from injuries every
year because adequate and timely assistance
is not provided effectively. First Aid reduces
deaths, injuries and impact during disasters and
daily emergencies.
• It provides an immediate response to an
emergency, taking life saving measures until
professional help arrives. Simple first aid skills,
and the confidence to use them, can save lives
and everyone, if properly trained, has the
potential to save lives.
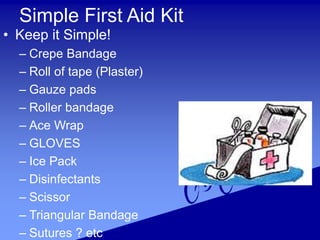
Simple First Aid Kit
• Keep it Simple!
– Crepe Bandage
– Roll of tape (Plaster)
– Gauze pads
– Roller bandage
– Ace Wrap
– GLOVES
– Ice Pack
– Disinfectants
– Scissor
– Triangular Bandage
– Sutures ? etc
History of First Aid
• A battle in northern Italy brought an idea of
First Aid.
• On 24 June 1859, Henry Dunant, a young
Geneva businessman, witnessed suffering
people following the battle of Solferino.
• He mobilized the civilian population, mainly
women and girls, to care for the wounded
irrespective of their role in the conflict.
History of First Aid Cont.
• He secured them with the necessary materials
and supplies and helped in the establishment
of temporary hospitals. His book “A memory of
Solferino” inspired the establishment of the
International Committee of the Red Cross
(ICRC) in 1863.
• Today, the need for humanitarian action is still
as vital as it was in 1859.
History of First Aid Cont…
• Providing first aid services to injured people
was one of the first services provided by the
Red Cross Red Crescent volunteers for over
100 years.
• Now, almost all 187 Red Cross Red Crescent
(RCRC) National Societies (NS) have first aid
as their core activity.
• RCRC National Societies are the major first aid
educator and provider in the world.
History of First Aid Cont.
• Today, there is a growing interest of private and public
sectors in ensuring that their respective employees
and the population at large receive first aid training.
• Due to the awareness on the importance of first aid
techniques knowledge in reducing the consequences
of any type of accident, special attention is
increasingly paid to first aid and prevention.
• The general public should be encouraged to learn first
aid since they are often the first present on the spot
and thus the first link in any survival chain (pre-
hospital care).
Responsibilities of First Aider
• Assess the situation quickly and safely
• Protect casualties and others at the scene
from possible danger
• Identify as far as possible, the nature of
illness/injury/situation affecting casualty.
• To give each casualty early and
appropriate treatment and treating the
most serious condition first.
Responsibilities of First Aider
Cont.
• To arrange for the casualty’s removal to
hospital or Health Centre.
• To remain with a casualty until appropriate
care is available.
• To report your observations to those taking
care of the casualty
• To give further assistance if required.
First Aid Priorities
• Assess the situation quickly and calmly
• Protect yourself and casualties from
danger
• Assess the conditions of all casualties
• Comfort and reassure the casualties
• Deal with any life threatening conditions
first
• Obtain medical aid if necessary
Priority of Causality
• Save the conscious casualties before the
unconscious ones as they have a higher
chance of recovery.
• Save the young before the old.
• Do not jeopardize your own life while rendering
First Aid.
• In the event of immediate danger, get out of site
immediately.
• Remember: One of your aims is to preserve life,
and not endanger your own in the process of
rendering First Aid.
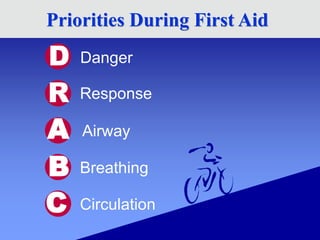
Priorities During First Aid
Danger
Response
Airway
Breathing
Circulation
D
R
A
B
C
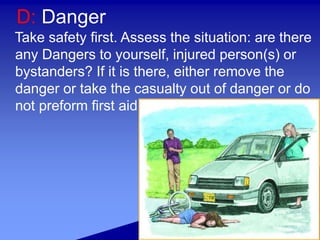
D: Danger
Take safety first. Assess the situation: are there
any Dangers to yourself, injured person(s) or
bystanders? If it is there, either remove the
danger or take the casualty out of danger or do
not preform first aid
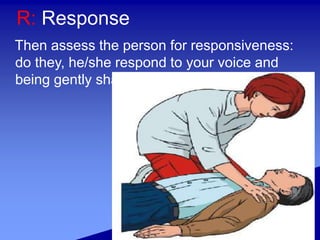
R: Response
Then assess the person for responsiveness:
do they, he/she respond to your voice and
being gently shaken?
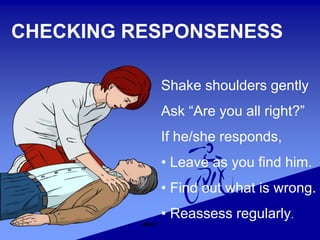
Shake shoulders gently
Ask “Are you all right?”
If he/she responds,
• Leave as you find him.
• Find out what is wrong.
• Reassess regularly.
CHECKING RESPONSENESS
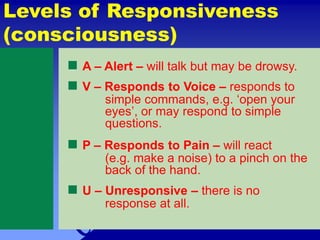
 A – Alert – will talk but may be drowsy.
 V – Responds to Voice – responds to
simple commands, e.g. ‘open your
eyes’, or may respond to simple
questions.
 P – Responds to Pain – will react
(e.g. make a noise) to a pinch on the
back of the hand.
 U – Unresponsive – there is no
response at all.
Levels of Responsiveness
(consciousness)
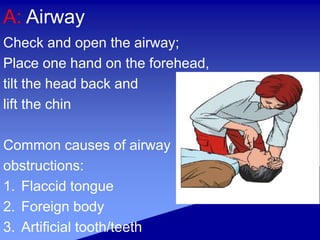
A: Airway
Check and open the airway;
Place one hand on the forehead,
tilt the head back and
lift the chin
Common causes of airway
obstructions:
1. Flaccid tongue
2. Foreign body
3. Artificial tooth/teeth
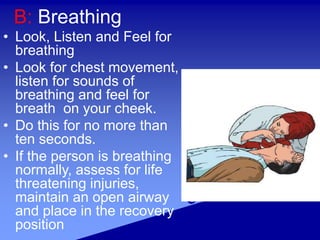
B: Breathing
• Look, Listen and Feel for
breathing
• Look for chest movement,
listen for sounds of
breathing and feel for
breath on your cheek.
• Do this for no more than
ten seconds.
• If the person is breathing
normally, assess for life
threatening injuries,
maintain an open airway
and place in the recovery
position
Breathing Rates
• Average breathing rates:
• Adults:
– 12 – 20 times per minute
• Infants and Children:
– 20 - 30 times per minute
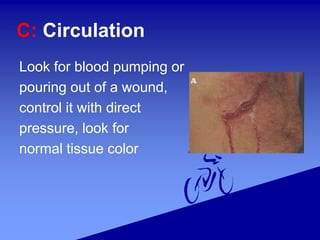
C: Circulation
Look for blood pumping or
pouring out of a wound,
control it with direct
pressure, look for
normal tissue color
Fundamentals of First Aid
• 1. ABC (airway-breathing-circulation)
• 2. Control bleeding
• 3. Treat for Shock (medical emergencies)
• 4. Open wounds & Burns
• 5. Fractures & Dislocations
• 6. Transportation
Cardio Pulmonary Resuscitation (CPR)
• Is a sequences of procedures performed to
restore the circulation of oxygenated blood after
a sudden pulmonary (lungs) and /or cardiac
(heart) arrest
• Or
• Chest compressions and pulmonary ventilation
performed by anyone who knows how to do it,
anywhere, immediately, without any equipment
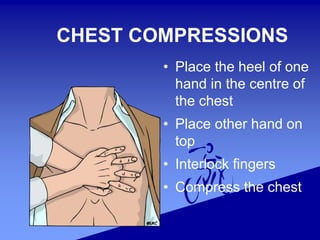
• Place the heel of one
hand in the centre of
the chest
• Place other hand on
top
• Interlock fingers
• Compress the chest
CHEST COMPRESSIONS
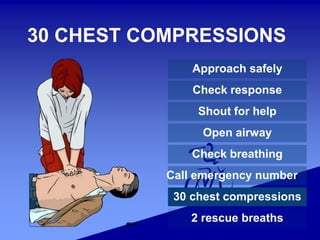
30 CHEST COMPRESSIONS
Approach safely
Check response
Shout for help
Open airway
Check breathing
Call emergency number
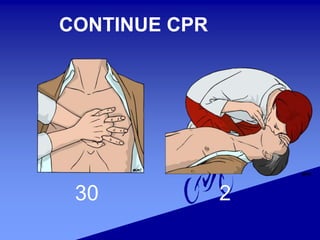
30 chest compressions
2 rescue breaths
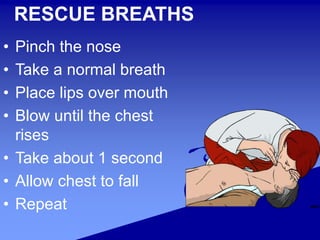
RESCUE BREATHS
• Pinch the nose
• Take a normal breath
• Place lips over mouth
• Blow until the chest
rises
• Take about 1 second
• Allow chest to fall
• Repeat
CONTINUE CPR
30 2
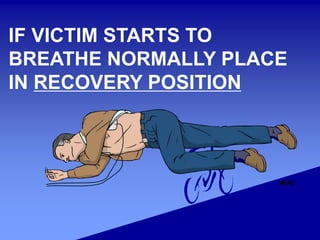
IF VICTIM STARTS TO
BREATHE NORMALLY PLACE
IN RECOVERY POSITION
Procedures for Recovering Position
Emergency Services
• Always Give the Following Information:
• Name and telephone number
• Give exact location
• Type of incident
• Seriousness of incident
• Number of casualties
• Condition of casualties
• Any hazards
• DON'T HANG UP THE PHONE UNTIL YOU ARE
TOLD TO DO SO !
Copyright © Texas Education Agency, 2014. All rights reserved.
23
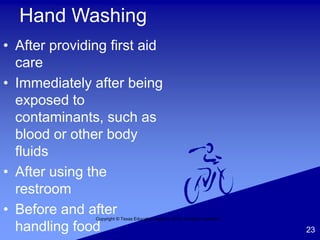
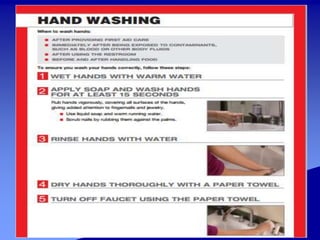
Hand Washing
• After providing first aid
care
• Immediately after being
exposed to
contaminants, such as
blood or other body
fluids
• After using the
restroom
• Before and after
handling food
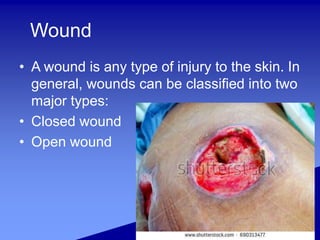
Wound
• A wound is any type of injury to the skin. In
general, wounds can be classified into two
major types:
• Closed wound
• Open wound
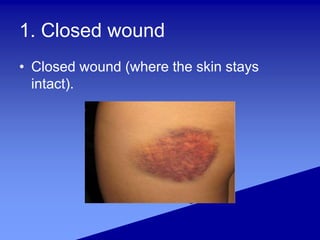
1. Closed wound
• Closed wound (where the skin stays
intact).
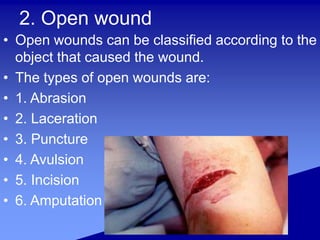
2. Open wound
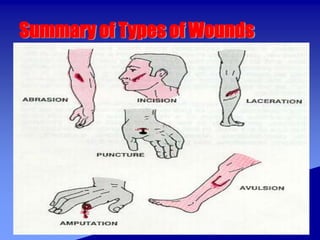
• Open wounds can be classified according to the
object that caused the wound.
• The types of open wounds are:
• 1. Abrasion
• 2. Laceration
• 3. Puncture
• 4. Avulsion
• 5. Incision
• 6. Amputation
1. Abrasion wound
• Abrasions, superficial wounds in which
the topmost layer of the skin (the
epidermis) is rubbed off. Abrasions are
often caused by a sliding fall onto a rough
surface
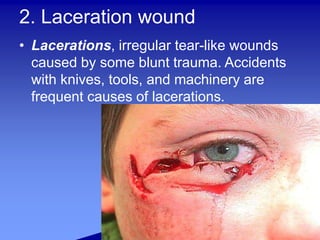
2. Laceration wound
• Lacerations, irregular tear-like wounds
caused by some blunt trauma. Accidents
with knives, tools, and machinery are
frequent causes of lacerations.
3. Puncture/Penetrating wound
• A puncture is caused by a long, pointed object,
such as a nail, needle. Sometimes, a bullet can
cause a puncture wound. Punctures may not
bleed much, but these wounds can be deep
enough to damage internal organs. If you have
a puncture wound, visit your doctor to get a
tetanus vaccine to prevent infection.
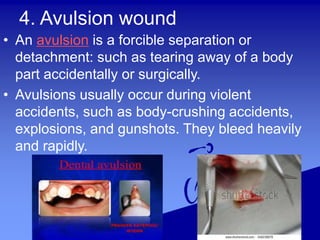
4. Avulsion wound
• An avulsion is a forcible separation or
detachment: such as tearing away of a body
part accidentally or surgically.
• Avulsions usually occur during violent
accidents, such as body-crushing accidents,
explosions, and gunshots. They bleed heavily
and rapidly.
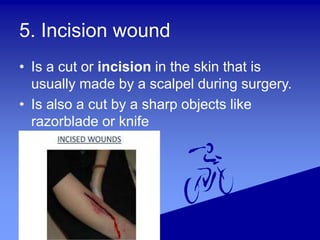
5. Incision wound
• Is a cut or incision in the skin that is
usually made by a scalpel during surgery.
• Is also a cut by a sharp objects like
razorblade or knife
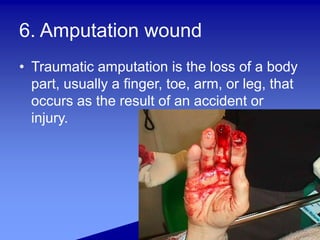
6. Amputation wound
• Traumatic amputation is the loss of a body
part, usually a finger, toe, arm, or leg, that
occurs as the result of an accident or
injury.
First Aid for Wounds
• Rinse the wound with water
• Apply direct pressure if there is bleeding using
bandage/clean cloth.
• If blood soaks through the bandage/cloth,
place another over the first and keep applying
pressure.
• Raise the injured body or part to slow bleeding.
• When bleeding stops, cover the wound with a
bandage/cloth
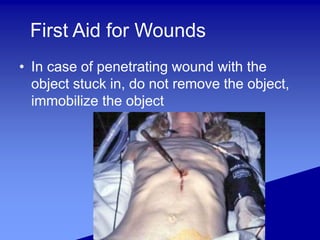
First Aid for Wounds
• In case of penetrating wound with the
object stuck in, do not remove the object,
immobilize the object
Summary of Types of Wounds
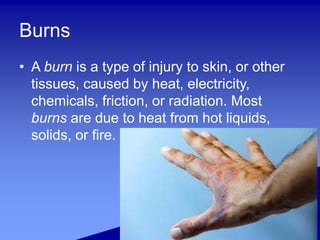
Burns
• A burn is a type of injury to skin, or other
tissues, caused by heat, electricity,
chemicals, friction, or radiation. Most
burns are due to heat from hot liquids,
solids, or fire.
Types of Burns
• There are three primary types of burns:
• First degree
• second degree
• Third-degree
• Each degree is based on the severity of
damage to the skin, with first-degree being the
most minor and third-degree being the most
severe.
Types of Burn cont. ..
• first-degree burns: red, non blistered skin
• second-degree burns: blisters and some
thickening of the skin
• Third-degree burns: widespread thickness
with a white, leathery appearance
• There are also fourth-degree burns. This
type of burn includes all of the symptoms
of a third-degree burn and also extends
beyond the skin into tendons and bones.
Complications
• Third-degree burns carry the most risk for
complications such as:
• Infections
• Blood loss
• Shock which could lead to death
• At the same time, all burns carry the risk of
infections because bacteria can enter
broken skin.
First aid for Burns:
• Cool the burn.
• Immerse in cool water until pain subsides.
• Protect burn.
• Cover with sterile, non-adhesive bandage
or clean cloth. ...
• Transport to the hospital/health center
Bandage and Bandaging
A bandage is a piece of cloth or other
material used to bind or wrap a
diseased or injured part of the body.
Uses of Bandages
 Applying pressure to bleeding wounds.
 Covering wounds and burns.
 Provides support and immobilization for
broken bones, strains and sprains.
 Secures a splint to an injured part of the
body
Bandages
• Holds a dressing in place over a wound
• Creates pressure that controls bleeding
• Helps keep the edges of the wound closed
• Secures a splint to an injured part of the
body
• Provides support for an injured part of the
body
55
Types of Bandages
• 1. Ordinary/Gauze Bandages
• It is used to support dressing material on a
wound
2. Triangular Bandages
 Can be used as a cold compress or for padding
when they are made into a pad.
 When folded up they can be used to provide
support or pressure.
 When unfolded they can be used as a support
sling or cover bandage.
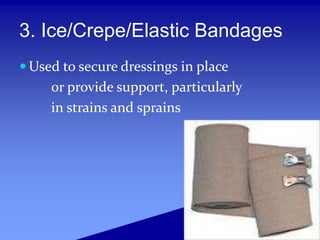
3. Ice/Crepe/Elastic Bandages
 Used to secure dressings in place
or provide support, particularly
in strains and sprains
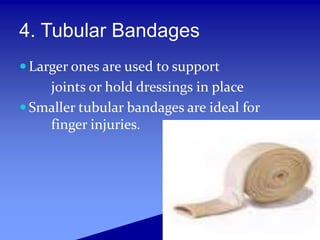
4. Tubular Bandages
 Larger ones are used to support
joints or hold dressings in place
 Smaller tubular bandages are ideal for
finger injuries.
BANDAGES
TYPES OF BANDAGES
• ROLLER BANDAGES
Differ in sizes, material
(cotton, gauze)
• Elasticity (non/elastic
roller bandage)
• TRIANGULAR
BANDAGES
Consist of base, point
and
ends
ADHESIVE TAPE
Often use to secure
bandages in place,
different types (paper,
dermatologic etc.)
ADHESIVE STRIPS
Used for small cuts,
combination of a
dressing
and a bandage
General Principles of Bandaging:
• Work with the injured person, explaining what
you are doing.
• Work in front of the injured person where
possible and from the injured side if you can.
• Bandage firmly over bleeding and securely
over broken bones, but not so tight as to
compromise circulation below the site of the
injury.
General Principles of Bandaging
cont. …
• Be aware that most injuries swell—check
regularly to ensure that the bandage is
still comfortable. Also check that the
bandage remains firmly secured,
particularly if the injured person has to
move, as movement can loosen the
bandage.
• Secure bandages with tape, clips, a bow,
or a square knot.
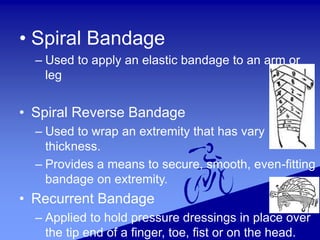
• Spiral Bandage
– Used to apply an elastic bandage to an arm or
leg
• Spiral Reverse Bandage
– Used to wrap an extremity that has vary
thickness.
– Provides a means to secure, smooth, even-fitting
bandage on extremity.
• Recurrent Bandage
– Applied to hold pressure dressings in place over
the tip end of a finger, toe, fist or on the head.
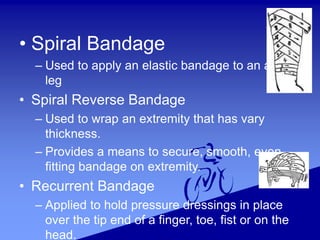
• Spiral Bandage
– Used to apply an elastic bandage to an arm or
leg
• Spiral Reverse Bandage
– Used to wrap an extremity that has vary
thickness.
– Provides a means to secure, smooth, even-
fitting bandage on extremity.
• Recurrent Bandage
– Applied to hold pressure dressings in place
over the tip end of a finger, toe, fist or on the
head.
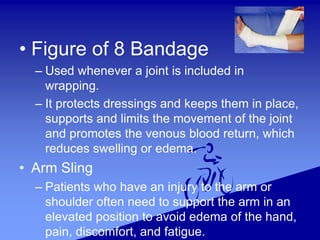
• Figure of 8 Bandage
– Used whenever a joint is included in
wrapping.
– It protects dressings and keeps them in place,
supports and limits the movement of the joint
and promotes the venous blood return, which
reduces swelling or edema.
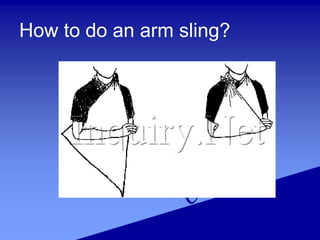
• Arm Sling
– Patients who have an injury to the arm or
shoulder often need to support the arm in an
elevated position to avoid edema of the hand,
pain, discomfort, and fatigue.
How to do an arm sling?
1. Put one end of the triangle over the shoulder
on the uninjured side.
2. Place the point(apex) of the triangle toward the
elbow.
3. Bring the other end over the injures arm and
shoulder.
4. Tie the two ends with a square knot.
5. Fold the apex of the triangle neatly over the
elbow toward the front.
6. Check the circulation in the fingers frequently.
How to do an arm sling?
Blood
• The red liquid that circulates in the arteries
and veins of humans and other vertebrate
animals, carrying oxygen to and carbon
dioxide from the tissues of the body.
Types of Blood and its functions
• Blood consists of:
1. Plasma
• Fluids
–Contains antibodies and nutrients
2. Cells
• Red blood cells (RBCs) = Erythrocytes
–Responsible for carrying Oxygen and
nutrients to tissues
–Carry cellular waste products away from
tissues
Types of Blood and its functions
cont.….
• White blood cells (WBCs) =
Leucocytes
–Responsible for fighting against
infections
• Platelets = Thrombocytes
–Responsible for blood clothing
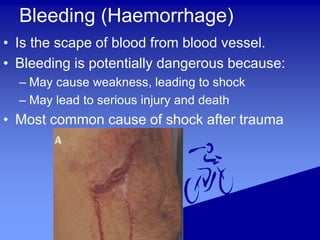
Bleeding (Haemorrhage)
• Is the scape of blood from blood vessel.
• Bleeding is potentially dangerous because:
– May cause weakness, leading to shock
– May lead to serious injury and death
• Most common cause of shock after trauma
Types of Bleeding (Haemorrhge)
• Hemorrhage: Bleeding
1. External hemorrhage usually controlled by:
• Direct pressure
• Pressure bandage
2. Internal hemorrhage is usually only controlled
by surgery.
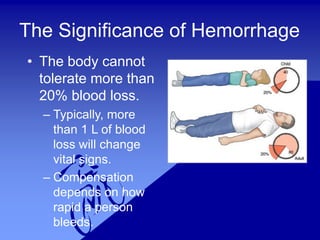
The Significance of Hemorrhage
• The body cannot
tolerate more than
20% blood loss.
– Typically, more
than 1 L of blood
loss will change
vital signs.
– Compensation
depends on how
rapid a person
bleeds.
Bleeding from Blood Vessels
• Bleeding from an open artery is bright red
and spurting.
• Bleeding from open veins is darker and
flowing.
• Bleeding from damaged capillary vessels
is dark red and oozing.
How to stop Bleeding
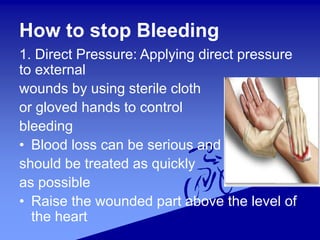
1. Direct Pressure: Applying direct pressure
to external
wounds by using sterile cloth
or gloved hands to control
bleeding
• Blood loss can be serious and
should be treated as quickly
as possible
• Raise the wounded part above the level of
the heart
How to stop Bleeding cont. ..
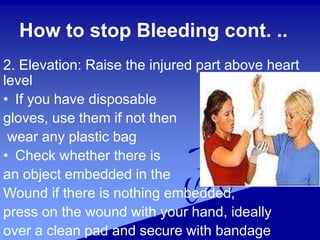
2. Elevation: Raise the injured part above heart
level
• If you have disposable
gloves, use them if not then
wear any plastic bag
• Check whether there is
an object embedded in the
Wound if there is nothing embedded,
press on the wound with your hand, ideally
over a clean pad and secure with bandage
How to stop Bleeding cont. ..
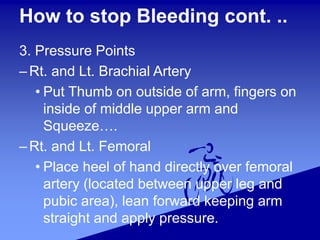
3. Pressure Points
–Rt. and Lt. Brachial Artery
• Put Thumb on outside of arm, fingers on
inside of middle upper arm and
Squeeze….
–Rt. and Lt. Femoral
• Place heel of hand directly over femoral
artery (located between upper leg and
pubic area), lean forward keeping arm
straight and apply pressure.
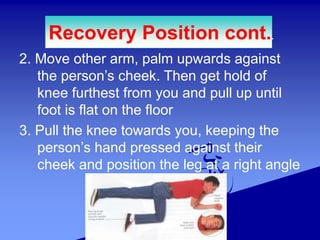
Recovery Position
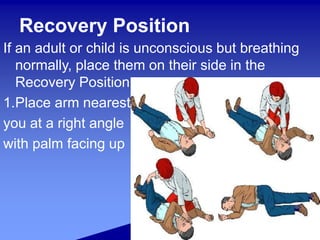
If an adult or child is unconscious but breathing
normally, place them on their side in the
Recovery Position.
1.Place arm nearest
you at a right angle
with palm facing up
2. Move other arm, palm upwards against
the person’s cheek. Then get hold of
knee furthest from you and pull up until
foot is flat on the floor
3. Pull the knee towards you, keeping the
person’s hand pressed against their
cheek and position the leg at a right angle
Recovery Position cont..
Sprain and Strain
• A sprain is a stretching or tearing of
ligaments or other structures in a joint.
• Strain is an injury to a muscle (tear in
tendon) in which the muscle fibers tear as
a result of over-stretching.
Sprainand StrainTechnique
• R. I.C.E.
• R = rest
• I = ice
• C = compress
• E = elevate
Sprainand StrainTechnique
• A sprain is a stretching or tearing of
ligaments or other structures in a joint.
• A strain is a stretching or tearing of muscle
or tendon.
• Common injury sites include the shoulder,
elbow, finger, hip and ankle.
• Mild sprains and strains will usually heal
within 2 weeks.
• If a sprain remains swollen and painful for
several days, consult a physician.
First Aid for Sprain and Strain
• Rest and do not put weight on the injured part
• Apply an ice pack wrapped in a thin moist cloth
for 20 minutes, 3-4 times a day for the first 2-3
days
• Wrap an elastic bandage around the injury to
control swelling
• Wrap in an upward spiral, overlapping with
each turn
First Aid for Sprain and Strain
• Apply the bandage not so tightly that it
cuts off circulation and causes the person
to lose sensation beyond the injury
• Check for sensation, warmth and color
before and after applying the compression
bandage
• Raise the injured area above the heart, if it
does not increase the pain
Dislocation
• A dislocation occurs when a bone slips out
of a joint. For example, the top of your arm
bone fits into a joint at your shoulder.
When it slips or pops out of that joint, you
have a dislocated shoulder. You can
dislocate almost any joint in your body,
including your knee, hip, ankle, or
shoulder.
Dislocation
• The most common dislocations occur in
the shoulder, elbow, finger, or thumb.
• LOOK FOR THESE SIGNS:
1. swelling
2. deformed look
3. pain and tenderness
4. possible discoloration of the affected
area
FIRST AID FOR DISLOCATION
•
1. Apply a splint to the joint to keep it from
moving.
2. Try to keep joint elevated to slow blood
flow to the area
3. A doctor should be contacted to have
the bone set back into its socket.
Fracture
• A fracture is a break or crack of a bone
•
TYPES OF A FRUCTURE
• All bone fractures, regardless of cause,
are classified into two major types:
• 1. Closed (Simple) and
• 2. Open (Compound) fractures:
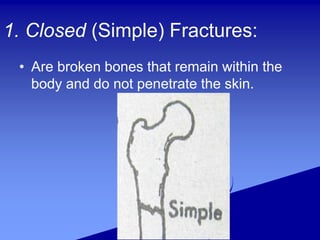
1. Closed (Simple) Fractures:
• Are broken bones that remain within the
body and do not penetrate the skin.
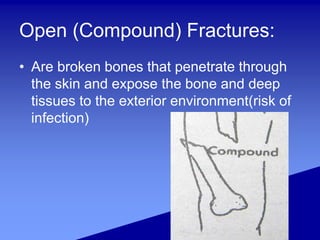
Open (Compound) Fractures:
• Are broken bones that penetrate through
the skin and expose the bone and deep
tissues to the exterior environment(risk of
infection)
Other types of Fractures
• Comminuted fractures are severe fractures
that involve the breaking of a bone into several
smaller pieces.
• Greenstick fractures are breaks in bones
along only one side of the bone caused by a
force perpendicular to the bone’s long axis.
Greenstick fractures are seen only in children
whose developing bones are more flexible than
adult bones and therefore tend to bend and
only partially break instead of breaking
completely.
Other types of Fractures cont.
• Bone fractures may occur at many different
angles depending on the direction in which a
force is applied to a bone.
• Transverse fractures form perpendicular to
the long axis of a bone and are the result of a
force applied at a right angle to the bone.
• Oblique fractures are slanted fractures that
occur when a force is applied at any angle
other than a right angle to the bone.
• Spiral fractures are the result of an extreme
twisting force being exerted on a bone.
SIGNS
- local bruising and tenderness in the
affected area
- skin stretch marks
- localized swelling
- forming hematomas
- pain
- impaired function
FIRST AID TREATMENT
- stop any bleeding
- immobilize the injured area (a splint)
- apply ice pack to limit swelling
- help relive pain
- treat for shock (head slightly lower than
the trunk, elevate legs)
- call emergency or transport to the hospital
or health facility
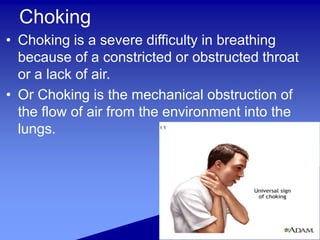
Choking
• Choking is a severe difficulty in breathing
because of a constricted or obstructed throat
or a lack of air.
• Or Choking is the mechanical obstruction of
the flow of air from the environment into the
lungs.
CAUSES:
• Introduction of foreign object into airway,
which becomes stuck
• Respiratory diseases
• Compression of airway (e.g. Strangling)
Recognition of choking
• A person cannot Breathe
• A person cannot Speak
• A person cannot Cough
• A person may Clutch Throat
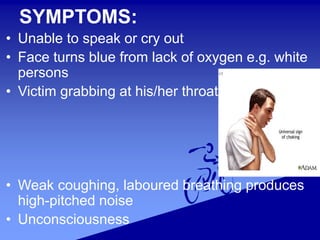
SYMPTOMS:
• Unable to speak or cry out
• Face turns blue from lack of oxygen e.g. white
persons
• Victim grabbing at his/her throat
• Weak coughing, laboured breathing produces
high-pitched noise
• Unconsciousness
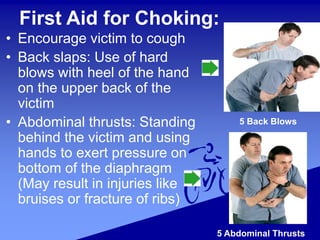
First Aid for Choking:
• Encourage victim to cough
• Back slaps: Use of hard
blows with heel of the hand
on the upper back of the
victim
• Abdominal thrusts: Standing
behind the victim and using
hands to exert pressure on
bottom of the diaphragm
(May result in injuries like
bruises or fracture of ribs)
5 Back Blows
5 Abdominal Thrusts