Downloaded 1,097 times
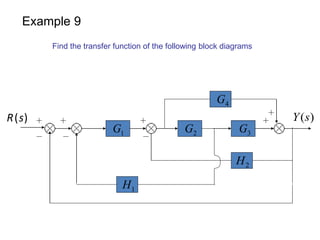
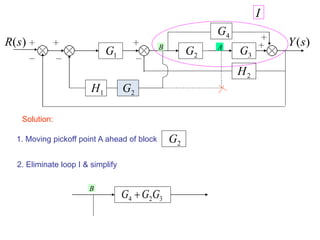
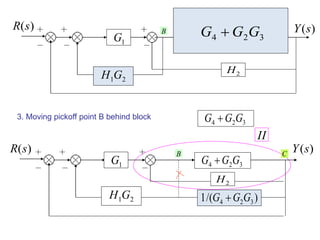
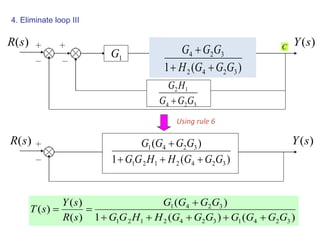
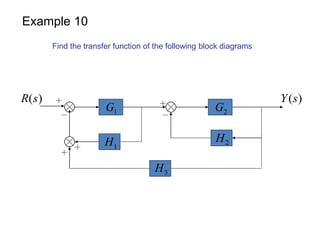
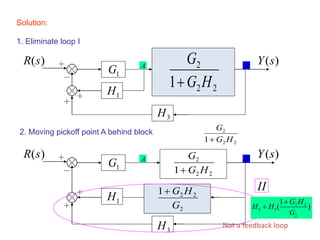
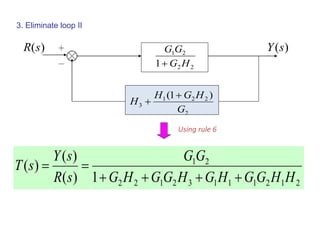
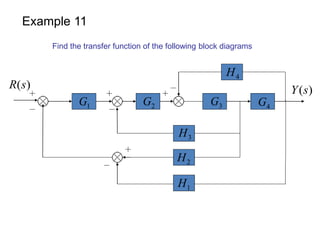

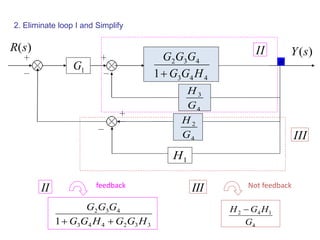
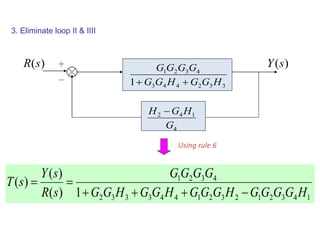
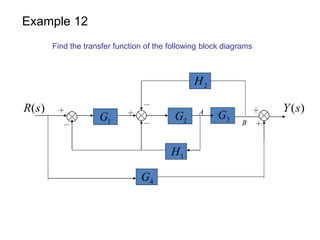
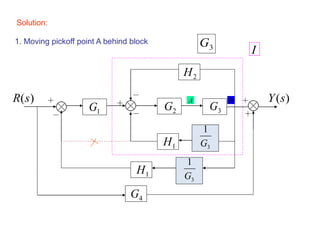
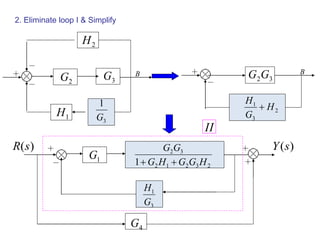
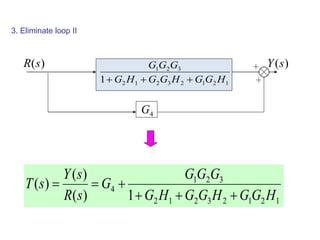

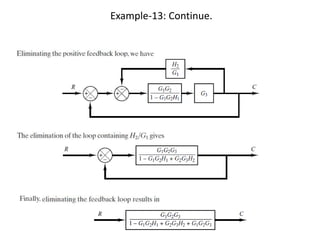
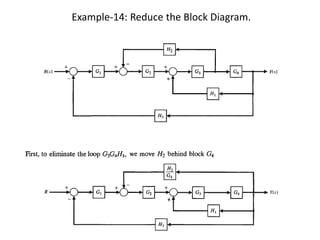
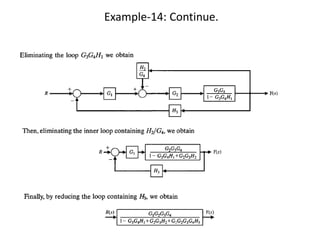
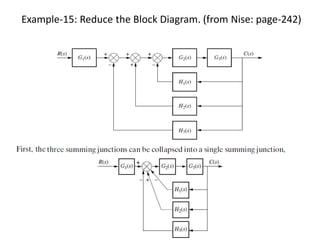
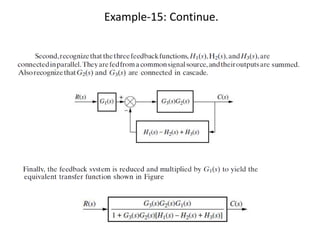
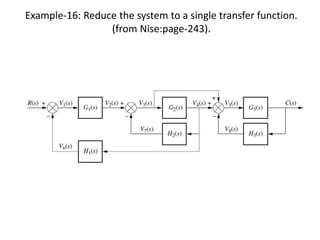
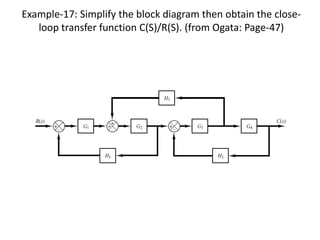
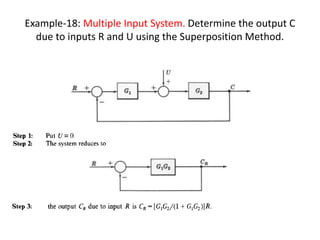
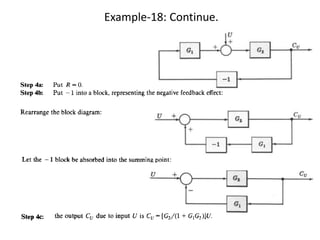
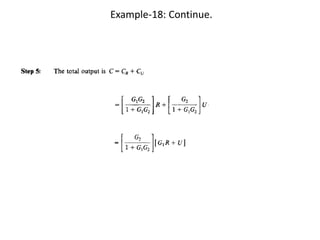
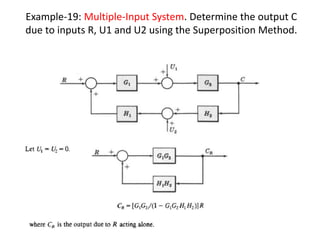
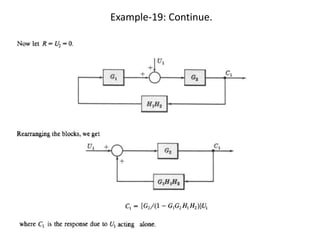
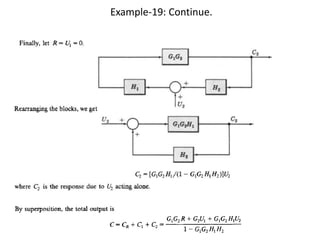
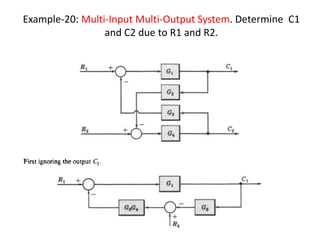
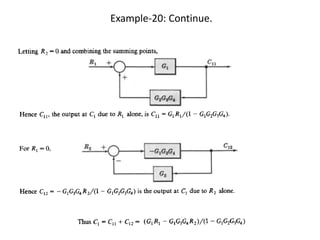
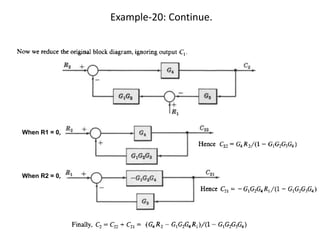
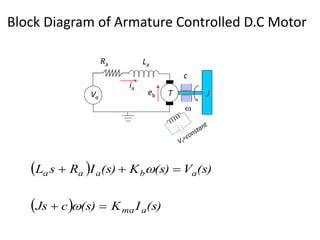
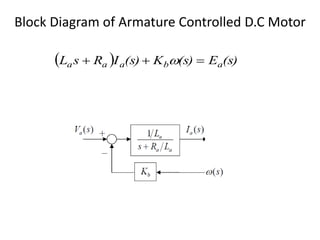
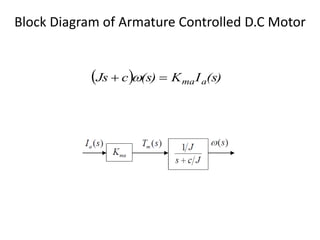
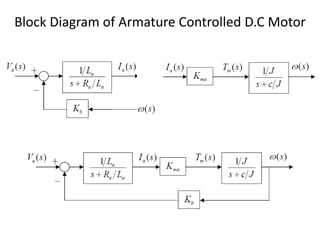
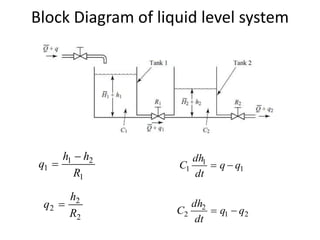
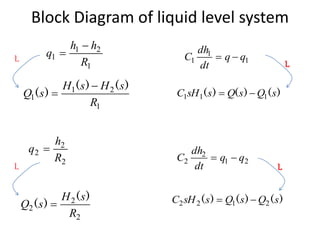

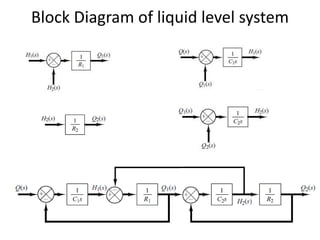


The document provides examples of block diagram reduction techniques. It begins with 12 examples showing the step-by-step process of reducing block diagrams to obtain transfer functions. It then provides block diagram examples of an armature controlled DC motor and a liquid level system. The examples illustrate techniques for moving pickoff points, eliminating feedback loops, and applying rules to reduce block diagrams to single transfer functions.


![Reduction of multiple subsystem [compatibility mode]](https://cdn.slidesharecdn.com/ss_thumbnails/reductionofmultiplesubsystemcompatibilitymode-110418075355-phpapp01-thumbnail.jpg?width=640&height=640&fit=bounds)