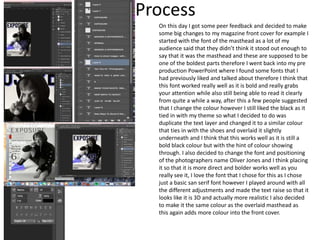
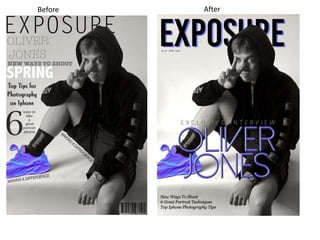
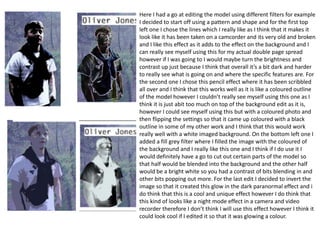
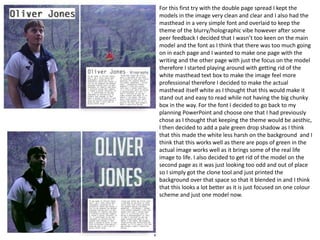
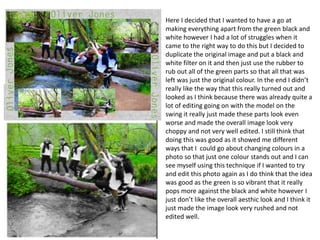
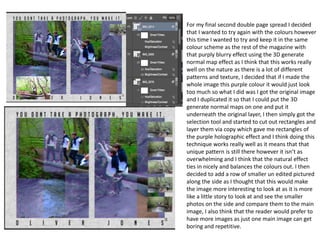
SlideShare a Scribd company logo
1 of 10
Production Reflection
Amy Foster
Process
For the first week of production I started by creating backgrounds and having a go at making the mast head I also decided to start writing the
text in my pre production PowerPoint so that when it comes to actually putting everything on the pages I can just copy and paste all the
writing into it. Next week I plan on getting more parts finished as I am not shooting my actual photographs until the week after therefore I
want to get all the other bits that I can do done so that I can just focus on the actual image itself and the editing so that I am not wasting time
waiting for my photos, however I don’t know how well my shoot is going to go therefore I am keeping it still quite open and not putting
everything completely together yet.
So I will be using this for my masthead I think as I think that it really fits in with my theme and it
looks good however it does the job and is clear and wont draw too much attention from the
actually important stuff. To create this I used my pre production PowerPoint to find the font I
wanted from Dafont.com and really like it as it still goes with the calligraphy theme that I said I
wanted in the text however it is still clear and looks mature and sophisticated while also
attracting my younger audience. Once I had installed the font onto the computer I then went
into Photoshop and typed in my masthead and originally I liked the way it looked just from the
font itself however I couldn’t decide on a colour so then I decided why don’t I make it so like is
white with a darker shadowed outline so then I started playing around with the different
adjustments and I decided to add drop shadows along with a stroke and I then chose the colour
to be no fill so that the background/ photograph would seep through as I think that it would
blend and merge better, after I decided that I wanted it to look thicker and abit bolder so I then
duplicated it and layered it on top but moved the copy slightly down abit so that it created a
more blurry and hand written effect.
I decided to start creating a background pattern which I found inspiration for from
my research PowerPoint. To create this I simple created 2 different layers and
decided to add a grey colour scheme to the first layer then on the next layer I got
the pencil tool and started drawing squiggles to create this messy hand drawn
pattern effect. I really like the way that it turned out and I think that this will work
well inside my magazine in a double page spread
Process • Today I decided to start working on the front cover
and I took this photo at home with a blank white
photography screen that I have I also had this large
light up mirror that I decided to use to get as much
light on the model as possible. For the editing of
just the photo itself I went through lots of different
types of black and white to try and find which type
of black and white I prefer, I found this hard as I
wanted the models jumper and outfit to be a harsh
black and white against the background but when I
edited it it changed the background colour so it
wasn’t as bright so in the end I decided to just cut
the model out and layer via copy so that I could
keep the background colour. When it came to the
shoe edit it took me a long time to really decide
what I wanted to do therefore I decided to look at
some of research PowerPoint to get inspiration and
once I decided that I wanted to make the shoe a
bright colour I then found this technique of adding
a 3D generate normal map which makes certain
layers this cool iridescent effect. Once I had done
the shoe in this pattern I decided to get the smudge
tool and really zoom into the shoe to try and make
it look as realistic as possible. I think that this
worked really well and I can see myself using this
editing in the future. I think moving forward I would
quite like to see another part of the magazine cover
in this same colour effect as I think the rest of the
magazine is quite life less.
Process
• Today I worked on my first double page spread and I went for
this glitched double effect, I think that this works well as it is
still a minimalist vibe while also still being interesting to look at
and enjoy. First off I worked on the initial picture where I cut
out the two people using the magnetic lasso tool and then
layered them via copy, with the left over picture I decided to
add some filters and for this effect I went into filter at the top
then into 3D and then into generate normal map , after I had
added this effect I then duplicated the image so that I could
turn the opacity right down and place the duplicated photo on
top but slightly more to the side so that it creates a blurred/
glitchy effect. Once I had the colours and effects that I desired
therefore I think I then went to the opacity in photoshop and
turned it right down so that it didn’t come across too edited
and in your face, after I had decided to cut the models out and
put them into separate layers I then went back and played with
the different settings to make the people stand out brighter
and make them appeal more clear and not as harsh against the
edited background. I then decided to add the white box so that
I could add the text and it would be easier to read, to do this I
simply select the rectangle box tool and added one and then
filled it with white, originally the box looked a lot harsher than I
wanted therefore I decided to add a drop shadow to make the
edges of it darker so that it fits in more and I really like this
effect as I think that it makes the box look more realistic and
more like a text box.
Process
On this day I got some peer feedback and decided to make
some big changes to my magazine front cover for example I
started with the font of the masthead as a lot of my
audience said that they didn’t think it stood out enough to
say that it was the masthead and these are supposed to be
one of the boldest parts therefore I went back into my pre
production PowerPoint where I found some fonts that I
had previously liked and talked about therefore I think that
this font worked really well as it is bold and really grabs
your attention while also still being able to read it clearly
from quite a while a way, after this a few people suggested
that I change the colour however I still liked the black as it
tied in with my theme so what I decided to do was
duplicate the text layer and changed it to a similar colour
that ties in with the shoes and overlaid it slightly
underneath and I think that this works well as it is still a
bold black colour but with the hint of colour showing
through. I also decided to change the font and positioning
of the photographers name Oliver Jones and I think placing
it so that it is more direct and bolder works well as you
really see it, I love the font that I chose for this as I chose
just a basic san serif font however I played around with all
the different adjustments and made the text raise so that it
looks like it is 3D and actually more realistic I also decided
to make it the same colour as the overlaid masthead as
this again adds more colour into the front cover.
Before After
Here I had a go at editing the model using different filters for example
I decided to start off using a pattern and shape and for the first top
left one I chose the lines which I really like as I think that it makes it
look like it has been taken on a camcorder and its very old and broken
and I like this effect as it adds to the effect on the background and I
can really see myself using this for my actual double page spread
however if I was going to I would maybe turn the brightness and
contrast up just because I think that overall it’s a bit dark and harder
to really see what is going on and where the specific features are. For
the second one I chose this pencil effect where it has been scribbled
all over and I think that this works well as it is like a coloured outline
of the model however I couldn’t really see myself using this one as I
think it is just abit too much on top of the background edit as it is,
however I could see myself using this but with a coloured photo and
then flipping the settings so that it came up coloured with a black
outline in some of my other work and I think that this would work
really well with a white imaged background. On the bottom left one I
added a fill grey filter where I filled the image with the coloured of
the background and I really like this one and I think if I do use it I
would definitely have a go to cut out certain parts of the model so
that half would be blended into the background and the other half
would be a bright white so you had a contrast of bits blending in and
other bits popping out more. For the last edit I decided to invert the
image so that it created this glow in the dark paranormal effect and i
do think that this is a cool and unique effect however I do think that
this kind of looks like a night mode effect in a camera and video
recorder therefore I don’t think I will use this effect however I think it
could look cool if I edited it so that it was glowing a colour.
For this first try with the double page spread I kept the
models in the image very clean and clear and I also had the
masthead in a very simple font and overlaid to keep the
theme of the blurry/holographic vibe however after some
peer feedback I decided that I wasn’t too keen on the main
model and the font as I think that there was too much going
on in each page and I wanted to make one page with the
writing and the other page with just the focus on the model
therefore I started playing around with getting rid of the
white masthead text box to make the image feel more
professional therefore I decided to make the actual
masthead itself white as I thought that this would make it
stand out and easy to read while not having the big chunky
box in the way. For the font I decided to go back to my
planning PowerPoint and choose one that I had previously
chose as I thought that keeping the theme would be aesthic,
I then decided to add a pale green drop shadow as I think
that this made the white less harsh on the background and I
think that this works well as there are pops of green in the
actual image works well as it brings some of the real life
image to life. I also decided to get rid of the model on the
second page as it was just looking too odd and out of place
so I simply got the clone tool and just printed the
background over that space so that it blended in and I think
that this looks a lot better as it is just focused on one colour
scheme and just one model now.
Here I decided that I wanted to have a go at
making everything apart from the green black and
white however I had a lot of struggles when it
came to the right way to do this but I decided to
duplicate the original image and put a black and
white filter on it and then just use the rubber to
rub out all of the green parts so that all that was
left was just the original colour. In the end I didn’t
really like the way that this really turned out and
looked as I think because there was already quite a
lot of editing going on with the model on the
swing it really just made these parts look even
worse and made the overall image look very
choppy and not very well edited. I still think that
doing this was good as it showed me different
ways that I could go about changing colours in a
photo so that just one colour stands out and I can
see myself using this technique if I wanted to try
and edit this photo again as I do think that the idea
was good as the green is so vibrant that it really
pops more against the black and white however I
just don’t like the overall aesthic look and I think it
just made the image look very rushed and not
edited well.
For my final second double page spread I decided
that I wanted to try again with the colours however
this time I wanted to try and keep it in the same
colour scheme as the rest of the magazine with
that purply blurry effect using the 3D generate
normal map effect as I think that this works really
well on the nature as there is a lot of different
patterns and texture, I decided that if I made the
whole image this purple colour it would just look
too much so what I did was I got the original image
and I duplicated it so that I could put the 3D
generate normal maps on one and put it
underneath the original layer, I then simply got the
selection tool and started to cut out rectangles and
layer them via copy which gave me rectangles of
the purple holographic effect and I think doing this
technique works really well as it means that that
unique pattern is still there however it isn’t as
overwhelming and I think that the natural effect
ties in nicely and balances the colours out. I then
decided to add a row of smaller un edited pictured
along the side as I thought that this would make
the image more interesting to look at as it is more
like a little story to look at and see the smaller
photos on the side and compare them to the main
image, I also think that the reader would prefer to
have more images as just one main image can get
boring and repetitive.

More Related Content

What's hot

On going evaluations.pptx2.
On going evaluations.pptx2.On going evaluations.pptx2.
On going evaluations.pptx2.em-monsey
 
College Magazine Evaluation
College Magazine EvaluationCollege Magazine Evaluation
College Magazine Evaluationhollypeacock
 
5. pre production (1)
5. pre production (1)5. pre production (1)
5. pre production (1)Sumiah Rose
 
Production reflection - print project
Production reflection - print projectProduction reflection - print project
Production reflection - print projectJoyLucyBuck
 
Reflective Diaries
Reflective DiariesReflective Diaries
Reflective DiariesSimran Jabbal
 
Production Reflection
Production Reflection Production Reflection
Production Reflection Simran Jabbal
 
Fmp evaluation
Fmp evaluationFmp evaluation
Fmp evaluationstefan hughes
 
Development of front cover
Development of front coverDevelopment of front cover
Development of front coverimogenlaw12
 
6. Production Reflection
6. Production Reflection6. Production Reflection
6. Production ReflectionLeon Boyce
 
Evaluation
Evaluation Evaluation
Evaluation OliviaBolt
 
Print screens for the construction of my front cover, contents and double pag...
Print screens for the construction of my front cover, contents and double pag...Print screens for the construction of my front cover, contents and double pag...
Print screens for the construction of my front cover, contents and double pag...brontesullivan14
 
6. fmp production reflection
6. fmp production reflection6. fmp production reflection
6. fmp production reflectionJamescooperabel1
 
Experimental Photography Evaluations (with improvements)
Experimental Photography Evaluations (with improvements)Experimental Photography Evaluations (with improvements)
Experimental Photography Evaluations (with improvements)cloestead
 
Experimental Photography Evaluations
Experimental Photography Evaluations Experimental Photography Evaluations
Experimental Photography Evaluations cloestead
 
On going evaluations
On going evaluationsOn going evaluations
On going evaluationsem-monsey
 
Production reflection
Production reflectionProduction reflection
Production reflectionAbbie Nicholls
 
4. production experiments(1) (1)
4. production experiments(1) (1)4. production experiments(1) (1)
4. production experiments(1) (1)Emma Garthwaite
 
Reflection
ReflectionReflection
ReflectionAJ
 

What's hot (20)

On going evaluations.pptx2.
On going evaluations.pptx2.On going evaluations.pptx2.
On going evaluations.pptx2.
 
Main evaluation
Main evaluationMain evaluation
Main evaluation
 
Main evaluation
Main evaluationMain evaluation
Main evaluation
 
College Magazine Evaluation
College Magazine EvaluationCollege Magazine Evaluation
College Magazine Evaluation
 
5. pre production (1)
5. pre production (1)5. pre production (1)
5. pre production (1)
 
Production reflection - print project
Production reflection - print projectProduction reflection - print project
Production reflection - print project
 
Reflective Diaries
Reflective DiariesReflective Diaries
Reflective Diaries
 
Production Reflection
Production Reflection Production Reflection
Production Reflection
 
Fmp evaluation
Fmp evaluationFmp evaluation
Fmp evaluation
 
Development of front cover
Development of front coverDevelopment of front cover
Development of front cover
 
6. Production Reflection
6. Production Reflection6. Production Reflection
6. Production Reflection
 
Evaluation
Evaluation Evaluation
Evaluation
 
Print screens for the construction of my front cover, contents and double pag...
Print screens for the construction of my front cover, contents and double pag...Print screens for the construction of my front cover, contents and double pag...
Print screens for the construction of my front cover, contents and double pag...
 
6. fmp production reflection
6. fmp production reflection6. fmp production reflection
6. fmp production reflection
 
Experimental Photography Evaluations (with improvements)
Experimental Photography Evaluations (with improvements)Experimental Photography Evaluations (with improvements)
Experimental Photography Evaluations (with improvements)
 
Experimental Photography Evaluations
Experimental Photography Evaluations Experimental Photography Evaluations
Experimental Photography Evaluations
 
On going evaluations
On going evaluationsOn going evaluations
On going evaluations
 
Production reflection
Production reflectionProduction reflection
Production reflection
 
4. production experiments(1) (1)
4. production experiments(1) (1)4. production experiments(1) (1)
4. production experiments(1) (1)
 
Reflection
ReflectionReflection
Reflection
 

Similar to 6. production reflection (1)

6. production reflection
6. production reflection6. production reflection
6. production reflectionfin sedgwick
 
6. production reflection(3)
6. production reflection(3)6. production reflection(3)
6. production reflection(3)jessicacrosland
 
Construction
ConstructionConstruction
Constructionsalaffina
 
3. experiments finished
3. experiments finished3. experiments finished
3. experiments finishedamy foster
 
Production reflectios
Production reflectiosProduction reflectios
Production reflectiosLouis Fitton
 
Construction
ConstructionConstruction
Constructionsalaffina
 
Development pro forma
Development pro formaDevelopment pro forma
Development pro formaemma_crampton
 
Task 2A evaluation photography
Task 2A  evaluation photographyTask 2A  evaluation photography
Task 2A evaluation photographygaetan lundula
 
4. production experiments(1)
4. production experiments(1)4. production experiments(1)
4. production experiments(1)fin sedgwick
 
4. production experiments(1)
4. production experiments(1)4. production experiments(1)
4. production experiments(1)fin sedgwick
 
Production diary
Production diaryProduction diary
Production diaryfintansedgwick
 
6. production reflection (fmp)
6. production reflection (fmp)6. production reflection (fmp)
6. production reflection (fmp)jessicacrosland
 
3. fmp production experiments
3. fmp production experiments3. fmp production experiments
3. fmp production experimentschrislaw34
 
Fanzine process
Fanzine processFanzine process
Fanzine processOlivia Groom
 
Post production.pptx
Post production.pptxPost production.pptx
Post production.pptxlydiajudge
 
Fmp ps
Fmp psFmp ps
Fmp psTom Batty
 
Production Reflection
Production ReflectionProduction Reflection
Production ReflectionImogen Minto
 
Digital graphics evaluation pro forma
Digital graphics evaluation pro formaDigital graphics evaluation pro forma
Digital graphics evaluation pro formaBen Clayton
 

Similar to 6. production reflection (1) (20)

6. production reflection
6. production reflection6. production reflection
6. production reflection
 
6. production reflection(3)
6. production reflection(3)6. production reflection(3)
6. production reflection(3)
 
Construction
ConstructionConstruction
Construction
 
3. experiments finished
3. experiments finished3. experiments finished
3. experiments finished
 
Production reflectios
Production reflectiosProduction reflectios
Production reflectios
 
Construction
ConstructionConstruction
Construction
 
Production Process
Production ProcessProduction Process
Production Process
 
Development pro forma
Development pro formaDevelopment pro forma
Development pro forma
 
Task 2A evaluation photography
Task 2A  evaluation photographyTask 2A  evaluation photography
Task 2A evaluation photography
 
4. production experiments(1)
4. production experiments(1)4. production experiments(1)
4. production experiments(1)
 
4. production experiments(1)
4. production experiments(1)4. production experiments(1)
4. production experiments(1)
 
Production diary
Production diaryProduction diary
Production diary
 
6. production reflection (fmp)
6. production reflection (fmp)6. production reflection (fmp)
6. production reflection (fmp)
 
3. fmp production experiments
3. fmp production experiments3. fmp production experiments
3. fmp production experiments
 
Fanzine process
Fanzine processFanzine process
Fanzine process
 
Post production.pptx
Post production.pptxPost production.pptx
Post production.pptx
 
Skills development
Skills developmentSkills development
Skills development
 
Fmp ps
Fmp psFmp ps
Fmp ps
 
Production Reflection
Production ReflectionProduction Reflection
Production Reflection
 
Digital graphics evaluation pro forma
Digital graphics evaluation pro formaDigital graphics evaluation pro forma
Digital graphics evaluation pro forma
 

More from amy foster

Essay research (4)
Essay research (4)Essay research (4)
Essay research (4)amy foster
 
Evaulation (1)
Evaulation (1)Evaulation (1)
Evaulation (1)amy foster
 
Dslr workshop camera audit form blank 20
Dslr workshop camera audit form blank 20Dslr workshop camera audit form blank 20
Dslr workshop camera audit form blank 20amy foster
 
Planning
PlanningPlanning
Planningamy foster
 
Essay research (4)
Essay research (4)Essay research (4)
Essay research (4)amy foster
 
Essay pt2
Essay pt2Essay pt2
Essay pt2amy foster
 
Researchfmpcopy 190611085118
Researchfmpcopy 190611085118Researchfmpcopy 190611085118
Researchfmpcopy 190611085118amy foster
 
Fmpproposal1 190501141411-190611090437
Fmpproposal1 190501141411-190611090437Fmpproposal1 190501141411-190611090437
Fmpproposal1 190501141411-190611090437amy foster
 
Researchfmpcopy 190611085118
Researchfmpcopy 190611085118Researchfmpcopy 190611085118
Researchfmpcopy 190611085118amy foster
 
5. evaluation(1) fin
5. evaluation(1) fin5. evaluation(1) fin
5. evaluation(1) finamy foster
 
4. pre production(1)
4. pre production(1)4. pre production(1)
4. pre production(1)amy foster
 
Fmpproposal1 190501141411
Fmpproposal1 190501141411Fmpproposal1 190501141411
Fmpproposal1 190501141411amy foster
 
Research fmp copy
Research fmp copyResearch fmp copy
Research fmp copyamy foster
 
4. pre production(1)
4. pre production(1)4. pre production(1)
4. pre production(1)amy foster
 
Fmp proposal (1)
Fmp proposal (1)Fmp proposal (1)
Fmp proposal (1)amy foster
 
1. initial plans(2) (1) finished
1. initial plans(2) (1) finished1. initial plans(2) (1) finished
1. initial plans(2) (1) finishedamy foster
 
Fmp proposal (1)
Fmp proposal (1)Fmp proposal (1)
Fmp proposal (1)amy foster
 
1. initial plans(2)
1. initial plans(2)1. initial plans(2)
1. initial plans(2)amy foster
 
7. evaluation
7. evaluation7. evaluation
7. evaluationamy foster
 
6. production reflection
6. production reflection6. production reflection
6. production reflectionamy foster
 

More from amy foster (20)

Essay research (4)
Essay research (4)Essay research (4)
Essay research (4)
 
Evaulation (1)
Evaulation (1)Evaulation (1)
Evaulation (1)
 
Dslr workshop camera audit form blank 20
Dslr workshop camera audit form blank 20Dslr workshop camera audit form blank 20
Dslr workshop camera audit form blank 20
 
Planning
PlanningPlanning
Planning
 
Essay research (4)
Essay research (4)Essay research (4)
Essay research (4)
 
Essay pt2
Essay pt2Essay pt2
Essay pt2
 
Researchfmpcopy 190611085118
Researchfmpcopy 190611085118Researchfmpcopy 190611085118
Researchfmpcopy 190611085118
 
Fmpproposal1 190501141411-190611090437
Fmpproposal1 190501141411-190611090437Fmpproposal1 190501141411-190611090437
Fmpproposal1 190501141411-190611090437
 
Researchfmpcopy 190611085118
Researchfmpcopy 190611085118Researchfmpcopy 190611085118
Researchfmpcopy 190611085118
 
5. evaluation(1) fin
5. evaluation(1) fin5. evaluation(1) fin
5. evaluation(1) fin
 
4. pre production(1)
4. pre production(1)4. pre production(1)
4. pre production(1)
 
Fmpproposal1 190501141411
Fmpproposal1 190501141411Fmpproposal1 190501141411
Fmpproposal1 190501141411
 
Research fmp copy
Research fmp copyResearch fmp copy
Research fmp copy
 
4. pre production(1)
4. pre production(1)4. pre production(1)
4. pre production(1)
 
Fmp proposal (1)
Fmp proposal (1)Fmp proposal (1)
Fmp proposal (1)
 
1. initial plans(2) (1) finished
1. initial plans(2) (1) finished1. initial plans(2) (1) finished
1. initial plans(2) (1) finished
 
Fmp proposal (1)
Fmp proposal (1)Fmp proposal (1)
Fmp proposal (1)
 
1. initial plans(2)
1. initial plans(2)1. initial plans(2)
1. initial plans(2)
 
7. evaluation
7. evaluation7. evaluation
7. evaluation
 
6. production reflection
6. production reflection6. production reflection
6. production reflection
 

Recently uploaded

ENGLISH 7_Q4_LESSON 2_ Employing a Variety of Strategies for Effective Interp...
ENGLISH 7_Q4_LESSON 2_ Employing a Variety of Strategies for Effective Interp...ENGLISH 7_Q4_LESSON 2_ Employing a Variety of Strategies for Effective Interp...
ENGLISH 7_Q4_LESSON 2_ Employing a Variety of Strategies for Effective Interp...JhezDiaz1
 
Planning a health career 4th Quarter.pptx
Planning a health career 4th Quarter.pptxPlanning a health career 4th Quarter.pptx
Planning a health career 4th Quarter.pptxLigayaBacuel1
 
Solving Puzzles Benefits Everyone (English).pptx
Solving Puzzles Benefits Everyone (English).pptxSolving Puzzles Benefits Everyone (English).pptx
Solving Puzzles Benefits Everyone (English).pptxOH TEIK BIN
 
Employee wellbeing at the workplace.pptx
Employee wellbeing at the workplace.pptxEmployee wellbeing at the workplace.pptx
Employee wellbeing at the workplace.pptxNirmalaLoungPoorunde1
 
Romantic Opera MUSIC FOR GRADE NINE pptx
Romantic Opera MUSIC FOR GRADE NINE pptxRomantic Opera MUSIC FOR GRADE NINE pptx
Romantic Opera MUSIC FOR GRADE NINE pptxsqpmdrvczh
 
ENGLISH6-Q4-W3.pptxqurter our high choom
ENGLISH6-Q4-W3.pptxqurter our high choomENGLISH6-Q4-W3.pptxqurter our high choom
ENGLISH6-Q4-W3.pptxqurter our high choomnelietumpap1
 
ACC 2024 Chronicles. Cardiology. Exam.pdf
ACC 2024 Chronicles. Cardiology. Exam.pdfACC 2024 Chronicles. Cardiology. Exam.pdf
ACC 2024 Chronicles. Cardiology. Exam.pdfSpandanaRallapalli
 
Atmosphere science 7 quarter 4 .........
Atmosphere science 7 quarter 4 .........Atmosphere science 7 quarter 4 .........
Atmosphere science 7 quarter 4 .........LeaCamillePacle
 
EPANDING THE CONTENT OF AN OUTLINE using notes.pptx
EPANDING THE CONTENT OF AN OUTLINE using notes.pptxEPANDING THE CONTENT OF AN OUTLINE using notes.pptx
EPANDING THE CONTENT OF AN OUTLINE using notes.pptxRaymartEstabillo3
 
Alper Gobel In Media Res Media Component
Alper Gobel In Media Res Media ComponentAlper Gobel In Media Res Media Component
Alper Gobel In Media Res Media ComponentInMediaRes1
 
Crayon Activity Handout For the Crayon A
Crayon Activity Handout For the Crayon ACrayon Activity Handout For the Crayon A
Crayon Activity Handout For the Crayon AUnboundStockton
 
Quarter 4 Peace-education.pptx Catch Up Friday
Quarter 4 Peace-education.pptx Catch Up FridayQuarter 4 Peace-education.pptx Catch Up Friday
Quarter 4 Peace-education.pptx Catch Up FridayMakMakNepo
 
Like-prefer-love -hate+verb+ing & silent letters & citizenship text.pdf
Like-prefer-love -hate+verb+ing & silent letters & citizenship text.pdfLike-prefer-love -hate+verb+ing & silent letters & citizenship text.pdf
Like-prefer-love -hate+verb+ing & silent letters & citizenship text.pdfMr Bounab Samir
 
ROOT CAUSE ANALYSIS PowerPoint Presentation
ROOT CAUSE ANALYSIS PowerPoint PresentationROOT CAUSE ANALYSIS PowerPoint Presentation
ROOT CAUSE ANALYSIS PowerPoint PresentationAadityaSharma884161
 
Judging the Relevance and worth of ideas part 2.pptx
Judging the Relevance  and worth of ideas part 2.pptxJudging the Relevance  and worth of ideas part 2.pptx
Judging the Relevance and worth of ideas part 2.pptxSherlyMaeNeri
 
DATA STRUCTURE AND ALGORITHM for beginners
DATA STRUCTURE AND ALGORITHM for beginnersDATA STRUCTURE AND ALGORITHM for beginners
DATA STRUCTURE AND ALGORITHM for beginnersSabitha Banu
 
Keynote by Prof. Wurzer at Nordex about IP-design
Keynote by Prof. Wurzer at Nordex about IP-designKeynote by Prof. Wurzer at Nordex about IP-design
Keynote by Prof. Wurzer at Nordex about IP-designMIPLM
 

Recently uploaded (20)

ENGLISH 7_Q4_LESSON 2_ Employing a Variety of Strategies for Effective Interp...
ENGLISH 7_Q4_LESSON 2_ Employing a Variety of Strategies for Effective Interp...ENGLISH 7_Q4_LESSON 2_ Employing a Variety of Strategies for Effective Interp...
ENGLISH 7_Q4_LESSON 2_ Employing a Variety of Strategies for Effective Interp...
 
Planning a health career 4th Quarter.pptx
Planning a health career 4th Quarter.pptxPlanning a health career 4th Quarter.pptx
Planning a health career 4th Quarter.pptx
 
Solving Puzzles Benefits Everyone (English).pptx
Solving Puzzles Benefits Everyone (English).pptxSolving Puzzles Benefits Everyone (English).pptx
Solving Puzzles Benefits Everyone (English).pptx
 
Employee wellbeing at the workplace.pptx
Employee wellbeing at the workplace.pptxEmployee wellbeing at the workplace.pptx
Employee wellbeing at the workplace.pptx
 
Romantic Opera MUSIC FOR GRADE NINE pptx
Romantic Opera MUSIC FOR GRADE NINE pptxRomantic Opera MUSIC FOR GRADE NINE pptx
Romantic Opera MUSIC FOR GRADE NINE pptx
 
Raw materials used in Herbal Cosmetics.pptx
Raw materials used in Herbal Cosmetics.pptxRaw materials used in Herbal Cosmetics.pptx
Raw materials used in Herbal Cosmetics.pptx
 
ENGLISH6-Q4-W3.pptxqurter our high choom
ENGLISH6-Q4-W3.pptxqurter our high choomENGLISH6-Q4-W3.pptxqurter our high choom
ENGLISH6-Q4-W3.pptxqurter our high choom
 
ACC 2024 Chronicles. Cardiology. Exam.pdf
ACC 2024 Chronicles. Cardiology. Exam.pdfACC 2024 Chronicles. Cardiology. Exam.pdf
ACC 2024 Chronicles. Cardiology. Exam.pdf
 
TataKelola dan KamSiber Kecerdasan Buatan v022.pdf
TataKelola dan KamSiber Kecerdasan Buatan v022.pdfTataKelola dan KamSiber Kecerdasan Buatan v022.pdf
TataKelola dan KamSiber Kecerdasan Buatan v022.pdf
 
Atmosphere science 7 quarter 4 .........
Atmosphere science 7 quarter 4 .........Atmosphere science 7 quarter 4 .........
Atmosphere science 7 quarter 4 .........
 
EPANDING THE CONTENT OF AN OUTLINE using notes.pptx
EPANDING THE CONTENT OF AN OUTLINE using notes.pptxEPANDING THE CONTENT OF AN OUTLINE using notes.pptx
EPANDING THE CONTENT OF AN OUTLINE using notes.pptx
 
Model Call Girl in Tilak Nagar Delhi reach out to us at 🔝9953056974🔝
Model Call Girl in Tilak Nagar Delhi reach out to us at 🔝9953056974🔝Model Call Girl in Tilak Nagar Delhi reach out to us at 🔝9953056974🔝
Model Call Girl in Tilak Nagar Delhi reach out to us at 🔝9953056974🔝
 
Alper Gobel In Media Res Media Component
Alper Gobel In Media Res Media ComponentAlper Gobel In Media Res Media Component
Alper Gobel In Media Res Media Component
 
Crayon Activity Handout For the Crayon A
Crayon Activity Handout For the Crayon ACrayon Activity Handout For the Crayon A
Crayon Activity Handout For the Crayon A
 
Quarter 4 Peace-education.pptx Catch Up Friday
Quarter 4 Peace-education.pptx Catch Up FridayQuarter 4 Peace-education.pptx Catch Up Friday
Quarter 4 Peace-education.pptx Catch Up Friday
 
Like-prefer-love -hate+verb+ing & silent letters & citizenship text.pdf
Like-prefer-love -hate+verb+ing & silent letters & citizenship text.pdfLike-prefer-love -hate+verb+ing & silent letters & citizenship text.pdf
Like-prefer-love -hate+verb+ing & silent letters & citizenship text.pdf
 
ROOT CAUSE ANALYSIS PowerPoint Presentation
ROOT CAUSE ANALYSIS PowerPoint PresentationROOT CAUSE ANALYSIS PowerPoint Presentation
ROOT CAUSE ANALYSIS PowerPoint Presentation
 
Judging the Relevance and worth of ideas part 2.pptx
Judging the Relevance  and worth of ideas part 2.pptxJudging the Relevance  and worth of ideas part 2.pptx
Judging the Relevance and worth of ideas part 2.pptx
 
DATA STRUCTURE AND ALGORITHM for beginners
DATA STRUCTURE AND ALGORITHM for beginnersDATA STRUCTURE AND ALGORITHM for beginners
DATA STRUCTURE AND ALGORITHM for beginners
 
Keynote by Prof. Wurzer at Nordex about IP-design
Keynote by Prof. Wurzer at Nordex about IP-designKeynote by Prof. Wurzer at Nordex about IP-design
Keynote by Prof. Wurzer at Nordex about IP-design
 

6. production reflection (1)

  • 2. Process For the first week of production I started by creating backgrounds and having a go at making the mast head I also decided to start writing the text in my pre production PowerPoint so that when it comes to actually putting everything on the pages I can just copy and paste all the writing into it. Next week I plan on getting more parts finished as I am not shooting my actual photographs until the week after therefore I want to get all the other bits that I can do done so that I can just focus on the actual image itself and the editing so that I am not wasting time waiting for my photos, however I don’t know how well my shoot is going to go therefore I am keeping it still quite open and not putting everything completely together yet. So I will be using this for my masthead I think as I think that it really fits in with my theme and it looks good however it does the job and is clear and wont draw too much attention from the actually important stuff. To create this I used my pre production PowerPoint to find the font I wanted from Dafont.com and really like it as it still goes with the calligraphy theme that I said I wanted in the text however it is still clear and looks mature and sophisticated while also attracting my younger audience. Once I had installed the font onto the computer I then went into Photoshop and typed in my masthead and originally I liked the way it looked just from the font itself however I couldn’t decide on a colour so then I decided why don’t I make it so like is white with a darker shadowed outline so then I started playing around with the different adjustments and I decided to add drop shadows along with a stroke and I then chose the colour to be no fill so that the background/ photograph would seep through as I think that it would blend and merge better, after I decided that I wanted it to look thicker and abit bolder so I then duplicated it and layered it on top but moved the copy slightly down abit so that it created a more blurry and hand written effect. I decided to start creating a background pattern which I found inspiration for from my research PowerPoint. To create this I simple created 2 different layers and decided to add a grey colour scheme to the first layer then on the next layer I got the pencil tool and started drawing squiggles to create this messy hand drawn pattern effect. I really like the way that it turned out and I think that this will work well inside my magazine in a double page spread
  • 3. Process • Today I decided to start working on the front cover and I took this photo at home with a blank white photography screen that I have I also had this large light up mirror that I decided to use to get as much light on the model as possible. For the editing of just the photo itself I went through lots of different types of black and white to try and find which type of black and white I prefer, I found this hard as I wanted the models jumper and outfit to be a harsh black and white against the background but when I edited it it changed the background colour so it wasn’t as bright so in the end I decided to just cut the model out and layer via copy so that I could keep the background colour. When it came to the shoe edit it took me a long time to really decide what I wanted to do therefore I decided to look at some of research PowerPoint to get inspiration and once I decided that I wanted to make the shoe a bright colour I then found this technique of adding a 3D generate normal map which makes certain layers this cool iridescent effect. Once I had done the shoe in this pattern I decided to get the smudge tool and really zoom into the shoe to try and make it look as realistic as possible. I think that this worked really well and I can see myself using this editing in the future. I think moving forward I would quite like to see another part of the magazine cover in this same colour effect as I think the rest of the magazine is quite life less.
  • 4. Process • Today I worked on my first double page spread and I went for this glitched double effect, I think that this works well as it is still a minimalist vibe while also still being interesting to look at and enjoy. First off I worked on the initial picture where I cut out the two people using the magnetic lasso tool and then layered them via copy, with the left over picture I decided to add some filters and for this effect I went into filter at the top then into 3D and then into generate normal map , after I had added this effect I then duplicated the image so that I could turn the opacity right down and place the duplicated photo on top but slightly more to the side so that it creates a blurred/ glitchy effect. Once I had the colours and effects that I desired therefore I think I then went to the opacity in photoshop and turned it right down so that it didn’t come across too edited and in your face, after I had decided to cut the models out and put them into separate layers I then went back and played with the different settings to make the people stand out brighter and make them appeal more clear and not as harsh against the edited background. I then decided to add the white box so that I could add the text and it would be easier to read, to do this I simply select the rectangle box tool and added one and then filled it with white, originally the box looked a lot harsher than I wanted therefore I decided to add a drop shadow to make the edges of it darker so that it fits in more and I really like this effect as I think that it makes the box look more realistic and more like a text box.
  • 5. Process On this day I got some peer feedback and decided to make some big changes to my magazine front cover for example I started with the font of the masthead as a lot of my audience said that they didn’t think it stood out enough to say that it was the masthead and these are supposed to be one of the boldest parts therefore I went back into my pre production PowerPoint where I found some fonts that I had previously liked and talked about therefore I think that this font worked really well as it is bold and really grabs your attention while also still being able to read it clearly from quite a while a way, after this a few people suggested that I change the colour however I still liked the black as it tied in with my theme so what I decided to do was duplicate the text layer and changed it to a similar colour that ties in with the shoes and overlaid it slightly underneath and I think that this works well as it is still a bold black colour but with the hint of colour showing through. I also decided to change the font and positioning of the photographers name Oliver Jones and I think placing it so that it is more direct and bolder works well as you really see it, I love the font that I chose for this as I chose just a basic san serif font however I played around with all the different adjustments and made the text raise so that it looks like it is 3D and actually more realistic I also decided to make it the same colour as the overlaid masthead as this again adds more colour into the front cover.
  • 7. Here I had a go at editing the model using different filters for example I decided to start off using a pattern and shape and for the first top left one I chose the lines which I really like as I think that it makes it look like it has been taken on a camcorder and its very old and broken and I like this effect as it adds to the effect on the background and I can really see myself using this for my actual double page spread however if I was going to I would maybe turn the brightness and contrast up just because I think that overall it’s a bit dark and harder to really see what is going on and where the specific features are. For the second one I chose this pencil effect where it has been scribbled all over and I think that this works well as it is like a coloured outline of the model however I couldn’t really see myself using this one as I think it is just abit too much on top of the background edit as it is, however I could see myself using this but with a coloured photo and then flipping the settings so that it came up coloured with a black outline in some of my other work and I think that this would work really well with a white imaged background. On the bottom left one I added a fill grey filter where I filled the image with the coloured of the background and I really like this one and I think if I do use it I would definitely have a go to cut out certain parts of the model so that half would be blended into the background and the other half would be a bright white so you had a contrast of bits blending in and other bits popping out more. For the last edit I decided to invert the image so that it created this glow in the dark paranormal effect and i do think that this is a cool and unique effect however I do think that this kind of looks like a night mode effect in a camera and video recorder therefore I don’t think I will use this effect however I think it could look cool if I edited it so that it was glowing a colour.
  • 8. For this first try with the double page spread I kept the models in the image very clean and clear and I also had the masthead in a very simple font and overlaid to keep the theme of the blurry/holographic vibe however after some peer feedback I decided that I wasn’t too keen on the main model and the font as I think that there was too much going on in each page and I wanted to make one page with the writing and the other page with just the focus on the model therefore I started playing around with getting rid of the white masthead text box to make the image feel more professional therefore I decided to make the actual masthead itself white as I thought that this would make it stand out and easy to read while not having the big chunky box in the way. For the font I decided to go back to my planning PowerPoint and choose one that I had previously chose as I thought that keeping the theme would be aesthic, I then decided to add a pale green drop shadow as I think that this made the white less harsh on the background and I think that this works well as there are pops of green in the actual image works well as it brings some of the real life image to life. I also decided to get rid of the model on the second page as it was just looking too odd and out of place so I simply got the clone tool and just printed the background over that space so that it blended in and I think that this looks a lot better as it is just focused on one colour scheme and just one model now.
  • 9. Here I decided that I wanted to have a go at making everything apart from the green black and white however I had a lot of struggles when it came to the right way to do this but I decided to duplicate the original image and put a black and white filter on it and then just use the rubber to rub out all of the green parts so that all that was left was just the original colour. In the end I didn’t really like the way that this really turned out and looked as I think because there was already quite a lot of editing going on with the model on the swing it really just made these parts look even worse and made the overall image look very choppy and not very well edited. I still think that doing this was good as it showed me different ways that I could go about changing colours in a photo so that just one colour stands out and I can see myself using this technique if I wanted to try and edit this photo again as I do think that the idea was good as the green is so vibrant that it really pops more against the black and white however I just don’t like the overall aesthic look and I think it just made the image look very rushed and not edited well.
  • 10. For my final second double page spread I decided that I wanted to try again with the colours however this time I wanted to try and keep it in the same colour scheme as the rest of the magazine with that purply blurry effect using the 3D generate normal map effect as I think that this works really well on the nature as there is a lot of different patterns and texture, I decided that if I made the whole image this purple colour it would just look too much so what I did was I got the original image and I duplicated it so that I could put the 3D generate normal maps on one and put it underneath the original layer, I then simply got the selection tool and started to cut out rectangles and layer them via copy which gave me rectangles of the purple holographic effect and I think doing this technique works really well as it means that that unique pattern is still there however it isn’t as overwhelming and I think that the natural effect ties in nicely and balances the colours out. I then decided to add a row of smaller un edited pictured along the side as I thought that this would make the image more interesting to look at as it is more like a little story to look at and see the smaller photos on the side and compare them to the main image, I also think that the reader would prefer to have more images as just one main image can get boring and repetitive.

Editor's Notes

  1. Discuss the tools and processes used in your production. Log your thoughts and feelings about your work.
  2. Discuss the tools and processes used in your production. Log your thoughts and feelings about your work.
  3. Discuss the tools and processes used in your production. Log your thoughts and feelings about your work.
  4. Discuss the tools and processes used in your production. Log your thoughts and feelings about your work.
  5. Discuss the tools and processes used in your production. Log your thoughts and feelings about your work.