This document provides information about basic hand tools used in a workshop technology course. It lists 10 common hand tools: hammer, nail set, crosscut saw, steel file, wood chisel, screwdriver, architect ruler, chalk line, level, and speed square. For each tool, it describes the tool's purpose and provides instructions on proper use and technique. The document aims to educate students on selecting and using basic hand tools safely and effectively.
The document provides information about lathe machines and their operation. It defines a lathe as a machine tool that removes metal from a workpiece to give it a desired shape and size. It then discusses several topics in lathe operation:
1) The major factors considered for selecting cutting speed on a lathe including material type, tool life, dimensions, finish, depth of cut, and machine rigidity.
2) The different classifications of lathe machines including speed, engine, bench, tool room, capstan, turret, special purpose, automatic, and CNC lathes.
3) The basic parts of a center lathe and their functions, which include the bed, headstock, tail
This document provides information about various machine shop machines and their functions. It introduces lathes, milling machines, shaper machines, planer machines, and drilling machines. It describes that a lathe rotates a workpiece to cut, shape, and form symmetrical objects. A milling machine uses rotating cutters to remove material. A shaper machine uses a reciprocating ram and single-point cutting tool. A planer machine has a moving workpiece and stationary cutting tool. Drilling machines cut holes using a drilling tool attached to a spindle.
This document provides descriptions of various workshop tools and machines used in design and technology classes, including different types of drill bits for drilling holes in various materials, saws for cutting wood and metal, hammers, files, clamps for holding materials, and power tools like drills, sanders, and saws. Safety equipment like goggles are required for some power tools like pillar drills. A variety of hand tools and machines allow students to shape, cut, drill, and finish materials like wood, metal, and plastic for design projects.
This document provides an overview of lathe machine operations, including the principle of how lathe machines work, different types of lathe machines, and various operations that can be performed on a lathe such as turning, taper turning, facing, knurling, thread cutting, and drilling. It explains that in a lathe machine, the workpiece is held by a chuck and rotated while a tool is fed against the workpiece. The document also describes different types of lathe machines such as engine lathes, turret lathes, single and multiple spindle automatic lathes, tracer lathes, and computerized numerically controlled lathes.
The document discusses tools used in a fitting shop. It describes various measuring tools like calipers and micrometers used to measure dimensions accurately. Marking and layout tools like scriber, center punch and surface plate are used for marking out on workpieces. Holding tools like vices and clamps are used to securely hold workpieces during operations. Cutting tools include files for shaping, hacksaws for cutting, drills for making holes and taps and dies for cutting threads. Measuring, layout, holding, cutting and other operations are performed in the fitting shop to complete projects to the required accuracy and specifications.
This document discusses different tool holding devices for milling machines. It describes drill chucks, which are the most common for holding straight-shank cutting tools and contain three jaws that move simultaneously when the outer sleeve is turned. Collets are also discussed, which hold workpieces or cutting tools in a milling machine spindle. Tapping heads are described as self-reversing mechanisms that allow controlled feed for tapping holes. Finally, arbors are defined as cutter holding devices with tapered shanks that fit in the machine spindle and can mount multiple cutters for milling operations.
The document discusses various tools used in a fitting shop for assembling manufactured parts. It describes holding, cutting, striking, and measuring tools. Specific tools covered include bench vices, hacksaws, files, chisels, drills, reamers, taps, dies, hammers, scribers, and micrometers. The document provides details on the parts and types of each tool.
Blacksmiths shape metal by heating it with fuels like propane or charcoal in a forge until soft enough to form with hand tools like hammers and chisels. Modern blacksmiths may also use blowtorches or induction heating. Hand forging involves hammering heated metal on an anvil with tongs. It is now often replaced by power forging with machines like power hammers and presses that can deform larger pieces of metal. Lathes hold and rotate workpieces to cut or shape them with fed tools and include a bed, headstock, tailstock, carriage, and tooling.
The document discusses lathe machines. It defines a lathe as a machine that removes metal from a workpiece to shape it. It then describes some key parts of a lathe like the bed, headstock, tailstock, and carriage. It explains the working principle of a lathe where the cutting tool is fed into a rotating workpiece to shape it. Finally, it summarizes some common lathe operations like turning, facing, drilling and threading.
This module aims to teach students how to mark out workpieces based on engineering drawings. It introduces common marking out tools like scribers, marking blue, punches, engineers squares, surface plates, surface gauges, angle plates, vee blocks, spring dividers and ball peen hammers. It explains how to use each tool, highlighting scribers are used to make lines, marking blue helps lines contrast, punches indent surfaces, and squares, plates and gauges aid layout accuracy. Maintaining tools like keeping plates oiled is also covered.
This document provides information about mechanical engineering and the centre lathe. It discusses the main parts and functions of the lathe, including the headstock, bed, carriage, cross-slide, apron, tailstock, tool post, and quick-change gearbox. It also covers lathe safety, types of lathes, cutting speeds, lathe accessories such as centers, chucks, faceplates, and work holding methods. The objectives are to identify lathe parts and their purposes, discuss safety procedures, calculate cutting speeds, and describe various lathe accessories.
A pattern is a replica of the object to be cast that is used to form the mold cavity. Patterns can be single-piece or multi-piece depending on the complexity of the casting. Common pattern materials include wood, metal, plastic, plaster, and wax. Pattern design and allowances provided, such as for shrinkage and machining, directly impact the quality of the resulting casting. Proper selection of pattern type and materials minimizes costs and defects in the casting process.
This document discusses tapping and threading. It begins by explaining the objectives of learning about tapping processes and tools. It then defines tapping as the process of cutting threads using specific tools. It discusses taper, plug, and bottoming taps for starting and finishing threads. It also covers tap types, drill sizes, wrenches, and best practices for safe and effective tapping.
This document provides general instructions and safety guidelines for students attending the Carpentry and Fitting Shop at the National Institute of Technology in Rourkela, India. It outlines rules for proper attire, attendance, following instructor instructions, machine operation, completing assignments, and cleaning up. A schedule is presented for workshop practice classes over two semesters, including tasks to be completed and details of records to submit. Examples of fitting and carpentry jobs are described along with required materials, tools, and procedures. The document concludes with safety precautions to prevent accidents in the workshop.
This document discusses different types of drilling machines and their functions. It describes bench drilling machines, which are light duty machines used in small workshops to drill holes from 1 to 15 mm in diameter. Radial drilling machines are heavy duty machines used to drill larger holes, up to 7.5 cm, in heavy workpieces. The document outlines the parts and working of bench drilling machines and radial drilling machines. It also covers drilling machine operations like reaming, boring, counterboring, countersinking, spot facing and tapping.
The document provides an overview of workshop practice courses taught in engineering programs. It discusses the objectives of workshop practice which are to provide hands-on experience with engineering materials, tools, equipment and manufacturing processes. It then summarizes the key trades covered in workshop practice, which include carpentry, fitting, plumbing, electrical works, sheet metal work, and welding. For each trade, it outlines the typical curriculum, tools used, and safe work practices. The goal of workshop practice is to integrate theoretical knowledge with practical skills needed for engineering product development and manufacturing.
This document discusses lathe operations and provides details on various operations like facing, turning, knurling, parting off, drilling, boring, thread cutting, and taper turning. It explains the basic principles and methods for each operation. The objective of the course is to help students understand different types of lathes, lathe operations, work holders, tool holders, lathe attachments, and automatic lathes. The outcome is for students to be able to use lathe machines and understand the importance of lathe tools and lathes. [/SUMMARY]
This document provides information about various machining processes and machine tools. It describes machining as a metal removing process using machine tools and cutting tools. Lathe machines are commonly used to produce cylindrical surfaces and other operations like turning, drilling, boring, etc. Other machine tools discussed include milling machines, drilling machines, grinding machines, shaping machines, and planning machines. The document provides detailed descriptions of various operations that can be performed on these machines.
Lathe-Types, Parts, Feed Mechanisms, Specifications,Lathe Accessories and Att...rajguptanitw
Who could ever think of manufacturing metals and other materials like wood and plastic without the lathe machine? Since the lathe machine is an important tool used in the machining process, which is an integral process in the manufacturing technology, it is just fitting to learn about it.
Machining is one of the most important material removal methods in the technology of manufacturing. It is basically a collection of material working processes that involves other processes such as drilling, shaping, sawing, planning, reaming, and grinding among others. Machining is practically a part of the manufacture of all metals and other materials such as plastics, and wood as well. An important machine that is useful in machining is the lathe machine.
A lathe machine is generally used in metalworking, metal spinning, woodturning, and glassworking. The various operations that it can perform include the following: sanding, cutting, knurling, drilling, and deforming of tools that are employed in creating objects which have symmetry about the axis of rotation. Some of the most common products of the lathe machine are crankshafts, camshafts, table legs, bowls, and candlestick holders.
The first lathe machine that was ever developed was the two-person lathe machine which was designed by the Egyptians in about 1300 BC. Primarily, there are two things that are achieved in this lathe machine set-up. The first is the turning of the wood working piece manually by a rope; and the second is the cutting of shapes in the wood by the use of a sharp tool. As civilizations progressed, there have been constant modifications and improvements over the original two-person lathe machine, most importantly on the production of the rotary motion.
The production of the rotary motion therefore evolved according to the following procedures: the Egyptians manual turning by hand; the Romans addition of a turning bow; the introduction of the pedal in the Middle Ages; the use of the steam engines during the Industrial Revolution; the employment of individual electric motors in the 19th and mid 20th centuries; and the latest of which is the adaption of numerically controlled mechanisms in controlling the lathe machine.
For the lathe machine to function and perform its operations, various important parts are integrated together. These essentials parts make up the lathe machine.
Different types of casting process and its applicationmangal iron
Casting involves pouring liquid metal into molds to form objects. The main types of casting are sand casting, permanent mold casting, centrifugal casting, continuous casting, and investment casting. Sand casting uses sand as the mold material and is inexpensive but less accurate. Permanent mold casting uses reusable metal molds for higher accuracy. Centrifugal casting forms thin-walled cylinders. Continuous casting produces long strips of metal in an automated process. Investment casting creates molds from liquid and is suitable for complex shapes.
The document presents information about lathe machine. It discusses the principal parts of a lathe including the bed, headstock, tailstock, carriage and feed mechanism. It describes the construction and various operations of a lathe such as turning, facing, boring, drilling, reaming and threading. The document is intended as part of a presentation on lathe machines.
This document discusses various methods for cutting screw threads, including:
1. Using a lathe to cut threads by securing a 60° threading toolbit and setting the compound rest at 29° to cut the thread along the workpiece.
2. Using a thread milling cutter that is tilted at the helix angle of the thread or a multiple-form cutter parallel to the workpiece to cut the thread in one revolution.
3. Grinding threads using a single-profile or multi-profile grinding wheel to cut internal or external threads.
4. Rolling threads using plunge or traverse dies on a die machine to shape the thread without removing material.
The document discusses different types of hammers. There are two main types: hard face hammers and soft face hammers. Hard face hammers include ball peen hammers, cross peen hammers, straight peen hammers, and sledge hammers. Ball peen hammers have a ball-shaped peen and are used for general purposes. Cross peen hammers have a wedge-shaped peen perpendicular to the handle and are used for heavy work. Straight peen hammers have a peen parallel to the handle and are used for swaging and riveting. Sledge hammers are the largest and heaviest hammers, used
Este documento presenta un prototipo para identificar nuevas necesidades en la zona norte a través de la colaboración entre 10 empresas de conocimiento intensivo. El prototipo propone la creación de una alianza entre empresas de TIC, finanzas e industrias profesionales para liderar la transformación digital en la región, identificar nuevas oportunidades a través del intercambio de conocimiento e innovación, y abordar las inquietudes del entorno empresarial mediante dos líneas de acción: el intercambio de talento y la formación, e
Analysis of tools usage by automobile mechanics at siwdoAlexander Decker
This document discusses a study analyzing the tools used by automobile mechanics in Siwdo-Kokompe, Cape Coast, Ghana. It finds that the condition of basic hand tools like wrenches, screwdrivers and pliers are generally excellent, very good or good. However, electrical and pneumatic power tools are in poorer condition. The document provides background on the location and history of automobile repair workshops in Siwdo-Kokompe. It also describes the various types of basic hand tools used by the mechanics, including open-end wrenches, adjustable wrenches, socket wrenches, box-end wrenches, and combination wrenches.
Maximizing the power of virtual reality and introducing it into educational institutions, this proposal is from our end of the year project in technical writing. The proposal mainly focuses on the virtual automotive mechanic but it also mentions the other uses for virtual reality in educational institutions. For the virtual automotive mechanic just think about being able to complete a vehicle maintenance task in a virtual environment on a virtual vehicle first gaining knowledge and confident so you are able to preform that same vehicle maintenance task on your vehicle saving yourself time and money.
El documento describe varias herramientas mecánicas automotrices como prensas, pinzas, martillos, llaves de tuercas, desarmadores, gatos hidráulicos, limas, taladros, extractores, llaves de torque, micrómetros, terrajas, fresas y torno. También incluye un breve resumen de la historia del automóvil desde la prehistoria hasta la edad moderna con el desarrollo de motores a vapor, explosión y autos a gas y energía solar.
El documento describe la metodología de design thinking utilizada para desarrollar una herramienta de gestión del conocimiento llamada CIE Connect para la empresa CIE Automotive. Se realizaron entrevistas con empleados, consultores y revisión de documentación para definir los usuarios y necesidades. Se propusieron diversas herramientas como mensajería instantánea, intranet con directorio de empleados, base de datos de conocimiento y formaciones en línea para facilitar el intercambio de información entre los empleados de diferentes ubicaciones. La implementación incluiría roles
Accomplished and integrity-driven Automotive Professional with over 13+ years of experience and enormous success in the Automotive Repair industry. Recognized as a leader with strengths in customer service, diagnosing, repairing, and troubleshooting all varieties of vehicles, and operational management. Verifiable track record of managing complex systems while always delivering on time, under budget and exceeding expectations. Strong interpersonal skills, highly adept at facilitating discussions and negotiations with key stakeholders.
Carpentry is the skilled craft of cutting, joining, and constructing wood. Carpenters work with wood to build structures like buildings, furniture, and other objects. There are different types of carpenters such as finish carpenters who do detailed woodwork, cabinetmakers who make furniture, and framing carpenters who construct building frames. Wood has physical strength, beauty, and works well for construction. It is classified as softwood or hardwood depending on characteristics. Joints like butt joints, lap joints, and mortise and tenon joints are used to connect wood pieces.
The document discusses various types of common hand tools used in woodworking and metalworking. It describes wrenches, screwdrivers including standard and Philips types, different types of pliers including long nose and locking pliers, hammers such as ball peen and rubber mallets, cutting tools including hacksaws, rip cut saws, keyhole saws, and cross cut saws. For each tool type, it provides details on usage and characteristics.
El documento describe las partes y funcionamiento básico de un motor de automóvil. Explica que un motor transforma energía (como la de combustibles) en energía mecánica mediante la combustión controlada en el cilindro. Describe las cuatro fases del ciclo de combustión (admisión, compresión, combustión-expansión, escape) y los componentes principales como el pistón, bujía y válvulas.
The document summarizes various hand and power tools used in an industrial technology lab, including screwdrivers, hammers, saws, squares, measurement tools, chisels, sanders, drills, and drill presses. It describes the basic functions and features of screwdriver types, hammer types, saw types, squares, tape measures, rulers, chisels, sanders like belt sanders and spindle sanders, drill bits for drilling holes, and drill presses for precise drilling. References are provided for the images and definitions used.
Searching for metal cutting blades, Bipico is one of the leading metal cutting tools supplier & manufacturer. We provide various metal cutting tools like hacksaw, bimetal bandsaw blades, reciprocating saw blades, abrasive cutting & grinding discs and other metal cutting saw across the globe. Visit our site www.bipico.com now for more details.
This slide was made for a first-semester course named Professional Development Seminar (IPE 152). A very basic slide about different types of hand tools used in workshops.
This document provides a parts list and descriptions for various recovery taps used to retrieve drilling tools that become separated or stuck in boreholes. It lists specific tapered taps for recovering rods, casings, couplings, bits, shells, and other downhole equipment. The taps are designed to grip the interior threads of the tools. The document also notes that Boart Longyear reserves the right to change product specifications without notice as it strives to improve designs.
The document discusses cutting tools and their properties. It describes different types of cutting tool materials like high-speed steel, cemented carbides, ceramics, and diamond. It explains cutting tool nomenclature and defines terms like rake angle, clearance angle, nose, and flank. It also discusses factors that affect tool life like cutting conditions, work material properties, and tool material.
The superstructure of a building consists of elements above the foundation like beams, columns, lintels, roofing and flooring. Beams are horizontal members that carry loads and transfer them to columns or walls. Reinforced concrete beams are designed to resist both bending moments and shear forces from loads. There are different types of beams like simply supported, fixed, cantilever, continuous and overhanging beams which are designed based on how they are supported. Columns are vertical load bearing members that transfer loads from beams and slabs to the foundation. Common column types include long, short and intermediate columns. Lintels are short horizontal members that span small openings like doors and windows and transfer loads to masonry, steel or reinforced concrete
The document discusses the proper use of hacksaws. It begins by stating the learning objectives which are to explain what a hacksaw is, identify its parts, state its functions, and how to properly use one. It then lists common reasons why hacksawing may not work properly, such as using the wrong blade, not clamping the work, or applying too much pressure. The document goes on to identify the parts of a hacksaw and provides safety tips for its use, such as selecting the correct blade, keeping the blade rigid, and clamping thin materials. It concludes by describing the proper method for hacksawing, including orienting the work vertically and using full strokes to involve all teeth.
The document discusses various lathe operations including facing, turning, drilling, and taper turning. It provides step-by-step explanations of the processes with diagrams. Facing involves removing metal from the end of a workpiece to create a flat surface. Turning reduces the diameter of a rotating cylindrical workpiece. Drilling uses the lathe to drill holes before other internal operations. Taper turning creates a conical shape through various methods such as using a forming tool, setting over the tailstock, swiveling the compound rest, or a taper turning attachment.
Store Technical Drawings and Equipment/ Instruments.pptxCLIFFORD BRANDES
1. The document provides instructions for properly storing technical drawings and equipment according to company procedures. It discusses storing drawing paper, pencils, erasers, rulers, protractors and other drafting tools in organized trays and pouches.
2. Details are given on cleaning tools with cloths and wiping down surfaces, as well as rolling up drawings, placing tools in designated slots, and storing materials in protective tubes and folders.
3. Proper care and maintenance of drafting tools is emphasized, including laying out items and separating into piles, cleaning surfaces, and storing tools, materials and drawings in an organized manner.
WORKSHOP TECHNOLOGY-Hand Tools and its OperationLearnwithus2
1) Hand tools are powered manually rather than by engines and include tools like files, hacksaws, hammers, wrenches, and various measuring tools.
2) Different types of files are used for various shaping tasks and include flat, half-round, round, and square files. Proper technique and care of files is important.
3) Hacksaws are used for cutting metal and consist of a frame and blade. Correct tensioning and technique such as avoiding rapid strokes are necessary for safe and effective use.
The document provides safety instructions for using a table saw. It details specific safety rules like keeping fingers at least 5 inches from the blade and using push sticks. Proper procedures are outlined for ripping stock using the rip fence and crosscutting stock using the miter gauge. Operational techniques like beveling, rabbeting, and dado cuts are also defined.
Hand Tools Practise - Mechanical.ppt for training and awareness in industriesrajendrakhatri5
Files are cutting tools used to remove metal from surfaces. They come in various sizes and shapes for different operations. Files have different lengths, sections, cuts, and grades. Common sections include flat, square, round, half round, triangular, and knife edge. Cuts include single, double, rasp and curved. Grades range from rough to dead smooth. Vices are tools used to securely hold workpieces for operations and come in types like bench, leg, pipe, hand, machine and pin.
This document classifies and describes various fitting tools used in manufacturing. It divides tools into measuring tools, marking tools, cutting tools, filling tools, drilling tools, reaming tools, threading tools, counter sinking tools, and counter boring tools. For each category, it provides examples of specific tools like try squares, calipers, center punches, hacksaws, files, drill bits, taps, countersinks, and counter bores along with brief descriptions of their functions.
This document discusses dental hand instruments. It begins by defining instruments and their purposes. It then discusses the history and evolution of instruments from large, heavy designs to smaller, more precise tools. It categorizes instruments as cutting or non-cutting and describes common types like excavators, mirrors, and probes. It details the parts of instruments, materials used, and techniques for proper handling.
The document discusses the proper use and identification of various common hand tools used in computer assembly and repair, including screwdrivers, pliers, wire cutters, and tweezers. It emphasizes the importance of using the correct tool for each task and following safety procedures to prevent damage to equipment and injury. A variety of hand tools are demonstrated along with best practices for their safe and effective use in computer maintenance and troubleshooting activities.
This document provides instructions for prepping farm tools and equipment before use. It discusses cleaning tools by removing rust with a wire brush or sandpaper. Tools should then be sharpened, maintaining their original bevel or angle. Whetstones and files should be used diagonally and away from the body. Moving parts should be disassembled and cleaned, then reassembled after applying oil. Worn tools should be fixed or replaced to prevent accidents. The document includes a pre-test and answer key to assess understanding of the proper techniques.
This document provides instructions for making miniature clock projects using scroll saw patterns. It begins with an introduction to the book and project themes. Next, it provides tips and techniques for scroll sawing, including using repositionable spray adhesive, selecting wood types, copying patterns, choosing blades, and adding an auxiliary table. The document concludes with directions for sanding, drilling starter holes, stack cutting, sawing thin woods, veining, adding silhouette backing, choosing bases, finishing, and assembling the clock projects.
This document provides information about simple home repairs and carpentry tools and skills. It discusses that both male and female family members should learn basic home repairs. It lists common tools needed in the home like hammers, pliers, saws and wrenches. It also outlines basic carpentry tools for measuring, marking, cutting, holding and power tools. It describes common home repairs like fixing doors, floors, windows and furniture. It emphasizes the importance of planning projects, using tools safely, and learning skills like measuring, sawing, planing, chiseling and boring.
This document provides an overview of common workshop tools. It identifies and describes various hand tools including hammers, wrenches, pliers, chisels, saws, sandpaper, files and screwdrivers. It emphasizes the importance of using tools properly and keeping them well maintained. The document also discusses power tools, measuring instruments, fasteners like nuts and bolts, and drill bits. Proper tool selection and care are highlighted to perform tasks safely and effectively.
This document provides an overview of various hand tools that may be encountered in a workshop. It describes different types of striking tools like hammers, mallets and sledges and their proper uses. Turning tools such as wrenches, pliers and screwdrivers are also outlined. Other tool categories summarized include bladed woodworking tools, saws, abrasives, measuring tools and fasteners. The document stresses the importance of using tools as intended and keeping them well maintained.
This document discusses various tools used in repoussé metalworking including liners, modeling punches, planishing punches, matting punches, and setting punches. It describes how to make your own tools from tool steel and shape them using sandpaper and a grinder. The document provides instructions for the repoussé process including preparing the metal, transferring the design, working the metal in pitch, and potential issues like overworking the metal. It stresses safety precautions like eye protection, ventilation, and maintaining tools to prevent risks during this metalworking process.
This document provides information about drilling machines and the drilling process. It defines drilling as cutting round holes in metalworking using machines like drill presses, radial drills, and gang drilling machines. It describes the parts and uses of bench drilling machines and portable drilling machines. It also provides steps for correctly using a drill press, including selecting drill bits, clamping the workpiece, setting depth, and drilling safely.
Knives powerpoint presentation in principles of food production.
Disclaimer: I do not own the rights not property of this powerpoint presentation. All rights reserved to the owner.
Do not forget to follow me on twitter @joviinthecity Thank you!
Joinery involves joining pieces of wood together through various woodworking joints. The document discusses different types of woodworking joints like butt joints, biscuit joints, bridle joints, dado joints, mortise and tenon joints, finger joints, lap joints, pocket hole joints, dovetail joints, rabbet joints, tongue and groove joints. It also discusses tools used for joinery like power tools, hand tools, clamps. Specific joints like dovetail and mortise and tenon are suitable for spiral hangers. The document provides steps for reinforcing loose joints in spiral hangers by drilling holes, inserting dowels and applying glue. It also discusses sanding techniques and different finish techniques for oak wood involving dye
This document describes an electric massager. It has benefits like relaxation, revitalization, circulation improvement, and pain relief. It features two kneading massage heads that can rotate clockwise or counterclockwise. It has a long battery life of 1-2 hours compared to other massagers. The massager can be used on different body parts. It comes with a charger and has a 1 year warranty. It is available in different colors and prices starting from RM129.99.
1) This document describes a group project to design an umbrella with an integrated fan. The fan umbrella is intended to provide comfort on hot, sunny days and reduce sweating while encouraging outdoor activity.
2) The umbrella fan uses batteries, a small fan, switch, wires, motor, and other basic materials. It has advantages like being able to switch the fan off when not needed, providing both sun and rain protection while feeling cool, operating quietly, and being affordable.
3) The fan umbrella is meant to improve upon the traditional shading function of umbrellas alone by keeping users comfortable on extremely hot days through the addition of a small built-in fan.
Digital logic circuits can be classified as either combinational or sequential logic circuits. Combinational logic circuits have outputs that go low or high depending on the specific combination of input signals, regardless of the order in which inputs are applied. Digital circuits can also be programmable, where the functionality can be changed through software instead of changing the physical circuit.
Anugerah Intergriti Resources Sdn Bhd is a company established in 2010 that specializes in inspection services, testing services, and engineering maintenance services. It has offices in Kemasik, Kemaman, Alor Setar, Kedah, and Labuan. The company offers non-destructive testing services like ultrasonic testing, radiography testing, dye penetrant inspection, and magnetic particle inspection. Dye penetrant inspection involves cleaning, applying red penetrant, more cleaning, and applying developer to locate surface defects. Magnetic particle inspection magnetizes ferromagnetic materials to detect subsurface discontinuities. During an internship at the company, administrative duties were also performed like report writing, emailing
This document discusses different types of blow molding processes used to make hollow plastic parts. It describes injection blow molding, stretch blow molding, and extrusion blow molding. Injection blow molding uses preforms made via injection molding and is used for small, high-volume products. Stretch blow molding also uses preforms but stretches them using a core rod and is used for bottles and jars. Extrusion blow molding extrudes a hollow plastic tube called a parison then air is pumped in to shape it in a mold, used for containers. The document outlines design considerations, advantages, disadvantages, applications, and examples of blow molding processes and products.
Italy is a country located in southern Europe, bordered by France, Switzerland, Austria, and Slovenia. Italy has a long history, originally being home to the powerful Roman Empire. Though it faced periods of foreign domination and broke into smaller states, Italy eventually unified in the 19th century and is now a democratic republic. Italian culture is rich with traditions like Carnival celebrations and national holidays. The country is also famous for foods like pizza, gelato, and tiramisu, and has spectacular architecture such as the Colosseum and canals of Venice.
Software Engineering and Project Management - Introduction, Modeling Concepts...Prakhyath Rai
Introduction, Modeling Concepts and Class Modeling: What is Object orientation? What is OO development? OO Themes; Evidence for usefulness of OO development; OO modeling history. Modeling
as Design technique: Modeling, abstraction, The Three models. Class Modeling: Object and Class Concept, Link and associations concepts, Generalization and Inheritance, A sample class model, Navigation of class models, and UML diagrams
Building the Analysis Models: Requirement Analysis, Analysis Model Approaches, Data modeling Concepts, Object Oriented Analysis, Scenario-Based Modeling, Flow-Oriented Modeling, class Based Modeling, Creating a Behavioral Model.
Comparative analysis between traditional aquaponics and reconstructed aquapon...bijceesjournal
The aquaponic system of planting is a method that does not require soil usage. It is a method that only needs water, fish, lava rocks (a substitute for soil), and plants. Aquaponic systems are sustainable and environmentally friendly. Its use not only helps to plant in small spaces but also helps reduce artificial chemical use and minimizes excess water use, as aquaponics consumes 90% less water than soil-based gardening. The study applied a descriptive and experimental design to assess and compare conventional and reconstructed aquaponic methods for reproducing tomatoes. The researchers created an observation checklist to determine the significant factors of the study. The study aims to determine the significant difference between traditional aquaponics and reconstructed aquaponics systems propagating tomatoes in terms of height, weight, girth, and number of fruits. The reconstructed aquaponics system’s higher growth yield results in a much more nourished crop than the traditional aquaponics system. It is superior in its number of fruits, height, weight, and girth measurement. Moreover, the reconstructed aquaponics system is proven to eliminate all the hindrances present in the traditional aquaponics system, which are overcrowding of fish, algae growth, pest problems, contaminated water, and dead fish.
Electric vehicle and photovoltaic advanced roles in enhancing the financial p...IJECEIAES
Climate change's impact on the planet forced the United Nations and governments to promote green energies and electric transportation. The deployments of photovoltaic (PV) and electric vehicle (EV) systems gained stronger momentum due to their numerous advantages over fossil fuel types. The advantages go beyond sustainability to reach financial support and stability. The work in this paper introduces the hybrid system between PV and EV to support industrial and commercial plants. This paper covers the theoretical framework of the proposed hybrid system including the required equation to complete the cost analysis when PV and EV are present. In addition, the proposed design diagram which sets the priorities and requirements of the system is presented. The proposed approach allows setup to advance their power stability, especially during power outages. The presented information supports researchers and plant owners to complete the necessary analysis while promoting the deployment of clean energy. The result of a case study that represents a dairy milk farmer supports the theoretical works and highlights its advanced benefits to existing plants. The short return on investment of the proposed approach supports the paper's novelty approach for the sustainable electrical system. In addition, the proposed system allows for an isolated power setup without the need for a transmission line which enhances the safety of the electrical network
Null Bangalore | Pentesters Approach to AWS IAMDivyanshu
#Abstract:
- Learn more about the real-world methods for auditing AWS IAM (Identity and Access Management) as a pentester. So let us proceed with a brief discussion of IAM as well as some typical misconfigurations and their potential exploits in order to reinforce the understanding of IAM security best practices.
- Gain actionable insights into AWS IAM policies and roles, using hands on approach.
#Prerequisites:
- Basic understanding of AWS services and architecture
- Familiarity with cloud security concepts
- Experience using the AWS Management Console or AWS CLI.
- For hands on lab create account on [killercoda.com](https://killercoda.com/cloudsecurity-scenario/)
# Scenario Covered:
- Basics of IAM in AWS
- Implementing IAM Policies with Least Privilege to Manage S3 Bucket
- Objective: Create an S3 bucket with least privilege IAM policy and validate access.
- Steps:
- Create S3 bucket.
- Attach least privilege policy to IAM user.
- Validate access.
- Exploiting IAM PassRole Misconfiguration
-Allows a user to pass a specific IAM role to an AWS service (ec2), typically used for service access delegation. Then exploit PassRole Misconfiguration granting unauthorized access to sensitive resources.
- Objective: Demonstrate how a PassRole misconfiguration can grant unauthorized access.
- Steps:
- Allow user to pass IAM role to EC2.
- Exploit misconfiguration for unauthorized access.
- Access sensitive resources.
- Exploiting IAM AssumeRole Misconfiguration with Overly Permissive Role
- An overly permissive IAM role configuration can lead to privilege escalation by creating a role with administrative privileges and allow a user to assume this role.
- Objective: Show how overly permissive IAM roles can lead to privilege escalation.
- Steps:
- Create role with administrative privileges.
- Allow user to assume the role.
- Perform administrative actions.
- Differentiation between PassRole vs AssumeRole
Try at [killercoda.com](https://killercoda.com/cloudsecurity-scenario/)
Rainfall intensity duration frequency curve statistical analysis and modeling...bijceesjournal
Using data from 41 years in Patna’ India’ the study’s goal is to analyze the trends of how often it rains on a weekly, seasonal, and annual basis (1981−2020). First, utilizing the intensity-duration-frequency (IDF) curve and the relationship by statistically analyzing rainfall’ the historical rainfall data set for Patna’ India’ during a 41 year period (1981−2020), was evaluated for its quality. Changes in the hydrologic cycle as a result of increased greenhouse gas emissions are expected to induce variations in the intensity, length, and frequency of precipitation events. One strategy to lessen vulnerability is to quantify probable changes and adapt to them. Techniques such as log-normal, normal, and Gumbel are used (EV-I). Distributions were created with durations of 1, 2, 3, 6, and 24 h and return times of 2, 5, 10, 25, and 100 years. There were also mathematical correlations discovered between rainfall and recurrence interval.
Findings: Based on findings, the Gumbel approach produced the highest intensity values, whereas the other approaches produced values that were close to each other. The data indicates that 461.9 mm of rain fell during the monsoon season’s 301st week. However, it was found that the 29th week had the greatest average rainfall, 92.6 mm. With 952.6 mm on average, the monsoon season saw the highest rainfall. Calculations revealed that the yearly rainfall averaged 1171.1 mm. Using Weibull’s method, the study was subsequently expanded to examine rainfall distribution at different recurrence intervals of 2, 5, 10, and 25 years. Rainfall and recurrence interval mathematical correlations were also developed. Further regression analysis revealed that short wave irrigation, wind direction, wind speed, pressure, relative humidity, and temperature all had a substantial influence on rainfall.
Originality and value: The results of the rainfall IDF curves can provide useful information to policymakers in making appropriate decisions in managing and minimizing floods in the study area.
Discover the latest insights on Data Driven Maintenance with our comprehensive webinar presentation. Learn about traditional maintenance challenges, the right approach to utilizing data, and the benefits of adopting a Data Driven Maintenance strategy. Explore real-world examples, industry best practices, and innovative solutions like FMECA and the D3M model. This presentation, led by expert Jules Oudmans, is essential for asset owners looking to optimize their maintenance processes and leverage digital technologies for improved efficiency and performance. Download now to stay ahead in the evolving maintenance landscape.
artificial intelligence and data science contents.pptxGauravCar
What is artificial intelligence? Artificial intelligence is the ability of a computer or computer-controlled robot to perform tasks that are commonly associated with the intellectual processes characteristic of humans, such as the ability to reason.
› ...
Artificial intelligence (AI) | Definitio
Applications of artificial Intelligence in Mechanical Engineering.pdfAtif Razi
Historically, mechanical engineering has relied heavily on human expertise and empirical methods to solve complex problems. With the introduction of computer-aided design (CAD) and finite element analysis (FEA), the field took its first steps towards digitization. These tools allowed engineers to simulate and analyze mechanical systems with greater accuracy and efficiency. However, the sheer volume of data generated by modern engineering systems and the increasing complexity of these systems have necessitated more advanced analytical tools, paving the way for AI.
AI offers the capability to process vast amounts of data, identify patterns, and make predictions with a level of speed and accuracy unattainable by traditional methods. This has profound implications for mechanical engineering, enabling more efficient design processes, predictive maintenance strategies, and optimized manufacturing operations. AI-driven tools can learn from historical data, adapt to new information, and continuously improve their performance, making them invaluable in tackling the multifaceted challenges of modern mechanical engineering.
Introduction- e - waste – definition - sources of e-waste– hazardous substances in e-waste - effects of e-waste on environment and human health- need for e-waste management– e-waste handling rules - waste minimization techniques for managing e-waste – recycling of e-waste - disposal treatment methods of e- waste – mechanism of extraction of precious metal from leaching solution-global Scenario of E-waste – E-waste in India- case studies.
Embedded machine learning-based road conditions and driving behavior monitoringIJECEIAES
Car accident rates have increased in recent years, resulting in losses in human lives, properties, and other financial costs. An embedded machine learning-based system is developed to address this critical issue. The system can monitor road conditions, detect driving patterns, and identify aggressive driving behaviors. The system is based on neural networks trained on a comprehensive dataset of driving events, driving styles, and road conditions. The system effectively detects potential risks and helps mitigate the frequency and impact of accidents. The primary goal is to ensure the safety of drivers and vehicles. Collecting data involved gathering information on three key road events: normal street and normal drive, speed bumps, circular yellow speed bumps, and three aggressive driving actions: sudden start, sudden stop, and sudden entry. The gathered data is processed and analyzed using a machine learning system designed for limited power and memory devices. The developed system resulted in 91.9% accuracy, 93.6% precision, and 92% recall. The achieved inference time on an Arduino Nano 33 BLE Sense with a 32-bit CPU running at 64 MHz is 34 ms and requires 2.6 kB peak RAM and 139.9 kB program flash memory, making it suitable for resource-constrained embedded systems.
LLM Fine Tuning with QLoRA Cassandra Lunch 4, presented by Anant
Workshop technology hand basic tools
1. WORKSHOP
TECHNOLOGY
BME 1023
PREPARED TO :
• EN.MUKHTAR
PREPARED BY :
• MUHAMMAD AMIR BIN MUDIN
(13B02012)
• AMMAR IRSYAD JUFRI BIN JOHARI
(13B02003)
• HASBULLOH BIN MOHD NOOR
(13B02005)
• MUHAMMAD AMIR BIN AWANG
JAAFAR (13B02011)
• NOR AJUAR BT ABDULLAH (13B02022)
• NANI SHAJIEHA BT ZAWAWI
(13B02021)
• SITI ZULAIKHA BT MOHD ROSLI
(13B02024)
BASIC
HAND
TOOLS
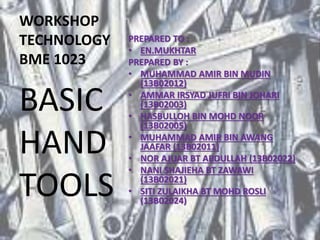
2. BASIC HAND TOOLS
• A basic hand tool is any tool that is not
a power tool – that is, one powered by hand
(manual labour) rather than by an engine.
• Some examples of hand tools
are hammers, spanners, pliers,screwdrivers
and chisels.
• Hand tools are generally less dangerous than
power tools.
3. Advantages of BASIC HAND TOOLS.
• Hand tools offer the advantage of precision.
• Fine carving and detailed work such as cabinetry,
building of musical instruments and decorative work
requires minute control over a tool that is sometimes
easier with hand tools.
• Hand tools also always work. You require no power,
fuel or air pressure and can utilize the tool at any
time.
• The smaller and more compact nature of hand tools
compared to power tools makes them easier and
lighter to transport as well.
4. Disadvantages of BASIC HAND TOOLS.
• The primary disadvantage of hand tools is the time that it takes to
complete simple tasks.
• Hammering shingles into a roof by hand, for instance, takes much
more time than nailing down shingles with an air-nailer.
• Industrial woodworking companies could never meet demand
with handsaws.
• Also, more skill is required to use hand tools than most power
tools.
• Making a clean and straight cut using a handsaw is much more
difficult than when using a tool like a table saw with guides and a
high cutting speed
6. 1.HAMMER
• Hammers are often
designed for a specific
purpose, and vary in
their shape and
structure.
• The term hammer is
also used for some
devices that are
designed to deliver
blows
• The hammer is a
basic tool of many
professions. The usual
features are a handle
and a head, with most
of the weight in the
head.
7. WAY TO USE???
• Check the hammer before use
• Get a firm grip on the handle.
• Hold the hammer at the end of the handle.
• Hit your surface squarely with the hammer.
• Use your whole arm and elbow.
• Place your work against a hard surface.
• Work in a natural position.
• Check before you swing.
8. 2. NAIL
SET
Tool used to
drive nail
heads
below the
surface.
9. WAY TO USE ??
• Grab a pair of ear plugs too because it’s
loud. It’s important to get a nail set that has a
dimple on the end. That way it won’t slip off the
nail head so easily.
• Place the nail set over the nail.
• Hammer until the nail is sunk and you have
enough of a depression in the wood to fill with
wood filler
• Sand down the wood that pushed out around
the nail set and then fill with wood filler, prime
and paint. That spot should disappear.
10. 3. CROSSCUT
SAW
A saw with
small teeth
(more teeth
per inch) for
cutting across
the grain of
wood.
11. WAY TO USE??
• Hold the wood down so it will not move. Mark the location where you will make the cut.
• Extend the end to be cut about one foot past the end of the sawhorse.Make sure the cut
location is off the sawhorse.
• Hold the saw in your dominant hand, using the other hand to hold the wood.Keep fingers
clear of the area to be cut.
• Slowly draw the blade of the saw on the mark on the wood at a 45 degree angle.
• Do this a couple of times until a groove is started in the wood.
Then slowly start to saw the wood, keeping the blade against the wood at all times. Do not
let the blade come off the wood
• Be consistent with your strokes and use most of the length blade. It is not a knife, so do not
try to use it as one.
• Let the saw do the work. As long as you see sawdust coming from the wood, it is being cut
• When you get almost all the way through, continue sawing and try to avoid breaking the
wood.
12. 4. STEEL
FILE
A steel hand
tool with
small sharp
teeth used
for
sharpening
or shaping.
13. Way to use??
• Procure the workpiece, plan the operation, and layout lines indicating where
material is to be removed.
• Select a file that is best for the job.
• Clean the file.
• Chalk/oil/lard the file.
• Clamp the work in the vice.
• Now, for the actual filing, we diverge (the following 3 steps are not to be taken in
order - you may indeed only do one of them:
• For heavy cross filing, to remove material, grab the handle of the file with the
dominant hand and place the palm of the other hand on the end of the file.
Orienting the file so that it points away from you, press down firmly (so that the
file digs in and cuts the metal) and make long, slow strokes away from your body,
removing downward pressure on the return stroke to prevent dulling the file.
• For light cross filing, to remove material with a small file (as for detail work), grab
the handle of the file with the dominant hand and place the fingers of the other
hand on the end of the file. Orienting the file so that it points away from you,
press down firmly (so that the file digs in and cuts the metal) and make long,
slow strokes away from your body, removing downward pressure on the return
stroke to prevent dulling the file.
• For draw filing, to make a highly finished surface, grab each side of the file with
your hands only somewhat further apart than your workpiece. Orienting the file
so that it points to your side, press down firmly (so that the file digs in and cuts
the metal) and make long, slow strokes away from your body, removing
downward pressure on the return stroke to prevent dulling the file.
14. 5. WOOD
CHISEL
A woodworking
tool for cutting,
shaping, or
smoothing
wood.
15. Way to use??
• Use a paring chisel for fine light woodwork, such as
shaving or sculpting.
• Secure the woodwork firmly on your workbench or in
your vise.
• Position the the blade at a slight slant to the line of the
wood.
• Place one hand on the chisel's blade and press it against
the surface of the wood.
• Drive the chisel with the other hand placed on the handle.
• Raise or lower the chisel handle to control the depth of
the cut.
• Repeat action and sharpen the blade as needed
16. 6. SCREW
DRIVER
• Hand-tool for
turning
(driving) screws
and sometimes
bolts or
other machine
elements with a
mating drive
system.
17. Way to use??
• Create a pilot hole. Place the screw on the driver
tip and hold both screw and tip together with
the fingers of one hand.
• Start the screw. Place the screw on the driver tip
and hold both screw and tip together with
the fingers of one hand.
• Keep driving. When the screw’s thread engages
with the wood, move your fingers that were
holding the screw in place to the screwdriver
shank
19. Way to use??
• Determine the scale of your plans. It will be labeled on the
plans and should be found in the bottom corner.
• Turn the ruler to the corresponding scale factor. For instance,
if the plans read ¼ inch equals one foot, you will use the ¼
inch scale on the ruler.
• Measure the desired line starting from zero on the correct
scale. In this case, you would need to use the ¼ inch scale.
• The measurement you calculate equals how many feet the
line actually is at full scale dimensions.
• Try it out several times until you get the hang of it. This will
increase your understanding of the scale ruler so you can use
it with ease.
20. 8. CHALK LINE
A tool used in
the building
trades to
make a
straight line
on a vertical
surface.
21. Way to use??
• Decide which color of chalk to use. Blue is for general purpose use. Red is
for more permanent jobs that need to last out in the weather for a few
days. White is a good choice for interior walls since it comes off easily.
There is also florescent chalk that is easier to see on certain surfaces.
• Fill the chalk reel with chalk. Open the side door on your chalk line. Pull
out about 12 inches of your line and insert the tip of the chalk bottle into
the side door. Fill about half full and close your side door.
• Pull out a large portion of the string and wind it back up 6 to 8 times to
help coat the string before the first use.
• Place the hook at the end of your first mark, using a nail or hooking it to
the end of a board. It is faster if another person can hold the end on the
mark.
• Place the reel end on the string on the other mark.
• Make sure the string is tight. Hold it up about 12 inches and let go. The
string should then snap back to the surface and make a chalk line
between the two marks.
• Wind up your string when you have finished.
22. 9. LEVEL
A tool with an
indicator that
establishes the
horizontal or
vertical, when a
bubble is
centered in a
tube of liquid.
23. Way to use??
• The surface to be levelled should be straight so the level will not
rock. Place the level in the centre of the job and adjust one end of
the work so the bubble is between the lines. The bubble rises to
the high end.
• When you think the work is level, turn the level around end to
end. Place the level back on the work in the same position. Check
the bubble again. If the level is accurate, the reading will be the
same. If not, the level may require adjusting.
• For levelling over larger areas, place a straight edge (a piece of
timber with both edges perfectly straight and parallel) along the
work. Use the level in the centre of the straight edge. Over large
distances, a string line and line level may be used.
• A more accurate method is the water level. This is a clear plastic
tube filled with water and is often used for levelling around
corners.
24. 10. SPEED
SQUARE
A trianglular
marking tool
containing both
90 and 45
degree angles. It
has a flange on
one side so you
can "square" it
against the
material.
25. Way to use??
• Draw square lines. Use the speed square to mark lines on wood at exactly 90
degrees to the wood's edge. Hold the tool against the end of the board. The lipped
edge on the speed square will help line it up. Use the side of the square to mark
the needed lines on the wood. Use the square to locate and mark studs,
positioning floor joists, and laying out stair stringers.
• Align pieces of wood at a right angle.When building cabinets, boxes, or other
furniture pieces, hold the speed square against the wood to measure angles
before cutting or attaching pieces of wood.
• Make a 45 degree line. Put the square firmly against the board and mark the
location of the diagonal edge to create a 45 degree line. As an isosceles triangle,
the square's diagonal edge is exactly at 45 degrees angle. Read and mark
angles. Look for the pivot point at the corner of the speed square. Each line along
the diagonal edge represents 1 degree, and they go from 0 to 90. Hold the pivot
point against the board, and adjust the square until the degree gradation needed
is aligned with the edge of the board. Use a pencil to draw a line along the square.
• Mark a parallel line. Press the square against the edge of the wood and place a
pencil tip into the notch that measures the number of inches needed. Slide the
square along the wood with the pencil in the notch. This will produce a straight
line that runs parallel to the edge of the wood.
• Guide a portable circular saw. Position the square flatly on the board to be cut.
Slide the saw shoe against the square, and cut. The saw will cut steadily and
accurately because the speed square is thicker than a framing square or
combination square.
26. 11. COMBINATION
SQUARE
A sliding square
mounted on a
steel rule, used
to mark a
"square" line,
find level, or
measure.
27. Way to use??
• Test for squareness.
• Adjusting the square.
• Retest for squareness.
28. 12. HAND
DRILL
A small
portable drill
held and
operated by
hand.
29. Way to use??
• The hand drill is held vertically.
• One hand holds the handle at the top whilst the second hand
rotates the other handle in a clockwise direction. This turns the
chuck and drill bit.
• Only light pressure should be used to push down on the hand drill,
if a lot of pressure is needed the drill bit is probably blunt (change
it for a sharp drill bit).
• When using the hand drill for the first few times a second person
can stand at the side to check that the hand drill is held vertically.
• As the drill bit turns through the wood, dust and chippings are
brought up to the surface where they collect. This should be
brushed away. Do not be tempted to blow it away as the dust
usually ends up in the eyes which can be very painful.
30. 13. BRACE
AND BIT
A type of
hand drill
consisting of
a bit and a
brace to hold
and turn it.
31. Way to use??
• A brace or brace and bit is a hand tool used to drill holes, usually
in wood. Pressure is applied to the top and the tool is rotated
withcgh a U-shaped grip.
• The U-shaped part is a kind of crankshaft. It gives the brace much
greater torque than other kinds of hand drill; a brace can be used
to drill much wider, and deeper, holes than can a gear-driven hand
drill.
• The price of the greater torque is lower rotational speed; it is
easy for a hand drill to achieve a rotational speed of several
hundred revolutions per minute, but it requires considerable
effort to achieve even 100 rpm with a brace. Due to the design of
the brace it tends to be easier than a power drill to keep at a
precise 90 degree angle.
• The front part of the brace consists of a chuck spindle with V-shaped
brackets or clamps inside. Turning the spindle of the chuck
in a clockwise direction tightens the drill bit in the chuck and
turning in a counter-clockwise direction loosens the bit for
removal.
32. 14. SCRAPER
A tool used
for removing
material
from a
surface.
33. Way to use??
• In use, the scraper is held at an angle of about 60° with
the surface of the work. If it is sharp and the edge
properly turned it will cut like a plane. Inexperienced
persons are often tempted to try to make the scraperdo
the work of the plane. This is a mistake for if much
material is removed the surface will become very uneven
due to the fact that the scraper tends to cut more on the
soft than on the hard spots.
• To counteract this tendency, the scraping should be done
so that the strokes of the scraper will cross one another at
an angle.
34. 15. WOOD
TURNING
TOOLS
A set of tools
used to cut
wood on a
wood lathe.
35. Way to use??
• The tool rest should be quite close to the
wood. Before turning on the lathe, spin the
wood by hand to ensure that it does not
‘catch’ on the tool rest.
39. 17. SLIDING
T- BEVEL
An
adjustable
gauge for
setting and
transferring
angles.
40. Way to use??
• To originate and new angle:
• Loosen the wing nut adjustment so that the blade is free to rotate.
• Swing the blade until the desired angle between the handle of the bevel and the
blade side is made. This may be best achieved by placing a protractor on the
inside of the bevel itself (so that the protractor is resting on the wing nut) and
measuring out the desired angle.
• Lock the T bevel into place by tightening the wing nut.
• Lay the T bevel on your working surface and draw the angle by tracing along the
inside of the T bevel blade and handle.
• Cut away!
• To transfer an existing angle:
• Loosen the wing nut adjustment so that the blade is free to rotate
• Lay the T bevel against the surface of the angle cut to be copied.
• Rotate the inside edge of the blade to the existing angle until it matches the
angle being transferred.
• Tighten the wing nut until it locks the blade and handle in position.
• Place the T bevel on the working surface and transfer the angle.
• Draw out the angle by tracing along the bevel on the inside edge of the blade and
handle.
41. 18. KEY HOLE
SAW
Short hand
saw with a
tapered blade
used to cut
curves or
irregular
shapes.
43. 19. SCRATCH
AWL
A sharp-pointed
tool
for marking
wood or
metal.
44. Way to use??
• Step 1
• Get the wood and use the scratch awl to mark a
point. Take the measurement twice.
• Step 2
• Position a straight edge next to the point you marked.
Firmly hold the straight edge so it doesn’t move.
• Step 3
• No matter which scratch awl size you use, make sure
to hold it at a slight angle. This way the point will be
on the straight edge. Now pull the scratch awl to you.
Use the straight edge as a guide.
45. 20. DIE
STOCK
A piece of
equipment that is
very important to
the process of
creating uniform
threads on
different types of
screw, bolts and
pipes.
46. Way to use??
• Step 1 – Clamp the Pipe on the Working Table
• To prevent the pipe from moving while you create the
threads, clamp the pipe on the side of the working
table.
• Step 2 – Insert the Pipe into the Hole of the Die Stock
• Insert the end of the pipe into the hole of the die
stock and lock it is place.
• Step 3 – Turn the Die Stock to Create the Threads
• Grasp the opposite ends of the die stock then slowly
turn the die stock clockwise. The die stock has razor
sharp blades that will cut into the pipe as you turn.
47. The End,
Thanks for lending your
attention friend and
lecturers.