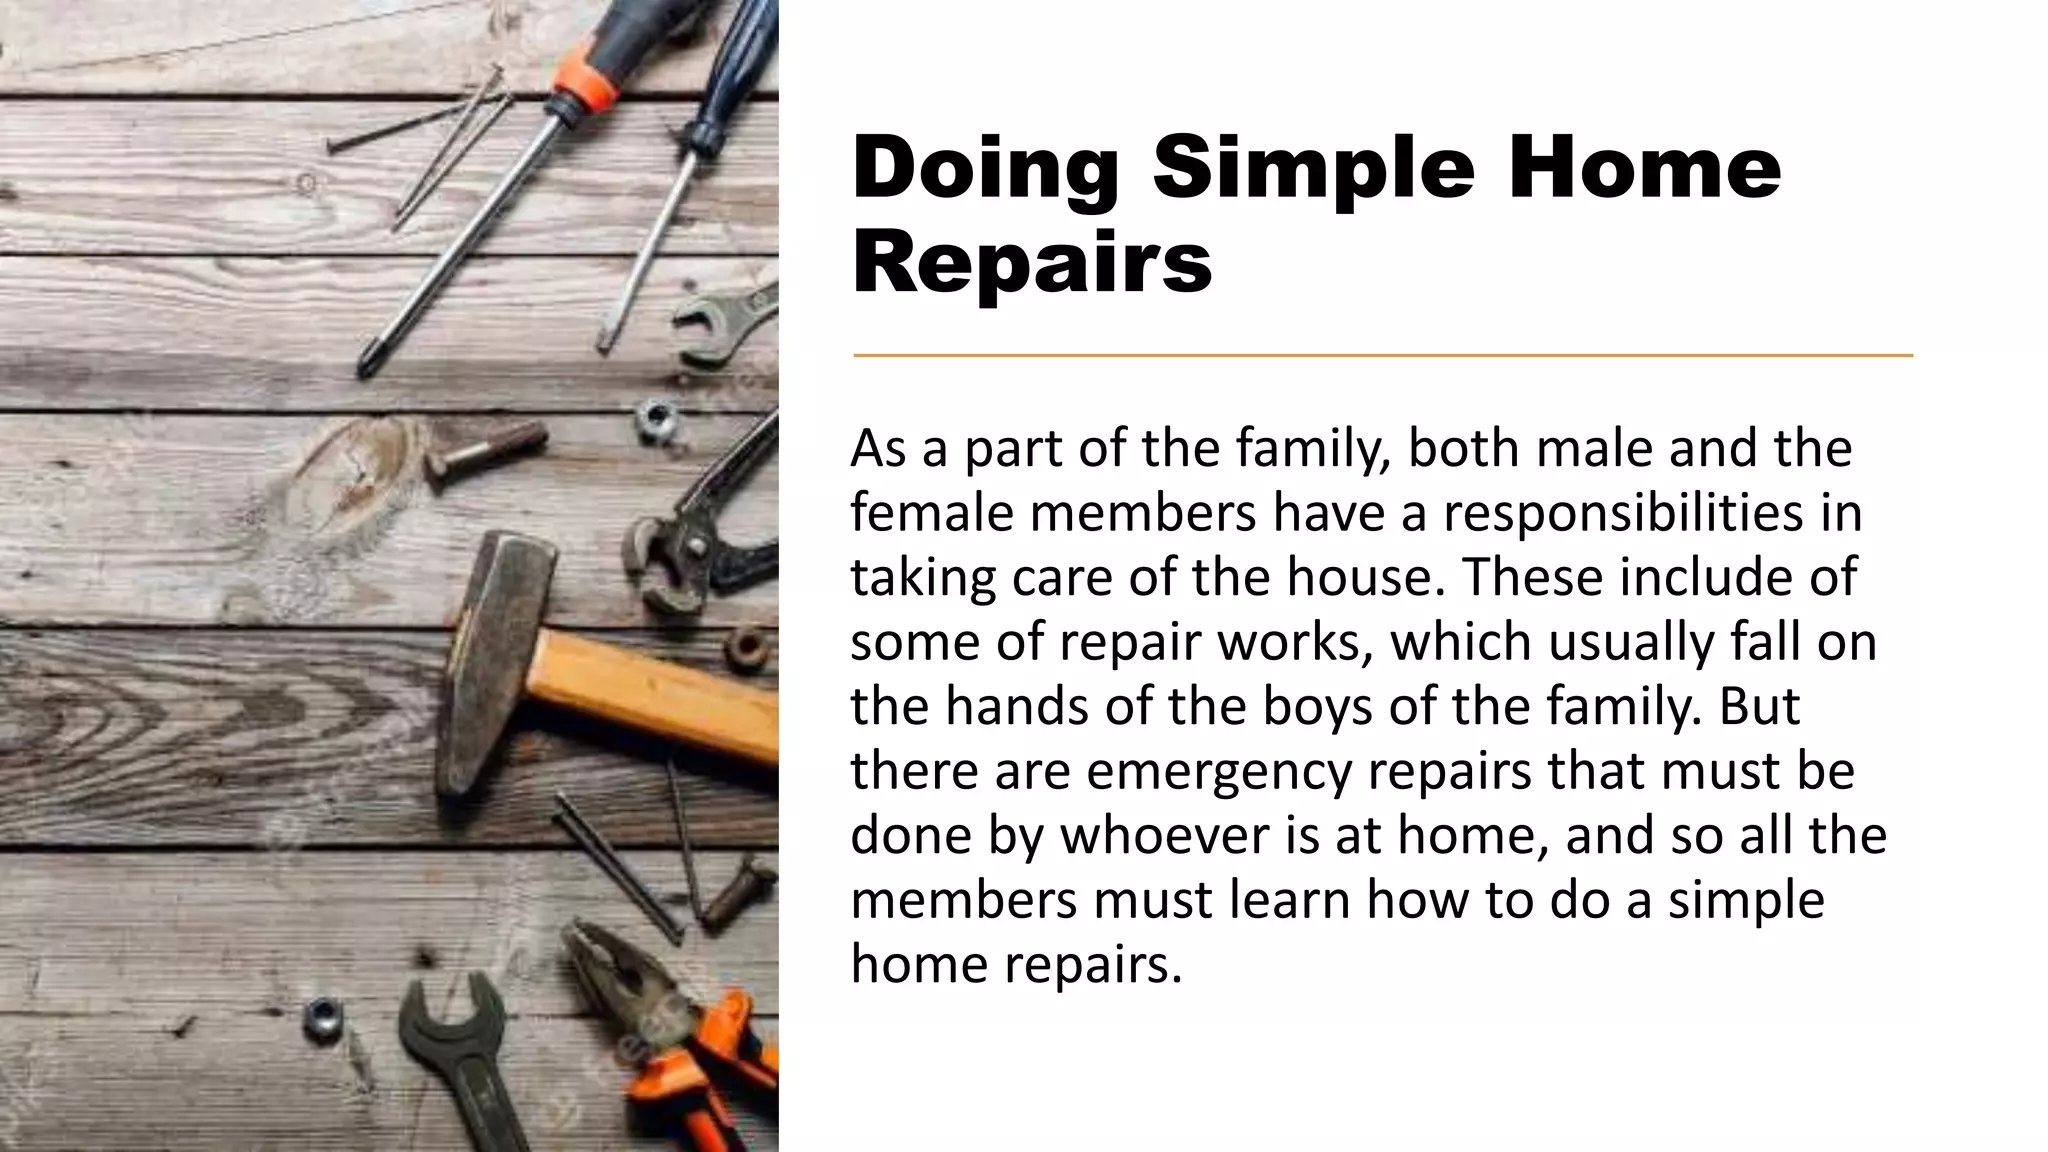
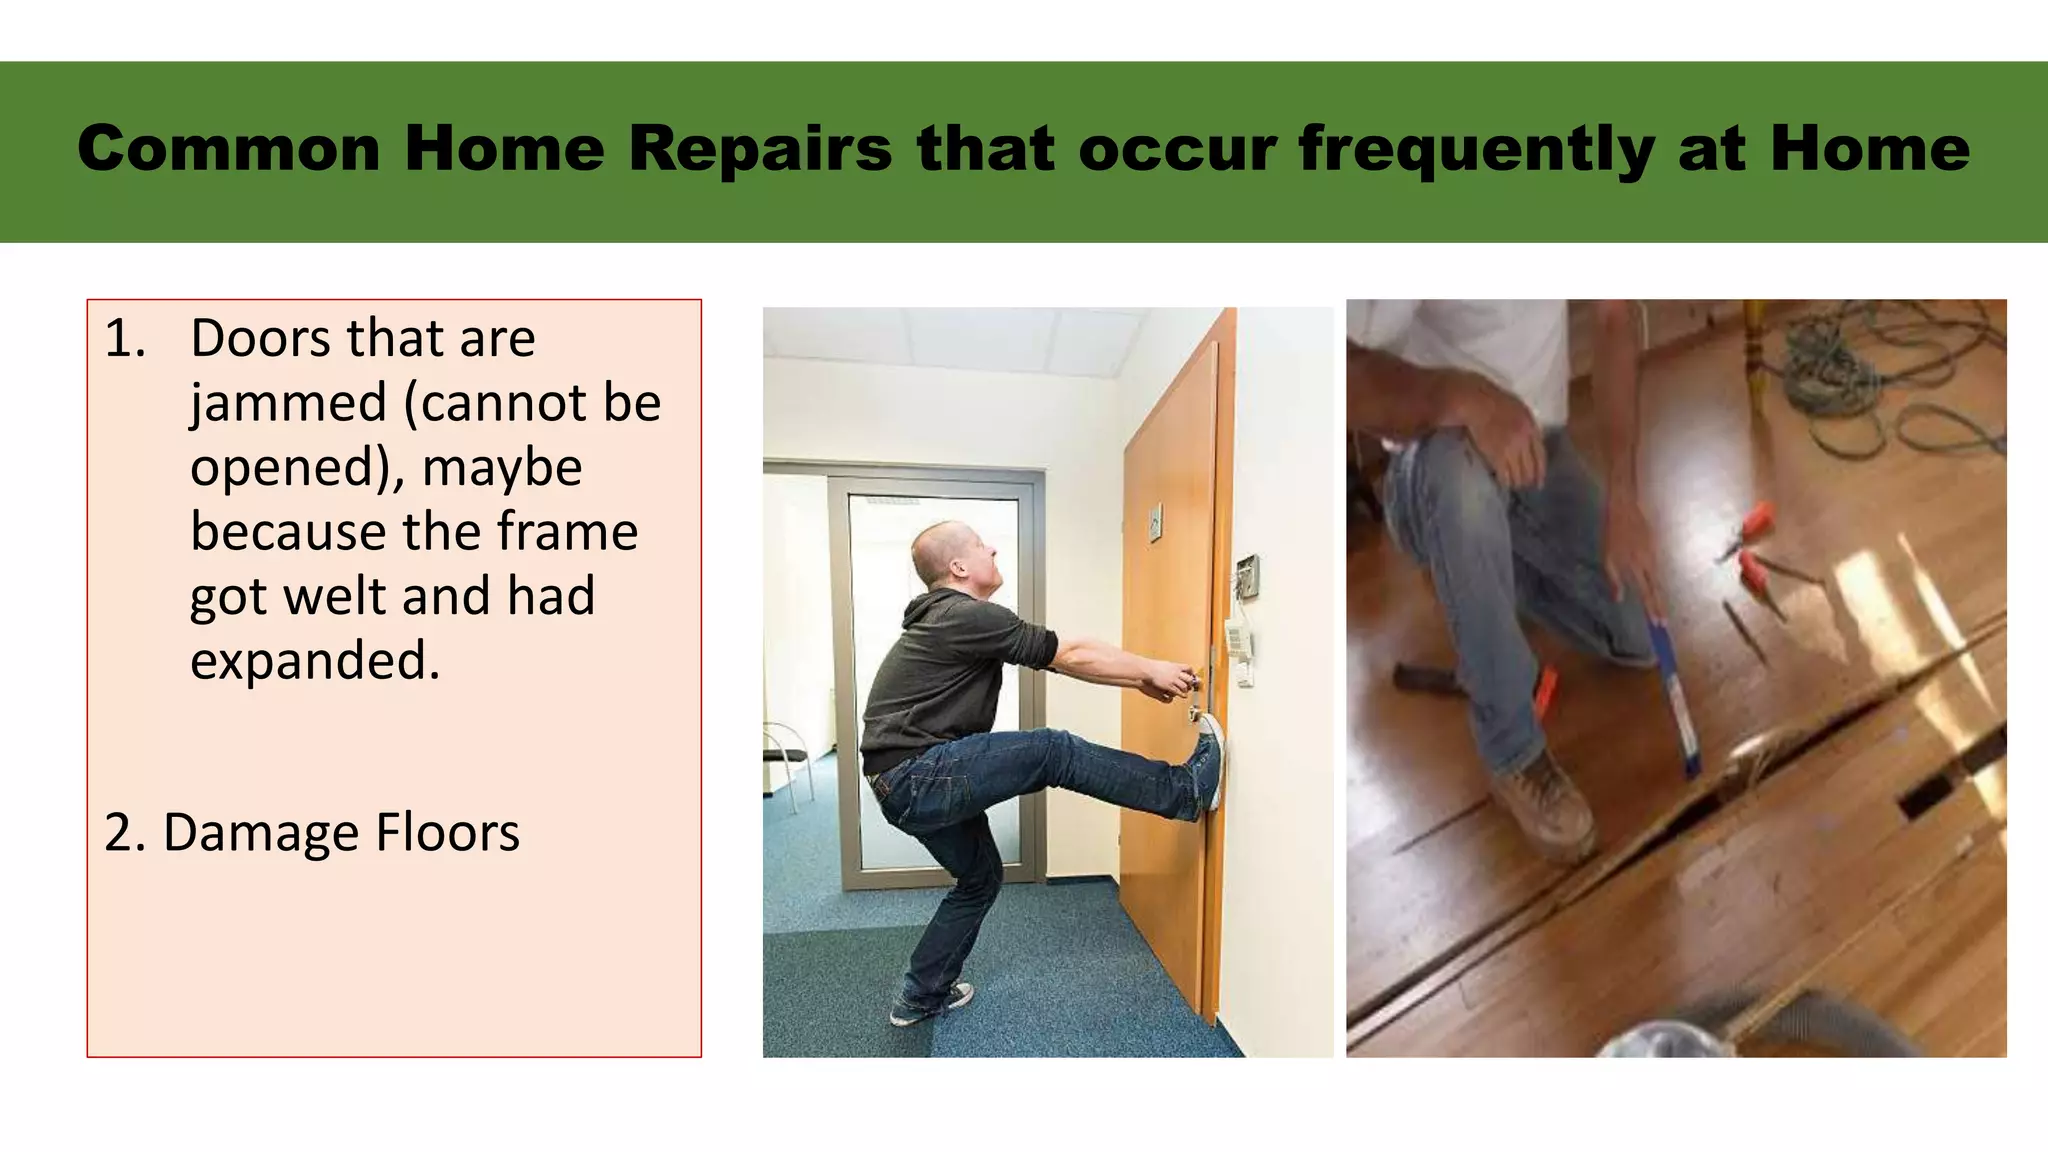
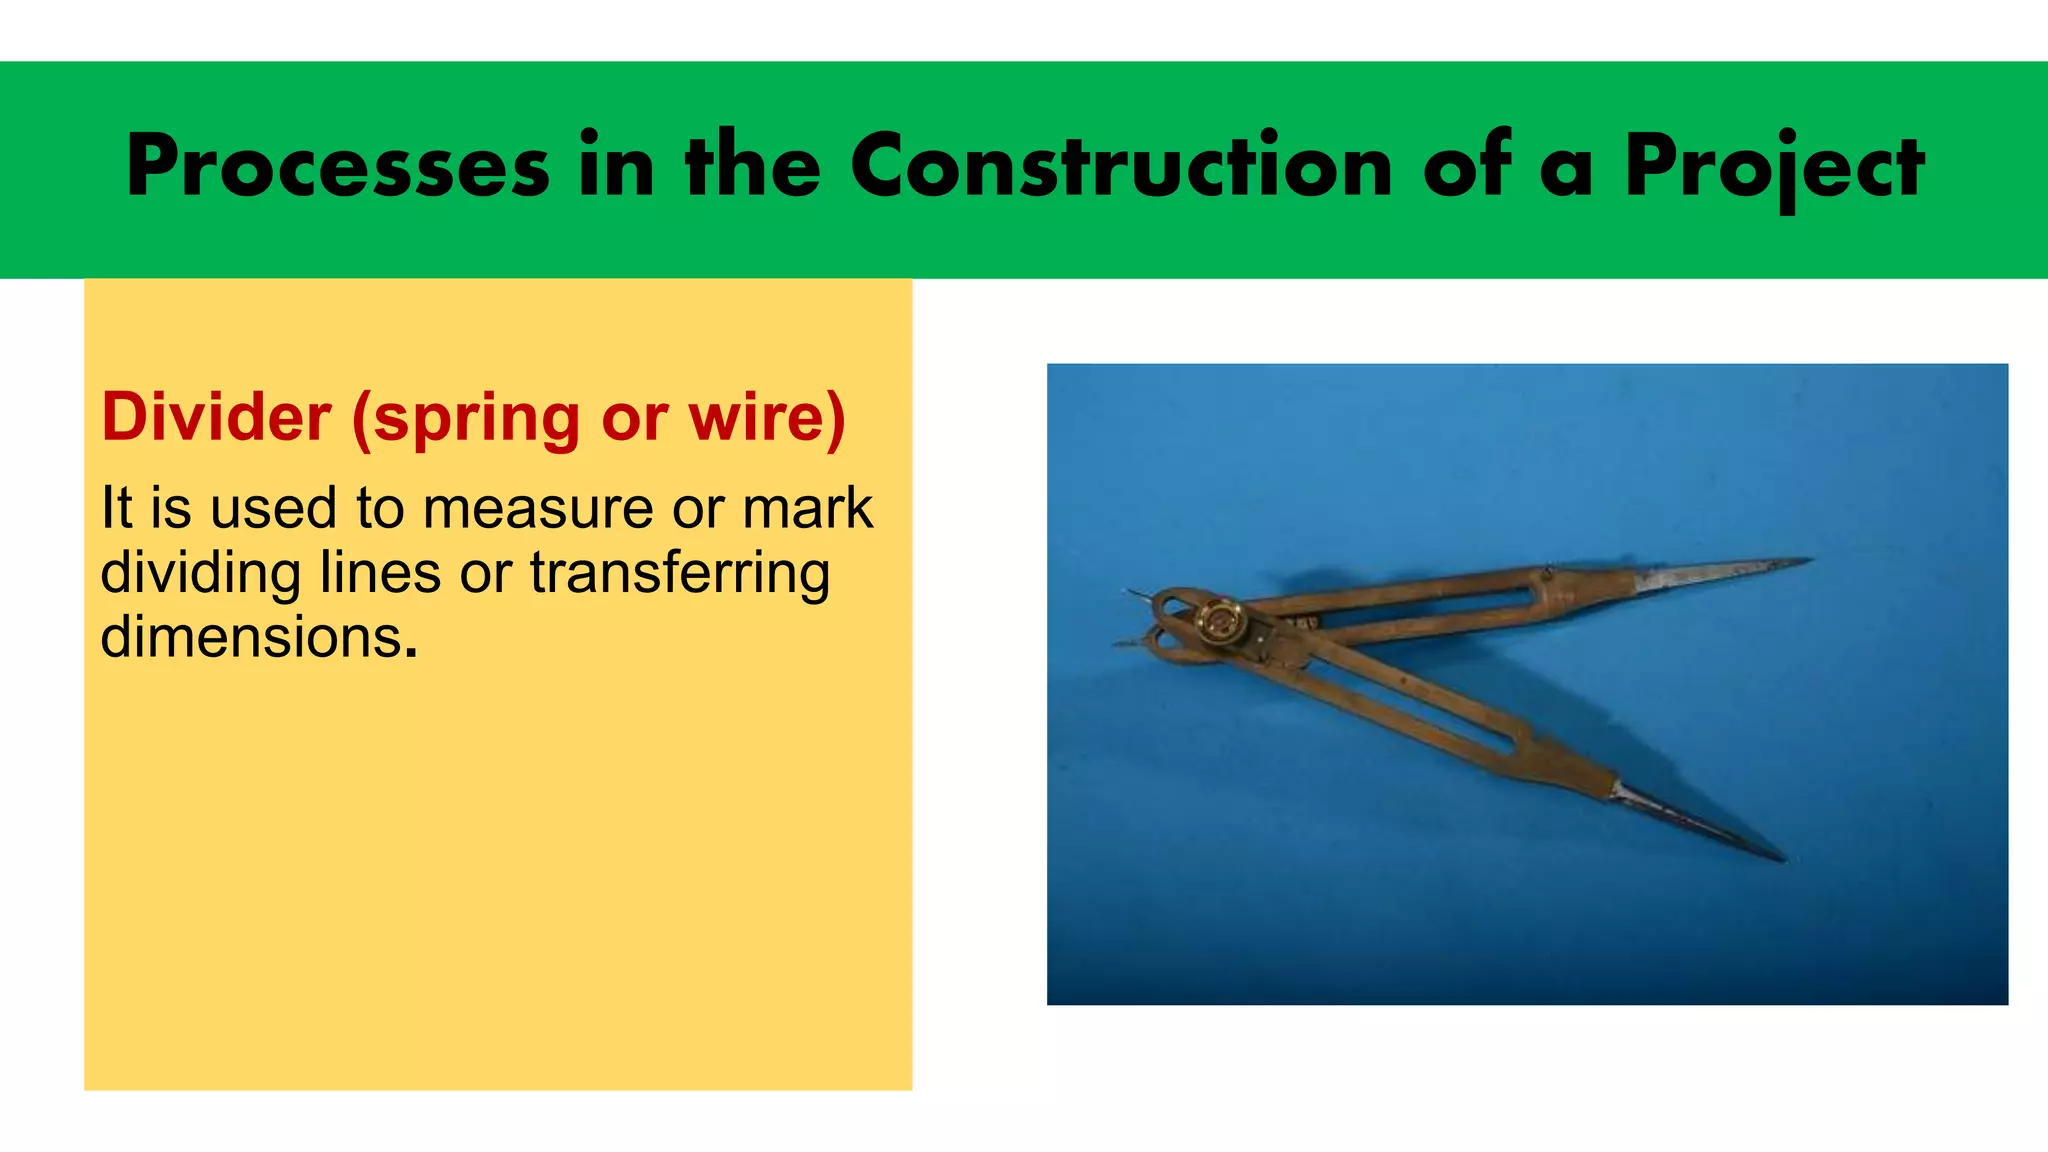
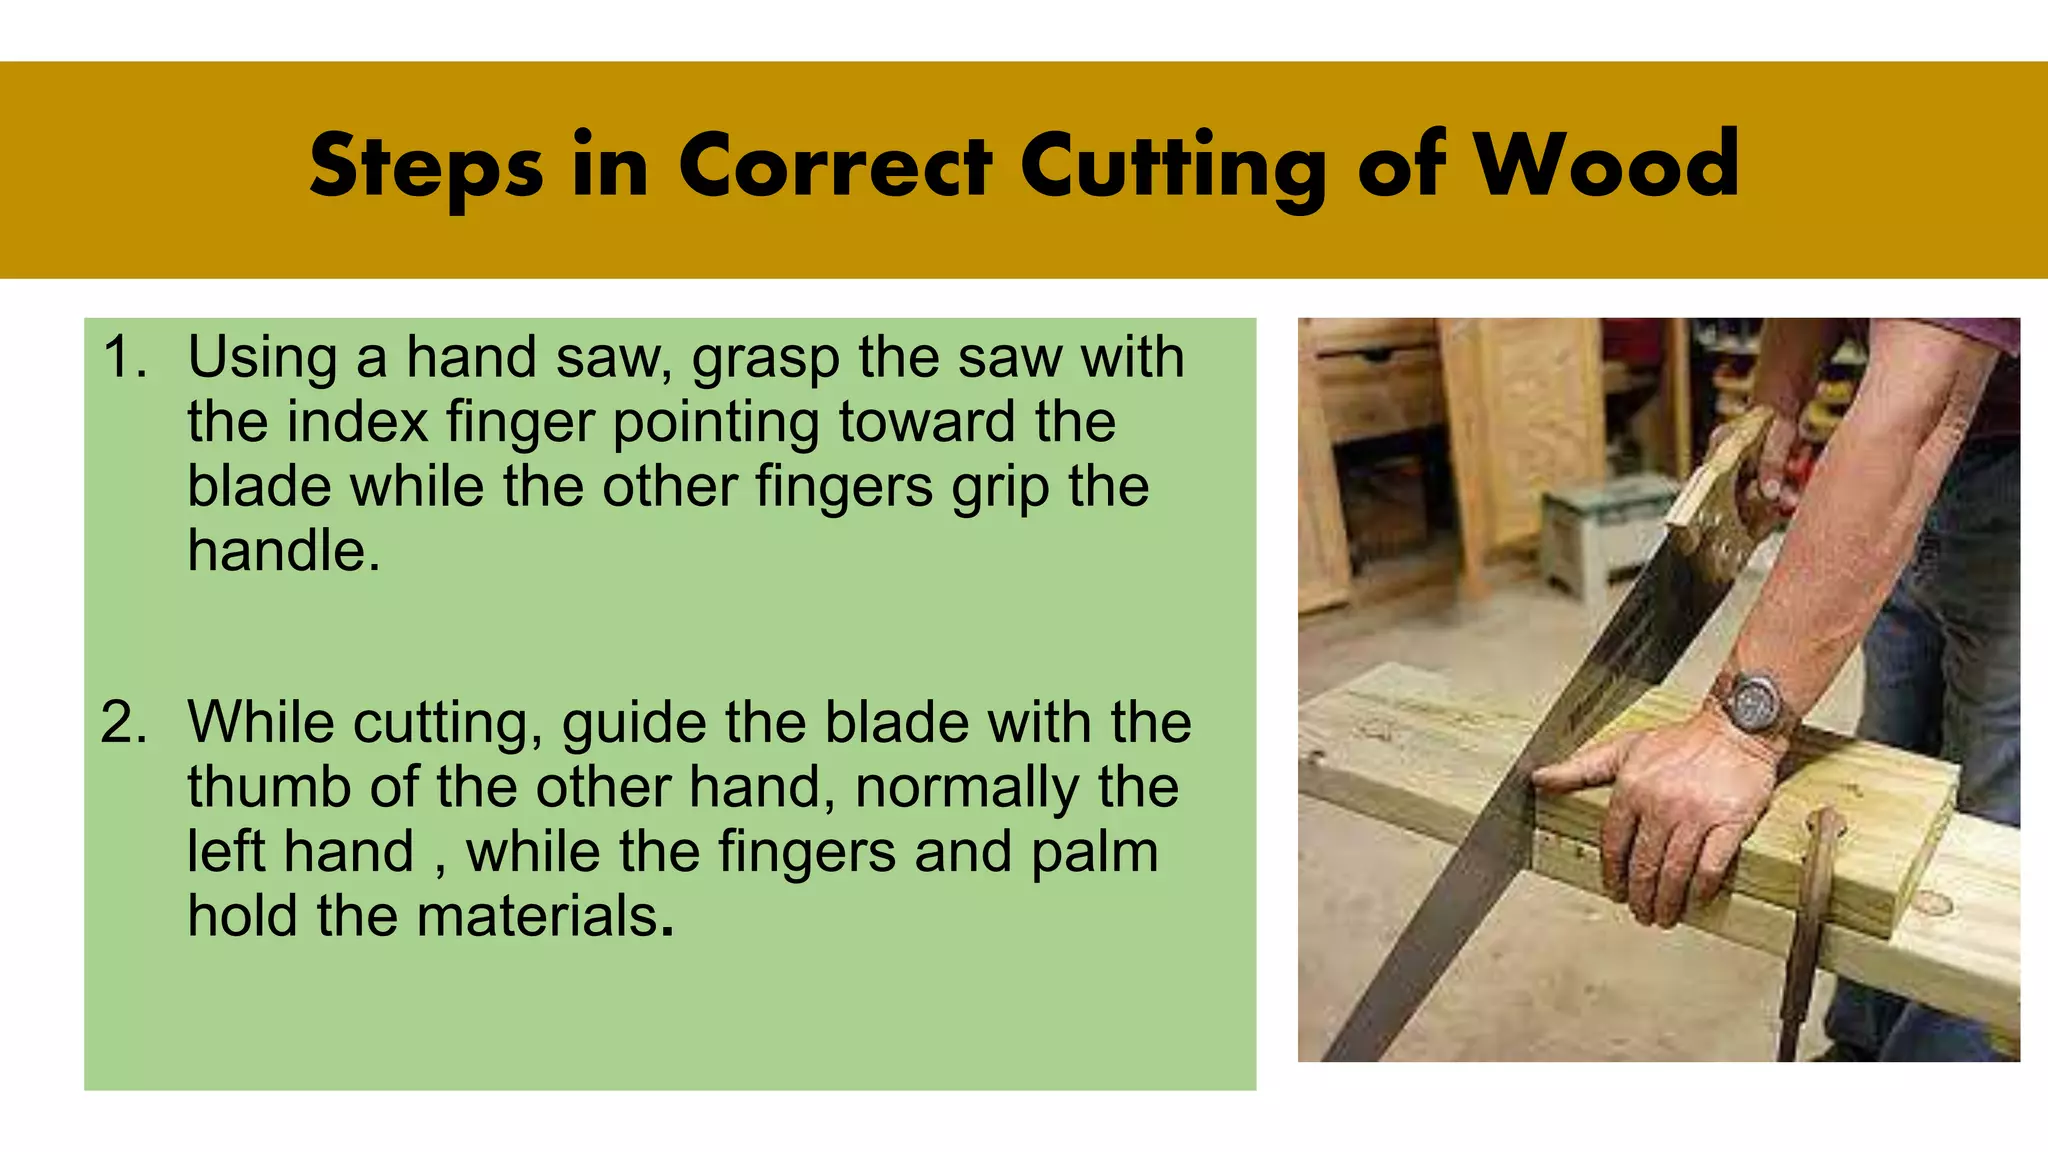
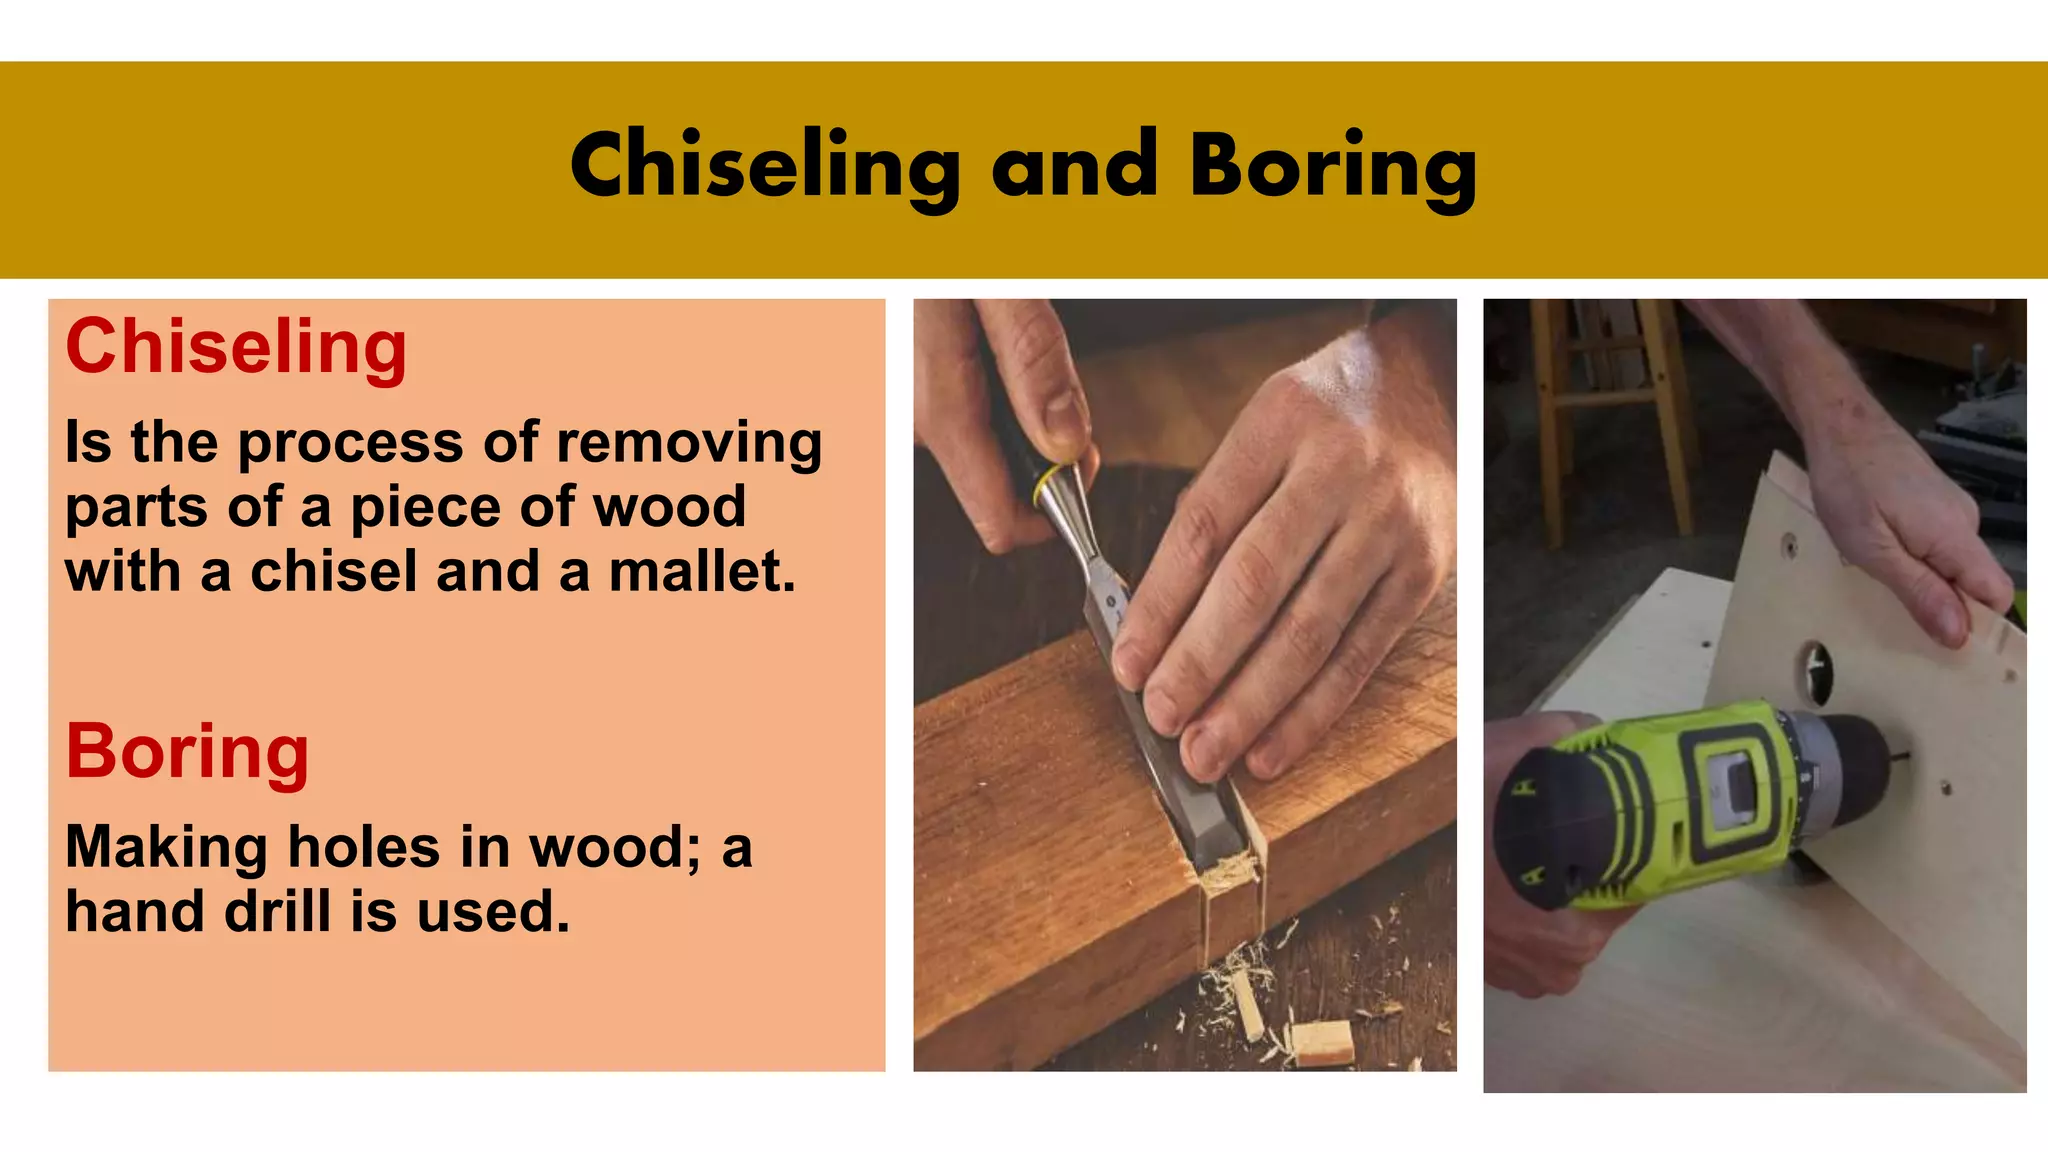
Industrial Arts
Doing Simple Home
Repairs
As a part of the family, both male and the
female members have a responsibilities in
taking care of the house. These include of
some of repair works, which usually fall on
the hands of the boys of the family. But
there are emergency repairs that must be
done by whoever is at home, and so all the
members must learn how to do a simple
home repairs.
Doing Simple Home
Repairs
Doing repair work needs tools and basic
equipment. All home should have the
following basic tools: Axe, bolo, boring
wheel, claw hammer, long nose pliers, saw,
a pair of scissors for metal sheet,
screwdriver, tape measure, and wrench.
Basic Tools for Carpentry
Measuring tools
Trisquare Yard stick Ruler Folding ruler
Basic Tools for Carpentry
Marking Tools
Trisquare Plumb Gauge Folding ruler
Basic Tools for Carpentry
Cutting Tools
Saw Plane Knife Chisels
Basic Tools for Carpentry
Holding Tools
Clamps Vises Miter Boxes Screws
Power Tools
Electric drill
Is the most useful power
tool used for general
woodwork and home
repairs. It drives a hole to
puncture or perforate hard
substances.
Power Tools
Electric Saw
Is a power driven tool
used to cut hard
materials, such as wood,
metal or bone. It usually
consists of a thin, flat
blade, or plate of
tempered steel with a
continuous series of teeth
on the edge, and
mounted in a handle or
frame.
Jig Saw Circular Saw
Power Tools
Electric Sander
Is a machine that
smoothens, rubs or
polishes a surface by
grinding or rubbing with
an abrasive material
(sandpaper) in preparation
for finishing.
Power Tools
Electric Grinder
Is another power tool
used to cut, sharpen by
friction or reduce
hardwood, stone or
tempered metals to
develop a smooth finish.
Common Home Repairs that occur frequently at Home
1. Doors that are
jammed (cannot be
opened), maybe
because the frame
got welt and had
expanded.
2. Damage Floors
Common Home Repairs that occur frequently at Home
3. Replacing a termite-
infected window frame.
4. Drawers of cabinets
that are difficult to
open.
Common Home Repairs that occur frequently at Home
5. Repainting a wall or
ceiling.
6. Broken legs of chairs
of table.
Common Home Repairs that occur frequently at Home
7. Changing a loose
hinge.
8. Electrical
connections that need
repair.
List down the following and write your
answers in your notebook.
1. Give at least 3 simple home repairs.
2. Give at least seven tools needed in the house.
3. Why is it important to have tools in doing home repairs?
Completing
a Project in
a Enjoyable
Way
Project
planning
A project plan guides you in
making your project. It is a
very important that you make
a plan on the materials and
tools needed, how to go about
making the project, and what
you expect your project to be.
Precaution while Working
1. Small pieces of wood, iron, nails, etc. must be thrown in waste
cans or be picked up immediately after work.
2. Clear aisles and passageways of obstruction that can causes
accidents.
3. Arrange tools properly in tools boxes.
4. Do not play with flammable materials.
5. Check the condition of your tools before using them.
6. Do not operate machines if you are not sure you can handle
them well.
7. Clean tools and equipment before keeping them in their proper
places.
8. Remember, tools are not playthings. Handle them with care.
Processes in the Construction of a Project
Laying Out – the process
of measuring and marking of
dimensions.
Flexible folding rule
It is used by carpenters in
woodworking where
distances to be measured is
more than 2 feet.
Processes in the Construction of a Project
Square
It is used for laying out small
work on a 40-90 degree. The
T-squares are the
combination square and
framing square.
Processes in the Construction of a Project
Sliding bevel
It has a movable blade which
can be set any desired angles
from 0 to 180 degree.
Processes in the Construction of a Project
Marking Gauge
It is used for laying guidelines
on the wood.
Processes in the Construction of a Project
Divider (spring or wire)
It is used to measure or mark
dividing lines or transferring
dimensions.
Correct Steps in Measuring
1. Use the longest rule available.
2. Place the ruler on the surface of what is to be measured.
3. When several measurements are needed along the length of
the wood, do not raise the ruler until all measurements are
made. Just mark with pencil.
Cutting of Wood
Sawing
The cutting with a saw or with a machine.
Cutting along a grain is termed ripping
which when done across a grain is called
cross-cutting.
Steps in Correct Cutting of Wood
1. Using a hand saw, grasp the saw with
the index finger pointing toward the
blade while the other fingers grip the
handle.
2. While cutting, guide the blade with the
thumb of the other hand, normally the
left hand , while the fingers and palm
hold the materials.
Steps in Correct Cutting of Wood
3. Hold the blade of the saw at an angle of
45 degree to the board.
4. Start cutting slowly with light backward
stroke increasing gradually in length from
heel to toe of the saw.
5. Continue the motion until the saw has
cut through the material.
Steps in How to Plane
Planing
Removing thin parts of wood surfaces with
a plane. A blade comes up in the center of
the body of the plane. This blade shoves
the wood surface as it is pushed along.
Steps in How to Plane
1. Notice the direction of the grain. Place
the wood so as not to plane against the
grain.
2. Test with a ruler before beginning to
plane.
3. Rest the plane flat upon the wood from
start to finish.
4. Press heavily upon the knob of the
plane in the starting point and upon the
handle in finishing the stroke.
Smoothening
It is the process of removing lints
and rough edges on wood to make
the wood’s surface even, smooth,
and free from projections or
indentation.
Tools:
Sand paper, Hand plane
Smoothening
1. Clean and feel with your hand
the surface of the wood to be
planed.
2. Position the wood in the place
and adjust the blade of the
plane according to the thickness
of the wood.
3. Hold the plane firmly on by the
handle and the font knob.
4. Move the plane forward firmly
but gently in a straight direction.
Steps in Smoothening
5. Check if the plane is functioning
well.
6. If the wood is smooth enough to
your satisfaction, your task is
finished. But if not, repeat the
process.
Steps in Smoothening
Chiseling
Is the process of removing
parts of a piece of wood
with a chisel and a mallet.
Boring
Making holes in wood; a
hand drill is used.
Chiseling and Boring
LET’S CHECK
1. Name the tools used for the following processes.
• Measuring __________________
• Marking __________________
• Cutting __________________
• Smoothening __________________
• Chiseling __________________
• Finishing __________________
2. List down rules to safeguard your health and safety while working on your
project:
__________________________________
__________________________________
__________________________________
3. Why do you need to make a project plan?

Lesson 1 Industrial Arts.pptx

  • 1.
  • 2.
    Doing Simple Home Repairs Asa part of the family, both male and the female members have a responsibilities in taking care of the house. These include of some of repair works, which usually fall on the hands of the boys of the family. But there are emergency repairs that must be done by whoever is at home, and so all the members must learn how to do a simple home repairs.
  • 3.
    Doing Simple Home Repairs Doingrepair work needs tools and basic equipment. All home should have the following basic tools: Axe, bolo, boring wheel, claw hammer, long nose pliers, saw, a pair of scissors for metal sheet, screwdriver, tape measure, and wrench.
  • 4.
    Basic Tools forCarpentry Measuring tools Trisquare Yard stick Ruler Folding ruler
  • 5.
    Basic Tools forCarpentry Marking Tools Trisquare Plumb Gauge Folding ruler
  • 6.
    Basic Tools forCarpentry Cutting Tools Saw Plane Knife Chisels
  • 7.
    Basic Tools forCarpentry Holding Tools Clamps Vises Miter Boxes Screws
  • 8.
    Power Tools Electric drill Isthe most useful power tool used for general woodwork and home repairs. It drives a hole to puncture or perforate hard substances.
  • 9.
    Power Tools Electric Saw Isa power driven tool used to cut hard materials, such as wood, metal or bone. It usually consists of a thin, flat blade, or plate of tempered steel with a continuous series of teeth on the edge, and mounted in a handle or frame. Jig Saw Circular Saw
  • 10.
    Power Tools Electric Sander Isa machine that smoothens, rubs or polishes a surface by grinding or rubbing with an abrasive material (sandpaper) in preparation for finishing.
  • 11.
    Power Tools Electric Grinder Isanother power tool used to cut, sharpen by friction or reduce hardwood, stone or tempered metals to develop a smooth finish.
  • 12.
    Common Home Repairsthat occur frequently at Home 1. Doors that are jammed (cannot be opened), maybe because the frame got welt and had expanded. 2. Damage Floors
  • 13.
    Common Home Repairsthat occur frequently at Home 3. Replacing a termite- infected window frame. 4. Drawers of cabinets that are difficult to open.
  • 14.
    Common Home Repairsthat occur frequently at Home 5. Repainting a wall or ceiling. 6. Broken legs of chairs of table.
  • 15.
    Common Home Repairsthat occur frequently at Home 7. Changing a loose hinge. 8. Electrical connections that need repair.
  • 16.
    List down thefollowing and write your answers in your notebook. 1. Give at least 3 simple home repairs. 2. Give at least seven tools needed in the house. 3. Why is it important to have tools in doing home repairs?
  • 17.
  • 18.
    Project planning A project planguides you in making your project. It is a very important that you make a plan on the materials and tools needed, how to go about making the project, and what you expect your project to be.
  • 19.
    Precaution while Working 1.Small pieces of wood, iron, nails, etc. must be thrown in waste cans or be picked up immediately after work. 2. Clear aisles and passageways of obstruction that can causes accidents. 3. Arrange tools properly in tools boxes. 4. Do not play with flammable materials. 5. Check the condition of your tools before using them. 6. Do not operate machines if you are not sure you can handle them well. 7. Clean tools and equipment before keeping them in their proper places. 8. Remember, tools are not playthings. Handle them with care.
  • 20.
    Processes in theConstruction of a Project Laying Out – the process of measuring and marking of dimensions. Flexible folding rule It is used by carpenters in woodworking where distances to be measured is more than 2 feet.
  • 21.
    Processes in theConstruction of a Project Square It is used for laying out small work on a 40-90 degree. The T-squares are the combination square and framing square.
  • 22.
    Processes in theConstruction of a Project Sliding bevel It has a movable blade which can be set any desired angles from 0 to 180 degree.
  • 23.
    Processes in theConstruction of a Project Marking Gauge It is used for laying guidelines on the wood.
  • 24.
    Processes in theConstruction of a Project Divider (spring or wire) It is used to measure or mark dividing lines or transferring dimensions.
  • 25.
    Correct Steps inMeasuring 1. Use the longest rule available. 2. Place the ruler on the surface of what is to be measured. 3. When several measurements are needed along the length of the wood, do not raise the ruler until all measurements are made. Just mark with pencil.
  • 26.
    Cutting of Wood Sawing Thecutting with a saw or with a machine. Cutting along a grain is termed ripping which when done across a grain is called cross-cutting.
  • 27.
    Steps in CorrectCutting of Wood 1. Using a hand saw, grasp the saw with the index finger pointing toward the blade while the other fingers grip the handle. 2. While cutting, guide the blade with the thumb of the other hand, normally the left hand , while the fingers and palm hold the materials.
  • 28.
    Steps in CorrectCutting of Wood 3. Hold the blade of the saw at an angle of 45 degree to the board. 4. Start cutting slowly with light backward stroke increasing gradually in length from heel to toe of the saw. 5. Continue the motion until the saw has cut through the material.
  • 29.
    Steps in Howto Plane Planing Removing thin parts of wood surfaces with a plane. A blade comes up in the center of the body of the plane. This blade shoves the wood surface as it is pushed along.
  • 30.
    Steps in Howto Plane 1. Notice the direction of the grain. Place the wood so as not to plane against the grain. 2. Test with a ruler before beginning to plane. 3. Rest the plane flat upon the wood from start to finish. 4. Press heavily upon the knob of the plane in the starting point and upon the handle in finishing the stroke.
  • 31.
    Smoothening It is theprocess of removing lints and rough edges on wood to make the wood’s surface even, smooth, and free from projections or indentation. Tools: Sand paper, Hand plane Smoothening
  • 32.
    1. Clean andfeel with your hand the surface of the wood to be planed. 2. Position the wood in the place and adjust the blade of the plane according to the thickness of the wood. 3. Hold the plane firmly on by the handle and the font knob. 4. Move the plane forward firmly but gently in a straight direction. Steps in Smoothening
  • 33.
    5. Check ifthe plane is functioning well. 6. If the wood is smooth enough to your satisfaction, your task is finished. But if not, repeat the process. Steps in Smoothening
  • 34.
    Chiseling Is the processof removing parts of a piece of wood with a chisel and a mallet. Boring Making holes in wood; a hand drill is used. Chiseling and Boring
  • 35.
    LET’S CHECK 1. Namethe tools used for the following processes. • Measuring __________________ • Marking __________________ • Cutting __________________ • Smoothening __________________ • Chiseling __________________ • Finishing __________________ 2. List down rules to safeguard your health and safety while working on your project: __________________________________ __________________________________ __________________________________ 3. Why do you need to make a project plan?

Editor's Notes

  • #2 Class have you experience to repaired something in your home, just like for example in fixing chairs, tables, windows and others?
  • #3 As a students, did you have a knowledge about a basic tools and equipment that can use for simple home repair?
  • #4 As a students, did you have a knowledge about a basic tools and equipment that can use for simple home repair?