Download to read offline

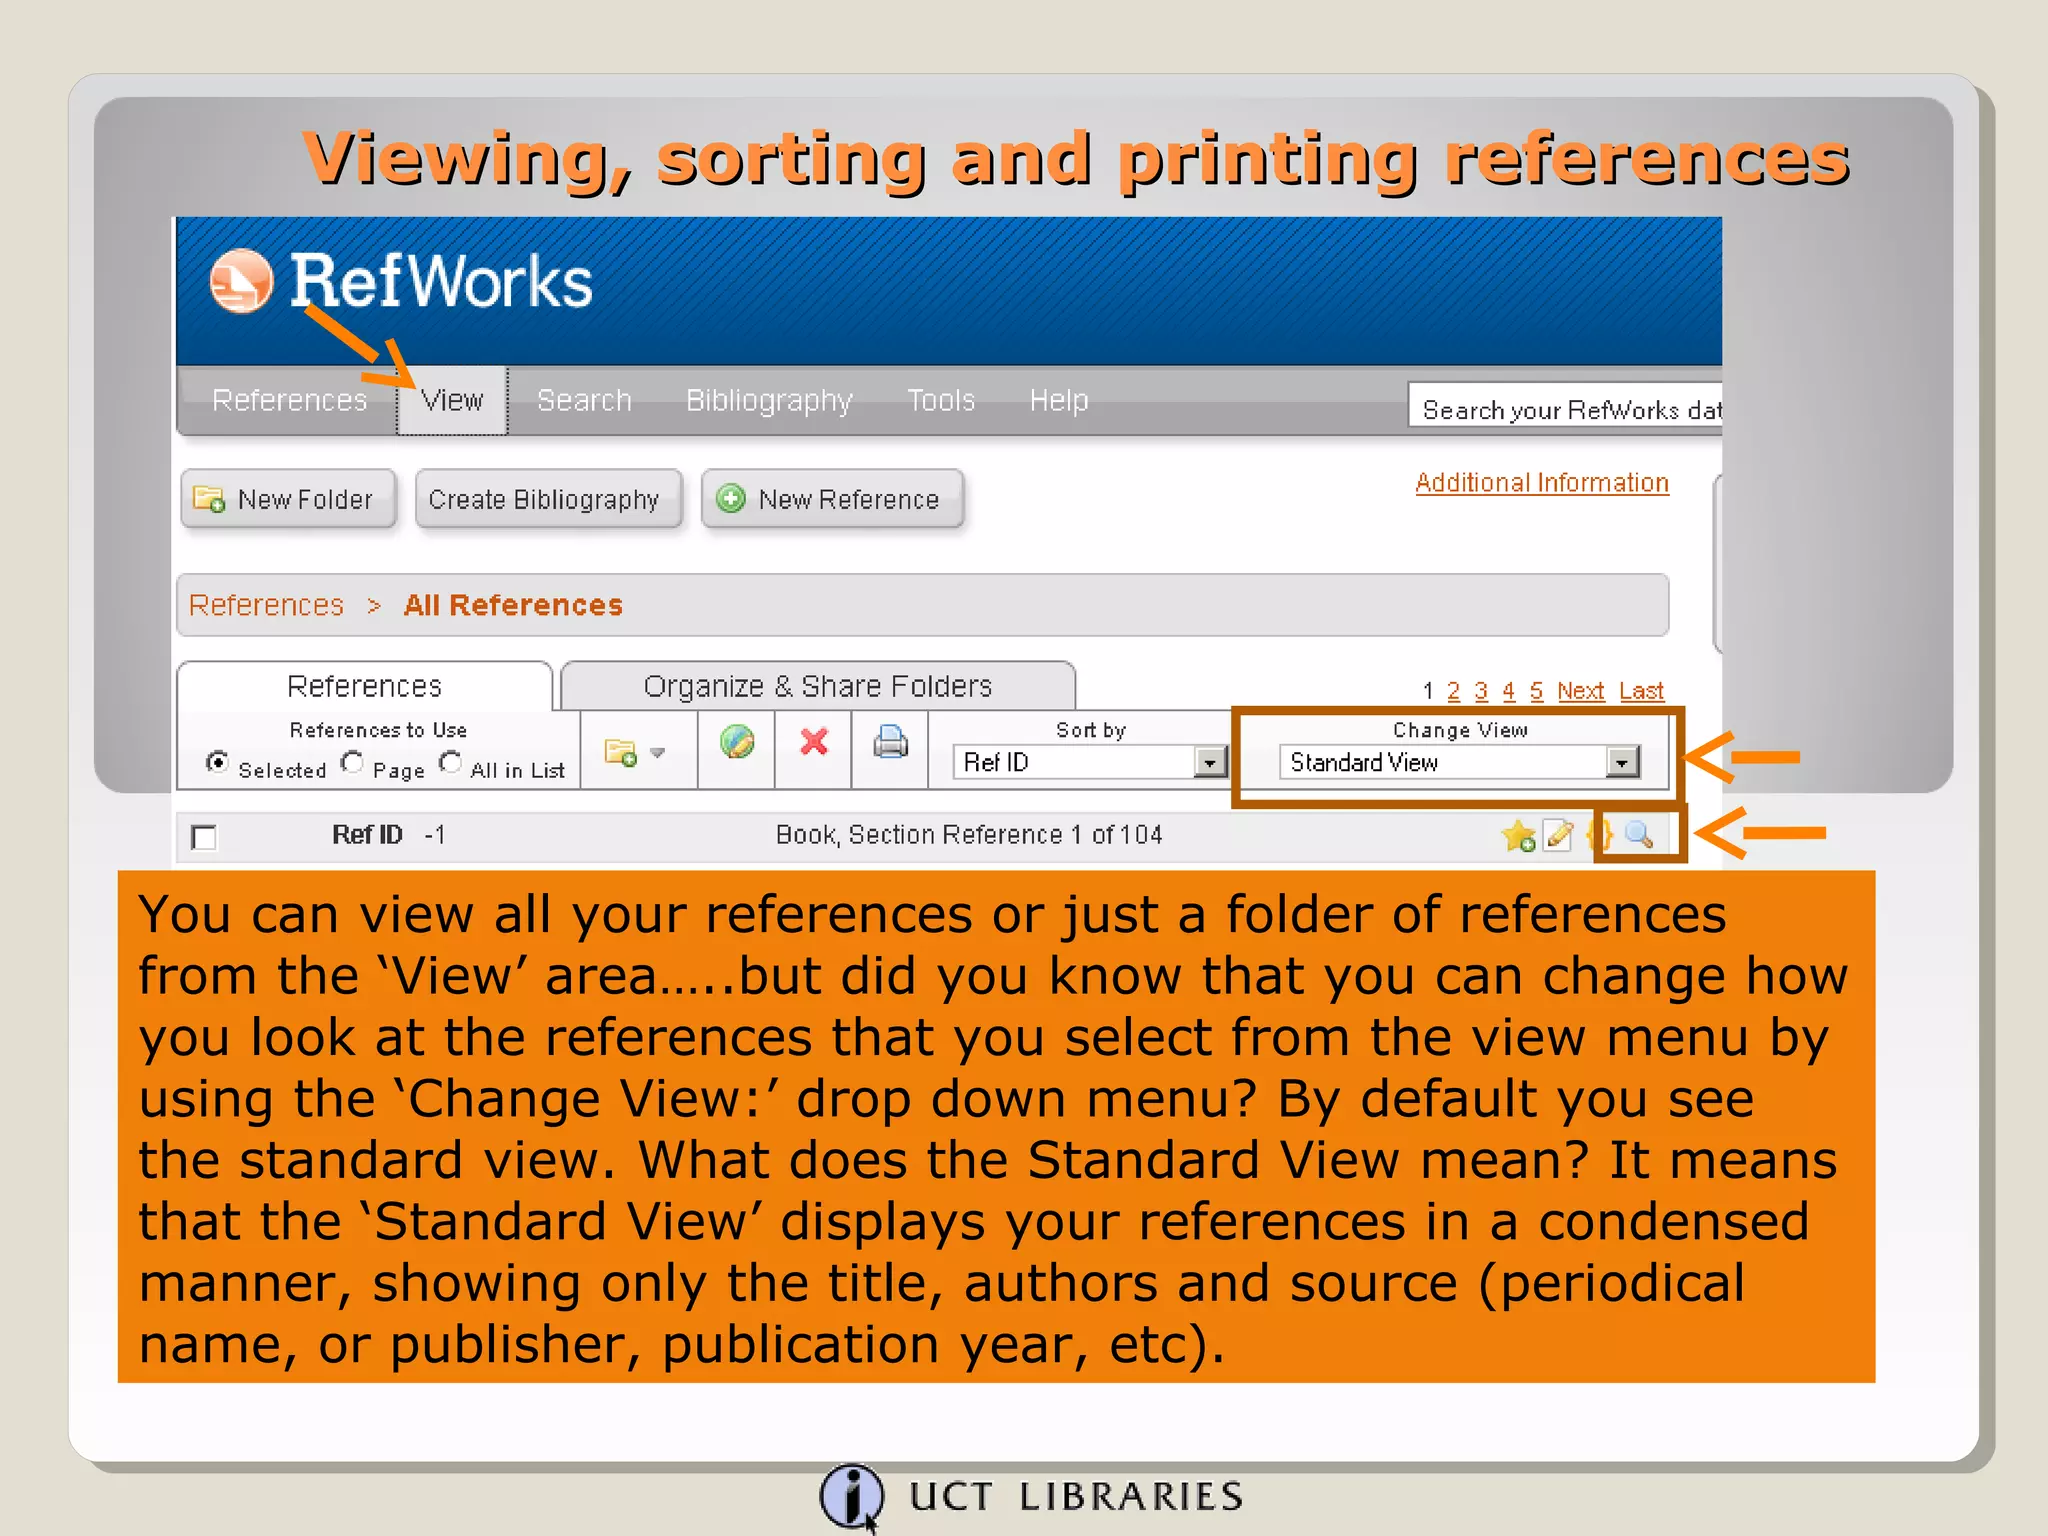
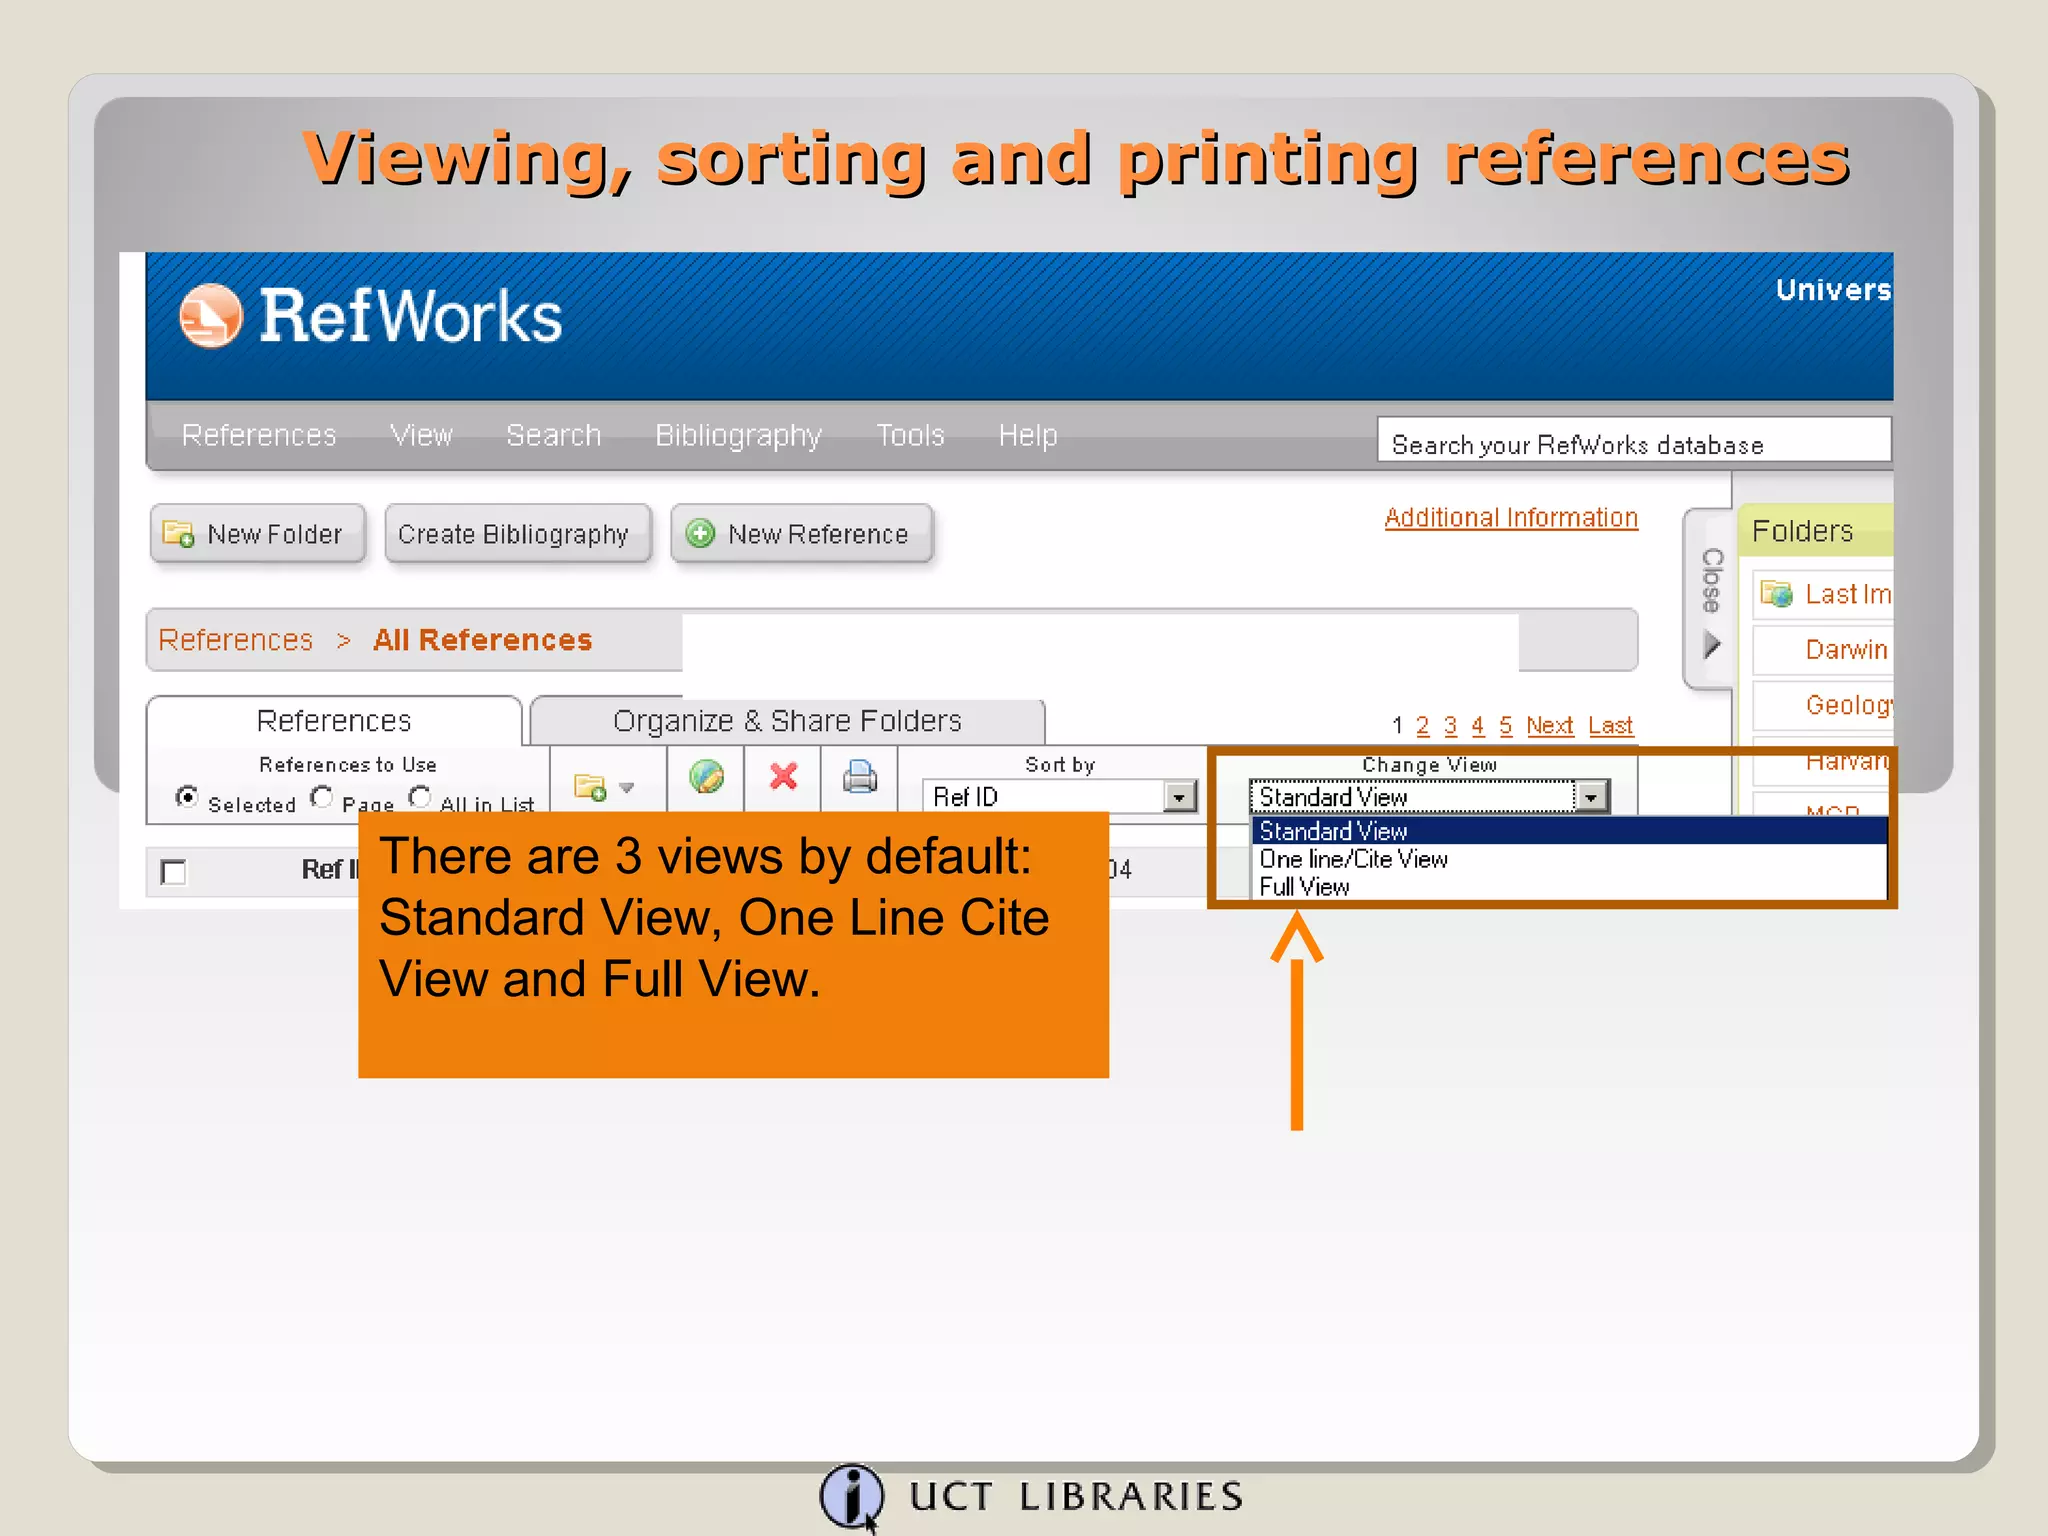
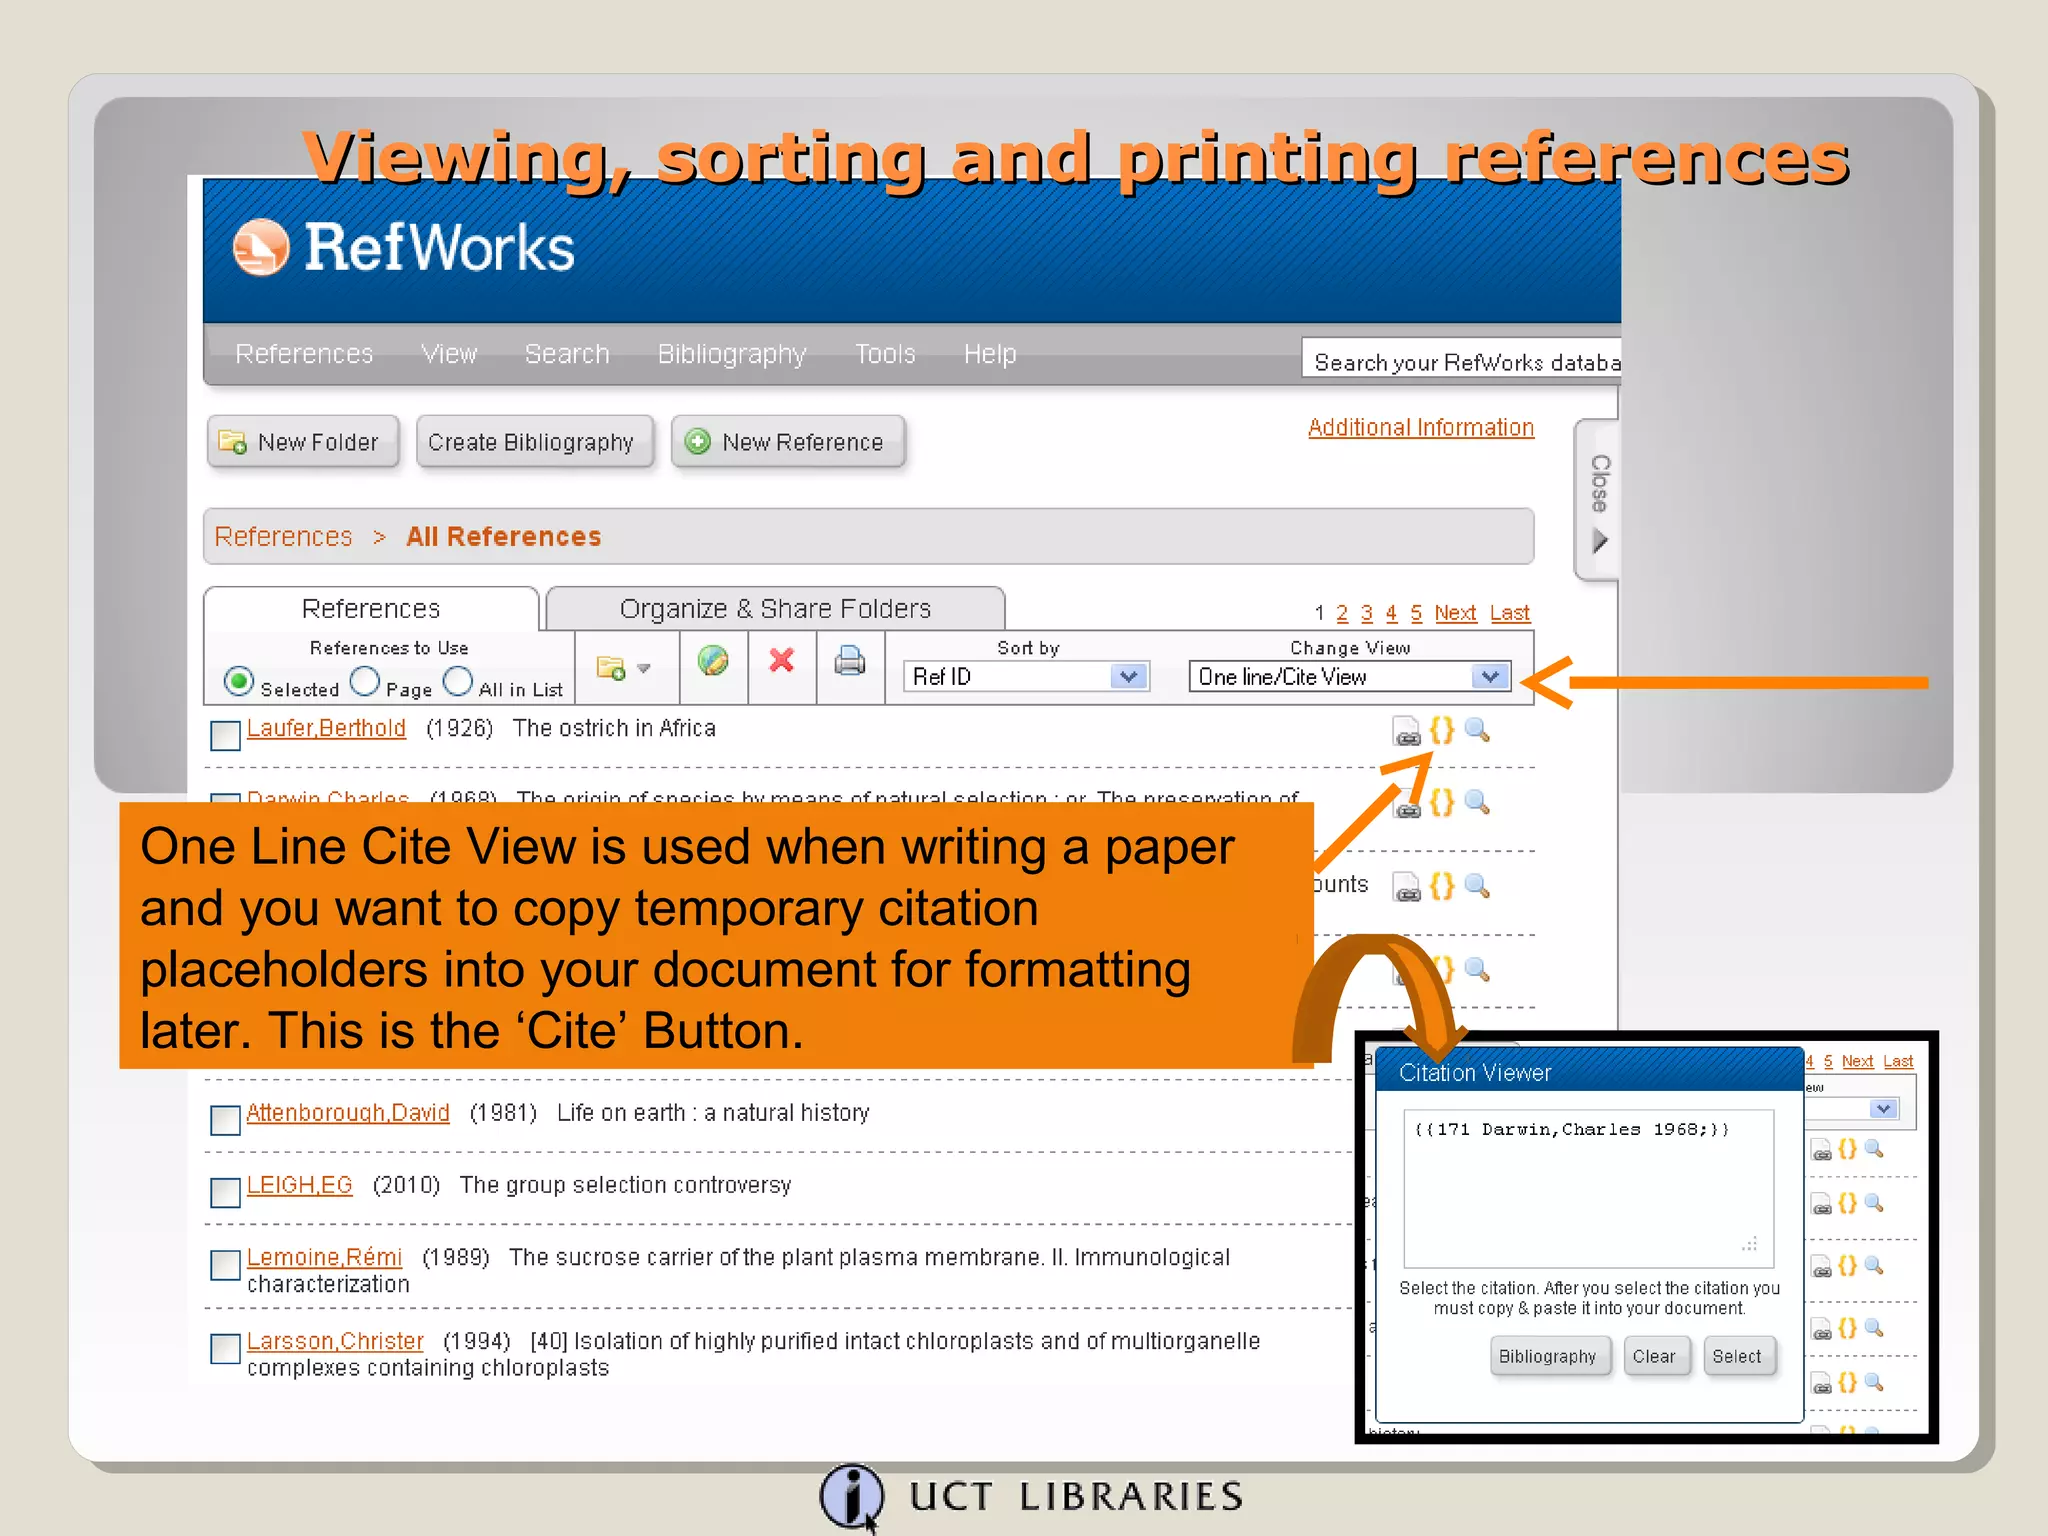
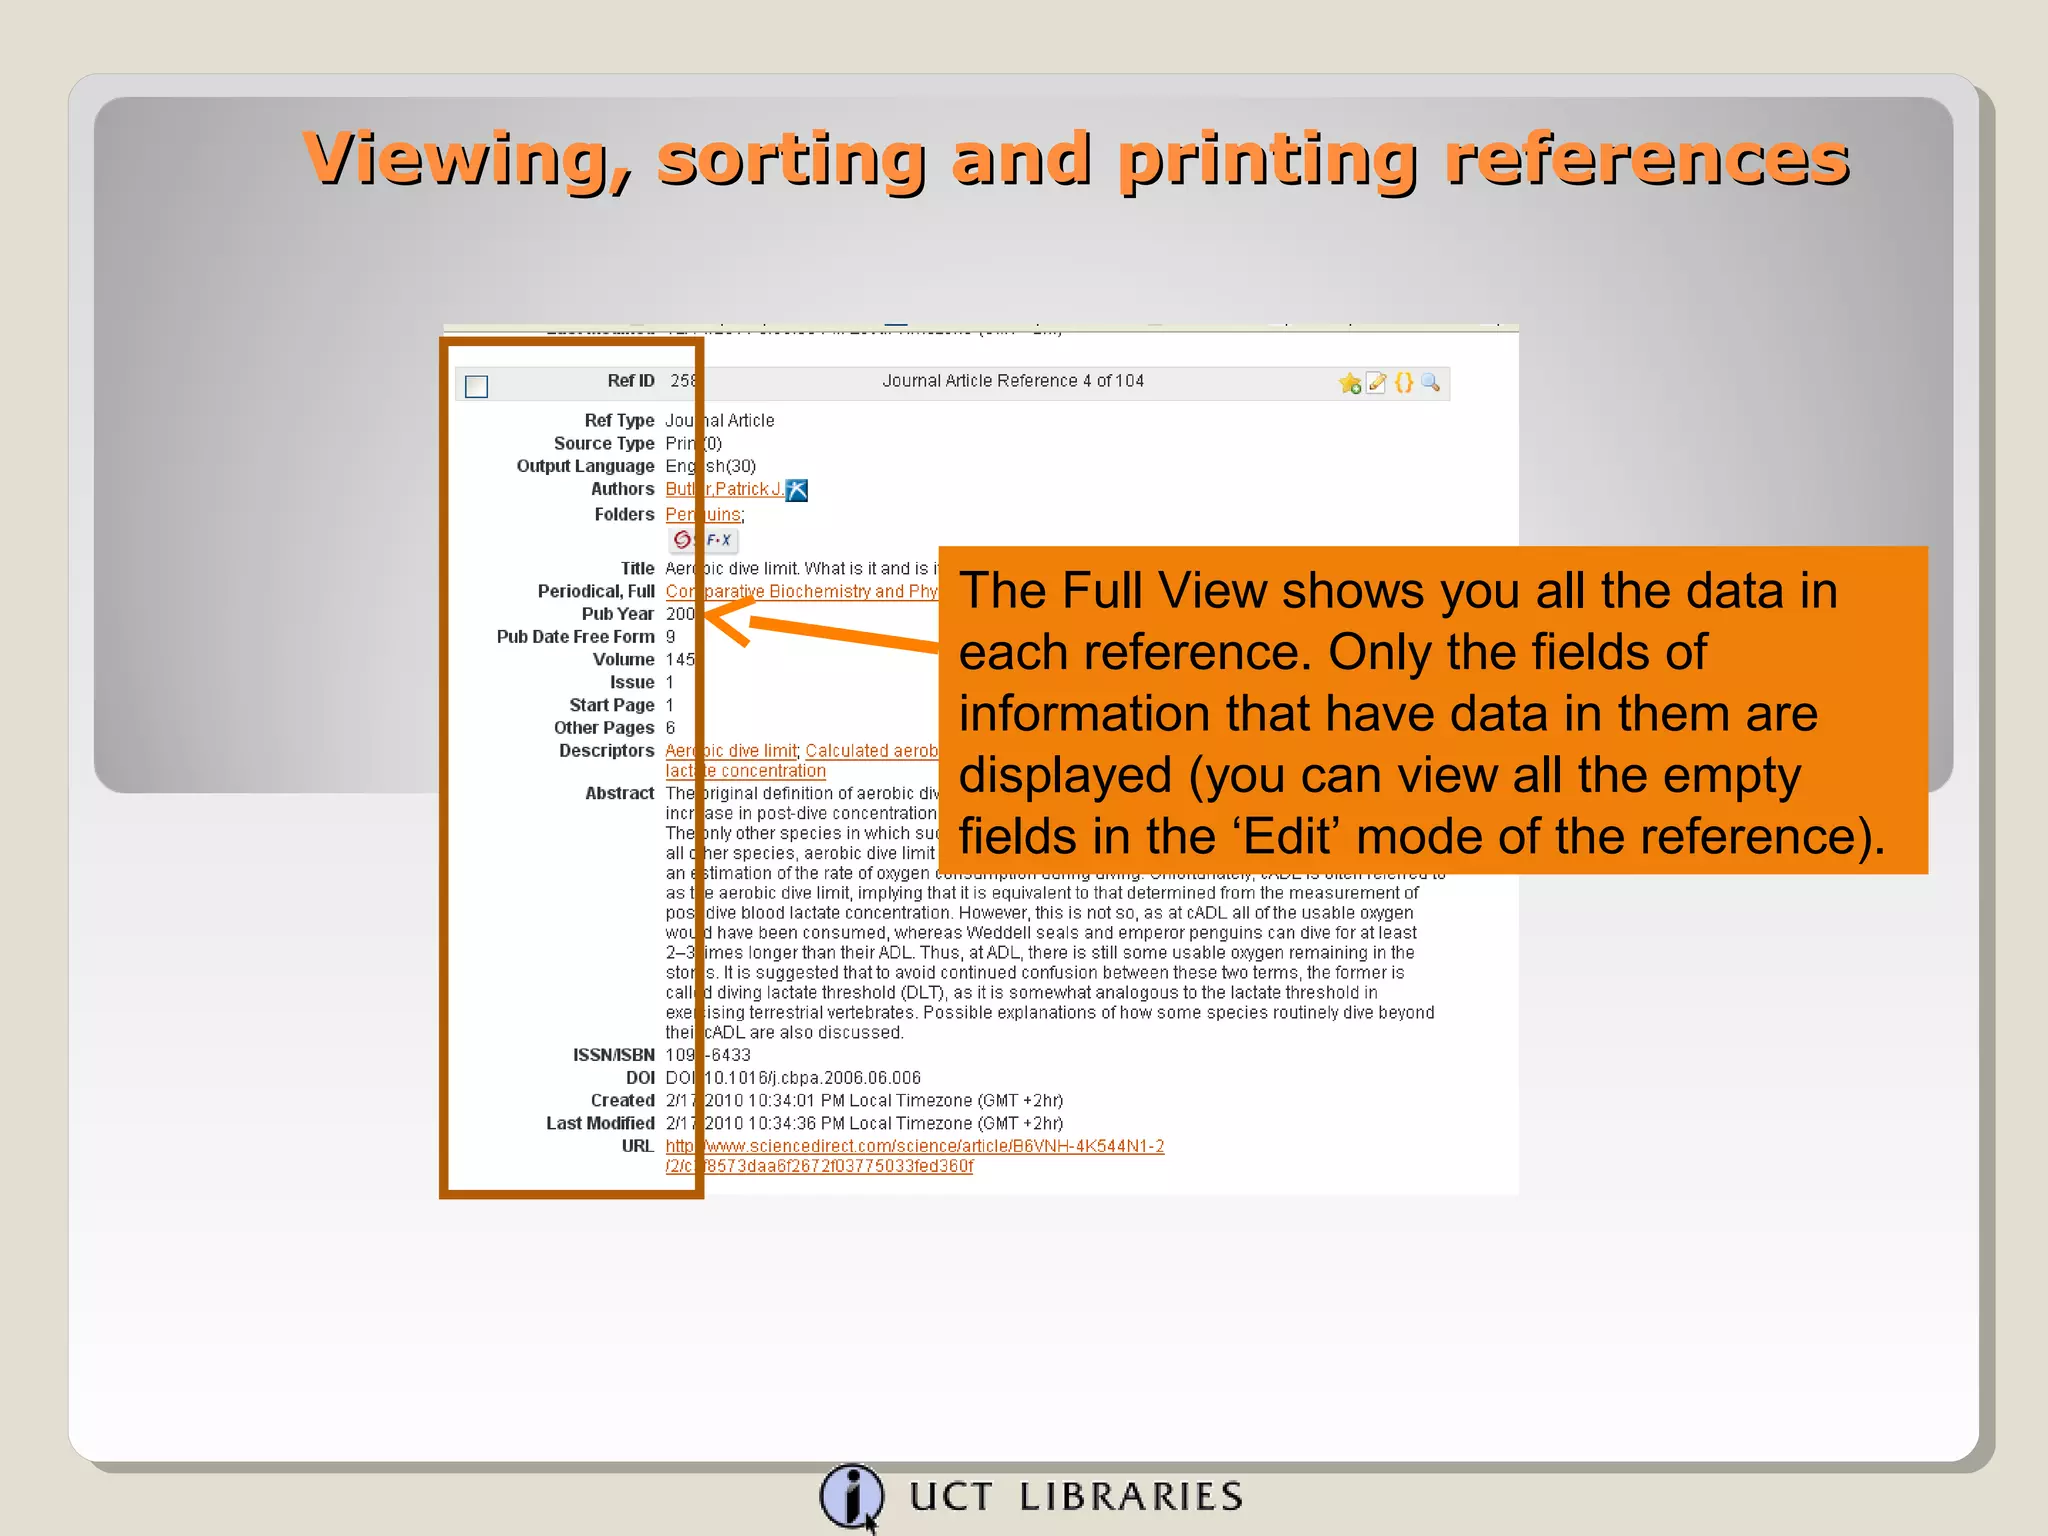
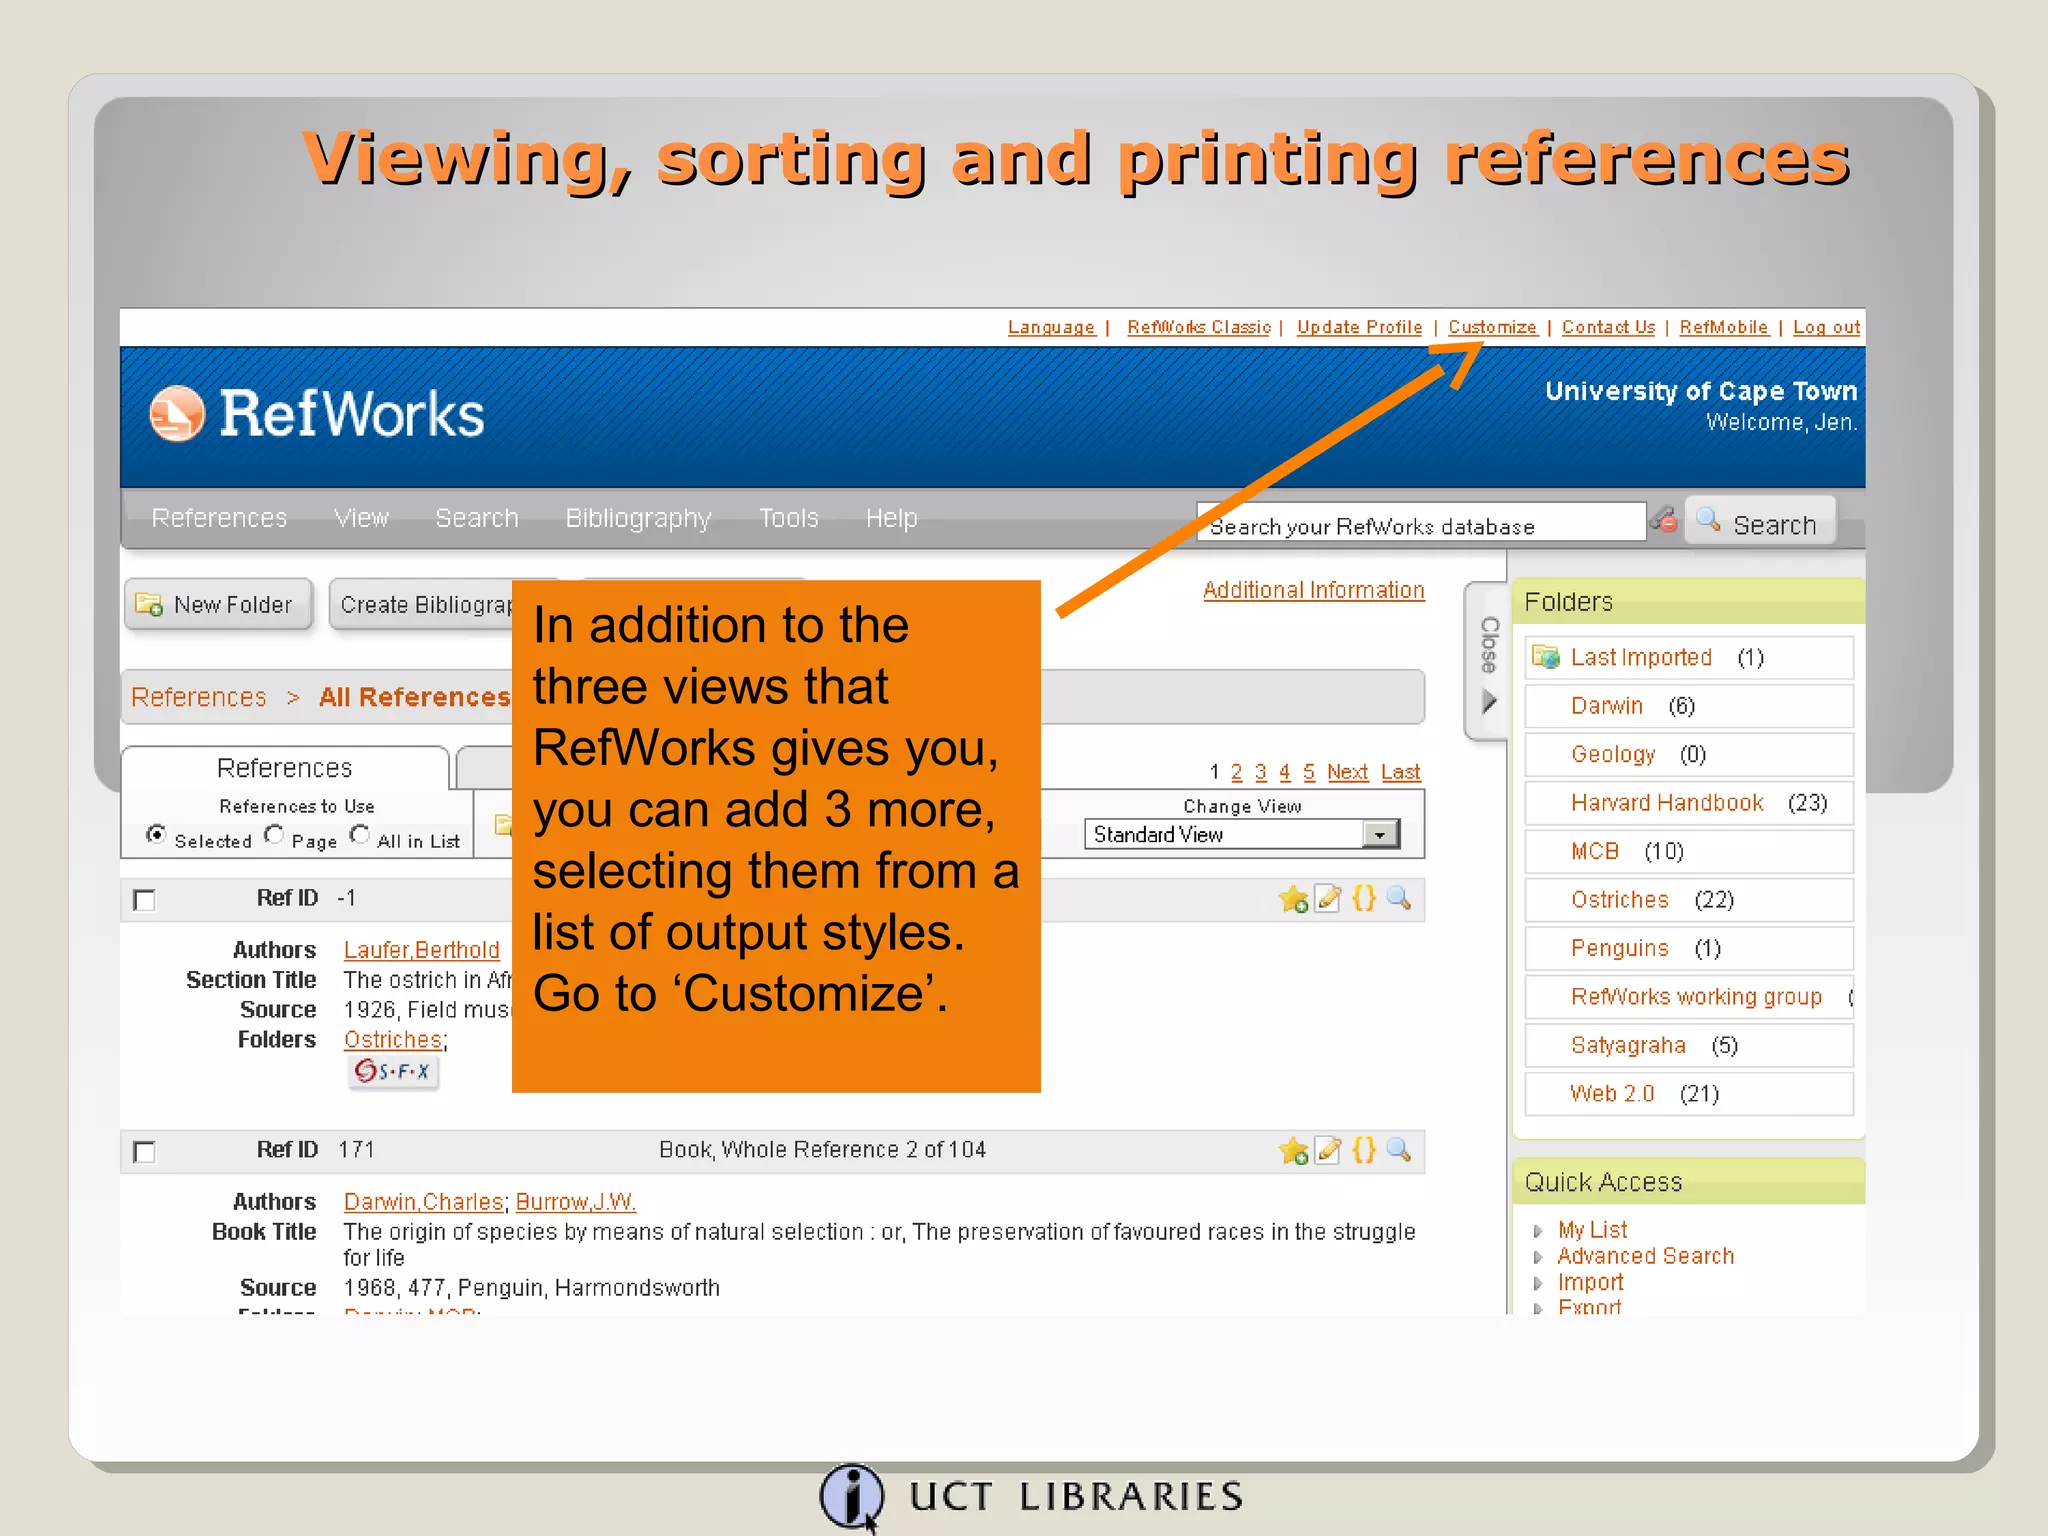
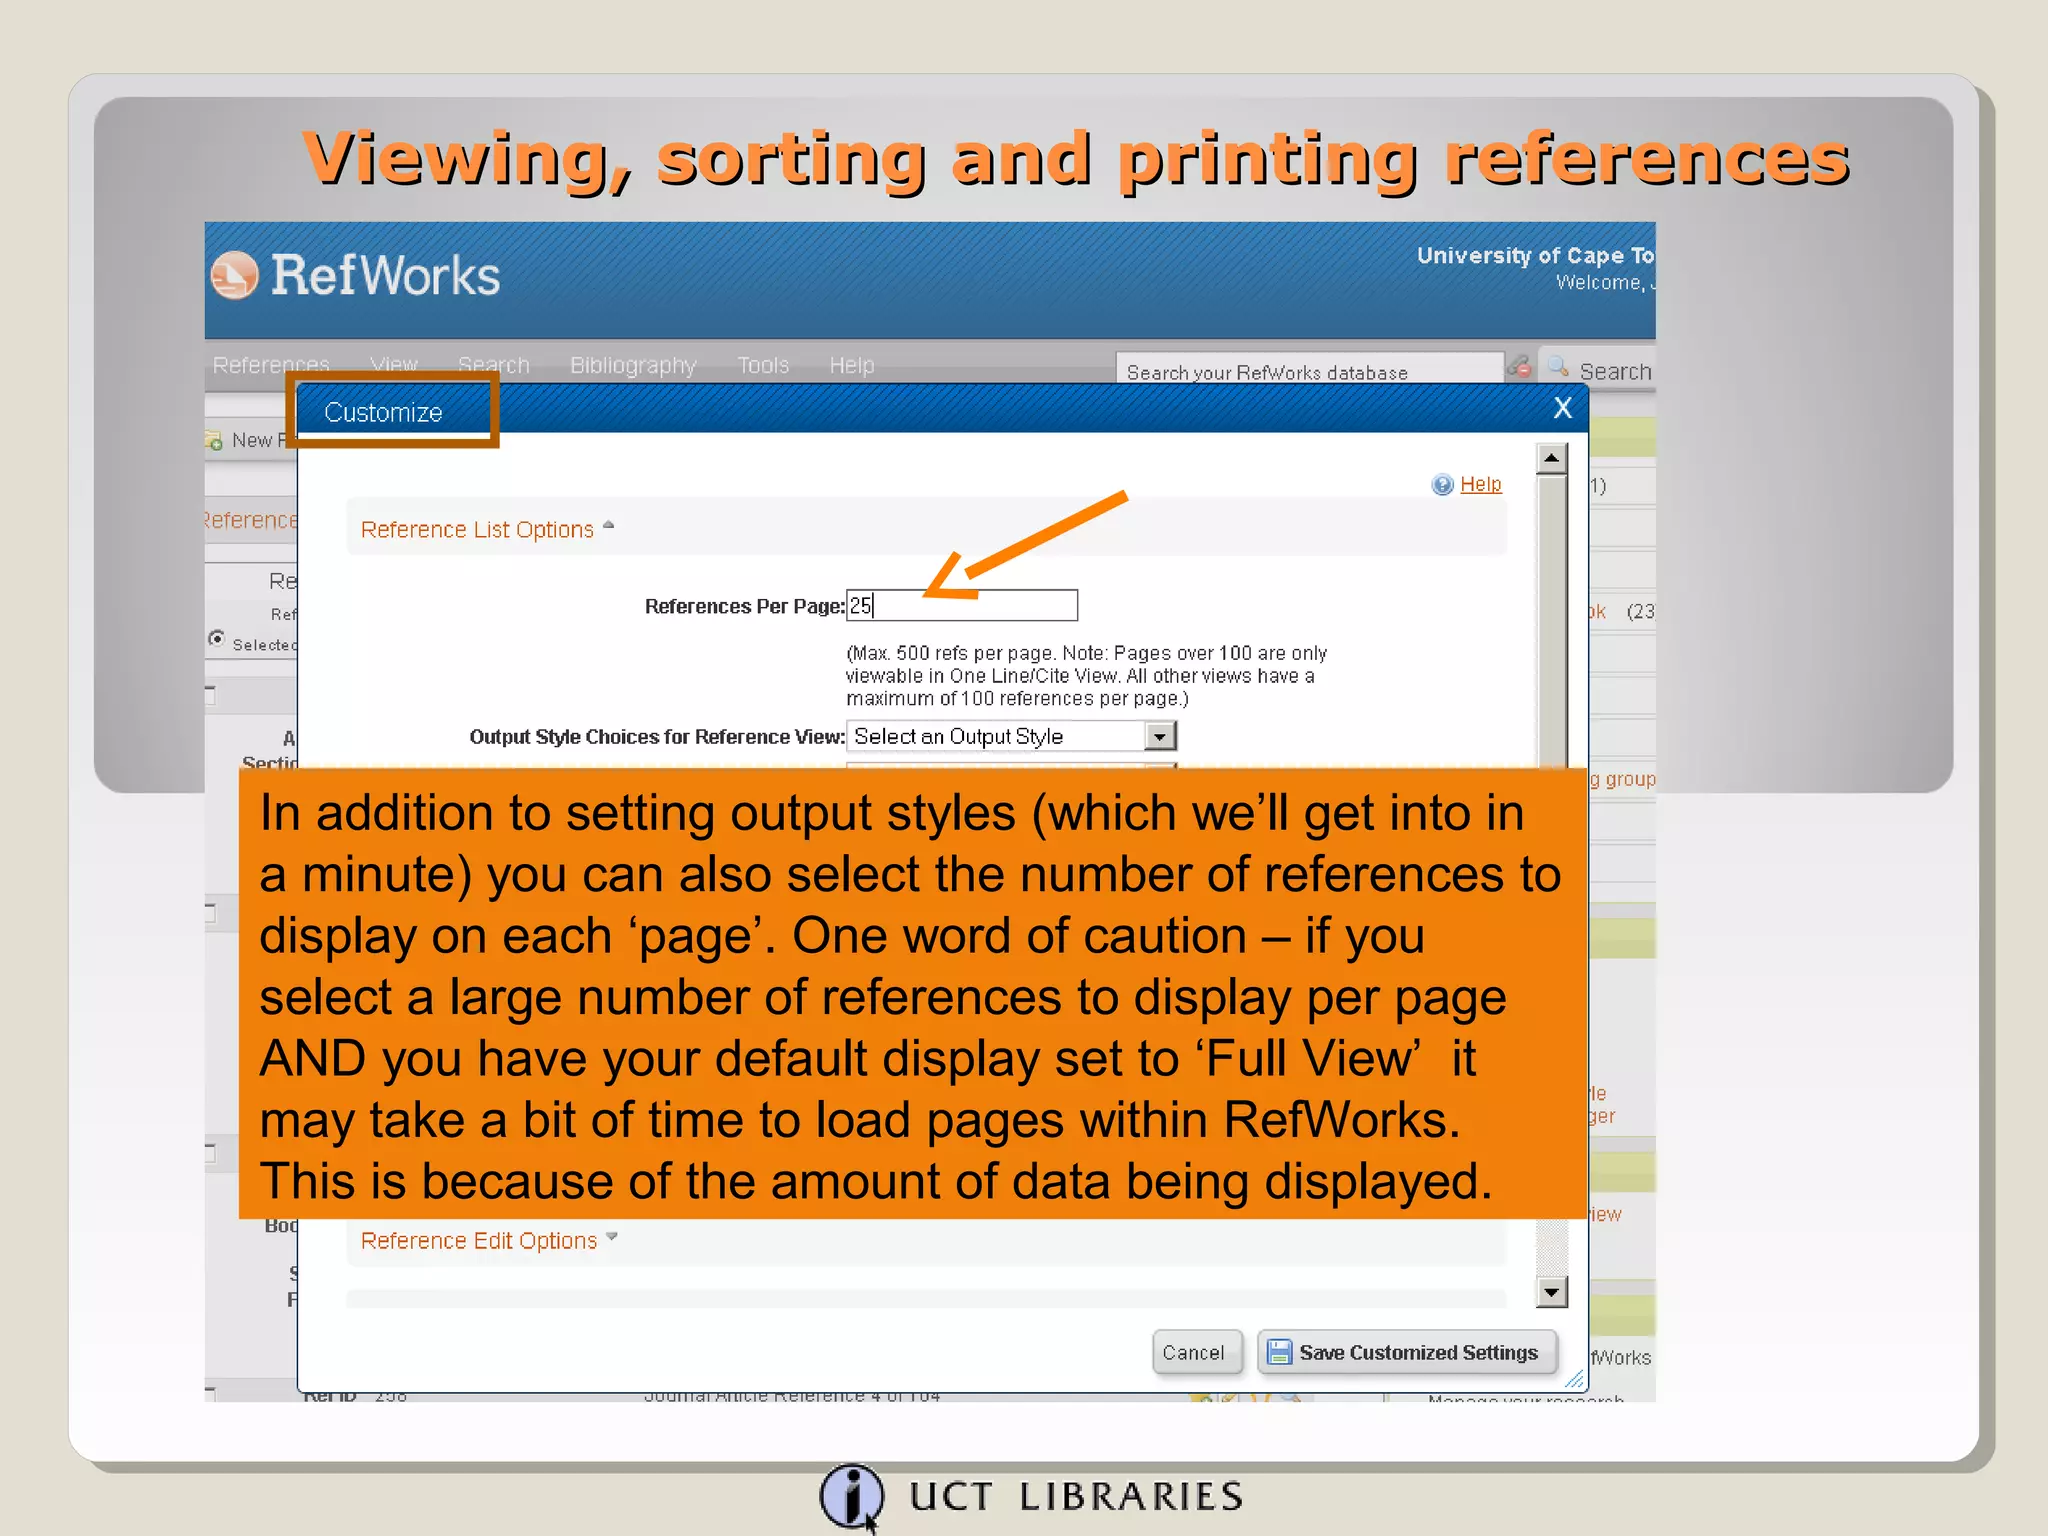
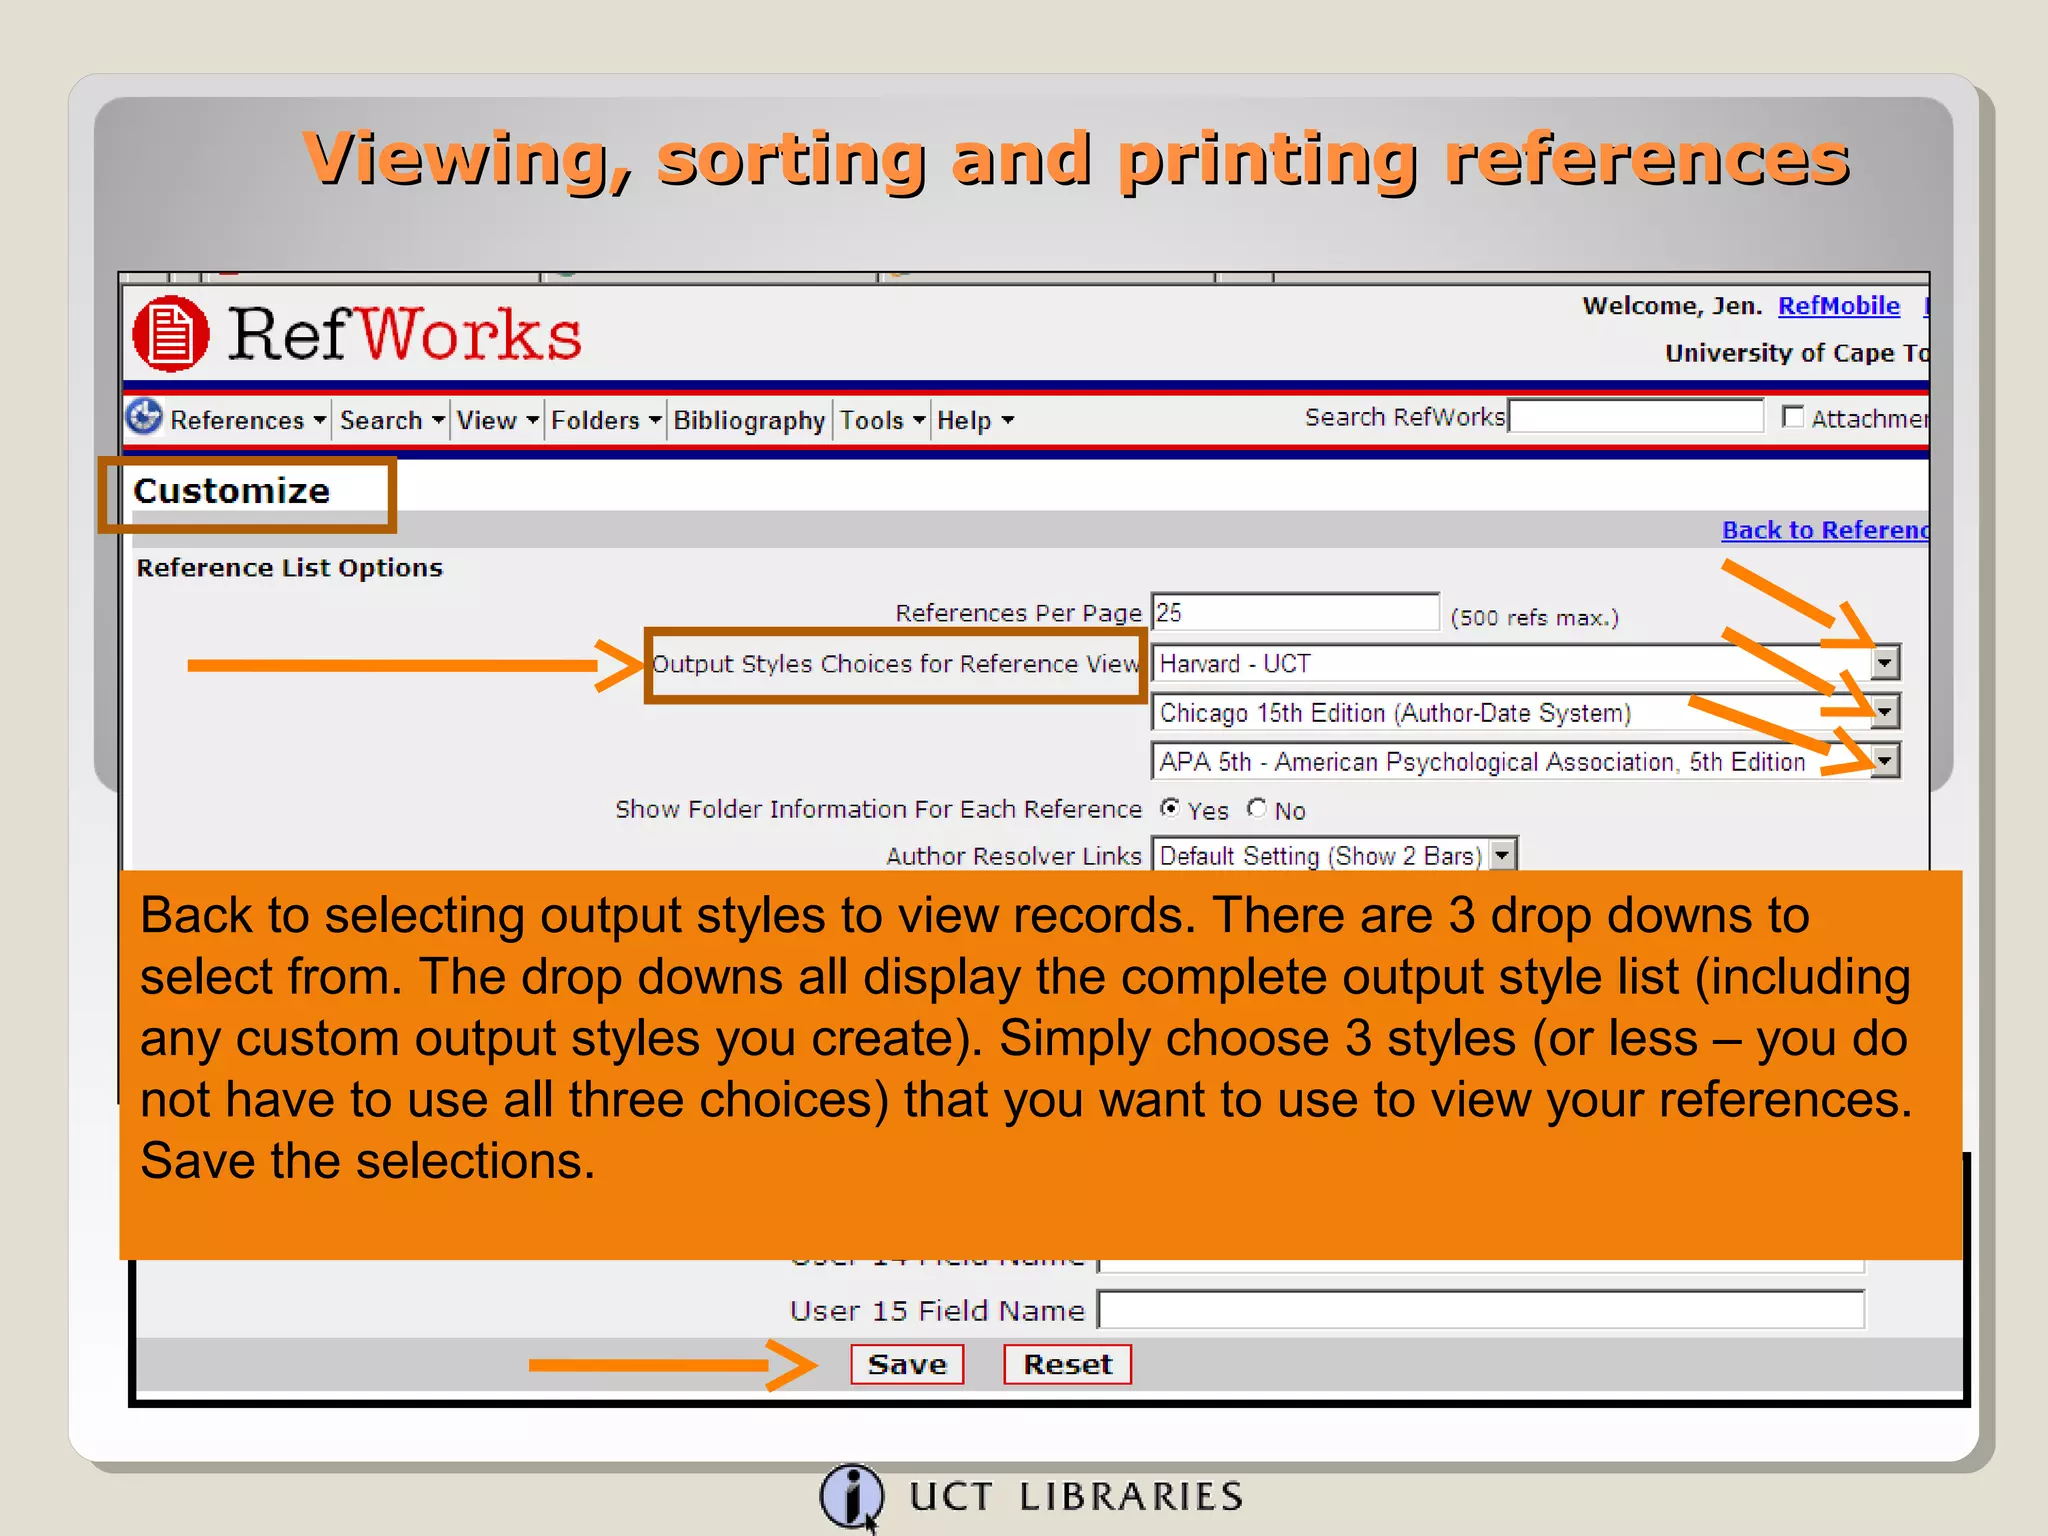
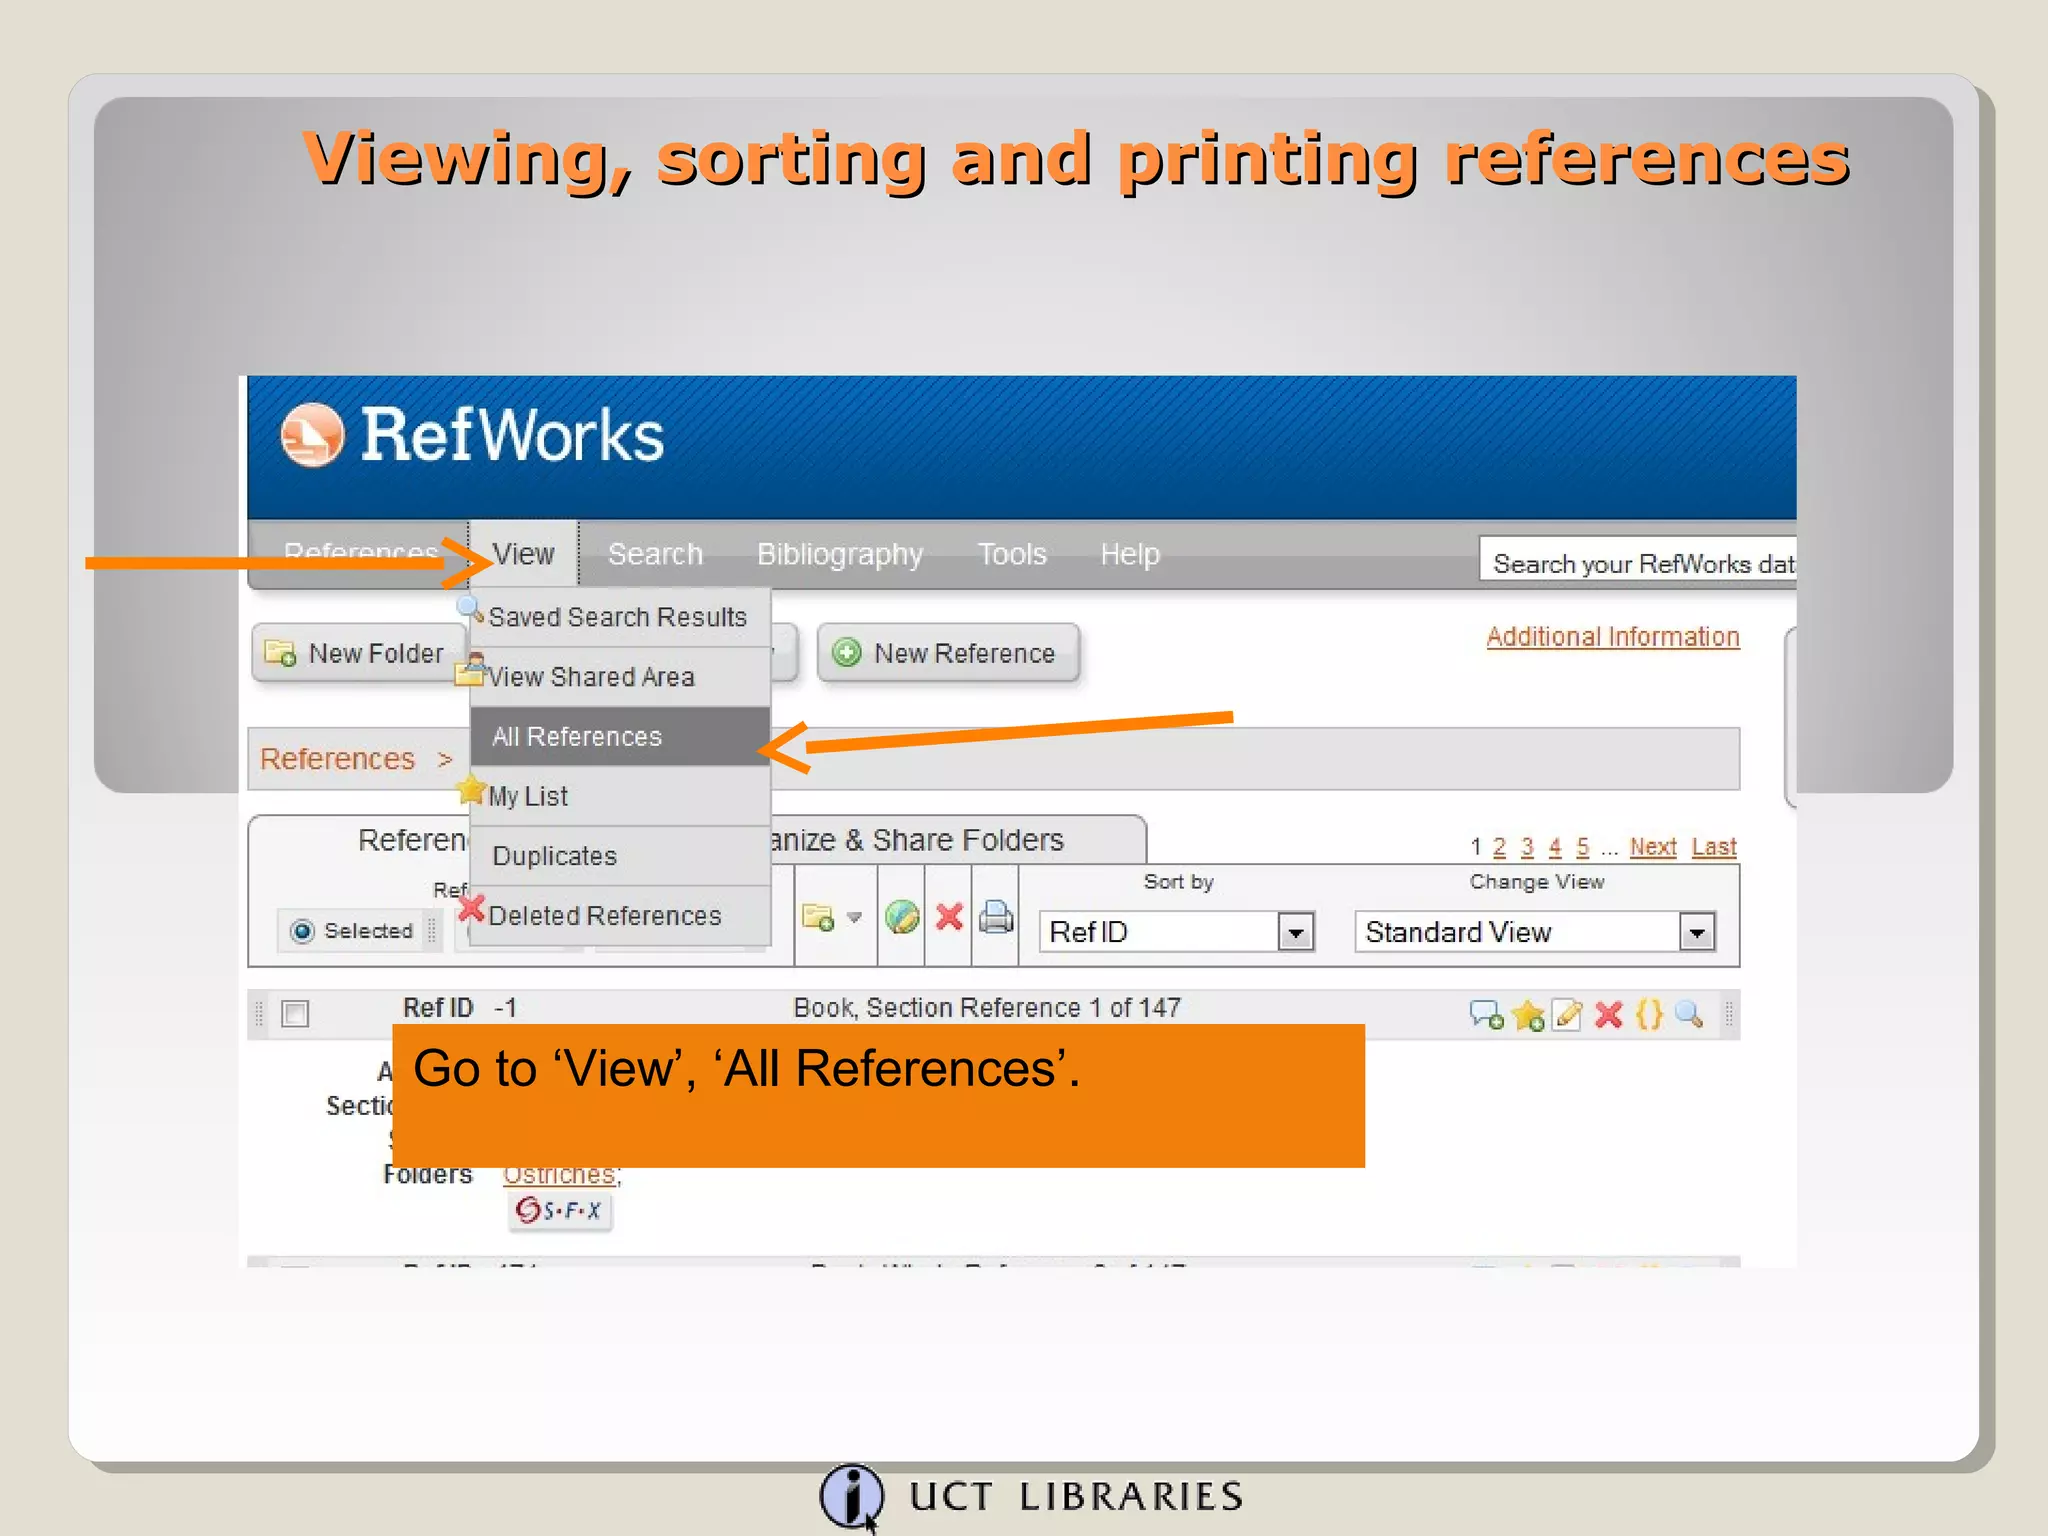
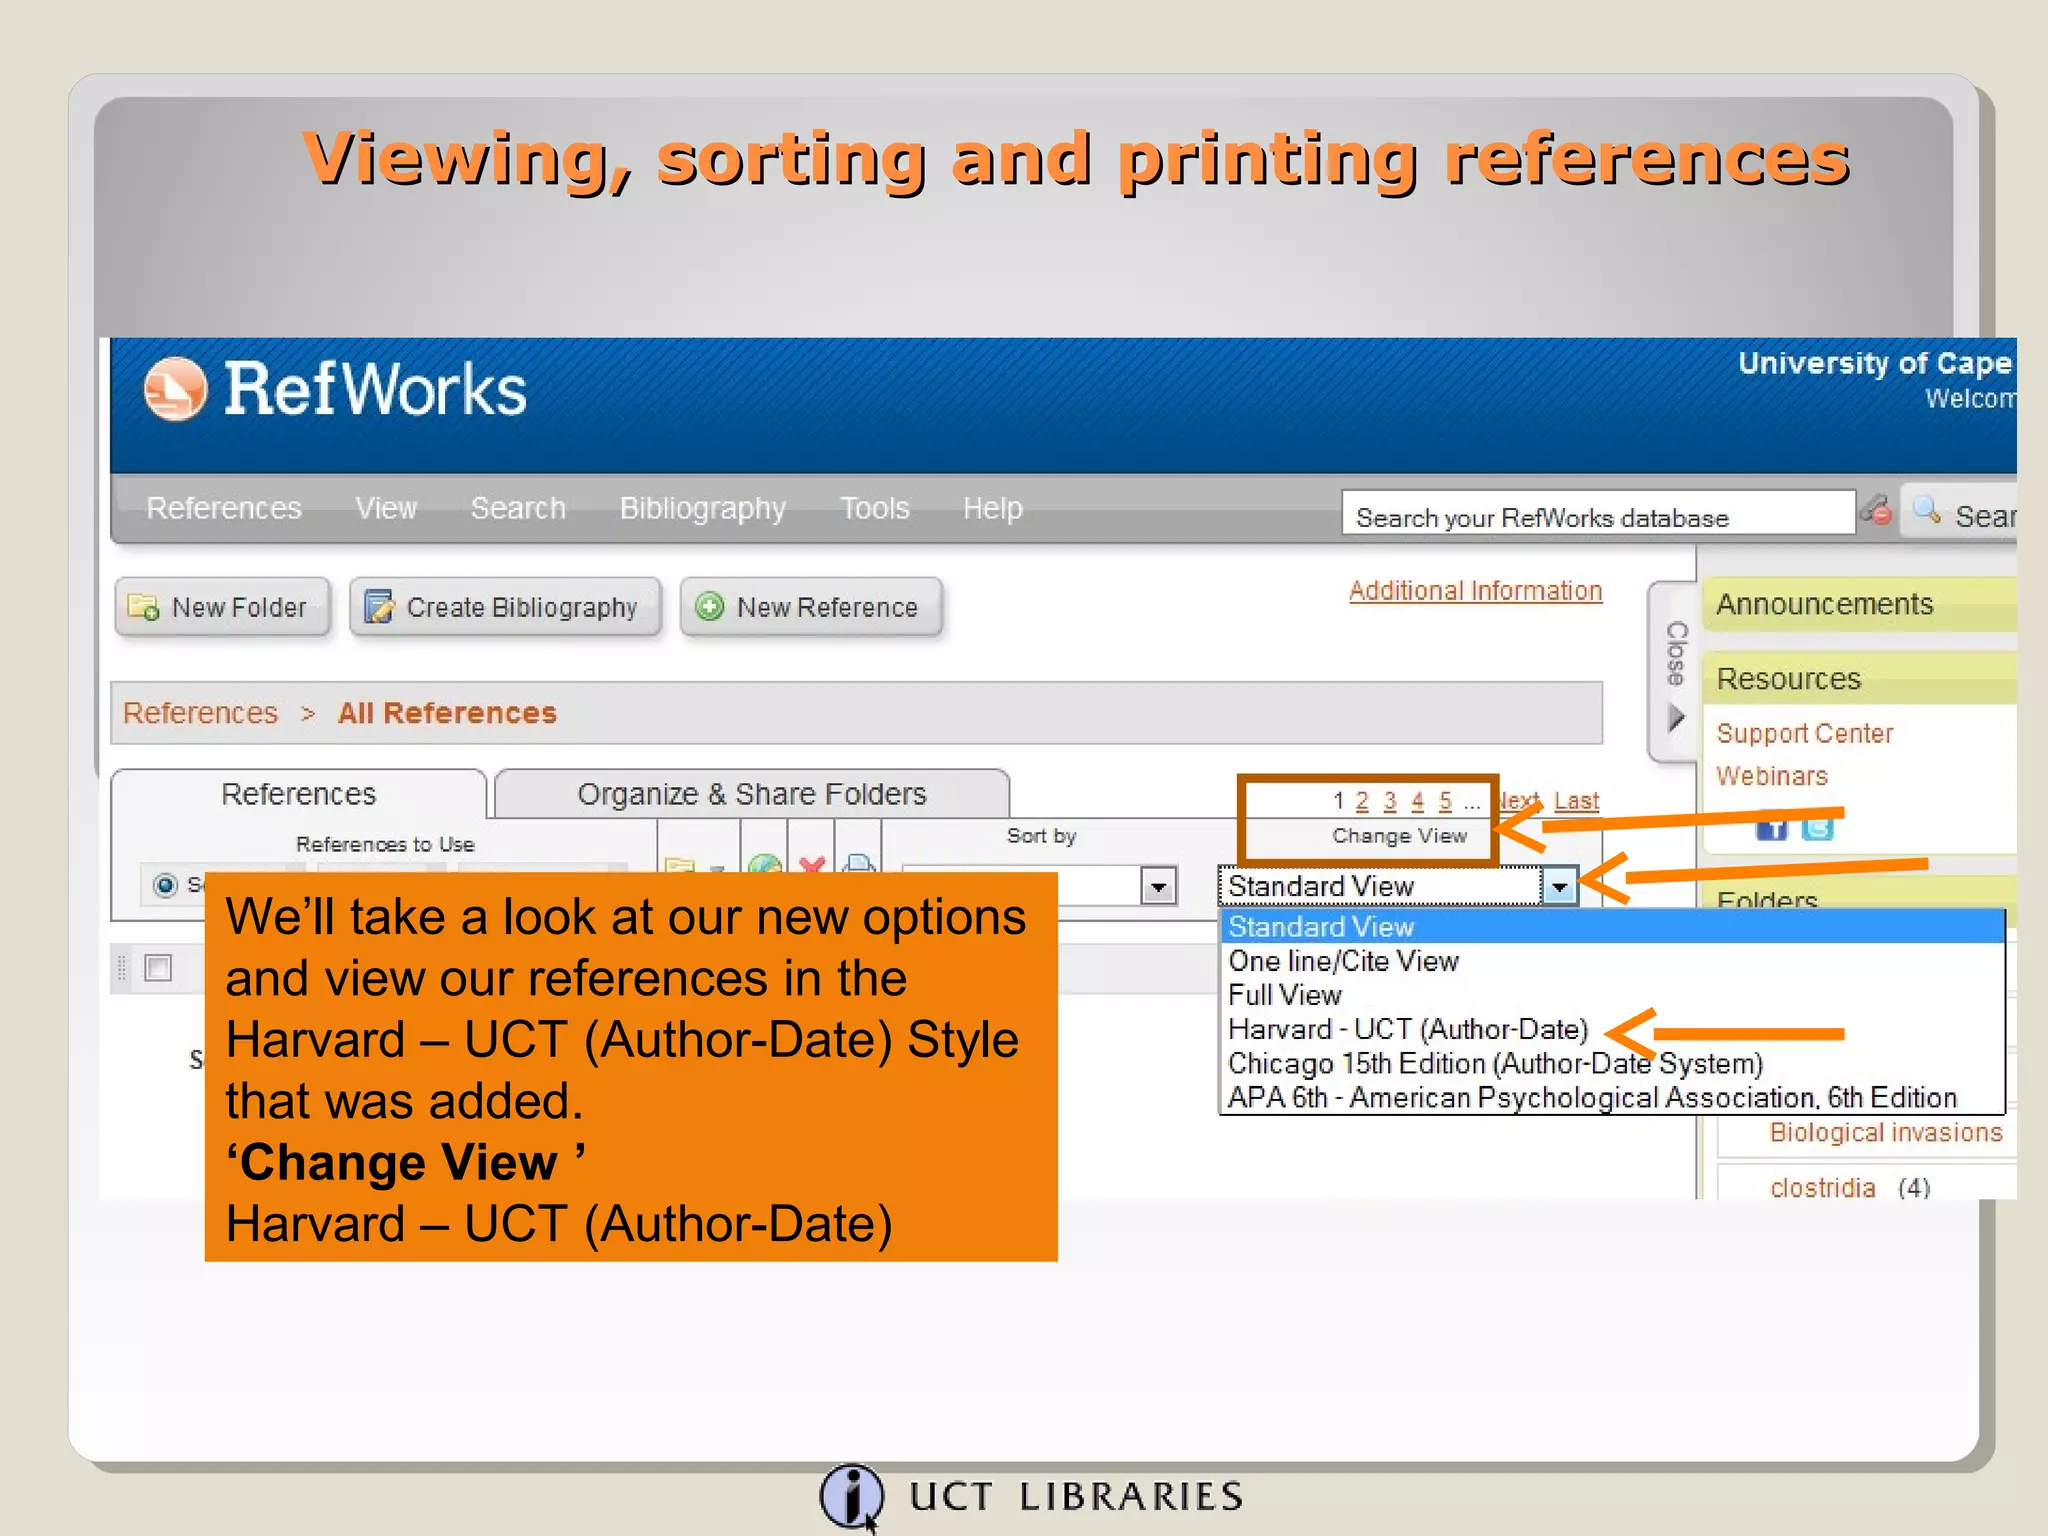
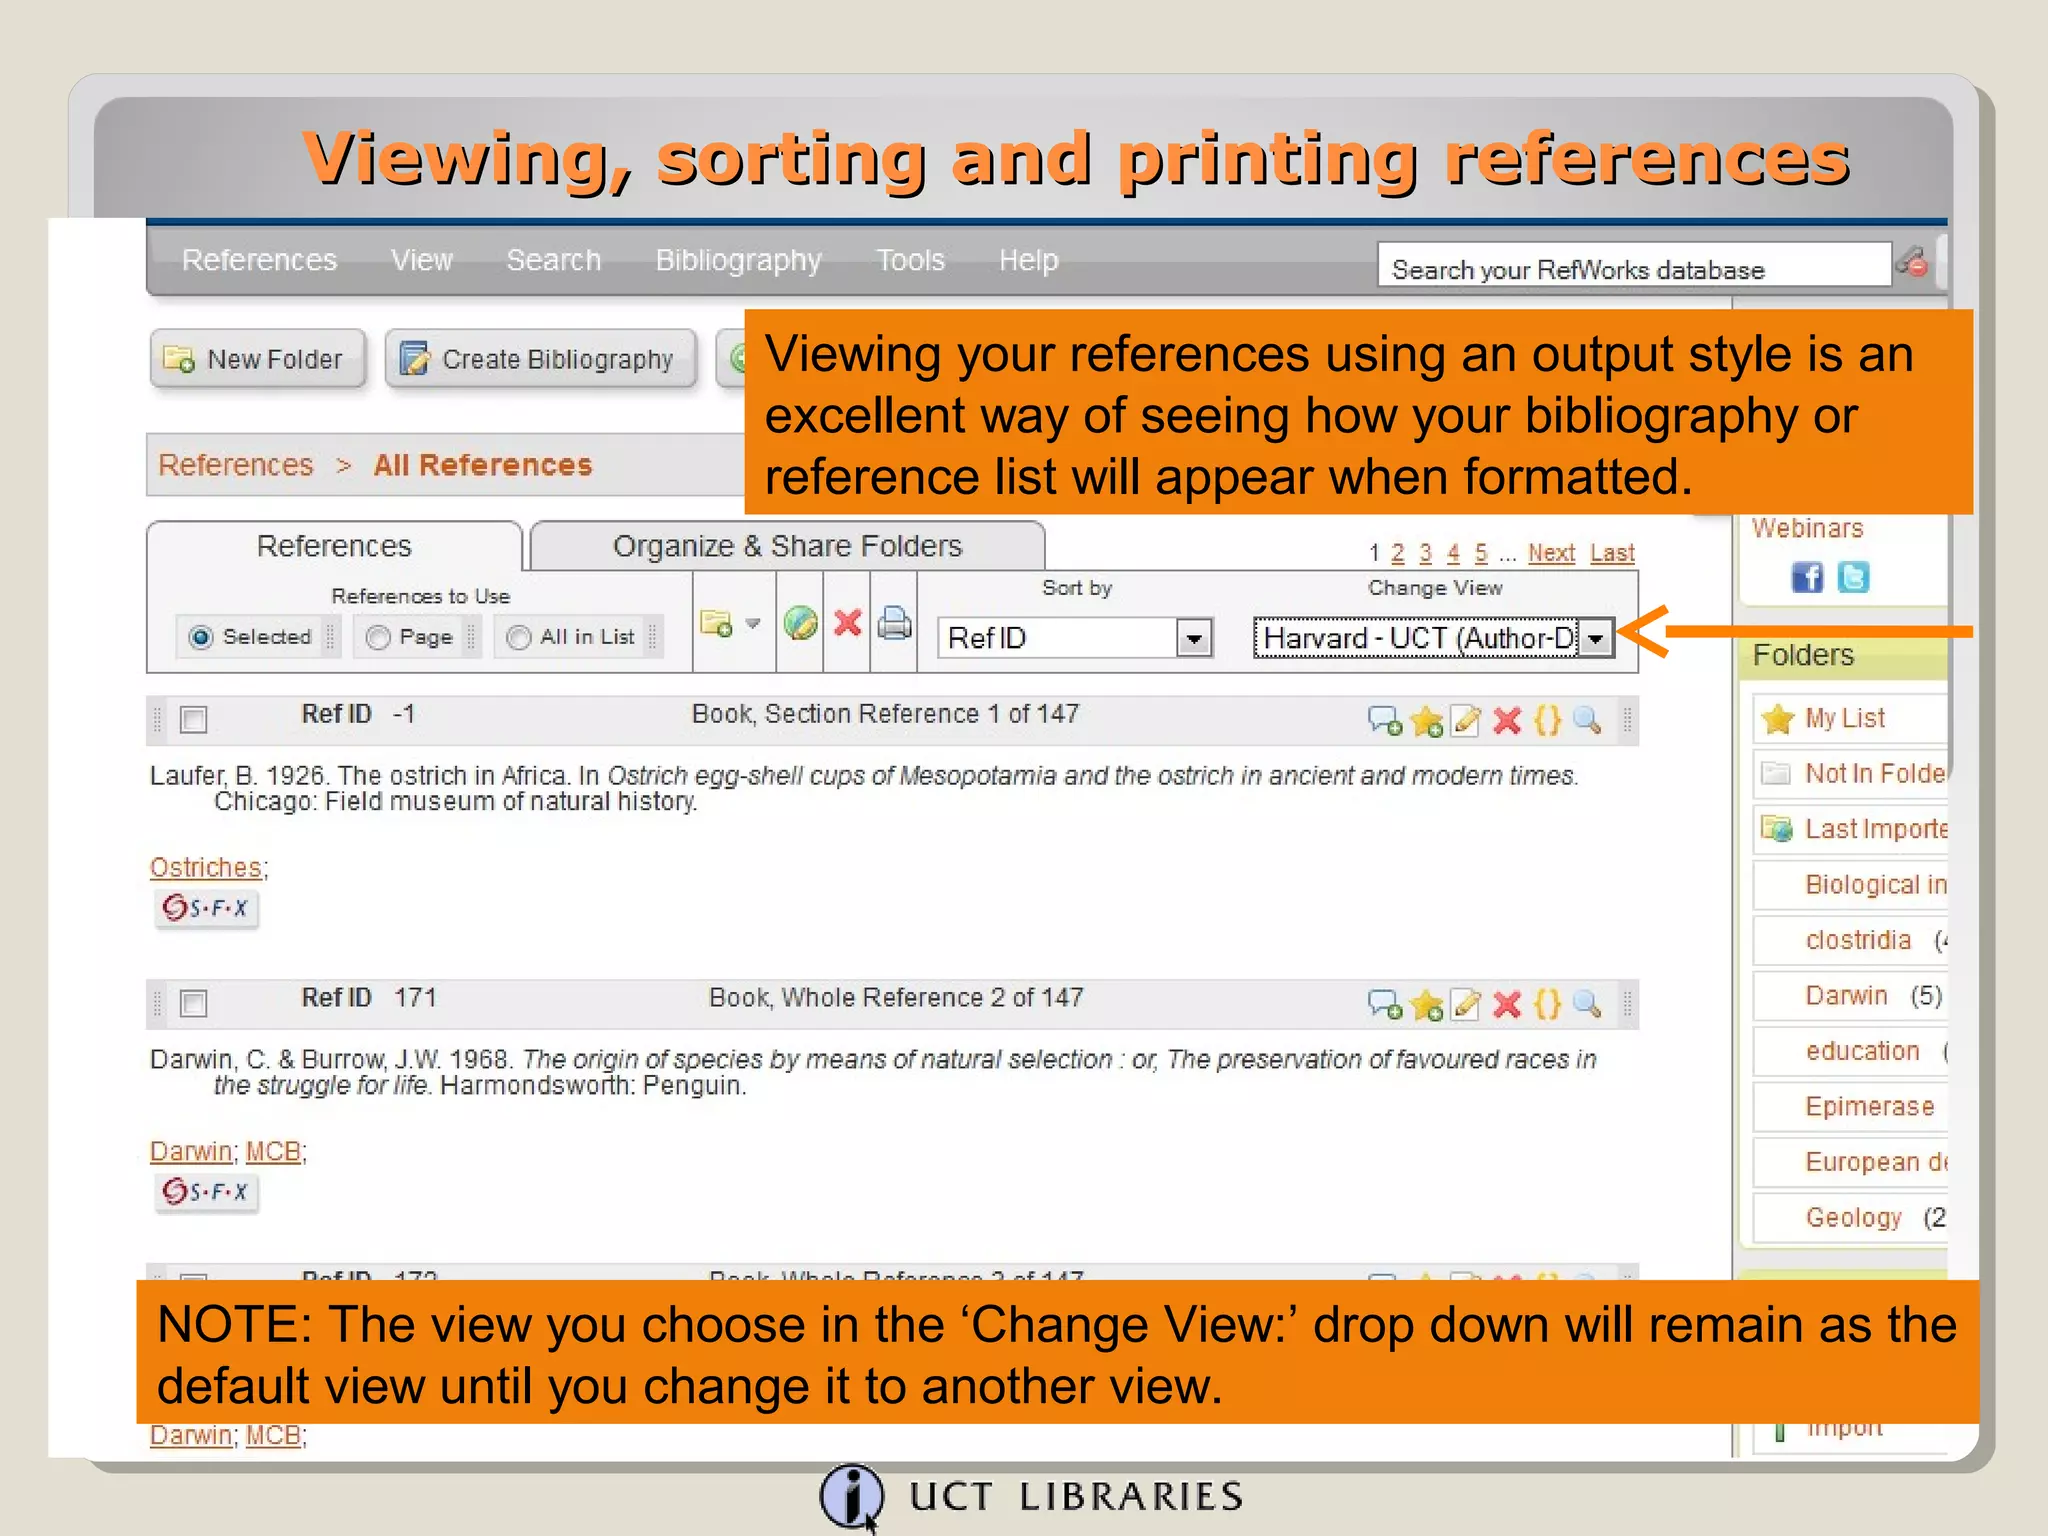
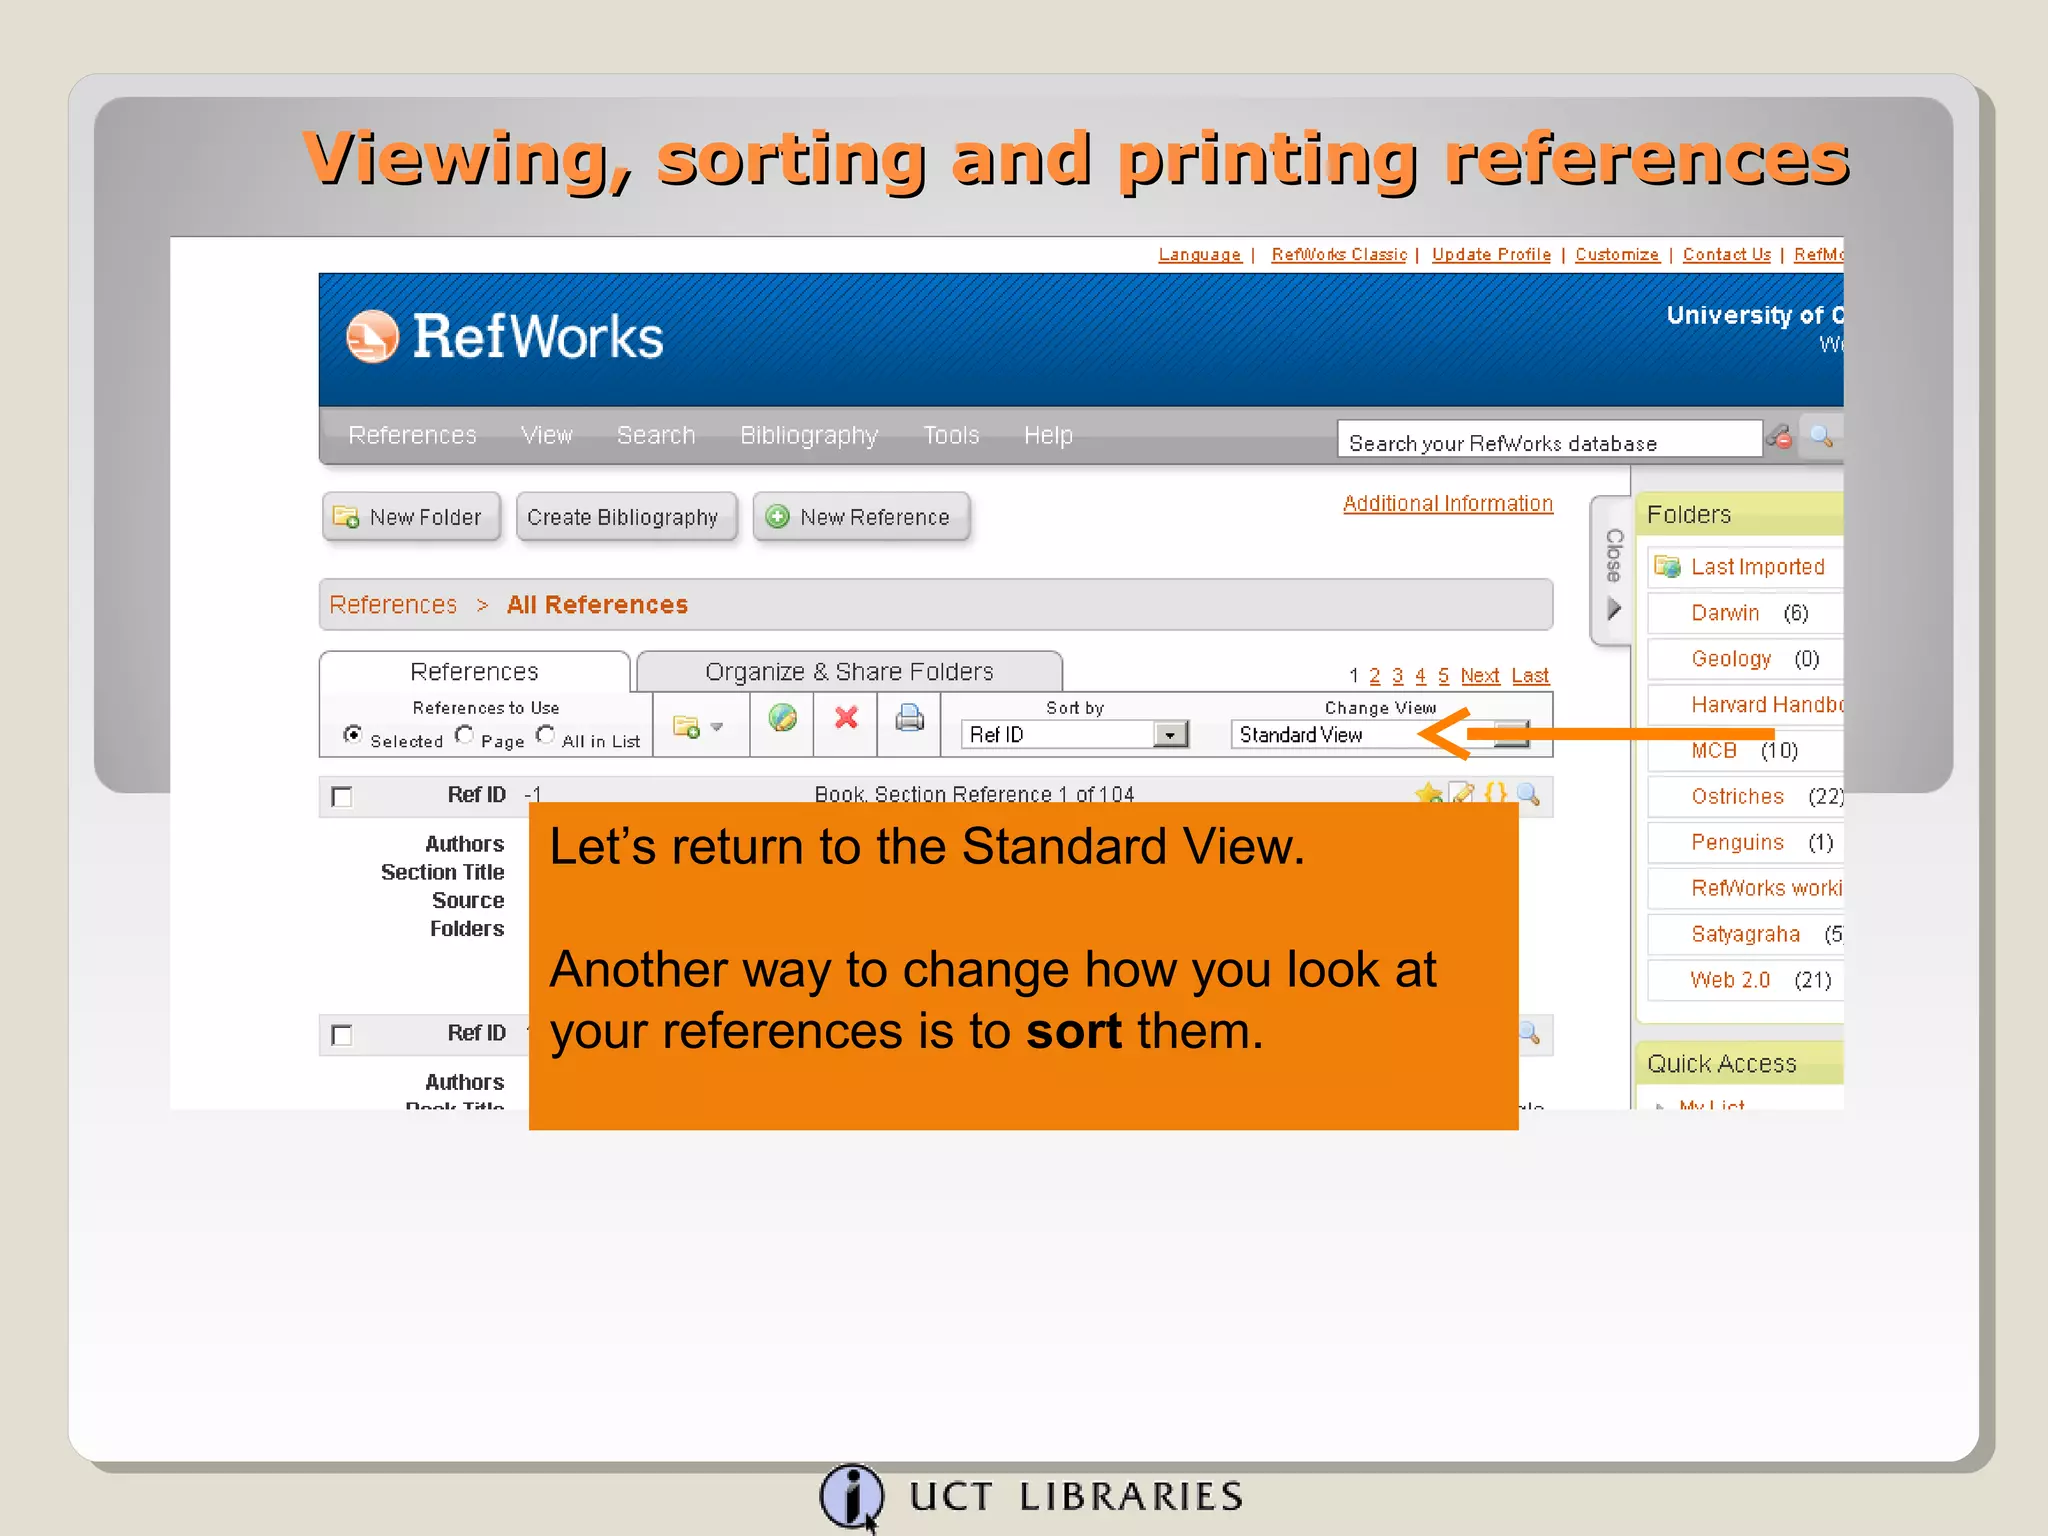
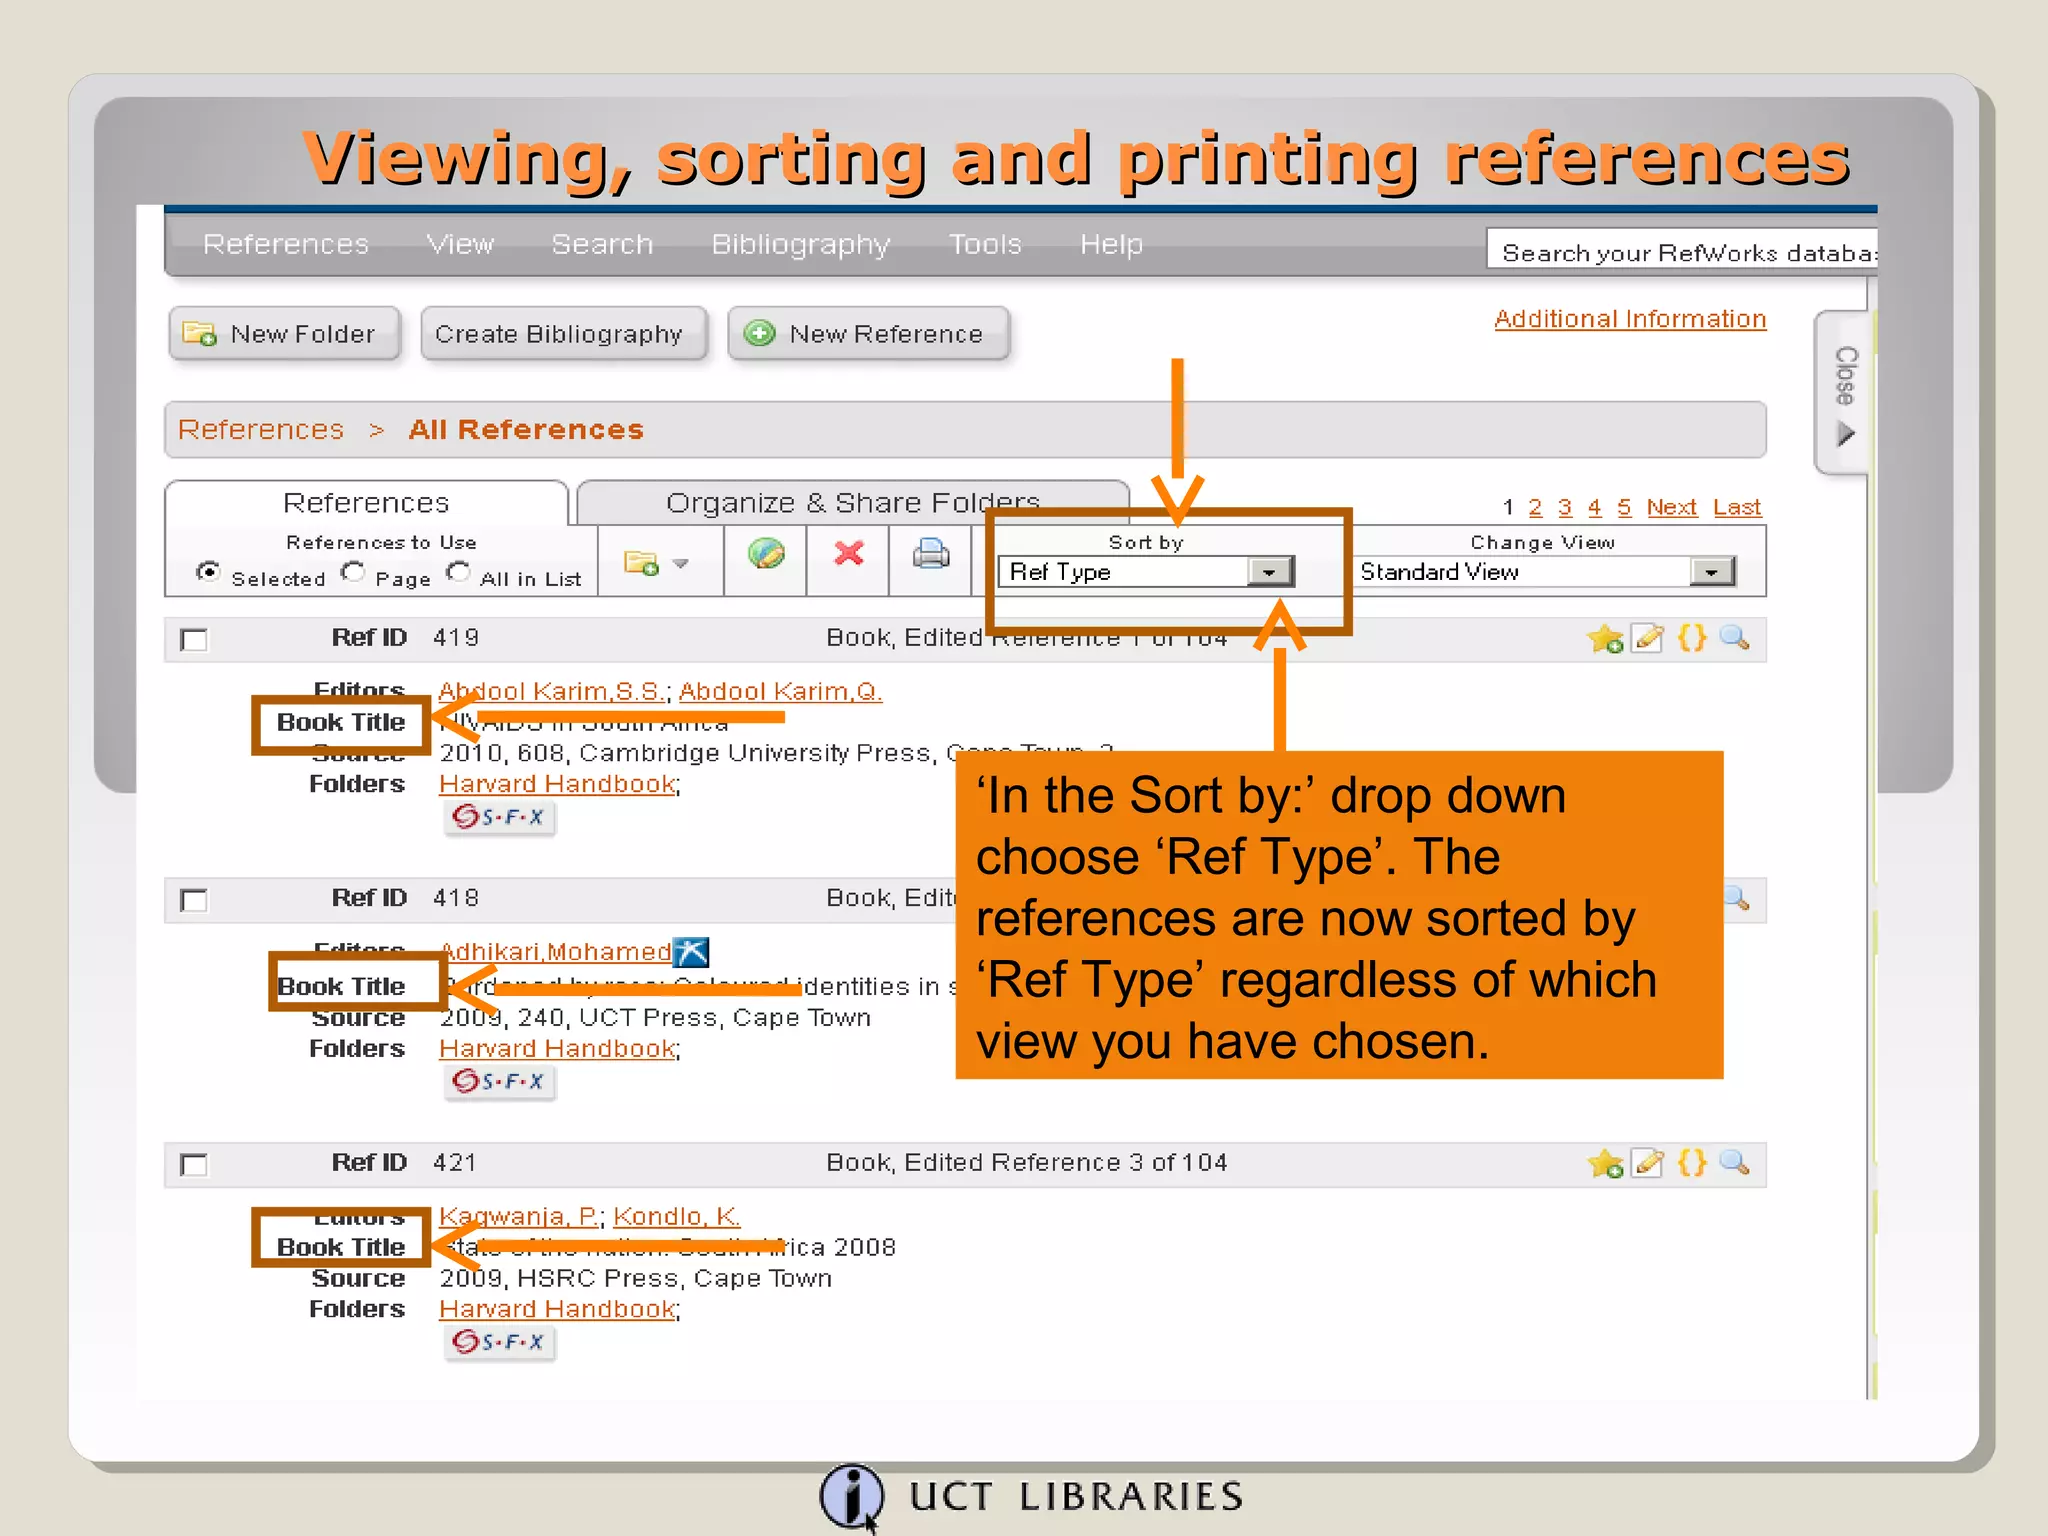

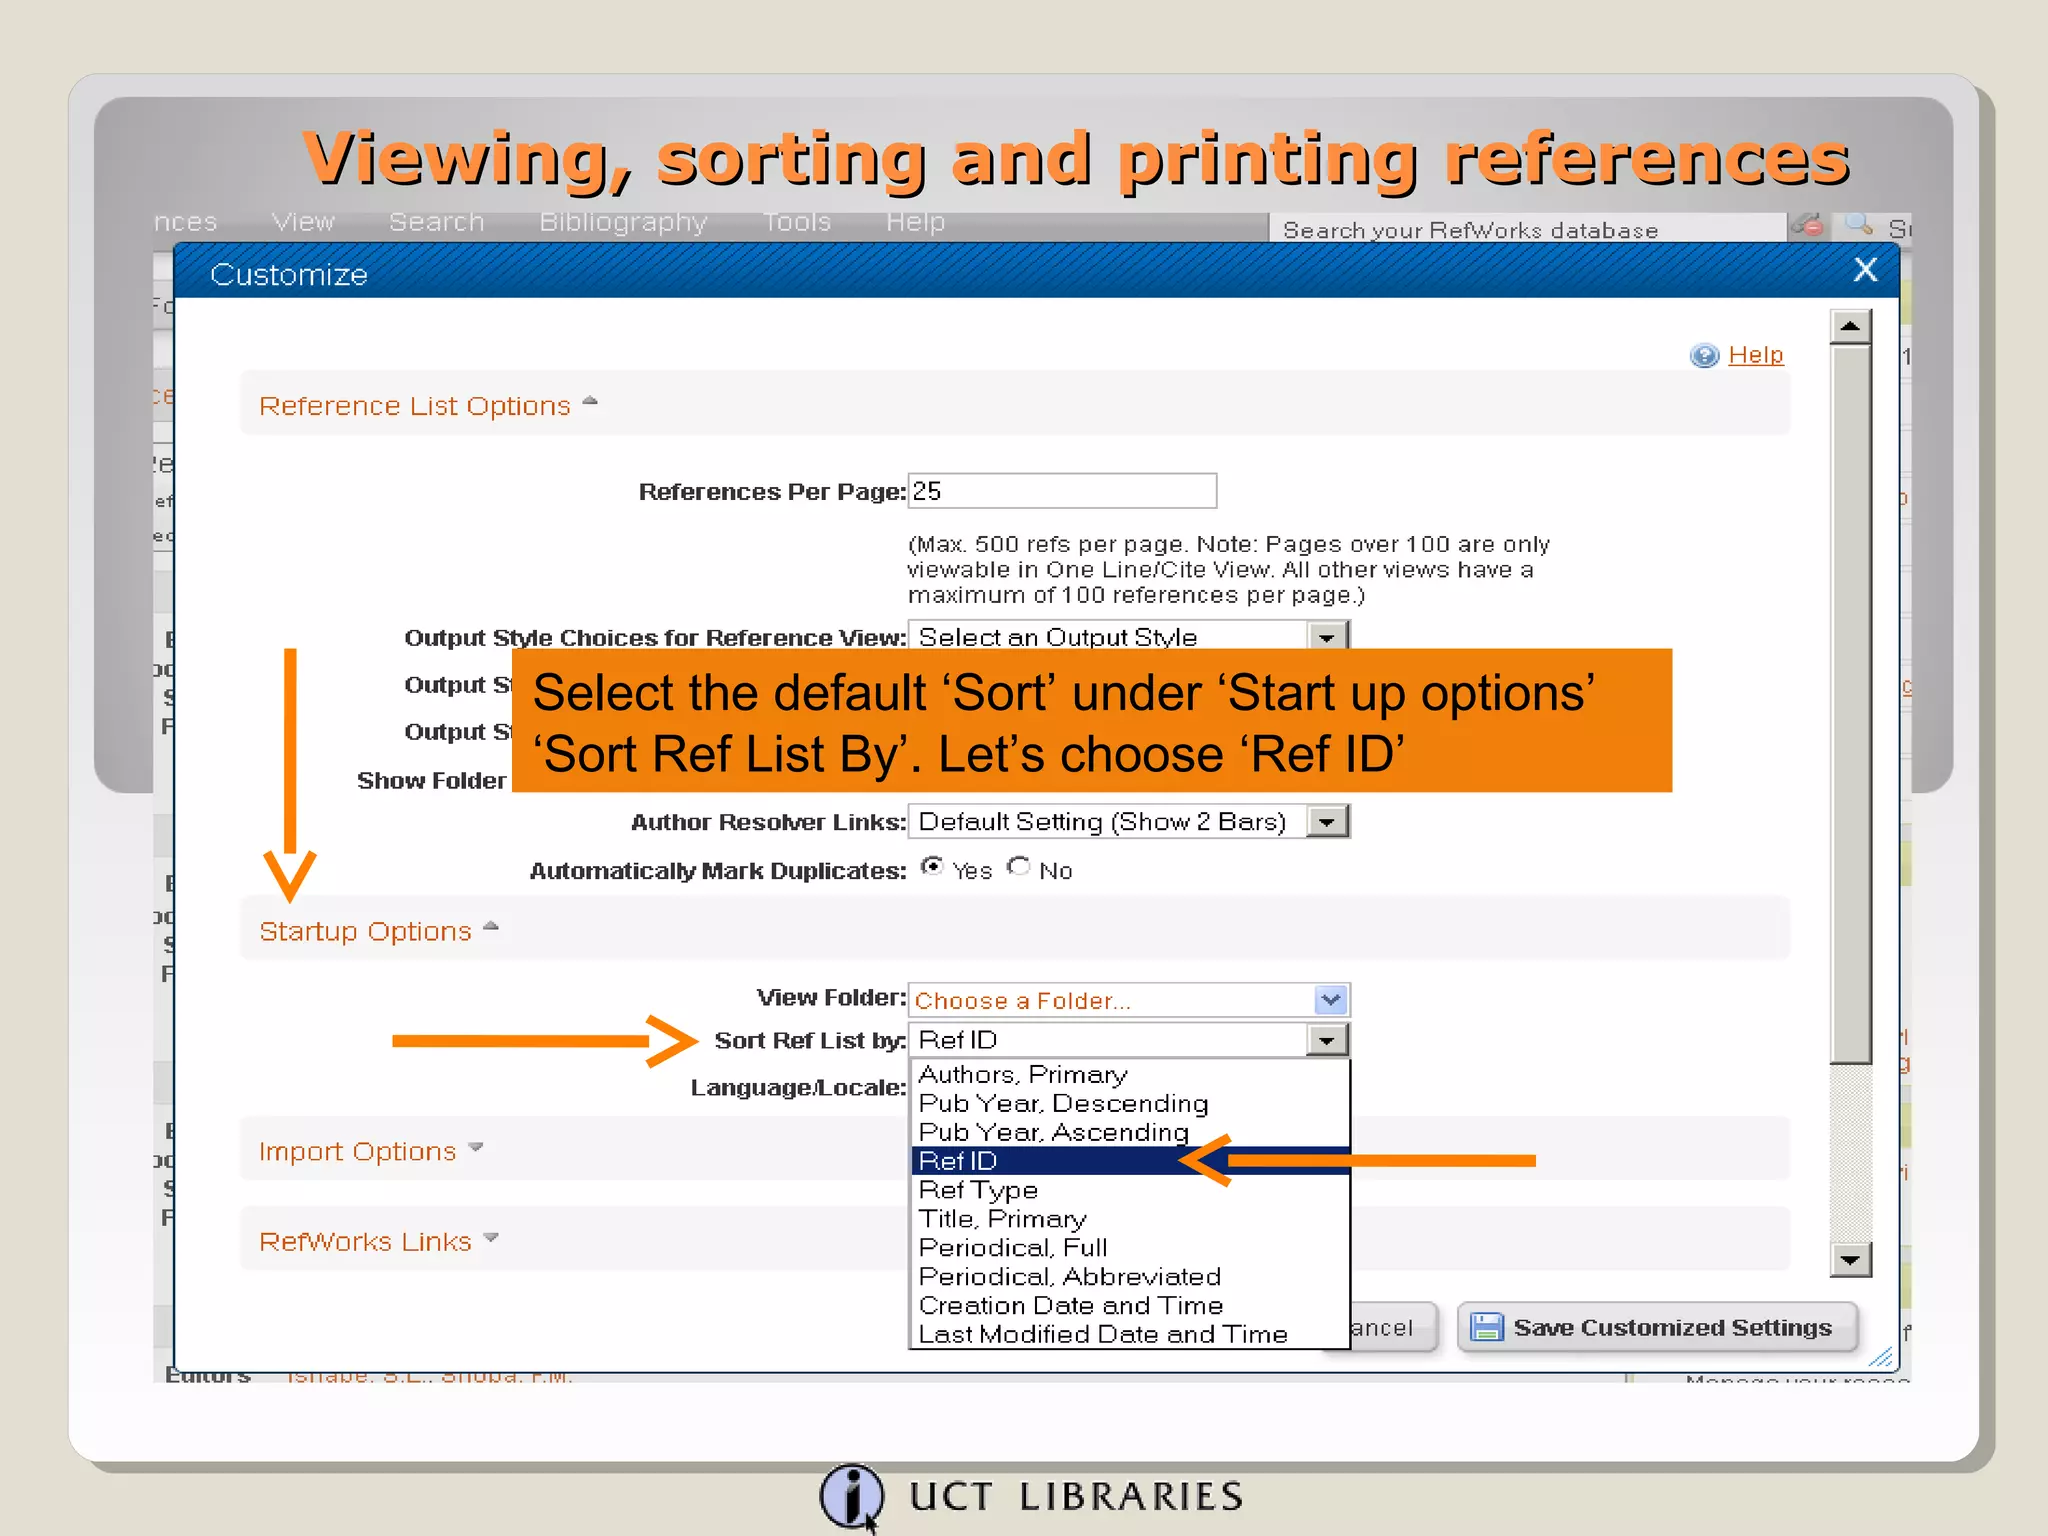
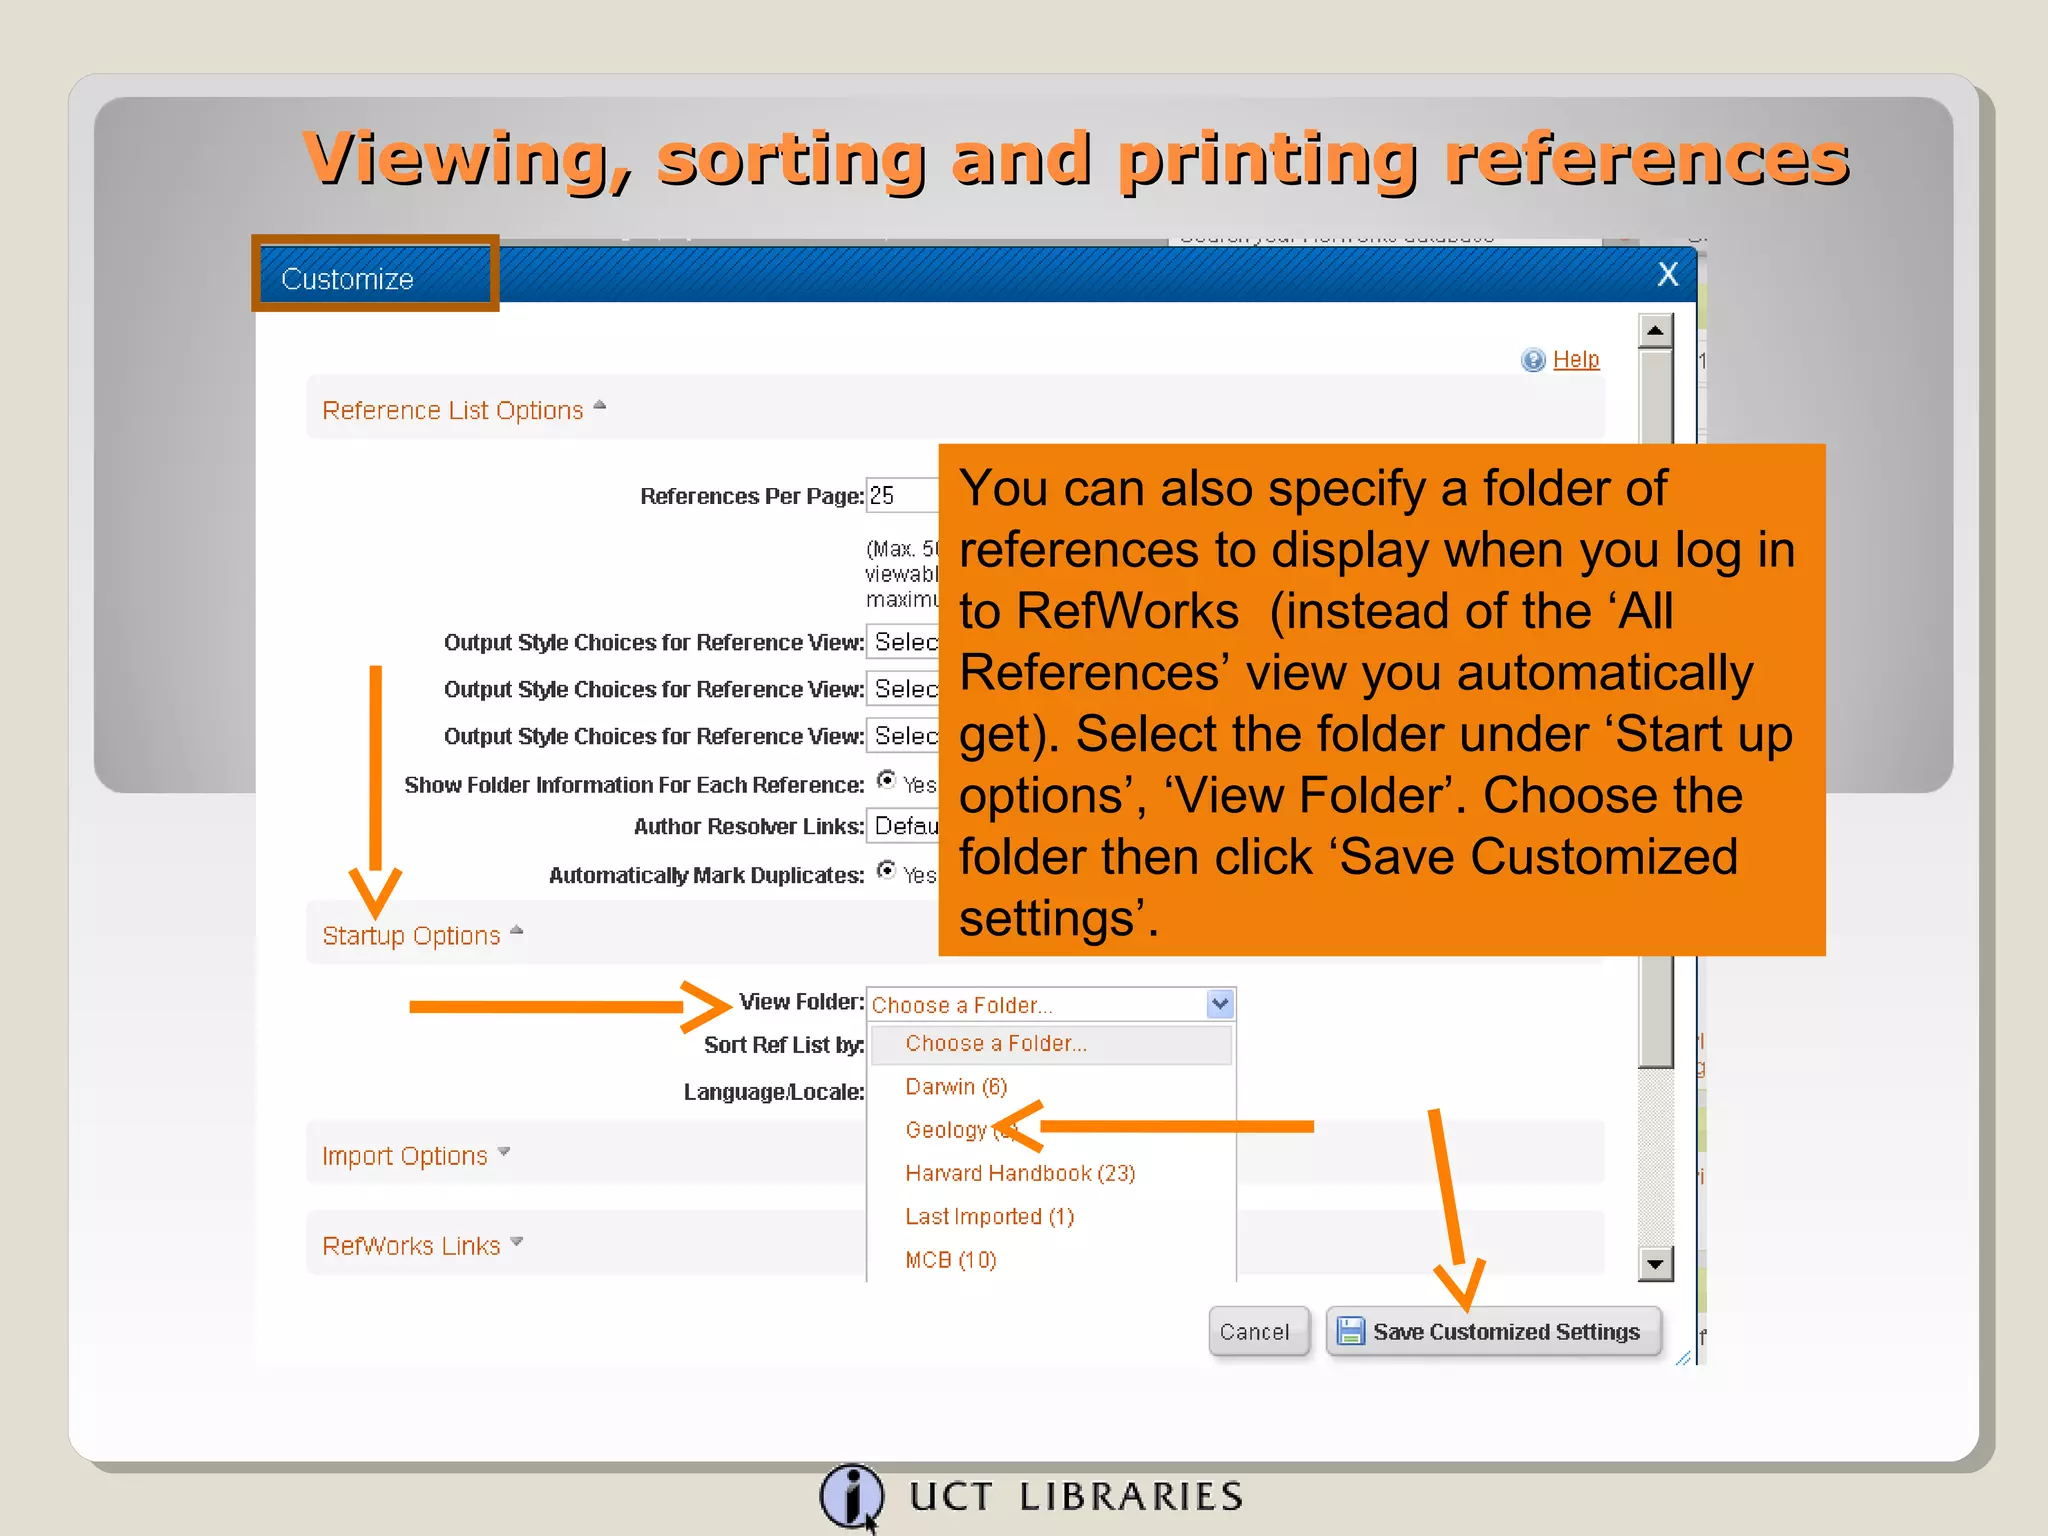
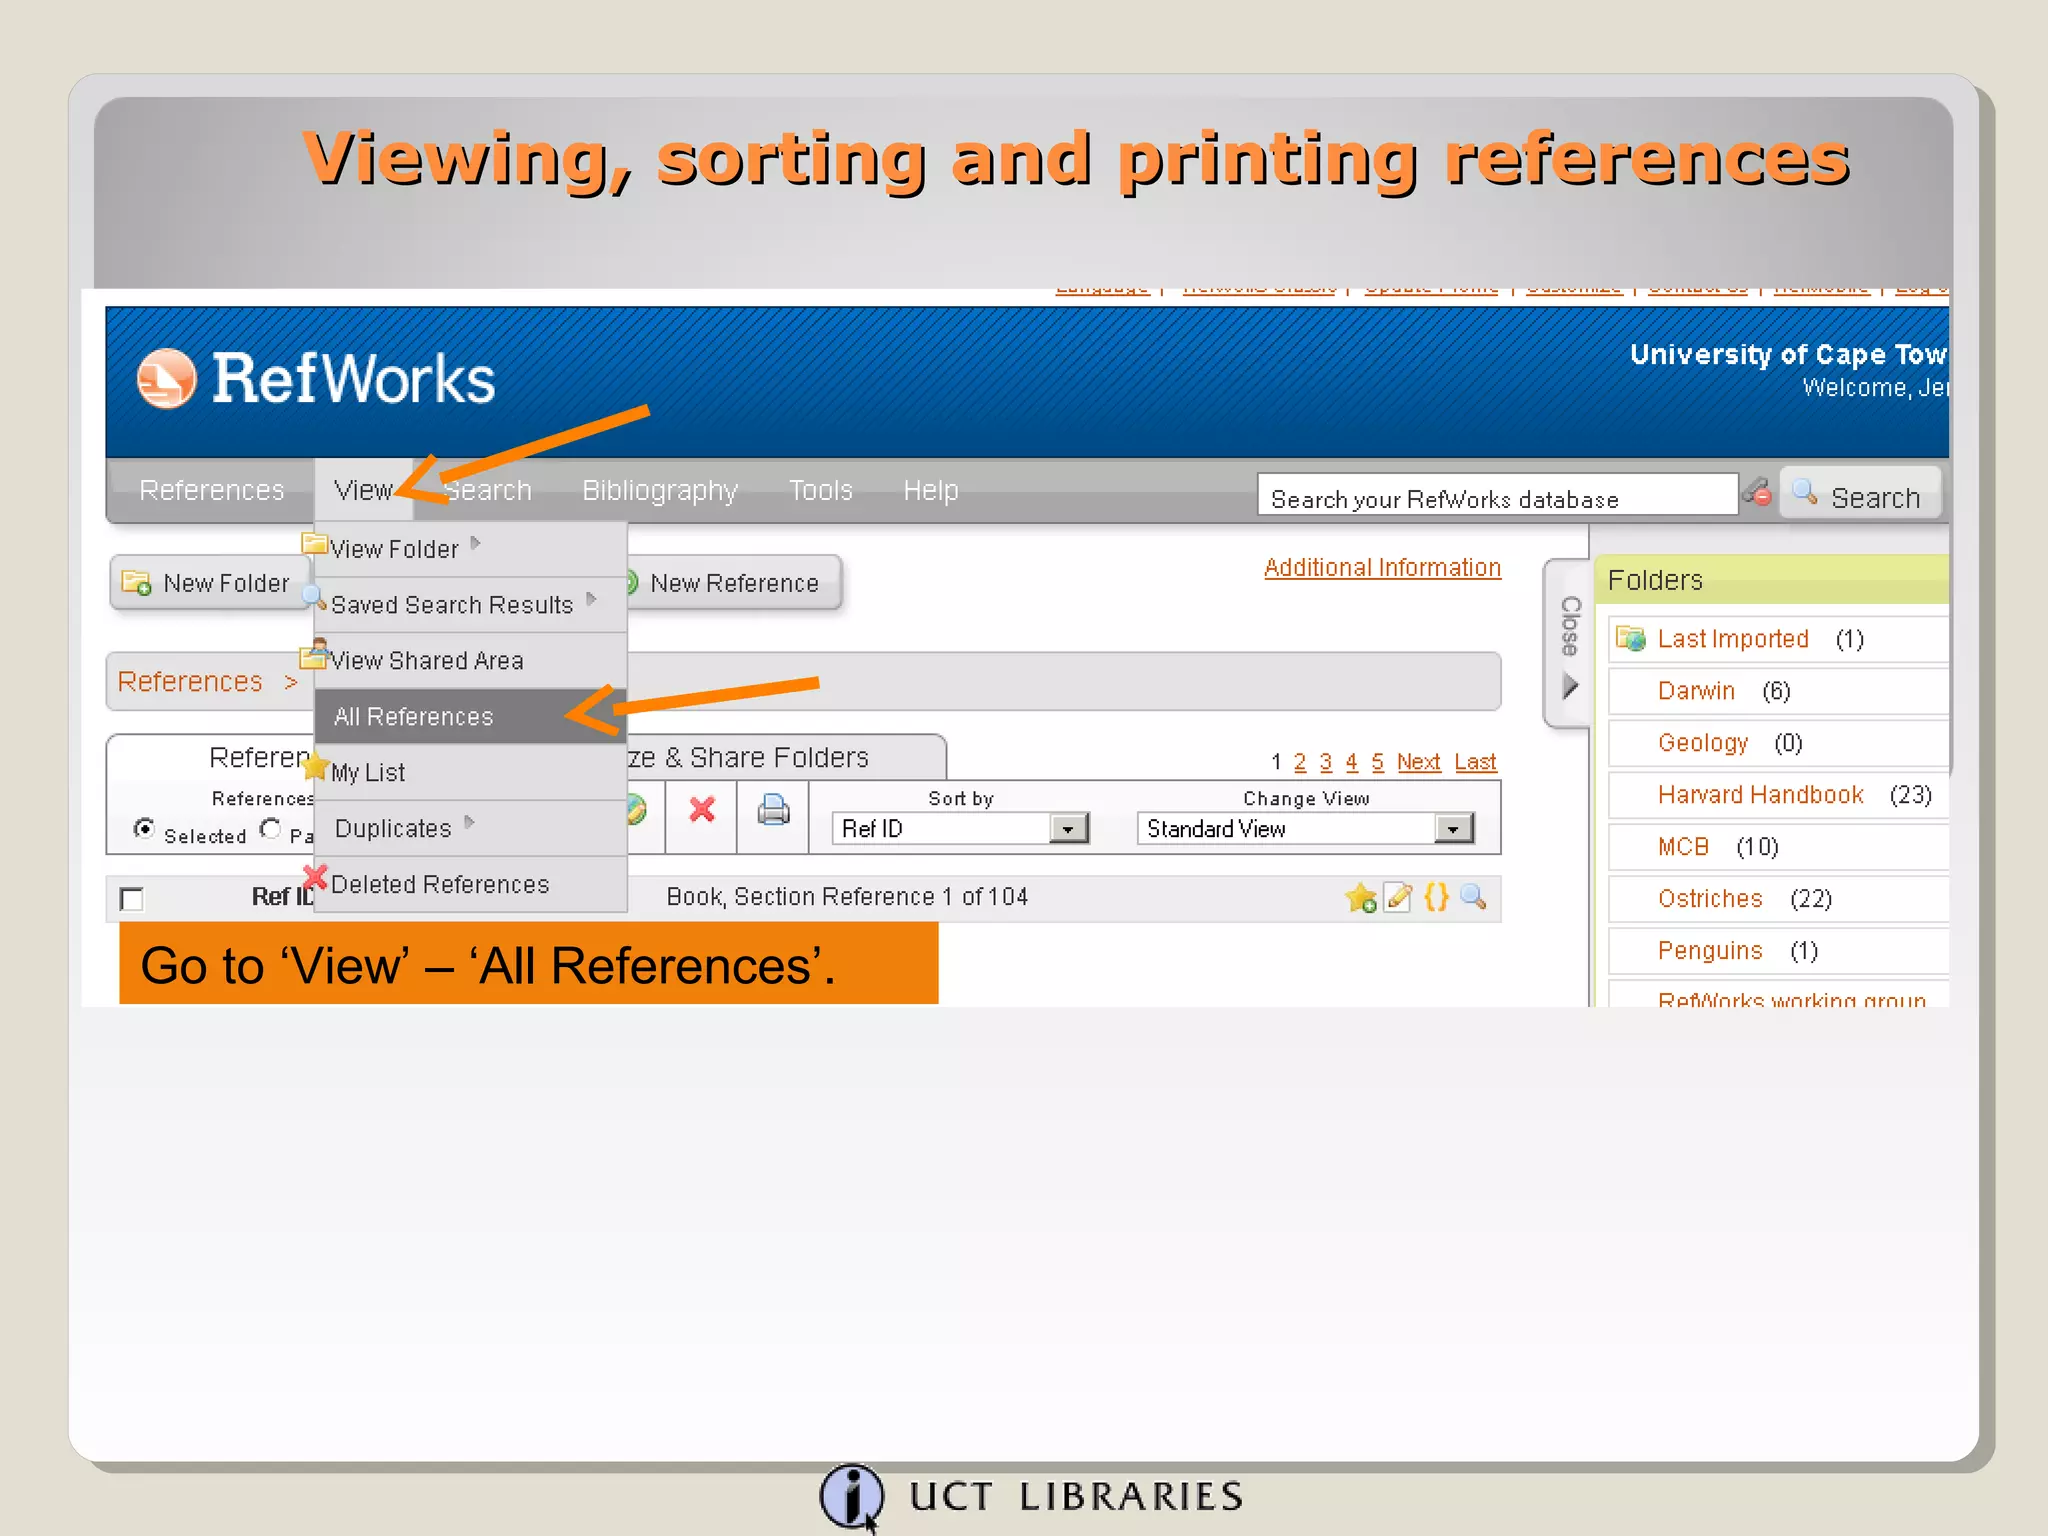
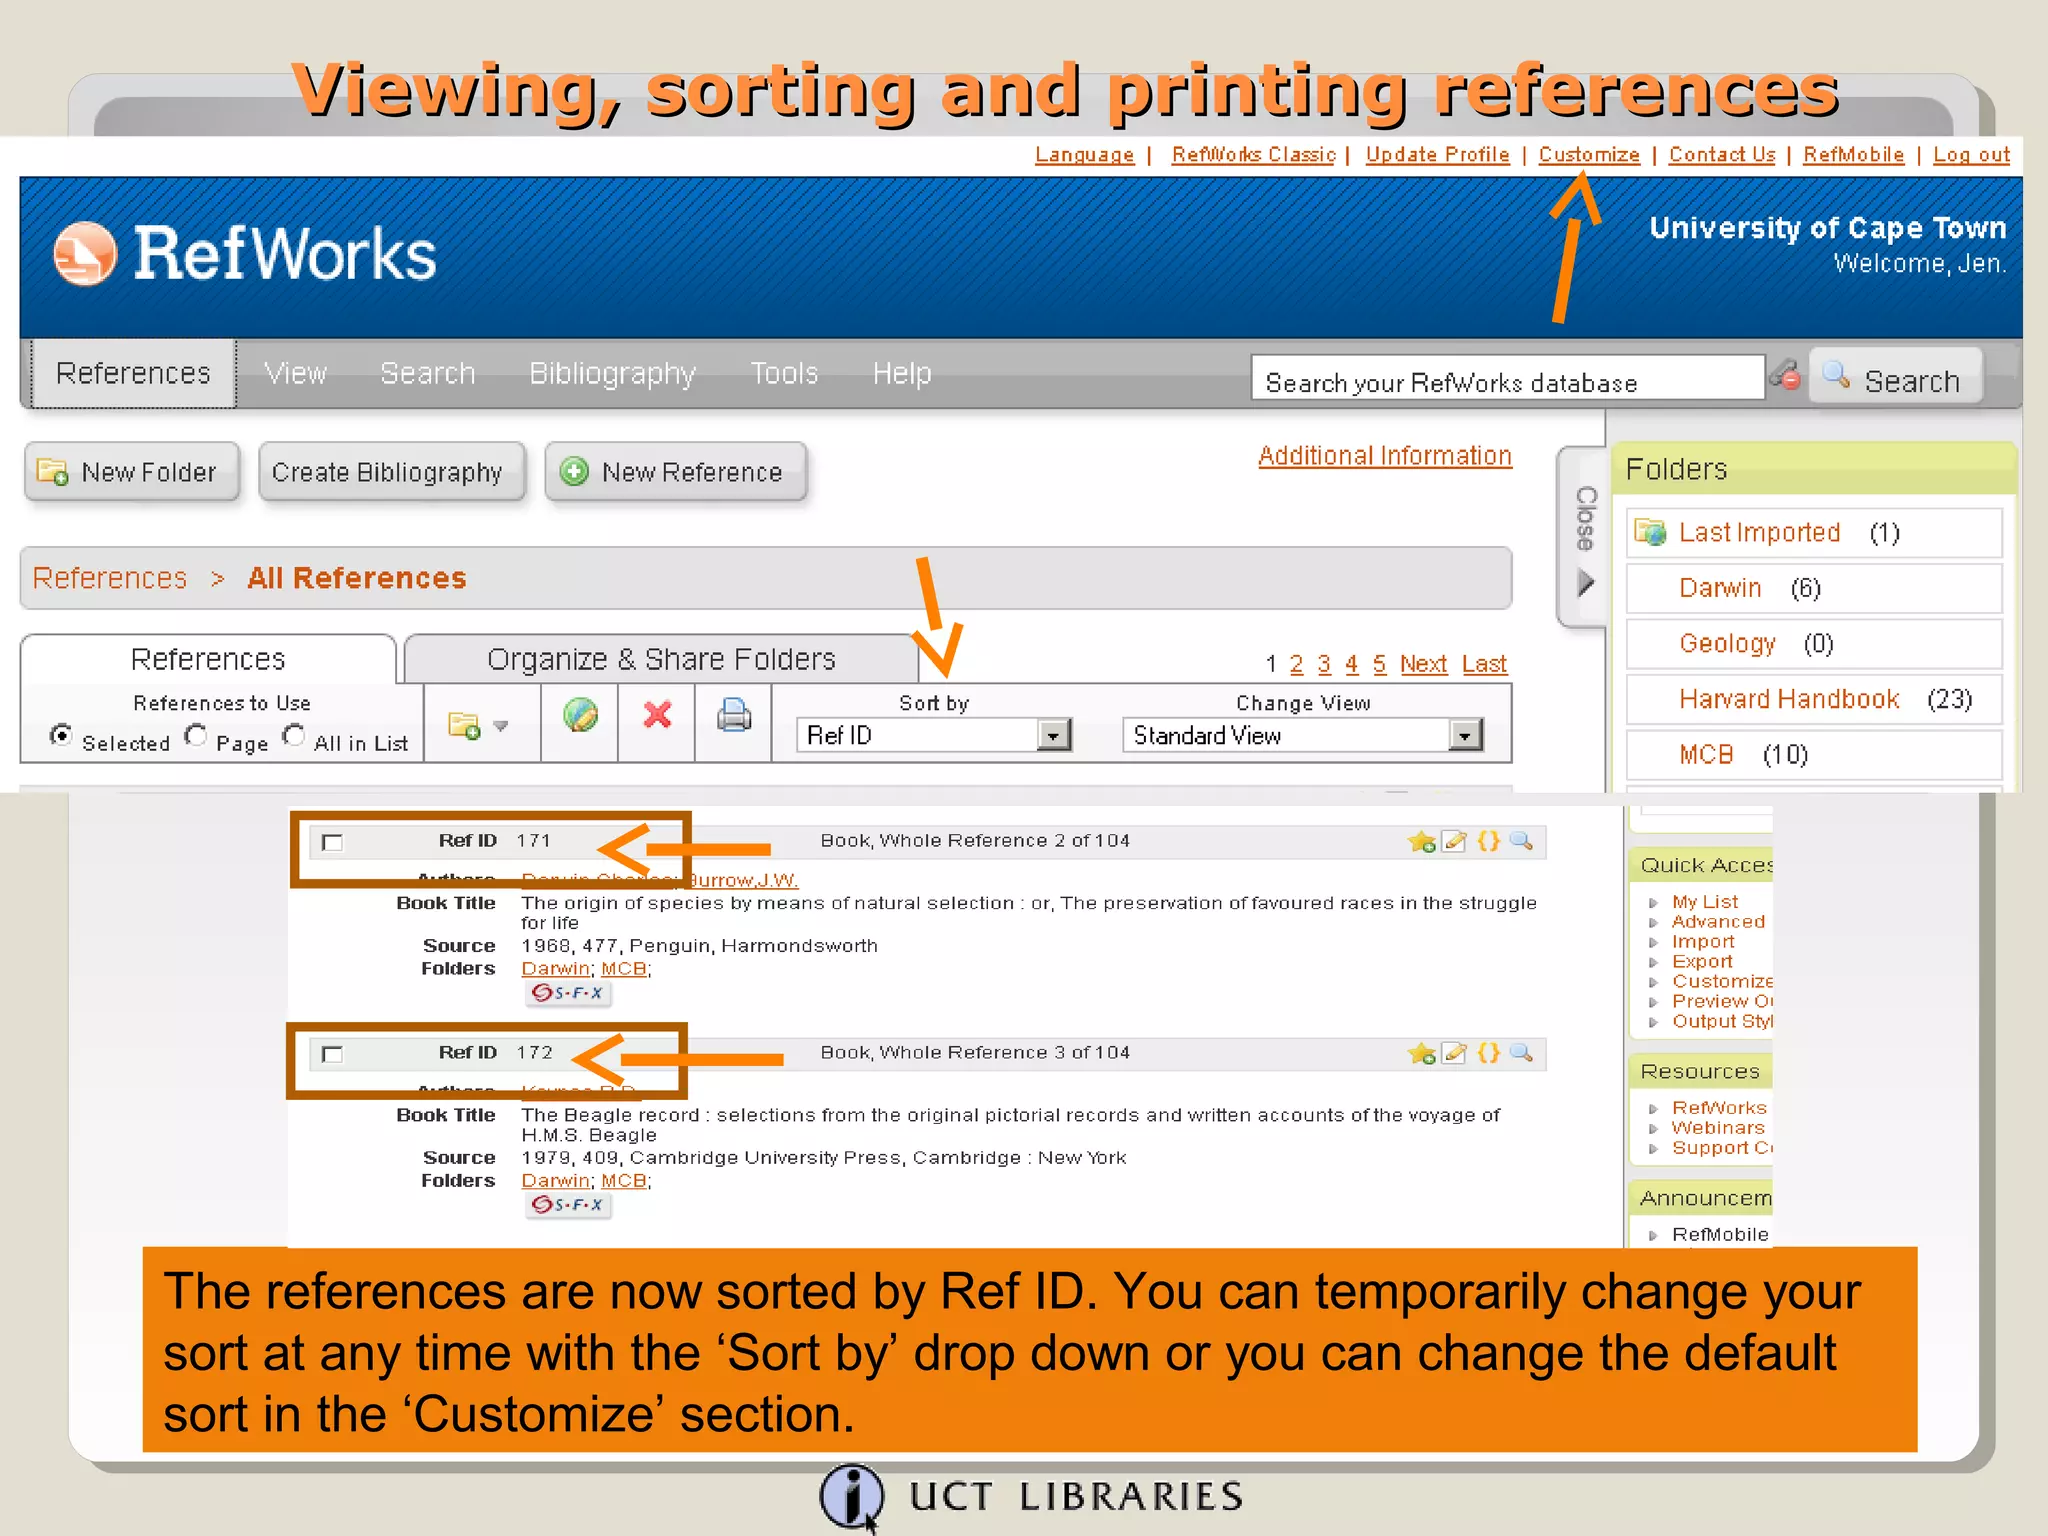
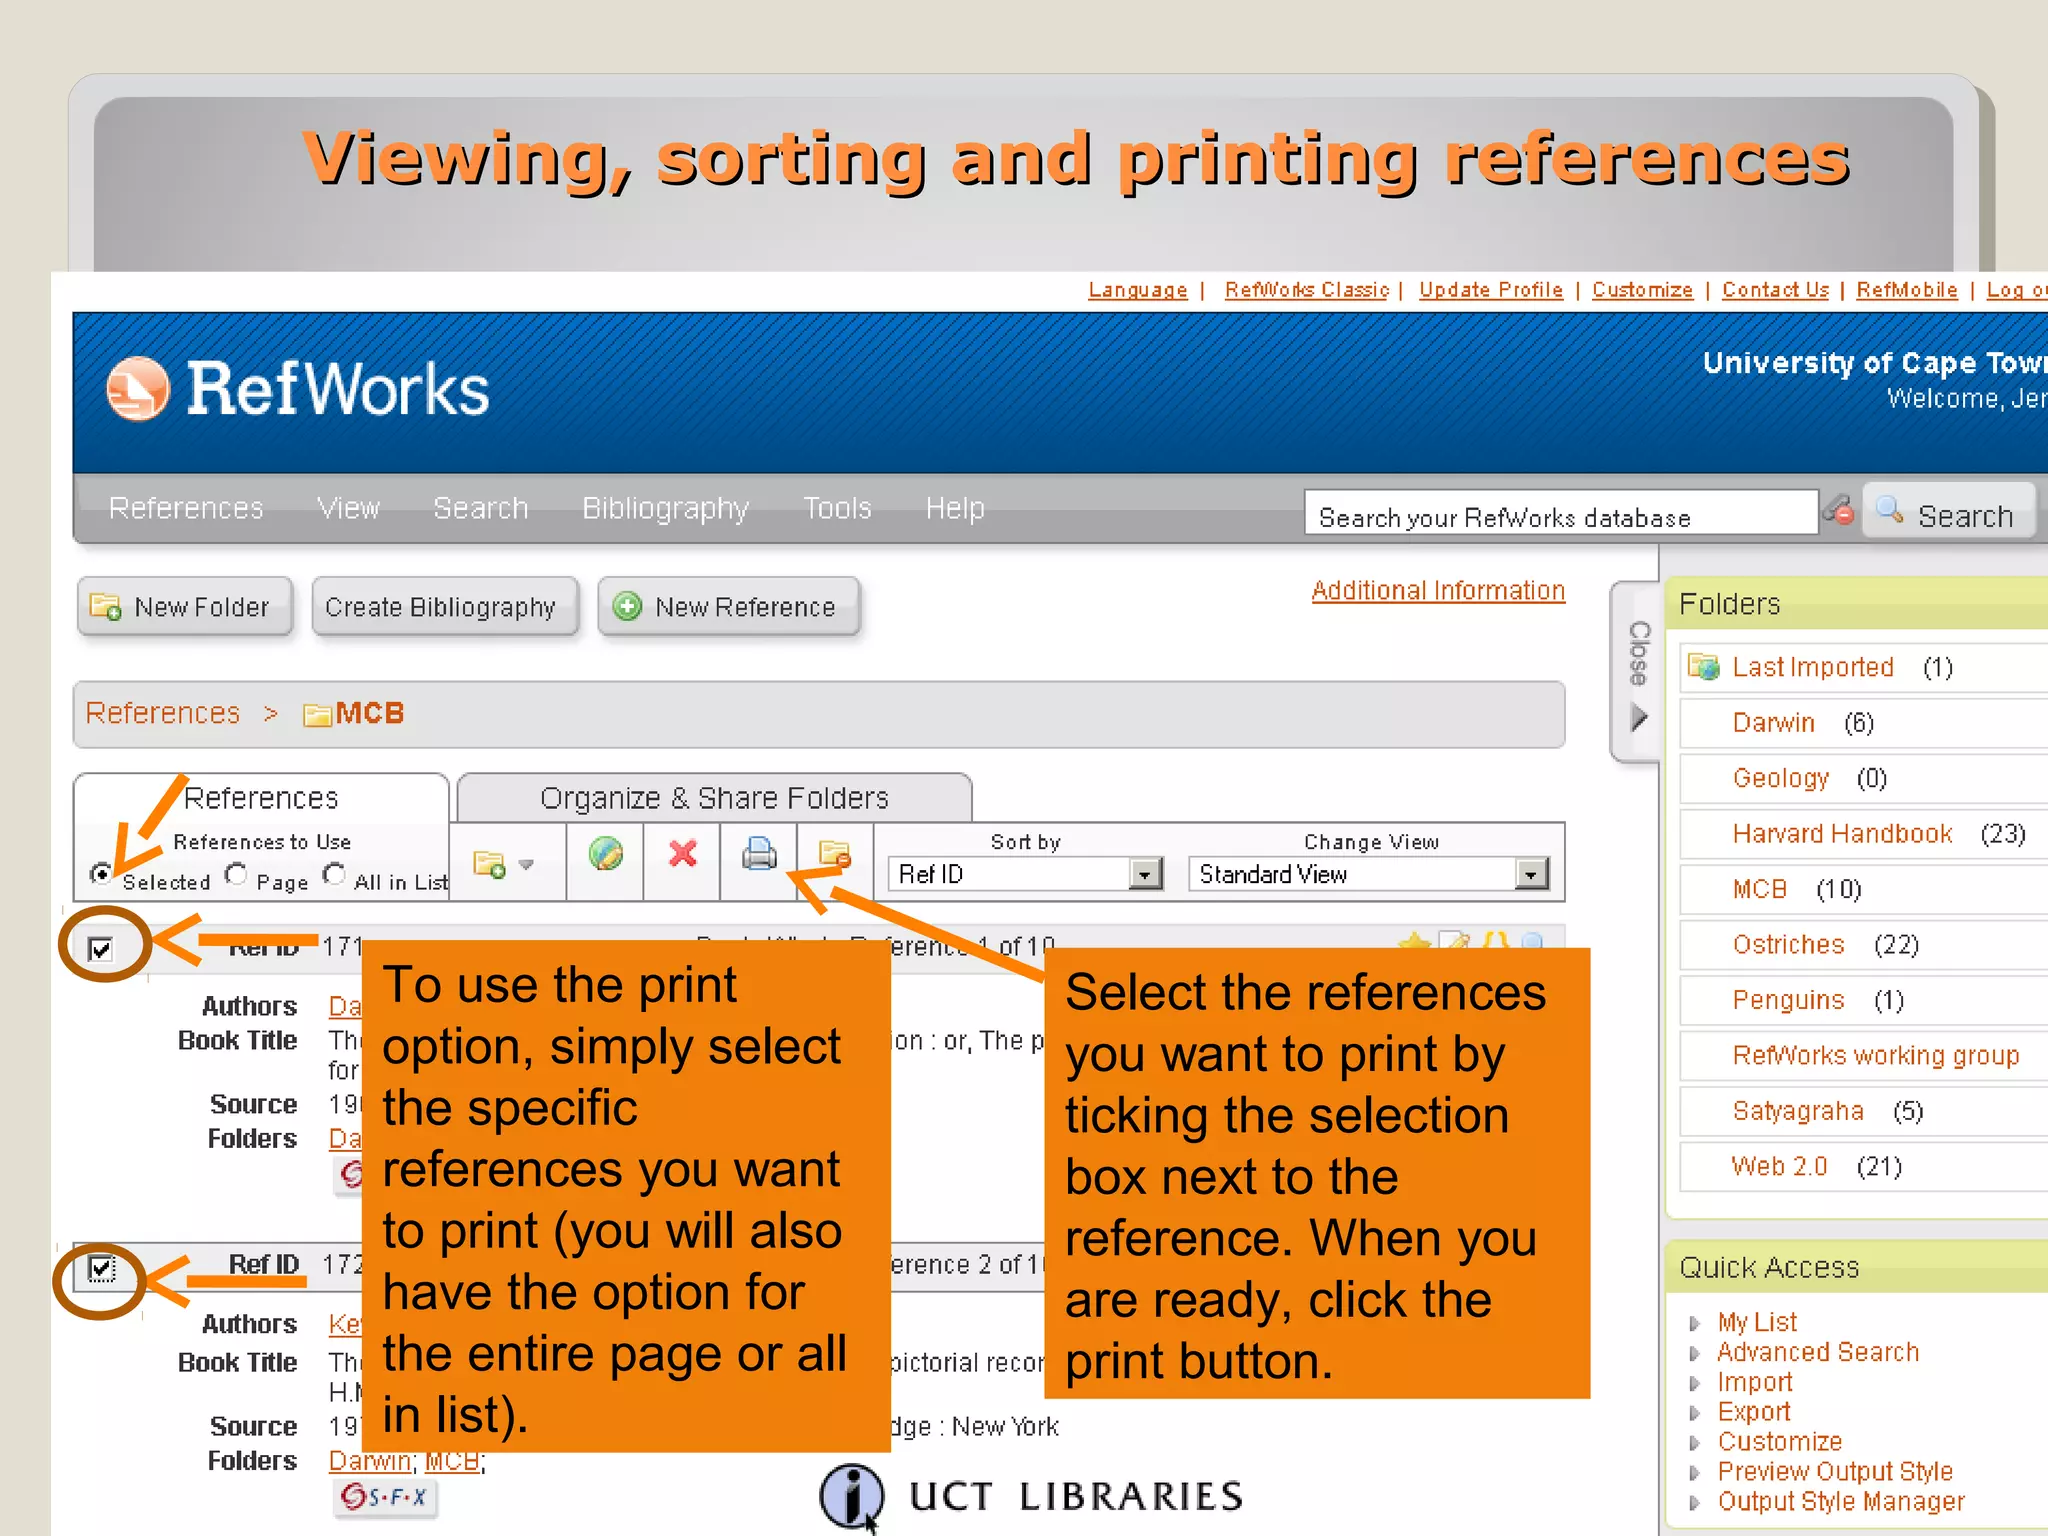
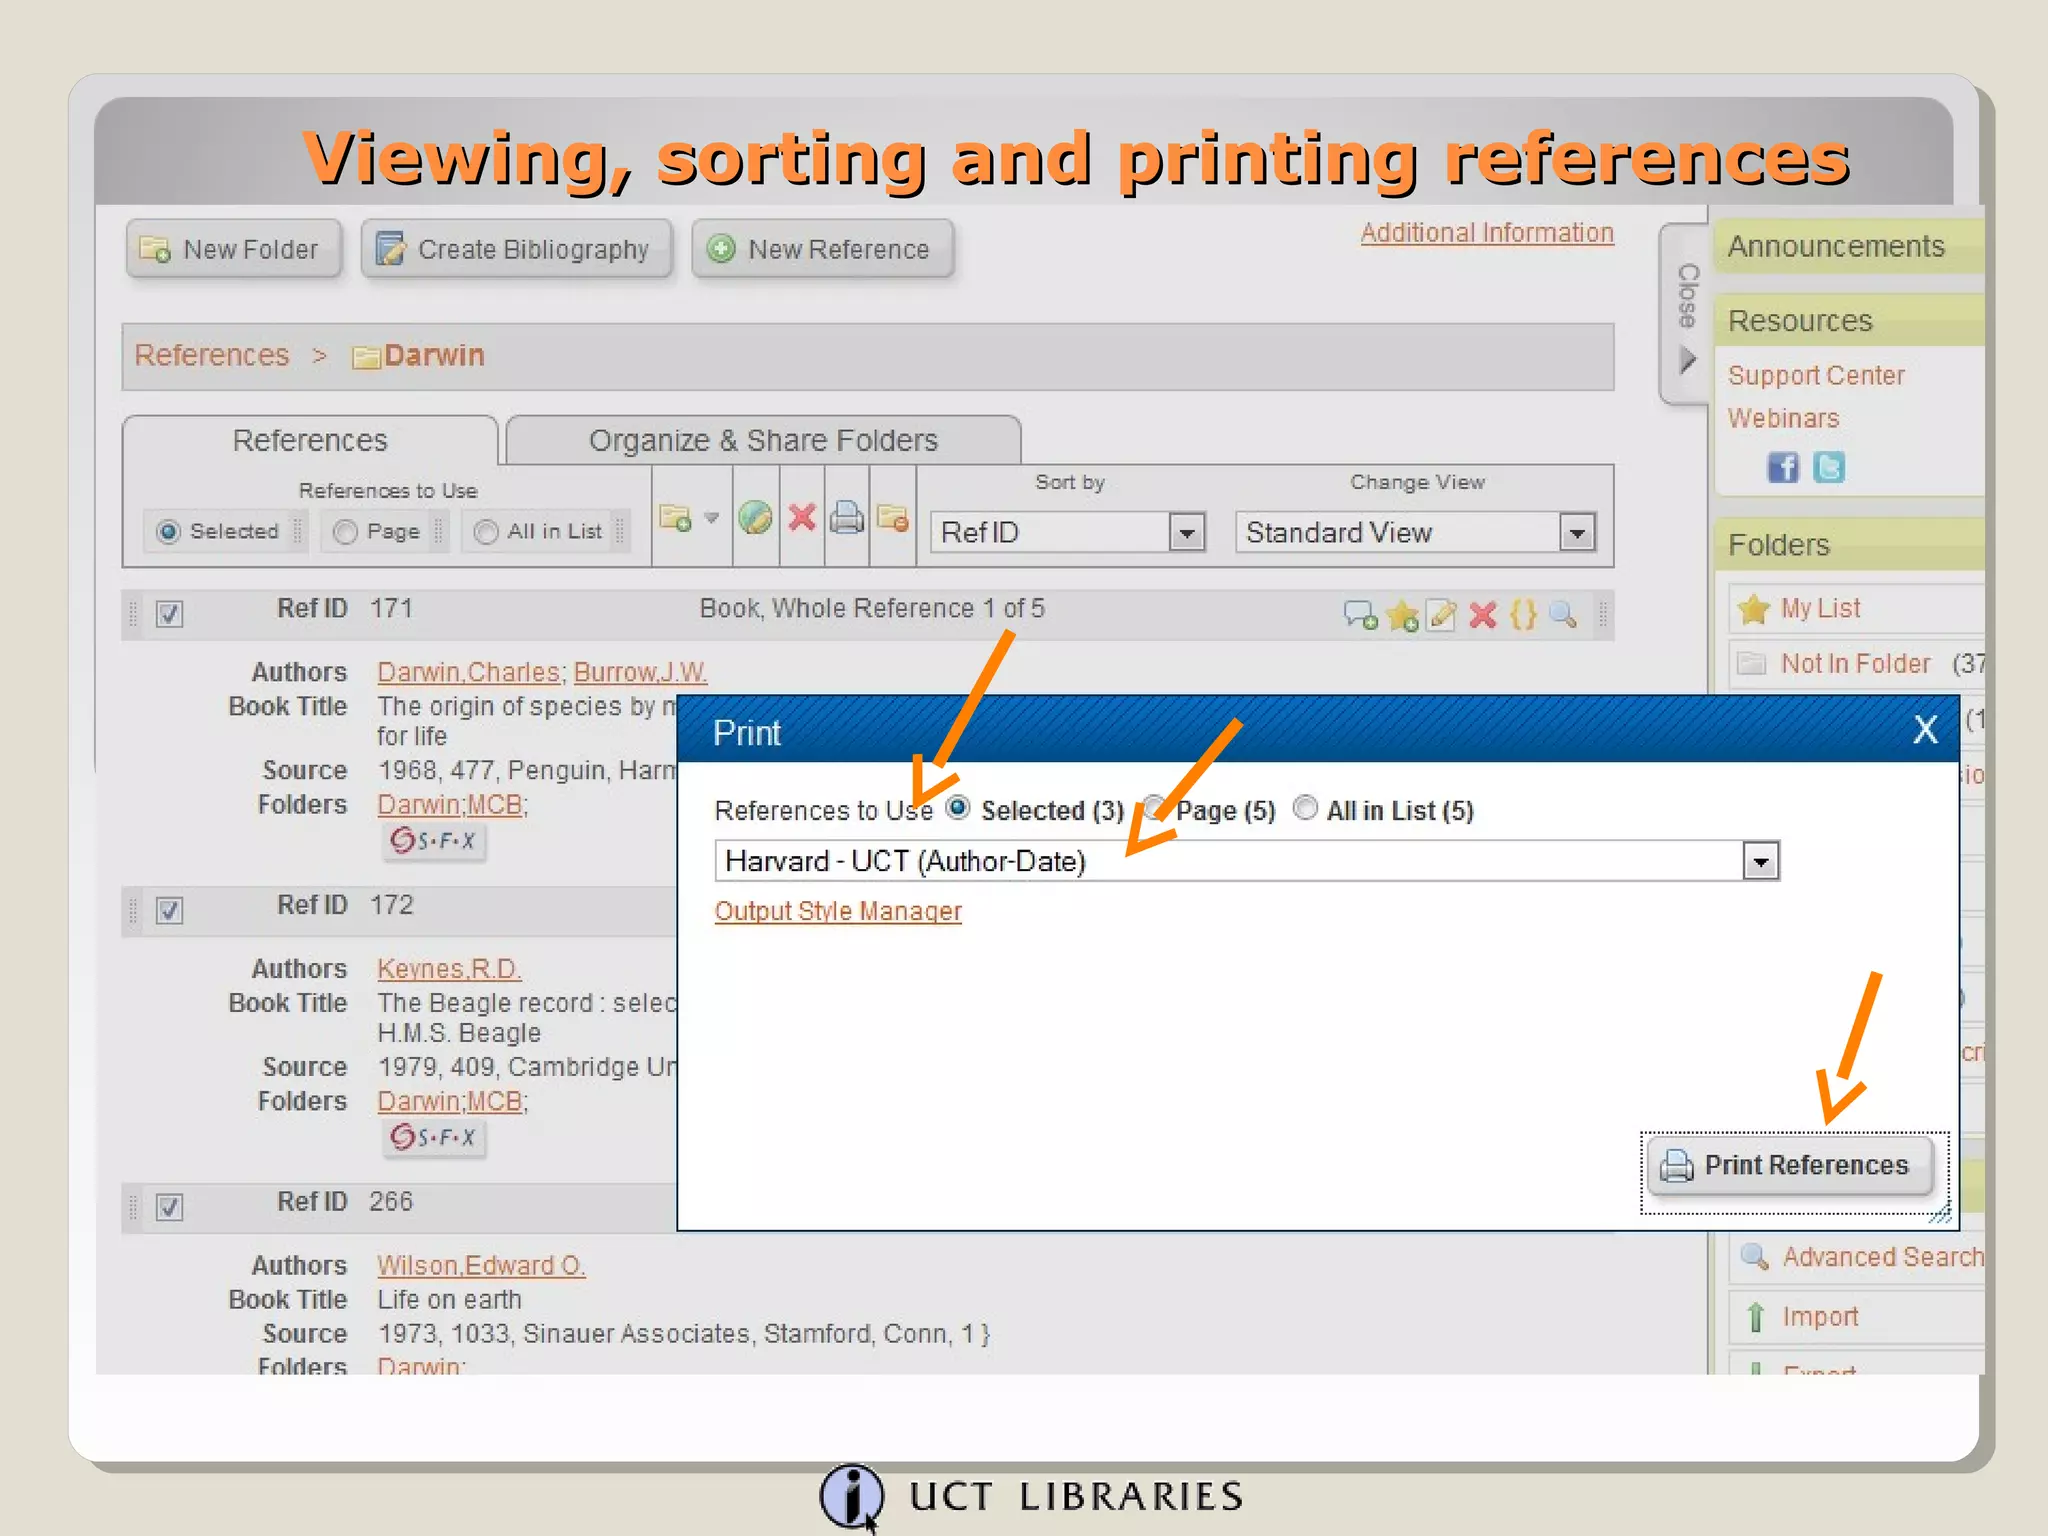
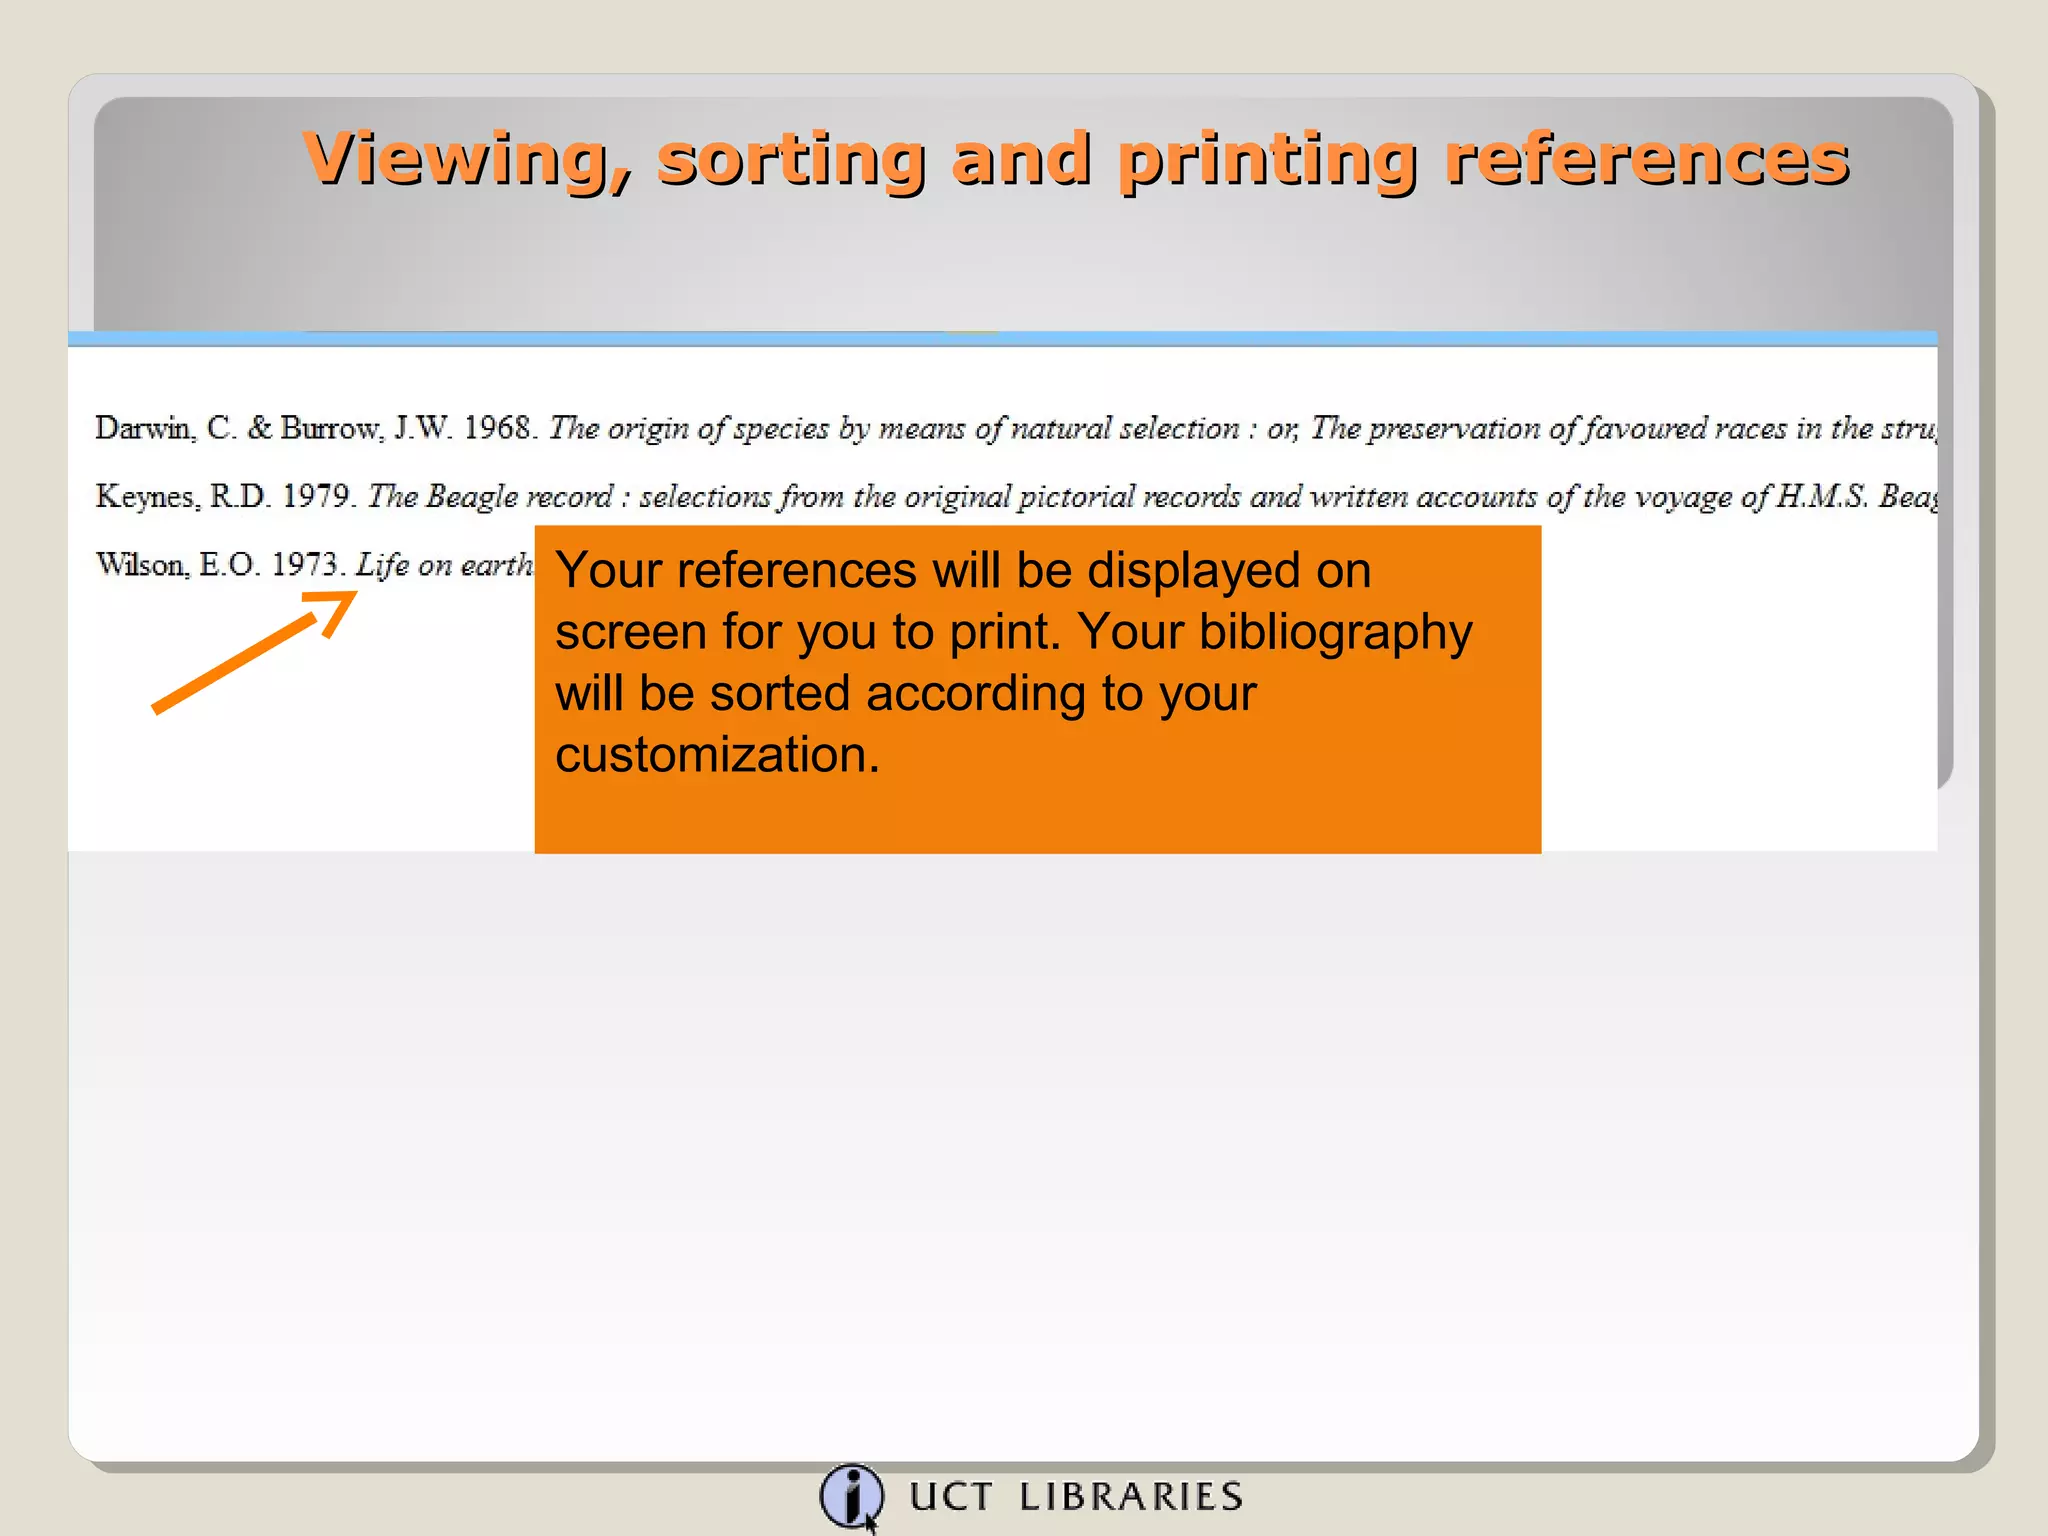

The document discusses different ways to view, sort, and print references in RefWorks. It describes the standard, one line cite, and full views available by default. Additional views can be added by selecting output styles. References can be sorted by fields like reference type or ID. The number of references displayed per page and default sort order can also be customized. Printing selected references displays them in the chosen format.


![Word processor plugin_usage [zotero documentation]](https://cdn.slidesharecdn.com/ss_thumbnails/wordprocessorpluginusagezoterodocumentation-150530060819-lva1-app6892-thumbnail.jpg?width=640&height=640&fit=bounds)


