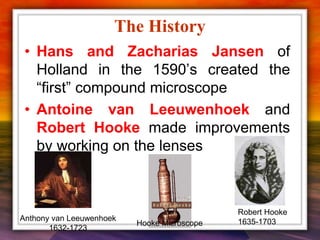
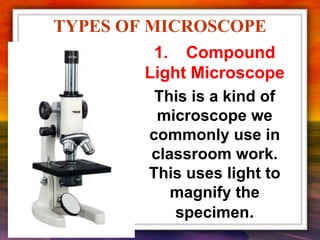
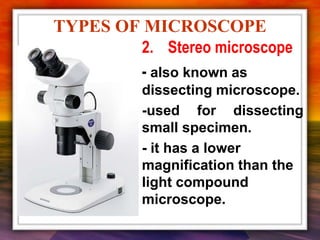
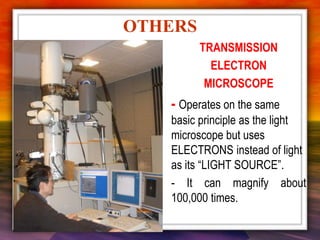
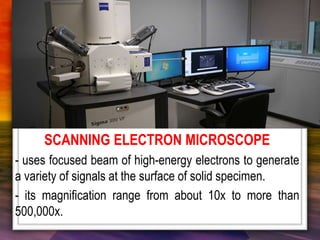
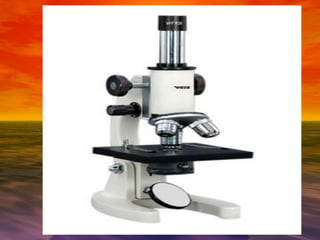
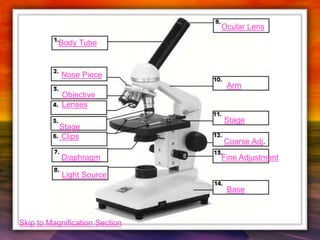
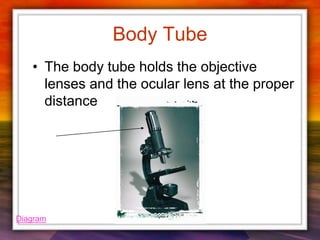
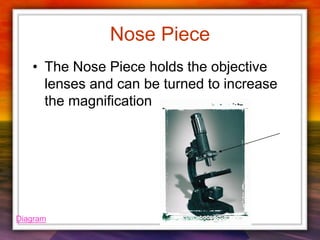
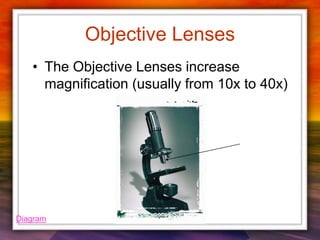
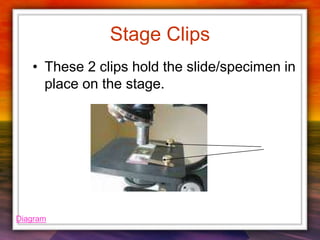
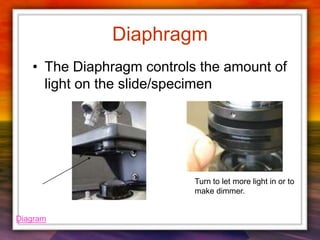
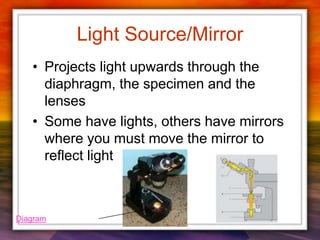
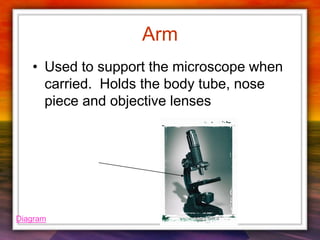
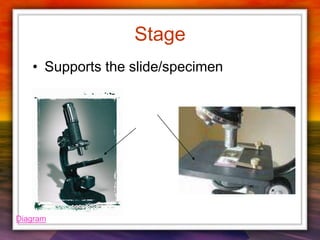
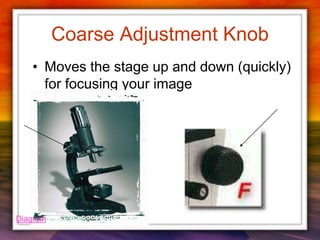
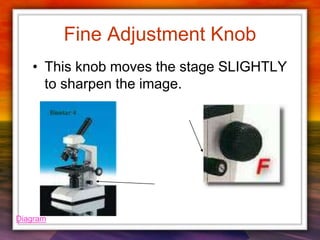
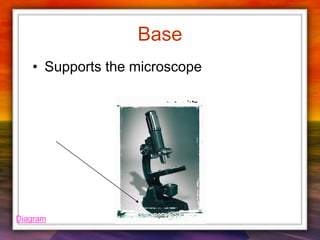
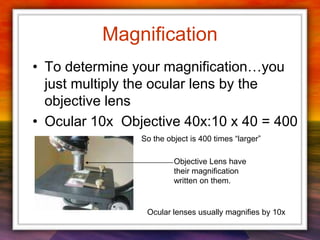
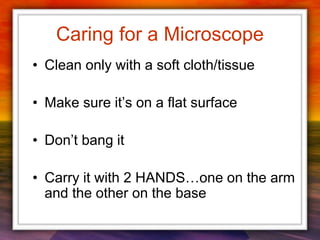
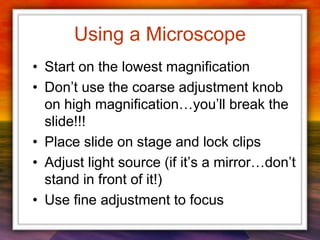
The Microscope
Microscopes
Objectives:
•To name the parts of the microscope
and describe their functions
•To describe how to properly use a
compound microscope.
•To compare a compound to a light
microscope
MICROSCOPE
• A special equipment
used to make small
objects appear bigger,
like cell, bacteria and
etc.
The History
• Hans and Zacharias Jansen of
Holland in the 1590’s created the
“first” compound microscope
• Antoine van Leeuwenhoek and
Robert Hooke made improvements
by working on the lenses
Anthony van Leeuwenhoek
1632-1723
Robert Hooke
1635-1703
Hooke Microscope
The History
Zacharias Jansen
1588-1631
The “First” Microscope
TYPES OF MICROSCOPE
1. Compound
Light Microscope
This is a kind of
microscope we
commonly use in
classroom work.
This uses light to
magnify the
specimen.
TYPES OF MICROSCOPE
2. Stereo microscope
- also known as
dissecting microscope.
-used for dissecting
small specimen.
- it has a lower
magnification than the
light compound
microscope.
OTHERS
TRANSMISSION
ELECTRON
MICROSCOPE
- Operates on the same
basic principle as the light
microscope but uses
ELECTRONS instead of light
as its “LIGHT SOURCE”.
- It can magnify about
100,000 times.
SCANNING ELECTRON MICROSCOPE
- uses focused beam of high-energy electrons to generate
a variety of signals at the surface of solid specimen.
- its magnification range from about 10x to more than
500,000x.
•Magnifying power or Magnification
the ability of the microscope to make tiny
objects and living organisms look bigger.
IMPORTANT TERMS!
• Resolving power or Resolution
– The ability of the microscope to distinguish small
gaps between two separate points which humans
can’t distinguish.
IMPORTANT TERMS!
•Fields of view
– The bright circle of light.
IMPORTANT TERMS!
•Specimen – a part or sample of any
material for study or examination under
the microscope.
IMPORTANT TERMS!
•Glass slide and cover slip – used in
mounting specimen.
IMPORTANT TERMS!
The Parts of a Microscope
Body Tube
Nose Piece
Objective
Lenses
Stage
Clips
Diaphragm
Light Source
Ocular Lens
Arm
Stage
Coarse Adj.
Fine Adjustment
Base
Skip to Magnification Section
Body Tube
• The body tube holds the objective
lenses and the ocular lens at the proper
distance
Diagram
Nose Piece
• The Nose Piece holds the objective
lenses and can be turned to increase
the magnification
Diagram
Objective Lenses
• The Objective Lenses increase
magnification (usually from 10x to 40x)
Diagram
Stage Clips
• These 2 clips hold the slide/specimen in
place on the stage.
Diagram
Diaphragm
• The Diaphragm controls the amount of
light on the slide/specimen
Turn to let more light in or to
make dimmer.
Diagram
Light Source/Mirror
• Projects light upwards through the
diaphragm, the specimen and the
lenses
• Some have lights, others have mirrors
where you must move the mirror to
reflect light
Diagram
Ocular Lens/Eyepiece
• Magnifies the specimen image
Diagram
Arm
• Used to support the microscope when
carried. Holds the body tube, nose
piece and objective lenses
Diagram
Stage
• Supports the slide/specimen
Diagram
Coarse Adjustment Knob
• Moves the stage up and down (quickly)
for focusing your image
Diagram
Fine Adjustment Knob
• This knob moves the stage SLIGHTLY
to sharpen the image.
Diagram
Base
• Supports the microscope
Diagram
Magnification
Magnification
• To determine your magnification…you
just multiply the ocular lens by the
objective lens
• Ocular 10x Objective 40x:10 x 40 = 400
Objective Lens have
their magnification
written on them.
Ocular lenses usually magnifies by 10x
So the object is 400 times “larger”
Caring for a Microscope
• Clean only with a soft cloth/tissue
• Make sure it’s on a flat surface
• Don’t bang it
• Carry it with 2 HANDS…one on the arm
and the other on the base
Carry a Microscope Correctly
Using a Microscope
• Start on the lowest magnification
• Don’t use the coarse adjustment knob
on high magnification…you’ll break the
slide!!!
• Place slide on stage and lock clips
• Adjust light source (if it’s a mirror…don’t
stand in front of it!)
• Use fine adjustment to focus
Q2 module-1-2 -microscope

Q2 module-1-2 -microscope

  • 1.
  • 2.
    Microscopes Objectives: •To name theparts of the microscope and describe their functions •To describe how to properly use a compound microscope. •To compare a compound to a light microscope
  • 3.
    MICROSCOPE • A specialequipment used to make small objects appear bigger, like cell, bacteria and etc.
  • 4.
    The History • Hansand Zacharias Jansen of Holland in the 1590’s created the “first” compound microscope • Antoine van Leeuwenhoek and Robert Hooke made improvements by working on the lenses Anthony van Leeuwenhoek 1632-1723 Robert Hooke 1635-1703 Hooke Microscope
  • 5.
  • 6.
    TYPES OF MICROSCOPE 1.Compound Light Microscope This is a kind of microscope we commonly use in classroom work. This uses light to magnify the specimen.
  • 7.
    TYPES OF MICROSCOPE 2.Stereo microscope - also known as dissecting microscope. -used for dissecting small specimen. - it has a lower magnification than the light compound microscope.
  • 8.
    OTHERS TRANSMISSION ELECTRON MICROSCOPE - Operates onthe same basic principle as the light microscope but uses ELECTRONS instead of light as its “LIGHT SOURCE”. - It can magnify about 100,000 times.
  • 9.
    SCANNING ELECTRON MICROSCOPE -uses focused beam of high-energy electrons to generate a variety of signals at the surface of solid specimen. - its magnification range from about 10x to more than 500,000x.
  • 10.
    •Magnifying power orMagnification the ability of the microscope to make tiny objects and living organisms look bigger. IMPORTANT TERMS!
  • 12.
    • Resolving poweror Resolution – The ability of the microscope to distinguish small gaps between two separate points which humans can’t distinguish. IMPORTANT TERMS!
  • 13.
    •Fields of view –The bright circle of light. IMPORTANT TERMS!
  • 14.
    •Specimen – apart or sample of any material for study or examination under the microscope. IMPORTANT TERMS!
  • 15.
    •Glass slide andcover slip – used in mounting specimen. IMPORTANT TERMS!
  • 17.
    The Parts ofa Microscope
  • 18.
    Body Tube Nose Piece Objective Lenses Stage Clips Diaphragm LightSource Ocular Lens Arm Stage Coarse Adj. Fine Adjustment Base Skip to Magnification Section
  • 19.
    Body Tube • Thebody tube holds the objective lenses and the ocular lens at the proper distance Diagram
  • 20.
    Nose Piece • TheNose Piece holds the objective lenses and can be turned to increase the magnification Diagram
  • 21.
    Objective Lenses • TheObjective Lenses increase magnification (usually from 10x to 40x) Diagram
  • 22.
    Stage Clips • These2 clips hold the slide/specimen in place on the stage. Diagram
  • 23.
    Diaphragm • The Diaphragmcontrols the amount of light on the slide/specimen Turn to let more light in or to make dimmer. Diagram
  • 24.
    Light Source/Mirror • Projectslight upwards through the diaphragm, the specimen and the lenses • Some have lights, others have mirrors where you must move the mirror to reflect light Diagram
  • 25.
    Ocular Lens/Eyepiece • Magnifiesthe specimen image Diagram
  • 26.
    Arm • Used tosupport the microscope when carried. Holds the body tube, nose piece and objective lenses Diagram
  • 27.
    Stage • Supports theslide/specimen Diagram
  • 28.
    Coarse Adjustment Knob •Moves the stage up and down (quickly) for focusing your image Diagram
  • 29.
    Fine Adjustment Knob •This knob moves the stage SLIGHTLY to sharpen the image. Diagram
  • 30.
    Base • Supports themicroscope Diagram
  • 31.
  • 32.
    Magnification • To determineyour magnification…you just multiply the ocular lens by the objective lens • Ocular 10x Objective 40x:10 x 40 = 400 Objective Lens have their magnification written on them. Ocular lenses usually magnifies by 10x So the object is 400 times “larger”
  • 33.
    Caring for aMicroscope • Clean only with a soft cloth/tissue • Make sure it’s on a flat surface • Don’t bang it • Carry it with 2 HANDS…one on the arm and the other on the base
  • 34.
  • 35.
    Using a Microscope •Start on the lowest magnification • Don’t use the coarse adjustment knob on high magnification…you’ll break the slide!!! • Place slide on stage and lock clips • Adjust light source (if it’s a mirror…don’t stand in front of it!) • Use fine adjustment to focus