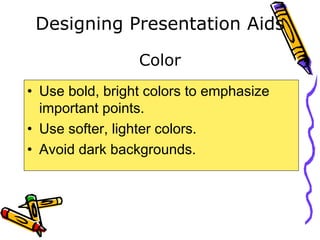
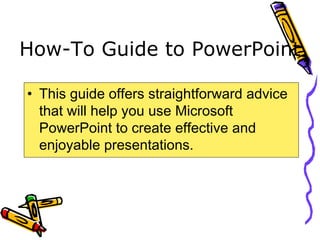
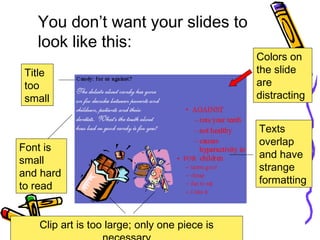
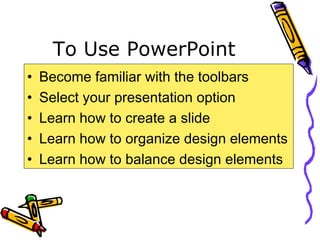
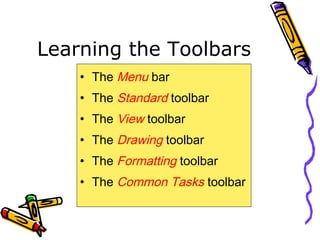
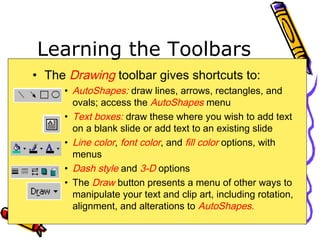
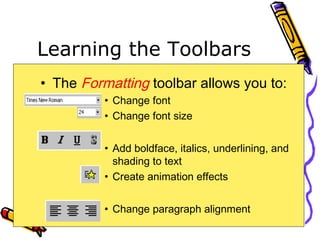
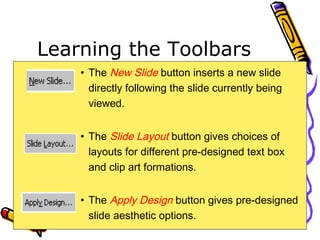
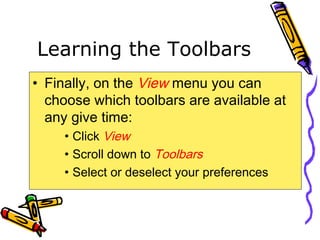
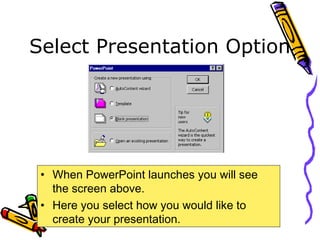
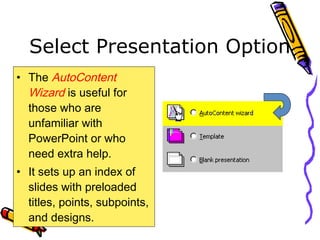
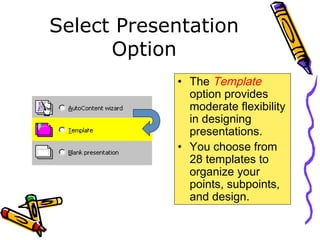
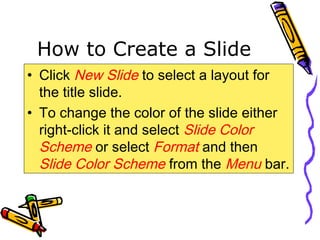
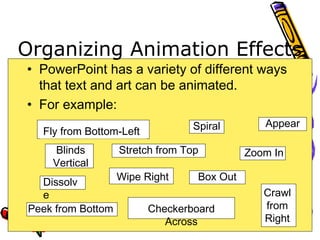
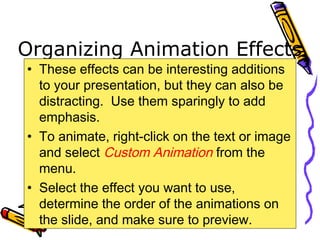
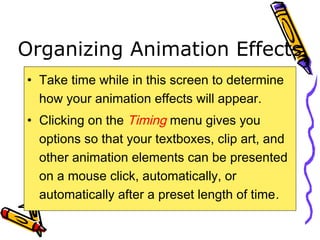
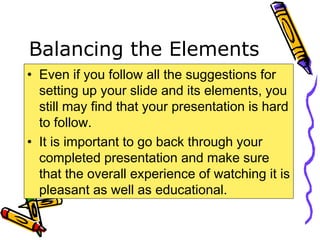
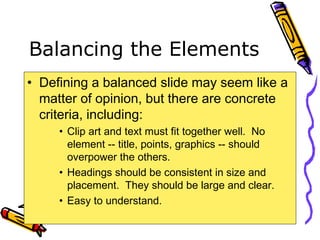
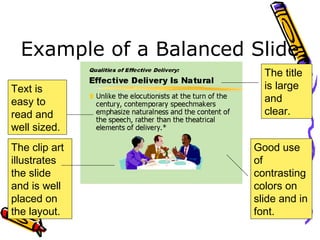
This guide provides instructions for using PowerPoint to create effective presentations. It discusses the various toolbars in PowerPoint and how to select presentation options. It also covers how to create and organize slides, including adding text, images, charts and animation effects. The guide emphasizes balancing different design elements on slides to ensure the content is clear and visually pleasing.
This document provides an overview of Microsoft PowerPoint 2007. It covers starting PowerPoint, exploring the interface and ribbon, creating and modifying presentations, adding and arranging slides, applying themes and backgrounds, and using different views including normal, slide sorter, and slide show views. Tutorials are also available online for additional PowerPoint features and functions.
The document discusses presentation software and its uses. It defines presentation software as tools that combine text, graphics, charts, animations and sound into electronic slides. It then examines objects as the basic elements of presentation software, describing how PowerPoint slides are made up of different object types like text boxes, shapes, pictures etc. Each object has properties and behaviors that can be manipulated. The document provides examples of how PowerPoint is used to support presentations, deliver tutorials, and more.
This document provides an overview of the presentation software Impress, which is part of OpenOffice. It describes Impress' features for creating and editing slides, including master pages, layouts, importing images and 3D shapes. It also mentions viewing presentations and customizing the program window. The goal is to demonstrate how Impress can be used to easily create stunning presentations.
The document provides instructions on how to create a presentation using PowerPoint. It covers inserting themes, pictures, text boxes, headers and footers, tables, and deleting slides. It also discusses presentation tools used to project visual aids and overhead projectors. The objectives are to produce an effective presentation, manipulate colors and images, and present information to an audience. Evaluation questions ask about presentation tools and their importance.
This document provides an overview of how to use Microsoft PowerPoint to create and deliver effective presentations. It begins with objectives for learning PowerPoint and covers topics like creating and formatting slides, adding transitions between slides, animating text and objects, including multimedia elements, and delivering the presentation. The document provides instructions and examples for each topic and encourages the reader to do practice exercises along the way to reinforce their learning.
The document provides instructions on how to create and optimize effective PowerPoint presentations, including starting with clear objectives and knowing your audience, using visuals like images and charts to engage viewers, and optimizing file size and reducing fonts to improve loading and sharing of the presentation. It also discusses using PowerPoint presentations for purposes like marketing, training, and improving search engine optimization.
This document provides an overview of Module 1 of the MS PowerPoint 2010 Essential Training course. It covers topics like the basic PowerPoint interface and elements, how to create and work with presentations, and how to format slides. Key points covered include how to change views, insert and modify slides, apply themes and backgrounds, and use the slide sorter view to rearrange slides. The goal of the module is to learn fundamental PowerPoint skills like navigation, layouts, and basic formatting and organization.
PowerPoint 2010 is a visual application used to create presentations combining text, images, graphs, videos and more. It has a ribbon interface with tabs for tasks like Home, Insert and Design. The application window includes elements like a title bar, quick access toolbar, file tab, groups of commands, slide and notes panes, and status bar. The document provides guidance on designing effective PowerPoint presentations, such as minimizing slides, using readable font sizes, keeping text simple, adding visuals, and checking for errors.
This document discusses formatting options in PowerPoint 2010 presentations. It covers how to change themes, color themes, theme effects, slide backgrounds, fonts, and the look of text boxes. It also discusses applying quick styles to text boxes and tables. The document provides step-by-step instructions for tasks like changing themes, backgrounds, fonts, and applying quick styles. It explains concepts like what themes, color themes, and theme effects are in PowerPoint.
The document provides dos and don'ts for creating effective PowerPoint presentations. It recommends organizing thoughts before creating slides, using outlines to structure content, and proofreading text. For design, it suggests using minimal text per slide, consistent formatting, and high-contrast colors. Graphics and images should complement the content without distracting. The presentation should be practiced to ensure readability and remove unnecessary elements before presenting.
The document provides an overview of the new Ribbon interface in Microsoft Word 2007. It discusses the key components of the Ribbon including tabs, groups, and commands. It also summarizes the locations of common formatting and editing tools like bullets, styles, spelling checks, and printing options. Users are guided on how to access these tools and customize aspects like keyboard shortcuts and the Quick Access toolbar.
Creating Presentations using Microsoft Powerpoint - 2007indika rathninda
PowerPoint replaced traditional presentation methods like whiteboards, charts, flip charts, and overhead transparencies. It can be used in various settings for presentations. Common mistakes in PowerPoint include putting all text from a speech on slides, which makes them boring, as well as spelling errors and excessive bullet points. Effective presentations use simple fonts, 30 point minimum font size, limited words per line, and colors chosen carefully to convey the right message without being distracting. Proper use of images, animation, and focusing on 1-2 main points per slide can improve presentations.
PowerPoint allows users to create presentations with text, graphics, and multimedia. It is important to plan presentations by determining the message, audience, and materials. PowerPoint has different views for editing, organizing slides, and viewing presentations. Design themes can be applied to format text and backgrounds. Presentations can be printed or shared in various formats.
This document provides an overview of the basics of using Microsoft PowerPoint. It describes the main tabs in PowerPoint including File, Home, Insert, Design, Transitions and Animations, Slideshow, Review and View. It explains how to create and save presentations, add slides, insert elements like images and tables, choose slide designs and themes, add transitions and animations, view and manage slideshows, and use spellcheck and other review tools. The document recommends always saving presentations frequently and using themes, transitions, and animations sparingly to avoid distraction. It provides contact information for the Pickerington Public Library reference staff if more help is needed with PowerPoint.
PowerPoint is used to create slide shows that accompany oral presentations. It provides title slides and text boxes to build out slides. The main views include Normal view for building slides, Slide Sorter view to see all slides miniatured, and Slide Show view for presenting. Outline view shows the text hierarchy and can be exported to Word, while Notes Pages are for printed speaker notes. Various content like clip art can be added and resized on slides using different content layouts.
This document provides an overview of PowerPoint, including what it is used for, when and how it is commonly used, and basic tips for creating a PowerPoint presentation. It discusses choosing templates and slide layouts, inserting text, images, charts, and multimedia elements, and provides guidance on the thinking process for planning an effective presentation.
Microsoft office power_point_2007_tutorialMizuhashi Yuki
Microsoft PowerPoint can be used to create interactive presentations. This tutorial explains how to open PowerPoint, save presentations, format slides using themes and layouts, insert objects like clip art, pictures and tables, and print presentations. It provides step-by-step instructions on the PowerPoint interface and tools for creating and modifying slides on PC. Screenshots illustrate where to find various options to launch PowerPoint, apply slide designs, adjust slide layouts and insert images, charts, and other objects.
Nine Easy Steps To Creating A PPt Presentationjoelk
This 9-step document outlines the process for creating a basic PowerPoint presentation, including organizing content, entering and editing text and outlines, selecting design templates, adding images and graphics, applying slide transitions and animations, printing and presenting slides, and testing the final presentation.
The document provides an overview of common features and functions in Microsoft Office 2010 applications. It covers how to use Windows Explorer to locate and manage files and folders, launch Office programs, enter and edit text, use dialog boxes and the ribbon interface, apply formatting, and access help. Additional topics include saving files, adding properties, printing, opening existing files, modifying application options, and compressing files. The objectives are to familiarize users with the basic capabilities and shared interfaces across Office 2010 programs.
PowerPoint is presentation software used to create slides and display information visually. It provides tools to insert and format text, images, graphics, sounds and visual effects. Presentations can be printed, displayed on a computer or projected for large audiences. PowerPoint consists of slides that contain information for the presenter to display. A presentation typically includes a title slide, outline slide, topic slides and conclusion slide. The information is usually in the form of bullet points to convey ideas for the presenter to expand on.
This document provides instructions for learning basic skills in Microsoft PowerPoint. It outlines several lessons that teach how to open PowerPoint, identify its main tools and parts, insert text and media, apply themes and formatting, add animations and transitions between slides. The goals are to understand PowerPoint's basic functions and how to effectively present information to an audience. Quizzes are included to test comprehension.
This document provides an overview of the parts and views of Microsoft PowerPoint. It describes the main interface elements like the title bar, menu bar, toolbars, and views such as Normal View, Slide Sorter View, Outline View, Notes Pages View, and Slide Show View. It explains that Normal View is the main editing view with four working areas, while Slide Sorter View makes it easy to organize slide sequences and Outline View is good for writing content and planning presentations.
This document provides an overview of features and functions in Microsoft PowerPoint 2013, including:
- Creating and editing presentations, slides, text, and visual elements like tables, charts, photos, and videos.
- Formatting presentations with themes, slide layouts, animations, and multimedia enhancements.
- Organizing slides into sections, rearranging slides, and outlining the presentation.
- Customizing elements like the ribbon, slide masters, and saving as templates.
- Sharing and delivering presentations through different formats, password protection, comments, and collaboration.
This document provides an overview of MS PowerPoint and covers topics like understanding the ribbon interface, adding and formatting slide content, choosing slide layouts, inserting images and other objects, applying themes, and adding speaker notes. The main goals are to familiarize users with the PowerPoint interface and teach basic skills for creating and formatting presentation slides.
This document provides guidance on using PowerPoint to create effective presentations. It discusses the basic functions and toolbars in PowerPoint, how to design and organize slides, and tips for balancing text, images, and other design elements. The key steps covered include learning the various toolbars in PowerPoint, how to create and format slides, inserting and organizing text, images, charts and other visual elements, using animation effects, and balancing the design of slides for clarity and readability.
This document provides guidance on using PowerPoint to design effective presentations. It discusses how to select a presentation option, create slides, organize text, images, and effects, and balance design elements. The key points are:
- PowerPoint allows blank presentations for full customization or templates for guided design.
- Slides should be kept simple with short bullet points reinforcing the speech.
- Consistent formatting, readable fonts, and complimentary colors improve visuals.
- Animation and media should emphasize important points without distracting from the content.
- Effective slides balance different elements so no one part overpowers the others.
PowerPoint 2013 is a slide show presentation program developed by Microsoft that allows users to create and deliver professional presentations. It offers tools for word processing, outlining, drawing, graphing, and presentation management. The document discusses how to create and open presentations in PowerPoint, save files, customize slides, apply themes, insert images, tables, charts, videos and other media, animate objects, and present slideshows. It also covers more advanced topics like grouping objects, customizing tables and charts, using SmartArt graphics, and applying slide timings and transitions.
This document provides guidance on using PowerPoint effectively for presentations. It discusses the various toolbars in PowerPoint and how to use them. It also offers tips on creating slides, such as using simple designs with short bullet points, consistent formatting, and colors. The document emphasizes keeping content concise and using visual elements like images, charts and animation effects sparingly to reinforce key points.
This document provides an overview of an intermediate PowerPoint workshop. The workshop will teach attendees how to create PowerPoint presentations, use various functions like styles and animations, and understand best practices. It outlines the content which includes how to create and save presentations, insert objects, use templates, add animations and transitions. It also discusses design elements like slide size and alignment as well as dos and don'ts of PowerPoint design.
Impress is the presentation (slide show) program included in LibreOffice. You can create slides that contain many different elements, including text, bulleted and numbered lists, tables, charts, and a wide range of graphic objects such as clip-art, drawings and photographs. Impress also includes a spelling checker, a thesaurus, text styles, and background styles.
What is Impress?
Starting a presentation.
Formatting a presentation.
Design a presentation.
Working with templates.
PowerPoint is a slideshow presentation program that's part of the Microsoft office suite of tools. PowerPoint makes it easy to create, collaborate, and present your ideas in dynamic, visually compelling ways.
Powerpoint is an essential tool for most people and we have put everything you need to make learning how to use powerpoint easy. We hope you enjoy this presentation and if you think it will benefit others please share.
Powerpoint skills are an essential part of the marketers toolkit. This presentation is an in depth beginners guide to using Powerpoint.
If you enjoy this presentation and think it would help others please feel free to share.
The document provides instructions for inserting and formatting pictures in PowerPoint presentations. It describes how to insert pictures from the ribbon or placeholders, resize and move pictures, apply picture styles and borders, and crop images. The document also discusses applying themes, fonts, and formatting text.
This document provides an overview of desktop publishing using Microsoft Publisher. It discusses how to set up a publication by selecting the page size and layout guides. It describes how to insert and format text, tables, graphics, and WordArt. It also covers arranging objects using layers and groups. Background elements that appear on all pages and inserting page numbers are also summarized.
This document provides an overview of Microsoft PowerPoint. It discusses what PowerPoint is used for and its main functions. PowerPoint is presentation software that allows users to create slides with text, images, videos and other media to effectively communicate ideas. The document outlines how PowerPoint can be used to make presentations, handouts, graphics and more. It also provides tips on layouts, formatting text, adding charts and tables and using other PowerPoint features.
This document provides an overview of PowerPoint, including how to create and format presentations, add text, images, and other objects to slides, switch between different views, change slide layouts, reorder slides, and deliver presentations. The key points covered are:
- PowerPoint allows creating presentations with slides for on-screen shows, overheads, or handouts.
- New presentations can be blank or use templates, and slides can be added and edited.
- Text, tables, graphics, and other objects can be inserted on slides.
- Views include Slide, Outline, Sorter, Notes Pages, and Slide Show for building and presenting.
- Layout, formatting, and contents of slides can
This document provides an overview of PowerPoint and how to create and format presentations. It discusses starting PowerPoint, creating new presentations from templates or blank slides, adding text and objects to slides using placeholders or drawing tools, and embedding tables, clip art, pictures, and other media. The document covers viewing and navigation modes, changing slide layouts, and delivering on-screen shows as well as printing and getting help. It aims to explain the basic PowerPoint features and functions for creating effective presentations.
This document discusses how to customize and create custom slideshows in PowerPoint without deleting slides. It provides steps to create a custom slideshow by selecting specific slides to include without removing other slides. It also discusses how to print PowerPoint presentations and outlines best practices for using PowerPoint effectively in the classroom, such as limiting text and bullets per slide, using images and animations to enhance learning, and engaging students through interactivity.
PowerPoint is a presentation tool used to create slideshows and communicate ideas visually. It allows users to create new presentations from templates, add text, images, tables and other media to slides. The document discusses how to start PowerPoint, use various templates to create presentations, insert slides, add objects, work in different views and some other presentation software alternatives to PowerPoint.
Microsoft PowerPoint is a presentation program developed by Microsoft as part of its Microsoft Office suite. It allows users to create slideshow presentations consisting of text, images, videos, and other objects that can be displayed on-screen or printed. PowerPoint has tools for inserting tables, charts, graphics, and other media and formatting slide layouts, as well as tools for animating and transitioning between slides during a live presentation. The main components of the PowerPoint interface include the ribbon, which contains tabs for commonly used tools, and the Microsoft Office button for creating new presentations or accessing recently opened ones.
PowerPoint is a program used to create professional presentations that can include text, graphics, tables, charts, audio, video and other media. It allows users to easily enter and edit information, incorporate content from other sources, and present information in various ways. Effective presentations require planning, including determining the message, audience and delivery method. PowerPoint provides various views and tools to organize, design and deliver presentations.
Microsoft PowerPoint is a presentation program developed by Microsoft as part of its Microsoft Office suite. It allows users to create slideshow presentations consisting of text, images, videos, and other objects which can be displayed on-screen and navigated through using slide transitions and animations. The main interface features include the Ribbon menu, which contains tabs for inserting objects, setting up slide designs and animations, reviewing slides, and changing views. New presentations can be created from blank slides or templates. Users can add pictures, charts, tables and other media to slides and customize their appearance. Transitions control how slides change during a presentation, while animations add effects to objects on individual slides.
Bridging the Digital Gap Brad Spiegel Macon, GA Initiative.pptxBrad Spiegel Macon GA
Brad Spiegel Macon GA’s journey exemplifies the profound impact that one individual can have on their community. Through his unwavering dedication to digital inclusion, he’s not only bridging the gap in Macon but also setting an example for others to follow.
Ready to Unlock the Power of Blockchain!Toptal Tech
Imagine a world where data flows freely, yet remains secure. A world where trust is built into the fabric of every transaction. This is the promise of blockchain, a revolutionary technology poised to reshape our digital landscape.
Toptal Tech is at the forefront of this innovation, connecting you with the brightest minds in blockchain development. Together, we can unlock the potential of this transformative technology, building a future of transparency, security, and endless possibilities.
Meet up Milano 14 _ Axpo Italia_ Migration from Mule3 (On-prem) to.pdfFlorence Consulting
Quattordicesimo Meetup di Milano, tenutosi a Milano il 23 Maggio 2024 dalle ore 17:00 alle ore 18:30 in presenza e da remoto.
Abbiamo parlato di come Axpo Italia S.p.A. ha ridotto il technical debt migrando le proprie APIs da Mule 3.9 a Mule 4.4 passando anche da on-premises a CloudHub 1.0.
Understanding User Behavior with Google Analytics.pdfSEO Article Boost
Unlocking the full potential of Google Analytics is crucial for understanding and optimizing your website’s performance. This guide dives deep into the essential aspects of Google Analytics, from analyzing traffic sources to understanding user demographics and tracking user engagement.
Traffic Sources Analysis:
Discover where your website traffic originates. By examining the Acquisition section, you can identify whether visitors come from organic search, paid campaigns, direct visits, social media, or referral links. This knowledge helps in refining marketing strategies and optimizing resource allocation.
User Demographics Insights:
Gain a comprehensive view of your audience by exploring demographic data in the Audience section. Understand age, gender, and interests to tailor your marketing strategies effectively. Leverage this information to create personalized content and improve user engagement and conversion rates.
Tracking User Engagement:
Learn how to measure user interaction with your site through key metrics like bounce rate, average session duration, and pages per session. Enhance user experience by analyzing engagement metrics and implementing strategies to keep visitors engaged.
Conversion Rate Optimization:
Understand the importance of conversion rates and how to track them using Google Analytics. Set up Goals, analyze conversion funnels, segment your audience, and employ A/B testing to optimize your website for higher conversions. Utilize ecommerce tracking and multi-channel funnels for a detailed view of your sales performance and marketing channel contributions.
Custom Reports and Dashboards:
Create custom reports and dashboards to visualize and interpret data relevant to your business goals. Use advanced filters, segments, and visualization options to gain deeper insights. Incorporate custom dimensions and metrics for tailored data analysis. Integrate external data sources to enrich your analytics and make well-informed decisions.
This guide is designed to help you harness the power of Google Analytics for making data-driven decisions that enhance website performance and achieve your digital marketing objectives. Whether you are looking to improve SEO, refine your social media strategy, or boost conversion rates, understanding and utilizing Google Analytics is essential for your success.
2. PowerPoint
• PowerPoint is a part of the Microsoft
Office package.
• It is a presentation software program
that has many of the functions available
in Microsoft Word.
3. PowerPoint Continued
• To display a presentation, you need:
– A computer (desktop or laptop)
– LCD projector
– White board or screen for projection
4. Seeing (and Hearing)
Is Believing
• PowerPoint presentations can enhance
understanding and retention of
concepts.
• Audiovisual aids should be relevant to
the speech topic.
5. Designing Presentation Aids
• Do not add too much content.
– Keep bullets short
• Visual aids should:
– Reinforce
– Support
– Summarize what you say
Simplicity
8. Designing Presentation Aids
• Typeface:
– a specific style of lettering
• Arial
• Times Roman
•Courier New
• Tahoma
•Monotype Corsiva
Typeface
9. Designing Presentation Aids
• Fonts:
– sets of sizes (called the point size)
• 24 point
• 20 point
• 18 point
• 16 point
• 10 point
– upper and lower cases
Font Size
10. Designing Presentation Aids
• Check that your lettering stands apart
from your background.
• Use a typeface that is simple, easy to
read, and doesn’t distract from your
message.
• Don’t overuse boldface, underlining or
italics. Use upper-and lowercase type.
Typeface Style And Font Size
11. Designing Presentation Aids
• Use bold, bright colors to emphasize
important points.
• Use softer, lighter colors.
• Avoid dark backgrounds.
Color
12. A How-To Guide forA How-To Guide for
Using MicrosoftUsing Microsoft
PowerPoint as aPowerPoint as a
Presentation AidPresentation Aid
13. How-To Guide to PowerPoint
• This guide offers straightforward advice
that will help you use Microsoft
PowerPoint to create effective and
enjoyable presentations.
14. You don’t want your slides to
look like this:
Title
too
small
Font is
small
and hard
to read
Texts
overlap
and have
strange
formatting
Clip art is too large; only one piece is
Colors on
the slide
are
distracting
15. Let’s Begin!
• PowerPoint is a Microsoft application.
• If you are proficient in programs such
as Word and Excel, you are already
familiar with over 100 common
commands used by Microsoft Office
software.
16. Let’s Begin!
• NOTE: All of the icons, example
buttons, and toolbars shown in this
slide show are taken from the PC
version of PowerPoint. The Macintosh
version is similar, yet slightly different.
17. To Use PowerPoint
• Become familiar with the toolbars
• Select your presentation option
• Learn how to create a slide
• Learn how to organize design elements
• Learn how to balance design elements
19. Learning the Toolbars
• The Menu bar
• The Standard toolbar
• The View toolbar
• The Drawing toolbar
• The Formatting toolbar
• The Common Tasks toolbar
20. Learning the Toolbars
• The Menu bar contains the commands for which
shortcuts exist on the toolbars.
• For instance, under File you can find the option to
Save your presentation, which is also available on the
Standard toolbar.
• In the Formatting menu, you can click on Alignment
and change the flow of text on your screen. You can
also click one of the alignment icons on the Formatting
toolbar to perform the same task.
21. Learning the Toolbars
• The Standard toolbar contains a
number of useful shortcuts:
• New presentation
• Open a new or existing presentation
• Save
• Print
• Spelling
22. Learning the Toolbars
• The Standard toolbar also includes a
number of other shortcut features:
• Insert a Microsoft Word Table
• Insert a Microsoft Excel Table
• Insert a Chart
• Insert Clip Art
• The Office Wizard. When you click this and
type a question, it will search the Help index
for possible answer.
23. Learning the Toolbars
• The View toolbar gives different options
for viewing slides:
• Slide View: shows slides one by one
• Outline View: shows an outline of all slide text
• Slide Sorter View: places all the slides on one
screen in slide format
• Note Pages View: allows you to add and read
notes below each slide
• Slide Show: allows you to see the
presentation
24. Learning the Toolbars
• The Drawing toolbar gives shortcuts to:
• AutoShapes: draw lines, arrows, rectangles, and
ovals; access the AutoShapes menu
• Text boxes: draw these where you wish to add text
on a blank slide or add text to an existing slide
• Line color, font color, and fill color options, with
menus
• Dash style and 3-D options
• The Draw button presents a menu of other ways to
manipulate your text and clip art, including rotation,
alignment, and alterations to AutoShapes.
25. Learning the Toolbars
• The Formatting toolbar allows you to:
• Change font
• Change font size
• Add boldface, italics, underlining, and
shading to text
• Create animation effects
• Change paragraph alignment
26. Learning the Toolbars
• The New Slide button inserts a new slide
directly following the slide currently being
viewed.
• The Slide Layout button gives choices of
layouts for different pre-designed text box
and clip art formations.
• The Apply Design button gives pre-designed
slide aesthetic options.
27. Learning the Toolbars
• Finally, on the View menu you can
choose which toolbars are available at
any give time:
• Click View
• Scroll down to Toolbars
• Select or deselect your preferences
28. Select Presentation Option
• When PowerPoint launches you will see
the screen above.
• Here you select how you would like to
create your presentation.
29. Select Presentation Option
• The AutoContent
Wizard is useful for
those who are
unfamiliar with
PowerPoint or who
need extra help.
• It sets up an index of
slides with preloaded
titles, points, subpoints,
and designs.
30. Select Presentation
Option
• The Template
option provides
moderate flexibility
in designing
presentations.
• You choose from
28 templates to
organize your
points, subpoints,
and design.
31. Select Presentation
Option
• The Blank
Presentation option
offers the most
flexibility.
• Users customize
every aspect of the
design for each
individual slide.
• The following slides will
teach you how to work
from Blank Presentation.
32. How to Create a Slide
• Click New Slide to select a layout for
the title slide.
• To change the color of the slide either
right-click it and select Slide Color
Scheme or select Format and then
Slide Color Scheme from the Menu bar.
33. How to Create a Slide
• You choose the color scheme and
format of the slide, and if you wish you
can also apply these choices to all of
the following slides.
• You can change the color scheme of
one or all of your slides at any time.
34. How to Create a Slide
• To change the order of the slides, first
select Slide Sorter View ( ) from the
View toolbar. You can move slides by
cutting and pasting or dragging and
dropping
• To delete a slide, either click on it while
in Slide Sorter View or go to it in Slide
View ( ), then select Edit from the
Menu bar and click on Delete Slide.
36. Organizing Text
As you
can see
from this
slide, text
boxes can
be put
anywhere.
Click on the icon on
the Drawing toolbar.
With the cursor, draw the
approximate size you need
for your text.
37. Organizing Text
• You can expand the box to include more text or
make it smaller to make room for other design
elements on the slide.
• The pre-
designed
selections from
the Slide Layout
screen offer the
most logical and
often-used
layouts.
38. Organizing Text
• Use a readable font and font size for
each different aspect of the page (a
good size range is between 20-60
points).
• Be consistent from slide to slide with
fonts and font sizes.
• Choose colors that will ensure that
your text is readable and your slides do
not appear distracting.
39. Organizing Text
• Don’t use too many different
fonts.
• DON’T USE ALL CAPS.
• Avoid fonts that are
distracting:
– Braggadocio
– OzHandicraft BT
– Shelley Volant e BT
40. Organizing Text
• Don’t include your entire speech on the
slides. Instead highlight important points.
• To determine what information is best to
include in your presentation, you should:
• Review your speech outline.
• Identify points that can be illustrated,
such as key terms and their definitions,
statistics, or charts and graphs.
41. Organizing Clip Art and Pictures
• To insert clip art onto your slide you can:
• Select a slide layout that has a set space
for clip art. When working on that slide,
simply double-click on the clip art space
and it will take you to the Microsoft Clip
Gallery.
• Use the Insert menu, click Picture, and then
select Clip Art.
• Click on the shortcut icon:
42. Organizing Clip Art and Pictures
• To insert your own photos or graphics
rather than ones from the gallery, click
Insert, scroll to Picture, and select
From File.
• Here you can browse your computer
and choose art from your own files.
43. Organizing Clip Art and Pictures
• If you cannot find what you need in the
gallery or your own resources, you have
another option. Downloads of more
images are available free from Microsoft
via the Internet.
• In the gallery, click on the icon in
the bottom right corner.
• Search by key word to find what you
need.
44. Organizing Clip Art and Pictures
• PowerPoint can incorporate graphs and charts
as well.
• On the Standard toolbar, there are shortcuts for
inserting Microsoft Word tables and Microsoft
Excel worksheets and graphs .
• Change the numbers and labels on the graphs
or charts to fit your information.
45. Organizing Clip Art and Pictures
• Remember: use
clip art, pictures,
charts, and
graphs only to
illustrate points,
not as fillers.
46. Organizing Animation Effects
• PowerPoint has a variety of different ways
that text and art can be animated.
• For example:
Blinds
Vertical
Fly from Bottom-Left
Box Out
Spiral
Checkerboard
Across
Crawl
from
Right
Dissolv
e
Peek from Bottom
Stretch from Top
Appear
Wipe Right
Zoom In
47. Organizing Animation Effects
• These effects can be interesting additions
to your presentation, but they can also be
distracting. Use them sparingly to add
emphasis.
• To animate, right-click on the text or image
and select Custom Animation from the
menu.
• Select the effect you want to use,
determine the order of the animations on
the slide, and make sure to preview.
48. Organizing Animation Effects
• Take time while in this screen to determine
how your animation effects will appear.
• Clicking on the Timing menu gives you
options so that your textboxes, clip art, and
other animation elements can be presented
on a mouse click, automatically, or
automatically after a preset length of time.
49. Balancing the Elements
• Even if you follow all the suggestions for
setting up your slide and its elements, you
still may find that your presentation is hard
to follow.
• It is important to go back through your
completed presentation and make sure
that the overall experience of watching it is
pleasant as well as educational.
50. Balancing the Elements
• Defining a balanced slide may seem like a
matter of opinion, but there are concrete
criteria, including:
• Clip art and text must fit together well. No
element -- title, points, graphics -- should
overpower the others.
• Headings should be consistent in size and
placement. They should be large and clear.
• Easy to understand.
51. The clip art
illustrates
the slide
and is well
placed on
the layout.
Example of a Balanced Slide
The title
is large
and
clear.
Good use
of
contrasting
colors on
slide and in
font.
Text is
easy to
read and
well sized.
52. Example of an Unbalanced Slide
Title
and
color
scheme
are still
fine.
Text is
too
small.
Clip art
is too
large.
This slide is hard to read and places unnecessary
emphasis on the artwork.