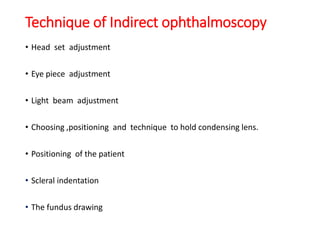
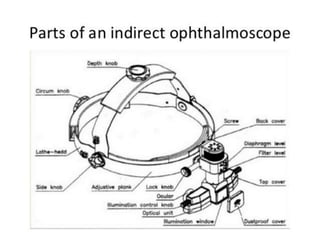
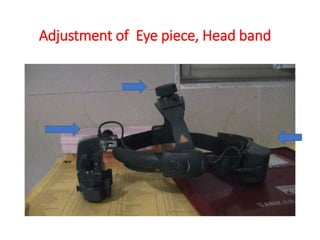
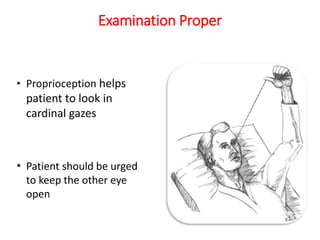
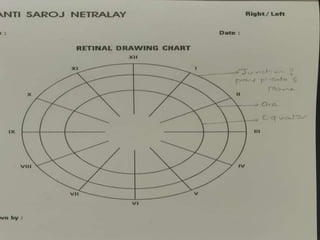
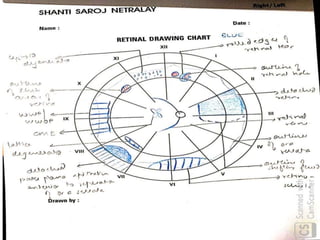
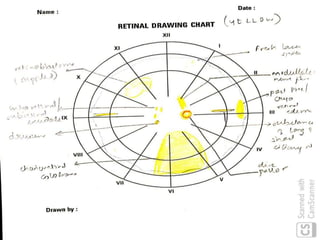
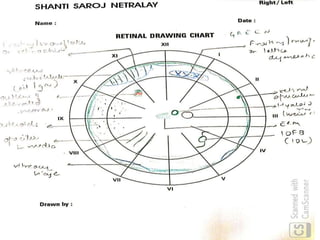
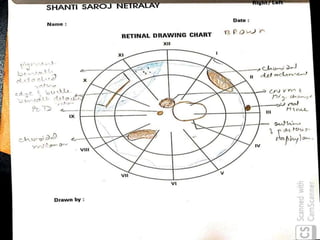
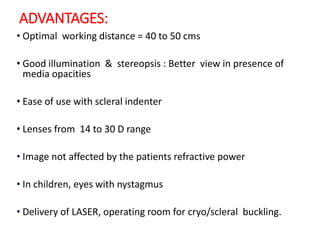
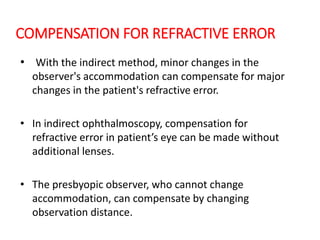
Indirect ophthalmoscopy has evolved since its introduction in the 1850s to become an indispensable tool for examining the retina. It allows examination of the peripheral retina through the use of a condensing lens held close to the eye. The observer views an enlarged, inverted image of the retina. Several advantages include the ability to compensate for a patient's refractive error, good illumination, and use with scleral indentation to examine the far periphery. Adjustments of the lens diopter and observation distance allow viewing different areas of the retina with varying magnification and field of view. Proper technique involves adjusting the headband-mounted binocular scope and positioning the condensing lens.


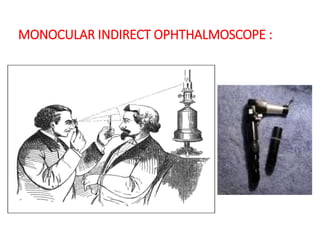
![MONOCULAR INDIRECT
OPHTHALMOSCOPY :
• It was introduced by Reute in 1960s.
• It was designed for its use in undilated pupil.
• The original monocular, hand-held indirect ophthalmoscope used
an external light source reflected by a mirror held in front of the
observer's eye.
• The monocular indirect method allows the use of low-power
lenses[13D] through which small details are seen larger.
• Since it is monocular, stereoscopic examination is not possible.](https://image.slidesharecdn.com/indirectophthalmoscopy2-191004161914/85/Indirect-ophthalmoscopy-4-320.jpg)
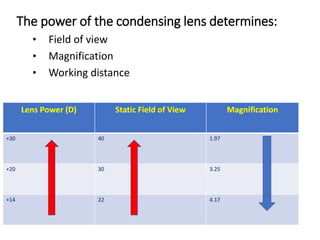
![FIELD OF VIEW
• The field of view is determined by the ratio of lens diameter and
focal length. This ratio can be written as:
Field of view = Lens diameter / Focal length
= Lens diameter × dioptric power
• Given lenses of equal power, a larger lens provides a wider field
of view.
• If lenses have equal diameters, a stronger lens provides a wider
field of view; however, after an optimum power, stronger lenses
[more convex] tend to have smaller diameter, hence a stronger
lens does not always provide a larger field.](https://image.slidesharecdn.com/indirectophthalmoscopy2-191004161914/85/Indirect-ophthalmoscopy-12-320.jpg)
![• Total magnification depends on lens power [inversely
proportional] and observation distance.
• Hence, the stronger the lens, the less magnified is the image
but wider field of view.
MAGNIFICATION:](https://image.slidesharecdn.com/indirectophthalmoscopy2-191004161914/85/Indirect-ophthalmoscopy-13-320.jpg)
![• Distance between observer ‘O’ and lens ‘L’ = 45 cm.
• Emmetropic eye: Aerial image at E’ and observer need to
accommodate upto 2.5D [40cm].
• Myopic eye [-5D]: Aerial image will be at M’ and accommodation
of 2.4D [41cm] is required to see it clearly.
• Hypermetropic eye [+5D]: Aerial image will be at H’ and observer
will have to accommodate upto 2.6D[38.4cm].
OLE](https://image.slidesharecdn.com/indirectophthalmoscopy2-191004161914/85/Indirect-ophthalmoscopy-16-320.jpg)