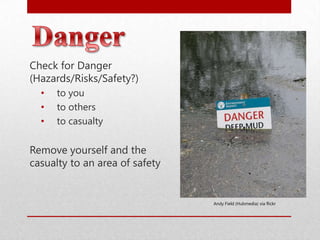
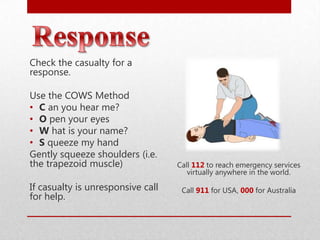
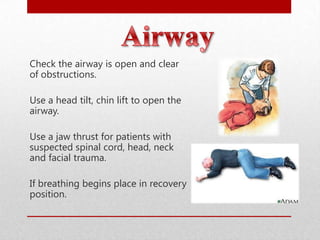
PurposeThe purpose of this presentation is to introduce and refresh some Basic Life Support (aka First Aid) principles.This presentation was designed with health students in mind, as a refresher or in preparation for clinical placements. However, the topics covered here will be of use to anyone.Your actions on the day of an emergency may be the difference between someone waking up or going away in a body bag.
DR ABCD
DangerCheck for Danger (Hazards/Risks/Safety?)to youto othersto casualtyRemove yourself and the casualty to an area of safetyAndy Field (Hubmedia) via flickr
ResponseCheck the casualty for a response.Use the COWS MethodC an you hear me?O pen your eyesW hat is your name?S queeze my handGently squeeze shoulders (i.e. the trapezoid muscle)If casualty is unresponsive call for help.Call 112to reach emergency services virtually anywhere in the world.Call 911for USA, 000for Australia
AirwayCheck the airway is open and clear of obstructions.Use a head tilt, chin lift to open the airway.Use a jaw thrust for patients with suspected spinal cord, head, neck and facial trauma.If breathing begins place in recovery position.
BreathingLook, listen and feel for breathing, up to 10 seconds.is chest rising and falling?can you hear or feel air from mouth or nose?After the airway has been opened, if the casualty is not breathing give, 2 full breaths, approx1 second per inspiration (breath)In clinical situations use a face mask to administer the breaths.image: c0d3in3via Flickr
CPRIf no signs of life – unconscious, not breathing and not moving, start CPR (cardiopulmonary resuscitation)CPR involves giving;30 compression and 2 breaths100 compressions per minute(useful tunes for compression rate are Staying Alive by the Bee Gees, Another one Bites the Dust to name a few)The recommended point of compresions is the midline over the lower half of the sternum.
CPR Continued….You should check for vital signs every 2 minutes.Doing CPR on Infantsuse two fingers instead of using hands to deliver compressions.Give 30 compression & 2 breaths100 compressions per minutewhen delivering breaths do not overdo the amount, as you may cause a lung to rupture.CPR should continue until the return of spontaneous circulation or you are relieved by a qualified professional.
CPR Continued….
Apply a DefibrillatorIf Defibrillator is available, apply and follow voice prompts.Remember when shocking to get everyone to stand well back.The Lifepak 500 is the standard product in AustraliaKeep checking for signs of life.
Airway ManagementNote the next two slides are specific to allied health professionals and medical students. It is a reminder of some devices used for airway management.Nasopharyngeal AirwayEndotracheal tubeOropharyngeal Airway (guedels)Laryngeal mask
Airway ManagementOnce the Guedel or Nasopharyngeal airway is inplace,Apply face maskUse the resuscitator to provide ventilationsAttach 15L of oxygen to resuscitatorIf performing ventilation manually ensure a tight sealbetween the mask and the face.Where possible have one person firmly holding the face mask down and the other ventilating.
BLS - what’s coming up…We shall now cover the following aspects of Basic Life Support.Care for BleedingCare for ShockFirst Aid for Sprains & StrainsCare for dislocations and fracturesPoisoningBurns
Care for bleeding…Apply Pressure to the WoundRaise and Support injured partBandage WoundCheck Circulation below woundIf severe bleeding persists, give nothing by mouth & call emergency services
Care for Shock…Assess Casualty (DRABCD)Call emergencyPosition CasualtyKeep the casualty lying down if possible.
Elevate legs 10-12inches unless you suspect a spinal injuryTreat any other injuriesEnsure ComfortCover casualty to maintain warmth
Provide casualty with fresh airMonitor & Record breathing and pulseWhen the face is pale, raise the tail
Signs & Symptoms of Shock…Weak rapid pulseCold, clammy skinRapid breathingFaintness/dizzinessNauseaPale face, fingernails, lips
Sprains & Strains…R – I – C – E R estIce, apply a cold pack. Do not apply ice directly to skin.Compress, use an elastic or comforting wrap – not to tight.Elevate, above heart level to control internal bleeding.
Dislocations & FracturesFollow DRABCD. Then proceed with  I  A-C-T.I mmobilise area. Use jackets, pillows, blankets and so on. Stop any movement by supporting injured area.Activate emergency services. Call 112 or 000.Care for shock. See care for shock slide.Treat any additional secondary injuries.
PoisoningFollow DRABCD& Check Materials Safety Data Sheet if possible .Signs & SymptomsAbdominal painDrowsinessNausea/vomitingBurning pains from mouth to stomachDifficulty in breathingTight chestBlurred visionand so on…….
BurnsRemove Casualty from Danger(follow DRABCD & remember STOP, DROP & ROLL)Cool the burnt area(hold burnt area under cold running water for a minimum of 20 minutes.)Remove any constrictions(e.g. clothing & jewellery)Cover Burn(place sterile, non-stick dressing over burn)Calm Casualtyisafmedia via flickr
Standard PrecautionsStandard Precautions are standard, safe work practices that are to be applied to all patients regardless of their known or presumed infectious status.Standard Precautions are particularly important in cases with:Blood (including dried blood)

Basic Life Support & First Aid

  • 2.
    PurposeThe purpose ofthis presentation is to introduce and refresh some Basic Life Support (aka First Aid) principles.This presentation was designed with health students in mind, as a refresher or in preparation for clinical placements. However, the topics covered here will be of use to anyone.Your actions on the day of an emergency may be the difference between someone waking up or going away in a body bag.
  • 3.
  • 4.
    DangerCheck for Danger(Hazards/Risks/Safety?)to youto othersto casualtyRemove yourself and the casualty to an area of safetyAndy Field (Hubmedia) via flickr
  • 5.
    ResponseCheck the casualtyfor a response.Use the COWS MethodC an you hear me?O pen your eyesW hat is your name?S queeze my handGently squeeze shoulders (i.e. the trapezoid muscle)If casualty is unresponsive call for help.Call 112to reach emergency services virtually anywhere in the world.Call 911for USA, 000for Australia
  • 6.
    AirwayCheck the airwayis open and clear of obstructions.Use a head tilt, chin lift to open the airway.Use a jaw thrust for patients with suspected spinal cord, head, neck and facial trauma.If breathing begins place in recovery position.
  • 7.
    BreathingLook, listen andfeel for breathing, up to 10 seconds.is chest rising and falling?can you hear or feel air from mouth or nose?After the airway has been opened, if the casualty is not breathing give, 2 full breaths, approx1 second per inspiration (breath)In clinical situations use a face mask to administer the breaths.image: c0d3in3via Flickr
  • 8.
    CPRIf no signsof life – unconscious, not breathing and not moving, start CPR (cardiopulmonary resuscitation)CPR involves giving;30 compression and 2 breaths100 compressions per minute(useful tunes for compression rate are Staying Alive by the Bee Gees, Another one Bites the Dust to name a few)The recommended point of compresions is the midline over the lower half of the sternum.
  • 9.
    CPR Continued….You shouldcheck for vital signs every 2 minutes.Doing CPR on Infantsuse two fingers instead of using hands to deliver compressions.Give 30 compression & 2 breaths100 compressions per minutewhen delivering breaths do not overdo the amount, as you may cause a lung to rupture.CPR should continue until the return of spontaneous circulation or you are relieved by a qualified professional.
  • 10.
  • 11.
    Apply a DefibrillatorIfDefibrillator is available, apply and follow voice prompts.Remember when shocking to get everyone to stand well back.The Lifepak 500 is the standard product in AustraliaKeep checking for signs of life.
  • 12.
    Airway ManagementNote thenext two slides are specific to allied health professionals and medical students. It is a reminder of some devices used for airway management.Nasopharyngeal AirwayEndotracheal tubeOropharyngeal Airway (guedels)Laryngeal mask
  • 13.
    Airway ManagementOnce theGuedel or Nasopharyngeal airway is inplace,Apply face maskUse the resuscitator to provide ventilationsAttach 15L of oxygen to resuscitatorIf performing ventilation manually ensure a tight sealbetween the mask and the face.Where possible have one person firmly holding the face mask down and the other ventilating.
  • 14.
    BLS - what’scoming up…We shall now cover the following aspects of Basic Life Support.Care for BleedingCare for ShockFirst Aid for Sprains & StrainsCare for dislocations and fracturesPoisoningBurns
  • 15.
    Care for bleeding…ApplyPressure to the WoundRaise and Support injured partBandage WoundCheck Circulation below woundIf severe bleeding persists, give nothing by mouth & call emergency services
  • 16.
    Care for Shock…AssessCasualty (DRABCD)Call emergencyPosition CasualtyKeep the casualty lying down if possible.
  • 17.
    Elevate legs 10-12inchesunless you suspect a spinal injuryTreat any other injuriesEnsure ComfortCover casualty to maintain warmth
  • 18.
    Provide casualty withfresh airMonitor & Record breathing and pulseWhen the face is pale, raise the tail
  • 19.
    Signs & Symptomsof Shock…Weak rapid pulseCold, clammy skinRapid breathingFaintness/dizzinessNauseaPale face, fingernails, lips
  • 20.
    Sprains & Strains…R– I – C – E R estIce, apply a cold pack. Do not apply ice directly to skin.Compress, use an elastic or comforting wrap – not to tight.Elevate, above heart level to control internal bleeding.
  • 21.
    Dislocations & FracturesFollowDRABCD. Then proceed with I A-C-T.I mmobilise area. Use jackets, pillows, blankets and so on. Stop any movement by supporting injured area.Activate emergency services. Call 112 or 000.Care for shock. See care for shock slide.Treat any additional secondary injuries.
  • 22.
    PoisoningFollow DRABCD& CheckMaterials Safety Data Sheet if possible .Signs & SymptomsAbdominal painDrowsinessNausea/vomitingBurning pains from mouth to stomachDifficulty in breathingTight chestBlurred visionand so on…….
  • 23.
    BurnsRemove Casualty fromDanger(follow DRABCD & remember STOP, DROP & ROLL)Cool the burnt area(hold burnt area under cold running water for a minimum of 20 minutes.)Remove any constrictions(e.g. clothing & jewellery)Cover Burn(place sterile, non-stick dressing over burn)Calm Casualtyisafmedia via flickr
  • 24.
    Standard PrecautionsStandard Precautionsare standard, safe work practices that are to be applied to all patients regardless of their known or presumed infectious status.Standard Precautions are particularly important in cases with:Blood (including dried blood)