


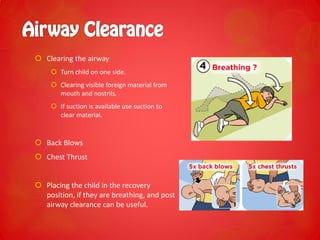

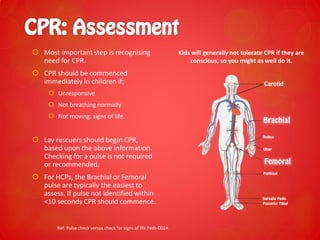
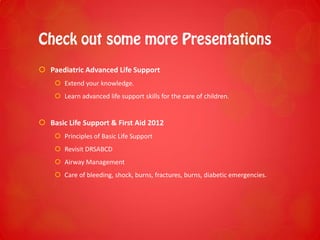
![ CPR = Compression + Ventilation
COMPRESSION RATE: 100 compressions/min
Useful tunes to keep the rate are ‘Staying Alive’ – Bee Gees, Another one bites
the Dust and many more.
RATIO: 30 Compressions to 2 ventilations (breaths)
CYCLES: 5 cycles of [30:2] in approximately 2
minutes. Recheck for signs of life at the end of cycle.
Pause compressions to allow for ventilation.](https://image.slidesharecdn.com/paedsbasiclifesupport-140520025943-phpapp01/85/Paediatric-Basic-Life-Support-First-Aid-17-320.jpg)
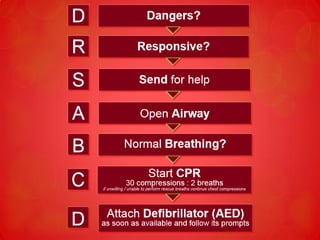


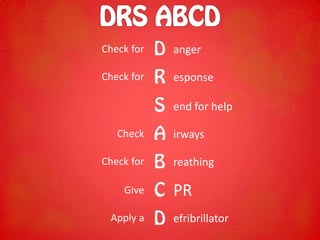
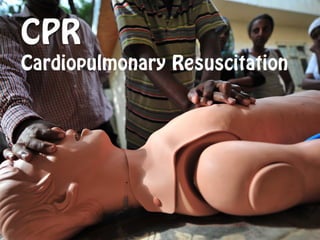
This document provides a summary of basic life support principles for children. It outlines the steps of DRSABCD (Danger, Response, Send for help, Airway, Breathing, CPR, Defibrillation) and how they differ for children compared to adults. Key differences for children include using two fingers to do chest compressions on infants and assessing response using the COWS method of talking and touching. The document emphasizes starting CPR immediately if a child is unresponsive and not breathing normally.


![ONFH[AVN HIP] -TRIPLE REGIME -A NOVAL SURGICAL CONCEPT .pptx](https://cdn.slidesharecdn.com/ss_thumbnails/onfhavnhip2026koaconcalicutdrgokuldevdrmashraf-260210064517-213ec005-thumbnail.jpg?width=640&height=640&fit=bounds)


