


This document provides an overview of a Microsoft Project 2007 training module that introduces participants to project management concepts and planning projects using Microsoft Project. The training covers topics such as the basics of project management, using Microsoft Project to plan tasks and resources, and project scheduling techniques like PERT charts and the critical path method. The course objectives are to teach participants how to identify, organize, manage and schedule tasks, resources, time and costs to complete a project.
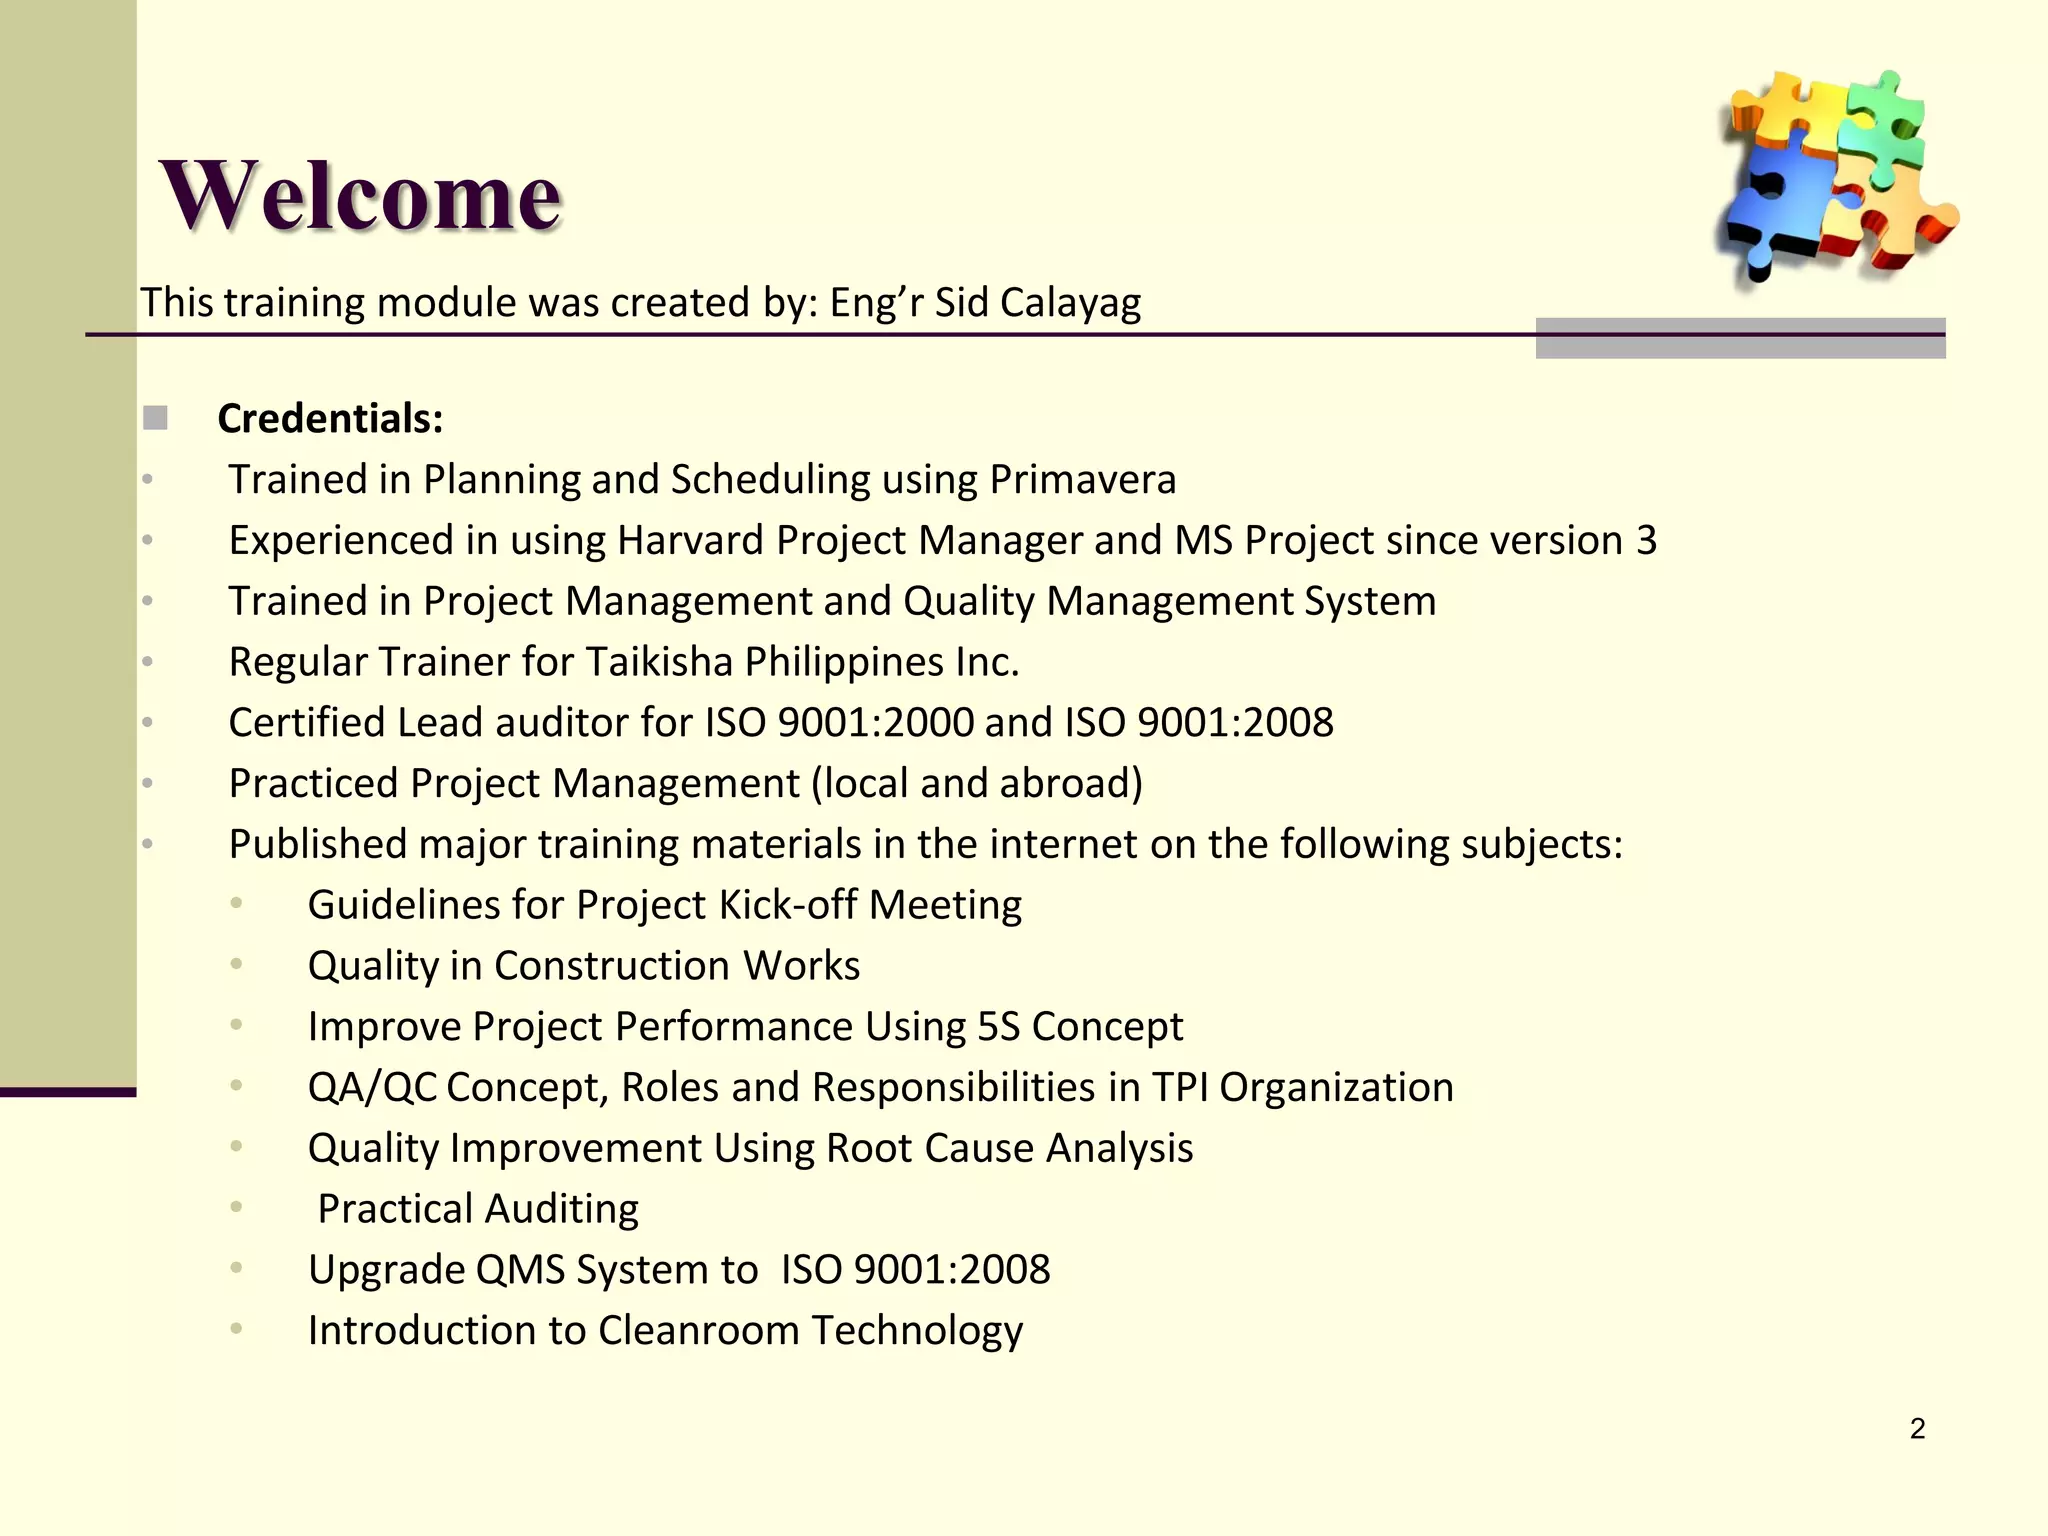
Introduction to Project Management training with emphasis on Microsoft Project 2007's capabilities.
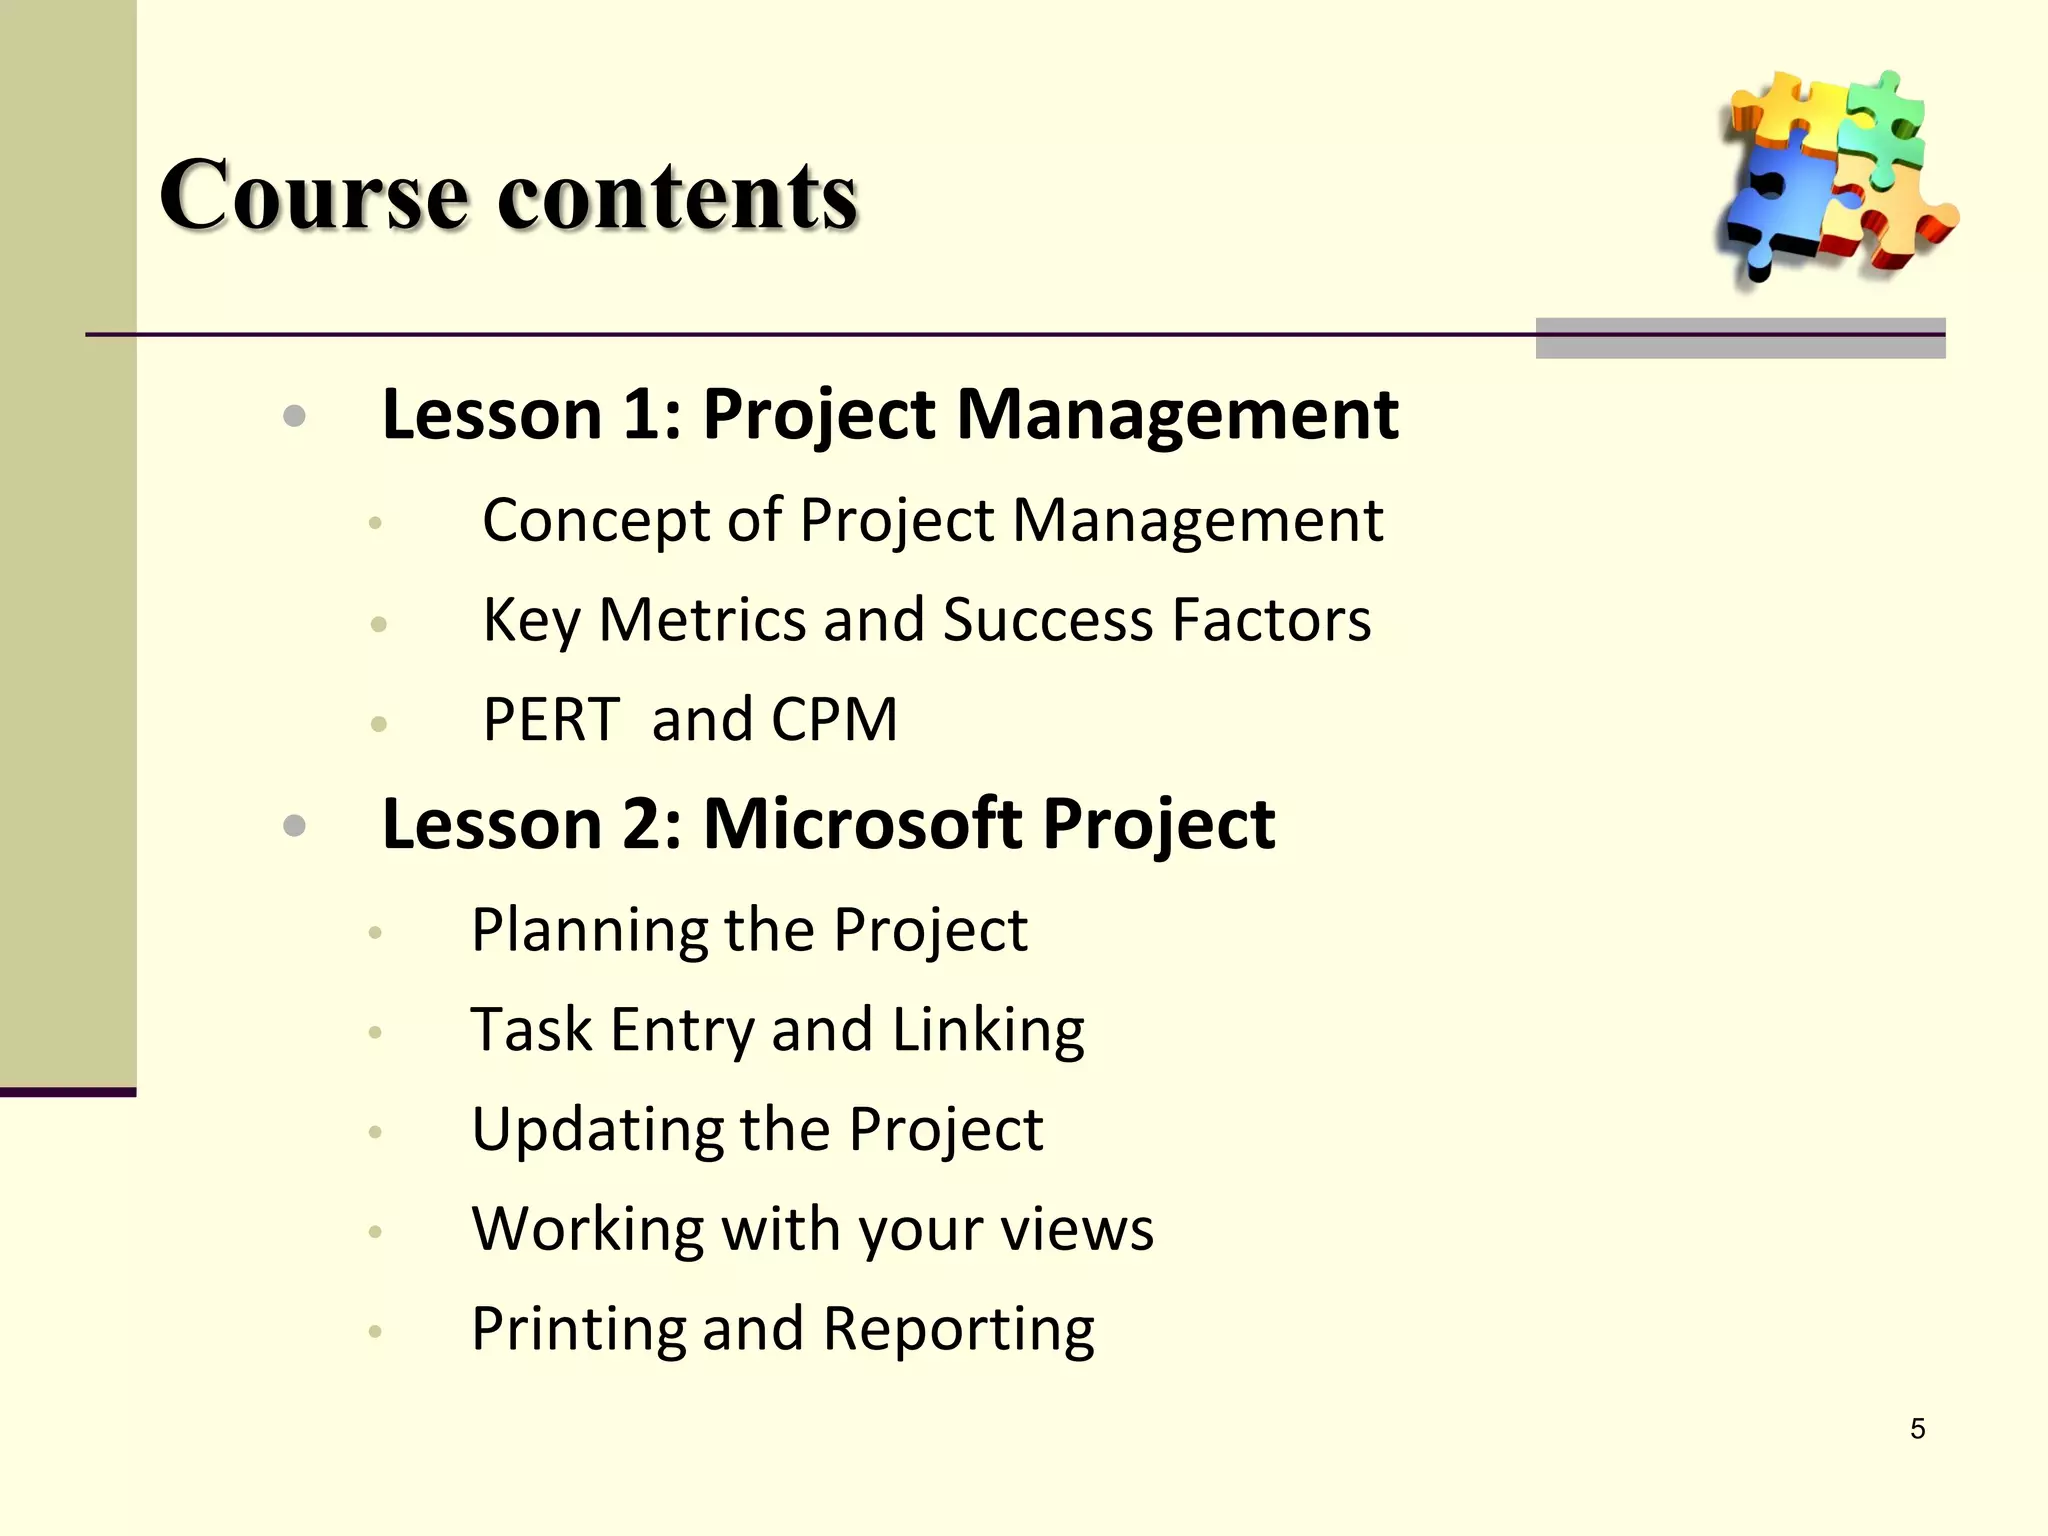
Outline of course contents including key lessons and focus areas relevant to project management.
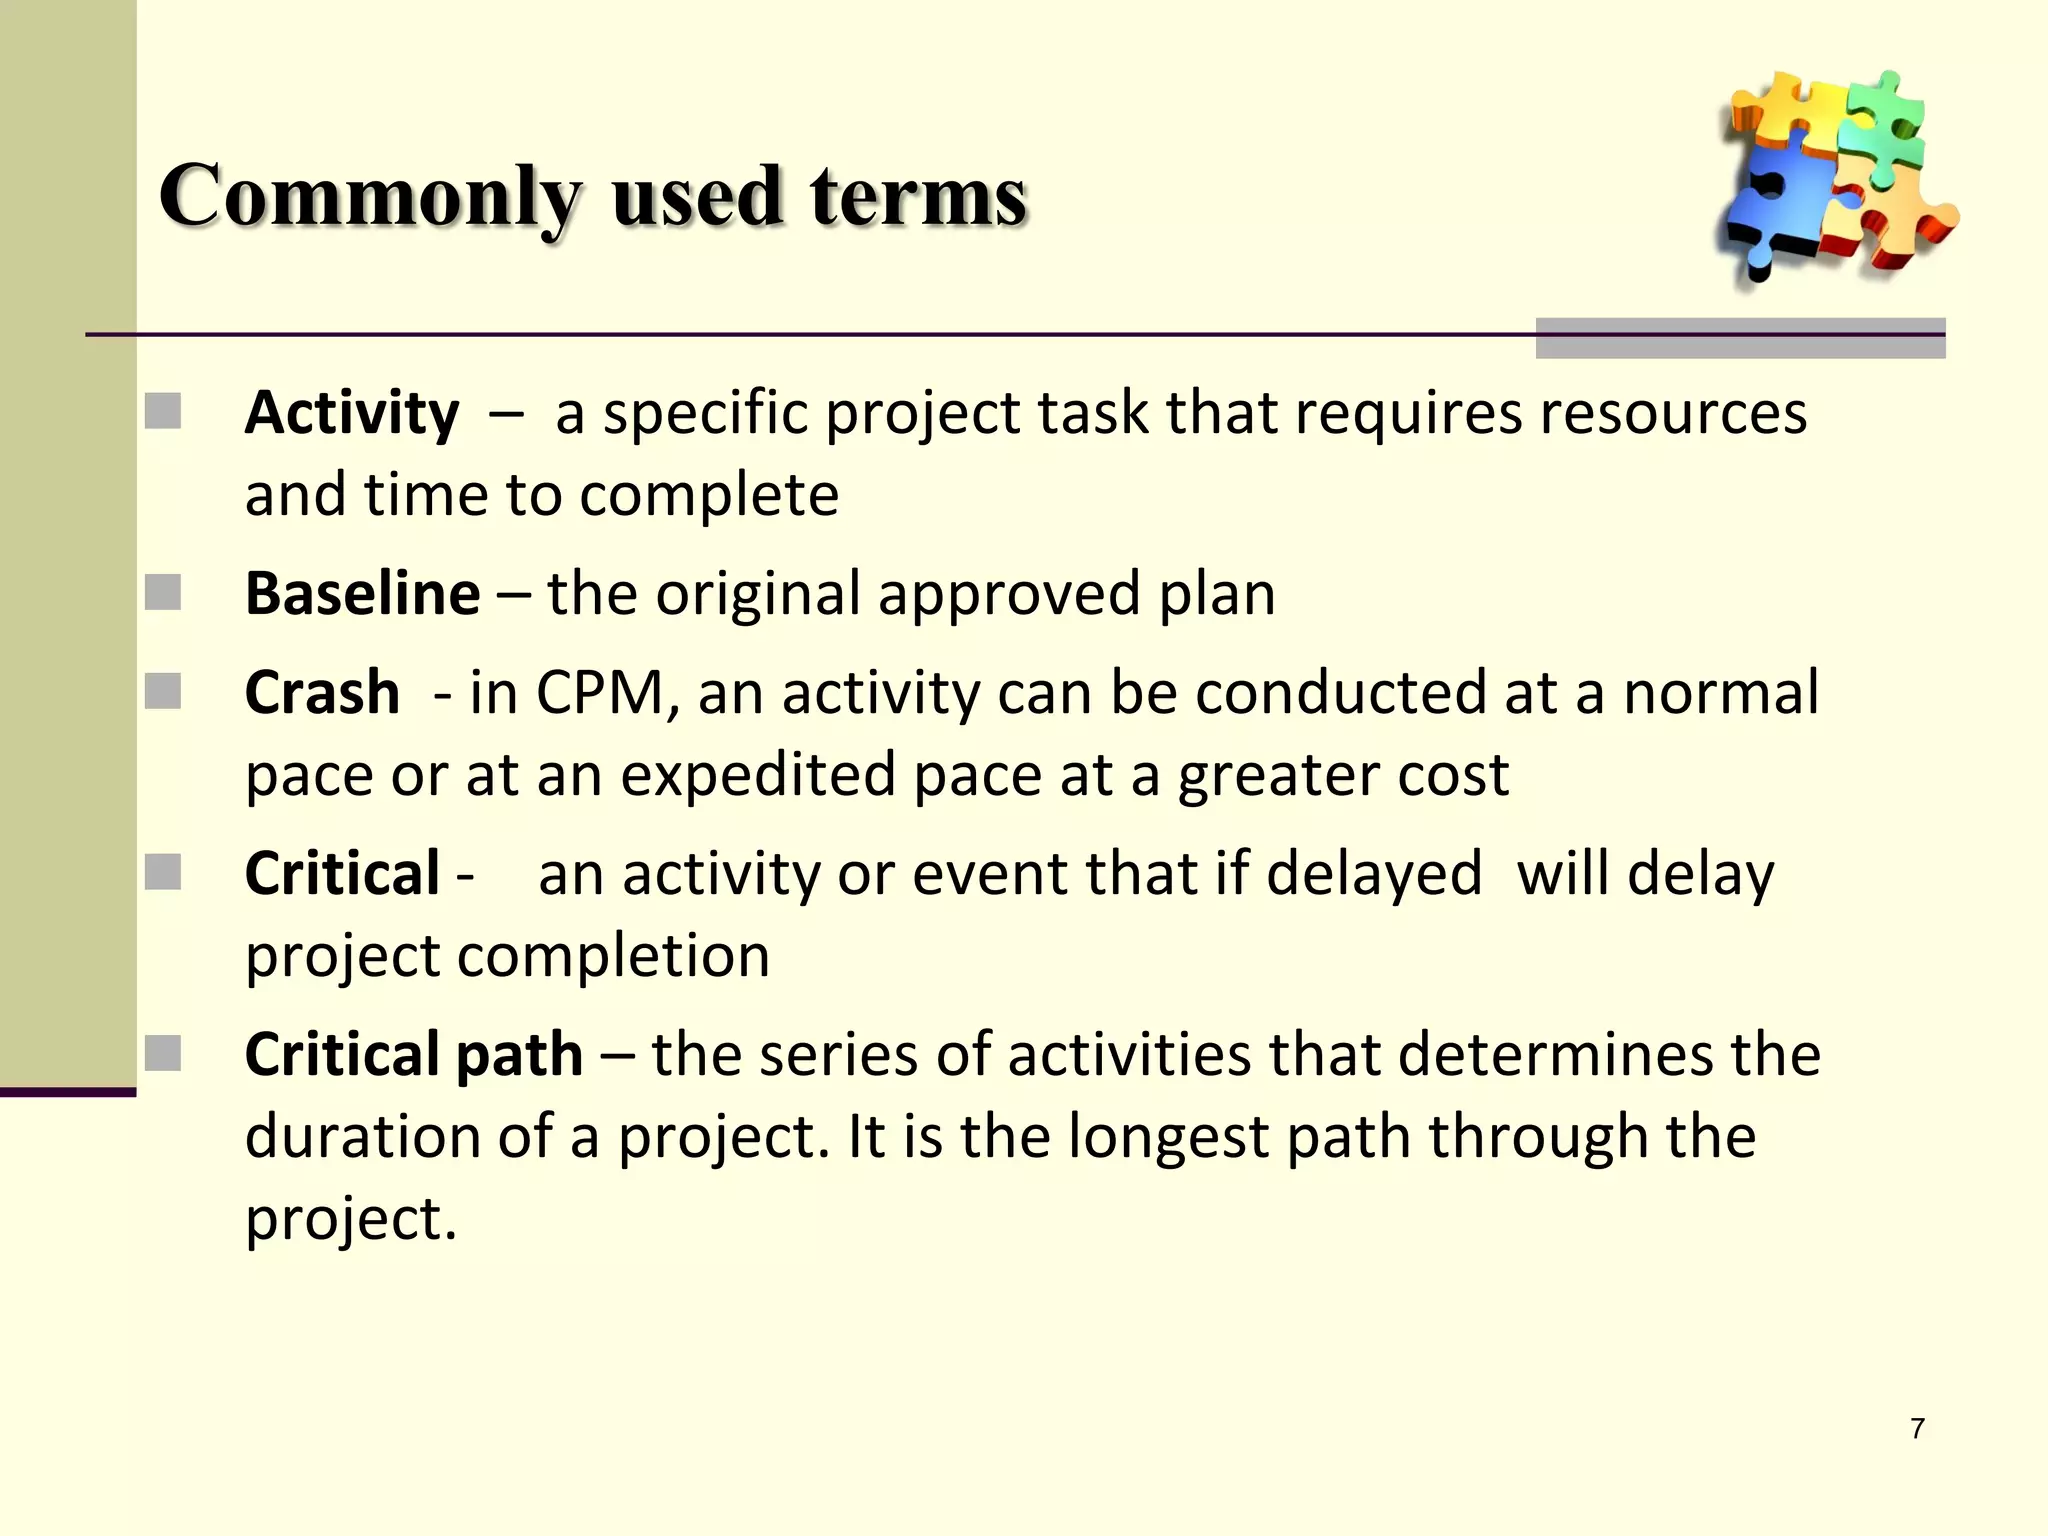
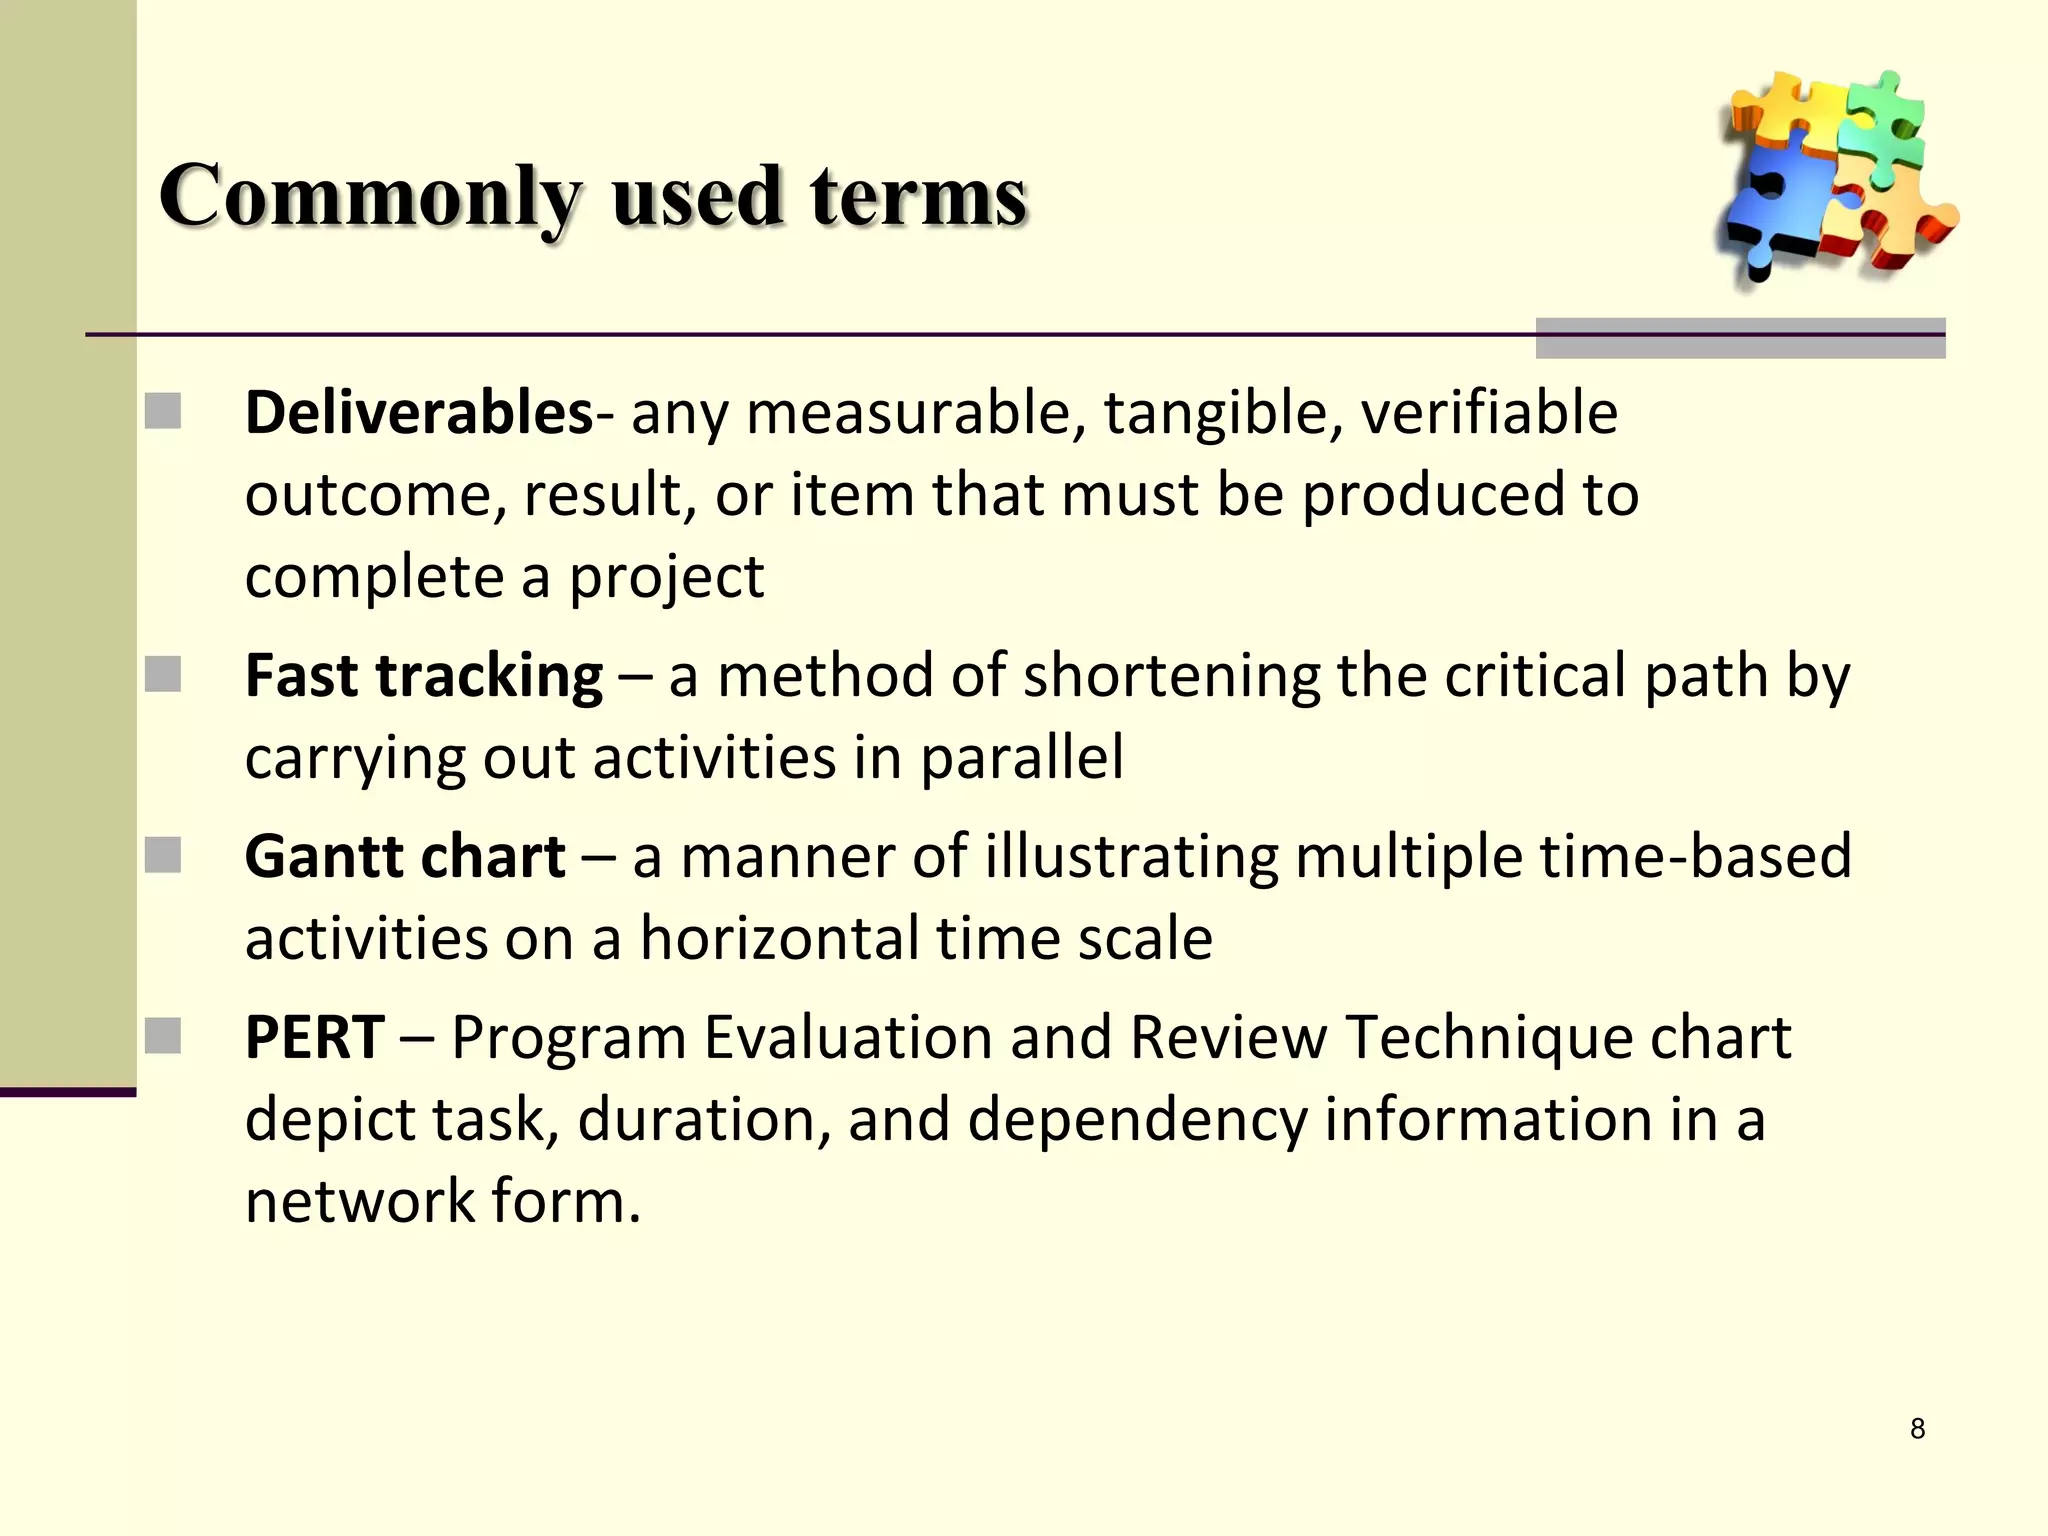
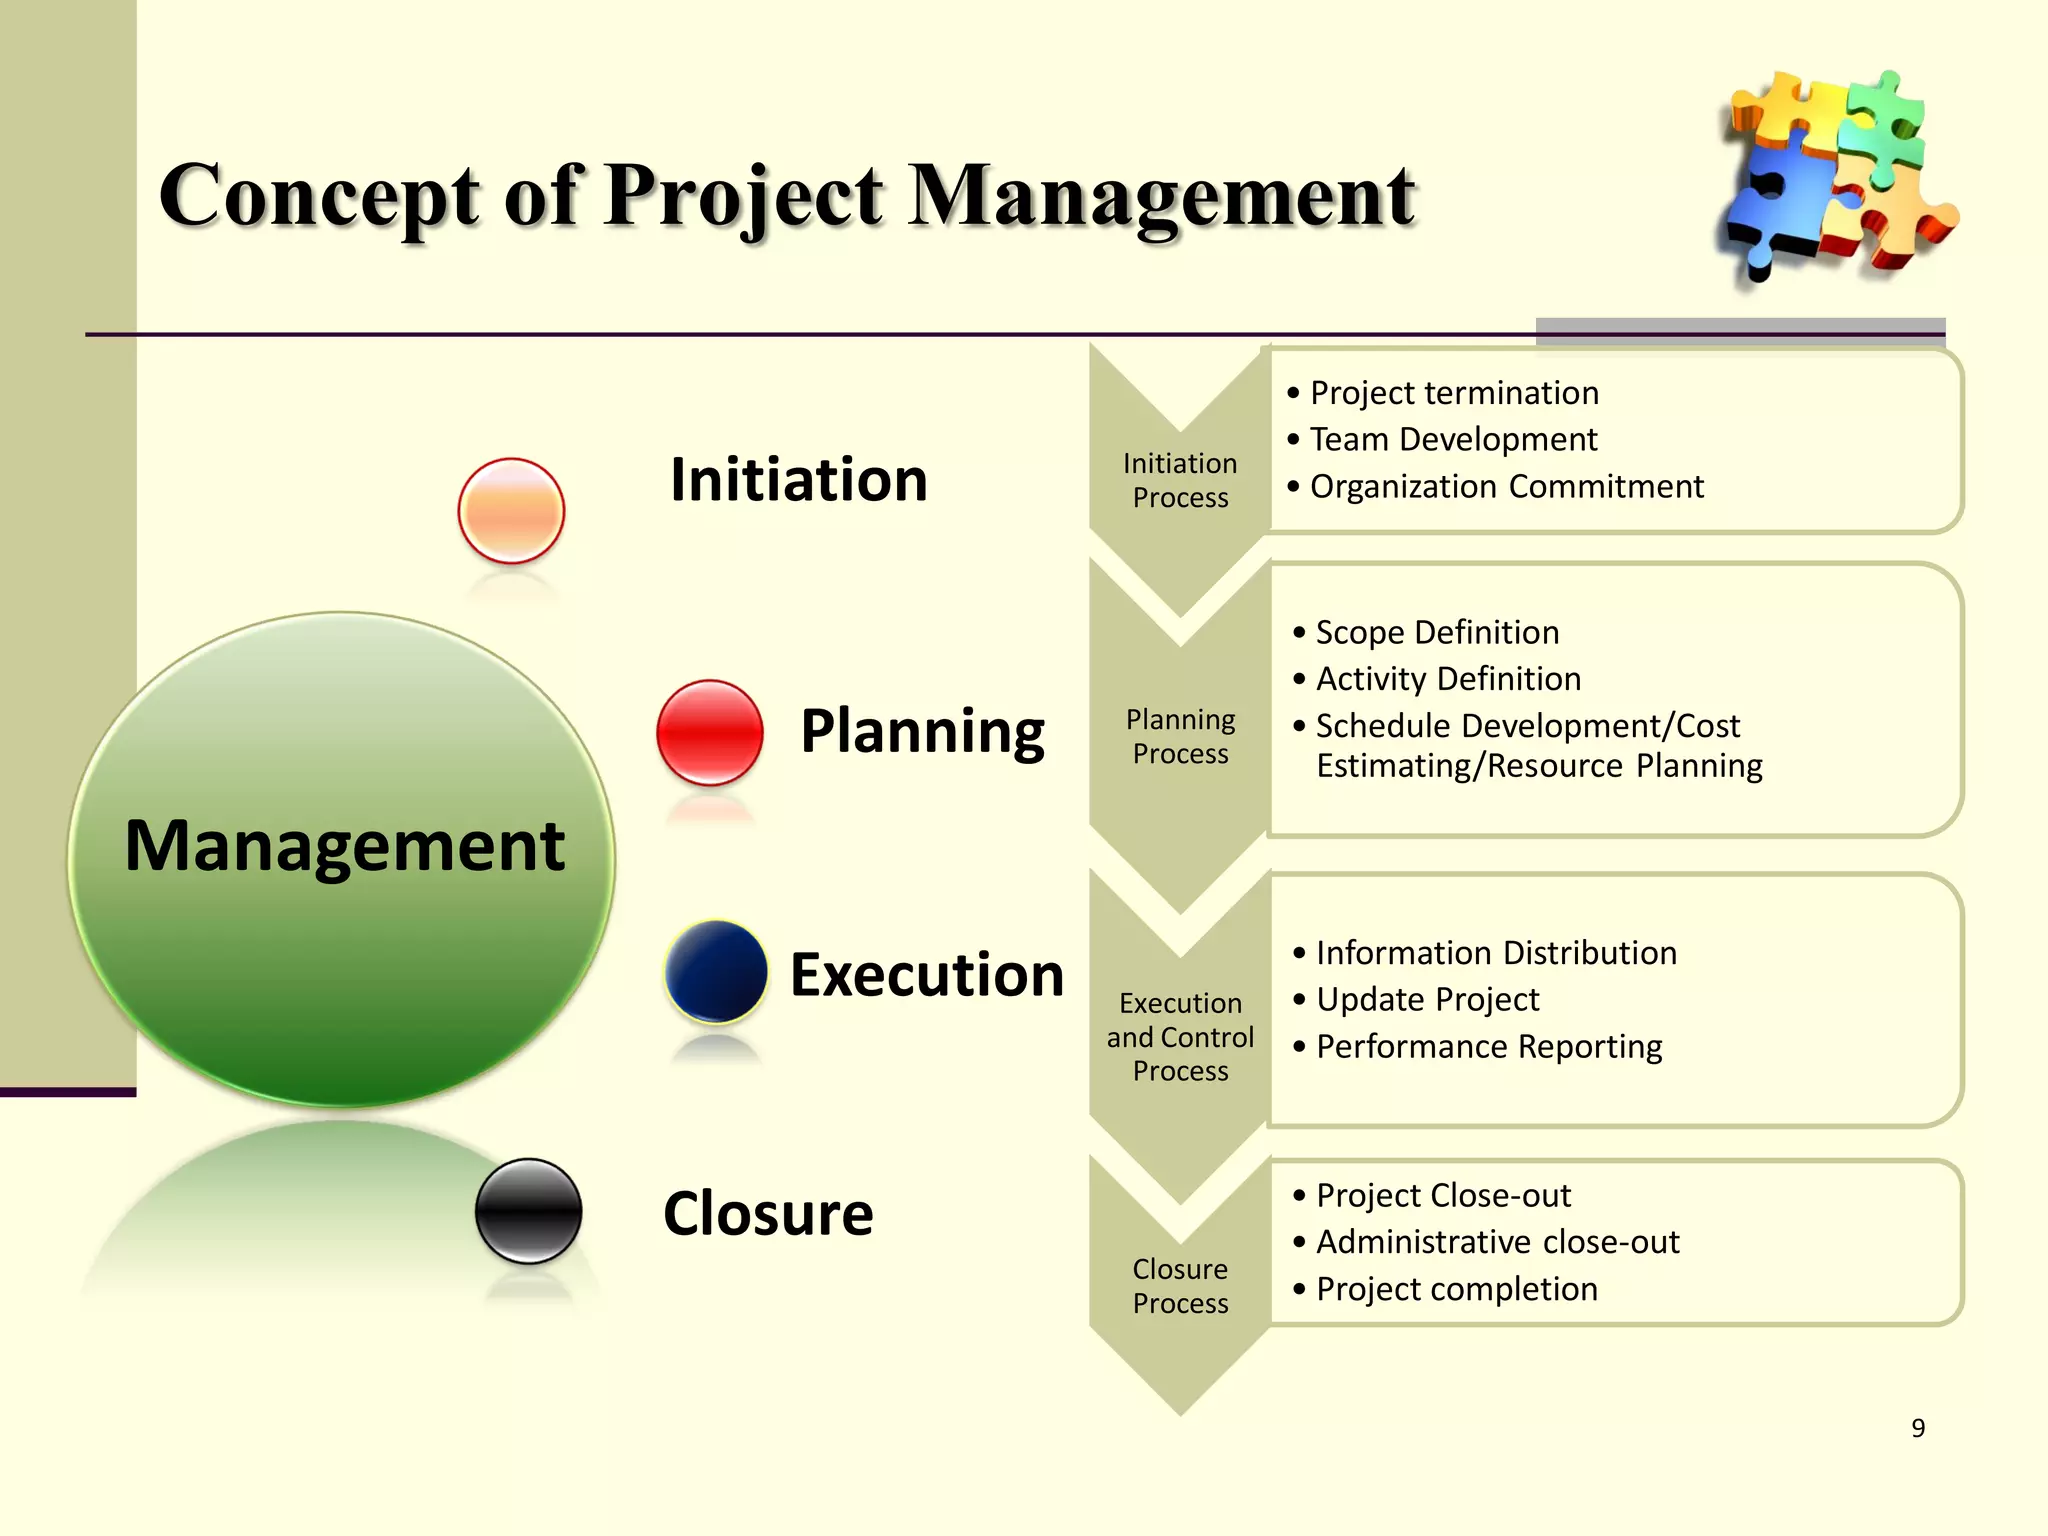
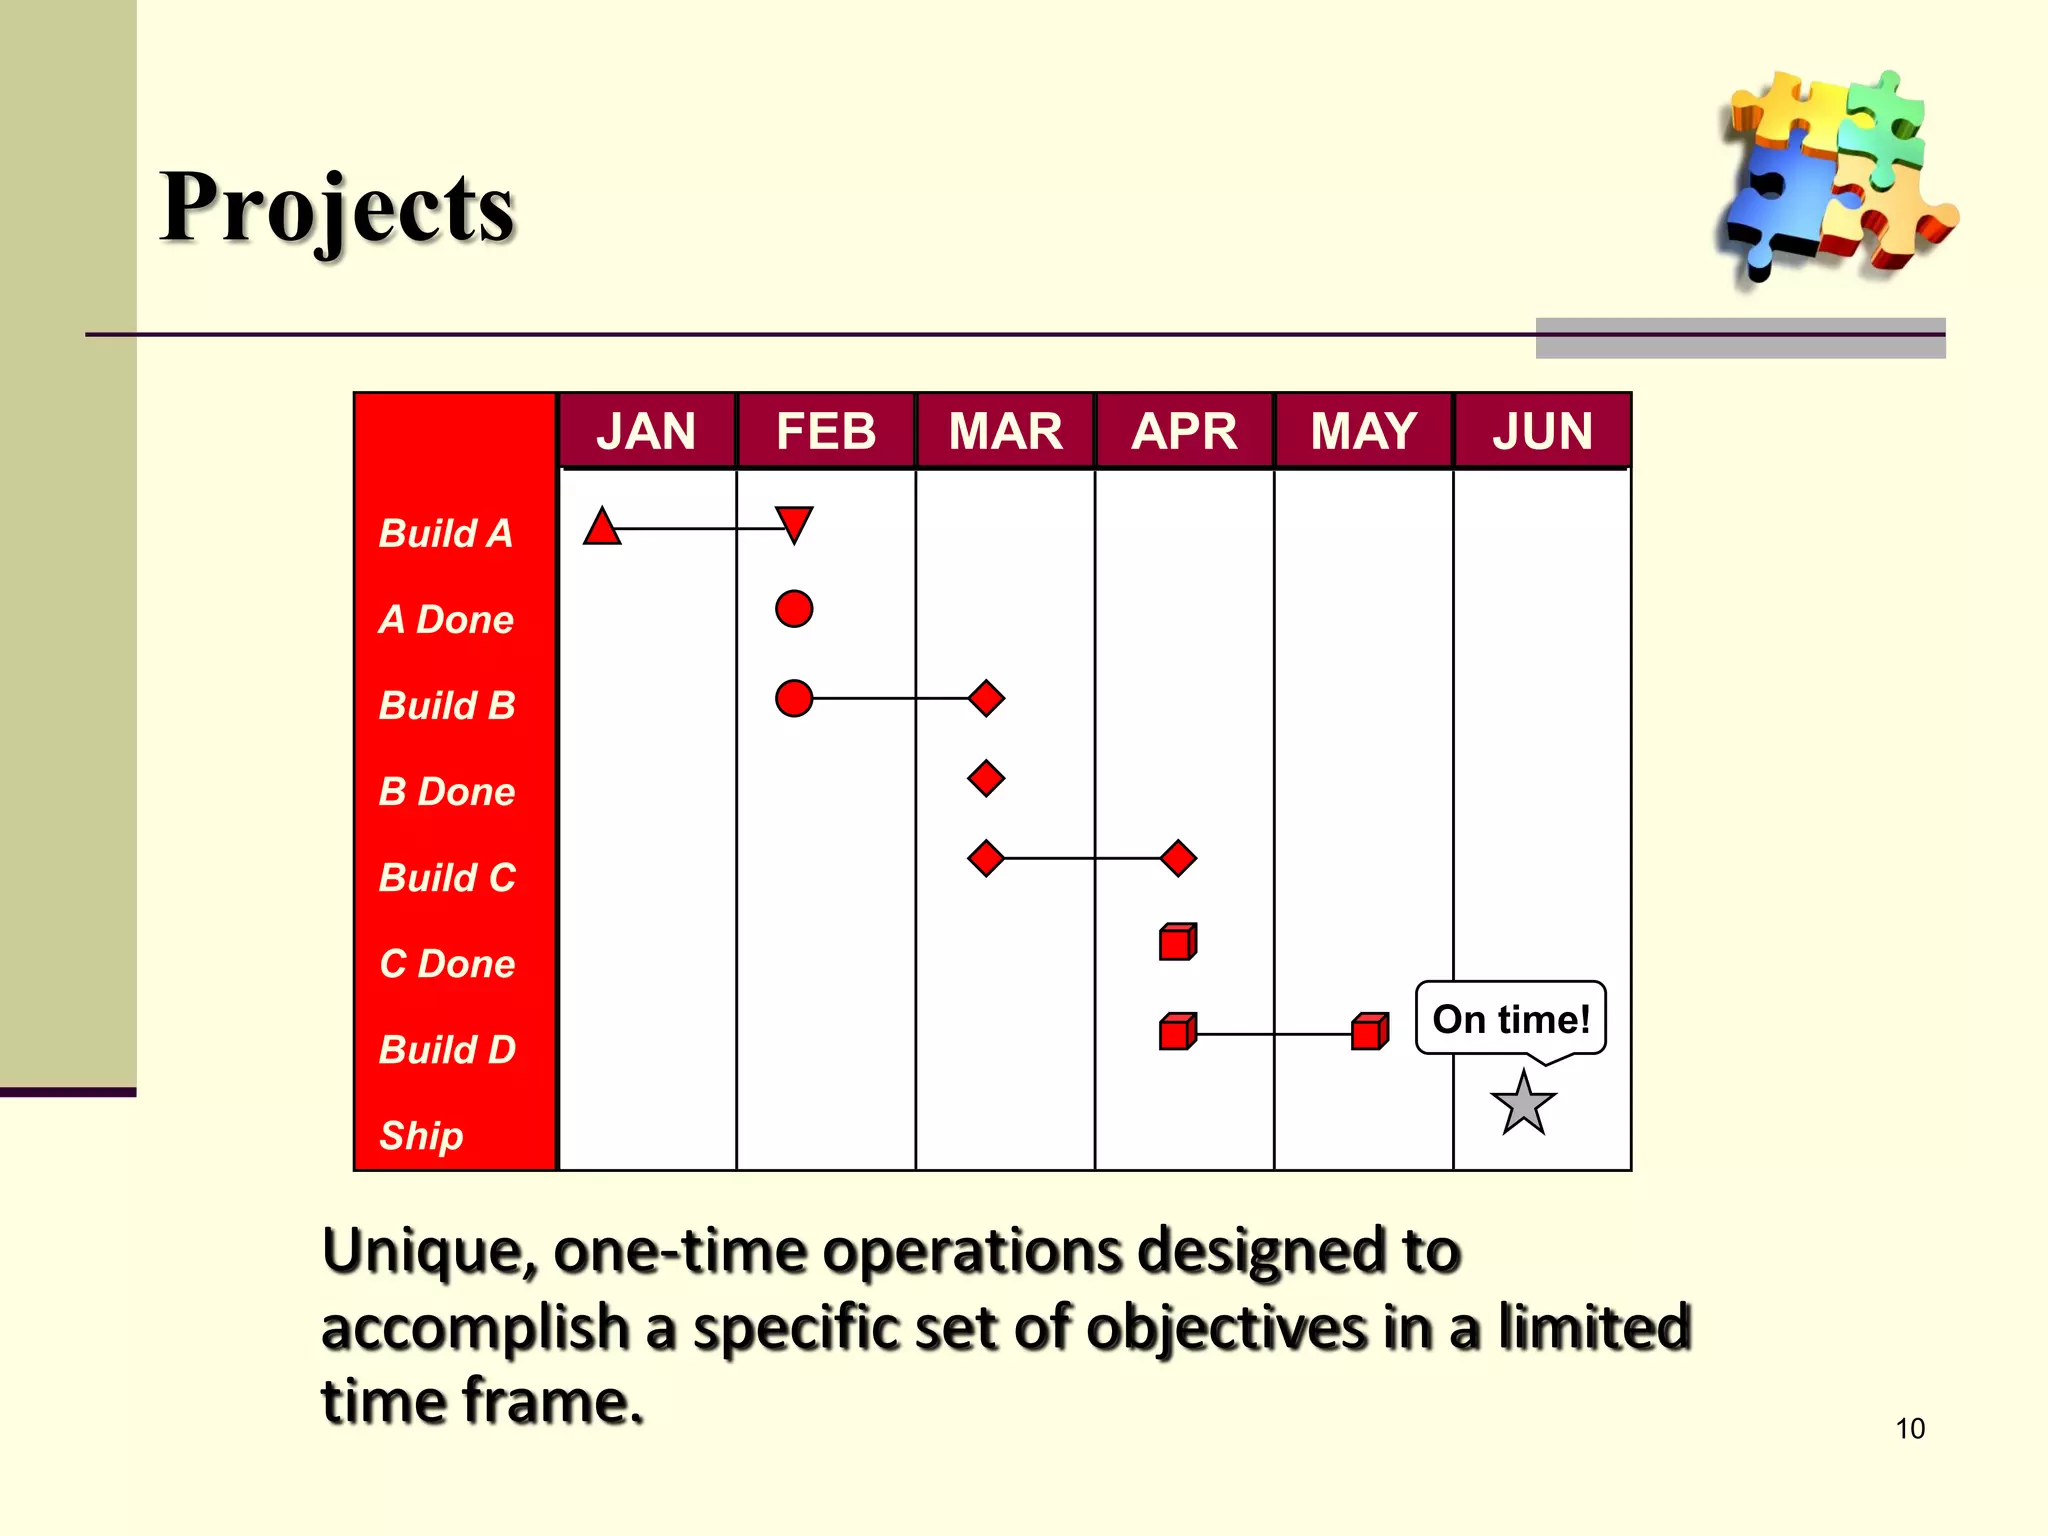
Fundamentals of project management, including key metrics, success factors, and common project terms.
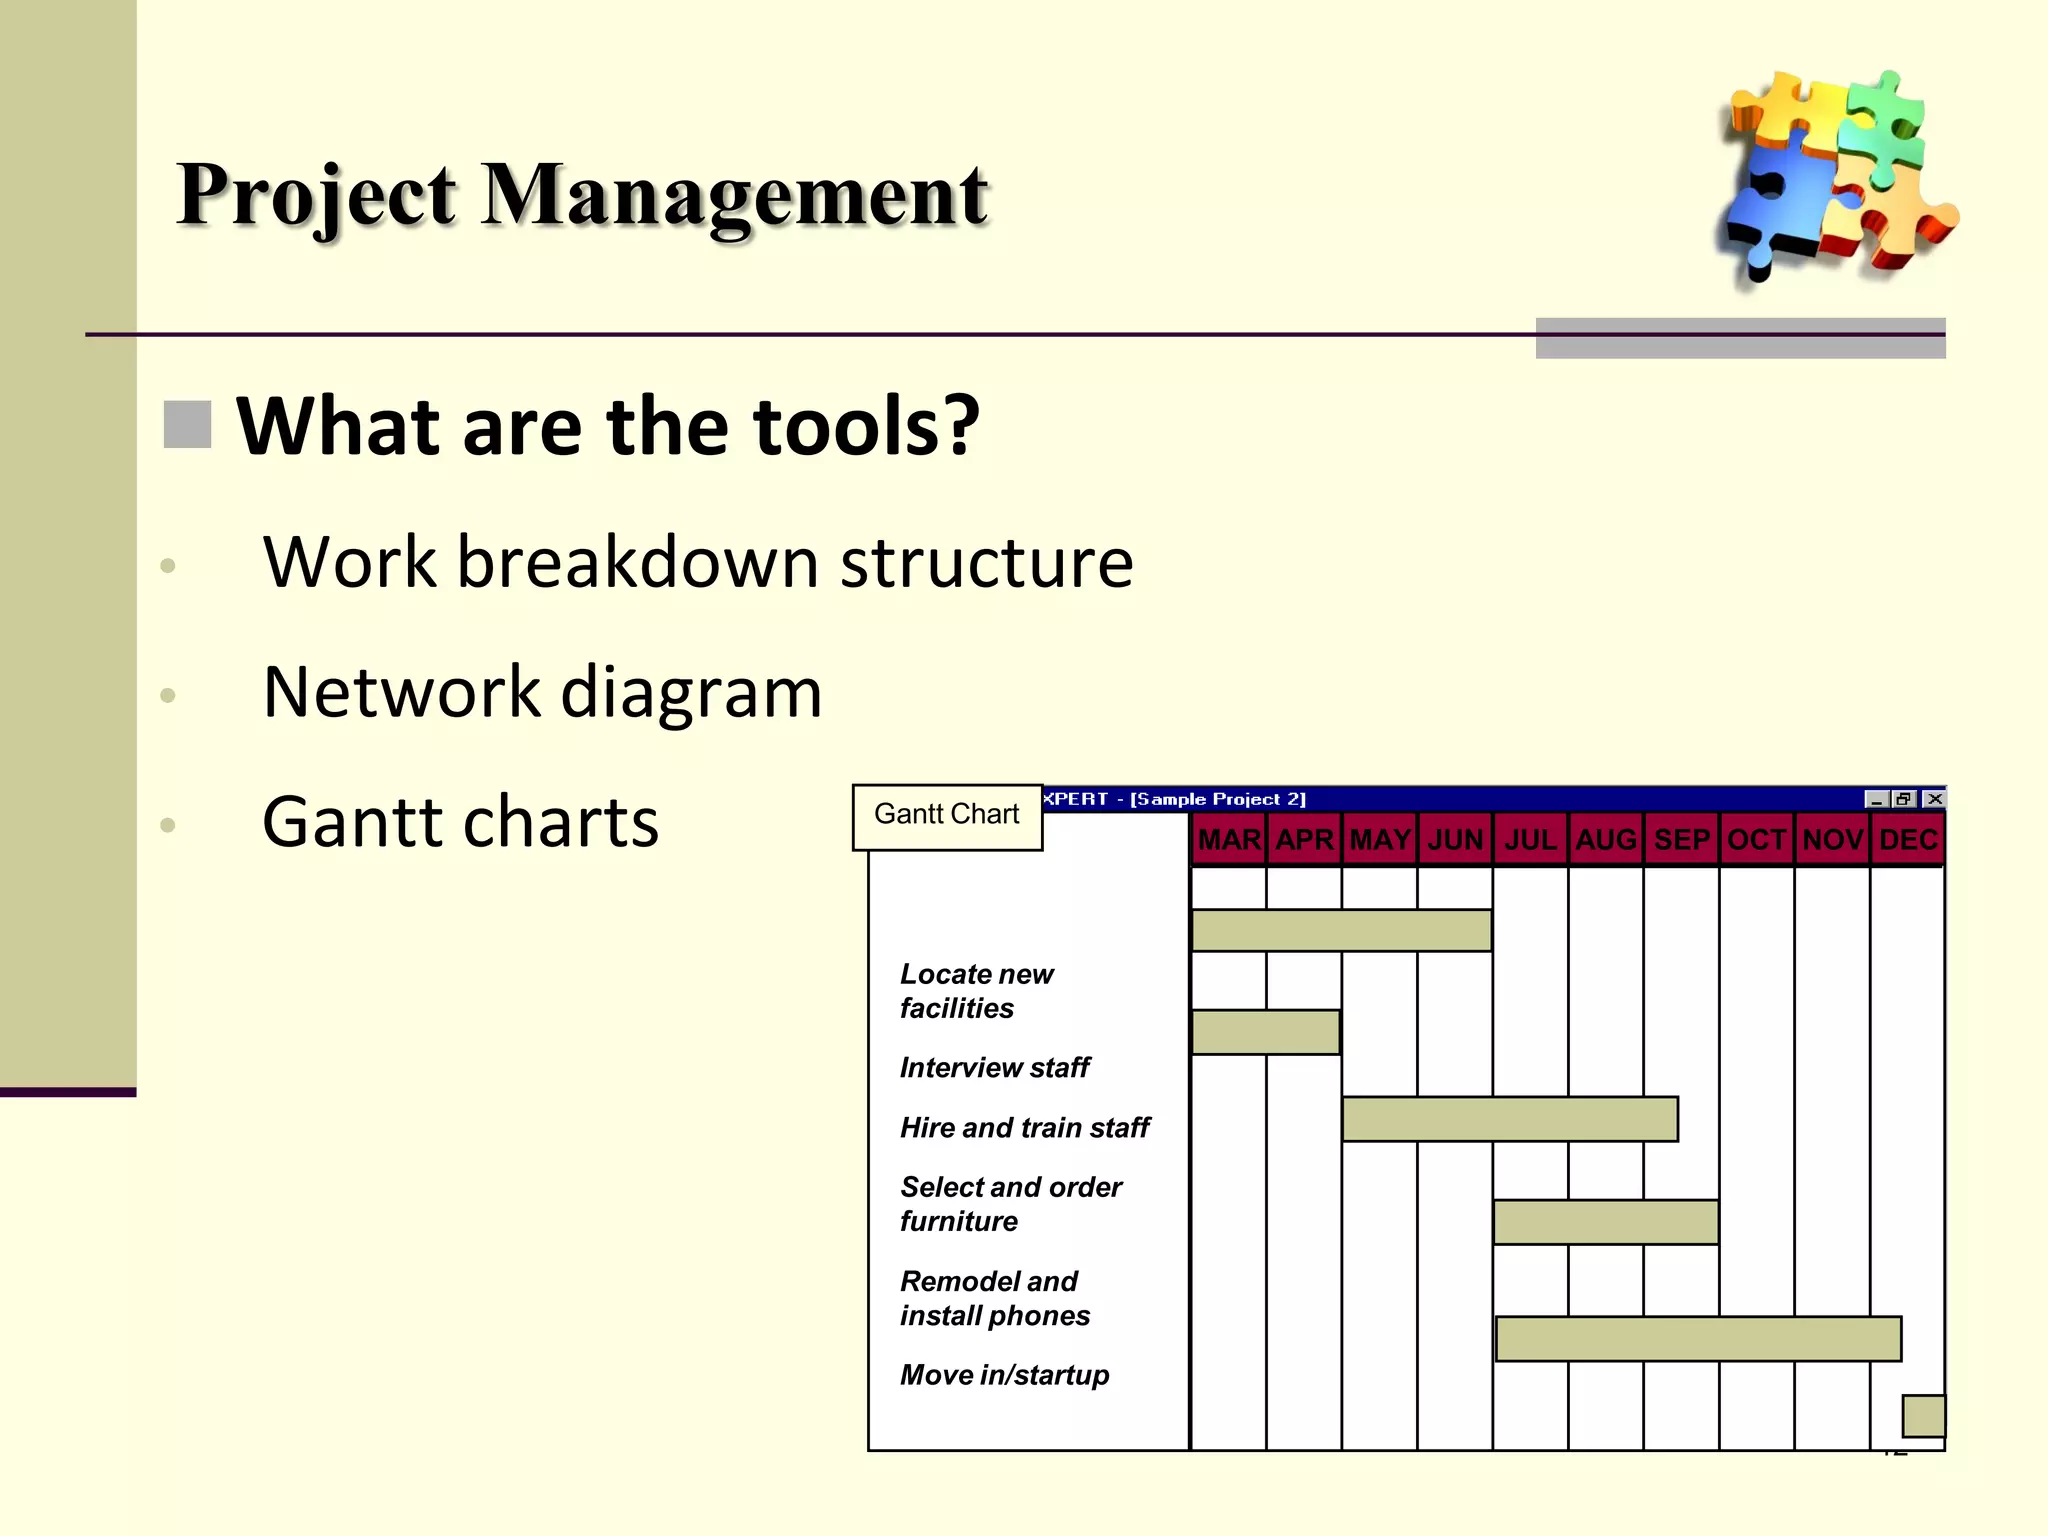
Tools and responsibilities for project managers, focusing on work breakdown structures and critical paths.
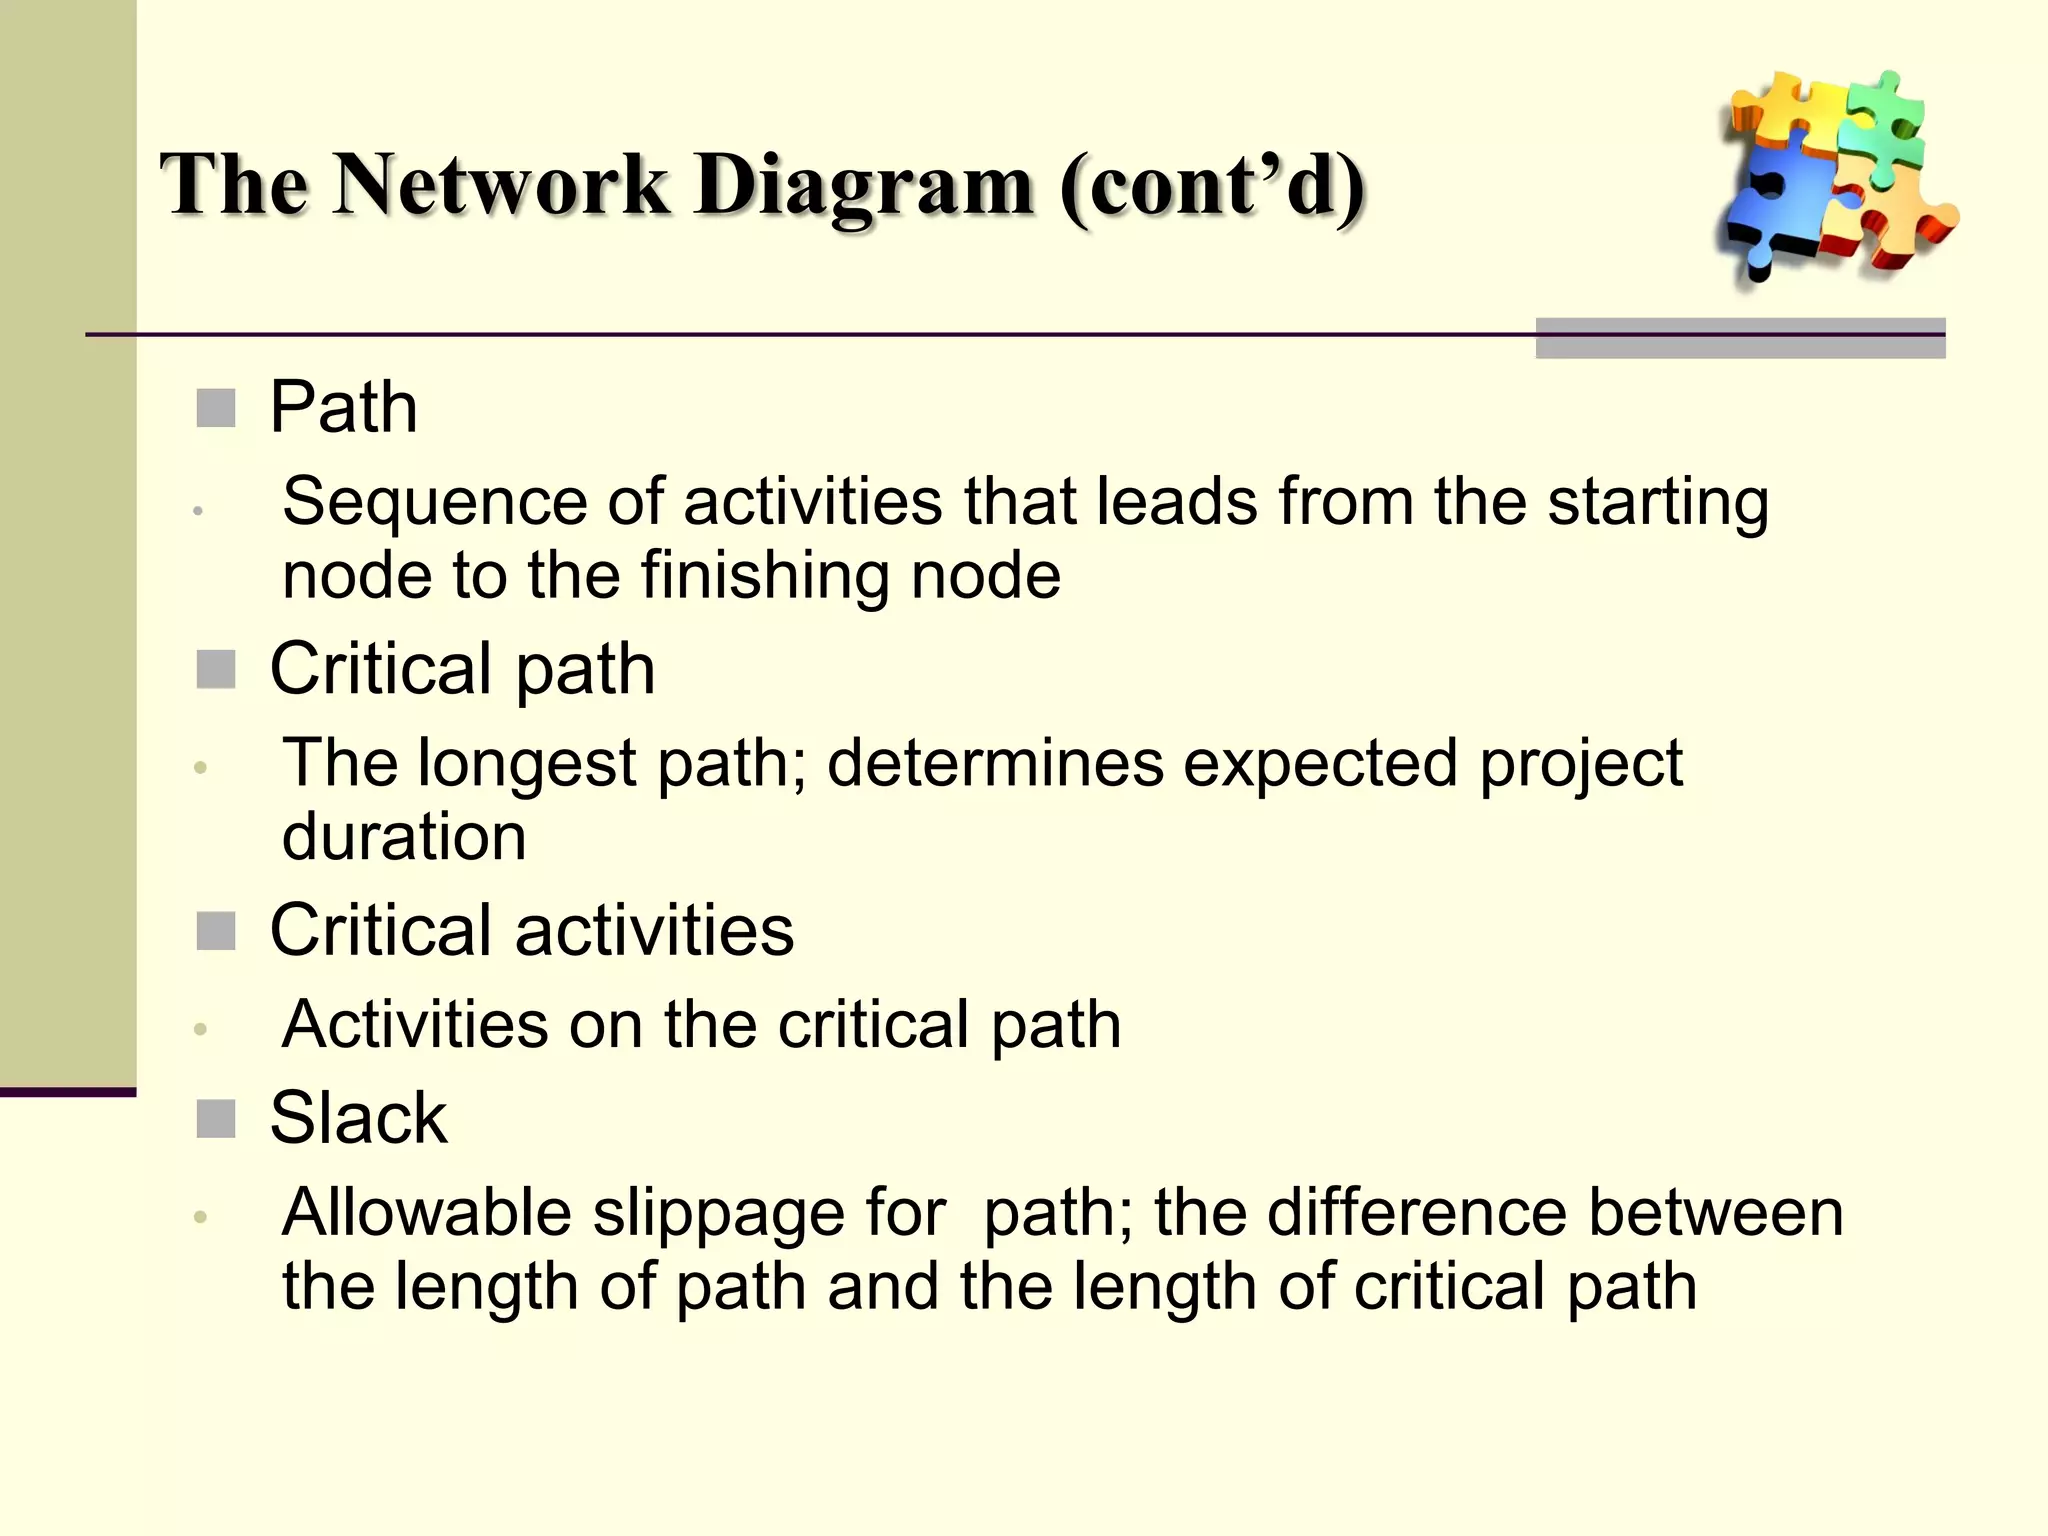
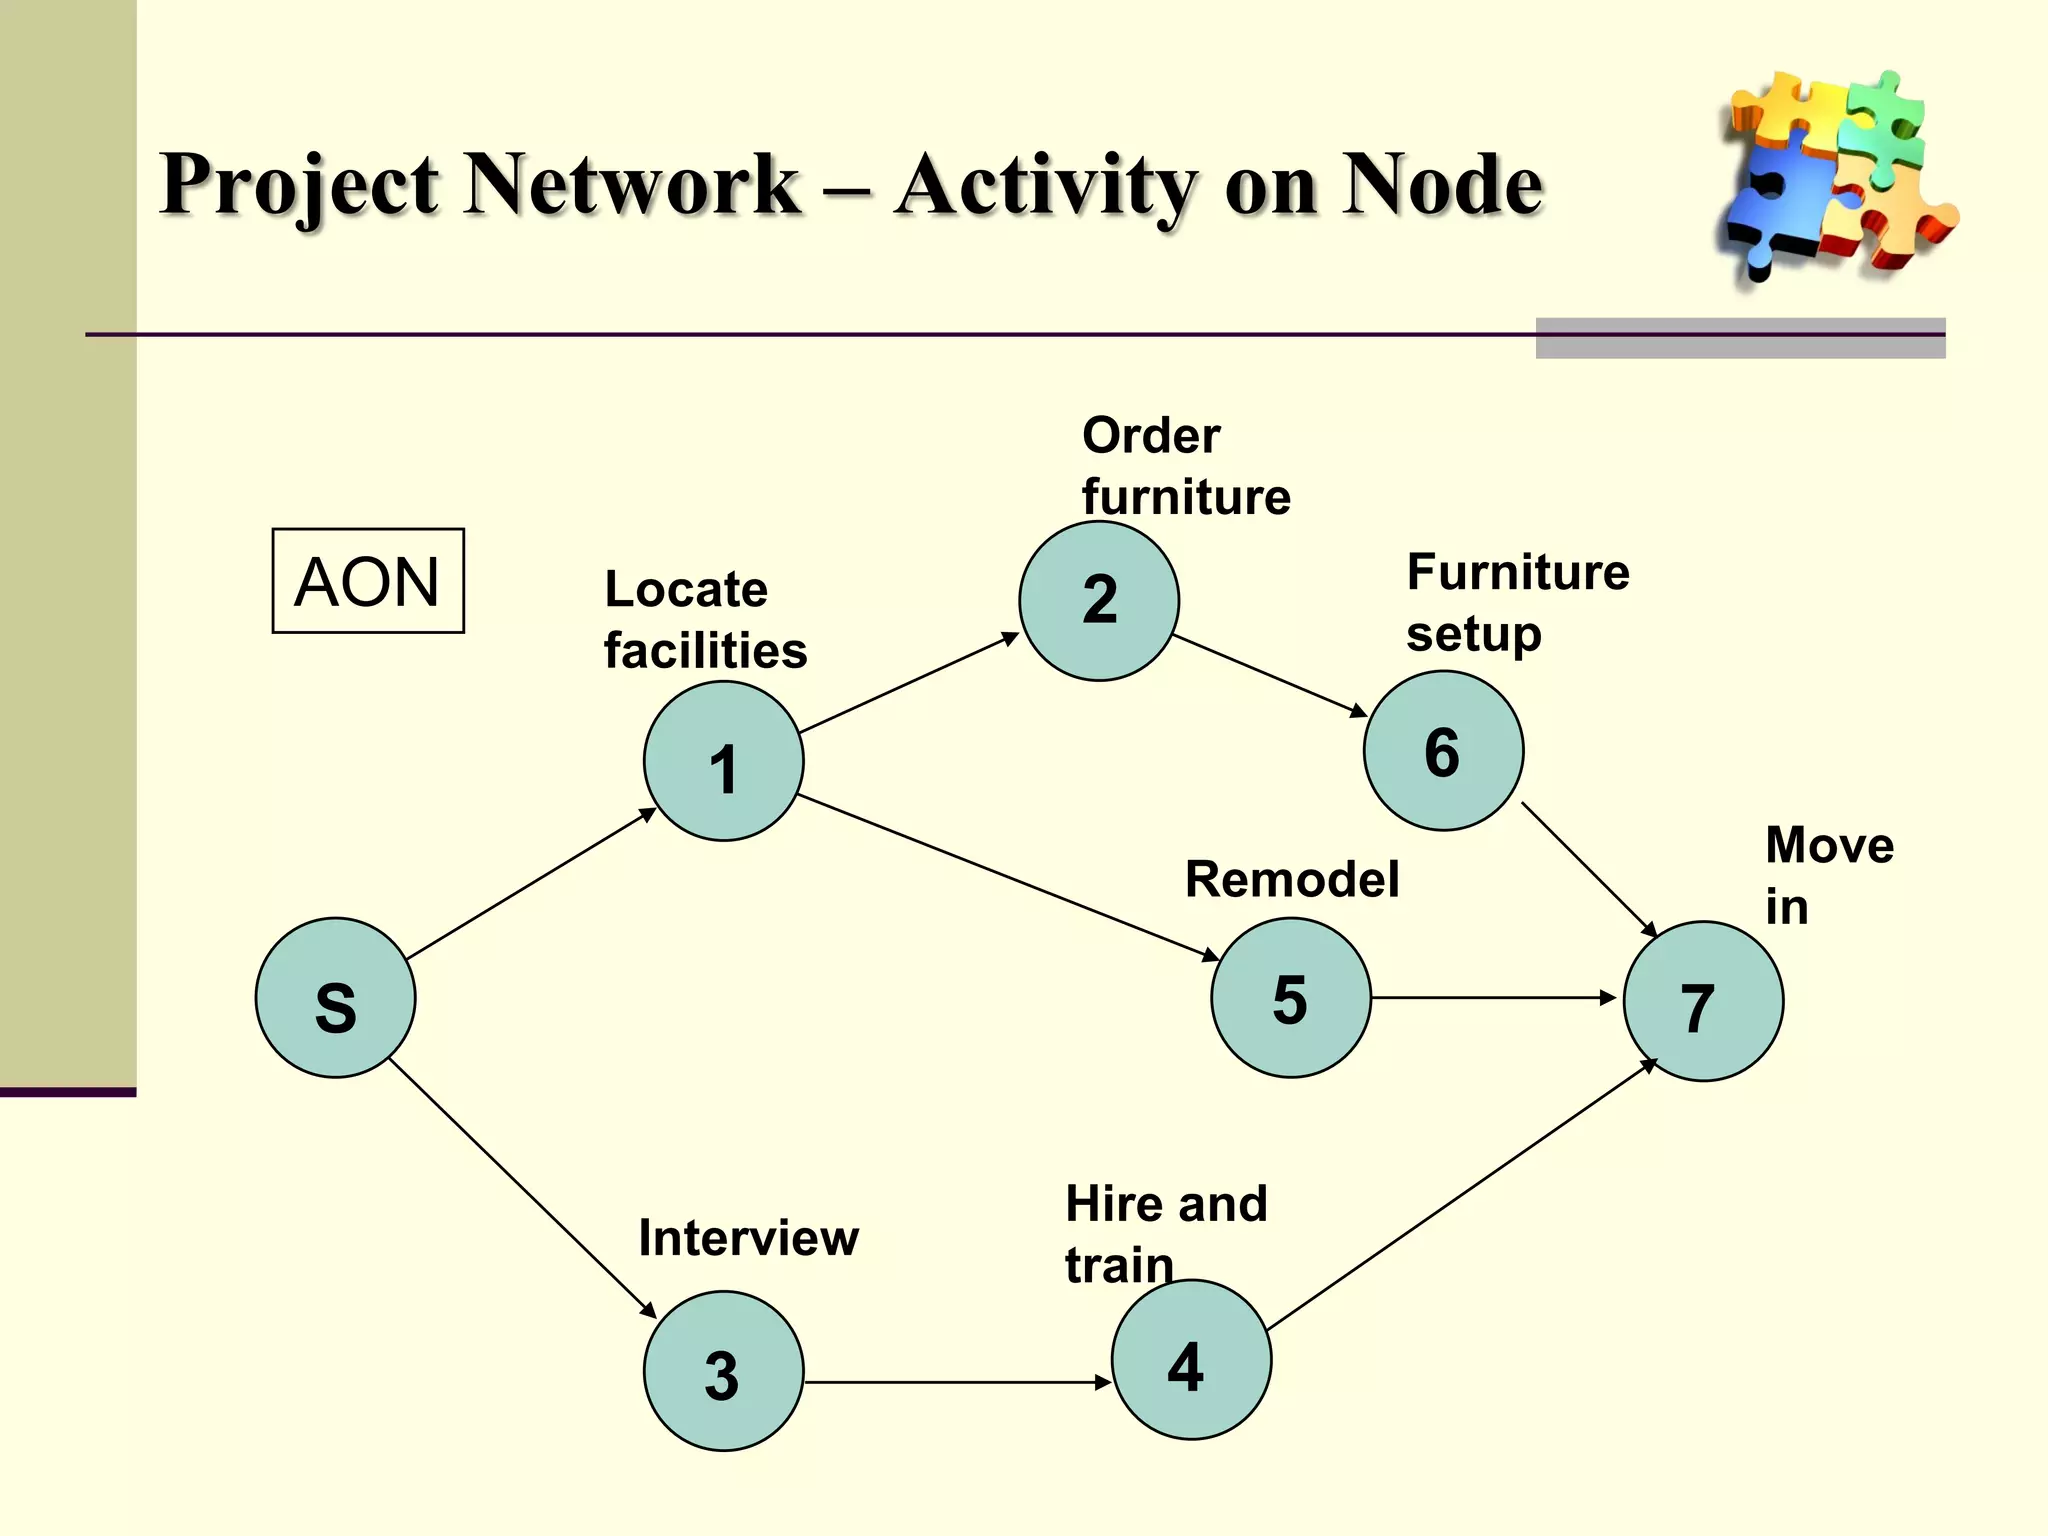
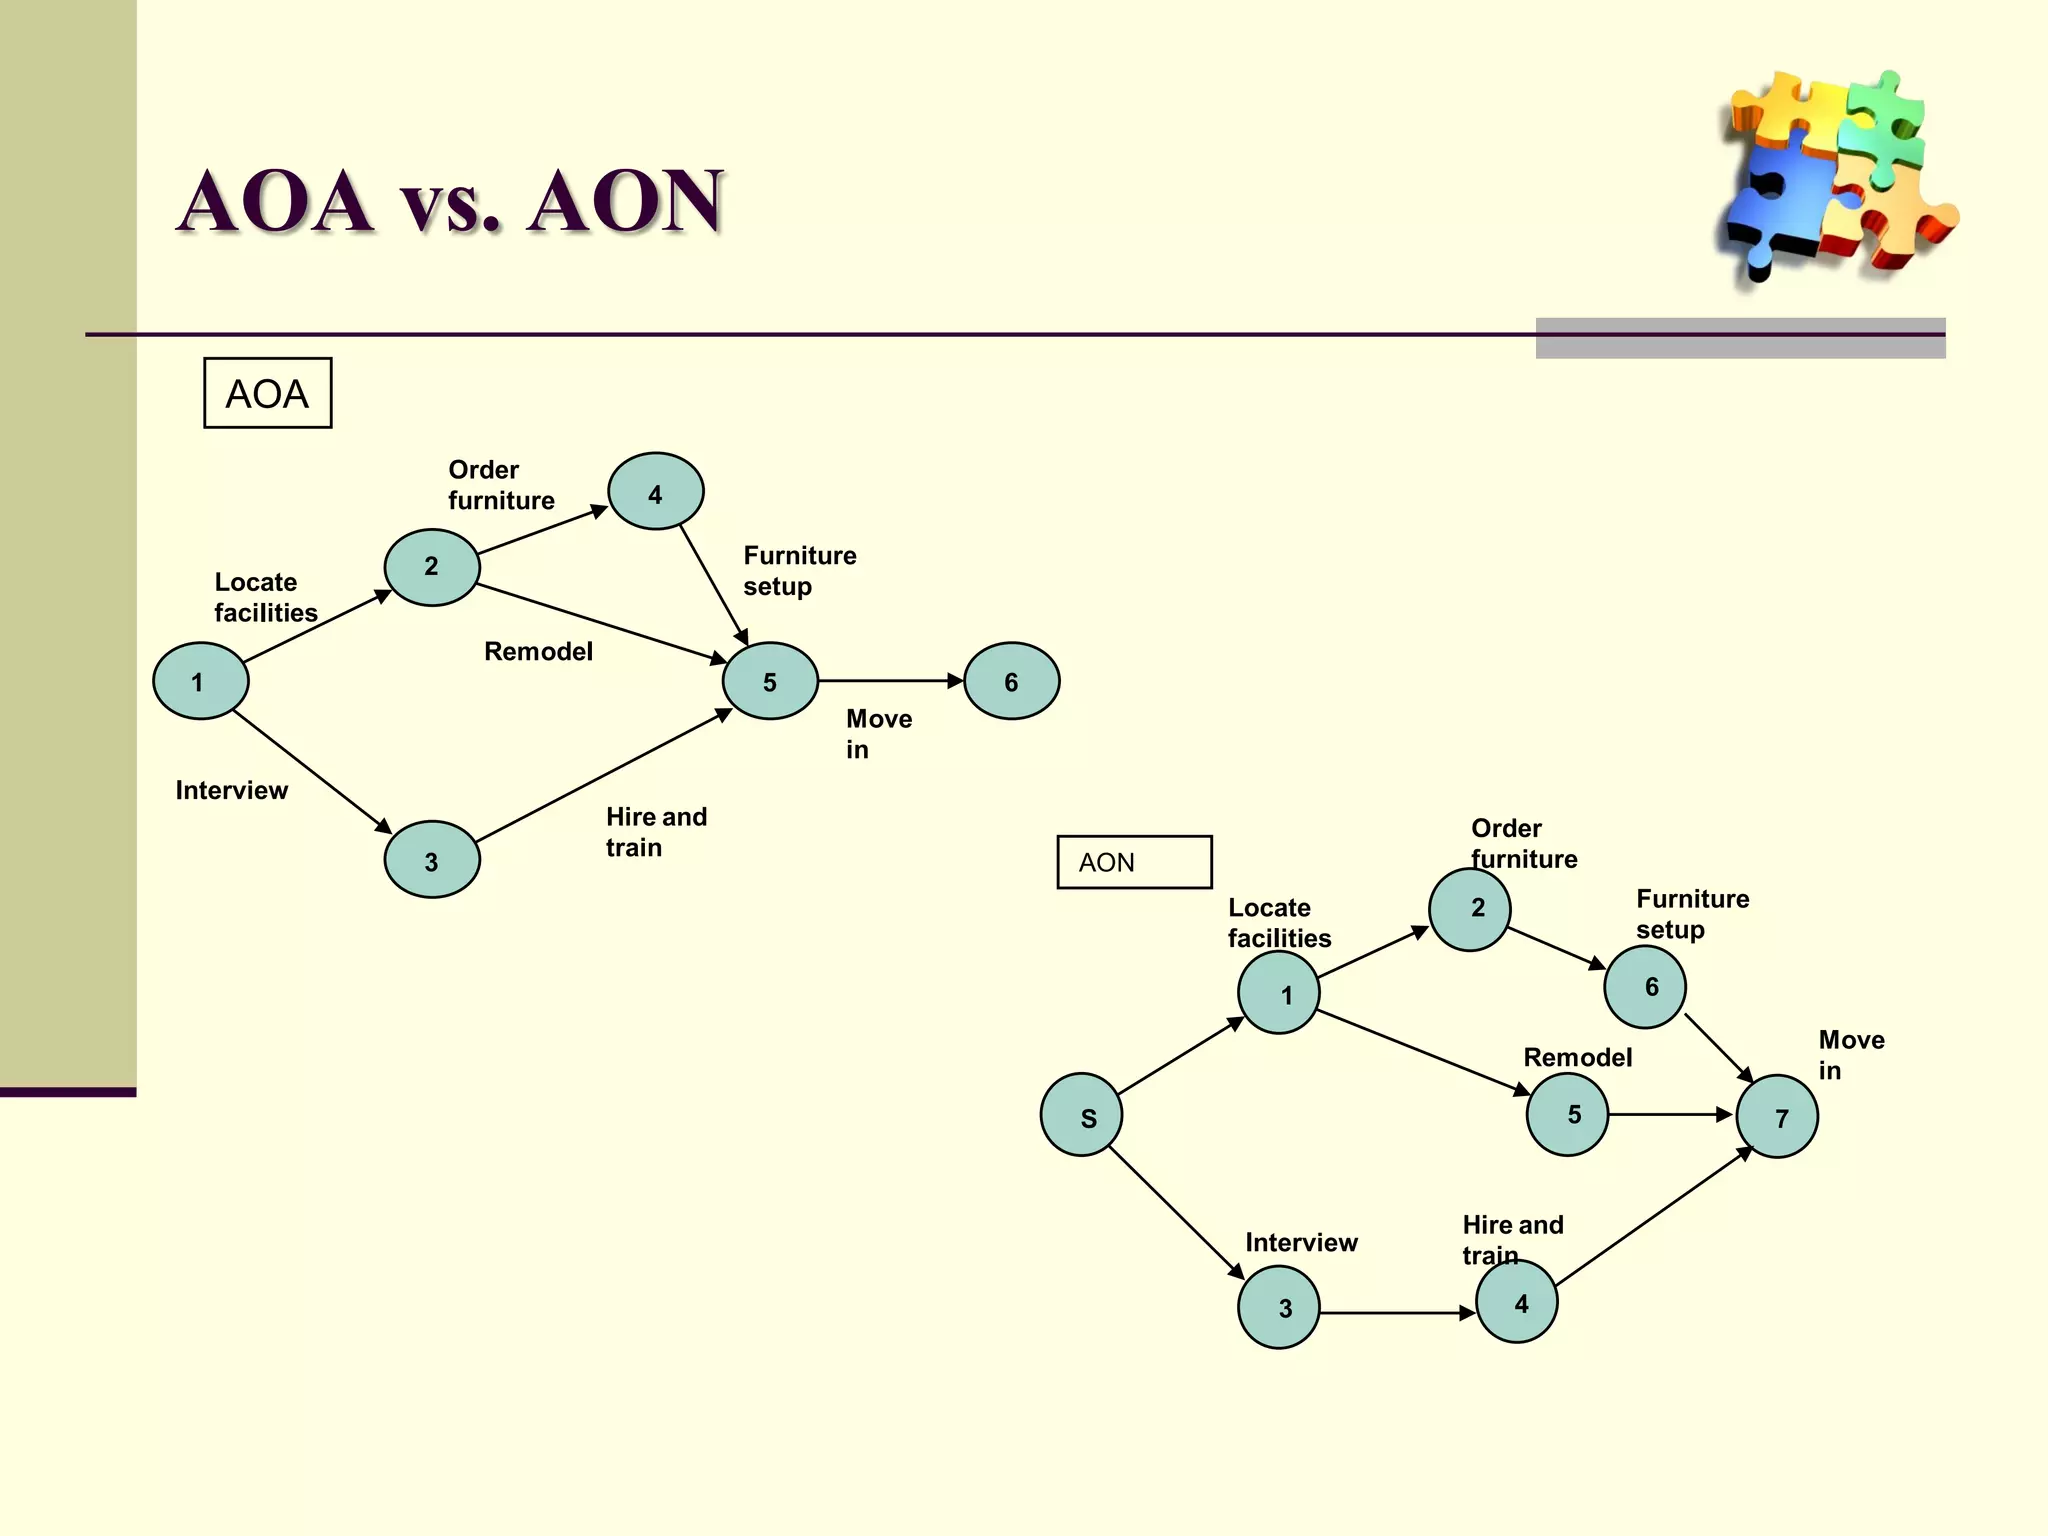
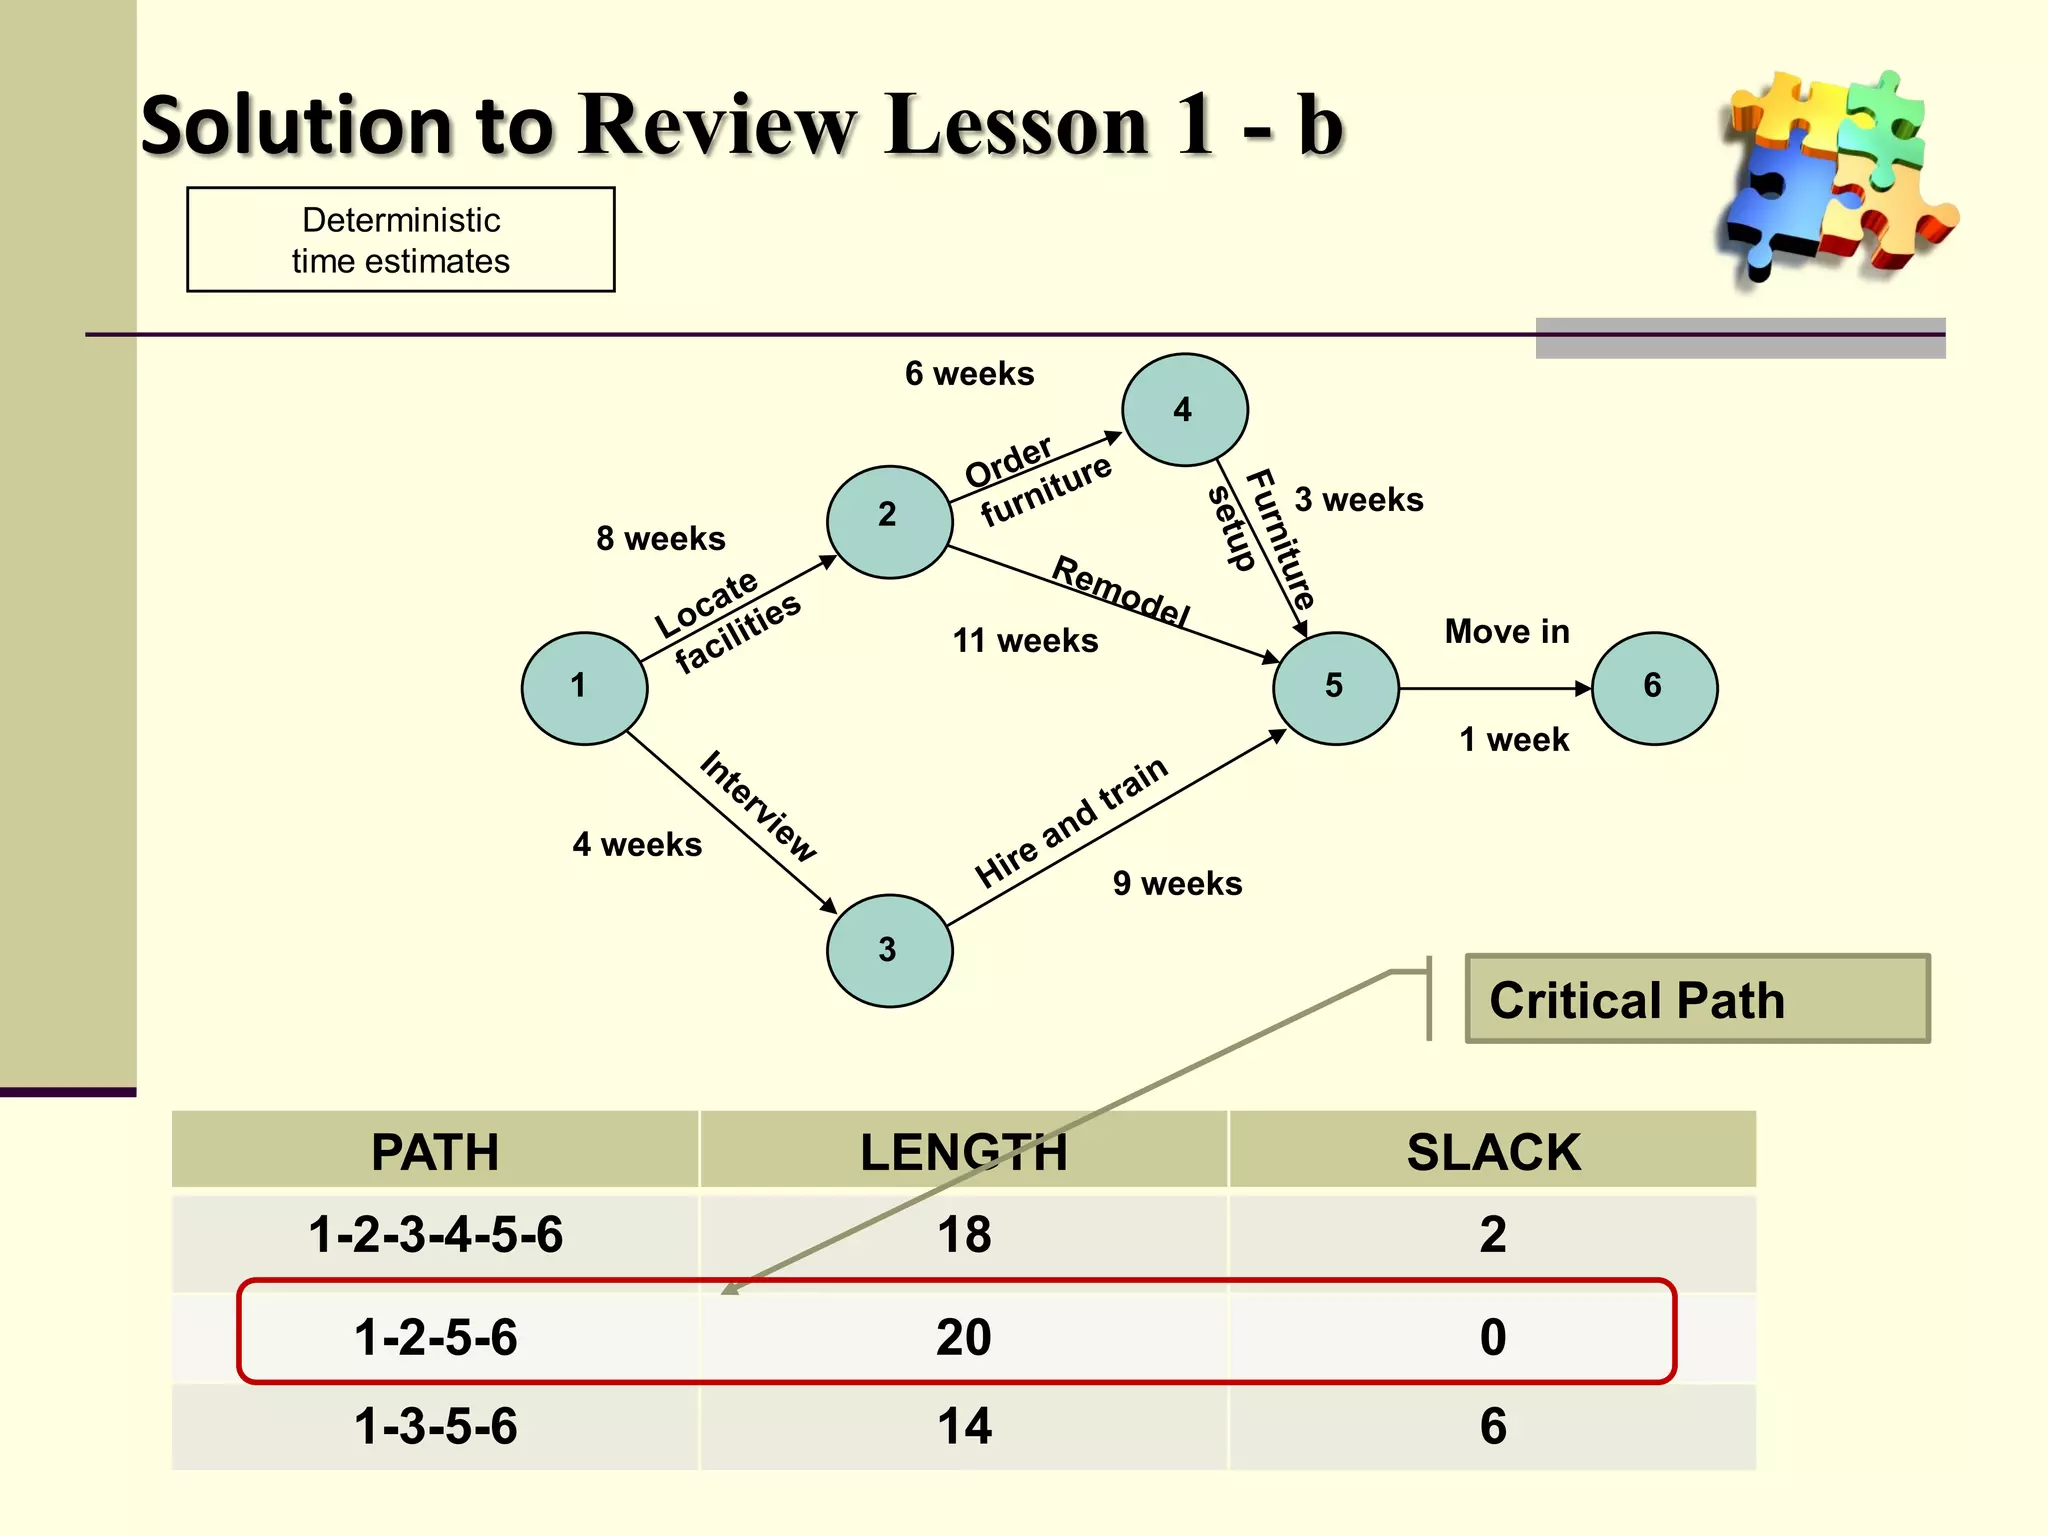
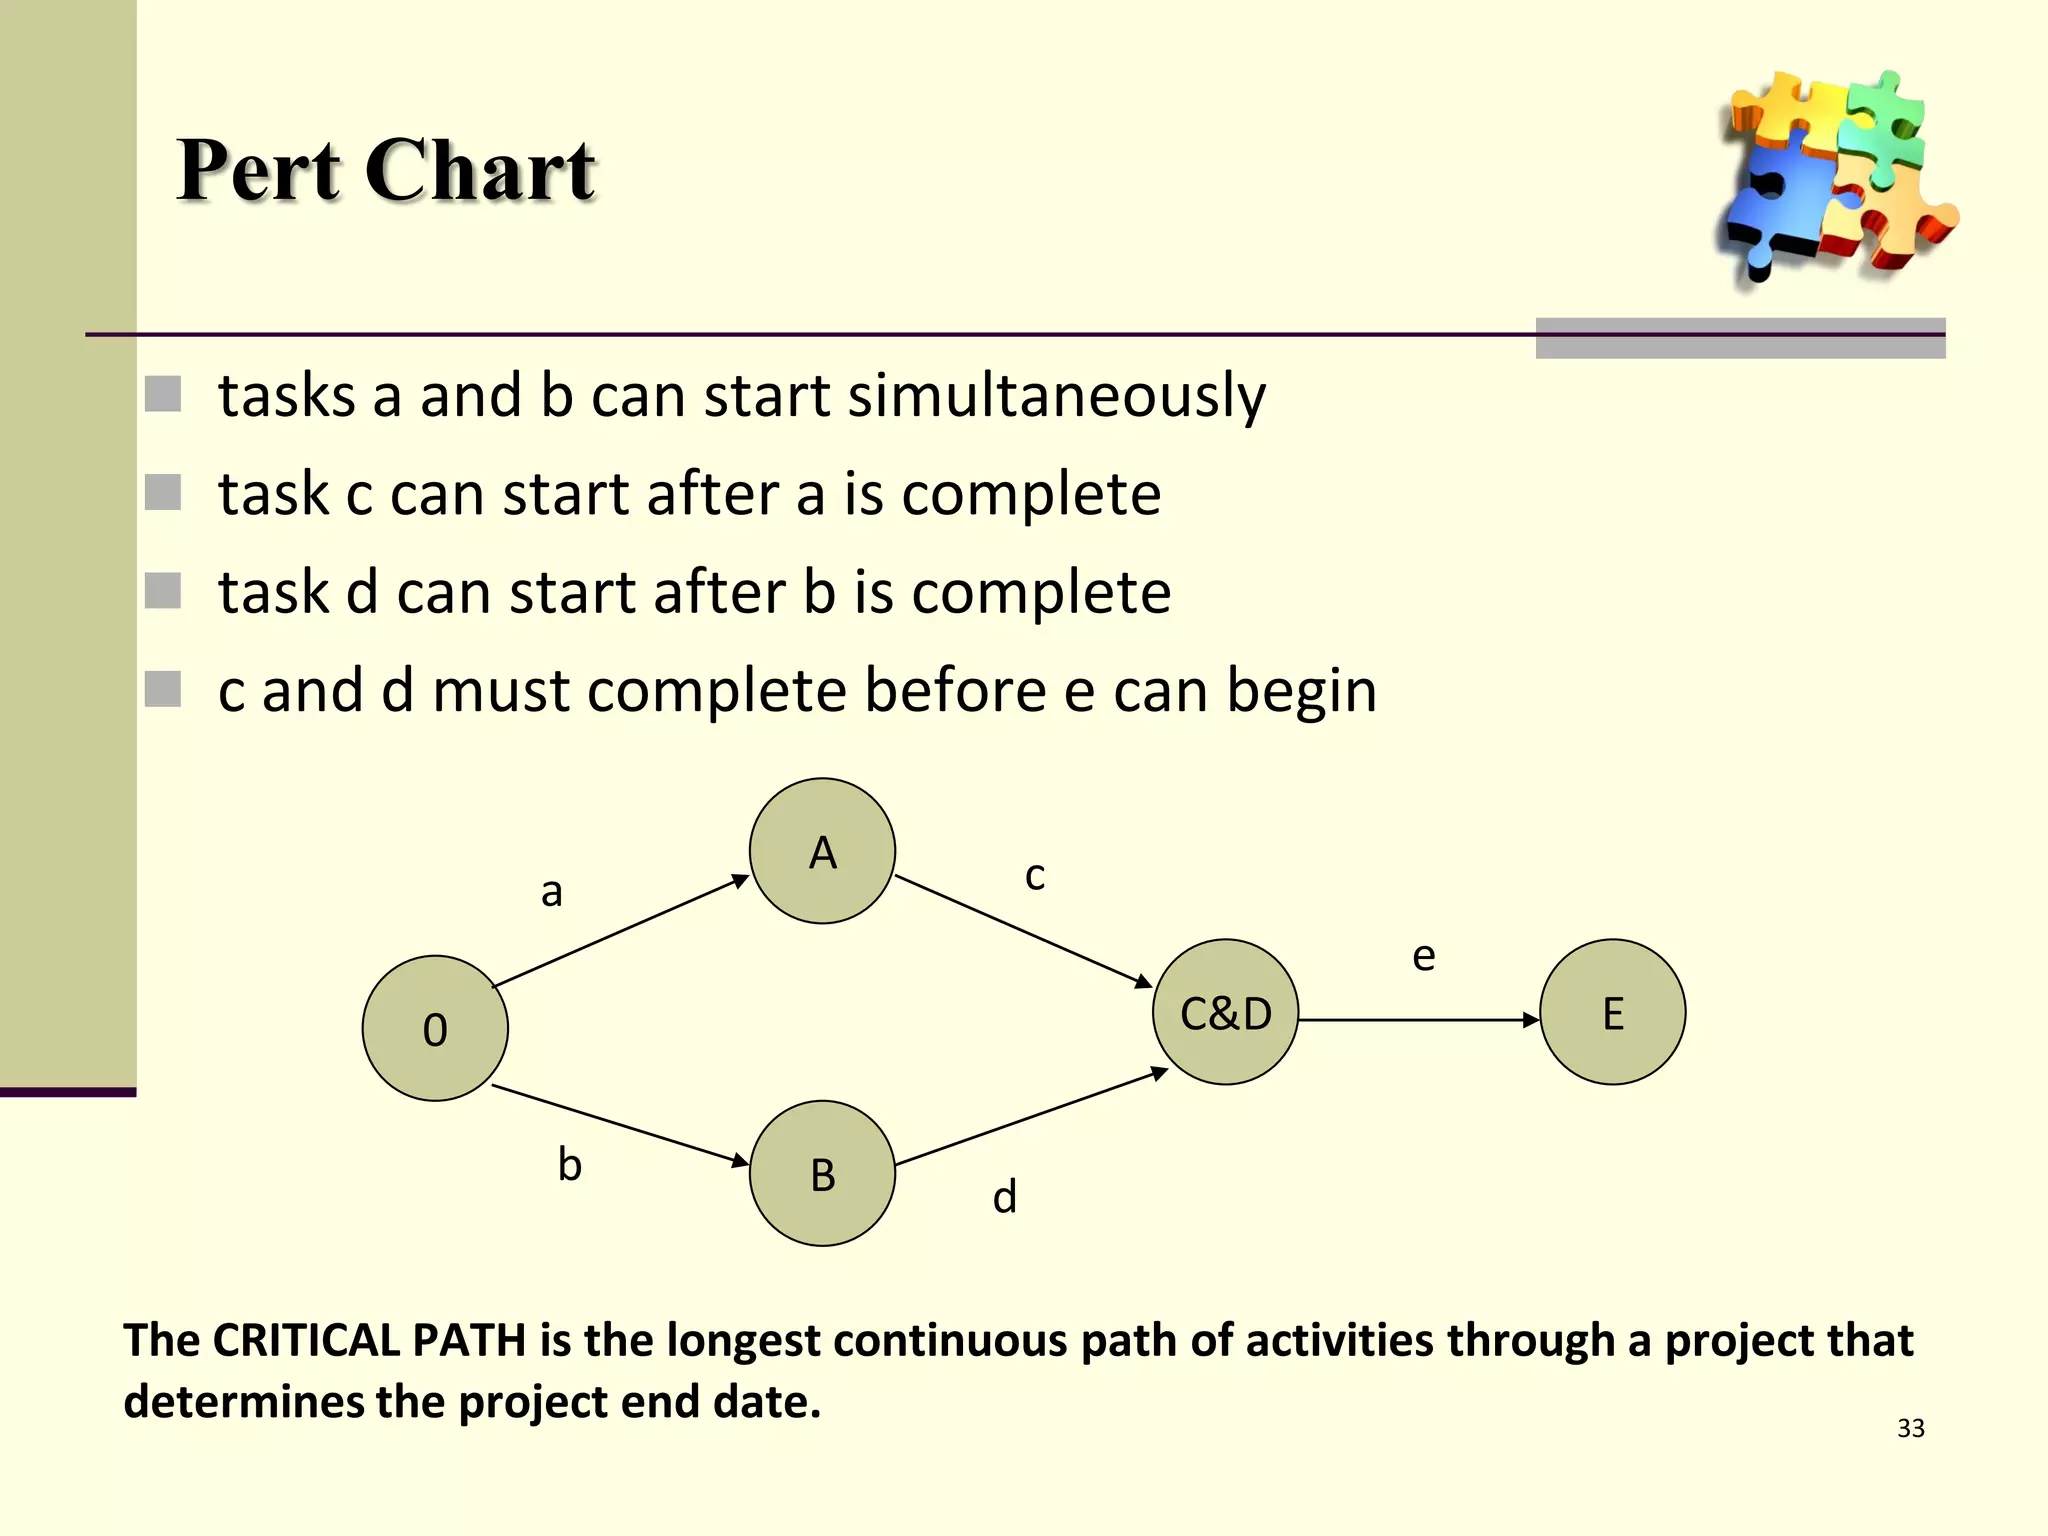
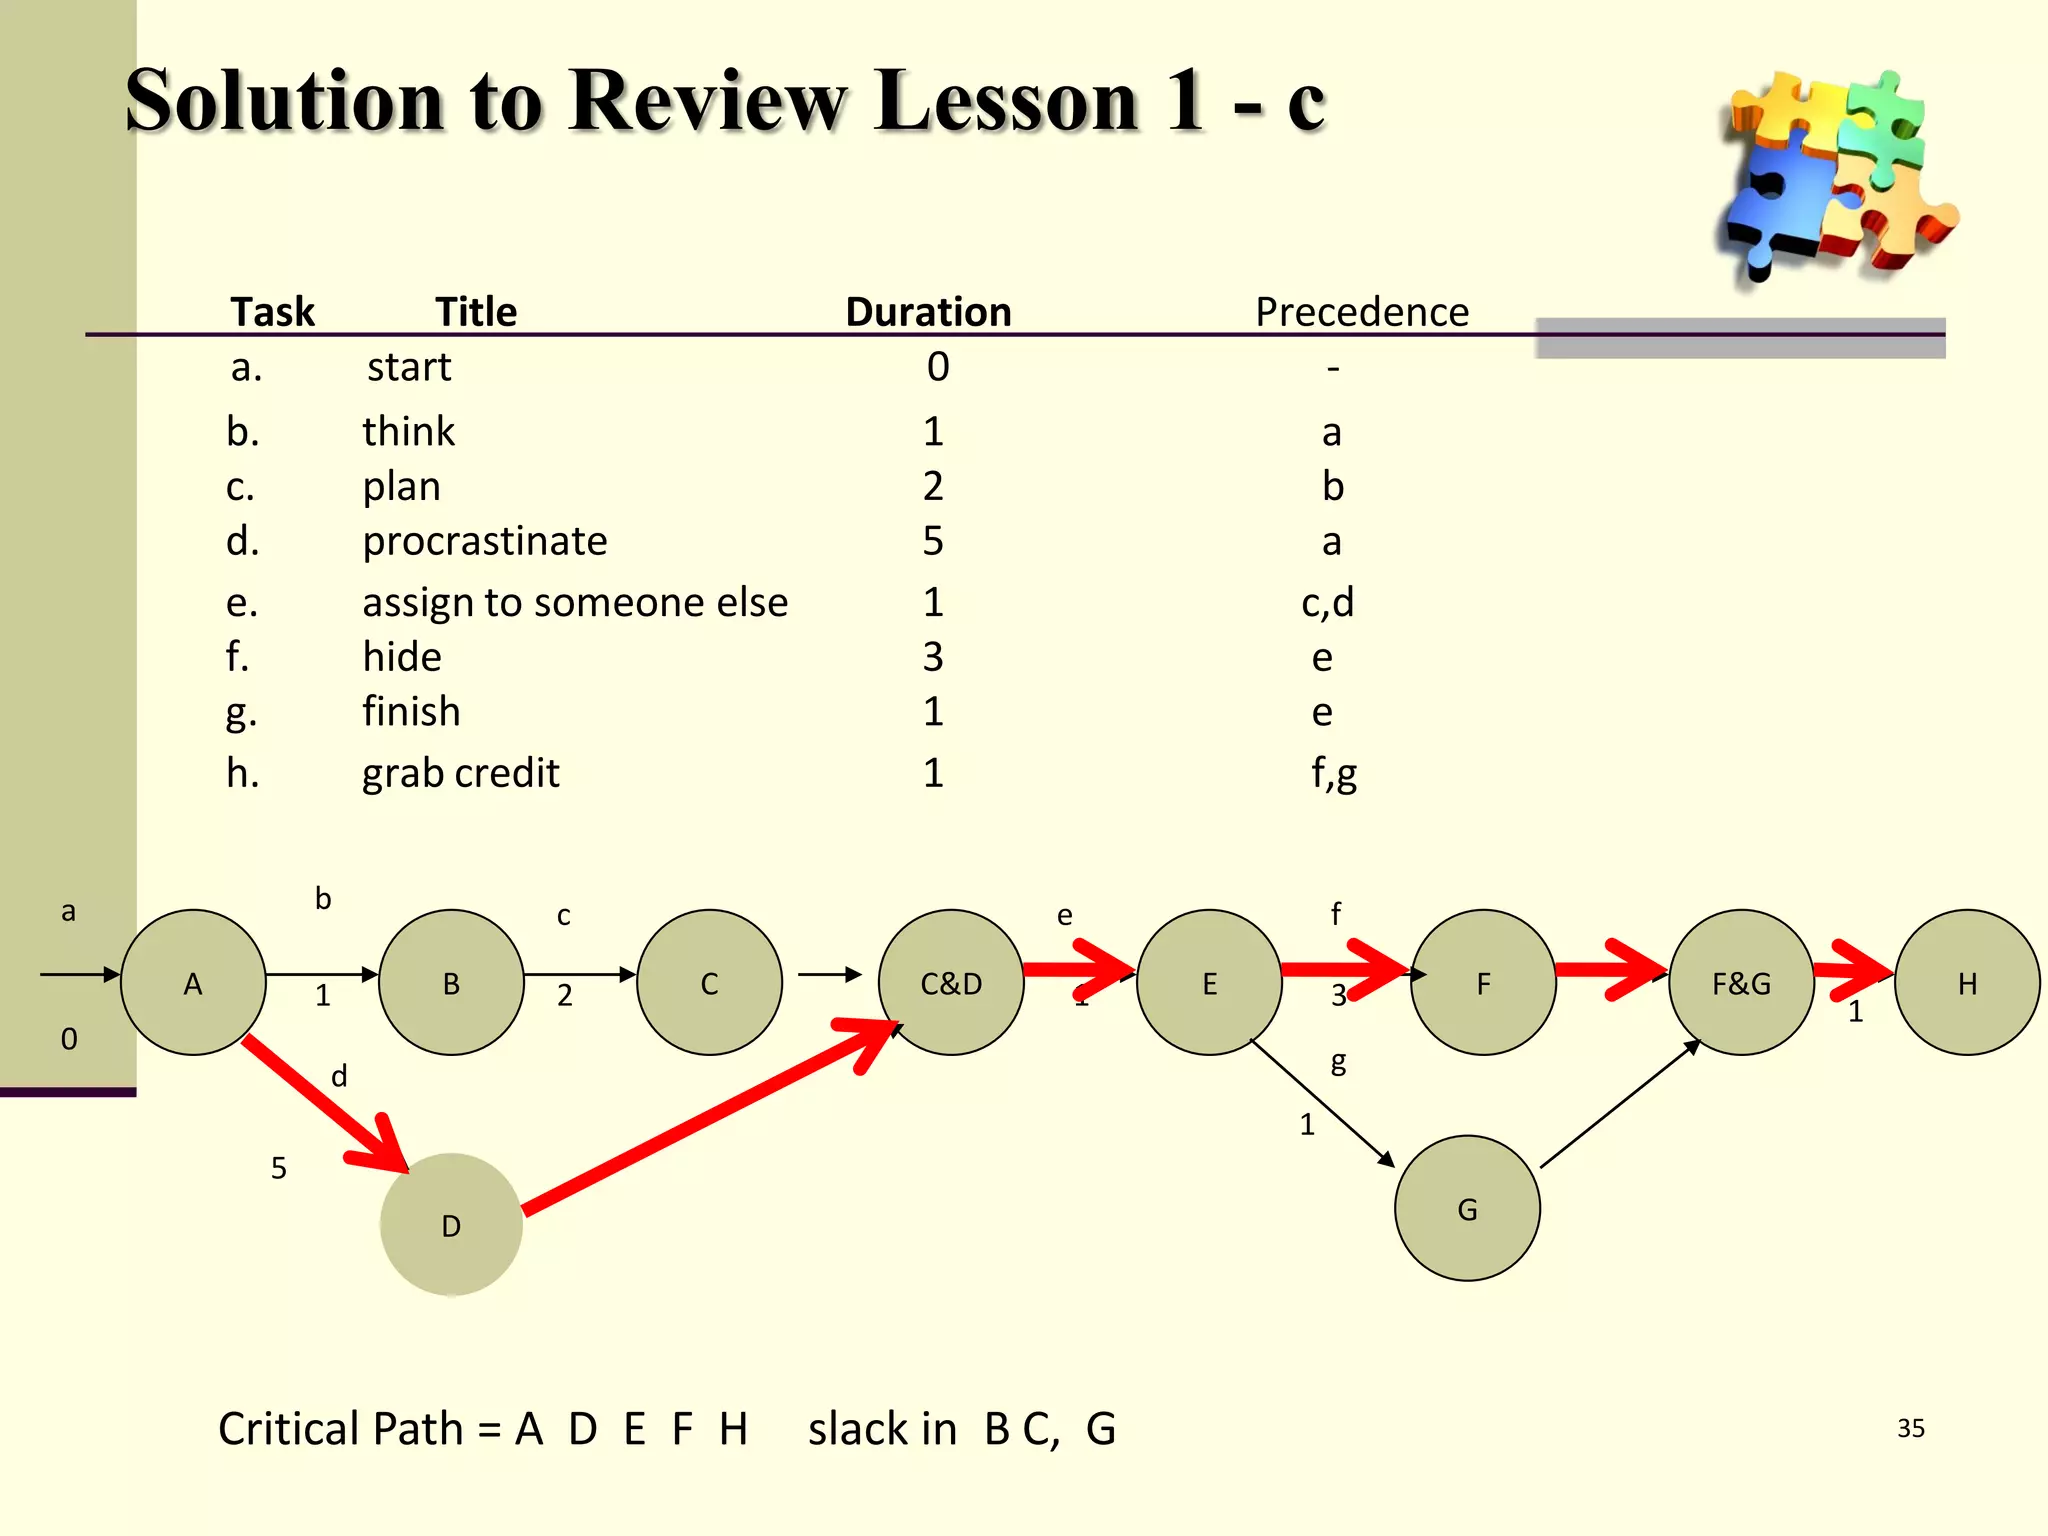
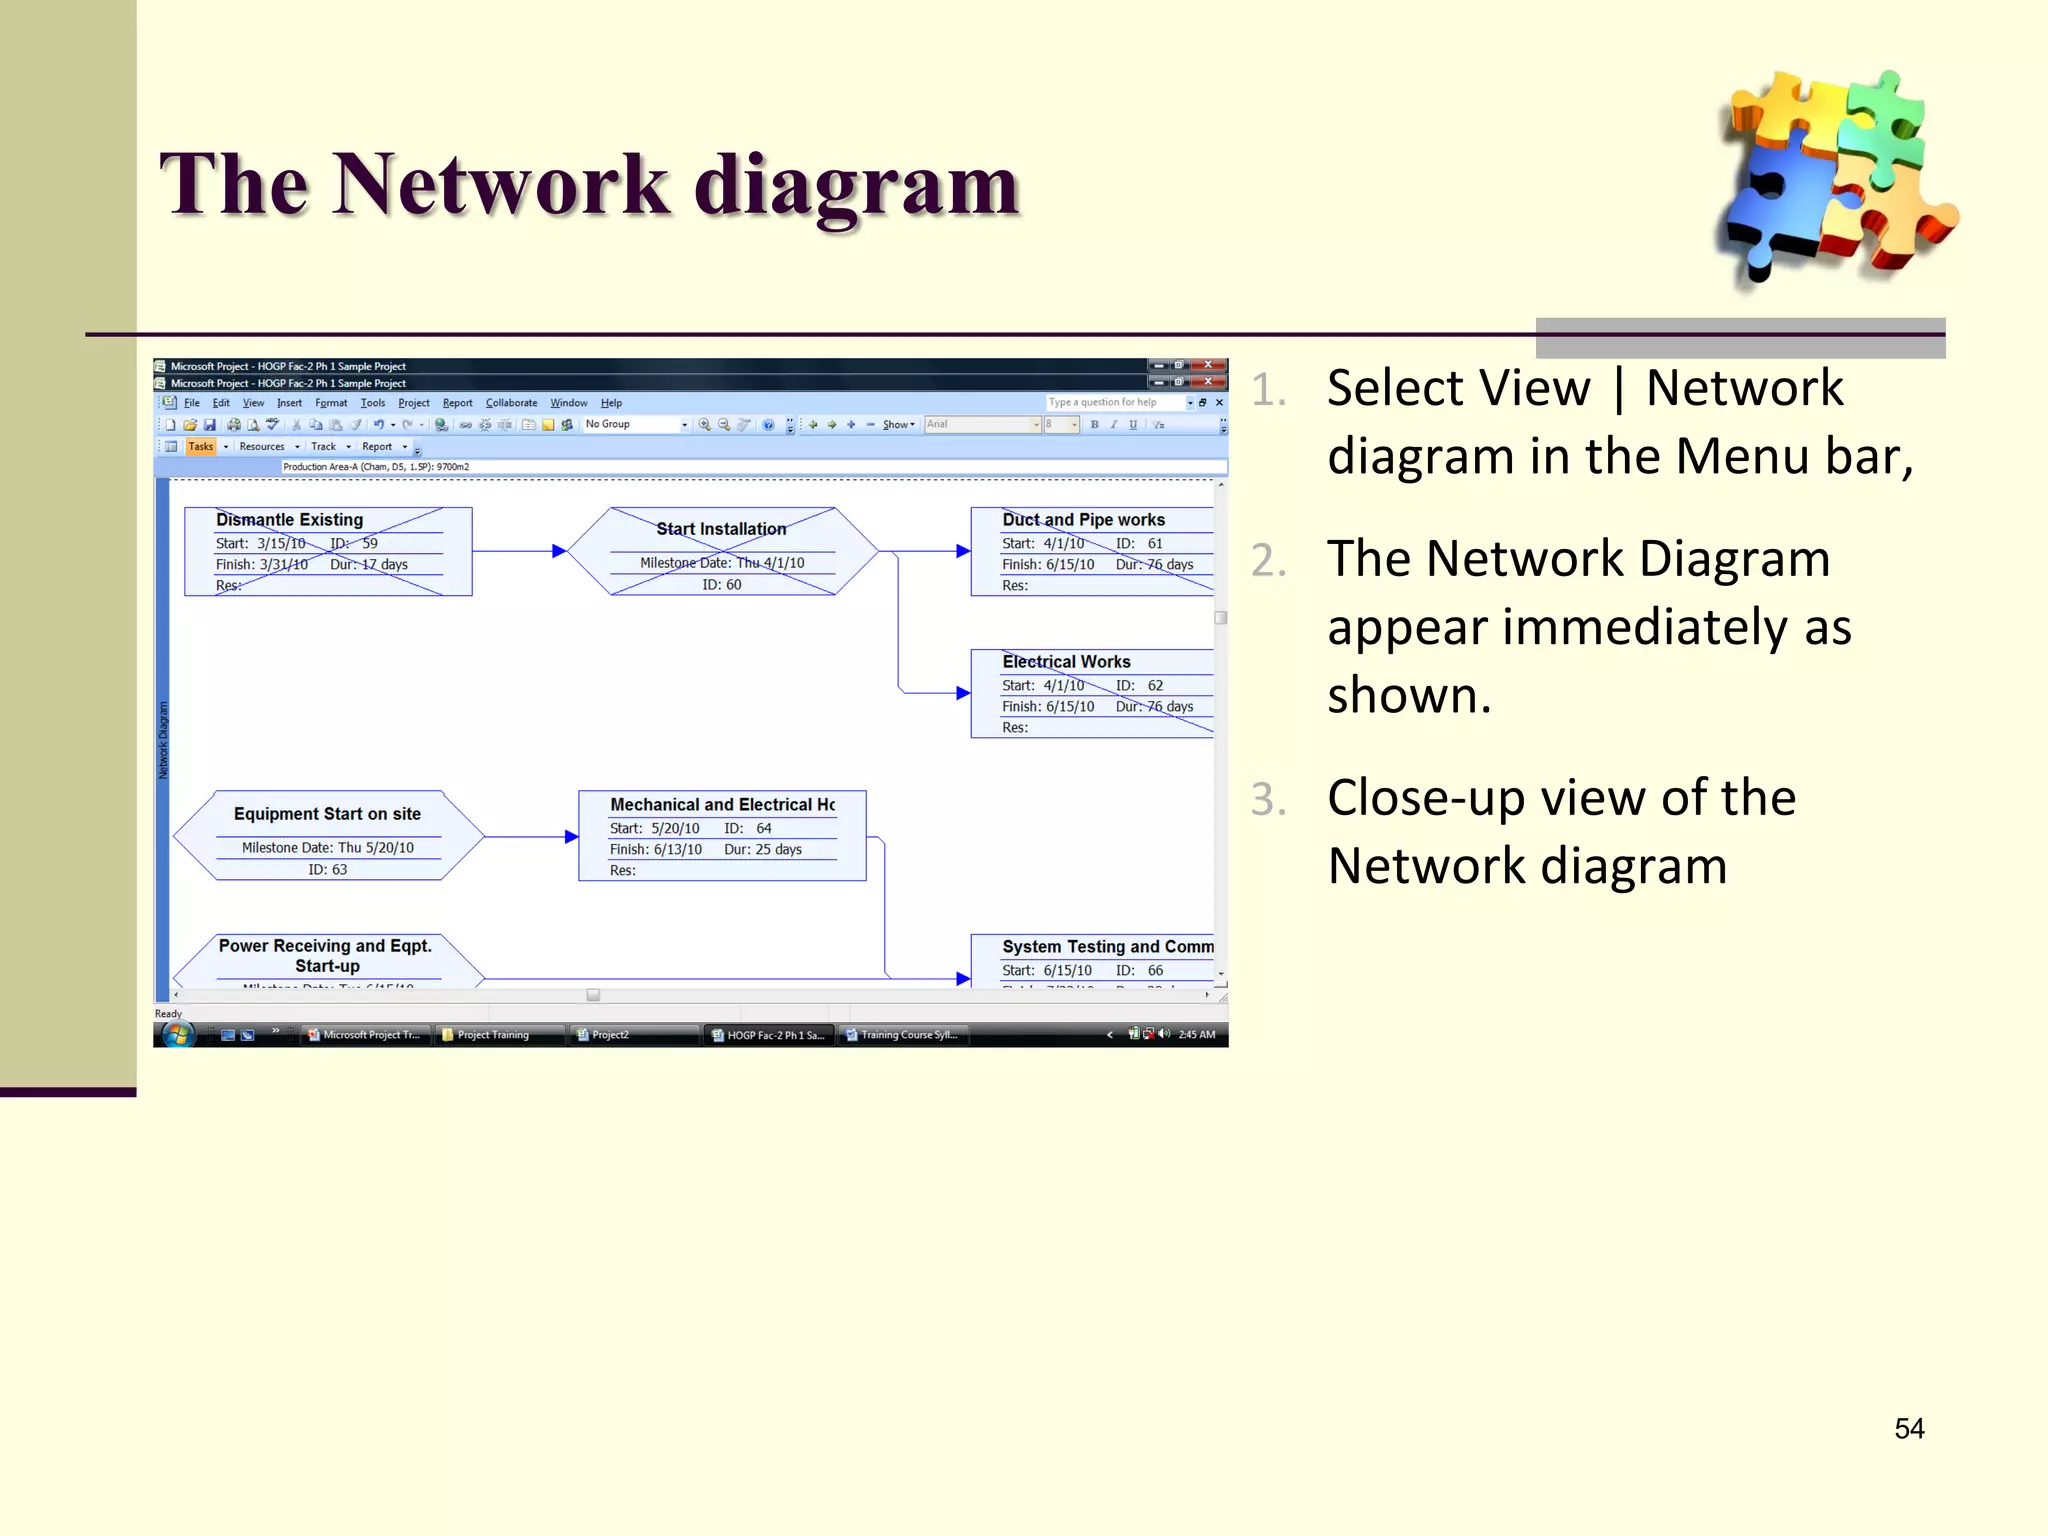
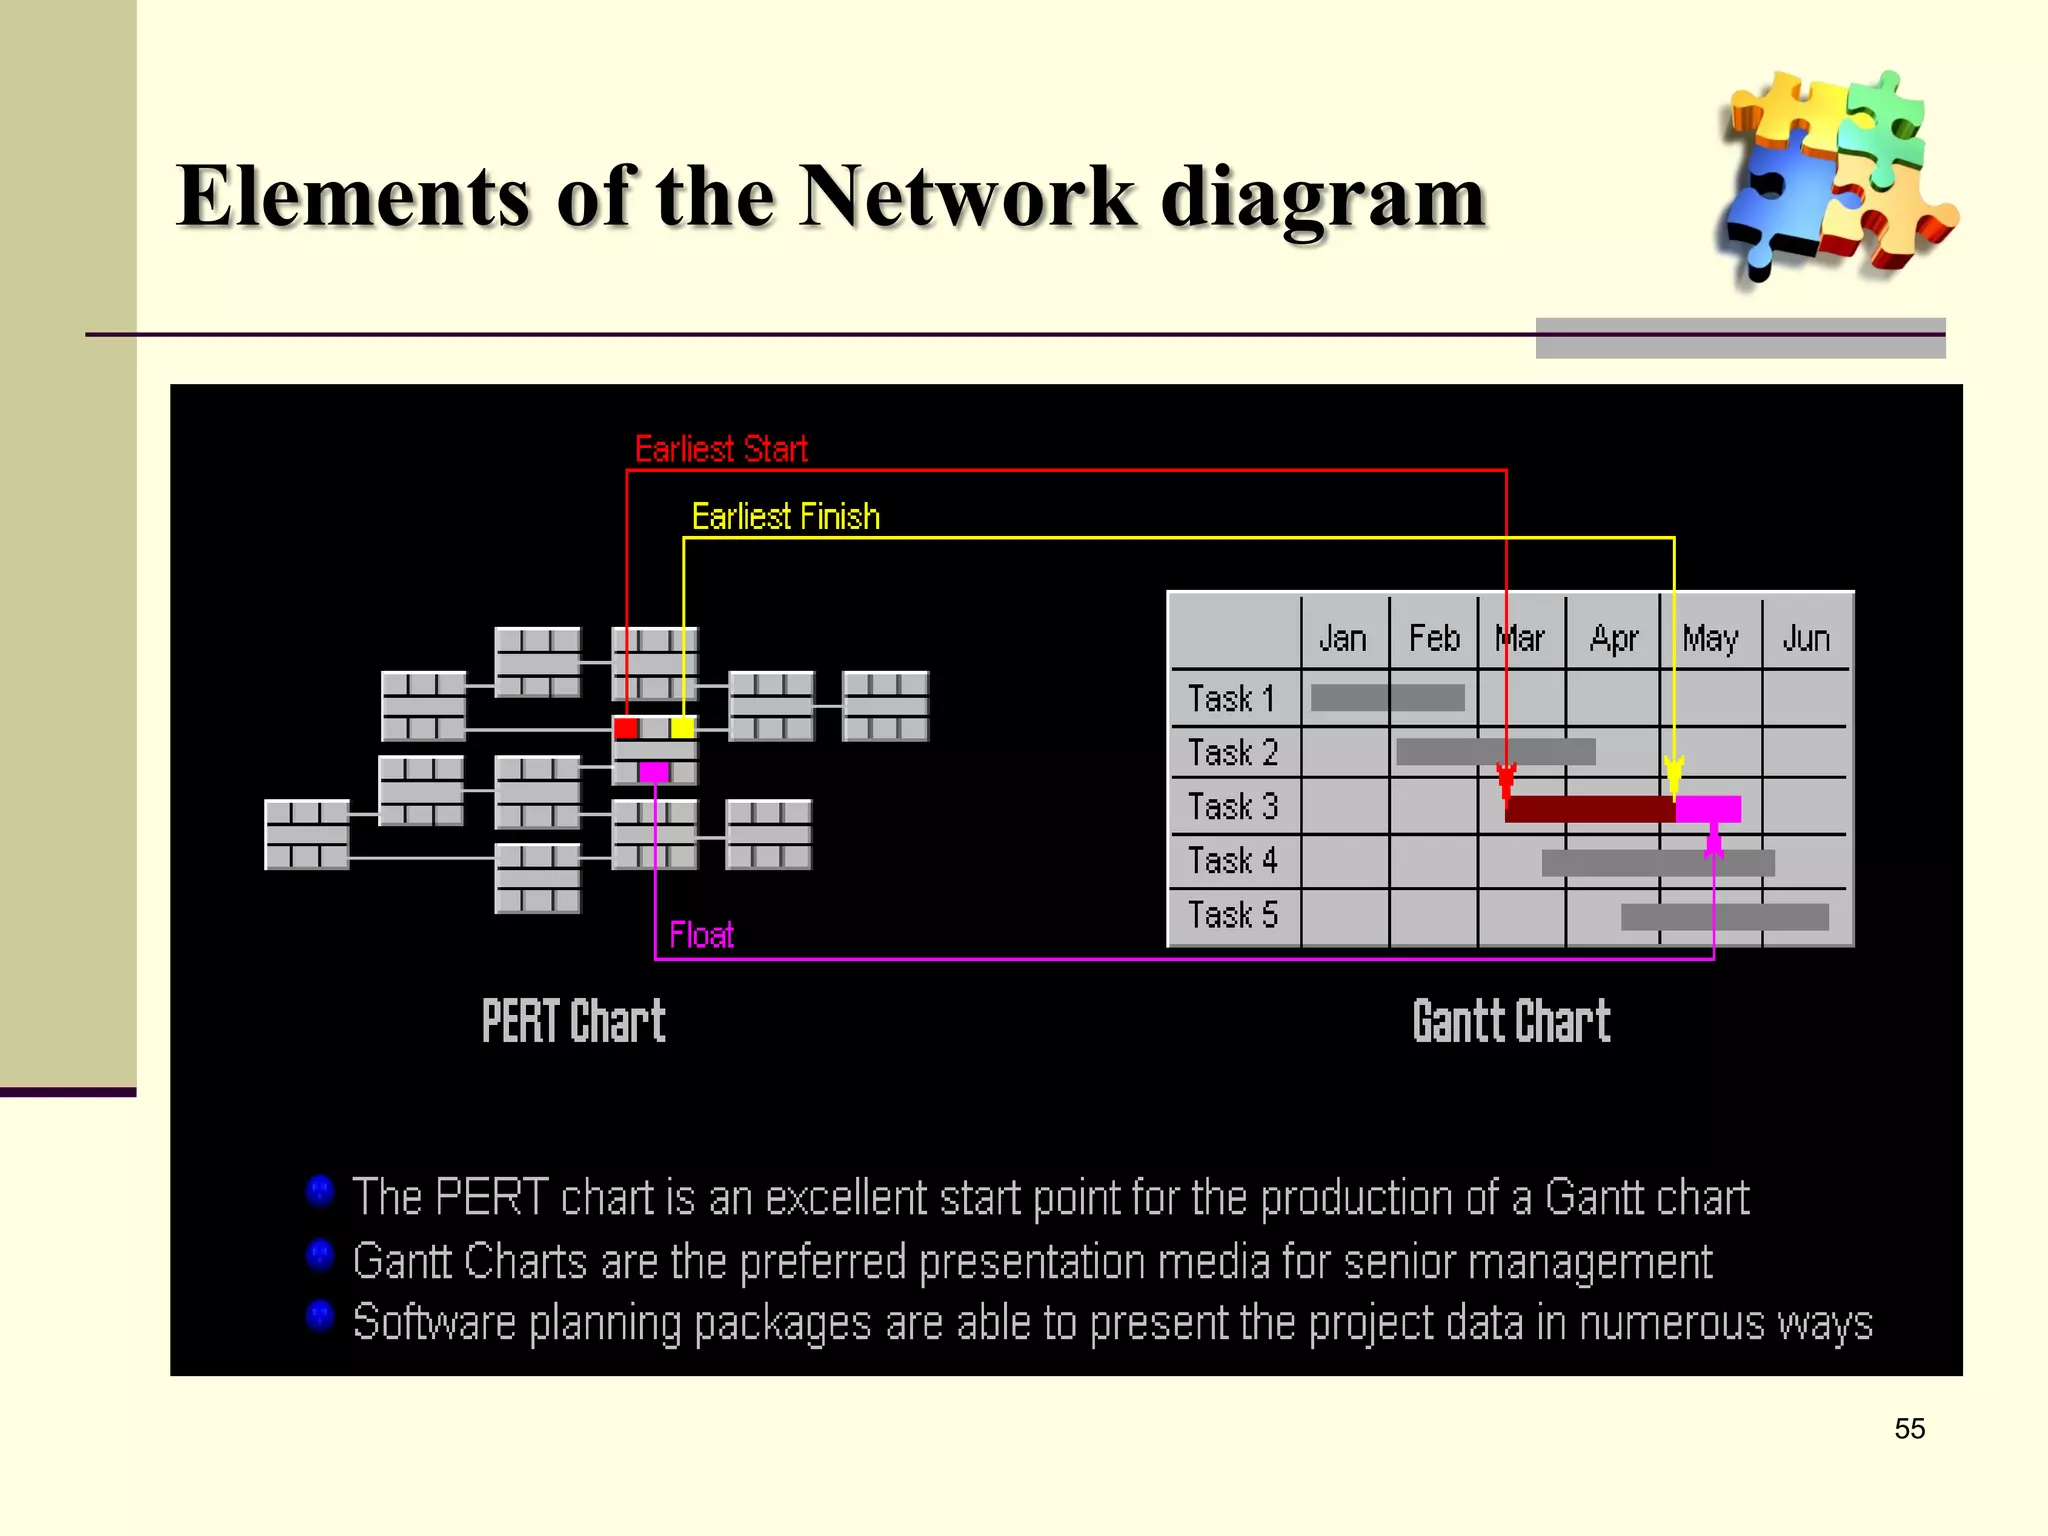
Detailed exploration of PERT and CPM techniques for project activity visualization and scheduling.
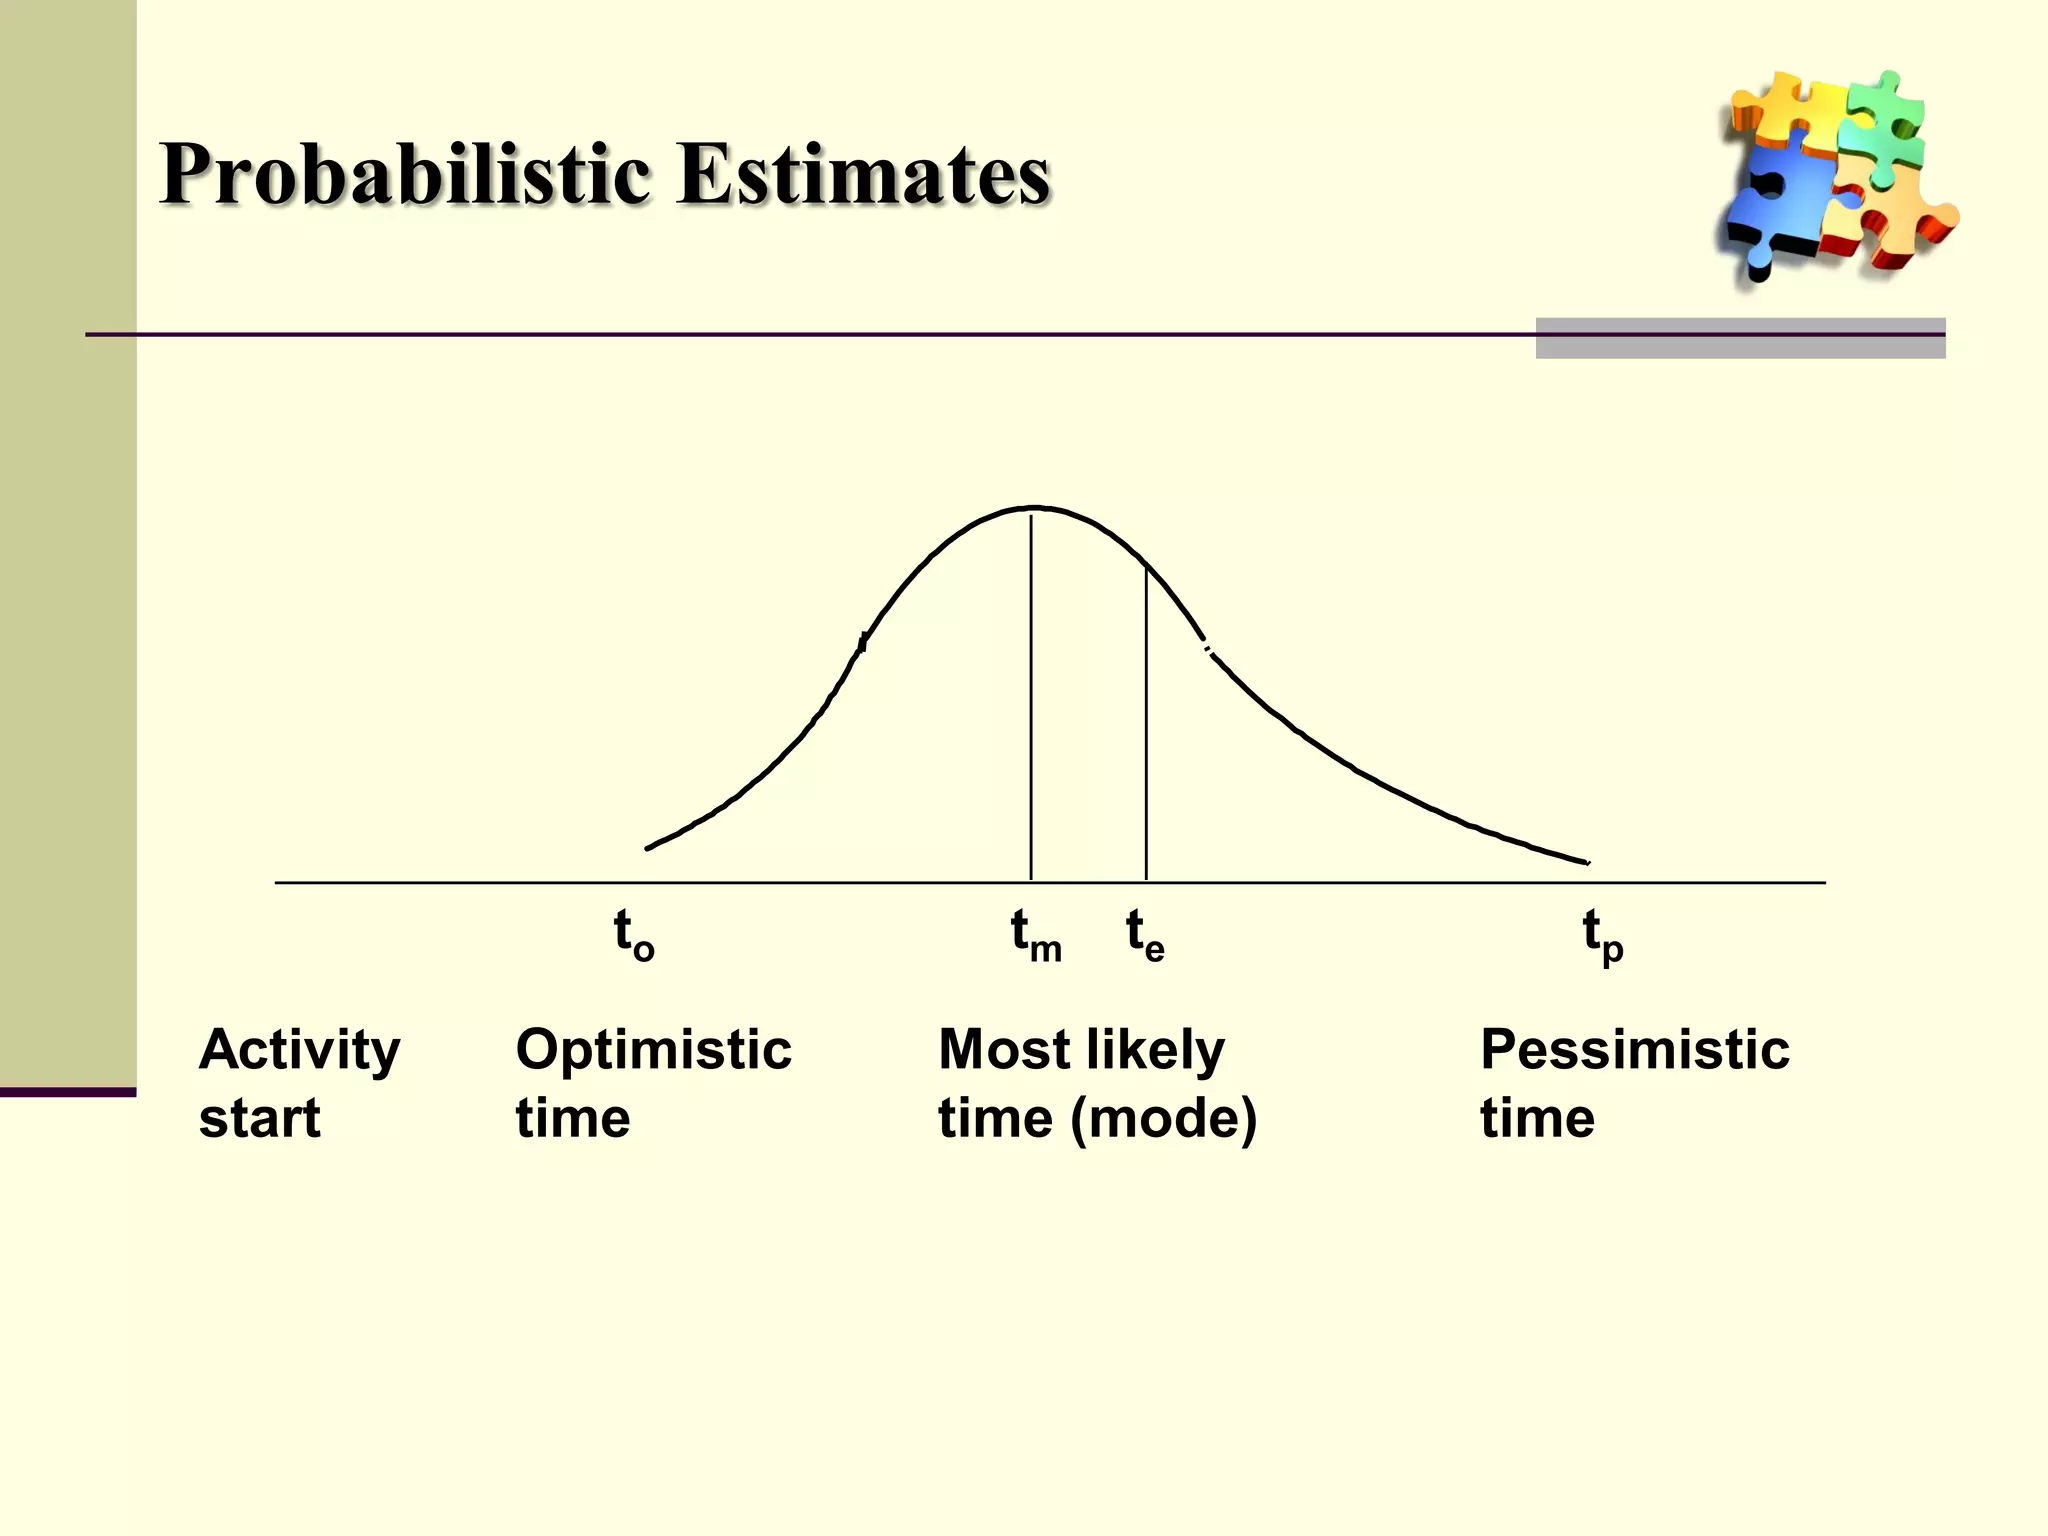
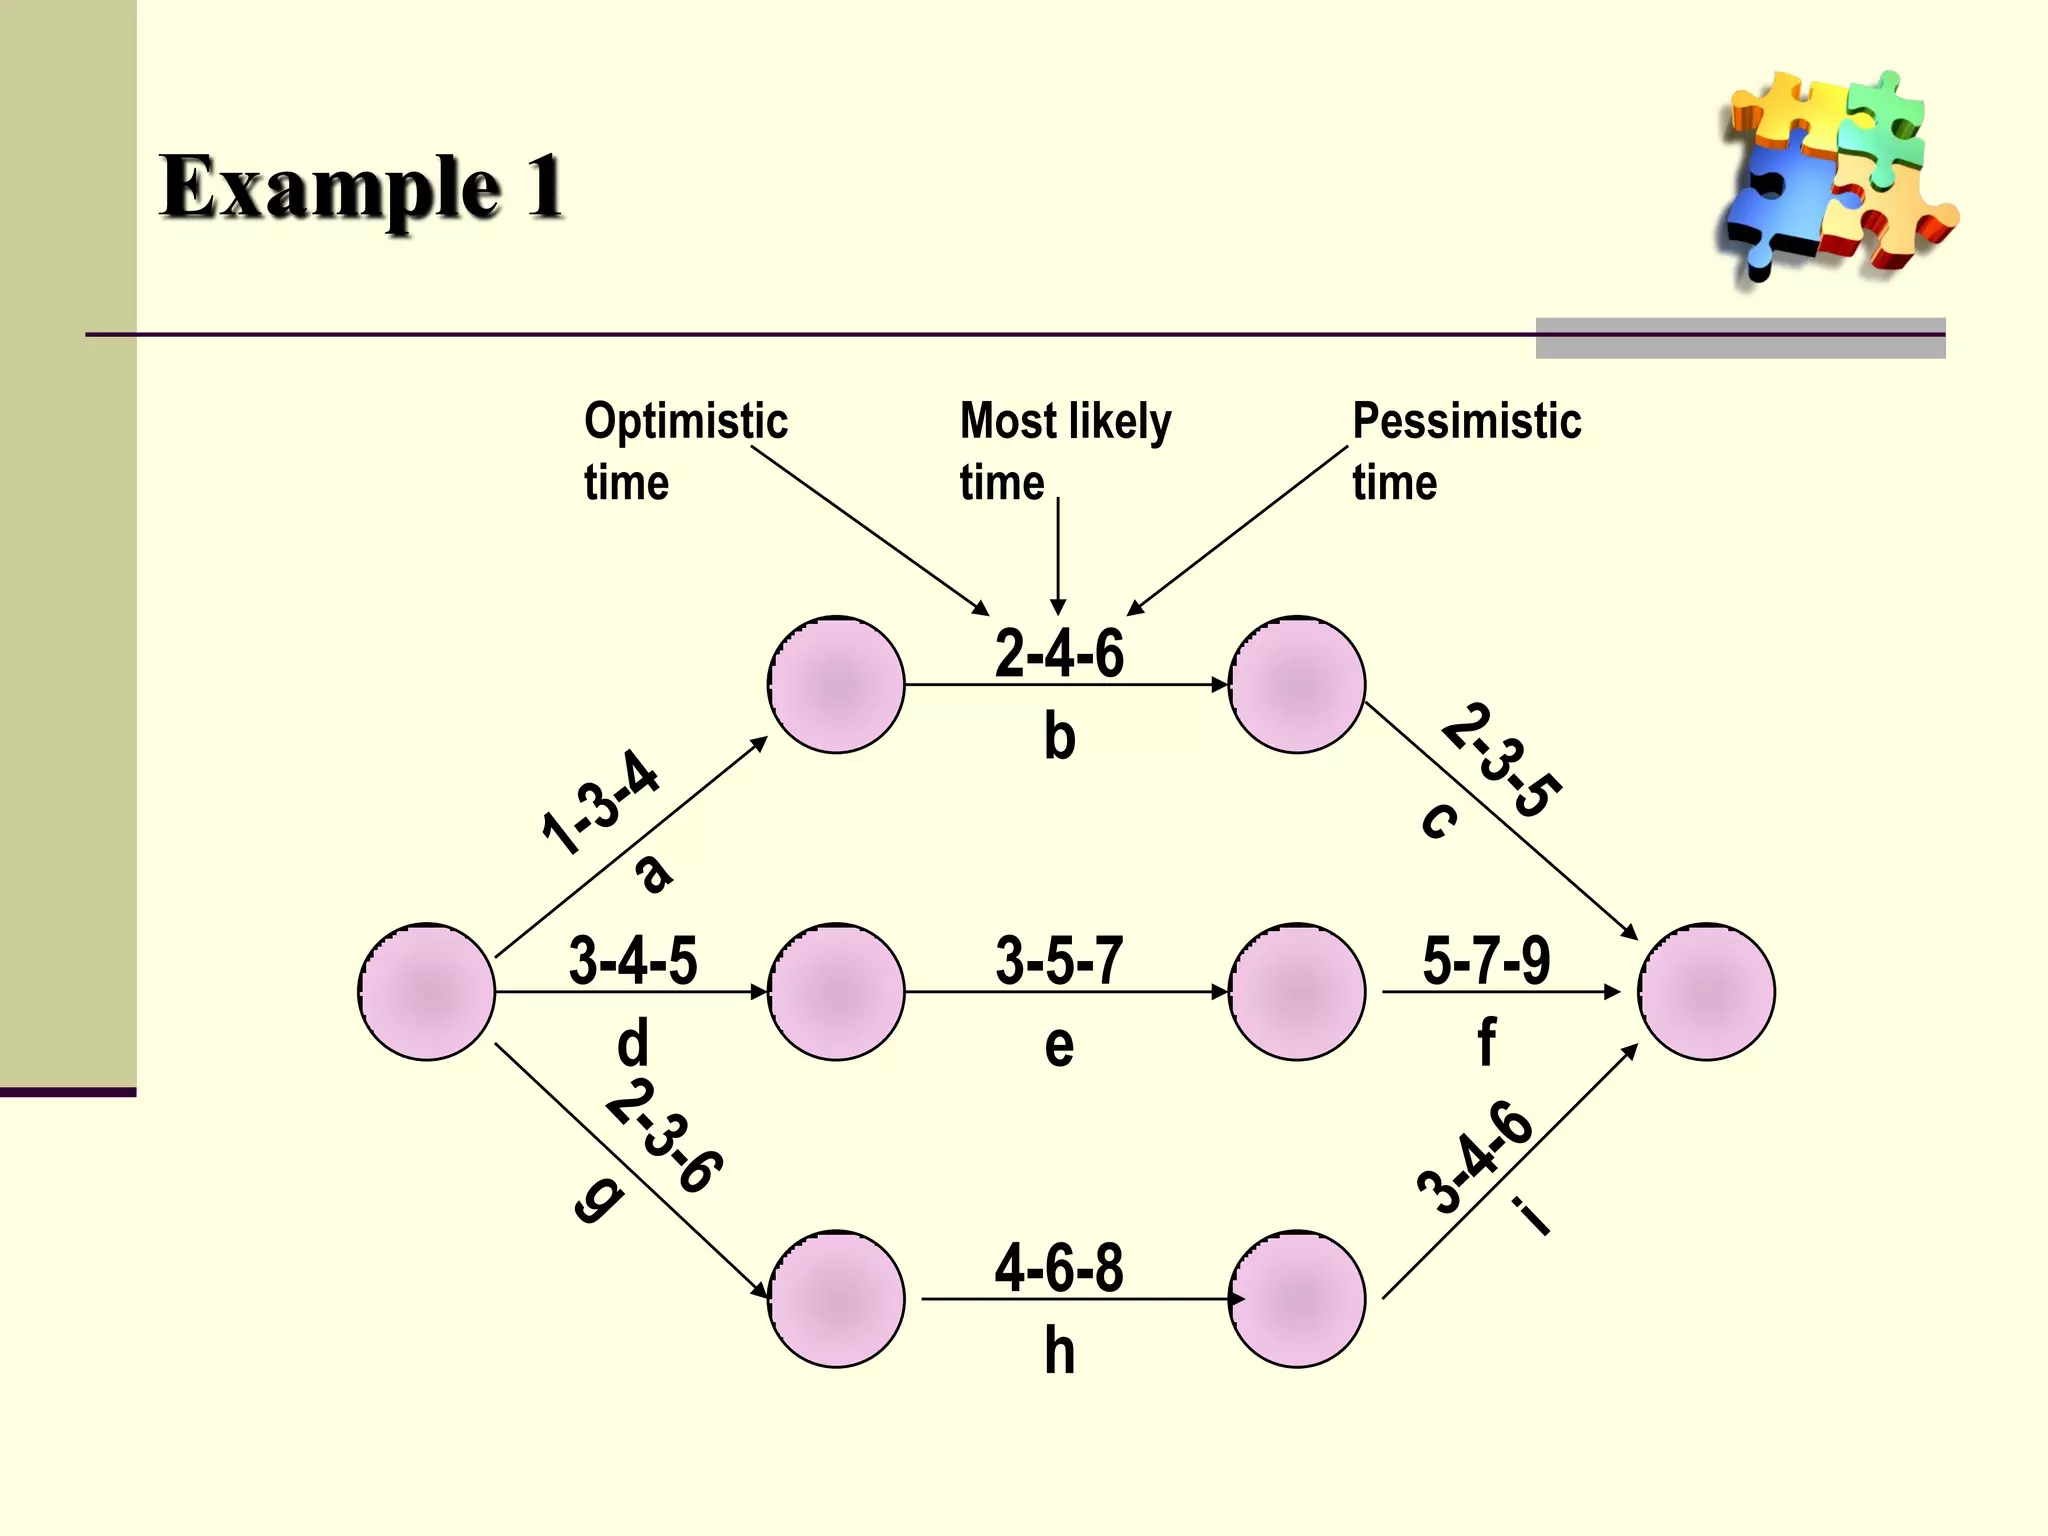
Deterministic and probabilistic time estimates including calculations for expected project duration.
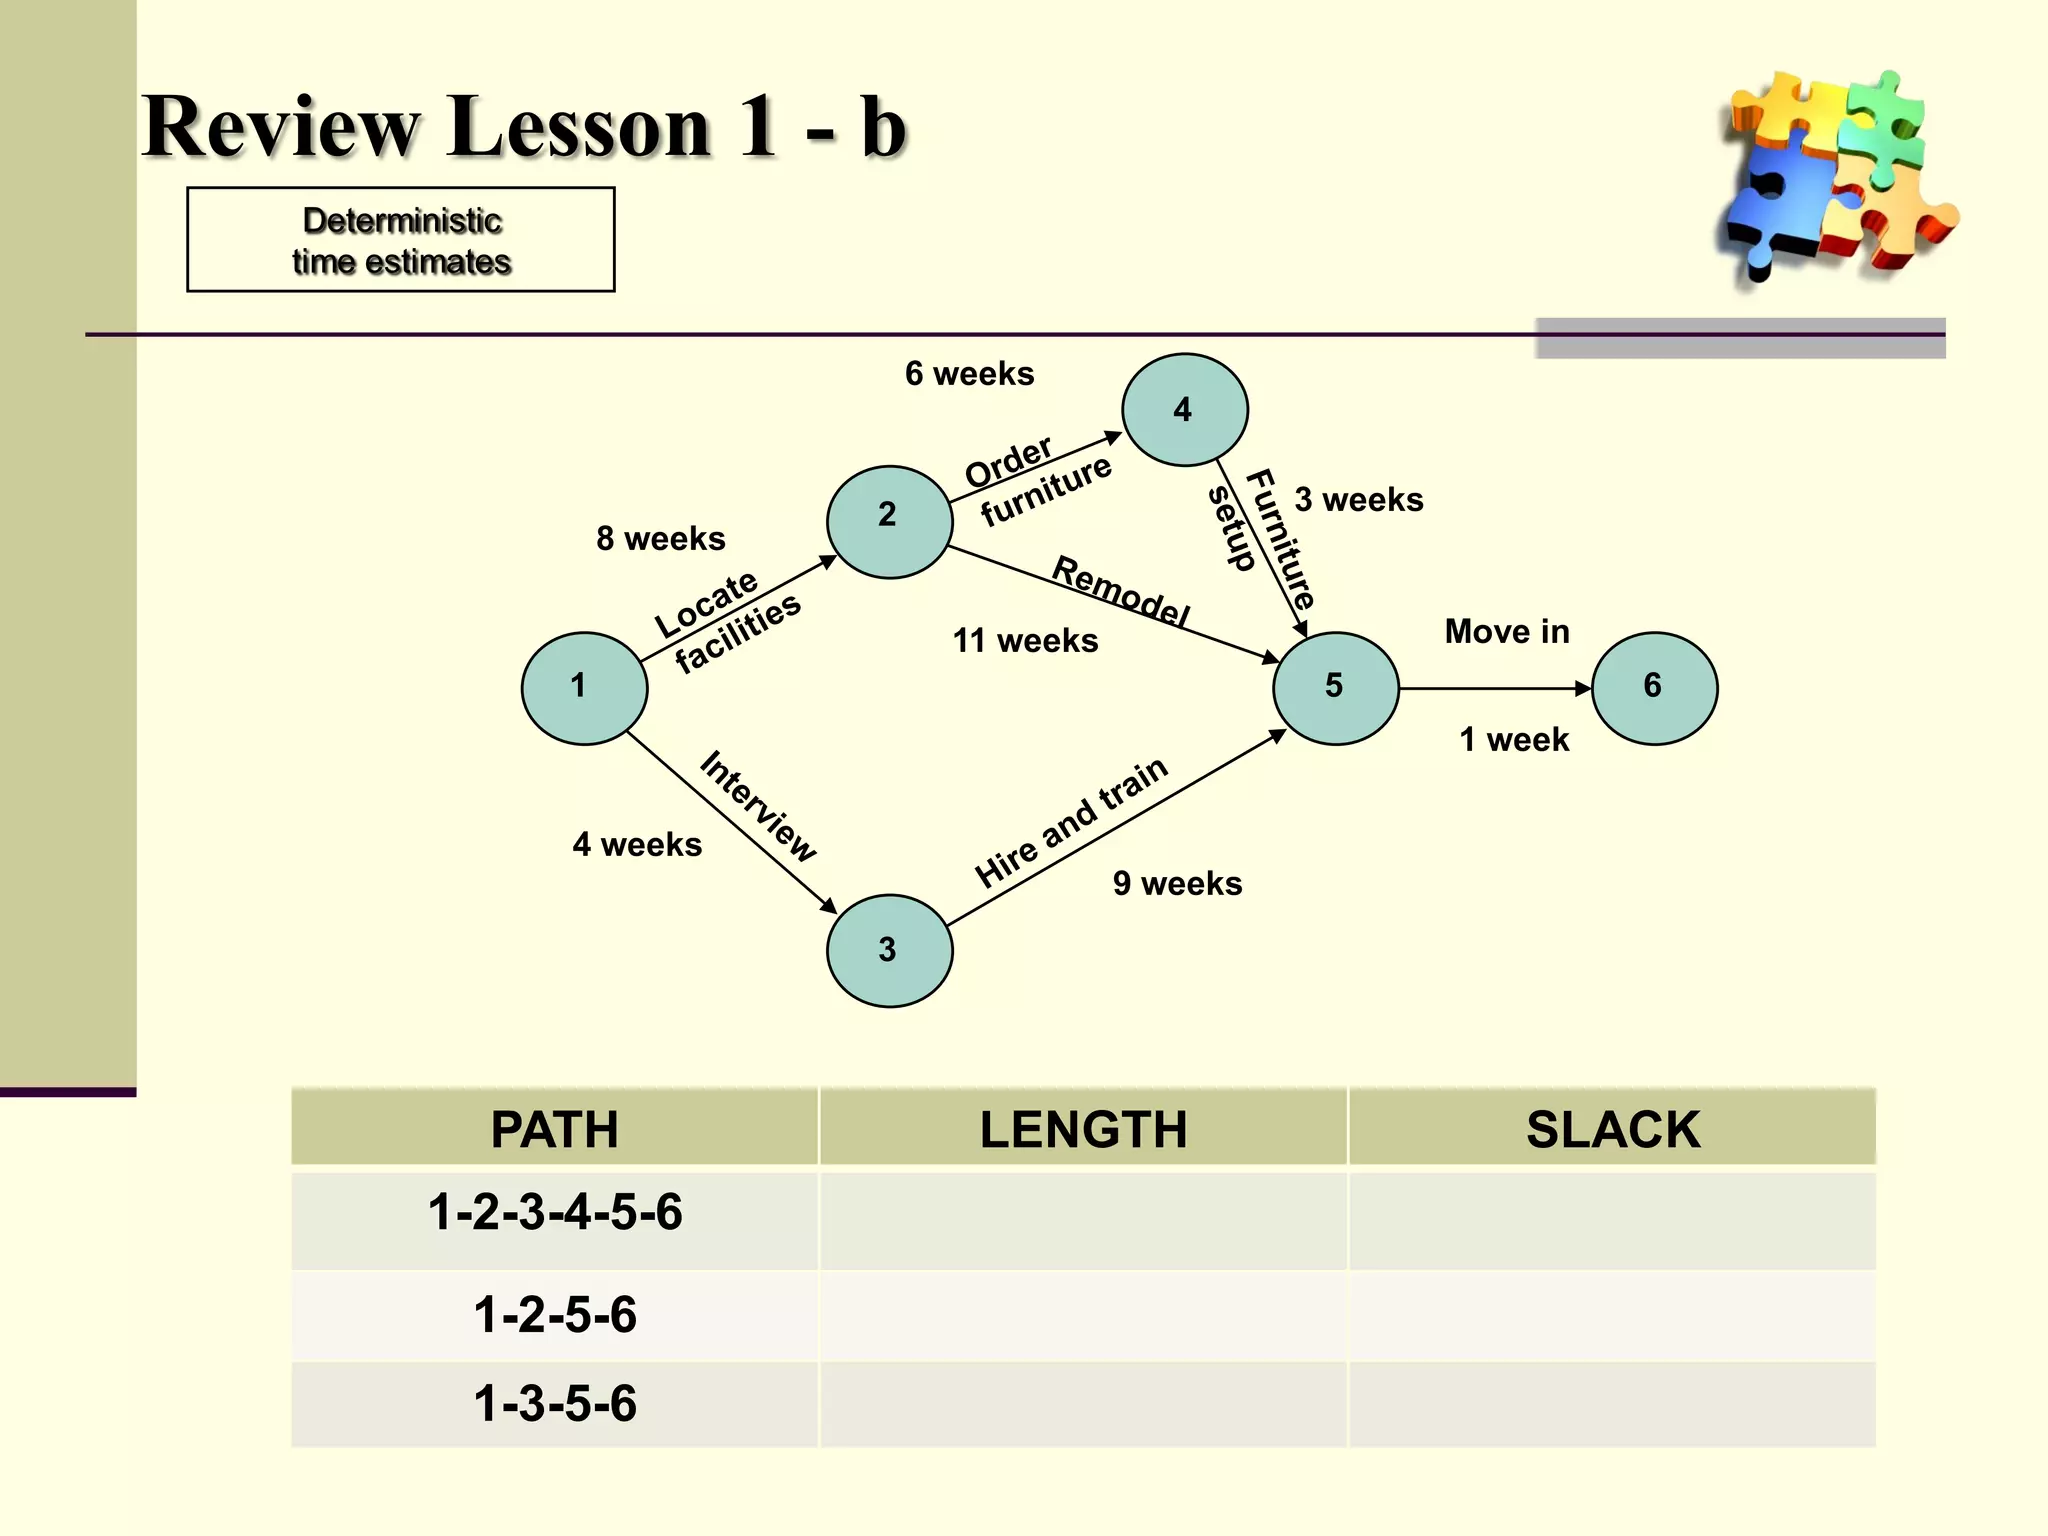
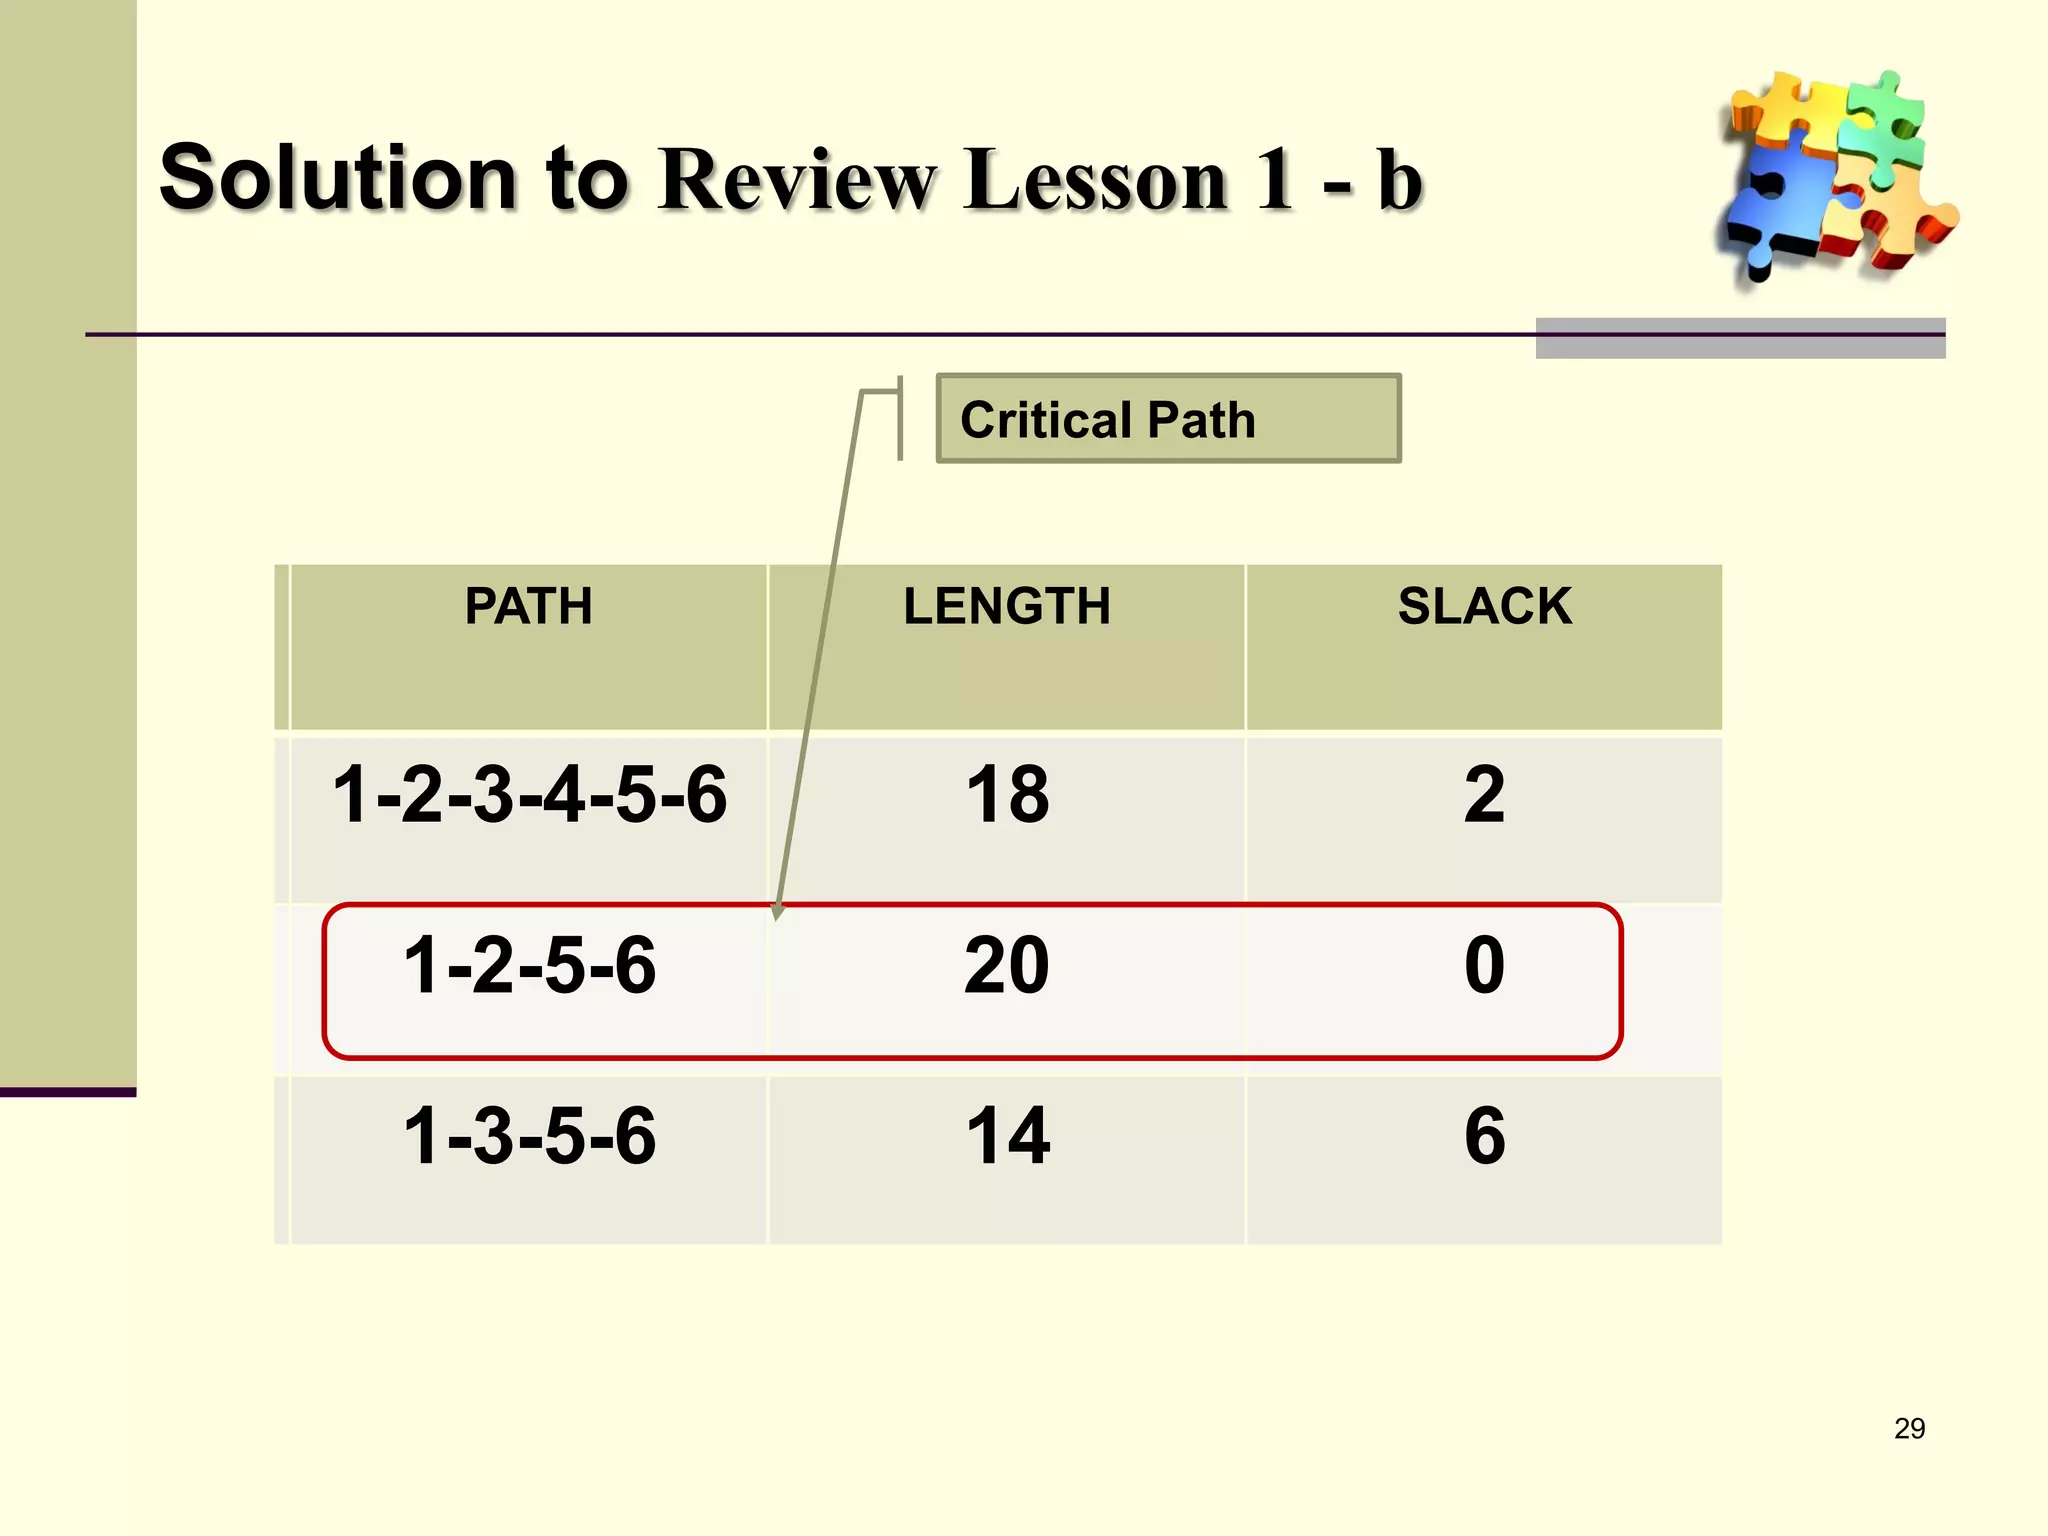
Exercises on creating PERT charts with solutions to reinforce learning of critical path and task dependencies.
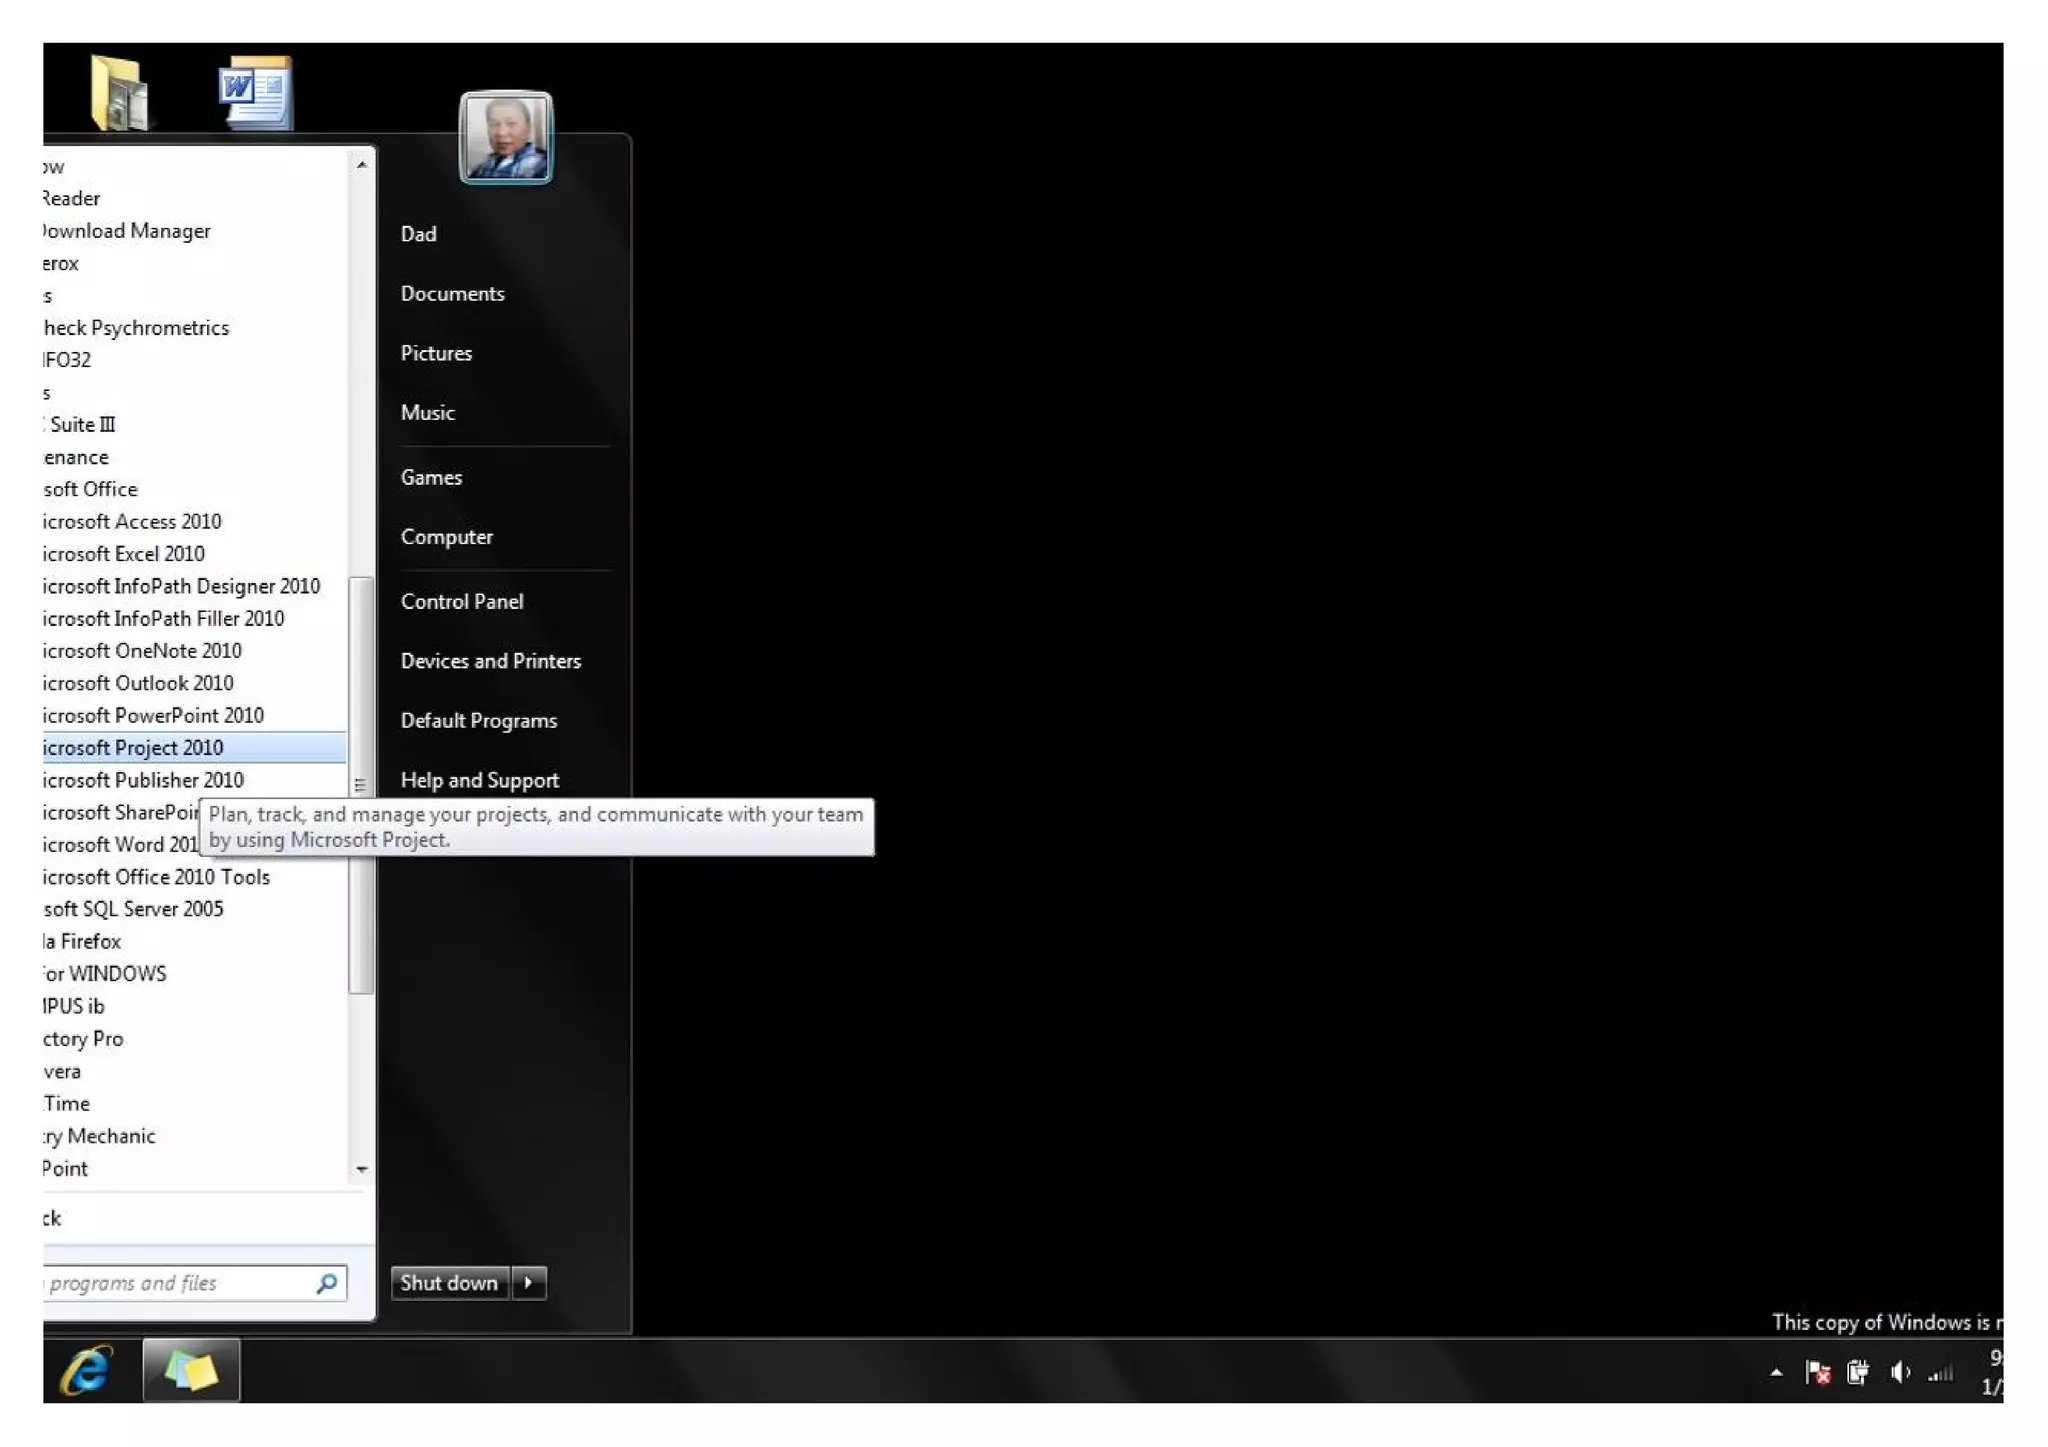
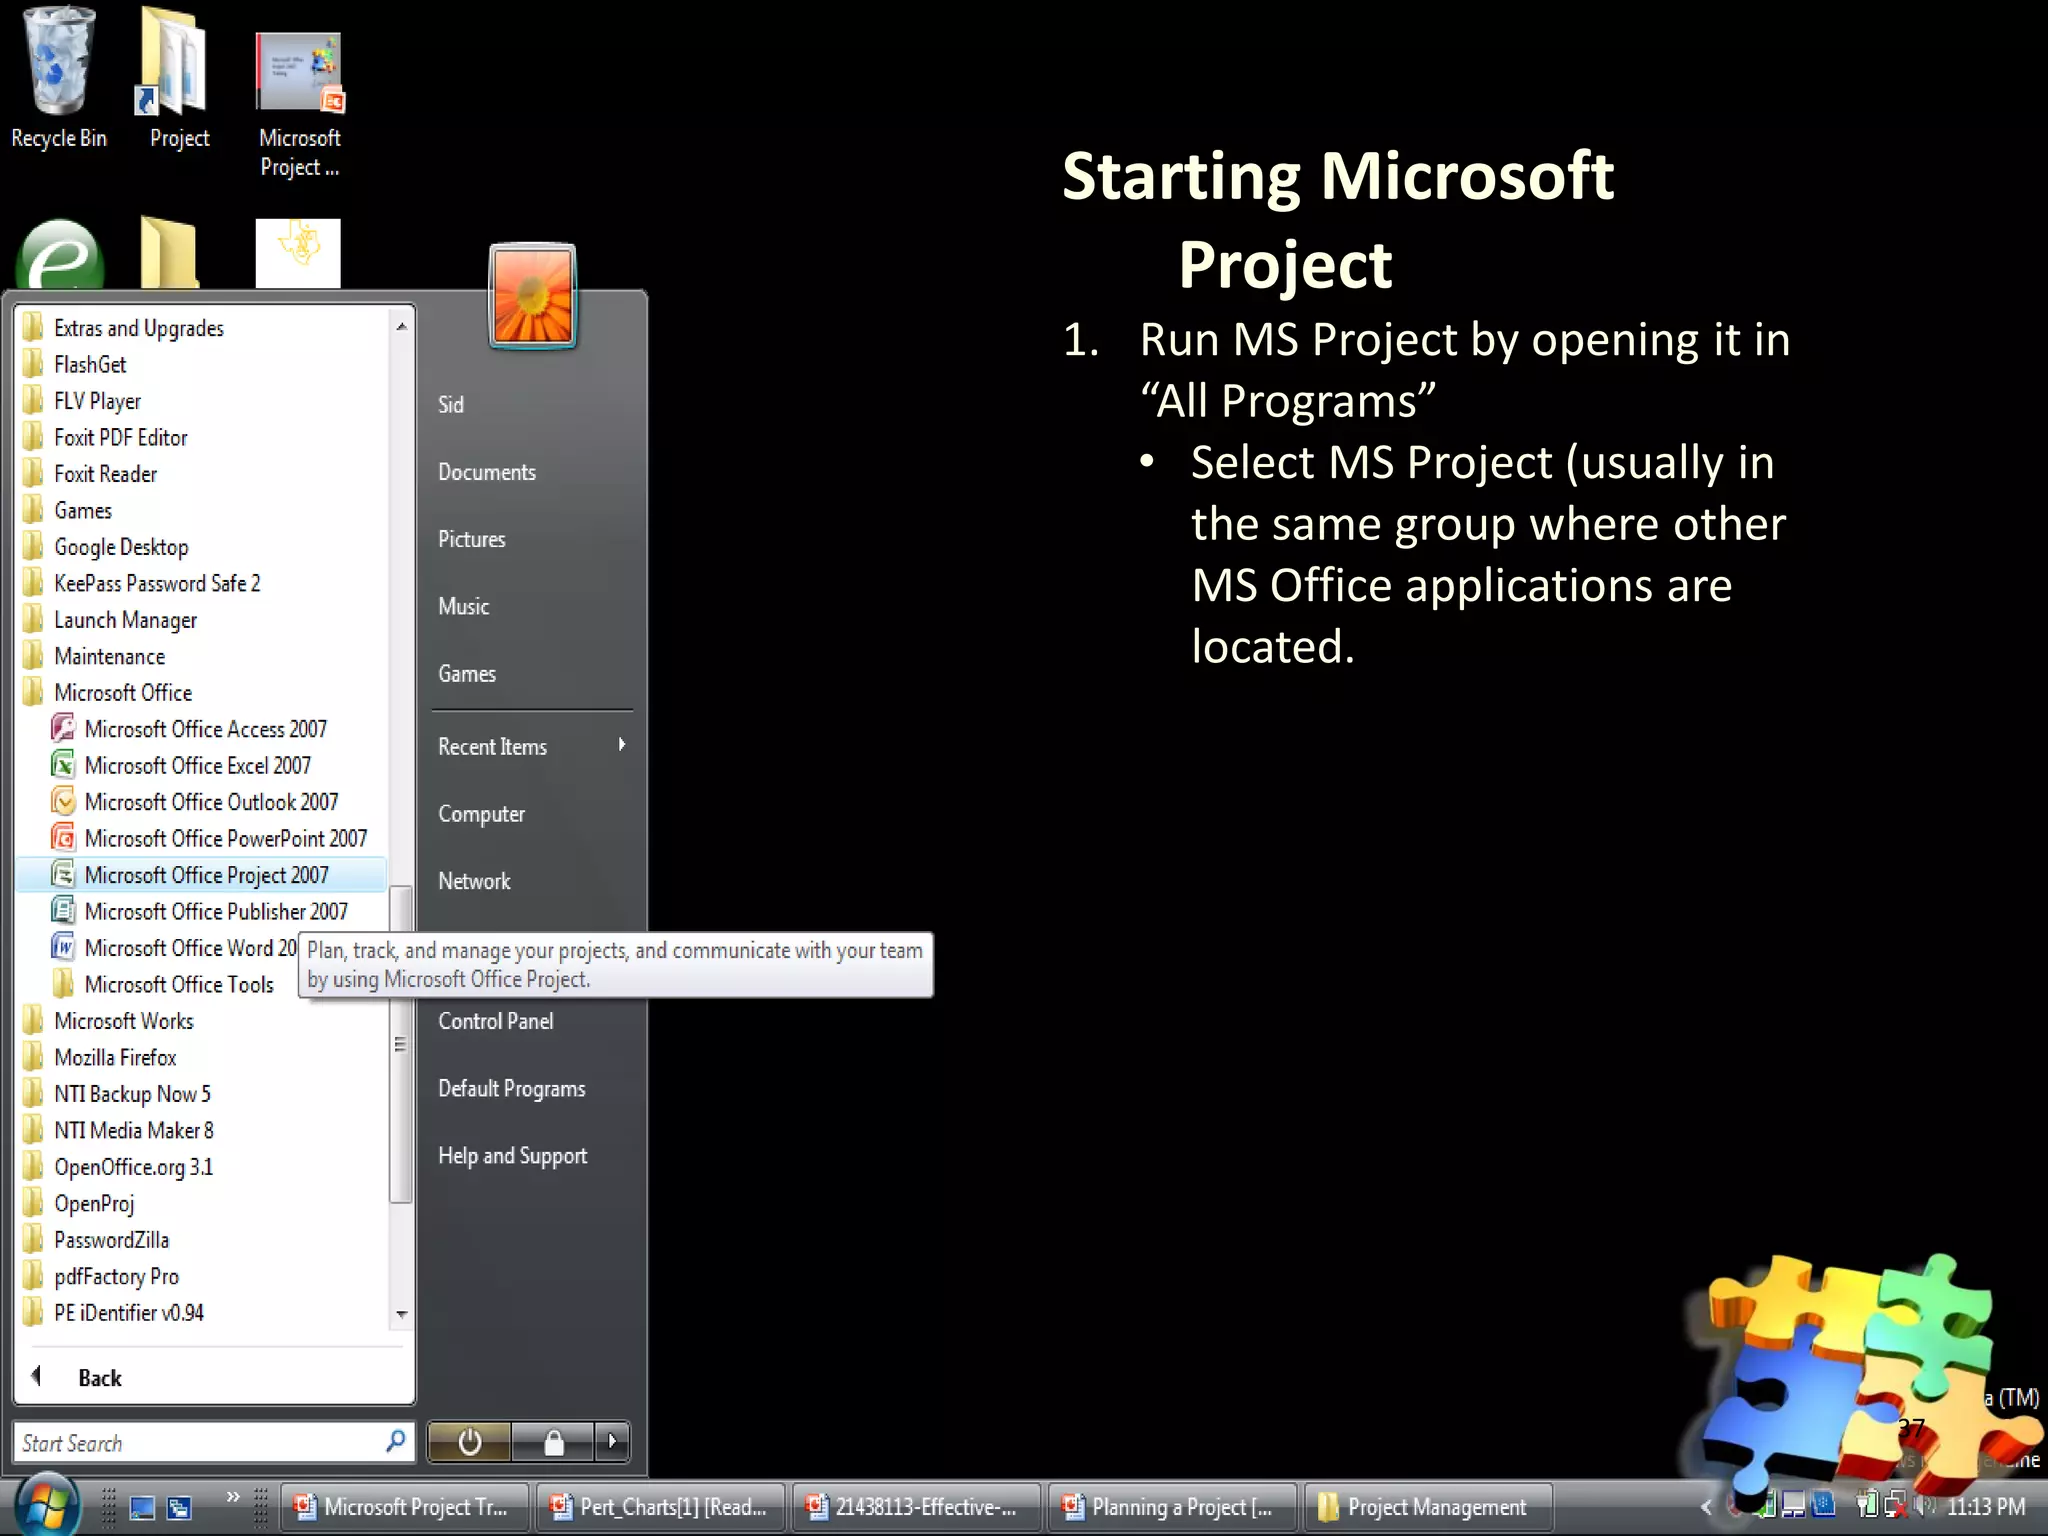
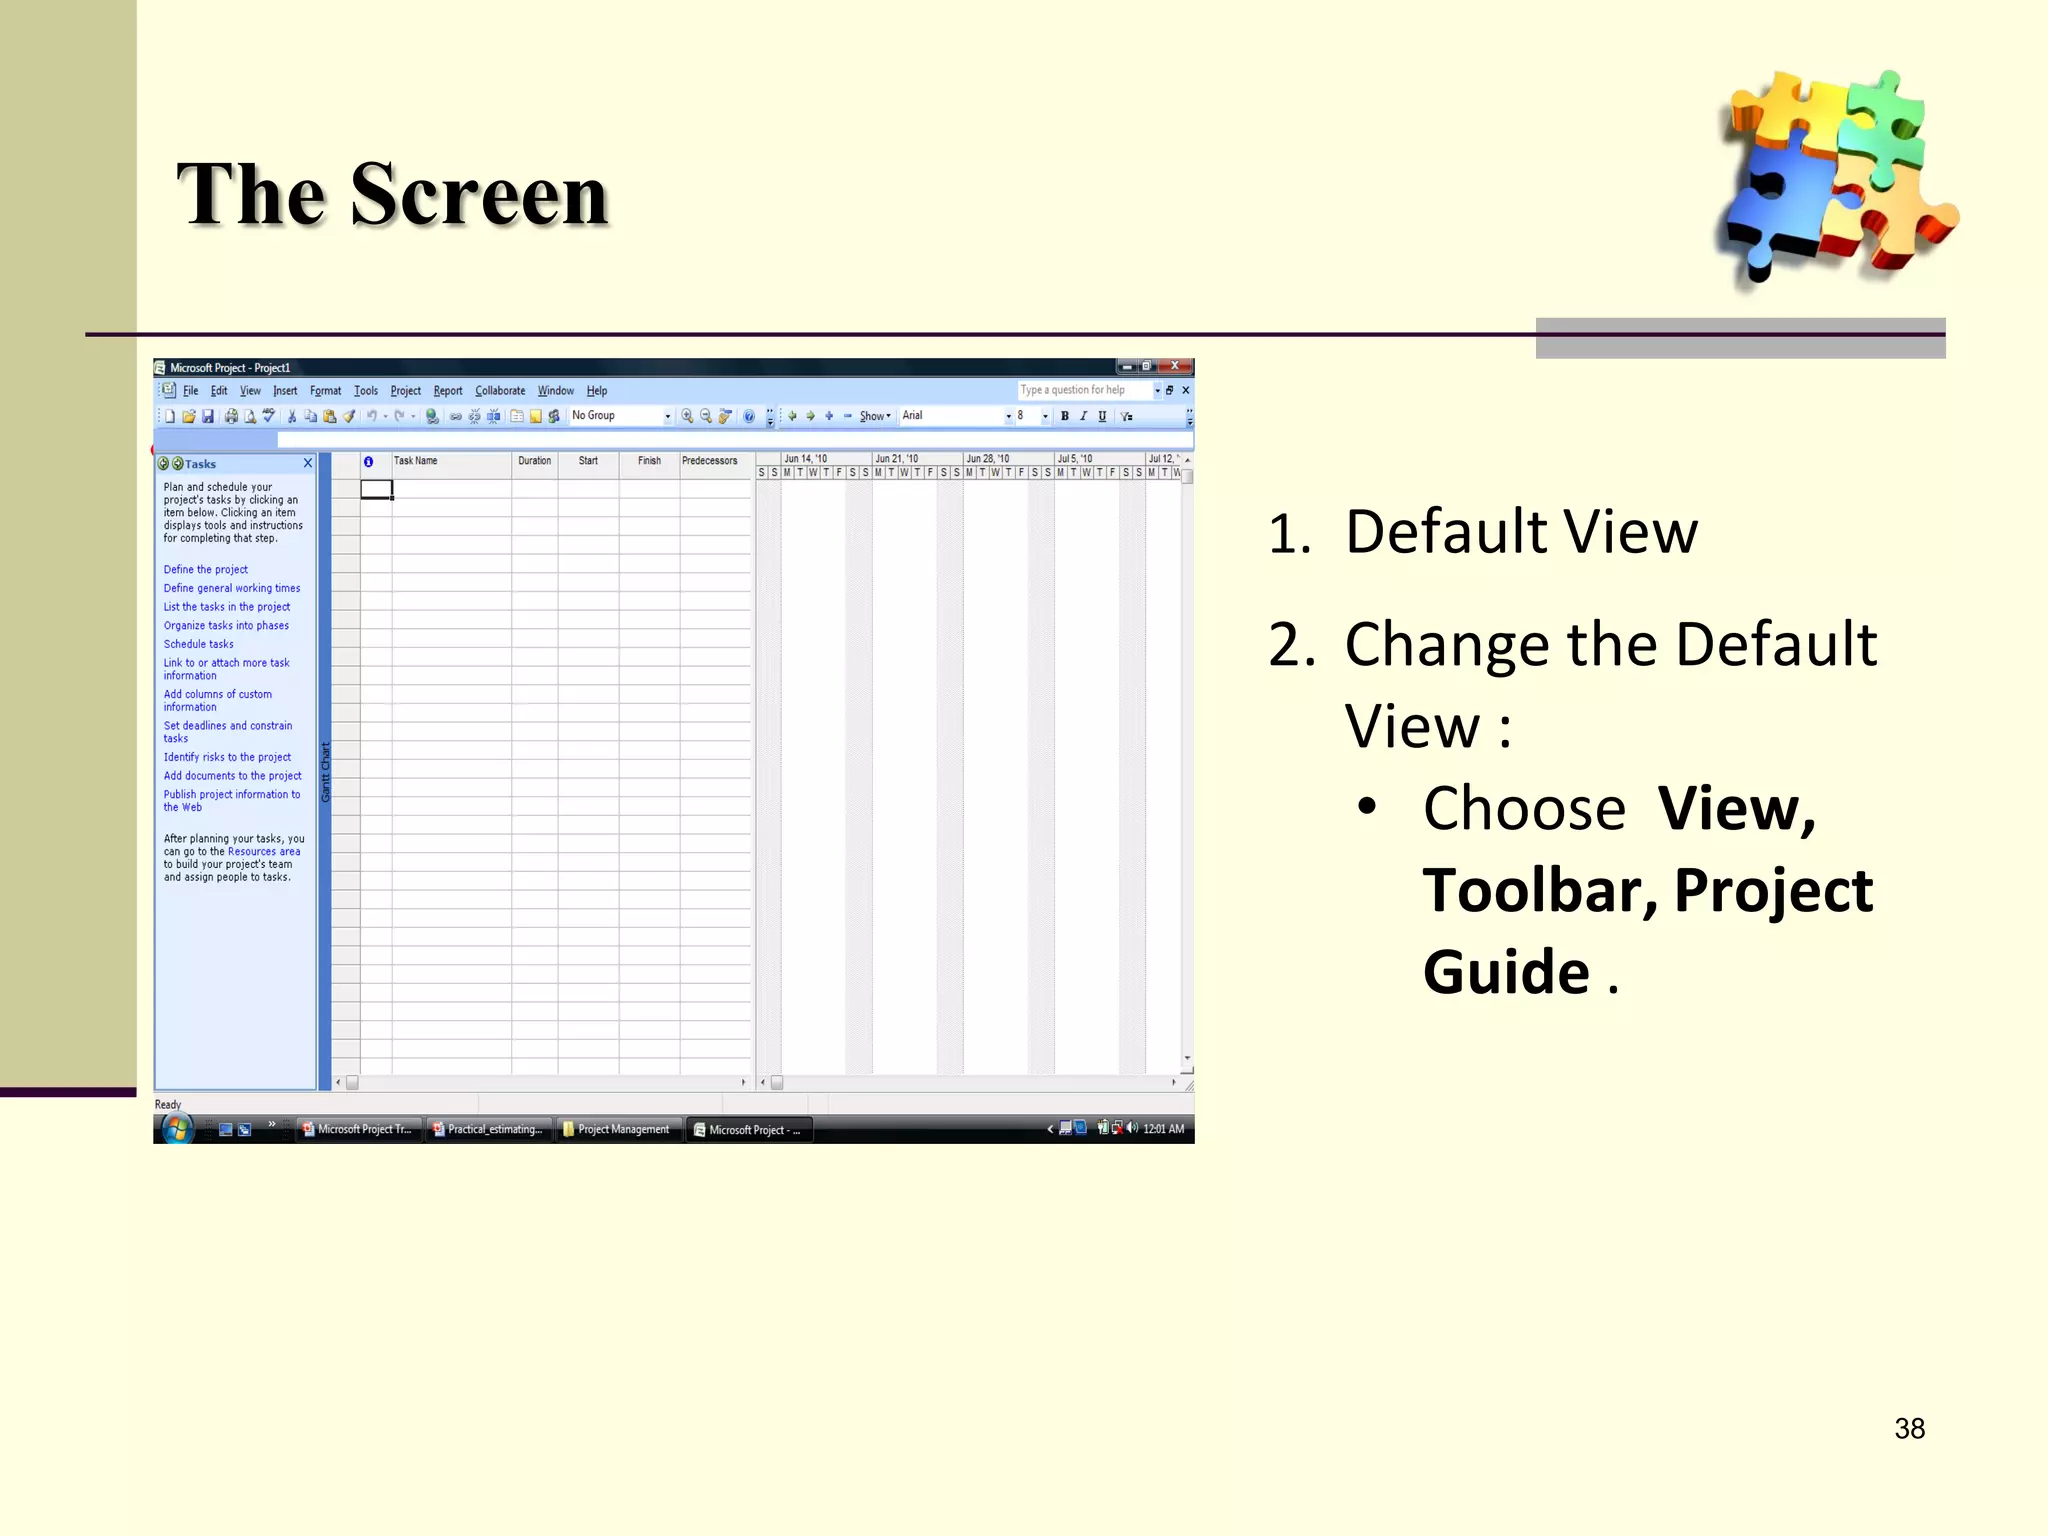
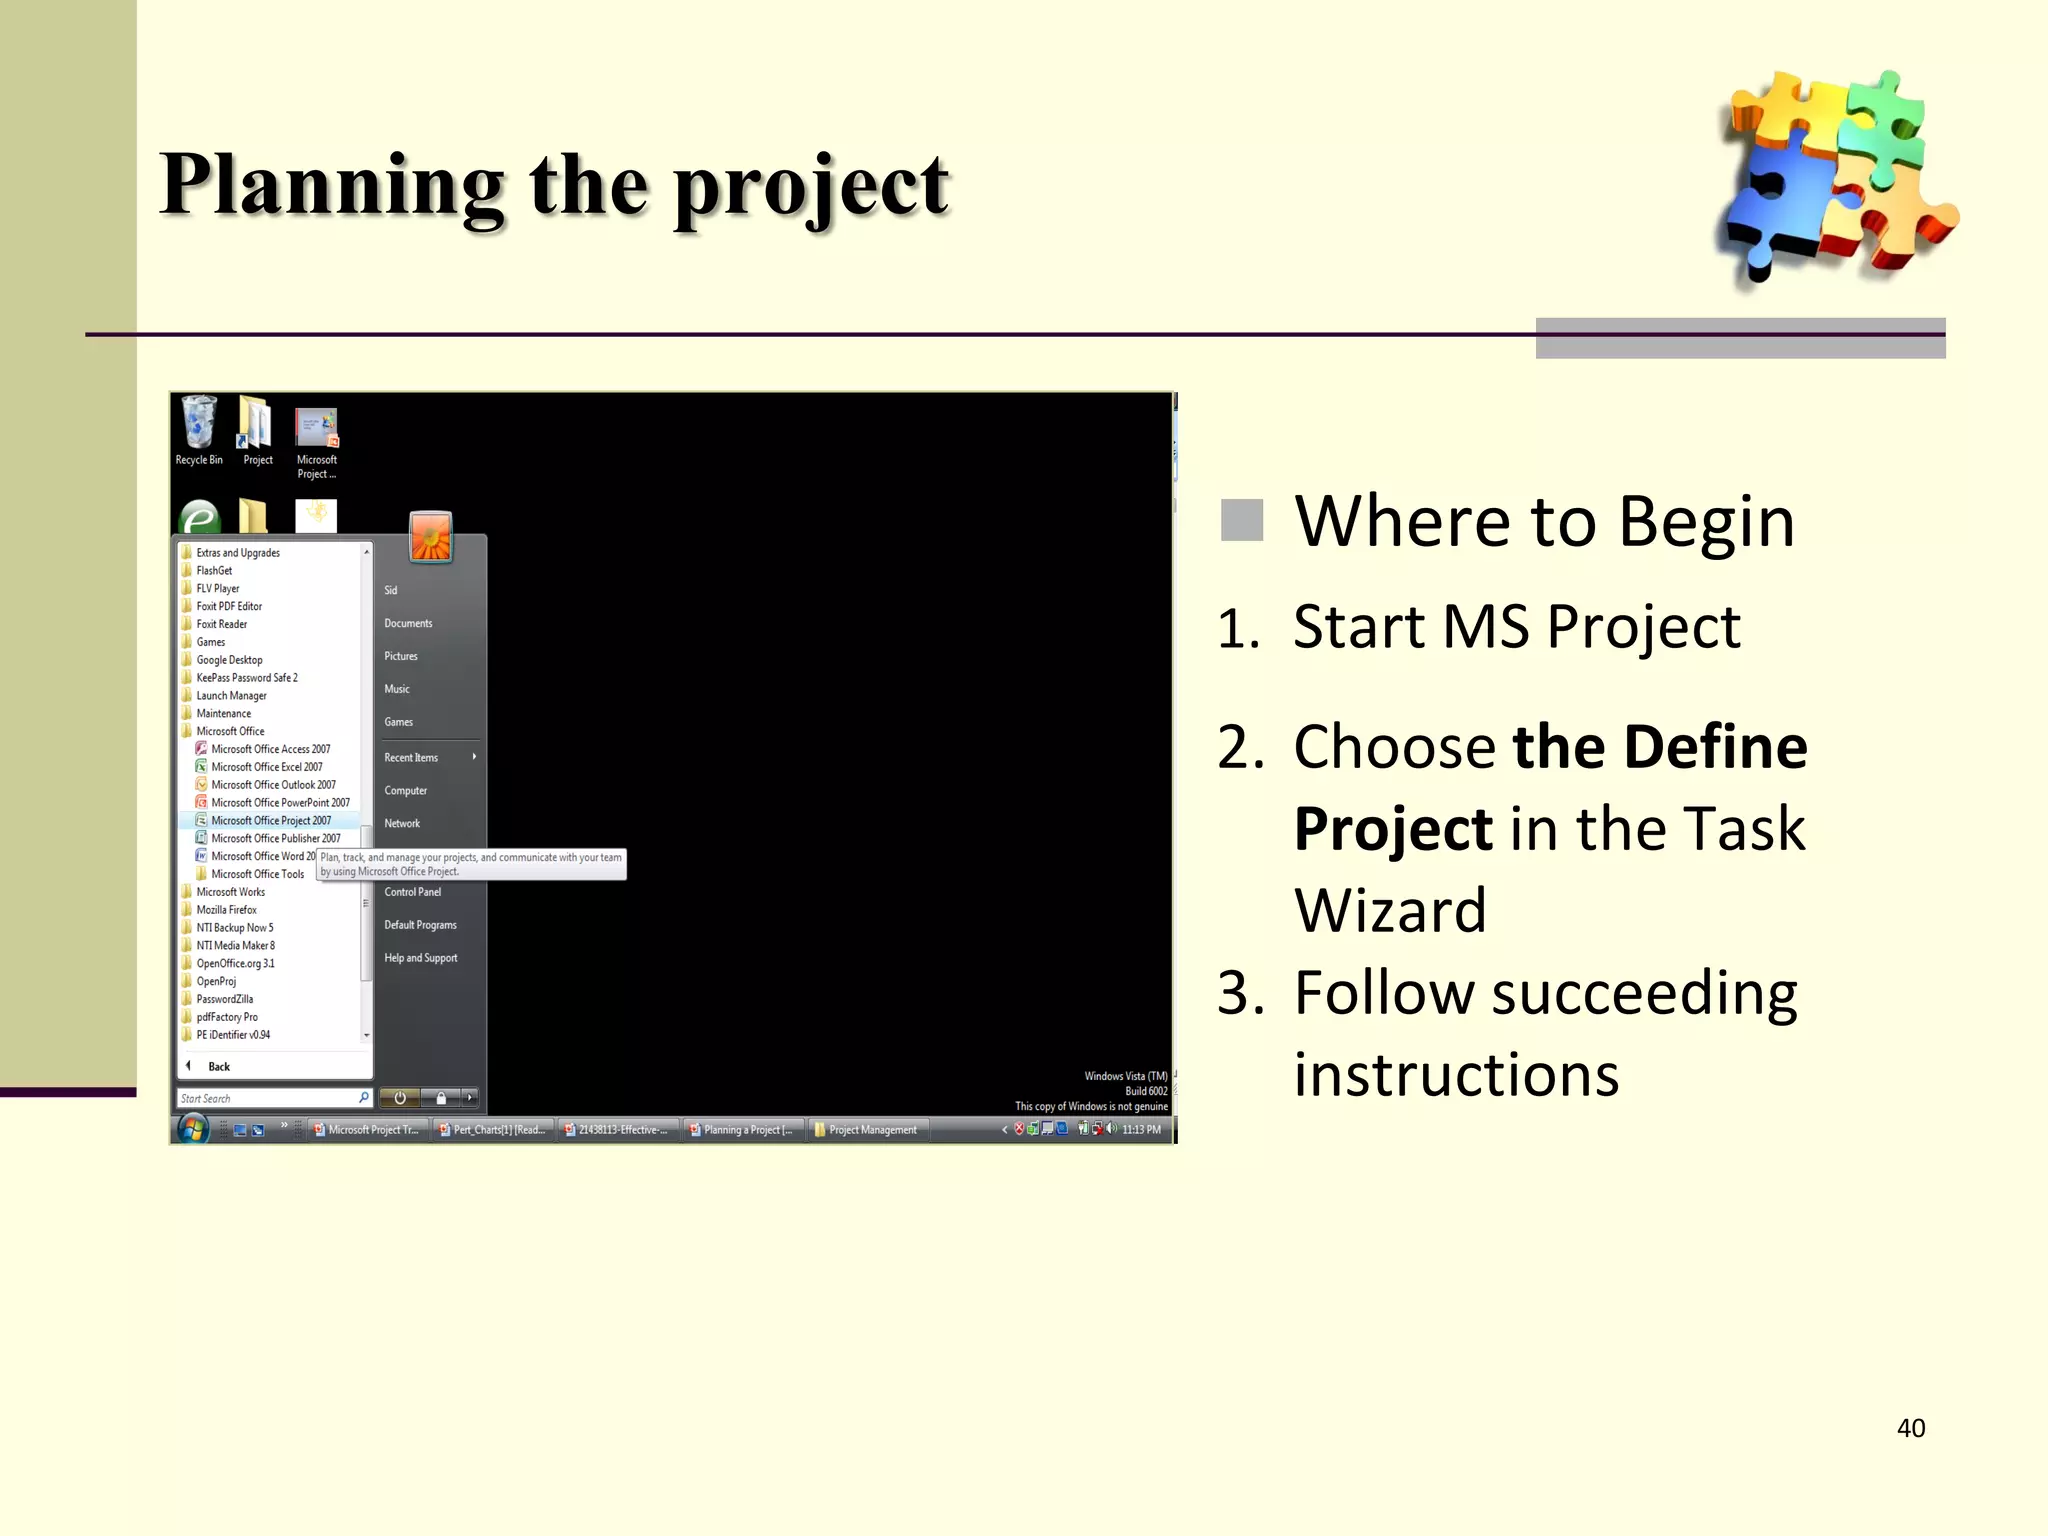
Overview of starting and navigating Microsoft Project software and its default features.
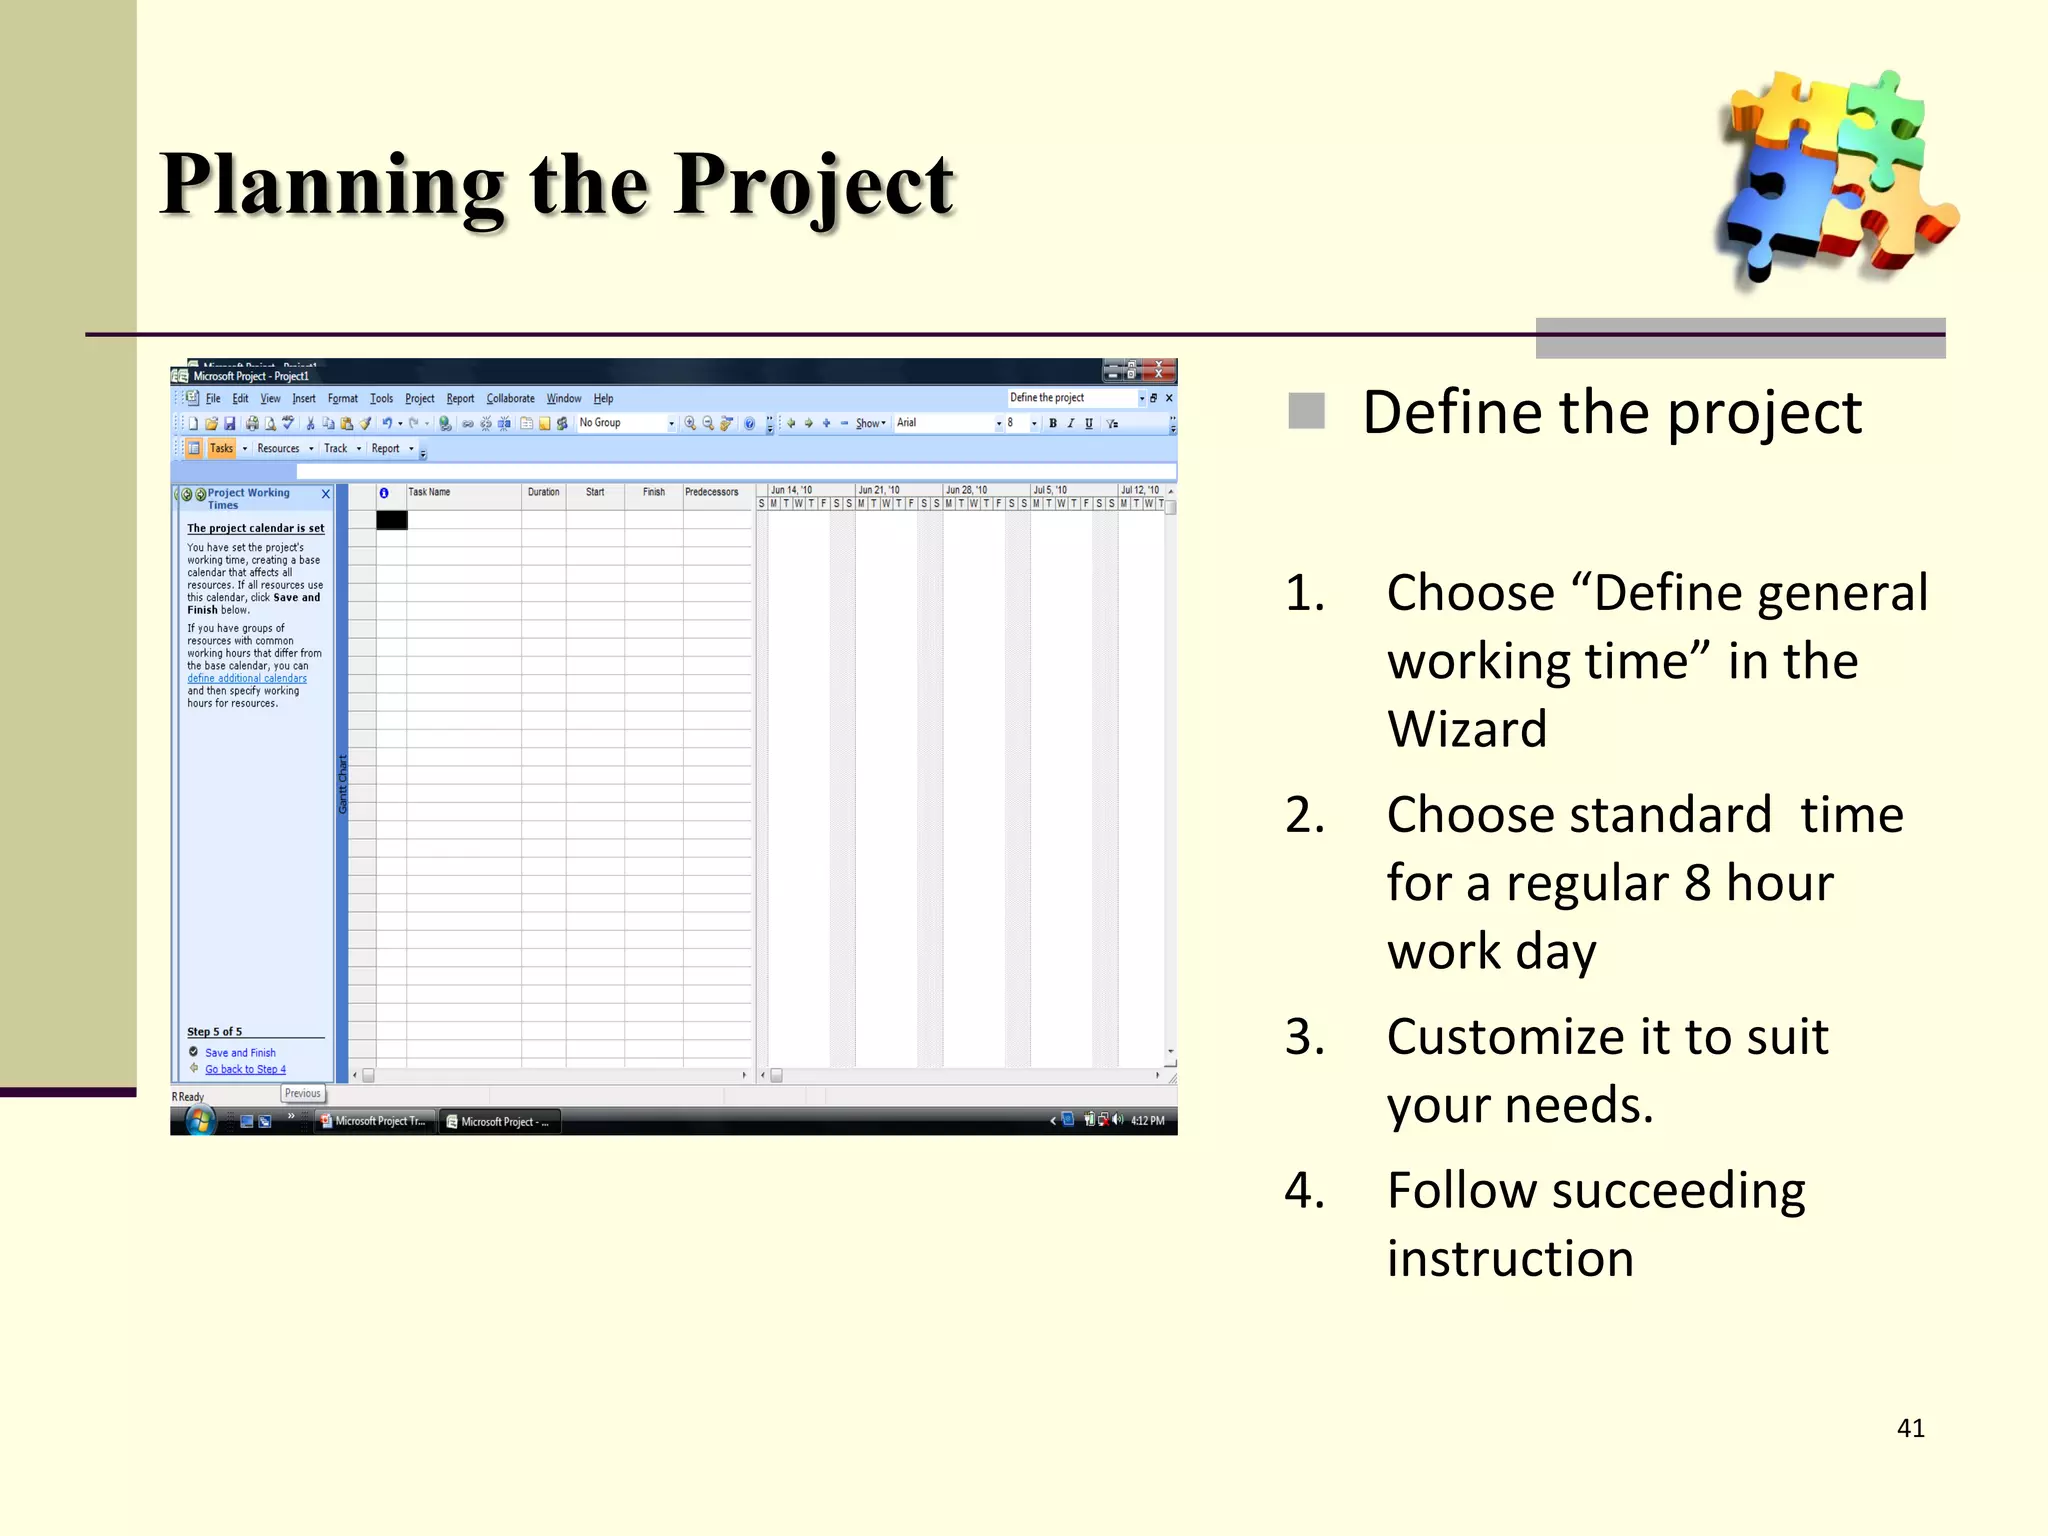
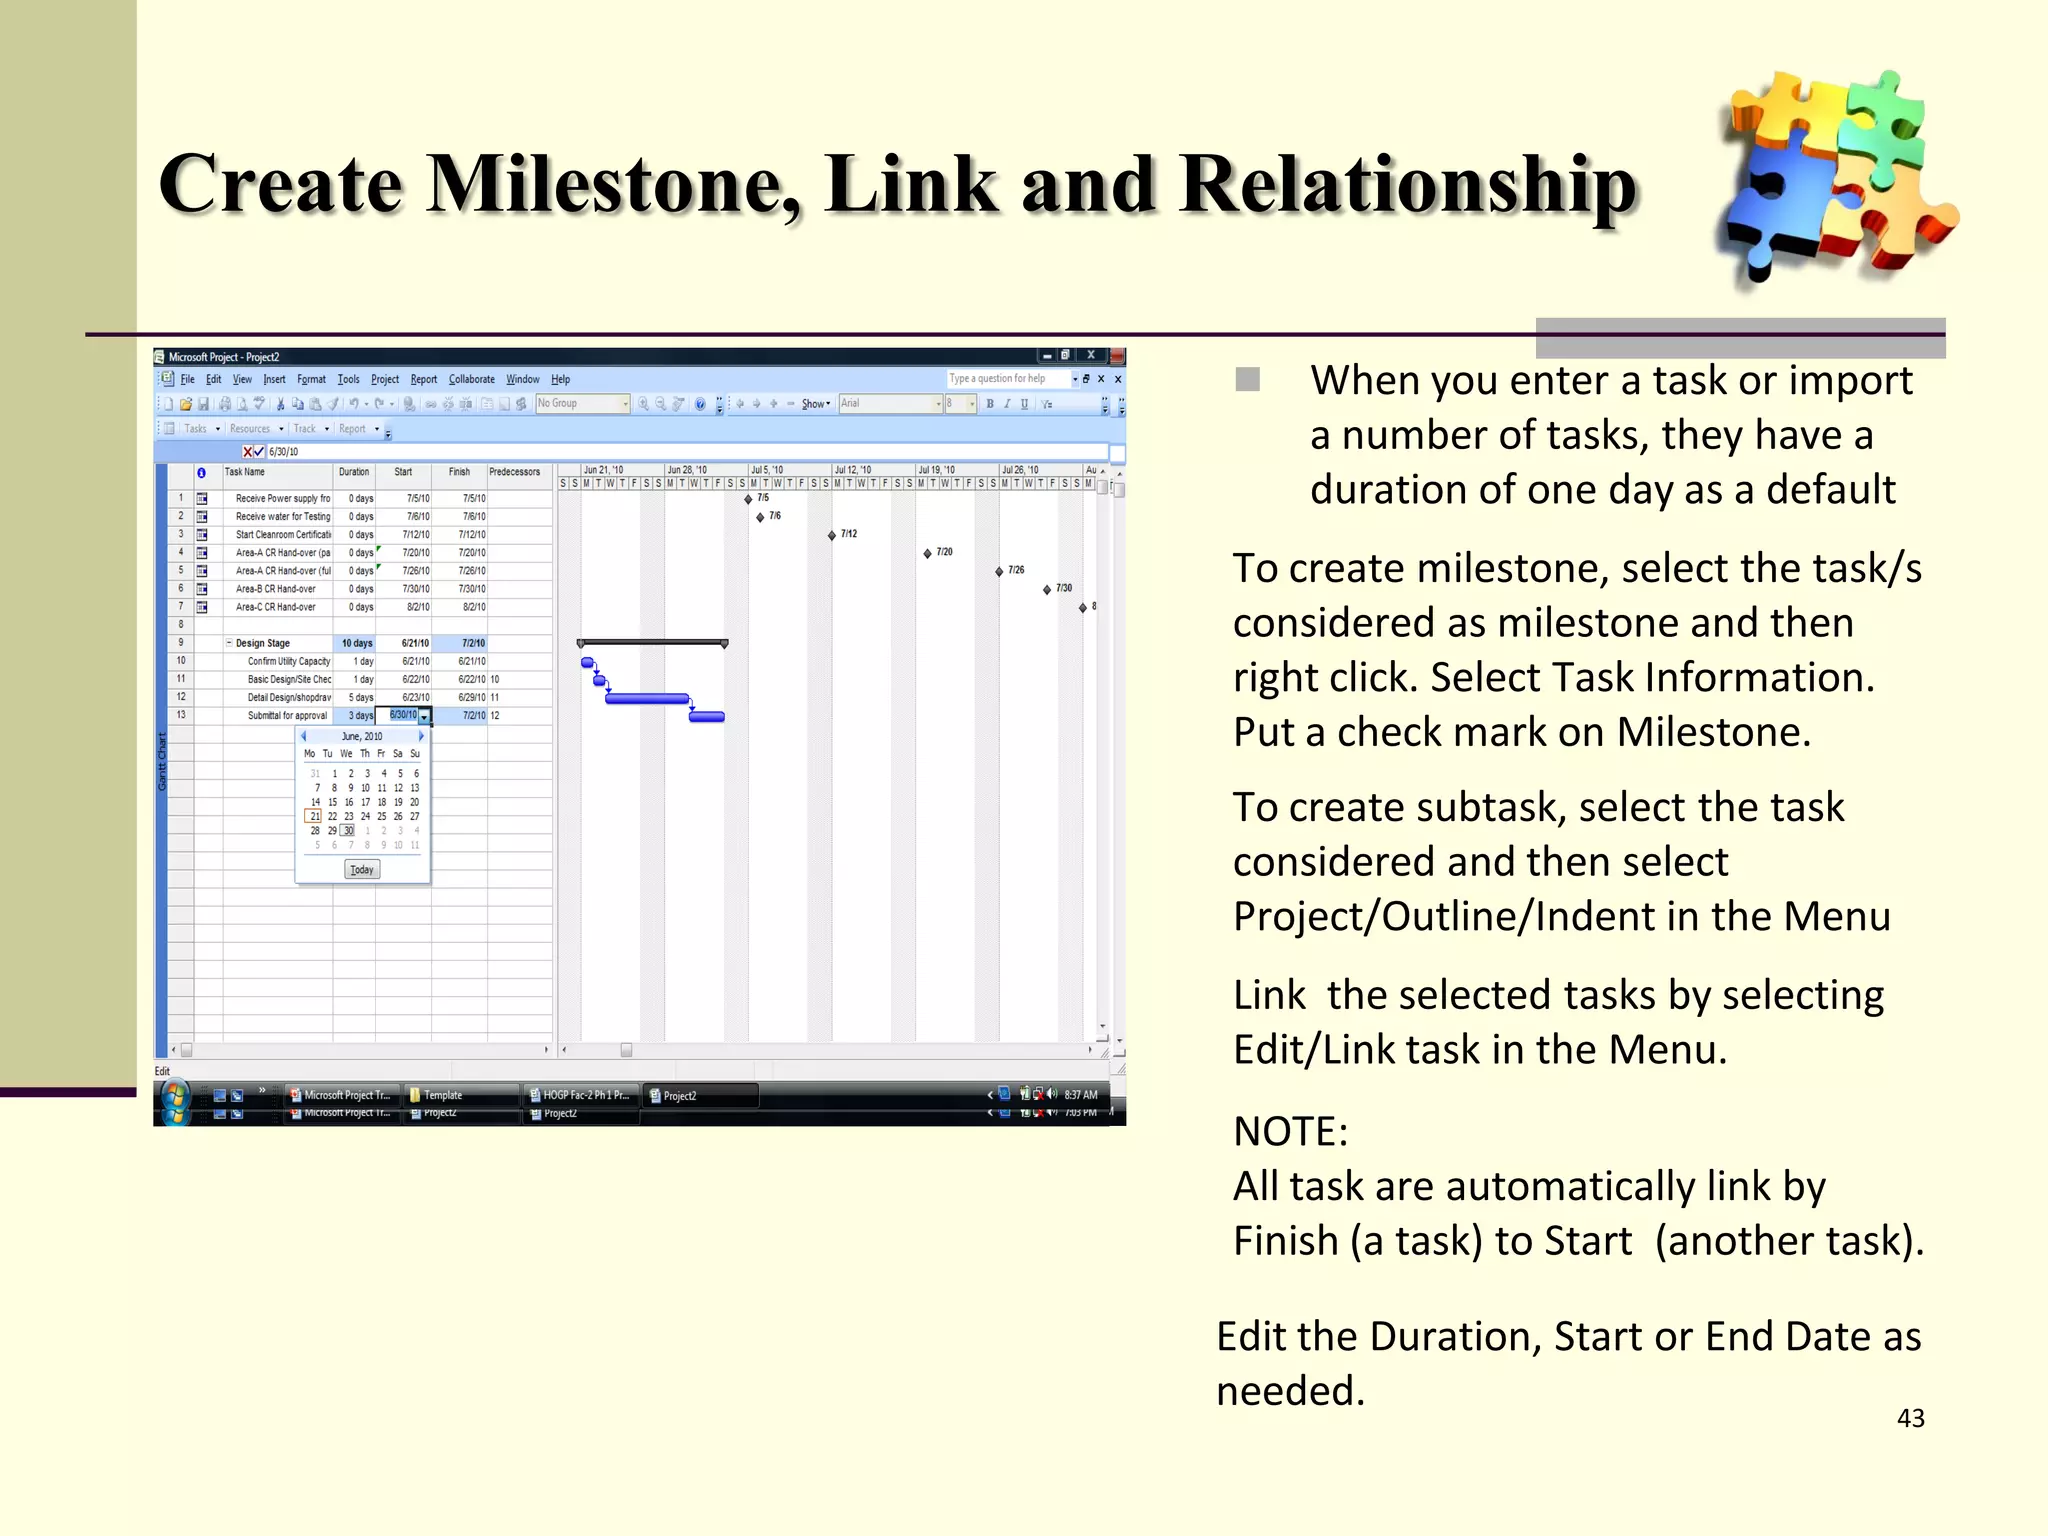
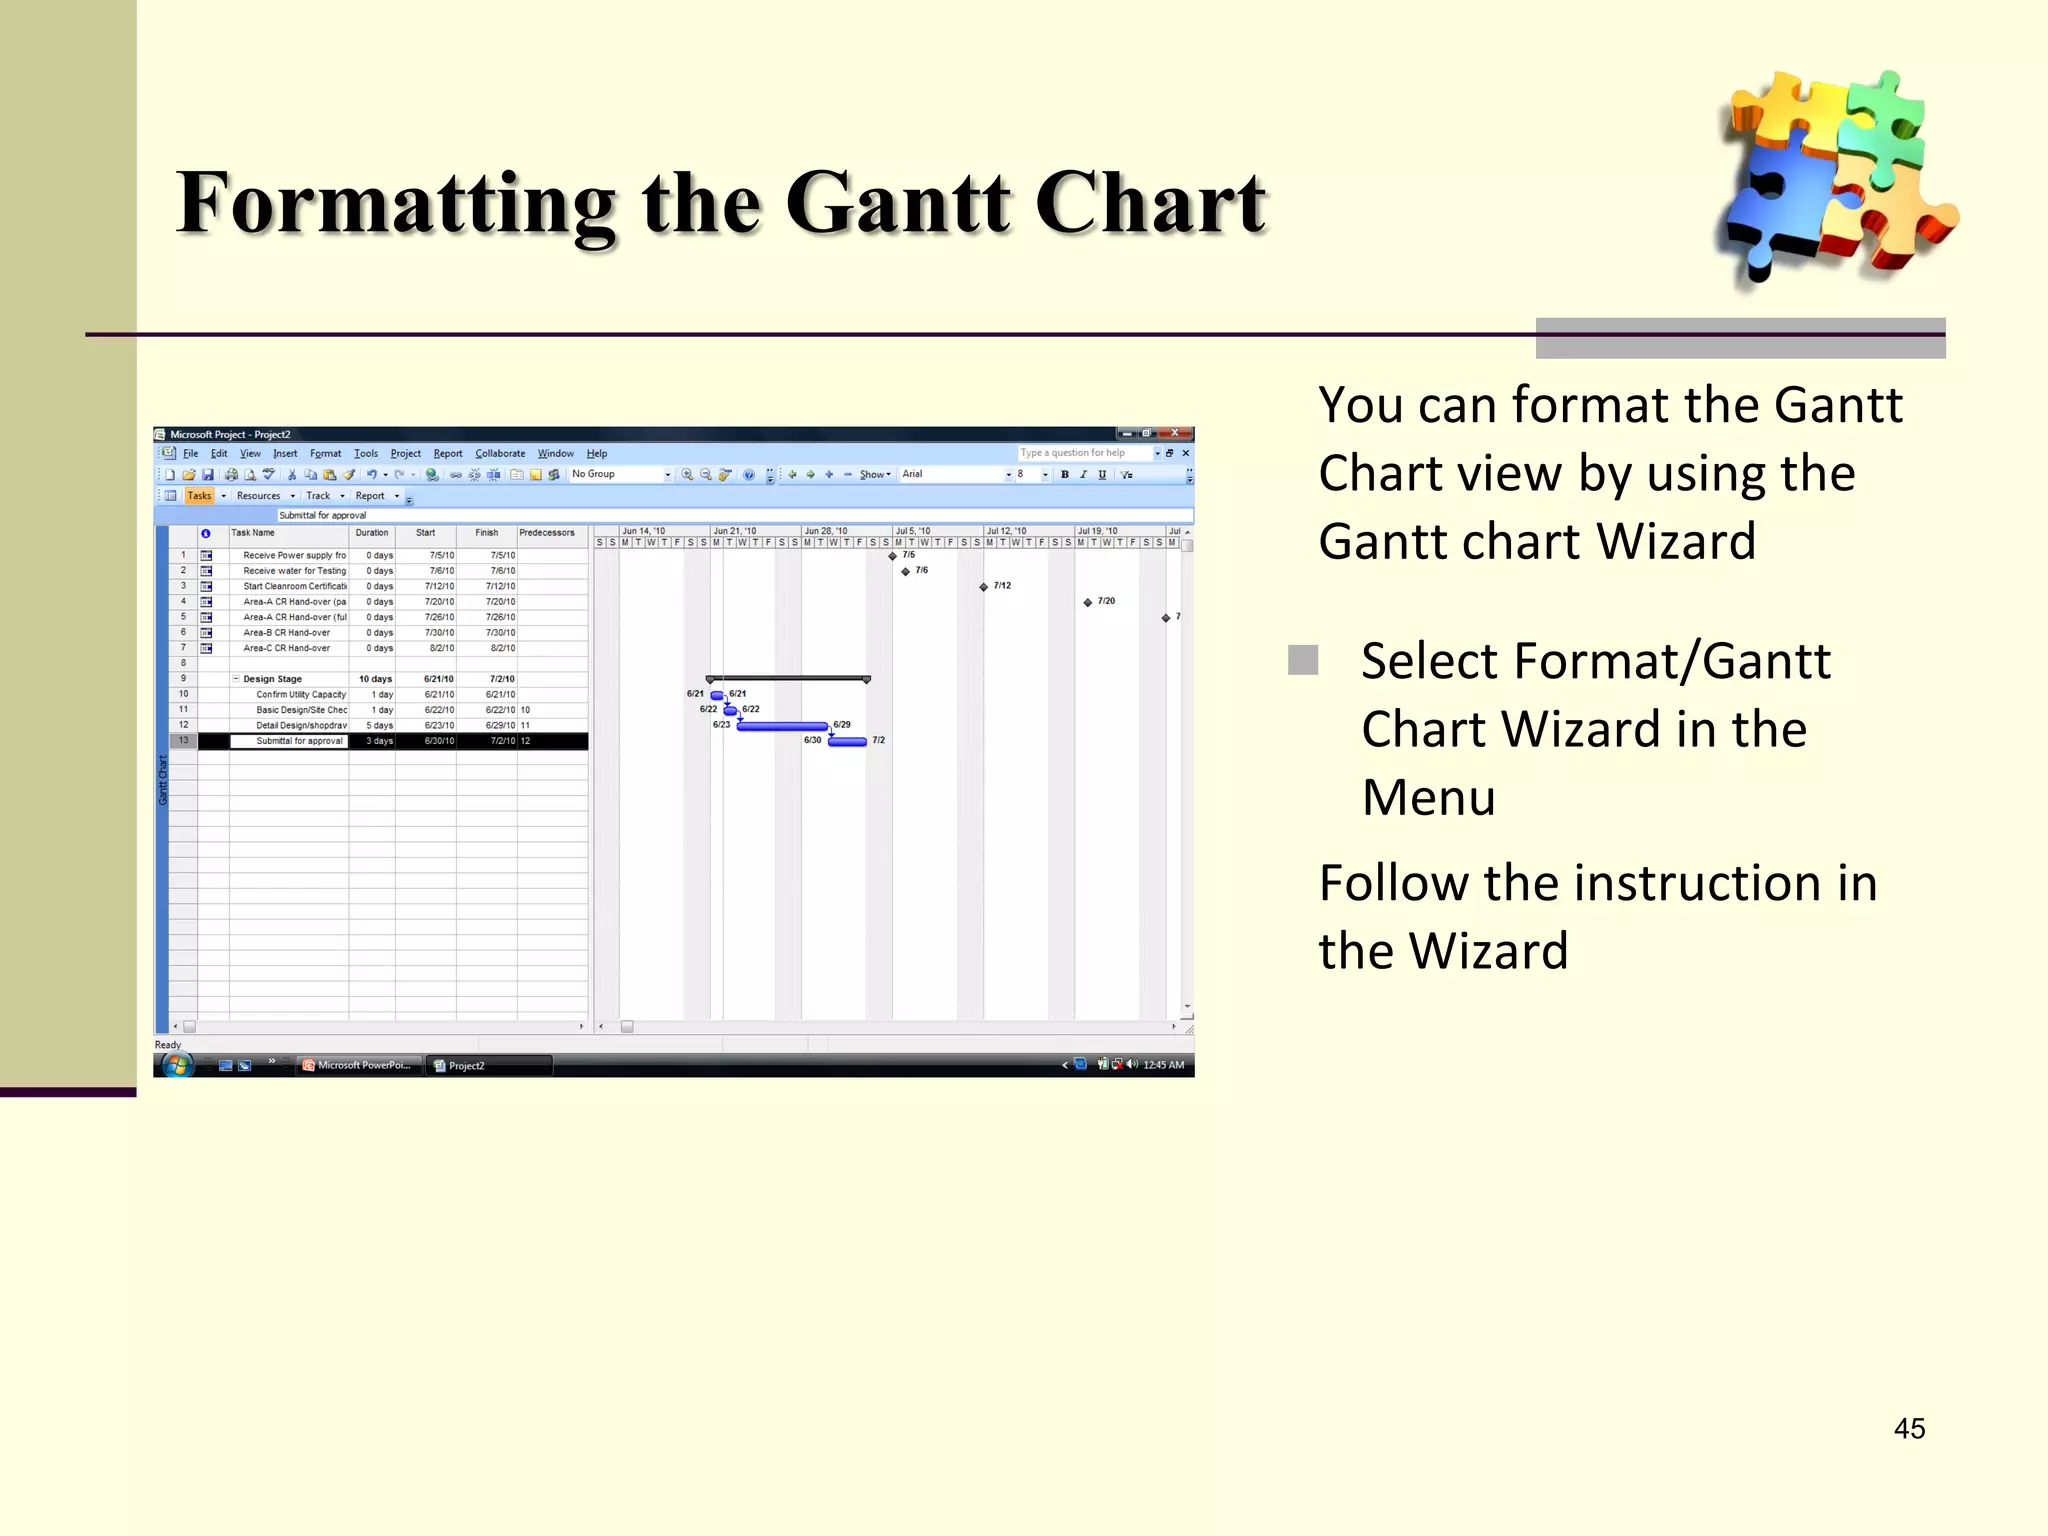
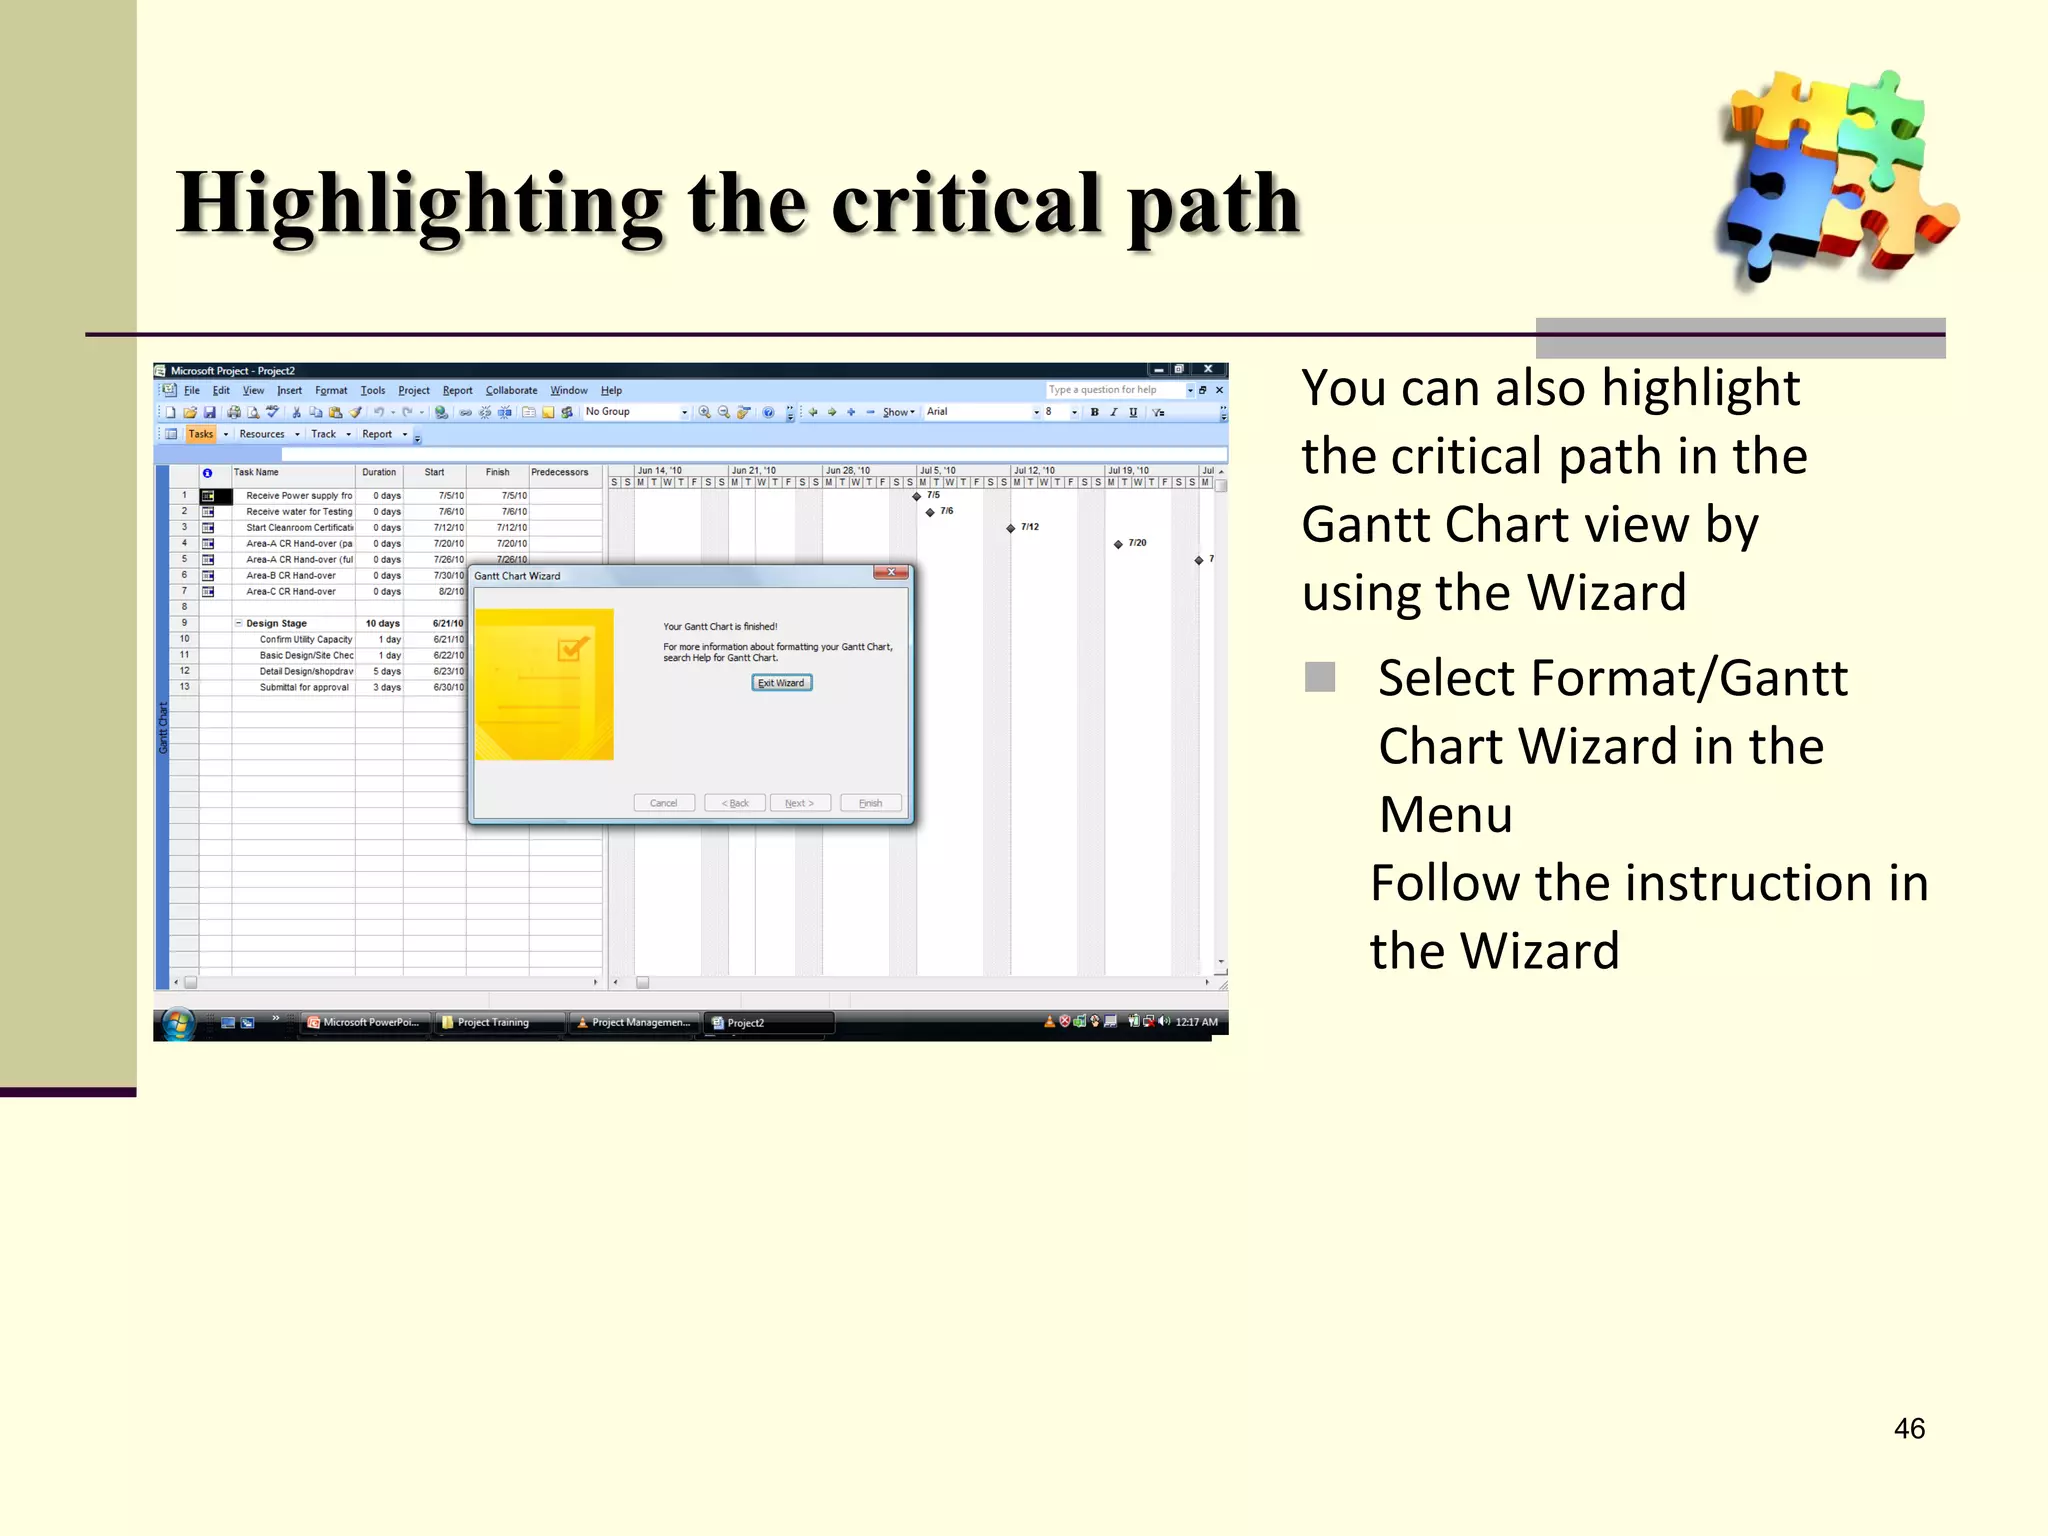
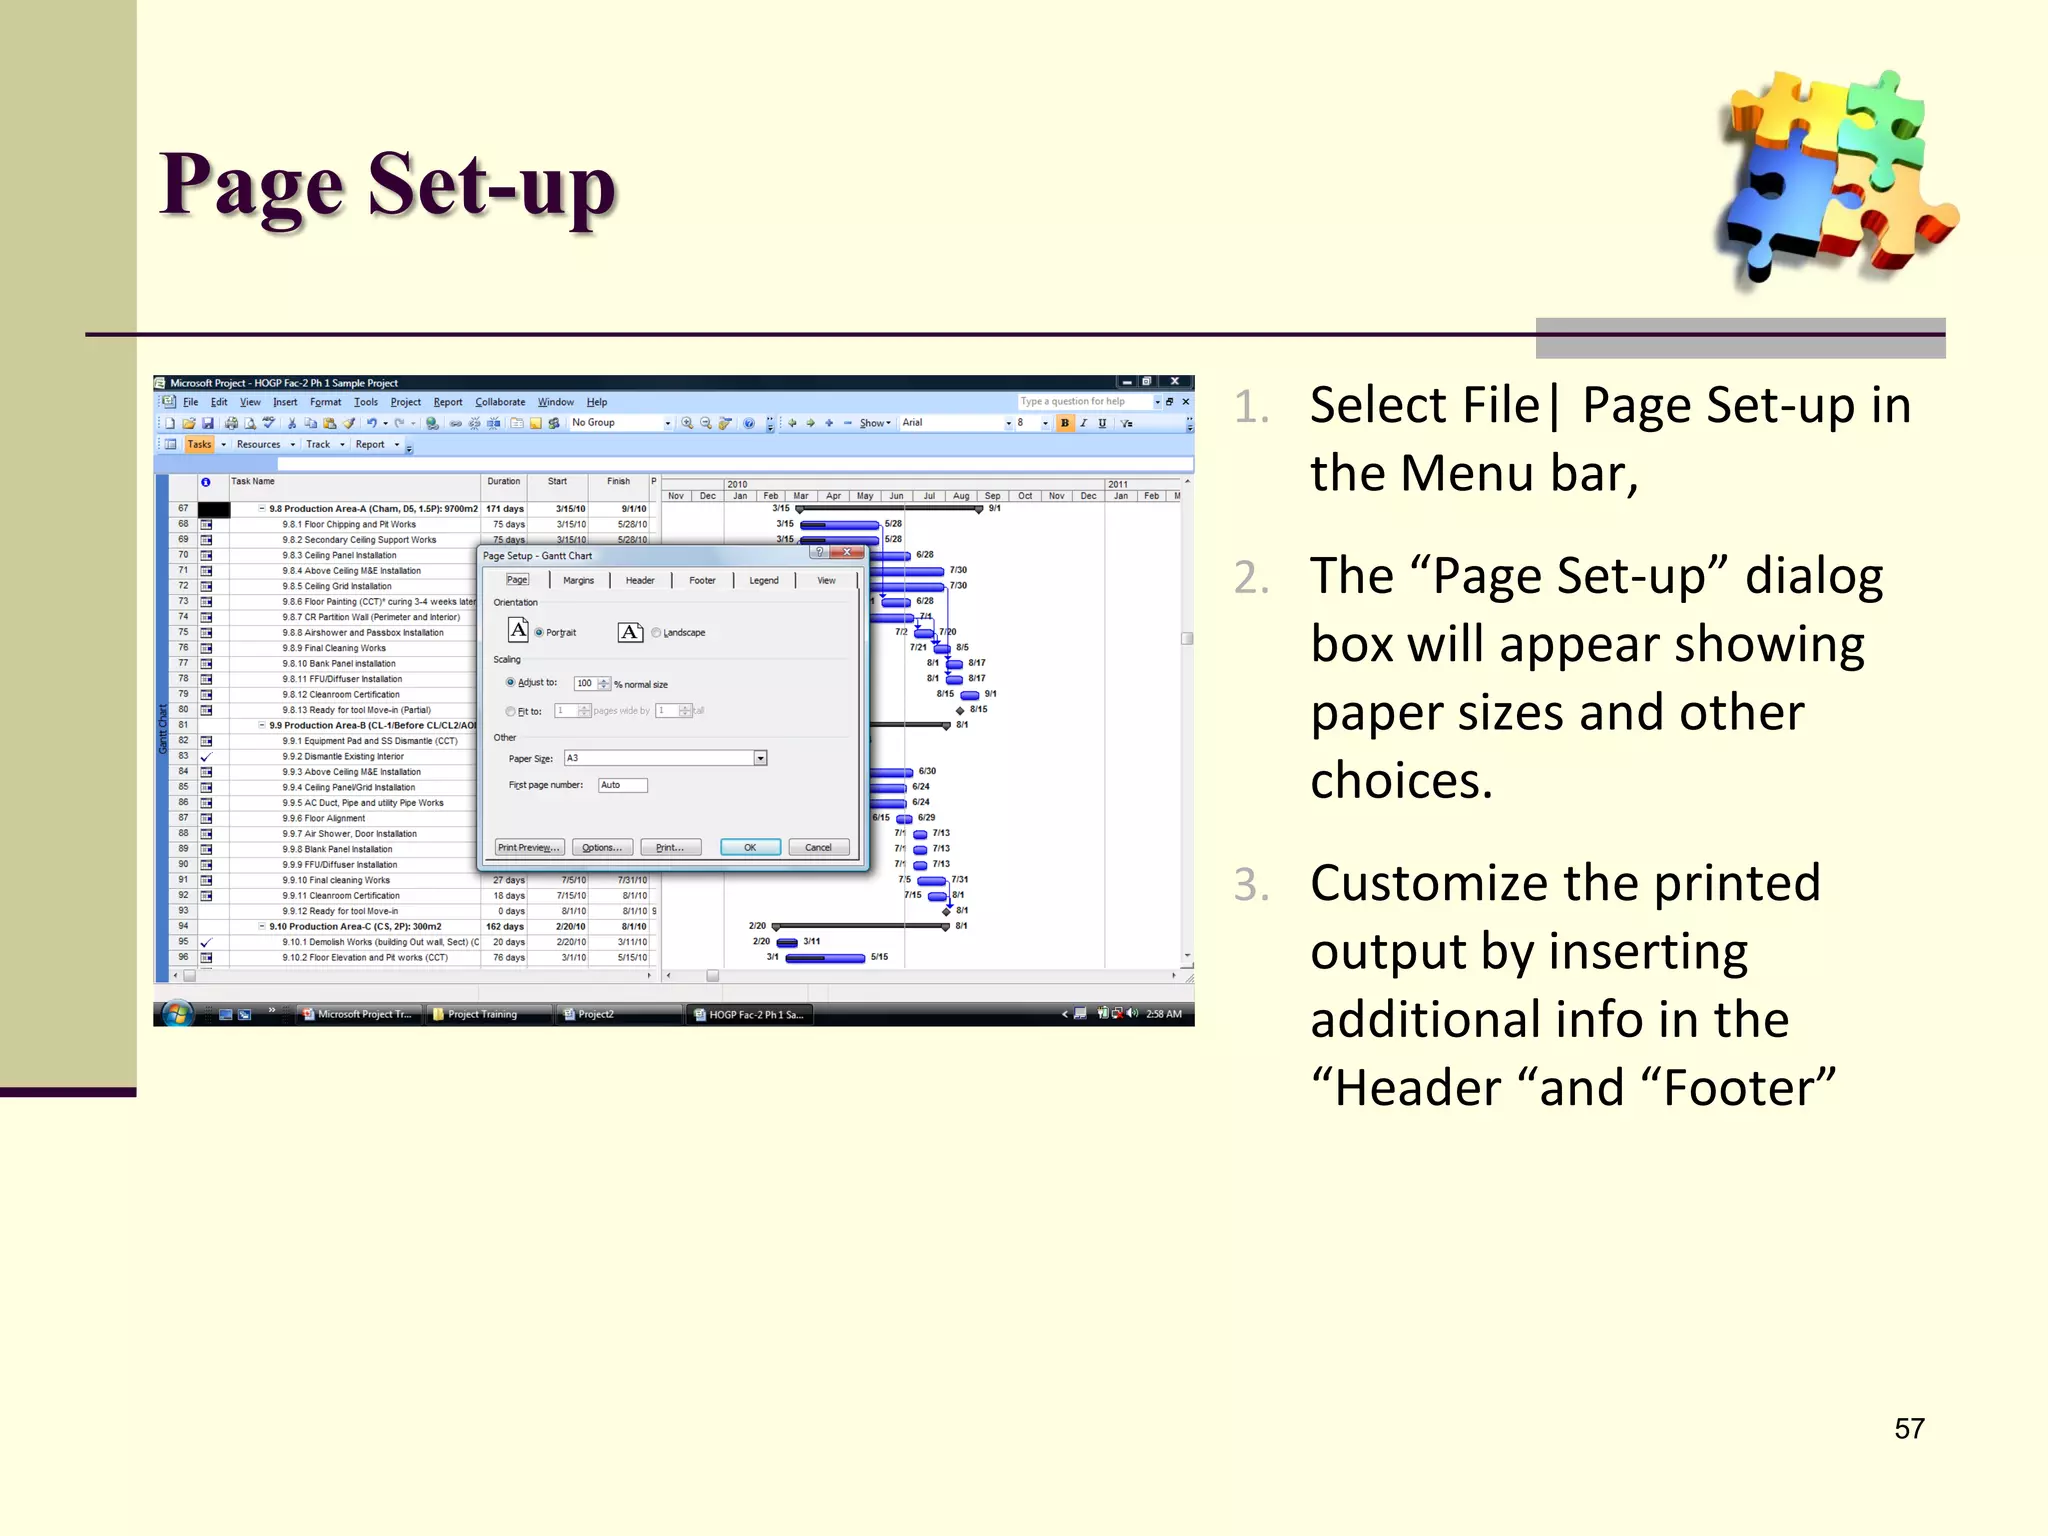
Guidance on defining project parameters - including milestones, task relationships, and Gantt chart formatting.
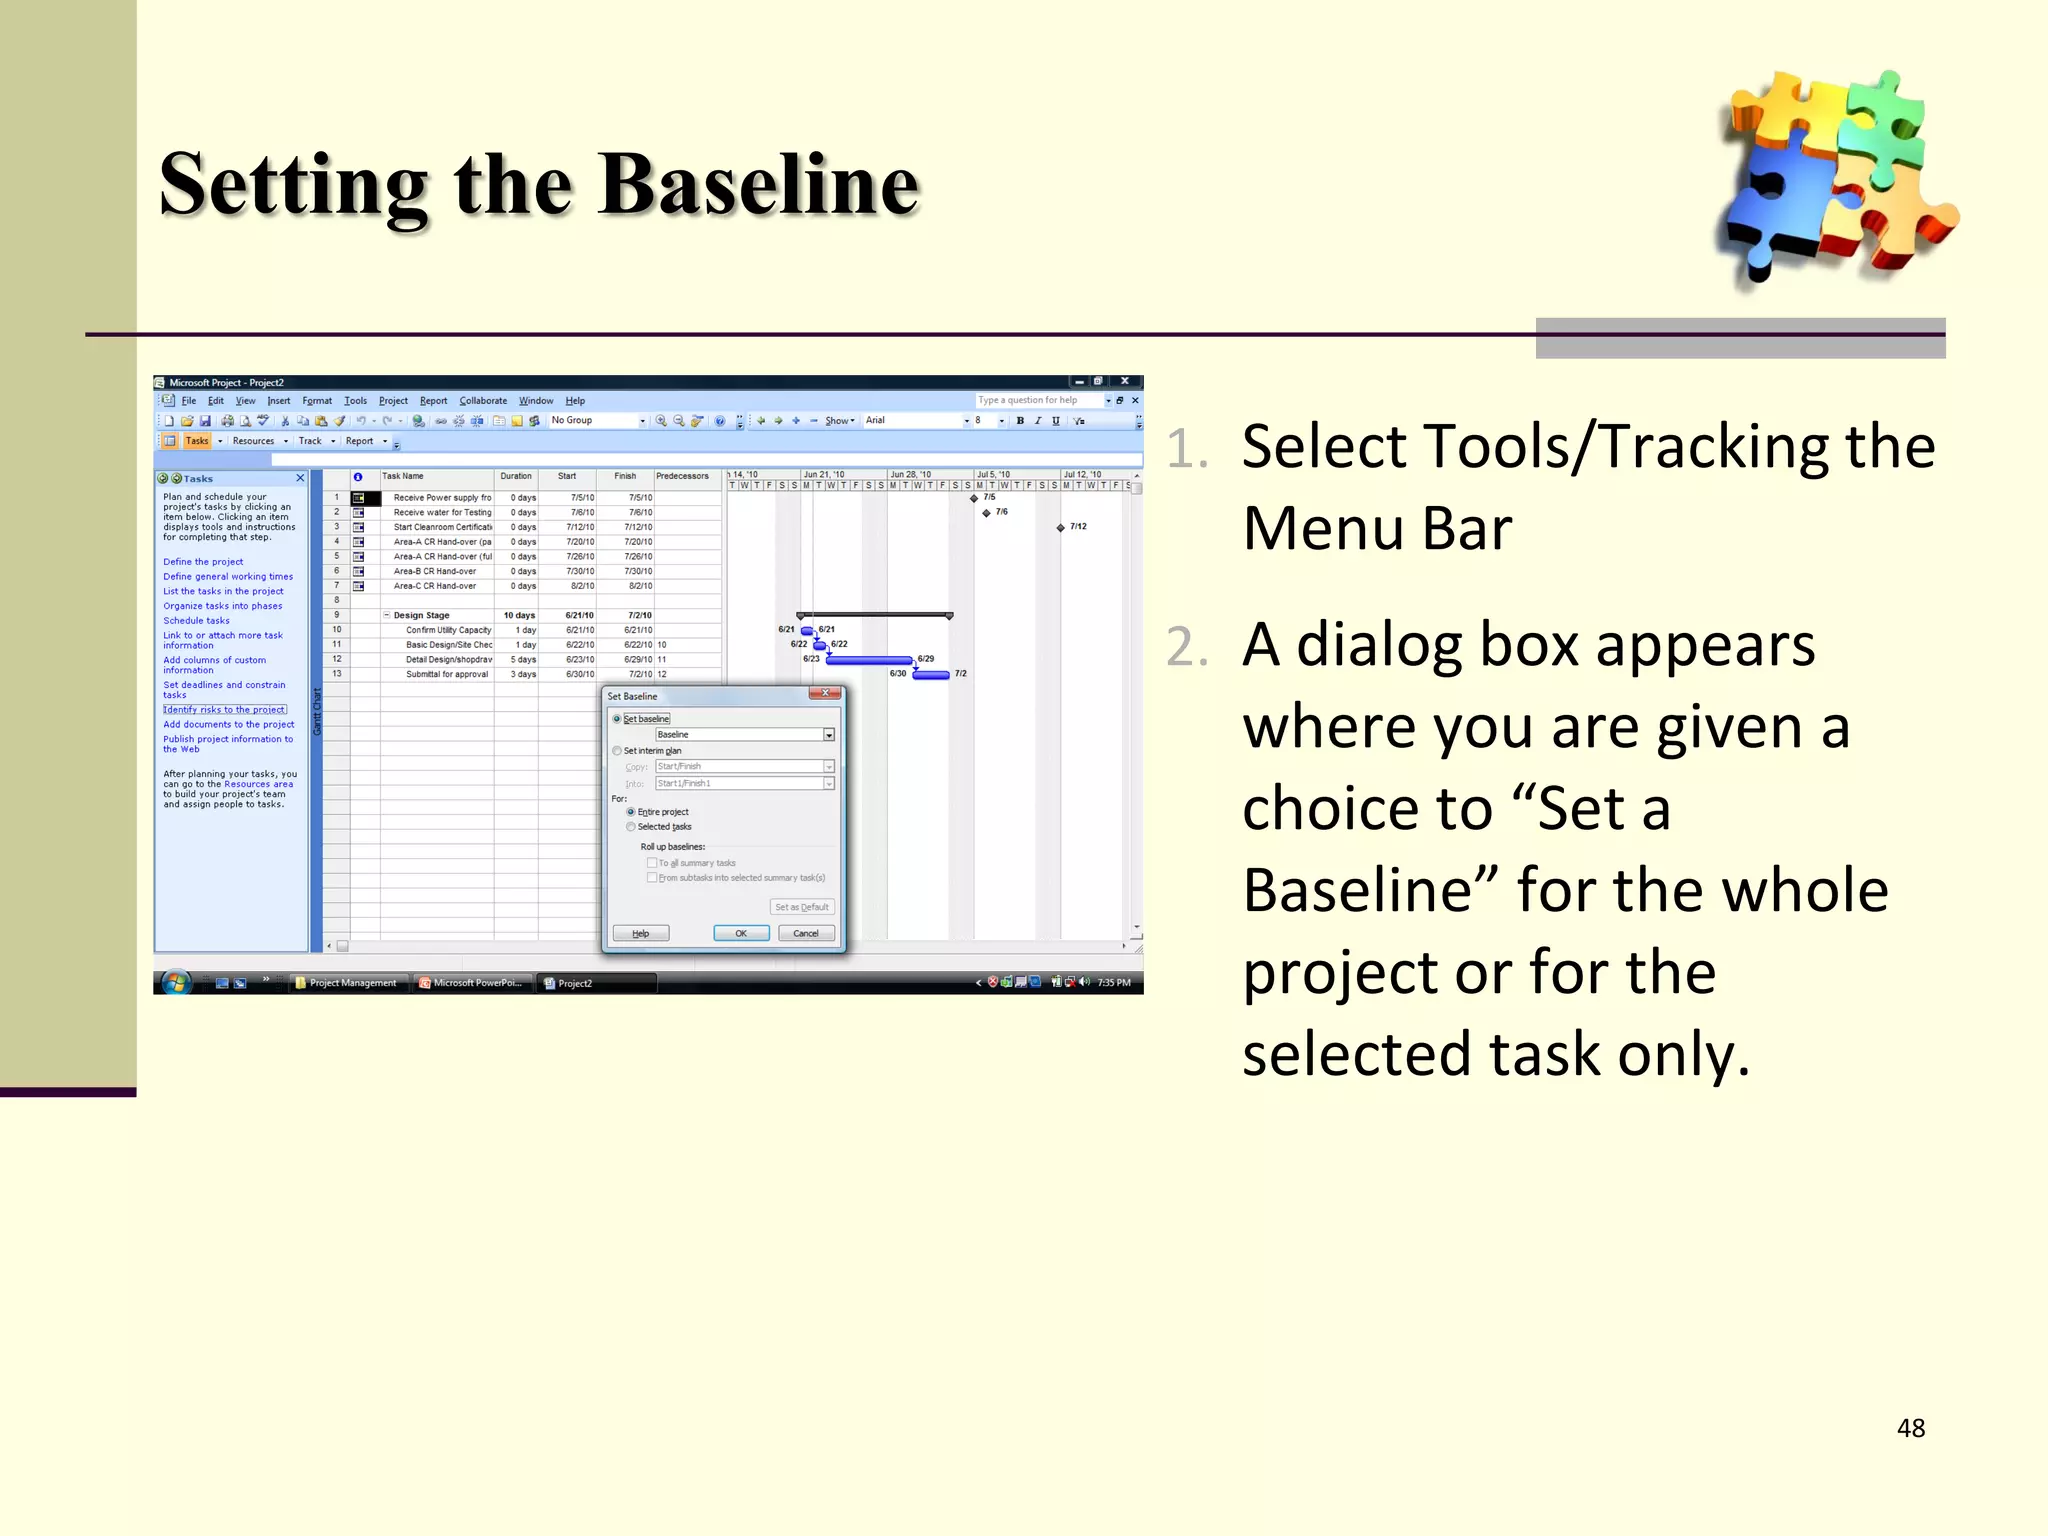
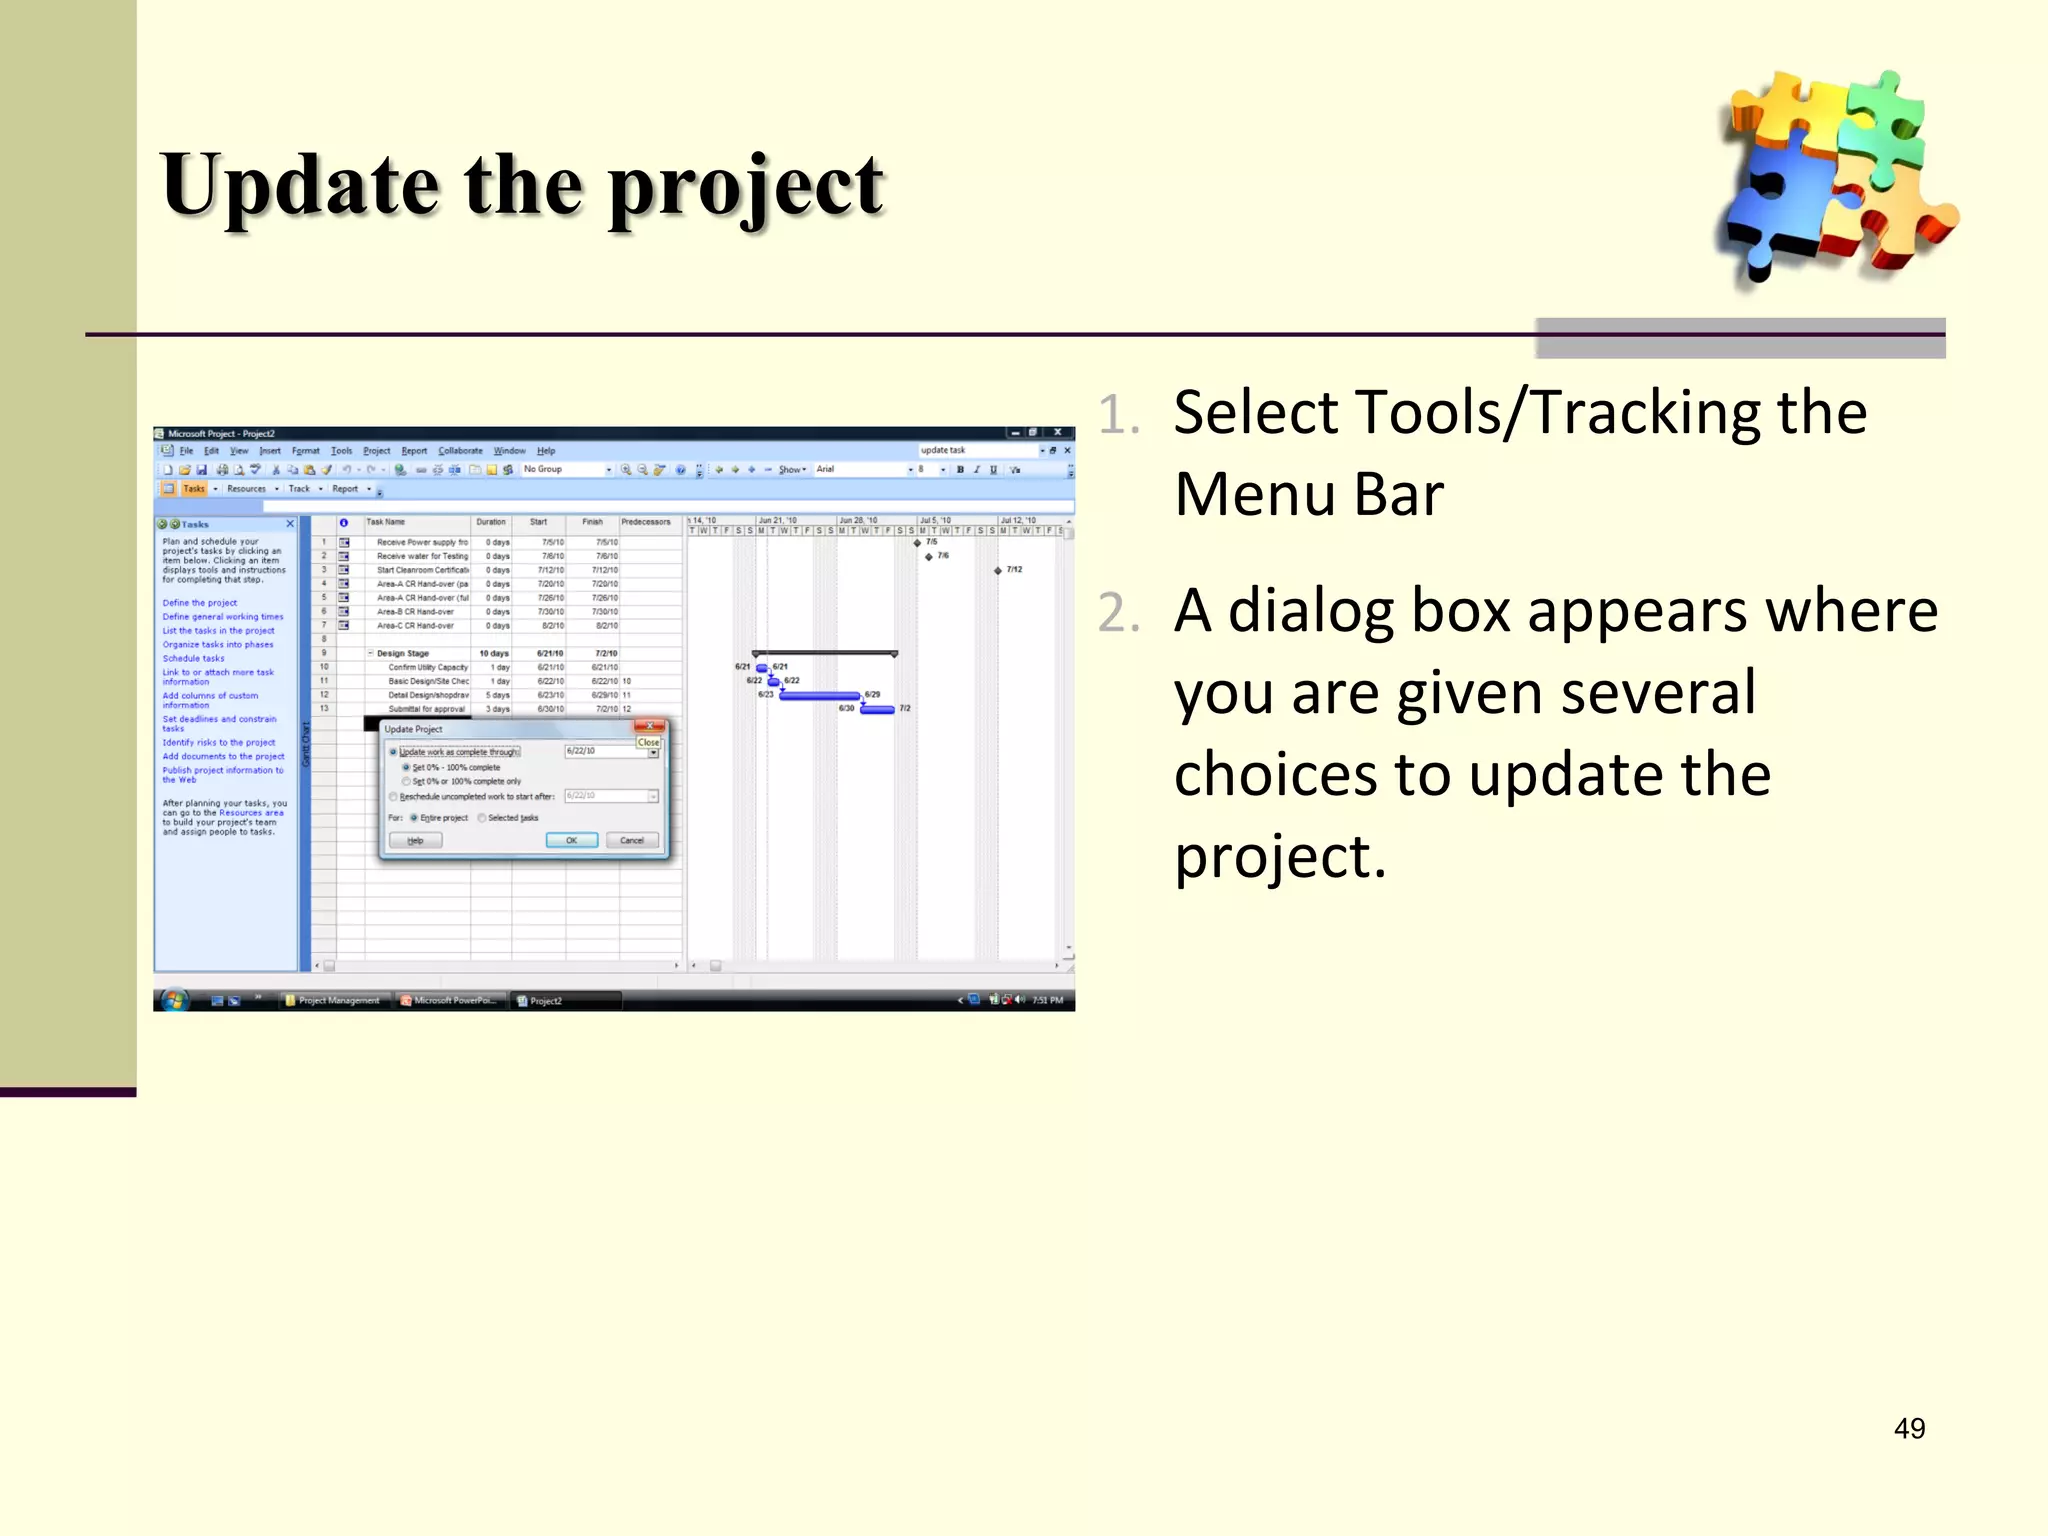
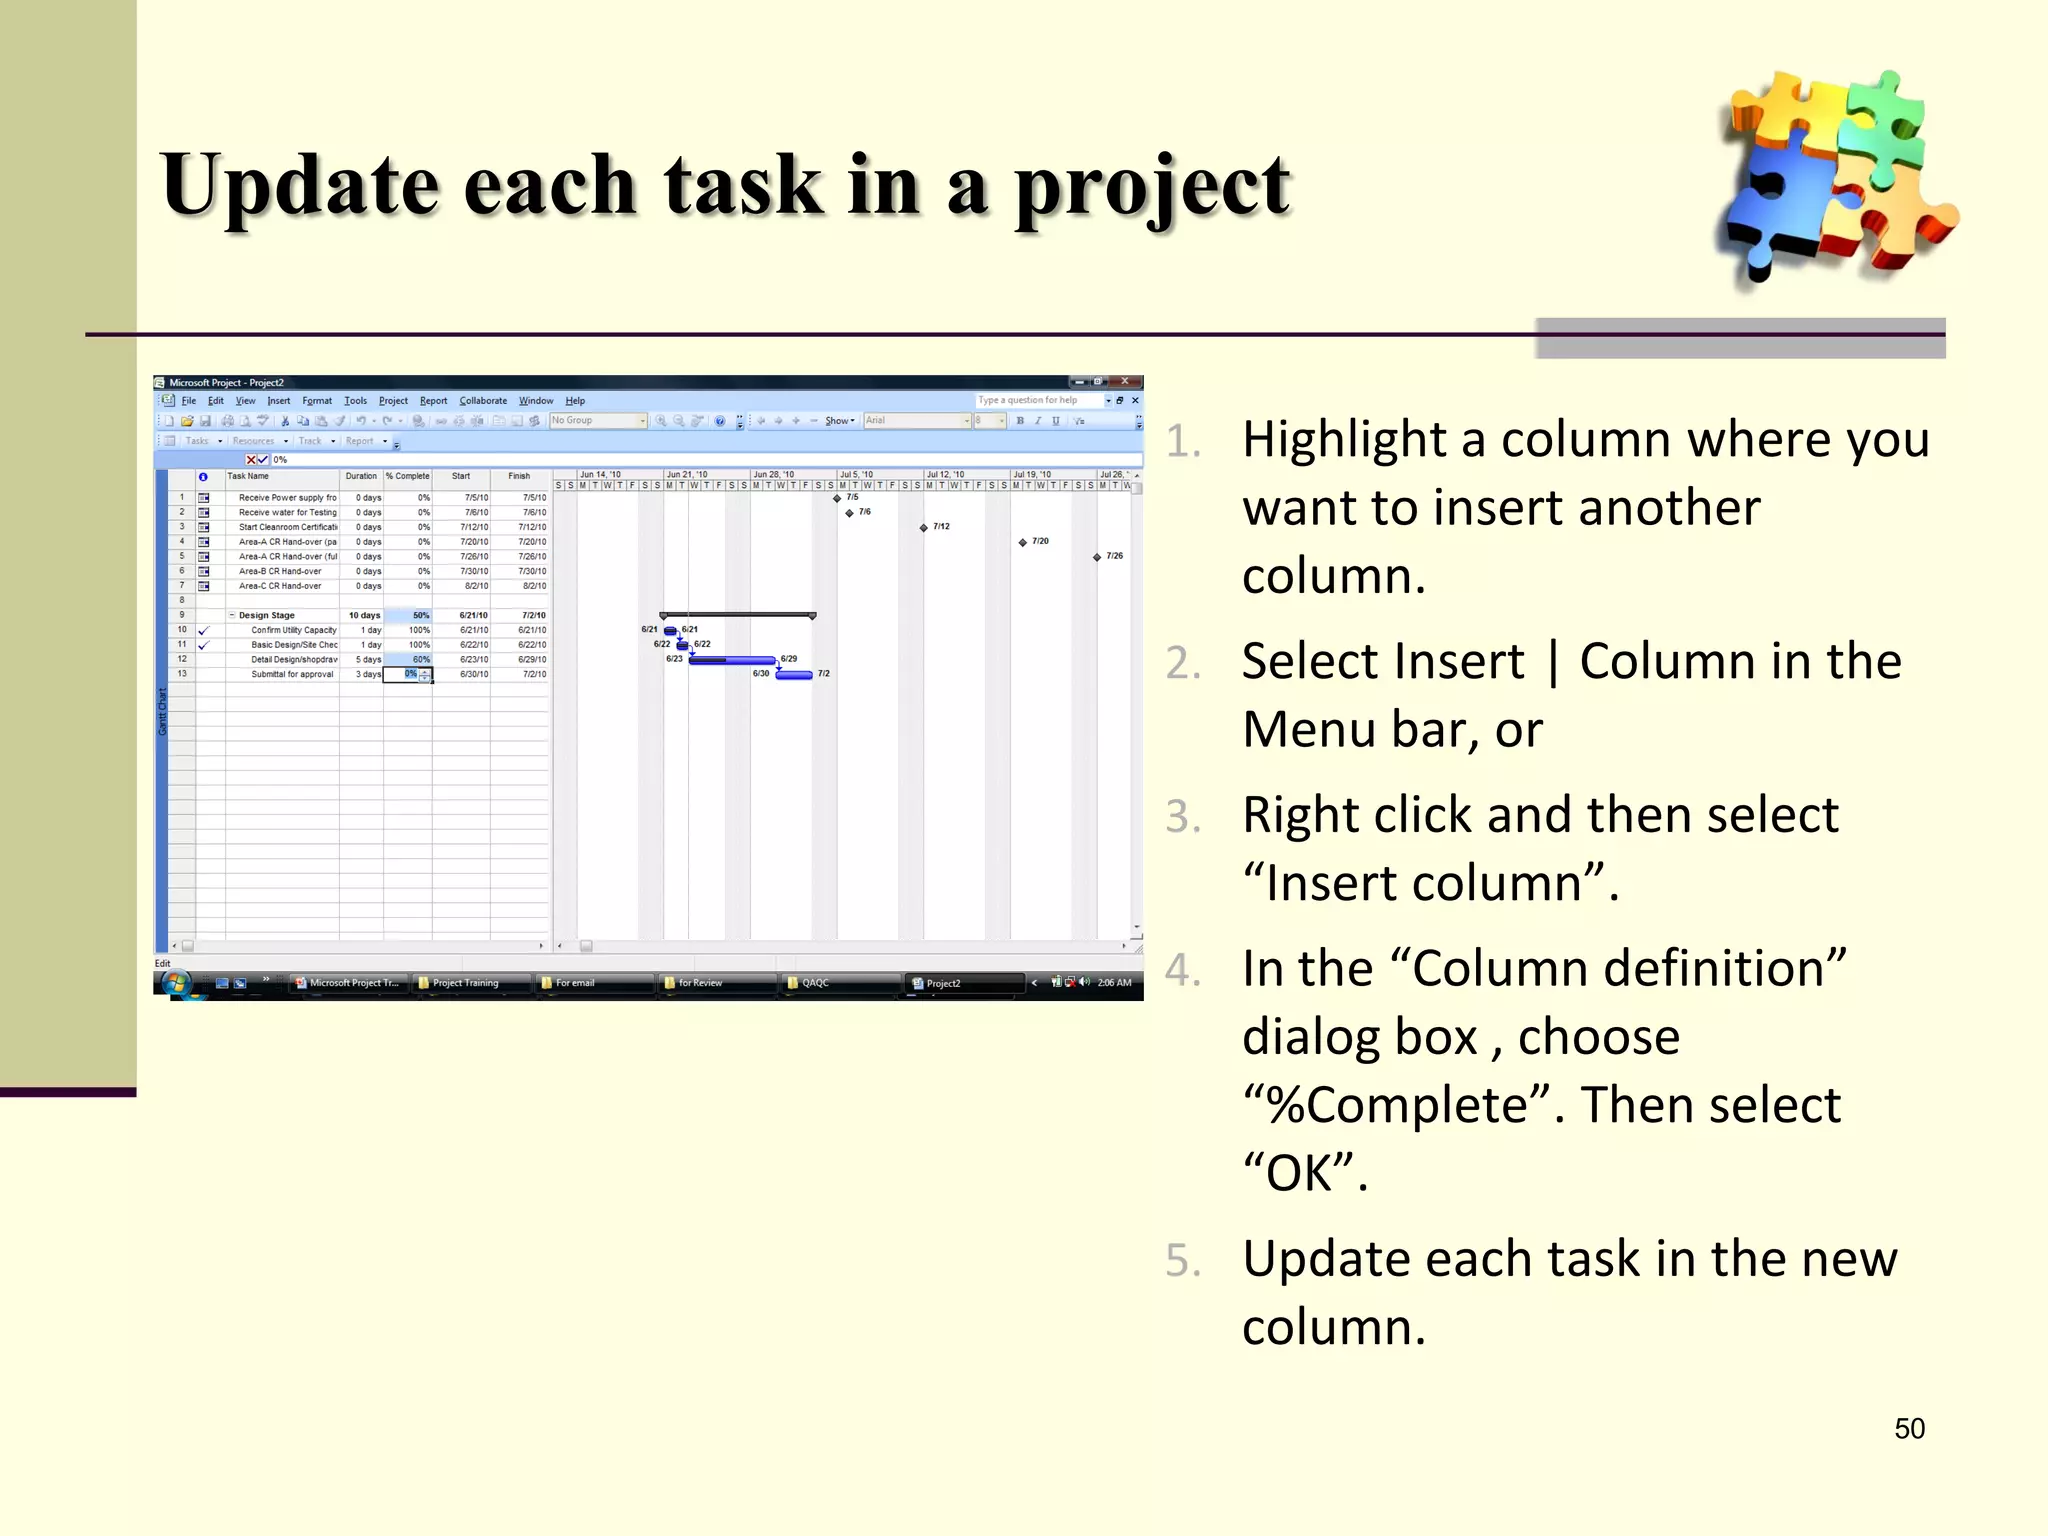
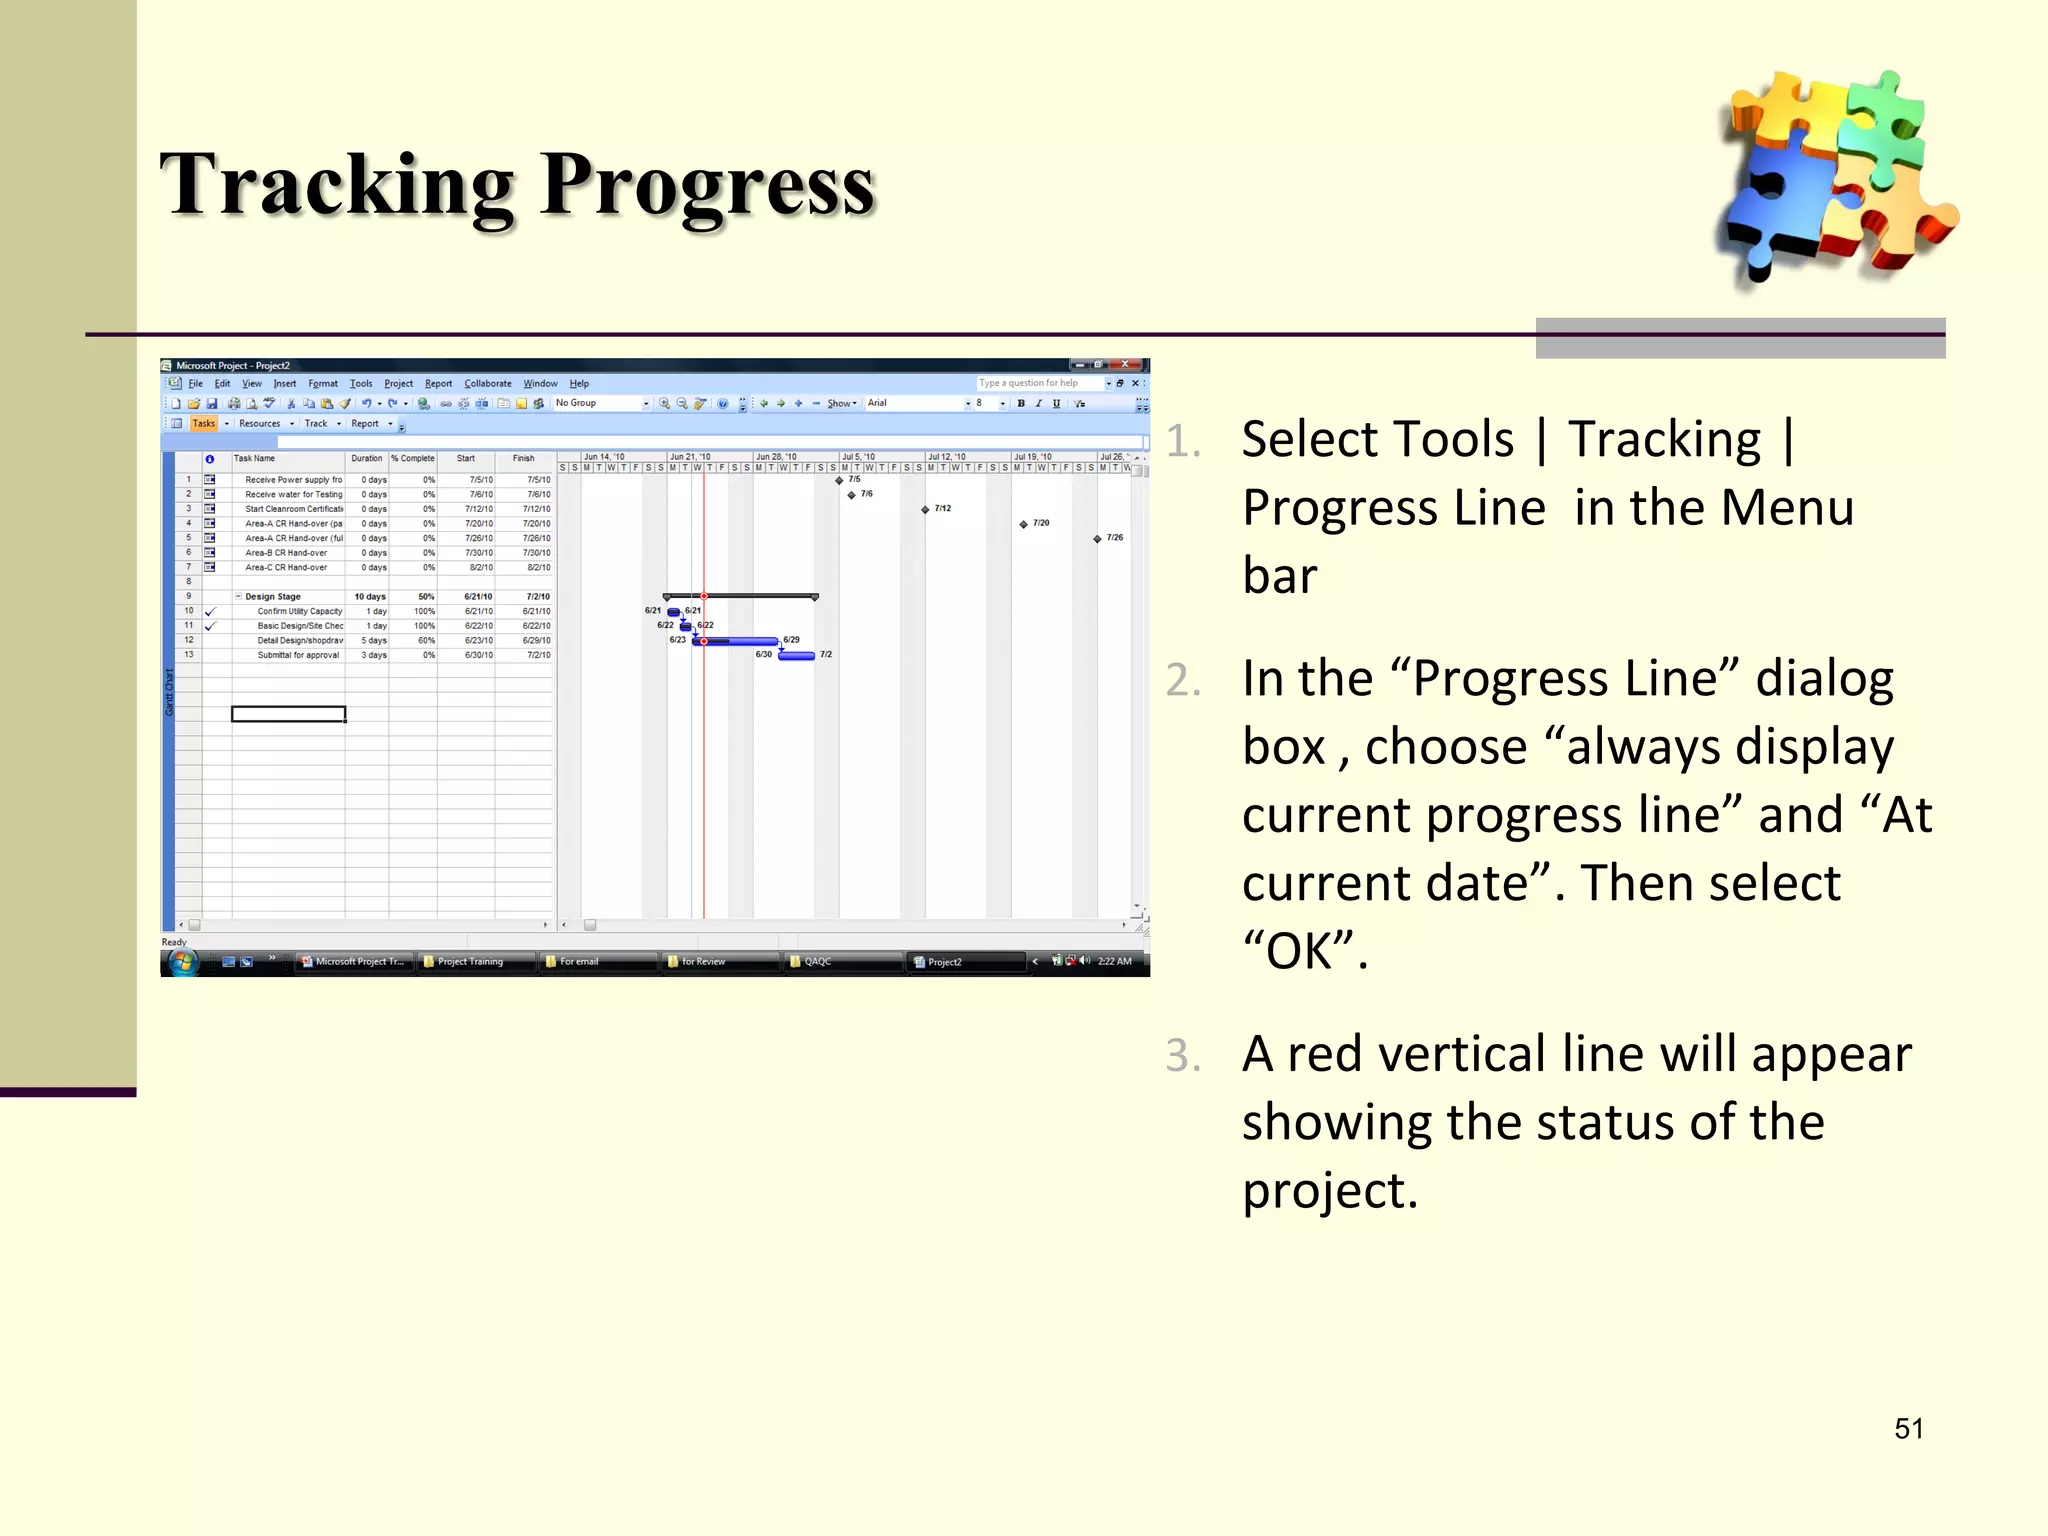
Setting baselines, tracking progress, and using tools within Microsoft Project to effectively manage projects.
Recap of the key lessons learned from the training module reminding the importance of planning.


![5 s – a program to improve project.ppt [compatibility mode]](https://cdn.slidesharecdn.com/ss_thumbnails/5saprogramtoimproveproject-150819202114-lva1-app6892-thumbnail.jpg?width=640&height=640&fit=bounds)


