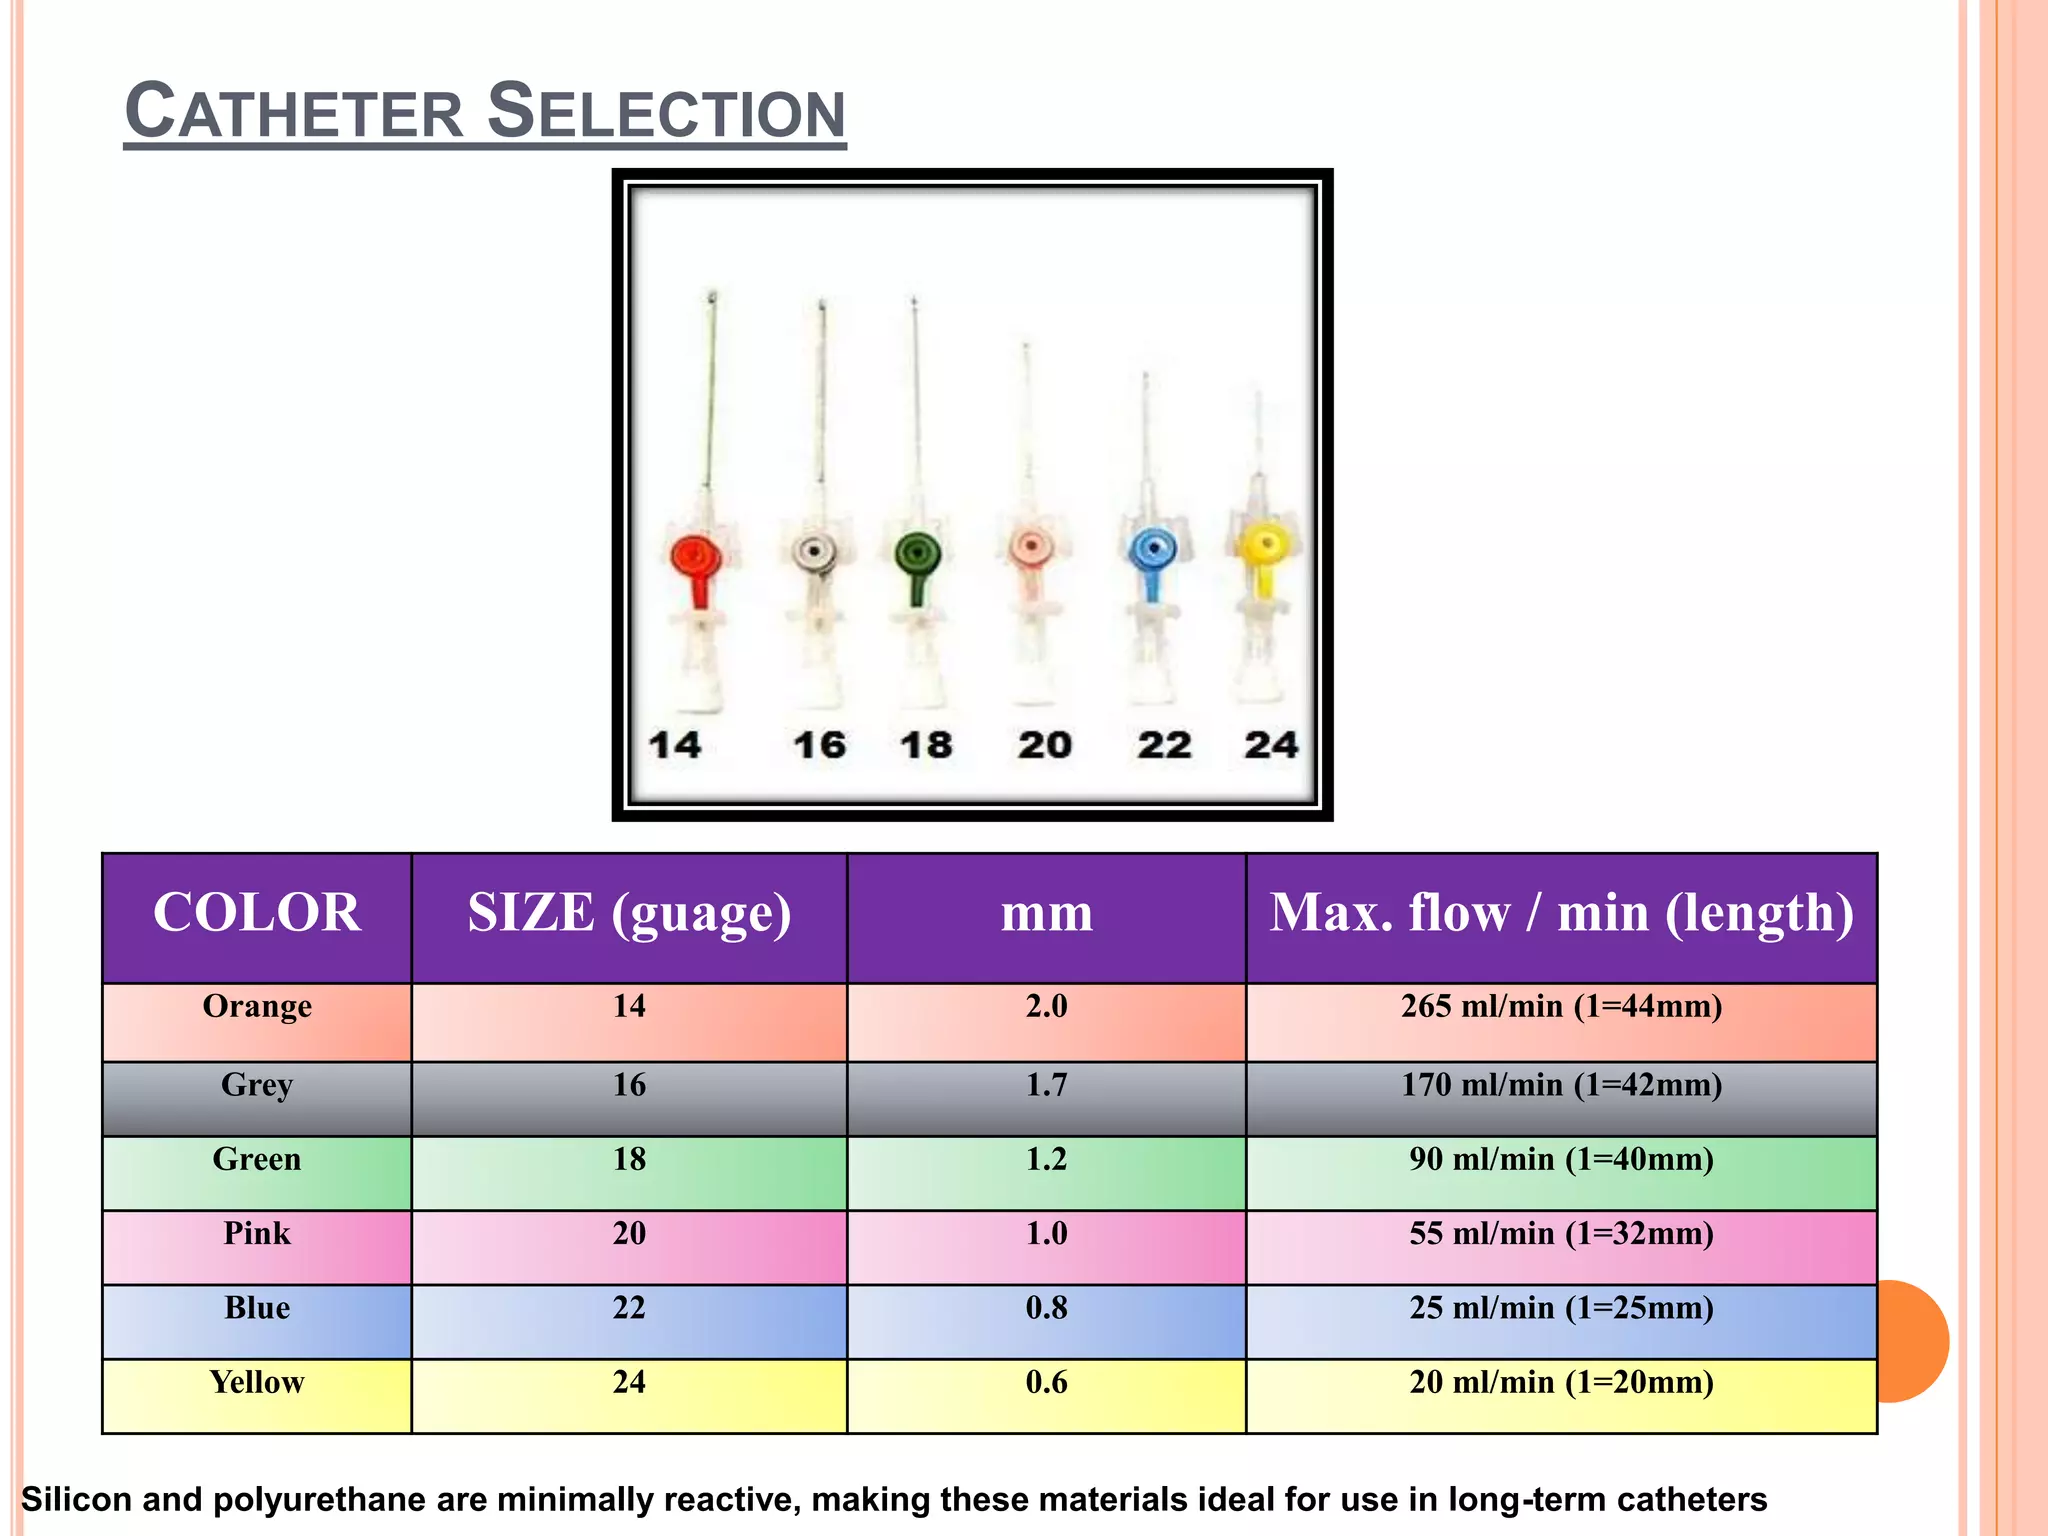
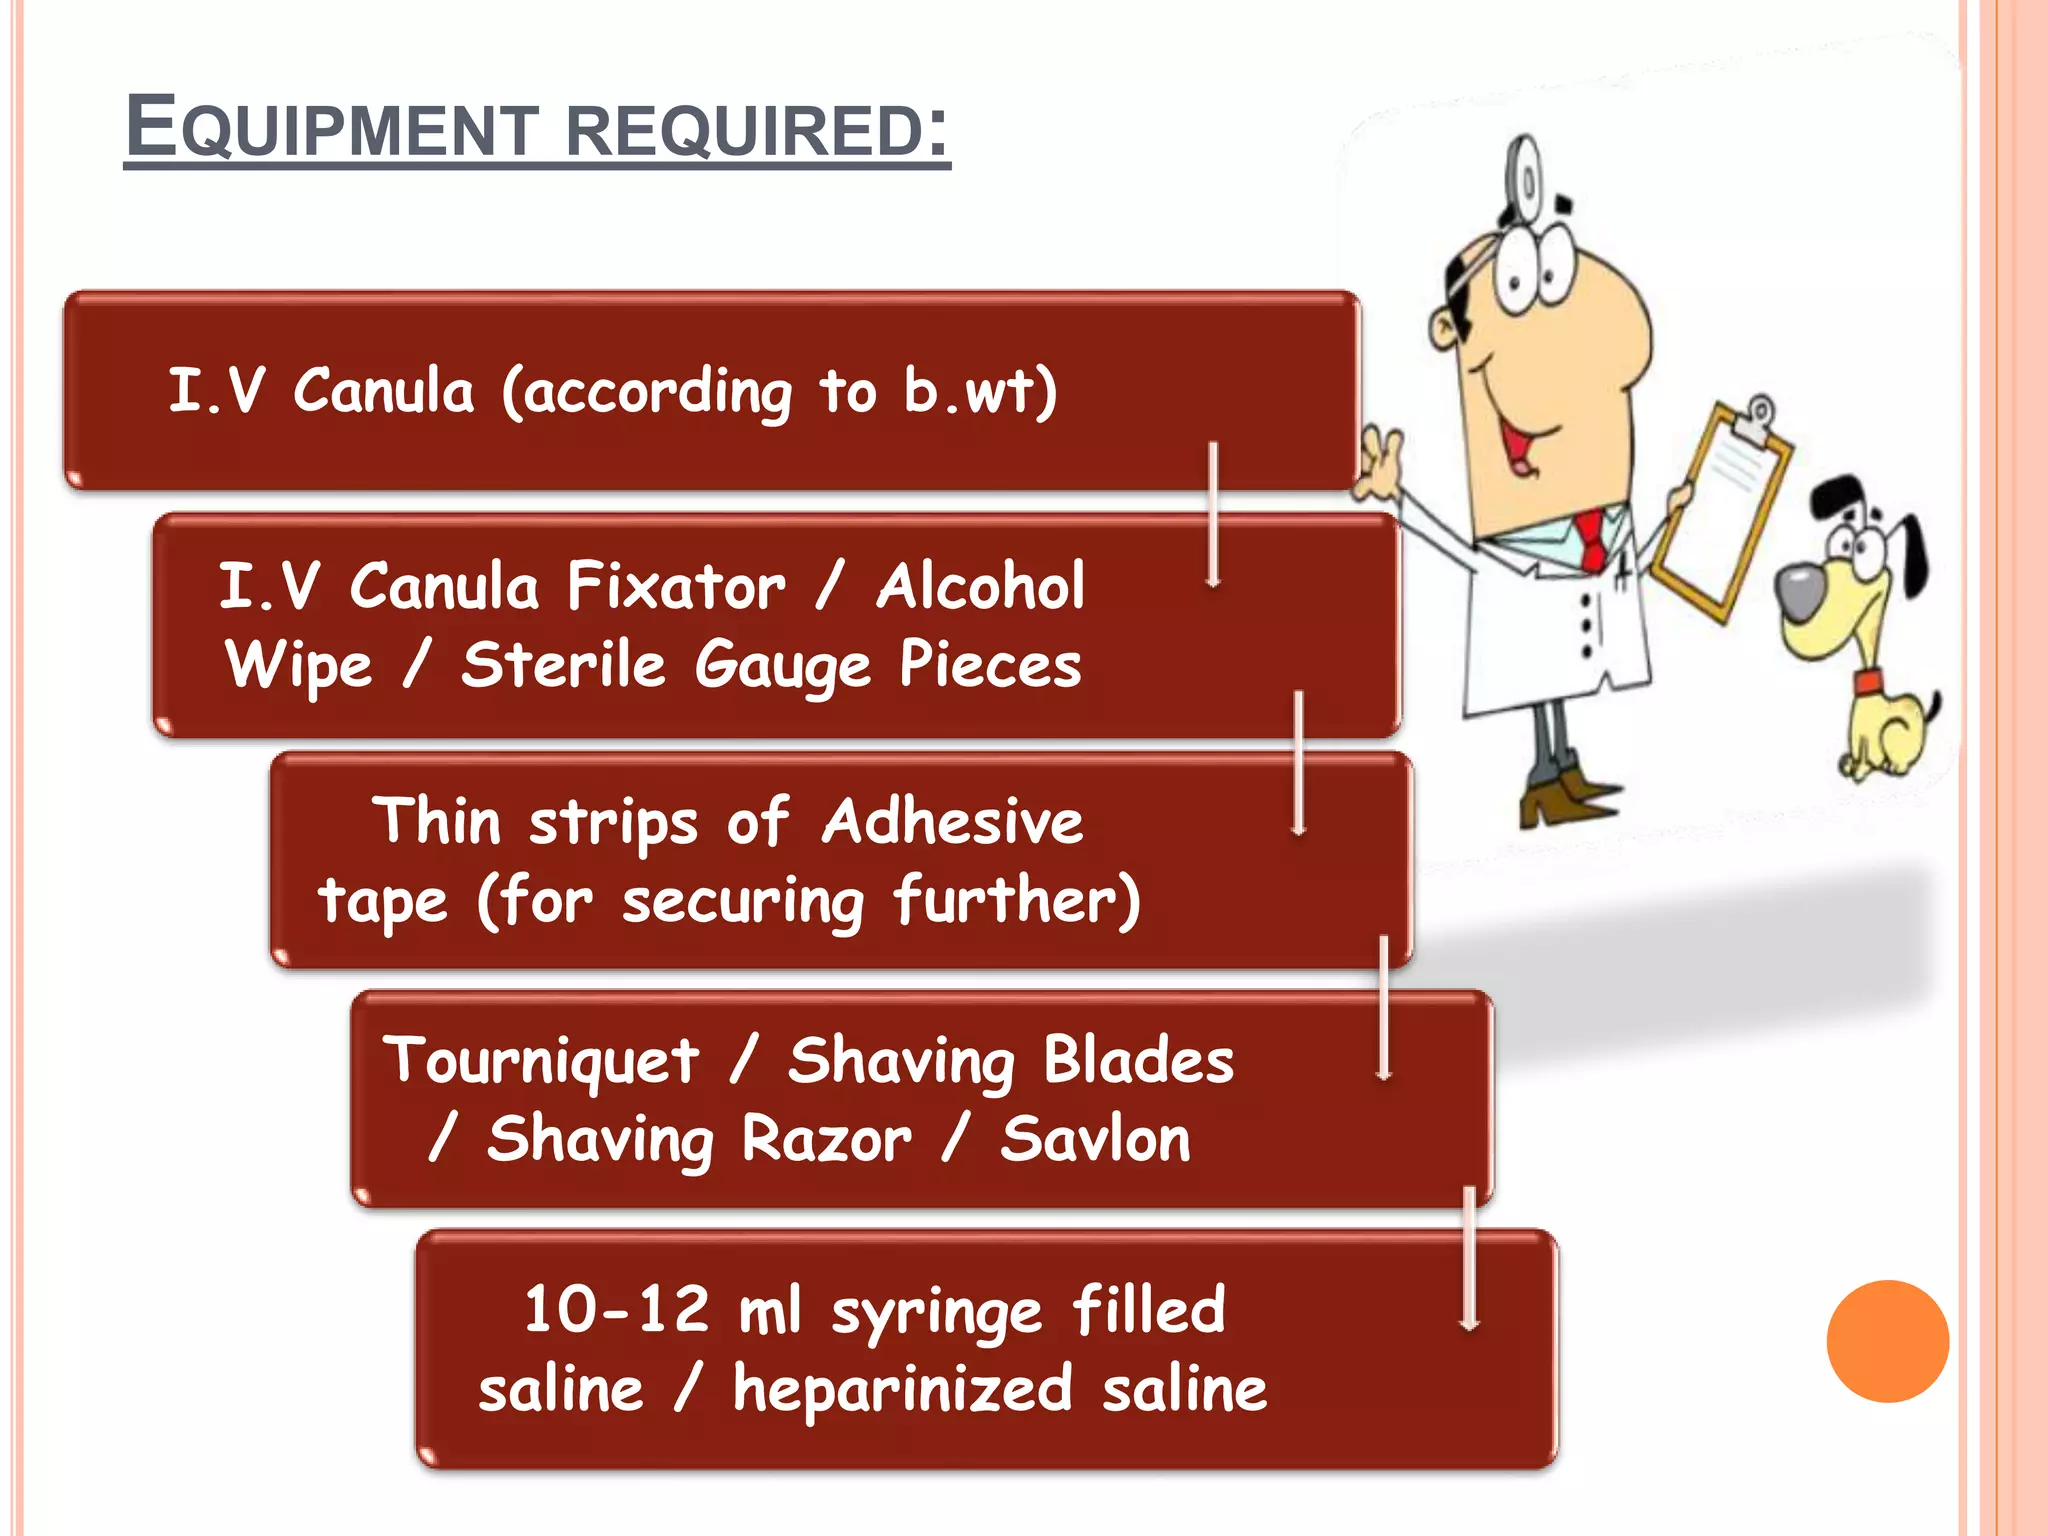
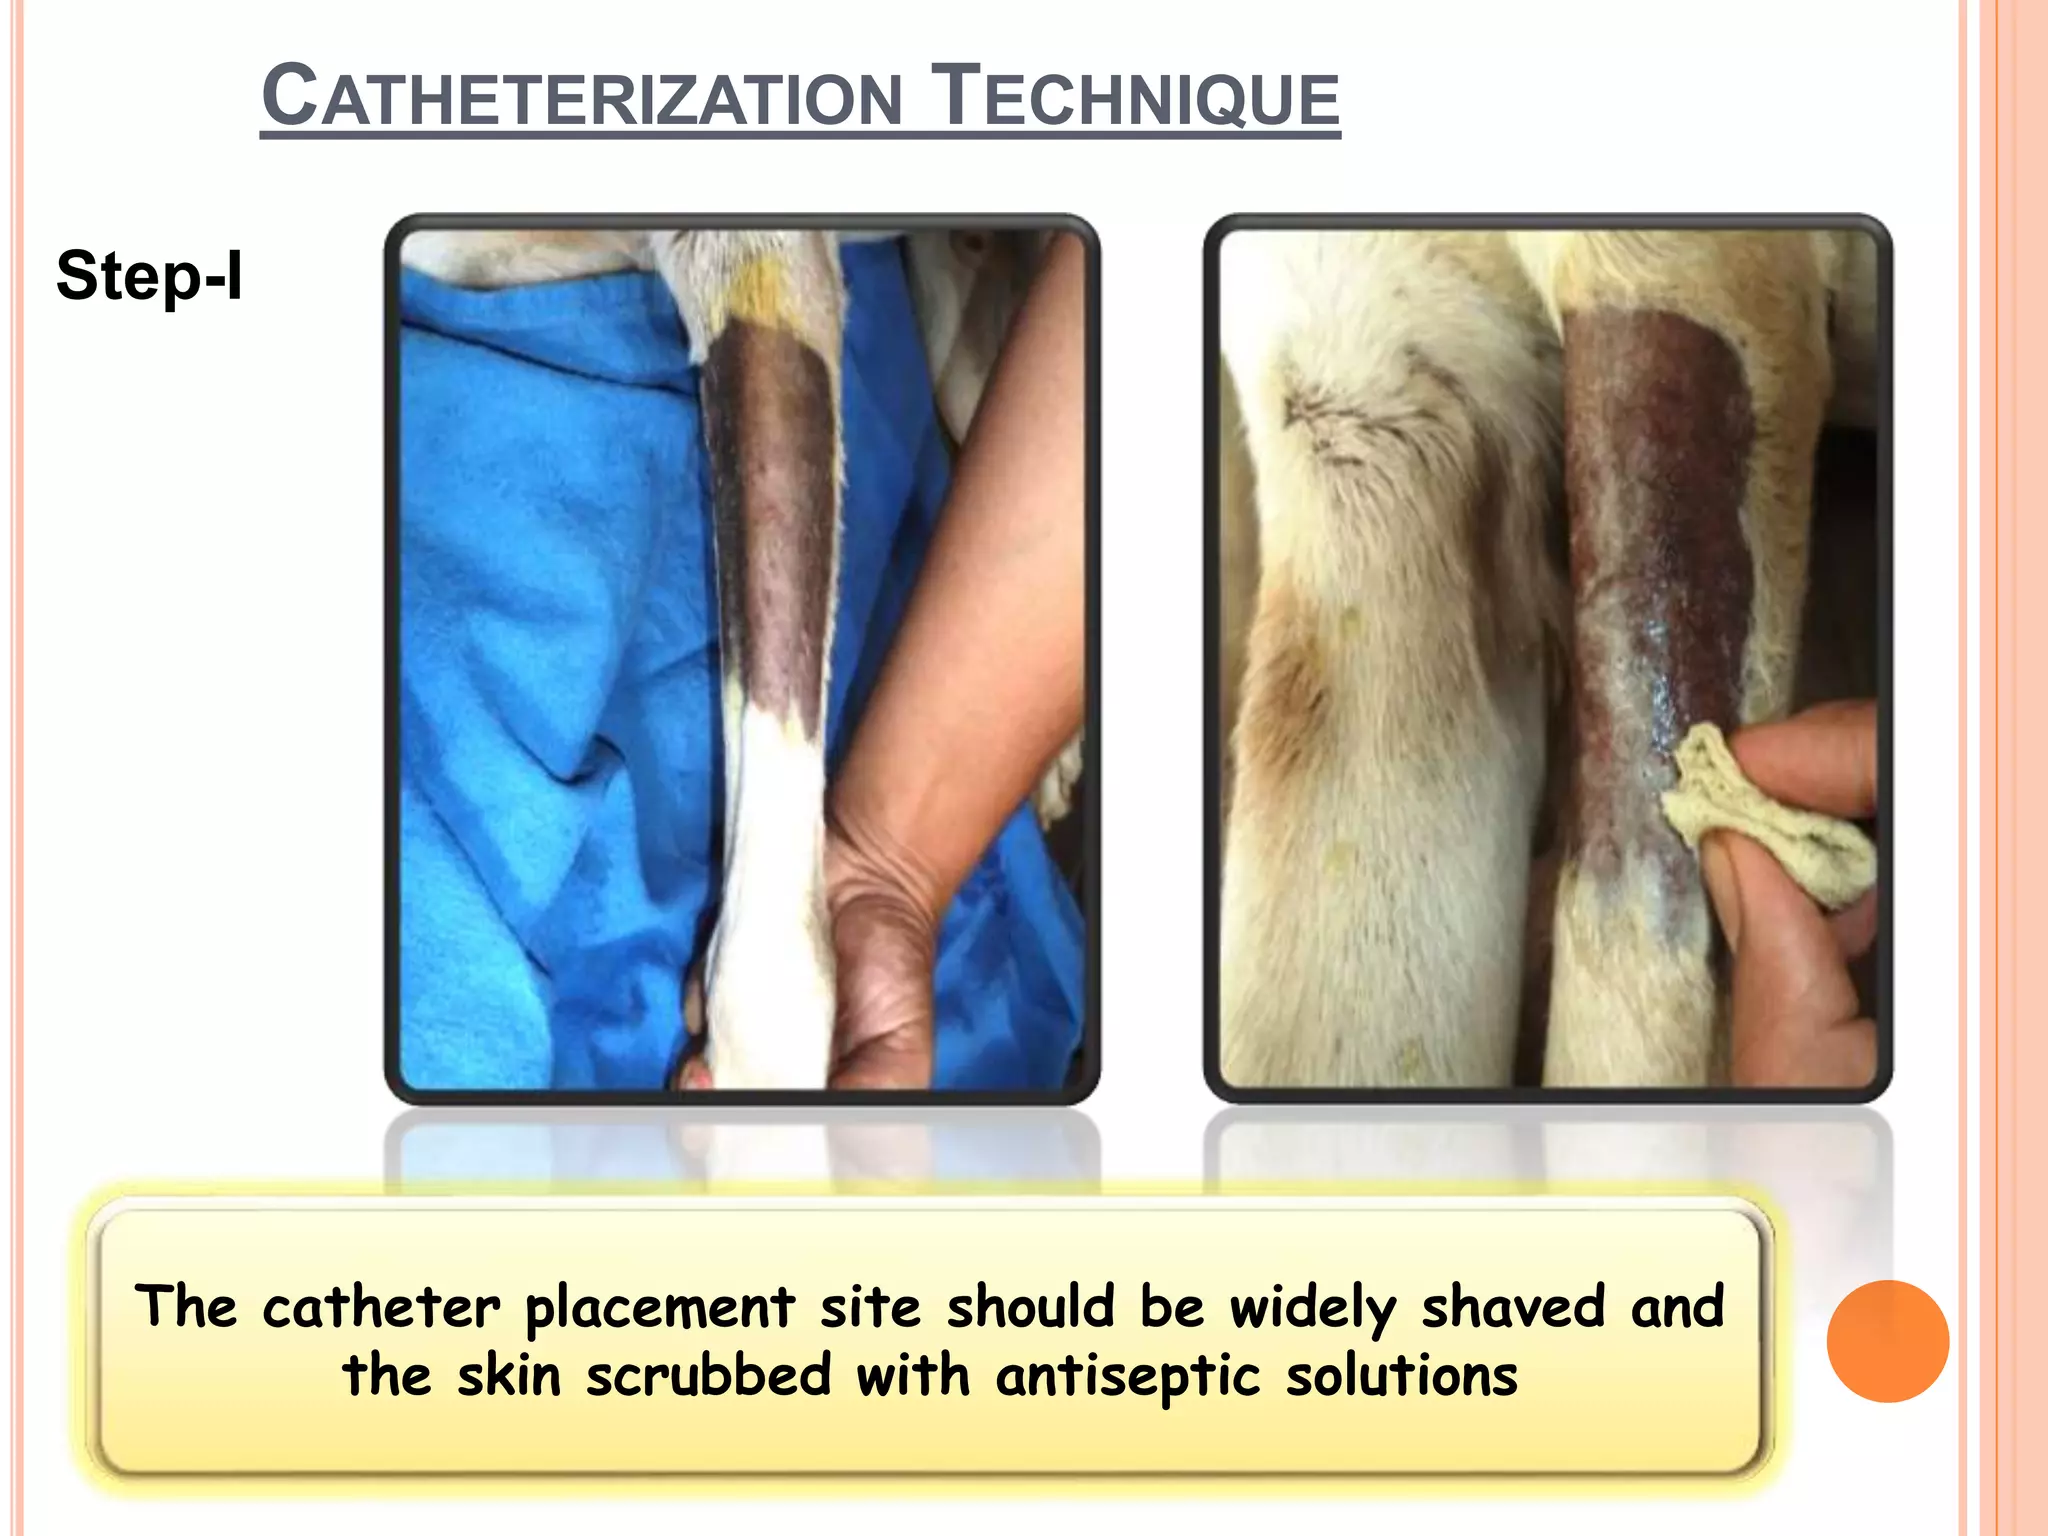
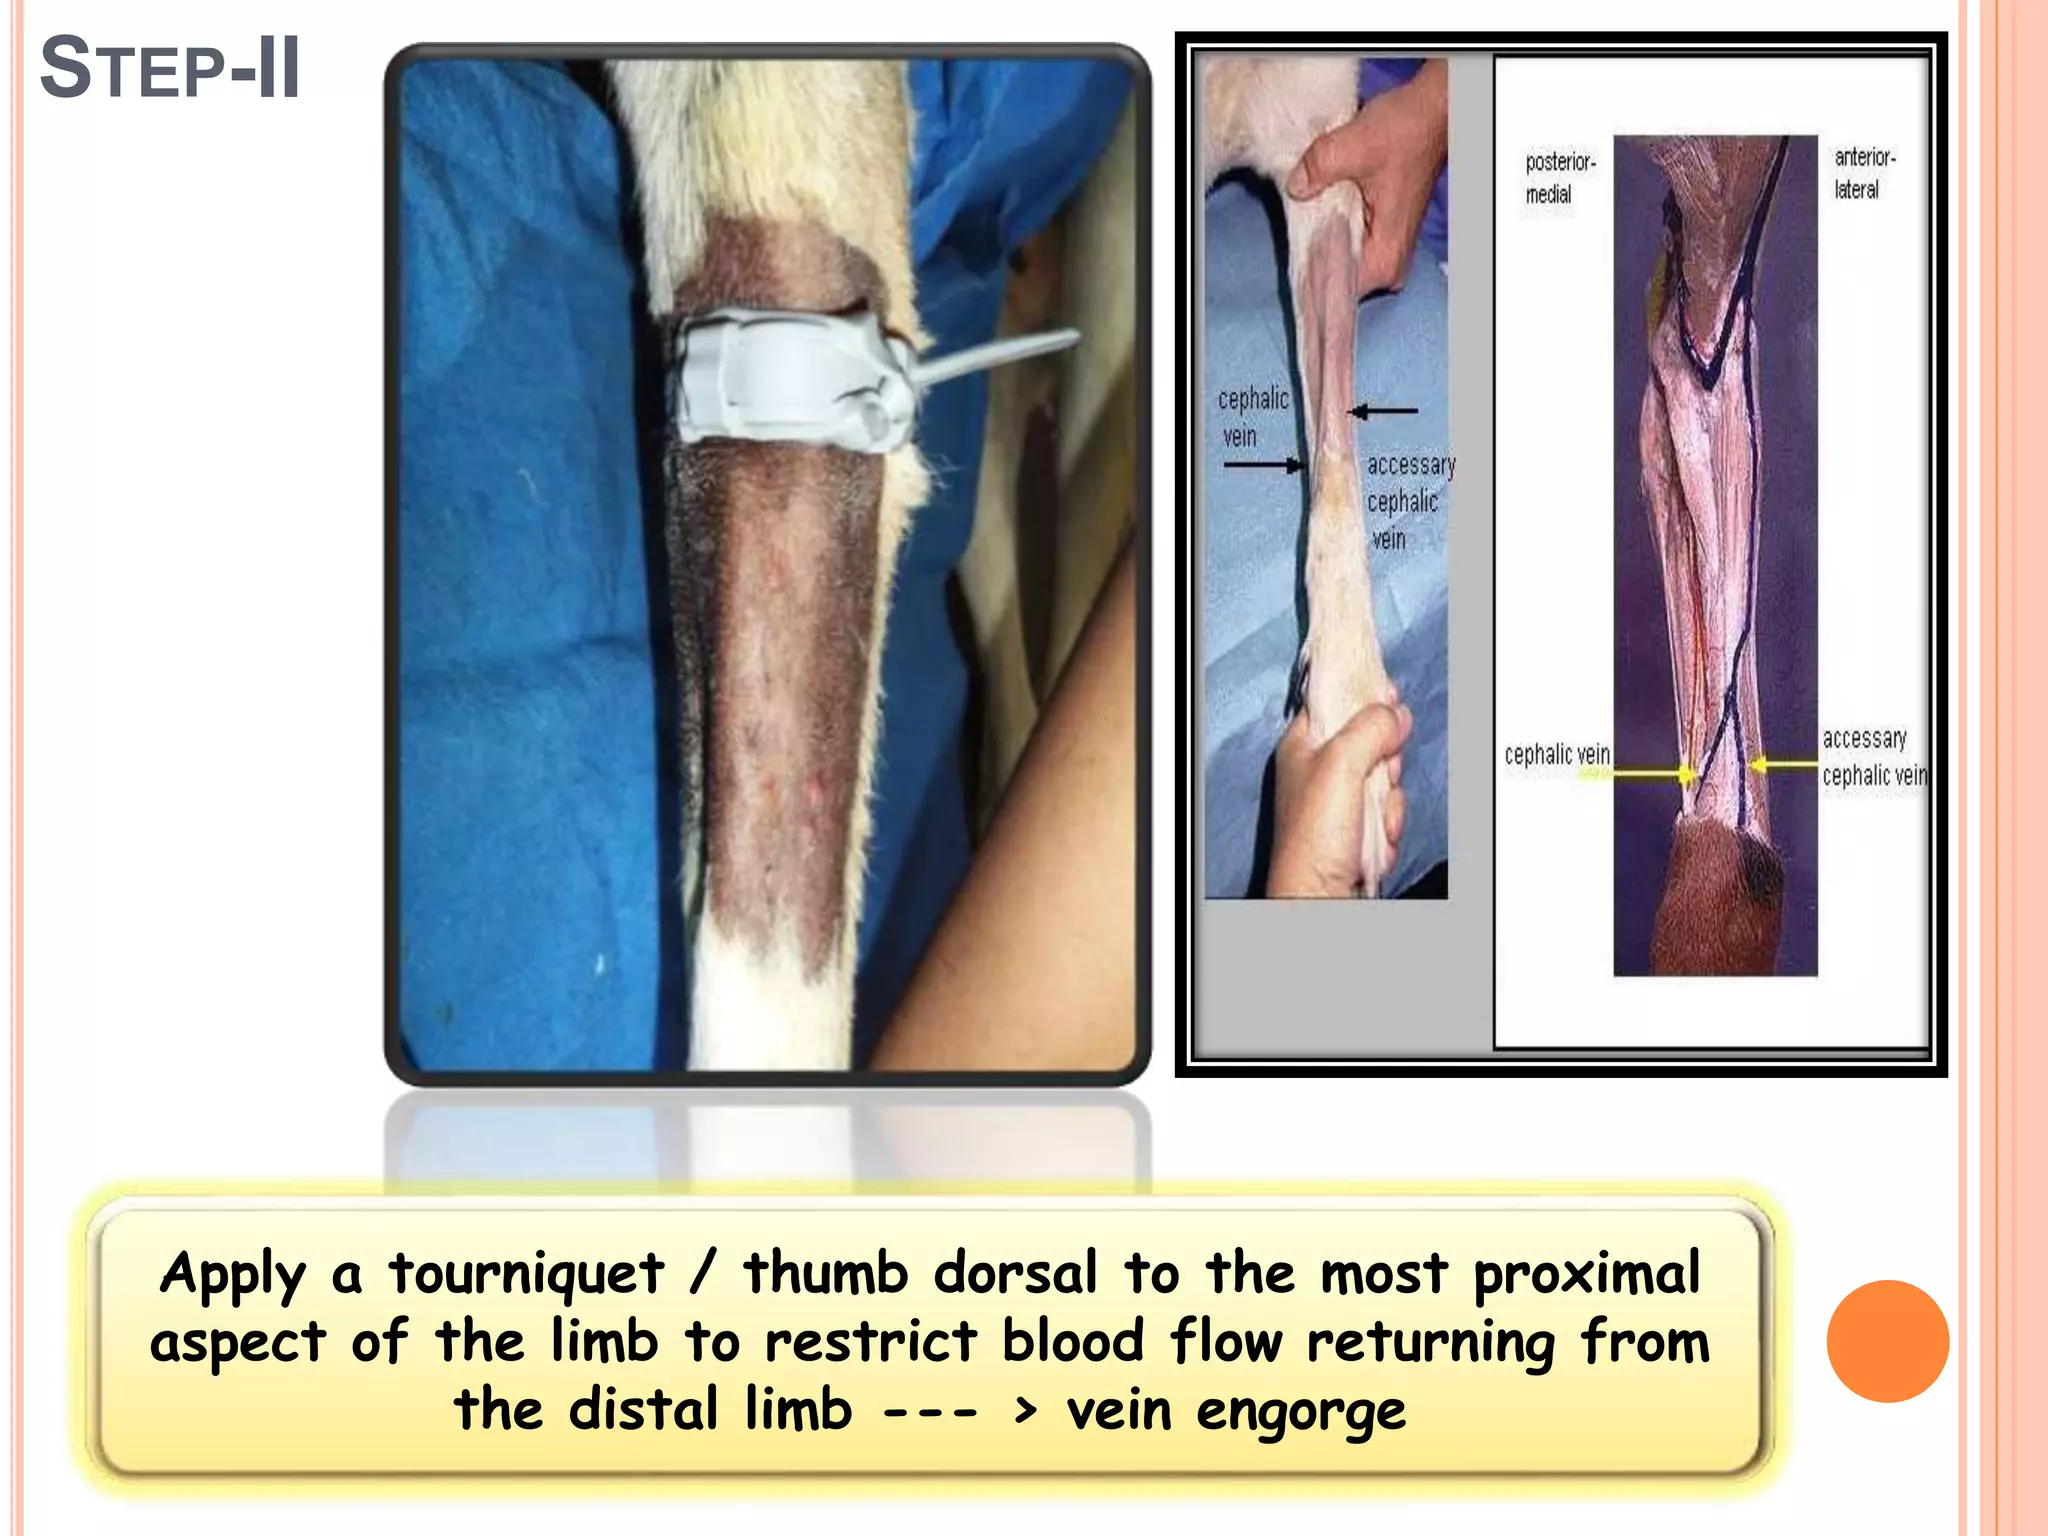
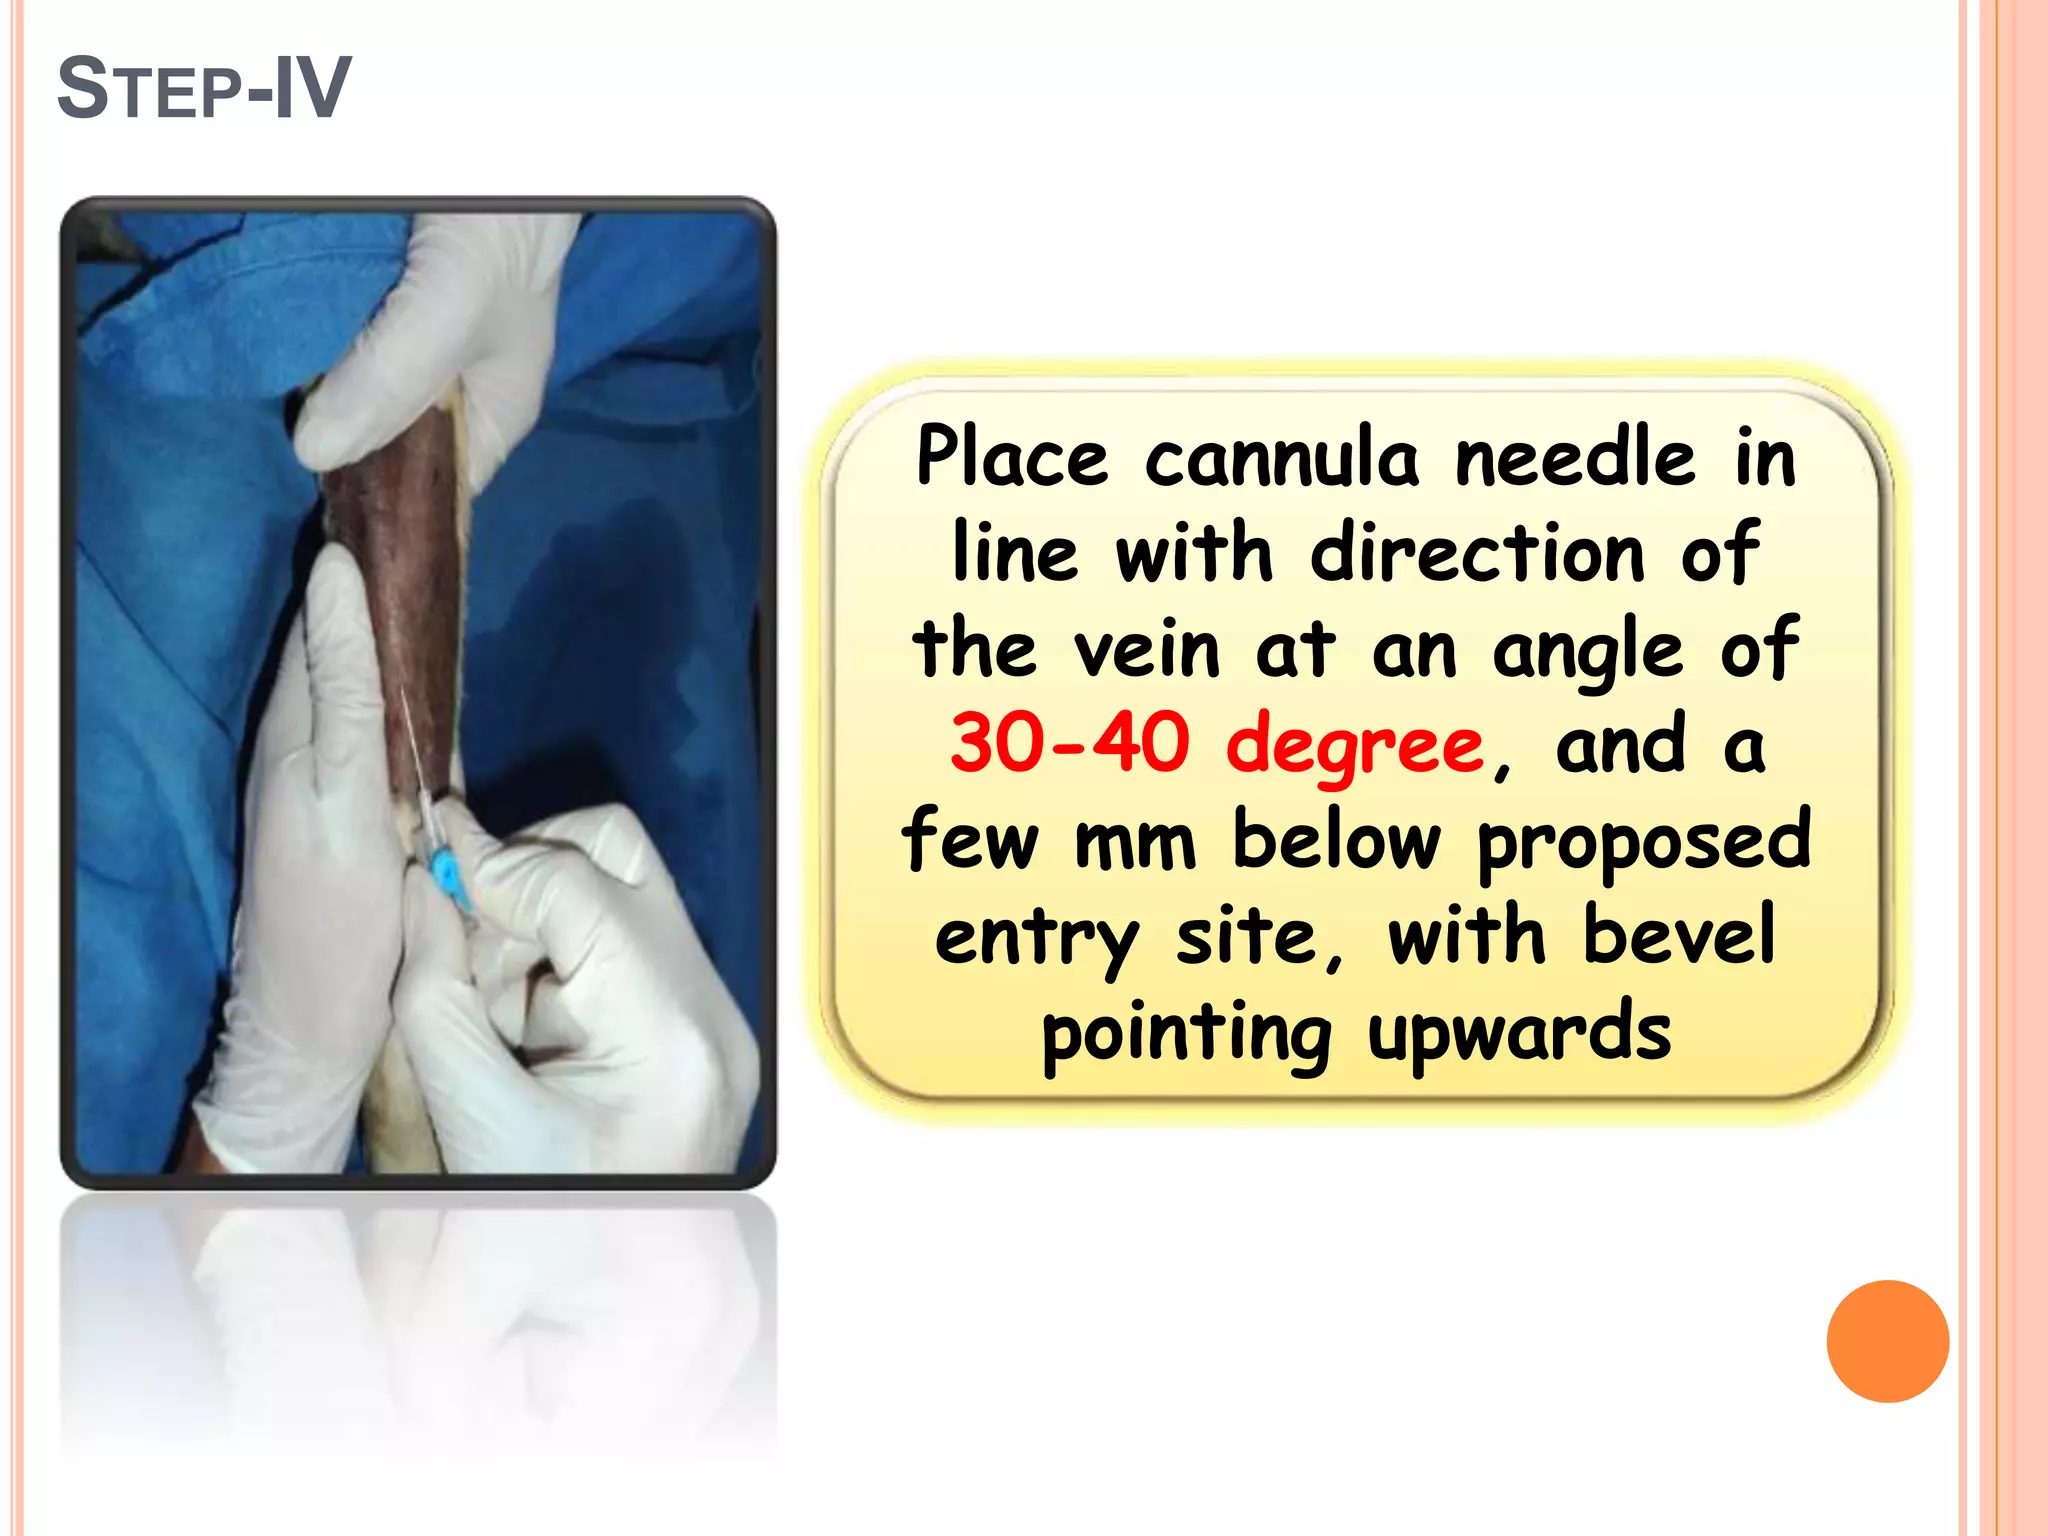
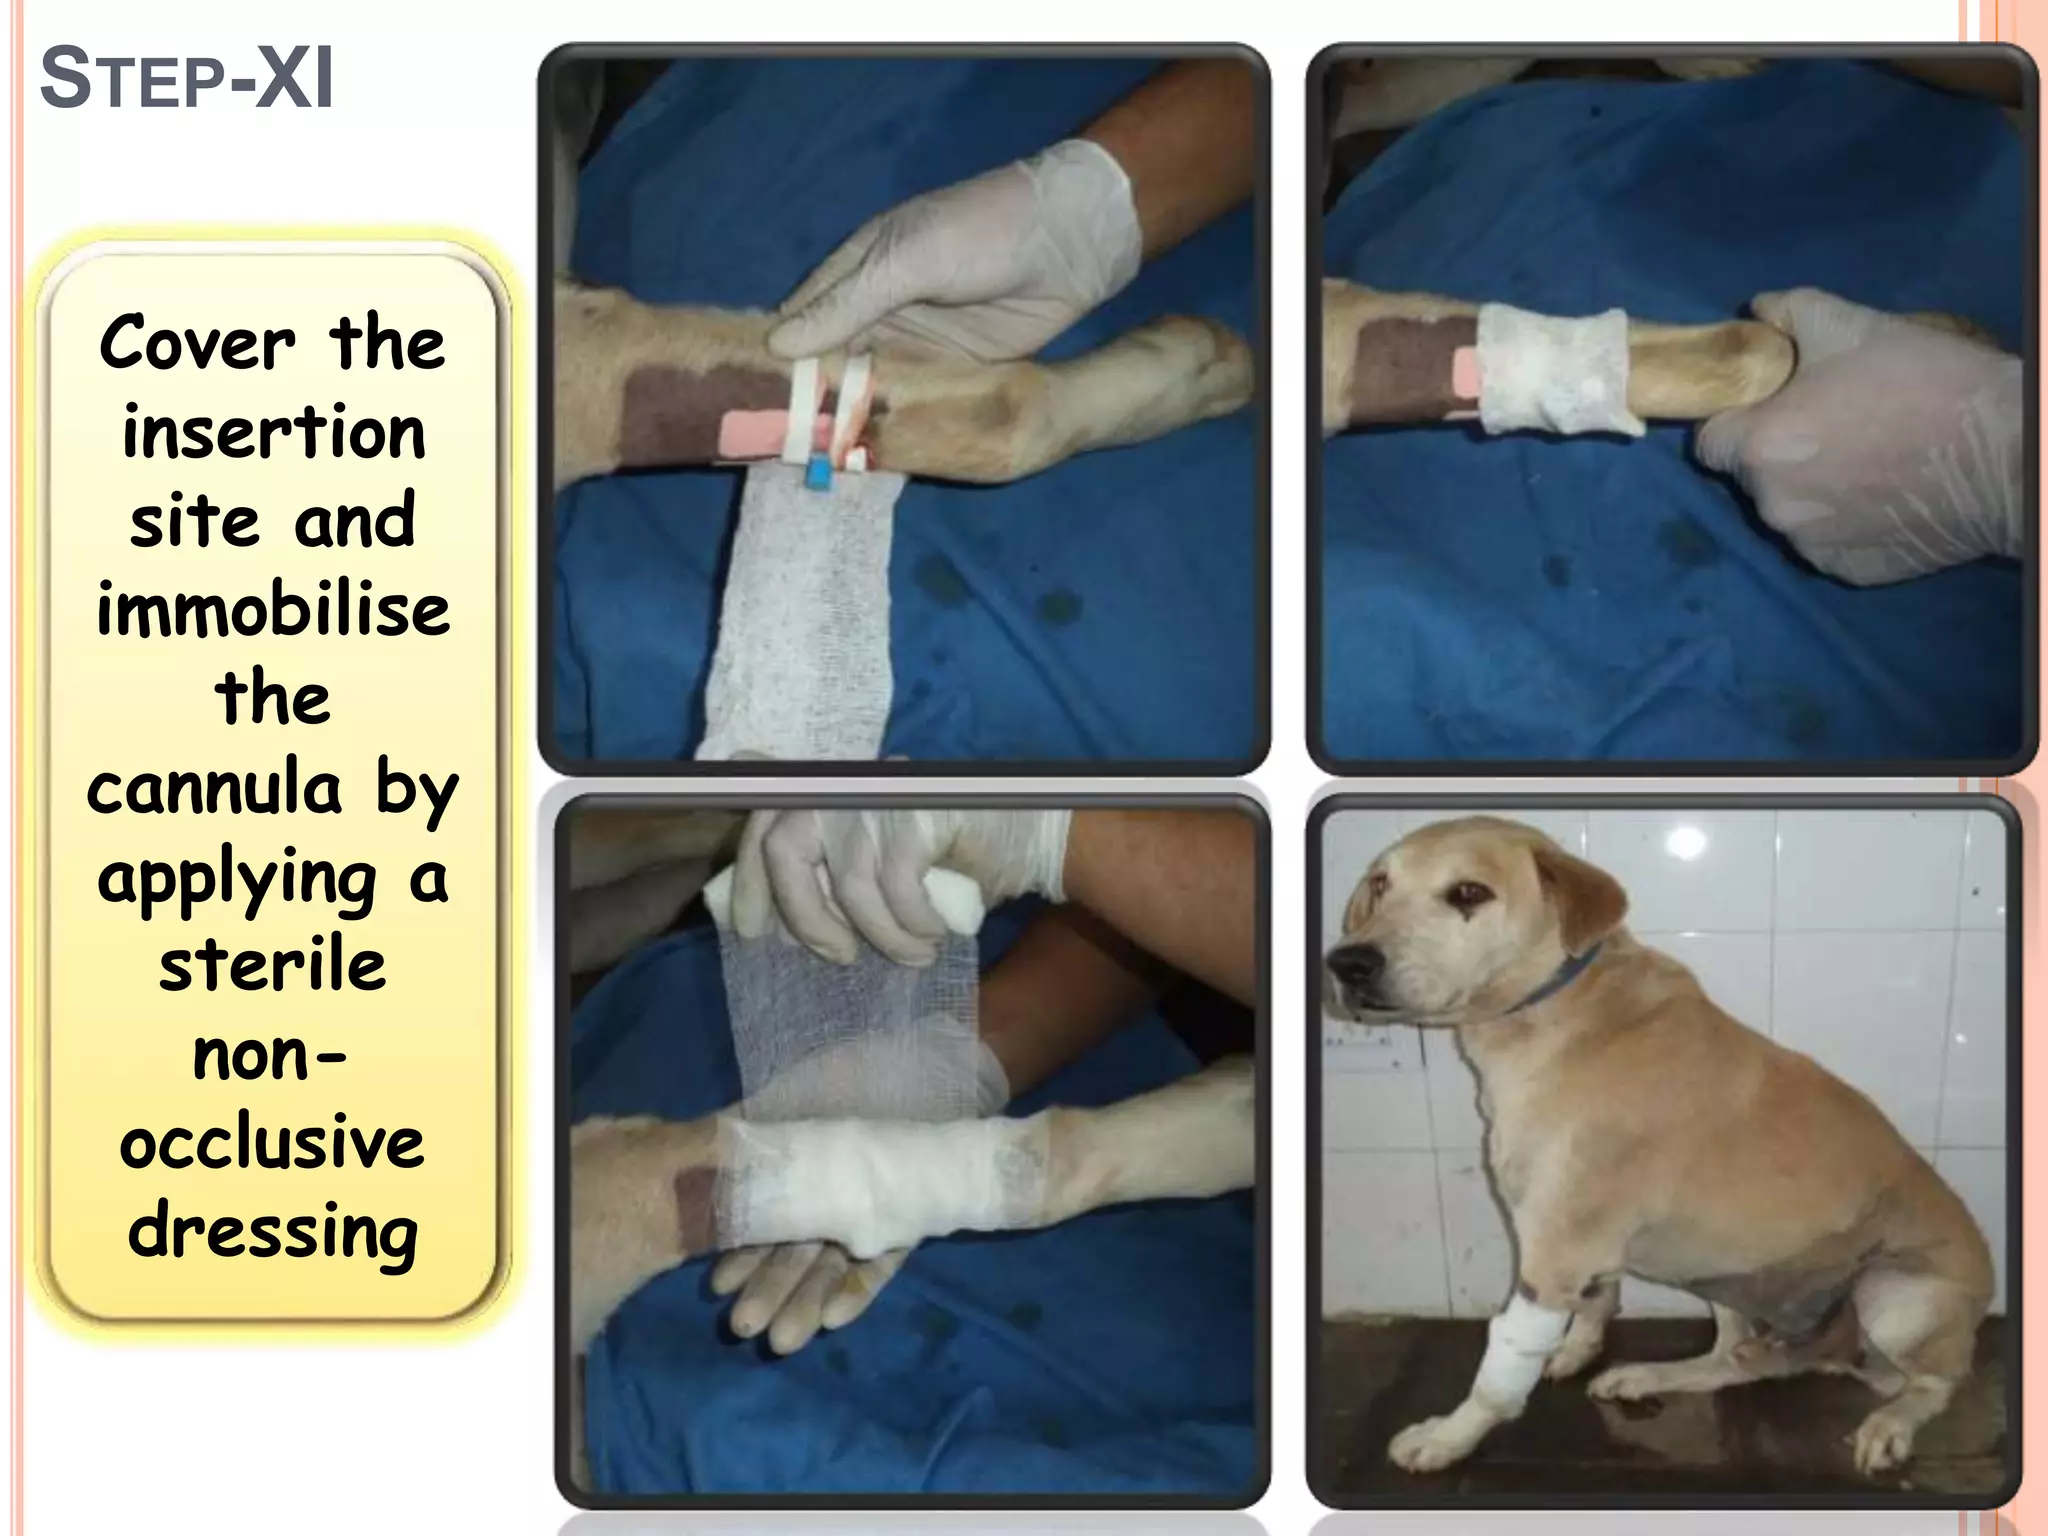
Presented By: Rohin Sharma
(PhD Scholar)
Project Instructor: Dr. Adarsh Kumar
(Associate Professor)
INTRAVENOUS CATHETERIZATIONAND TAPING
PROCEDURE
Department of Veterinary Surgery and Radiology
D.G.C.N COVAS , CSKHPKV, PALAMPUR (H.P)
Intravenous cannulation is a technique in which a cannula is
placed inside a vein to provide venous access
Introduction :
Venous valves
encourage
unidirectional flow of
blood and prevent
pooling of blood in the
dependent portions of
the extremities; they
also can impede the
passage of a catheter
through and into a
vein
Venous valves
are more
numerous just
distal to the
points were
tributaries join
larger veins and
in the lower
extremities
INDICATIONS:
Repeated blood sampling
Intravenous fluid administration
Intravenous medication administration
Intravenous chemotherapy administration
Intravenous nutritional support
Intravenous blood or blood products administration
Intravenous administration of radiological contrast agents
(eg, computed tomography, magnetic resonance imaging,
nuclear imaging)
CATHETER SELECTION
COLOR SIZE (guage) mm Max. flow / min (length)
Orange 14 2.0 265 ml/min (1=44mm)
Grey 16 1.7 170 ml/min (1=42mm)
Green 18 1.2 90 ml/min (1=40mm)
Pink 20 1.0 55 ml/min (1=32mm)
Blue 22 0.8 25 ml/min (1=25mm)
Yellow 24 0.6 20 ml/min (1=20mm)
Silicon and polyurethane are minimally reactive, making these materials ideal for use in long-term catheters
EQUIPMENT REQUIRED:
I.V Canula (according to b.wt)
I.V Canula Fixator / Alcohol
Wipe / Sterile Gauge Pieces
Thin strips of Adhesive
tape (for securing further)
Tourniquet / Shaving Blades
/ Shaving Razor / Savlon
10-12 ml syringe filled
saline / heparinized saline
STEP WISE
PROCEDURE
CATHETERIZATION TECHNIQUE
Step-I
The catheter placement site should be widely shaved and
the skin scrubbed with antiseptic solutions
STEP-II
Apply a tourniquet / thumb dorsal to the most proximal
aspect of the limb to restrict blood flow returning from
the distal limb --- > vein engorge
STEP-III
cleanse skin / disinfect
the skin area with
alcohol wipe
STEP-IV
Place cannula needle in
line with direction of
the vein at an angle of
30-40 degree, and a
few mm below proposed
entry site, with bevel
pointing upwards
STEP-V
Advance the catheter
into the place where you
visualized or palpated
the vein
Once you receive blood
back into the hub of the
catheter, slowly feed
the catheter off the
stylet and into the vein
STEP-VI
Withdraw the needle stylet (holding the
cannula steady) about 5mm to avoid
piercing the posterior vein wall, there
should be a further flashback of blood
along the shaft of the cannula and now
advance the cannula into the vein
STEP-VII
Catheter in place. Attach the fluid line
immediately after removing the stylet and
driven the i.v cannula fixator underneath
the fluid line over the catheter hub
STEP—VIII
Proper fixing of the cannula fixator with
the help of adhesive tape in a double row
i.e just cranial and caudal to injectionport
cap
STEP-IX
After proper taping, the
fluid administration set is
looped and taped to the
leg
This reduces the chance of
accidental removal of the
catheter if the
administration set is pulled
STEP-X
After completion, flush the cannula with
heparinised saline to ensure cannula
patency and after this, attach the
“luer lock plug” to prevent the blood
outflow
STEP-XI
Cover the
insertion
site and
immobilise
the
cannula by
applying a
sterile
non-
occlusive
dressing
Secure…….. Secure
Scalp
vein
set
•The dog's head to to your
right
•The quadriceps muscle is
located anterior to the
femur
•The left thumb is on the
femur
•The needle is inserted at a
right angle to the muscle
belly
SECURING THE CANNULA
 It is important to secure the cannula to prevent
mechanical phlebitis. This can be done with
clean tape or a special adhesive dressing
 Care should be taken to avoid the insertion site. If
the device is located over a joint, the joint should be
immobilised and splinted to prevent movement and
dislodgement of the cannula
CARE OF THE CANNULA
 Once sited the cannula should be flushed with
either normal saline or heparinised saline. The
site should be regularly inspected for signs of
phlebitis
 Peripheral cannula should be re-sited every 48-
72 hours to reduce the risk of phlebitis, but this
may be difficult in patients with difficult veins
 Cannula should not remain in situ for any
longer than necessary to reduce the risks of
infection. Consideration should be given to
resiting them after 48-72 hours
 When removing the cannula, pressure should
be applied to the site for at least a minute and
the site should be occluded with a sterile
dressing
CANNULA REMOVAL
Intravenous catheter

Intravenous catheter

  • 1.
    Presented By: RohinSharma (PhD Scholar) Project Instructor: Dr. Adarsh Kumar (Associate Professor) INTRAVENOUS CATHETERIZATIONAND TAPING PROCEDURE Department of Veterinary Surgery and Radiology D.G.C.N COVAS , CSKHPKV, PALAMPUR (H.P)
  • 2.
    Intravenous cannulation isa technique in which a cannula is placed inside a vein to provide venous access Introduction : Venous valves encourage unidirectional flow of blood and prevent pooling of blood in the dependent portions of the extremities; they also can impede the passage of a catheter through and into a vein Venous valves are more numerous just distal to the points were tributaries join larger veins and in the lower extremities
  • 3.
    INDICATIONS: Repeated blood sampling Intravenousfluid administration Intravenous medication administration Intravenous chemotherapy administration Intravenous nutritional support Intravenous blood or blood products administration Intravenous administration of radiological contrast agents (eg, computed tomography, magnetic resonance imaging, nuclear imaging)
  • 4.
    CATHETER SELECTION COLOR SIZE(guage) mm Max. flow / min (length) Orange 14 2.0 265 ml/min (1=44mm) Grey 16 1.7 170 ml/min (1=42mm) Green 18 1.2 90 ml/min (1=40mm) Pink 20 1.0 55 ml/min (1=32mm) Blue 22 0.8 25 ml/min (1=25mm) Yellow 24 0.6 20 ml/min (1=20mm) Silicon and polyurethane are minimally reactive, making these materials ideal for use in long-term catheters
  • 5.
    EQUIPMENT REQUIRED: I.V Canula(according to b.wt) I.V Canula Fixator / Alcohol Wipe / Sterile Gauge Pieces Thin strips of Adhesive tape (for securing further) Tourniquet / Shaving Blades / Shaving Razor / Savlon 10-12 ml syringe filled saline / heparinized saline
  • 6.
  • 7.
    CATHETERIZATION TECHNIQUE Step-I The catheterplacement site should be widely shaved and the skin scrubbed with antiseptic solutions
  • 8.
    STEP-II Apply a tourniquet/ thumb dorsal to the most proximal aspect of the limb to restrict blood flow returning from the distal limb --- > vein engorge
  • 9.
    STEP-III cleanse skin /disinfect the skin area with alcohol wipe
  • 10.
    STEP-IV Place cannula needlein line with direction of the vein at an angle of 30-40 degree, and a few mm below proposed entry site, with bevel pointing upwards
  • 11.
    STEP-V Advance the catheter intothe place where you visualized or palpated the vein Once you receive blood back into the hub of the catheter, slowly feed the catheter off the stylet and into the vein
  • 12.
    STEP-VI Withdraw the needlestylet (holding the cannula steady) about 5mm to avoid piercing the posterior vein wall, there should be a further flashback of blood along the shaft of the cannula and now advance the cannula into the vein
  • 13.
    STEP-VII Catheter in place.Attach the fluid line immediately after removing the stylet and driven the i.v cannula fixator underneath the fluid line over the catheter hub
  • 14.
    STEP—VIII Proper fixing ofthe cannula fixator with the help of adhesive tape in a double row i.e just cranial and caudal to injectionport cap
  • 15.
    STEP-IX After proper taping,the fluid administration set is looped and taped to the leg This reduces the chance of accidental removal of the catheter if the administration set is pulled
  • 16.
    STEP-X After completion, flushthe cannula with heparinised saline to ensure cannula patency and after this, attach the “luer lock plug” to prevent the blood outflow
  • 17.
    STEP-XI Cover the insertion site and immobilise the cannulaby applying a sterile non- occlusive dressing
  • 18.
  • 20.
    •The dog's headto to your right •The quadriceps muscle is located anterior to the femur •The left thumb is on the femur •The needle is inserted at a right angle to the muscle belly
  • 21.
    SECURING THE CANNULA It is important to secure the cannula to prevent mechanical phlebitis. This can be done with clean tape or a special adhesive dressing  Care should be taken to avoid the insertion site. If the device is located over a joint, the joint should be immobilised and splinted to prevent movement and dislodgement of the cannula
  • 22.
    CARE OF THECANNULA  Once sited the cannula should be flushed with either normal saline or heparinised saline. The site should be regularly inspected for signs of phlebitis  Peripheral cannula should be re-sited every 48- 72 hours to reduce the risk of phlebitis, but this may be difficult in patients with difficult veins
  • 23.
     Cannula shouldnot remain in situ for any longer than necessary to reduce the risks of infection. Consideration should be given to resiting them after 48-72 hours  When removing the cannula, pressure should be applied to the site for at least a minute and the site should be occluded with a sterile dressing CANNULA REMOVAL