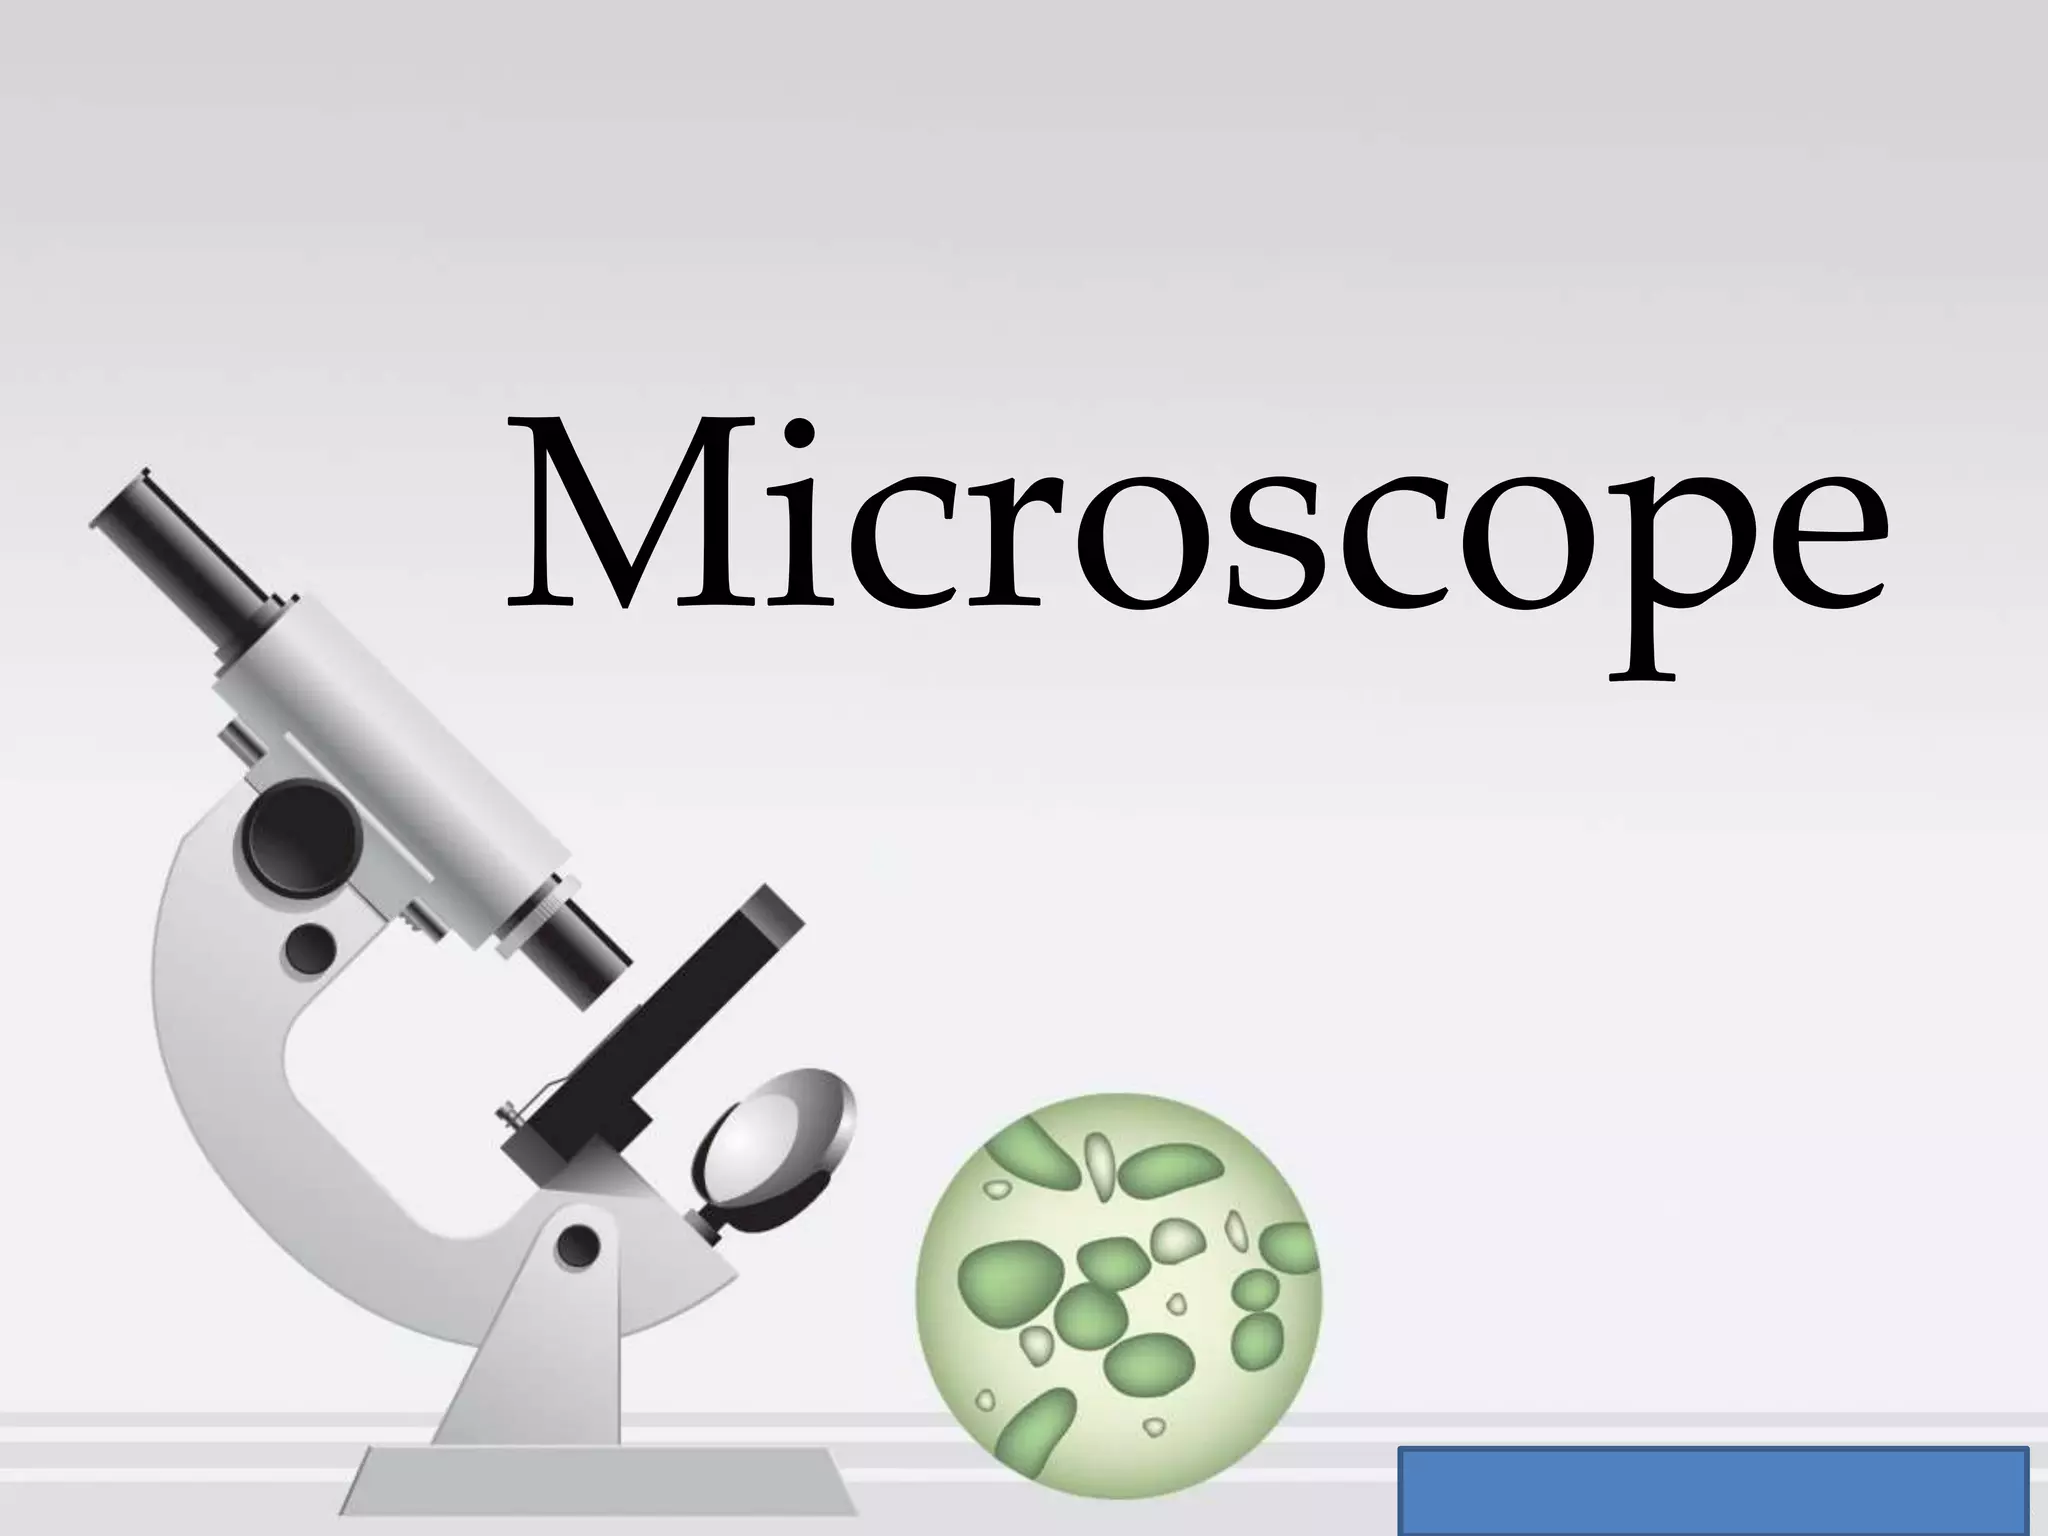
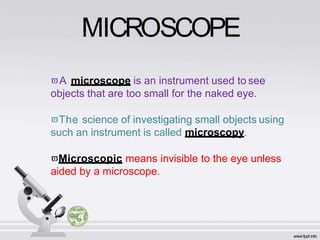
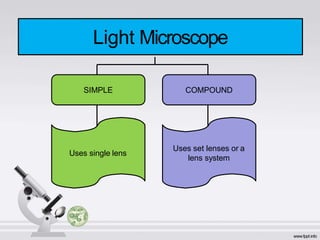
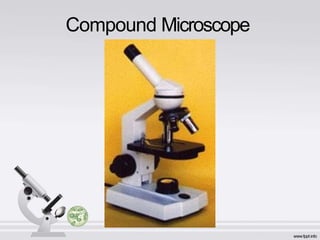
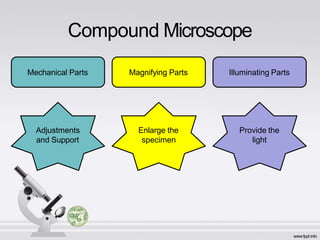
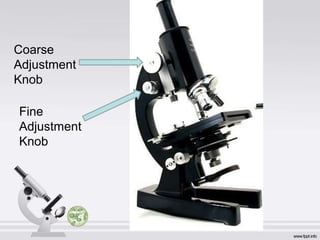
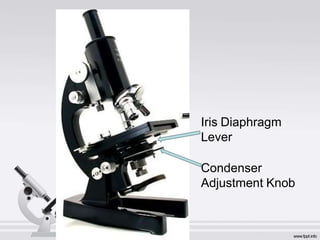
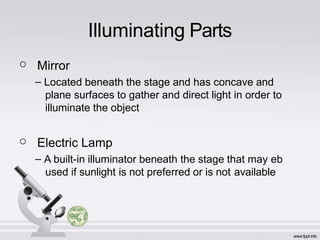
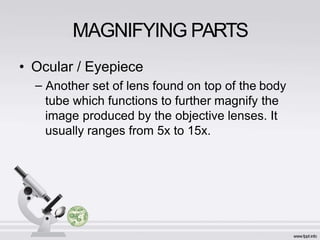
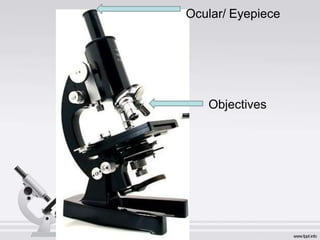
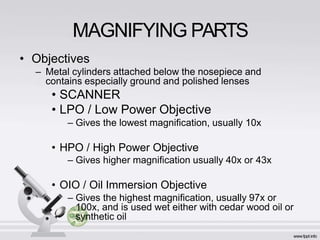
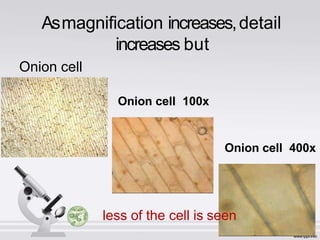
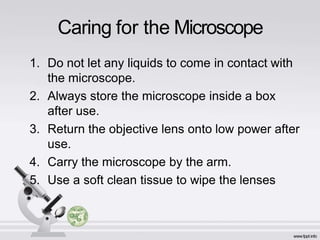
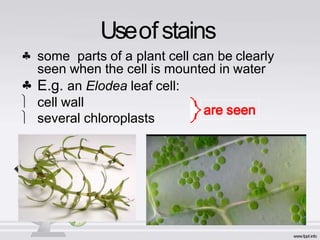
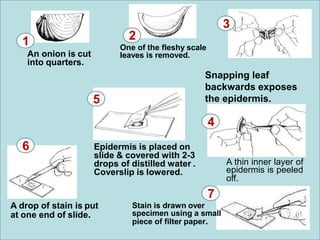
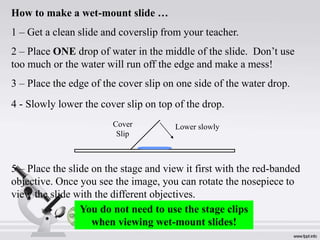
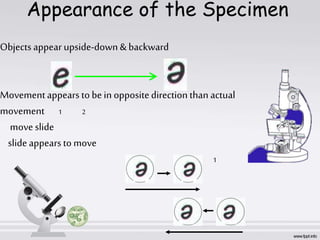
Microscope
-Sir Leomered P. Medina
MICROSCOPE
A microscope is an instrument used to see
objects that are too small for the naked eye.
The science of investigating small objects using
such an instrument is called microscopy.
Microscopic means invisible to the eye unless
aided by a microscope.
Parts and Functions of a
Compound Microscope
Light Microscope
Uses single lens
Uses set lenses or a
lens system
SIMPLE COMPOUND
Simple Light Microscope
Compound Microscope
Compound Microscope
Mechanical Parts Magnifying Parts Illuminating Parts
Adjustments
and Support
Enlarge the
specimen
Provide the
light
Mechanical Parts
o Base
– Bottommost portion that supports the
entire/lower microscope
o Pillar
– Part above the base that supports the other
parts
o Inclination Joint
– Allows for tilting of the microscope for
convenience of the user
Inclination Joint
Pillar
Base
o Arm/Neck
– Curved/slanted part which is held while
carrying the microscope
o Stage
– Platform where object to be examined is
placed
o Stage Clips
– Secures the specimen to the stage
Mechanical Parts
o Stage Opening
o Body Tube
– Attached to the arm and bears the lenses
o Draw Tube
– Cylindrical structure on top of the body tube
that holds the ocular lenses
Mechanical Parts
Draw Tube
Stage
Body
Tube
Arm /
Neck
o Revolving Nosepiece
– Rotating disc where the objectives are
attached
o Dust Shield
– Lies atop the nosepiece and keeps dust from
settling on the objectives
Mechanical Parts
Dust Shield
Revolving
Nosepiece
o Coarse Adjustment Knob
– Geared to the body tube which elevates or
lowers when rotated bringing the object into
approximate focus
o Fine Adjustment Knob
– A smaller knob for delicate focusing bringing
the object into perfect focus
Coarse
Adjustment
Knob
Fine
Adjustment
Knob
• Condenser Adjustment Knob
– Elevates and lowers the condenser to
regulate the intensity of light
• Iris Diaphragm Lever
– Lever in front of the condenser and which is
moved horizontally to open/close the
diaphragm
Mechanical Parts
Iris Diaphragm
Lever
Condenser
Adjustment Knob
Illuminating Parts
o Mirror
– Located beneath the stage and has concave and
plane surfaces to gather and direct light in order to
illuminate the object
o Electric Lamp
– A built-in illuminator beneath the stage that may eb
used if sunlight is not preferred or is not available
Mirror /
Electric Lamp
MAGNIFYING PARTS
• Ocular / Eyepiece
– Another set of lens found on top of the body
tube which functions to further magnify the
image produced by the objective lenses. It
usually ranges from 5x to 15x.
Ocular/ Eyepiece
Objectives
MAGNIFYING PARTS
• Objectives
– Metal cylinders attached below the nosepiece and
contains especially ground and polished lenses
• SCANNER
• LPO / Low Power Objective
– Gives the lowest magnification, usually 10x
• HPO / High Power Objective
– Gives higher magnification usually 40x or 43x
• OIO / Oil Immersion Objective
– Gives the highest magnification, usually 97x or
100x, and is used wet either with cedar wood oil or
synthetic oil
Total Magnification
Magnification = Objective lens X Eyepiece lensMagnification = Objective lens X Eyepiece lens
e.g. What is the total
magnification if the objective lens
is twenty times (X20) and the
eyepiece lens five times (X5)?
Magnification = 20 X 5 = X100
Asmagnification increases,detail
increases but
Onion cell
40x
Onion cell 100x
Onion cell 400x
less of the cell is seen
Caring for the Microscope
1. Do not let any liquids to come in contact with
the microscope.
2. Always store the microscope inside a box
after use.
3. Return the objective lens onto low power after
use.
4. Carry the microscope by the arm.
5. Use a soft clean tissue to wipe the lenses
Microscope
slides
Coverslip
s
Preparing a
slide as a wet
mount.
Useofstains
 some parts of a plant cell can be clearly
seen when the cell is mounted in water
 E.g. an Elodea leaf cell:
 cell wall
 several chloroplasts
 other cell structures which are not so
obvious can often be shown up more clearly
by the addition of dyes called STAINS
Iodine Solution
Used to stain plant
cells
Methylene Blue
Used to stain animal
cells
A thin inner layer of
epidermis is peeled
off.
Snapping leaf
backwards exposes
the epidermis.
Epidermis is placed on
slide & covered with 2-3
drops of distilled water .
Coverslip is lowered.
A drop of stain is put
at one end of slide.
1
An onion is cut
into quarters.
2
One of the fleshy scale
leaves is removed.
3
5
4
6
7
Stain is drawn over
specimen using a small
piece of filter paper.
How to make a wet-mount slide …
1 – Get a clean slide and coverslip from your teacher.
2 – Place ONE drop of water in the middle of the slide. Don’t use
too much or the water will run off the edge and make a mess!
3 – Place the edge of the cover slip on one side of the water drop.
You do not need to use the stage clips
when viewing wet-mount slides!
5 – Place the slide on the stage and view it first with the red-banded
objective. Once you see the image, you can rotate the nosepiece to
view the slide with the different objectives.
4 - Slowly lower the cover slip on top of the drop.
Cover
Slip
Lower slowly
Appearance of the Specimen
Objects appear upside-down&backward
Movementappears tobein oppositedirectionthan actual
movement 1 2
moveslide
slideappearstomove
2 1
End
-Sir Leomered P. Medina

The microscope

  • 1.
  • 2.
    MICROSCOPE A microscope isan instrument used to see objects that are too small for the naked eye. The science of investigating small objects using such an instrument is called microscopy. Microscopic means invisible to the eye unless aided by a microscope.
  • 3.
    Parts and Functionsof a Compound Microscope
  • 4.
    Light Microscope Uses singlelens Uses set lenses or a lens system SIMPLE COMPOUND
  • 5.
  • 6.
  • 7.
    Compound Microscope Mechanical PartsMagnifying Parts Illuminating Parts Adjustments and Support Enlarge the specimen Provide the light
  • 8.
    Mechanical Parts o Base –Bottommost portion that supports the entire/lower microscope o Pillar – Part above the base that supports the other parts o Inclination Joint – Allows for tilting of the microscope for convenience of the user
  • 9.
  • 10.
    o Arm/Neck – Curved/slantedpart which is held while carrying the microscope o Stage – Platform where object to be examined is placed o Stage Clips – Secures the specimen to the stage Mechanical Parts
  • 11.
    o Stage Opening oBody Tube – Attached to the arm and bears the lenses o Draw Tube – Cylindrical structure on top of the body tube that holds the ocular lenses Mechanical Parts
  • 12.
  • 13.
    o Revolving Nosepiece –Rotating disc where the objectives are attached o Dust Shield – Lies atop the nosepiece and keeps dust from settling on the objectives Mechanical Parts
  • 14.
  • 15.
    o Coarse AdjustmentKnob – Geared to the body tube which elevates or lowers when rotated bringing the object into approximate focus o Fine Adjustment Knob – A smaller knob for delicate focusing bringing the object into perfect focus
  • 16.
  • 17.
    • Condenser AdjustmentKnob – Elevates and lowers the condenser to regulate the intensity of light • Iris Diaphragm Lever – Lever in front of the condenser and which is moved horizontally to open/close the diaphragm Mechanical Parts
  • 18.
  • 19.
    Illuminating Parts o Mirror –Located beneath the stage and has concave and plane surfaces to gather and direct light in order to illuminate the object o Electric Lamp – A built-in illuminator beneath the stage that may eb used if sunlight is not preferred or is not available
  • 20.
  • 21.
    MAGNIFYING PARTS • Ocular/ Eyepiece – Another set of lens found on top of the body tube which functions to further magnify the image produced by the objective lenses. It usually ranges from 5x to 15x.
  • 22.
  • 23.
    MAGNIFYING PARTS • Objectives –Metal cylinders attached below the nosepiece and contains especially ground and polished lenses • SCANNER • LPO / Low Power Objective – Gives the lowest magnification, usually 10x • HPO / High Power Objective – Gives higher magnification usually 40x or 43x • OIO / Oil Immersion Objective – Gives the highest magnification, usually 97x or 100x, and is used wet either with cedar wood oil or synthetic oil
  • 24.
    Total Magnification Magnification =Objective lens X Eyepiece lensMagnification = Objective lens X Eyepiece lens e.g. What is the total magnification if the objective lens is twenty times (X20) and the eyepiece lens five times (X5)? Magnification = 20 X 5 = X100
  • 25.
    Asmagnification increases,detail increases but Onioncell 40x Onion cell 100x Onion cell 400x less of the cell is seen
  • 26.
    Caring for theMicroscope 1. Do not let any liquids to come in contact with the microscope. 2. Always store the microscope inside a box after use. 3. Return the objective lens onto low power after use. 4. Carry the microscope by the arm. 5. Use a soft clean tissue to wipe the lenses
  • 27.
  • 28.
  • 29.
    Useofstains  some partsof a plant cell can be clearly seen when the cell is mounted in water  E.g. an Elodea leaf cell:  cell wall  several chloroplasts
  • 30.
     other cellstructures which are not so obvious can often be shown up more clearly by the addition of dyes called STAINS Iodine Solution Used to stain plant cells Methylene Blue Used to stain animal cells
  • 31.
    A thin innerlayer of epidermis is peeled off. Snapping leaf backwards exposes the epidermis. Epidermis is placed on slide & covered with 2-3 drops of distilled water . Coverslip is lowered. A drop of stain is put at one end of slide. 1 An onion is cut into quarters. 2 One of the fleshy scale leaves is removed. 3 5 4 6 7 Stain is drawn over specimen using a small piece of filter paper.
  • 32.
    How to makea wet-mount slide … 1 – Get a clean slide and coverslip from your teacher. 2 – Place ONE drop of water in the middle of the slide. Don’t use too much or the water will run off the edge and make a mess! 3 – Place the edge of the cover slip on one side of the water drop. You do not need to use the stage clips when viewing wet-mount slides! 5 – Place the slide on the stage and view it first with the red-banded objective. Once you see the image, you can rotate the nosepiece to view the slide with the different objectives. 4 - Slowly lower the cover slip on top of the drop. Cover Slip Lower slowly
  • 33.
    Appearance of theSpecimen Objects appear upside-down&backward Movementappears tobein oppositedirectionthan actual movement 1 2 moveslide slideappearstomove 2 1
  • 34.