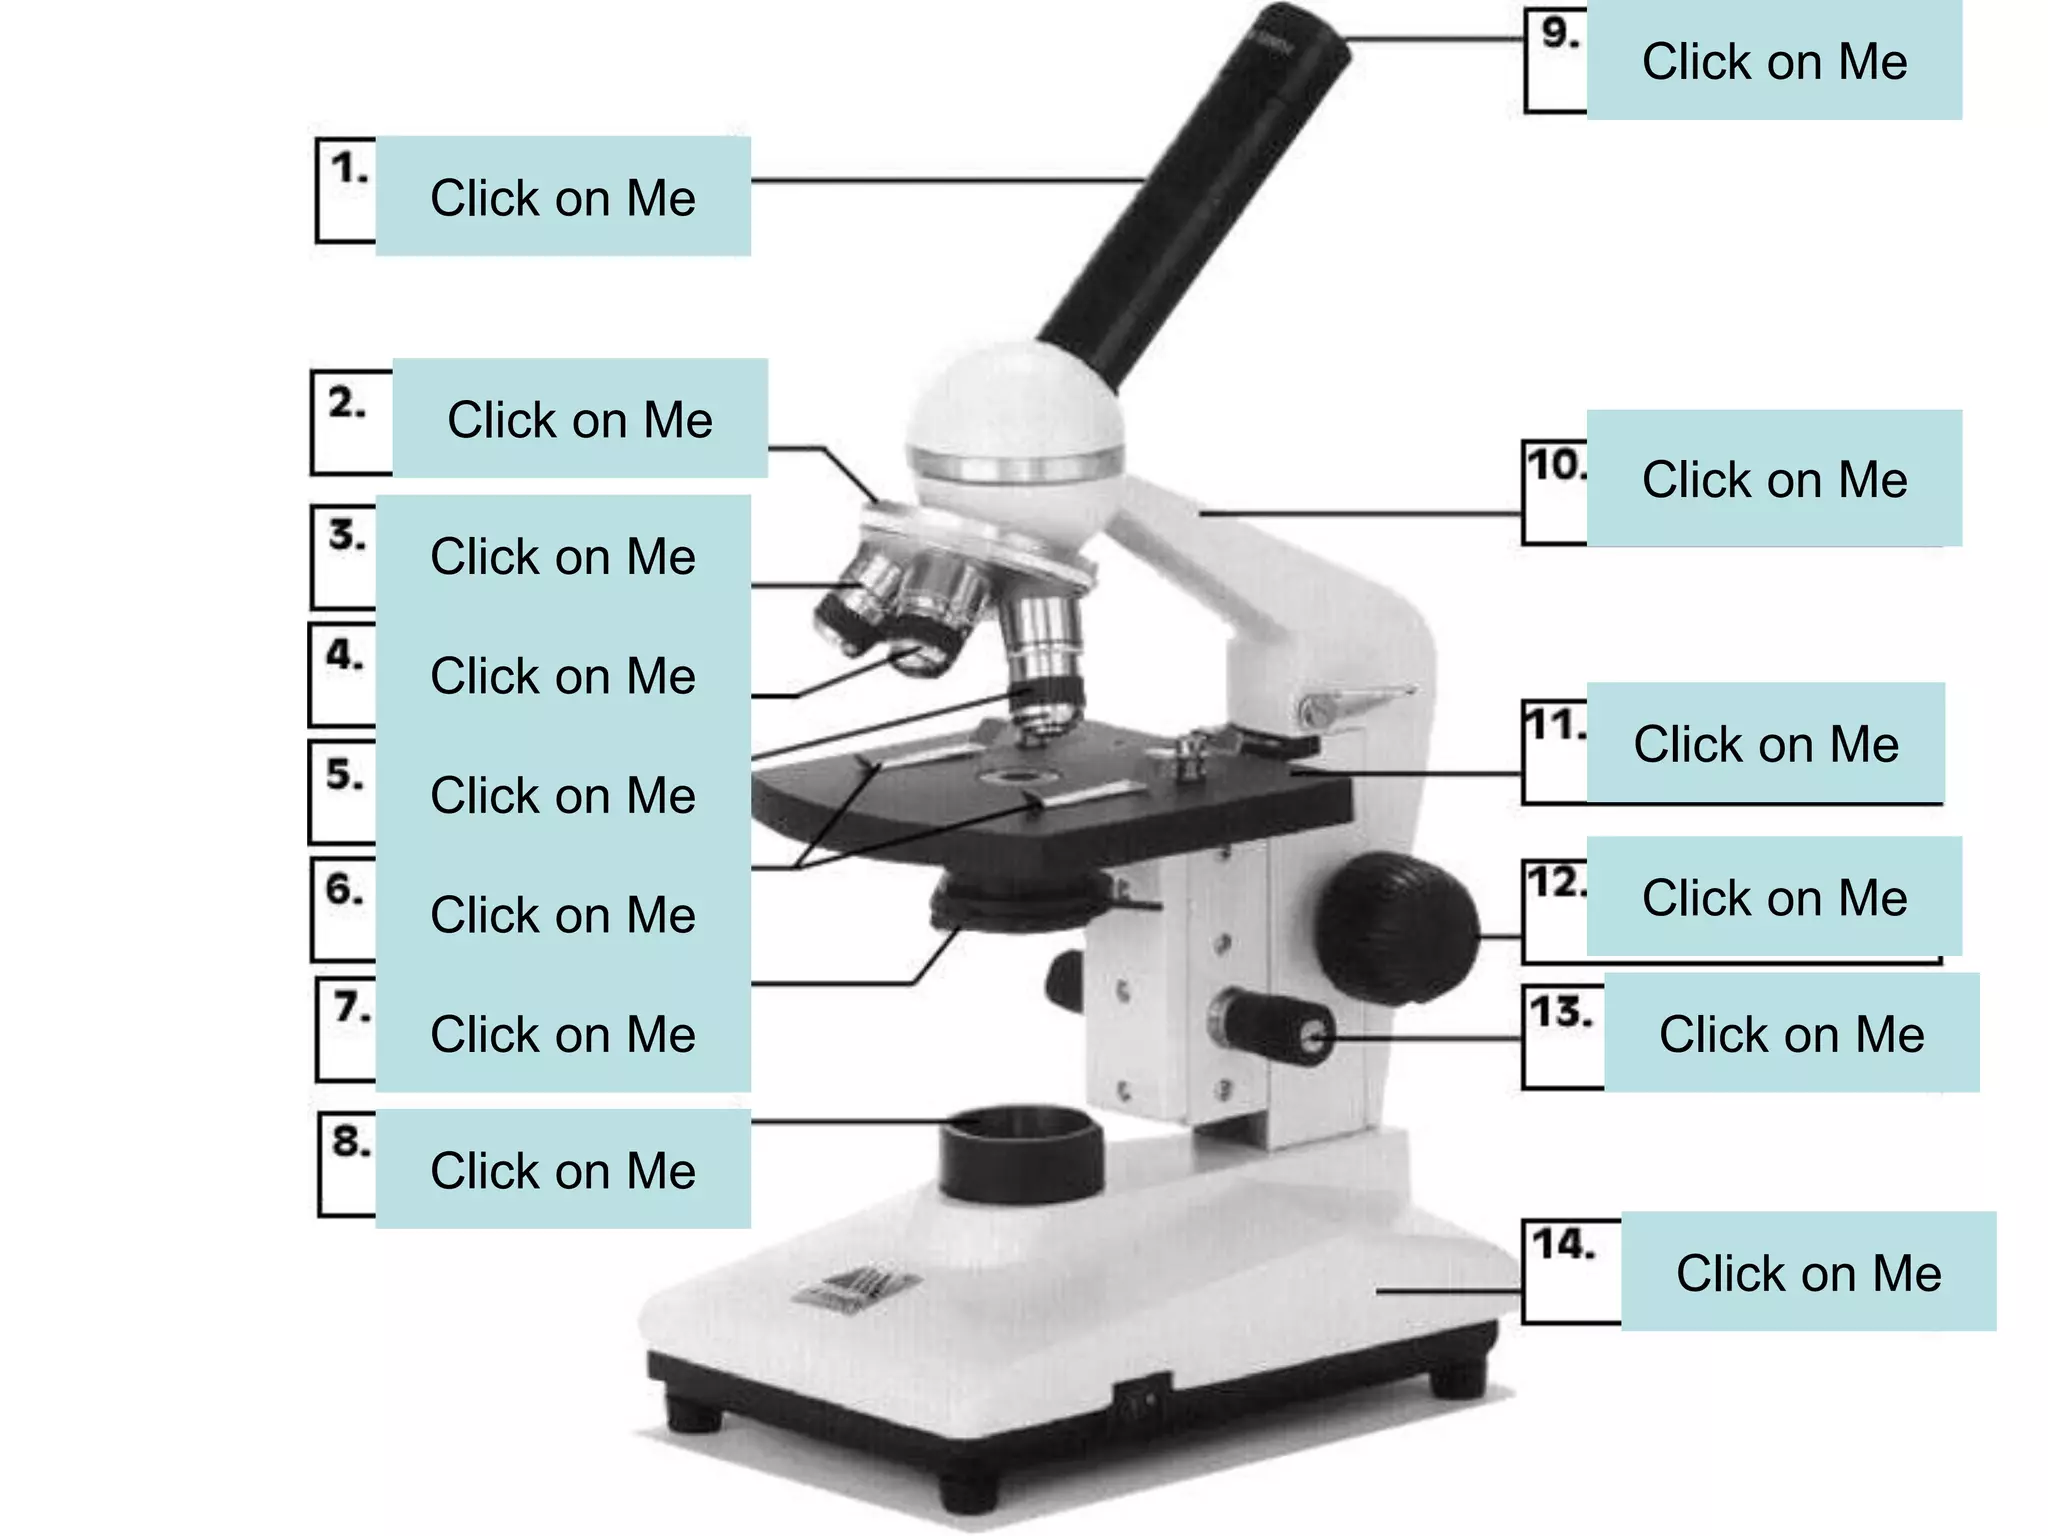
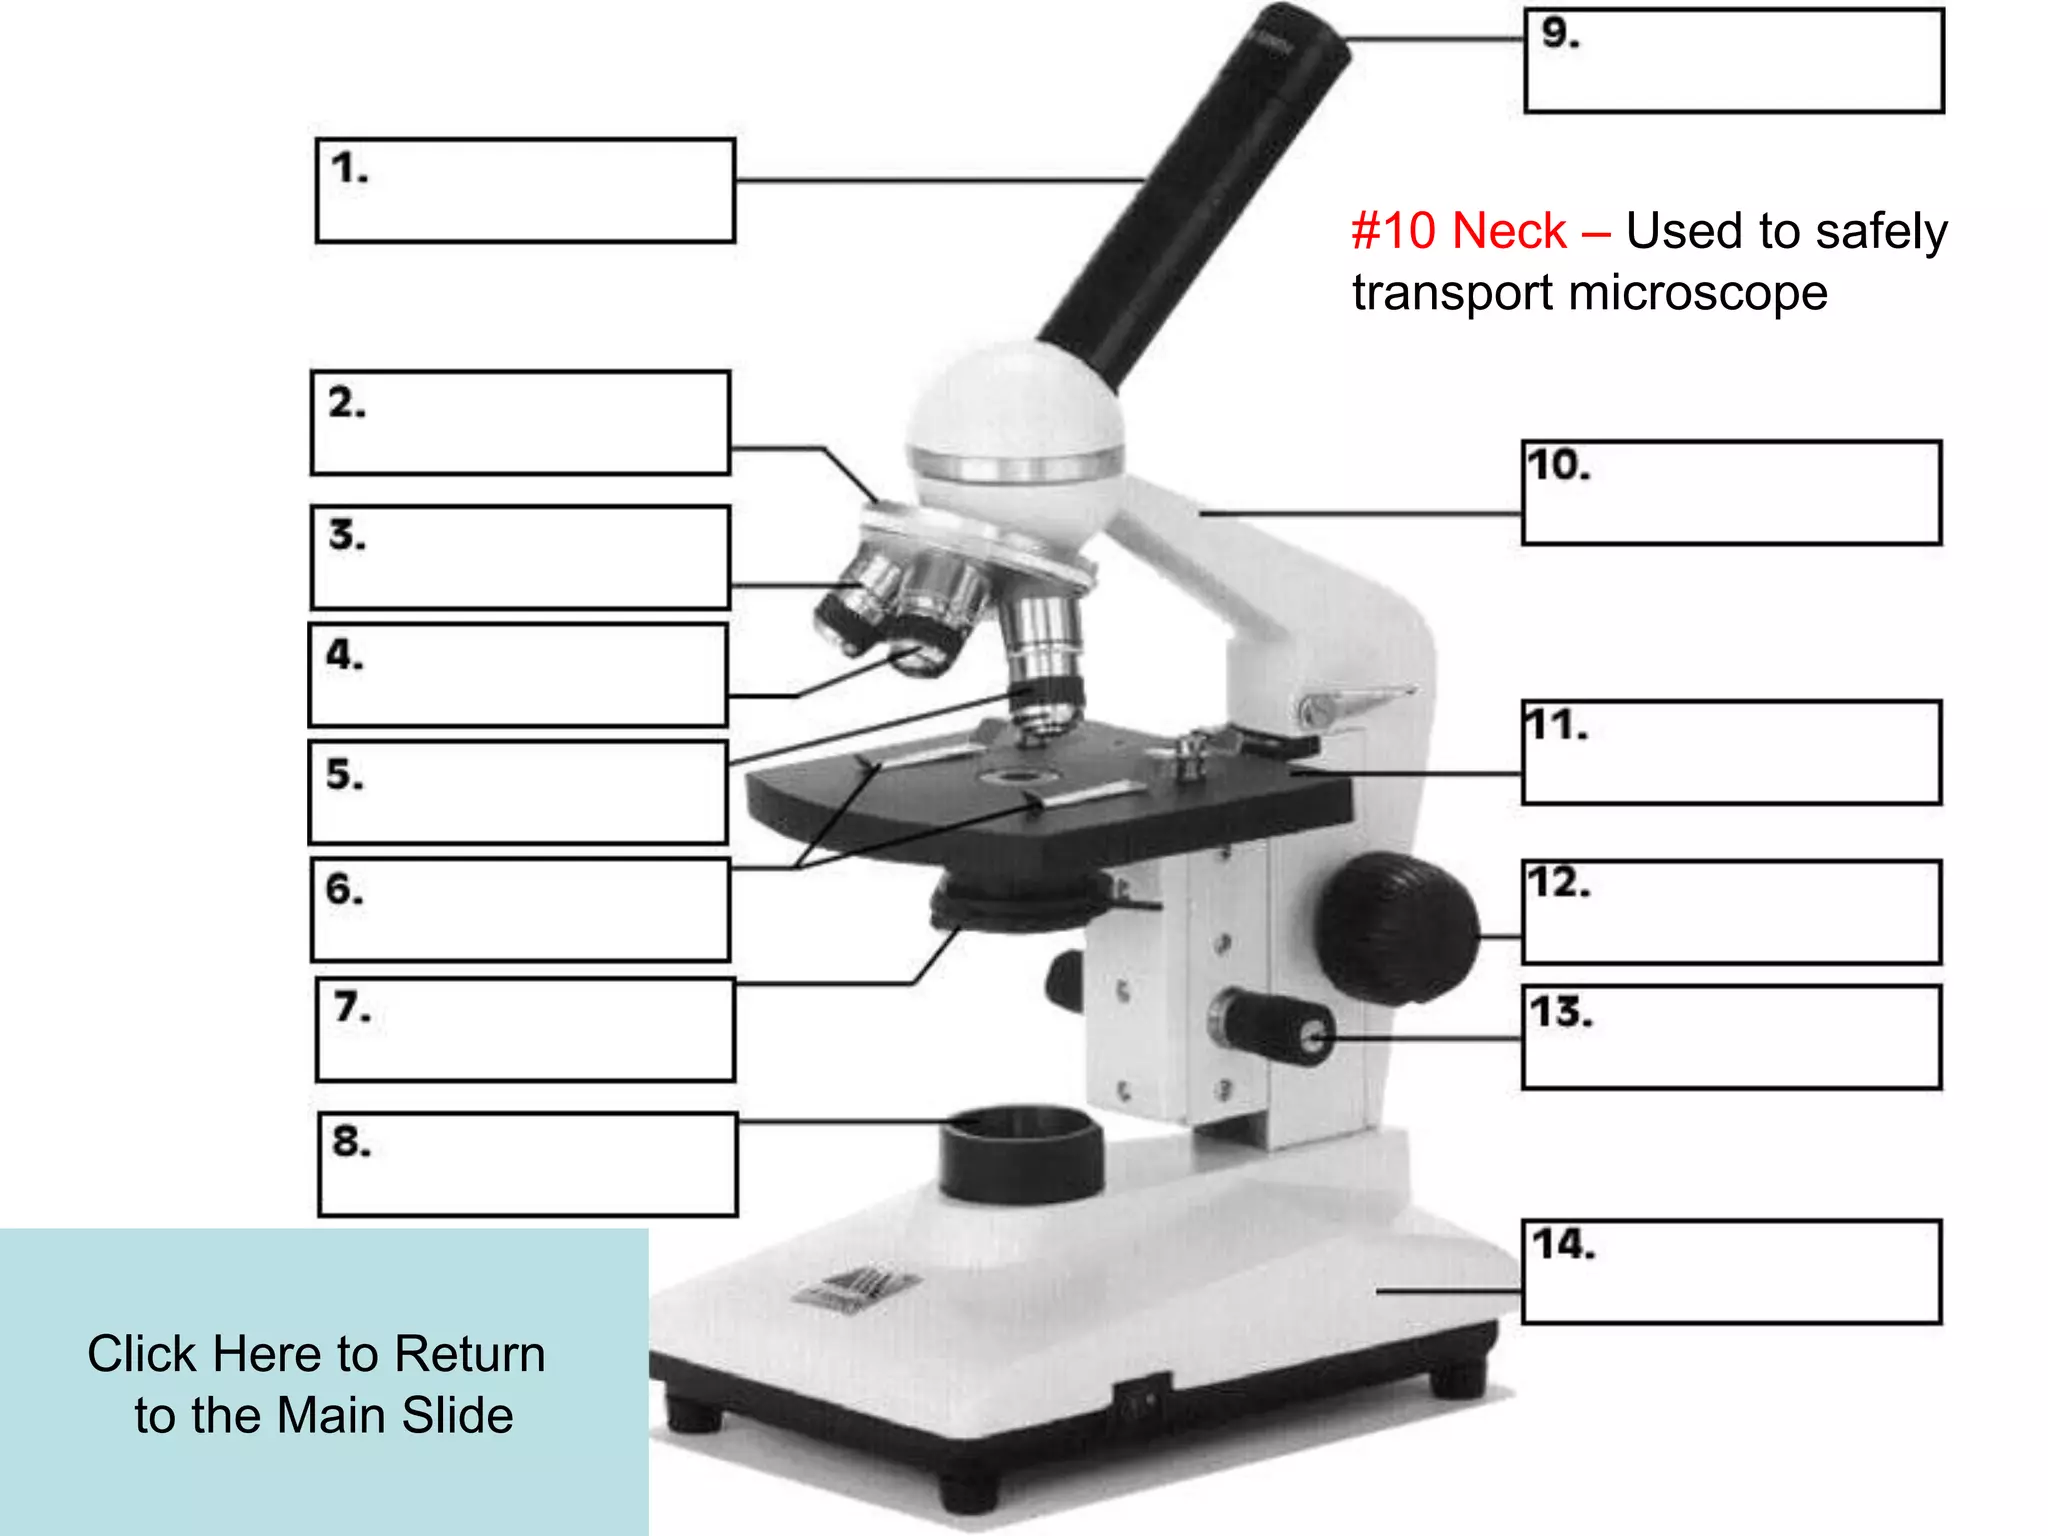
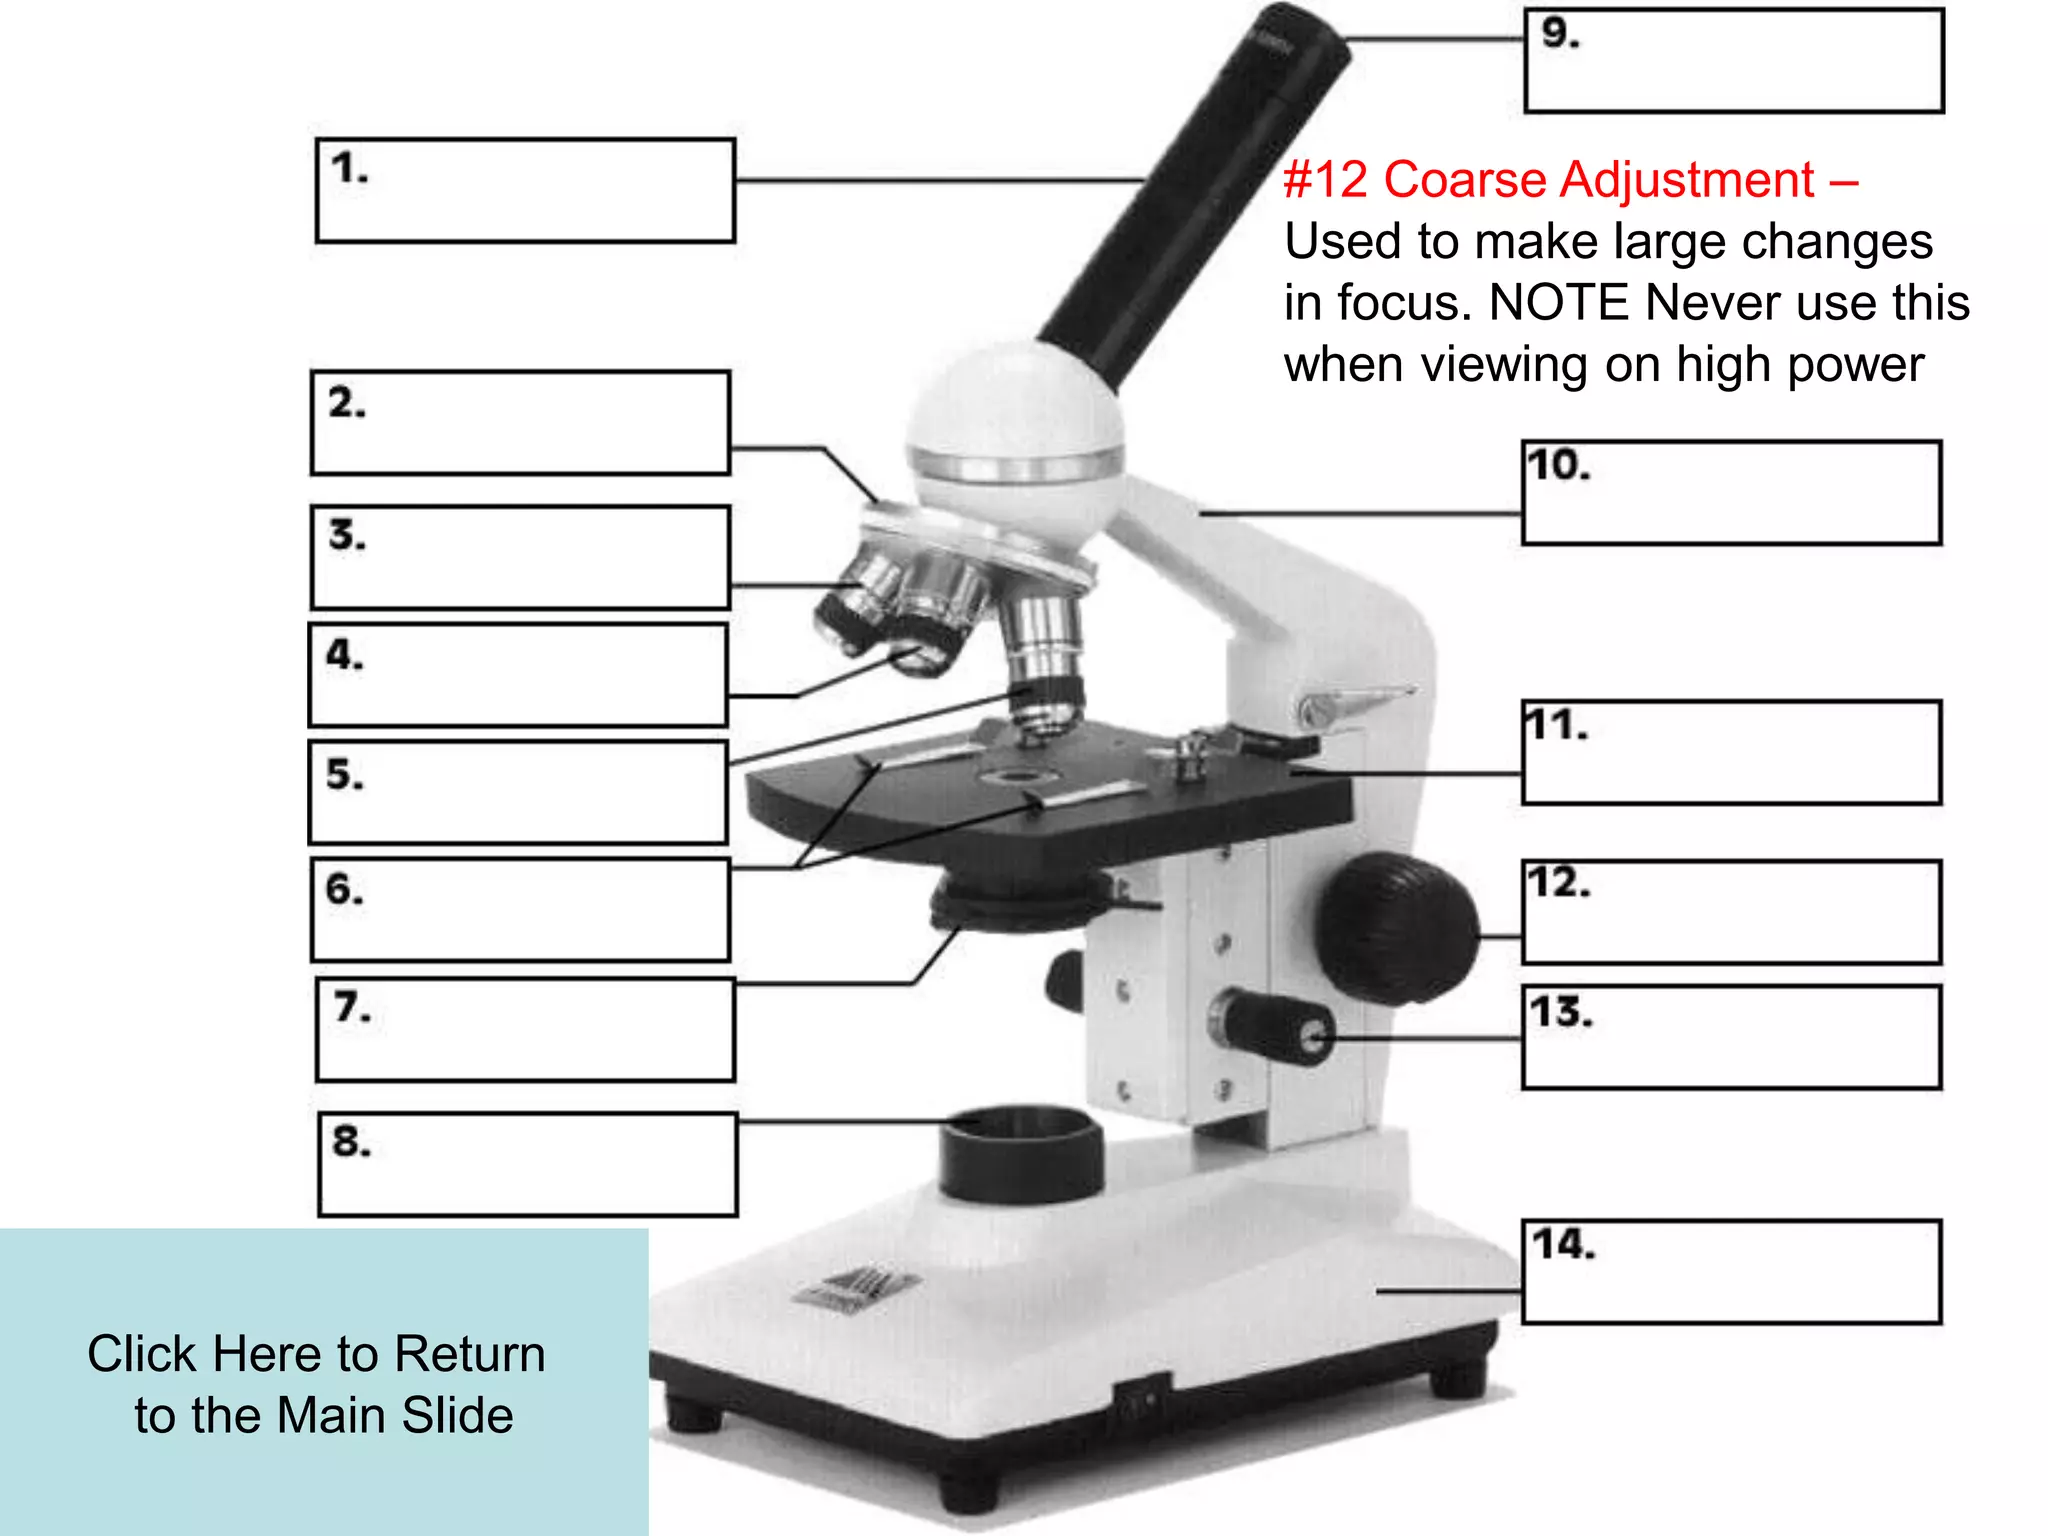
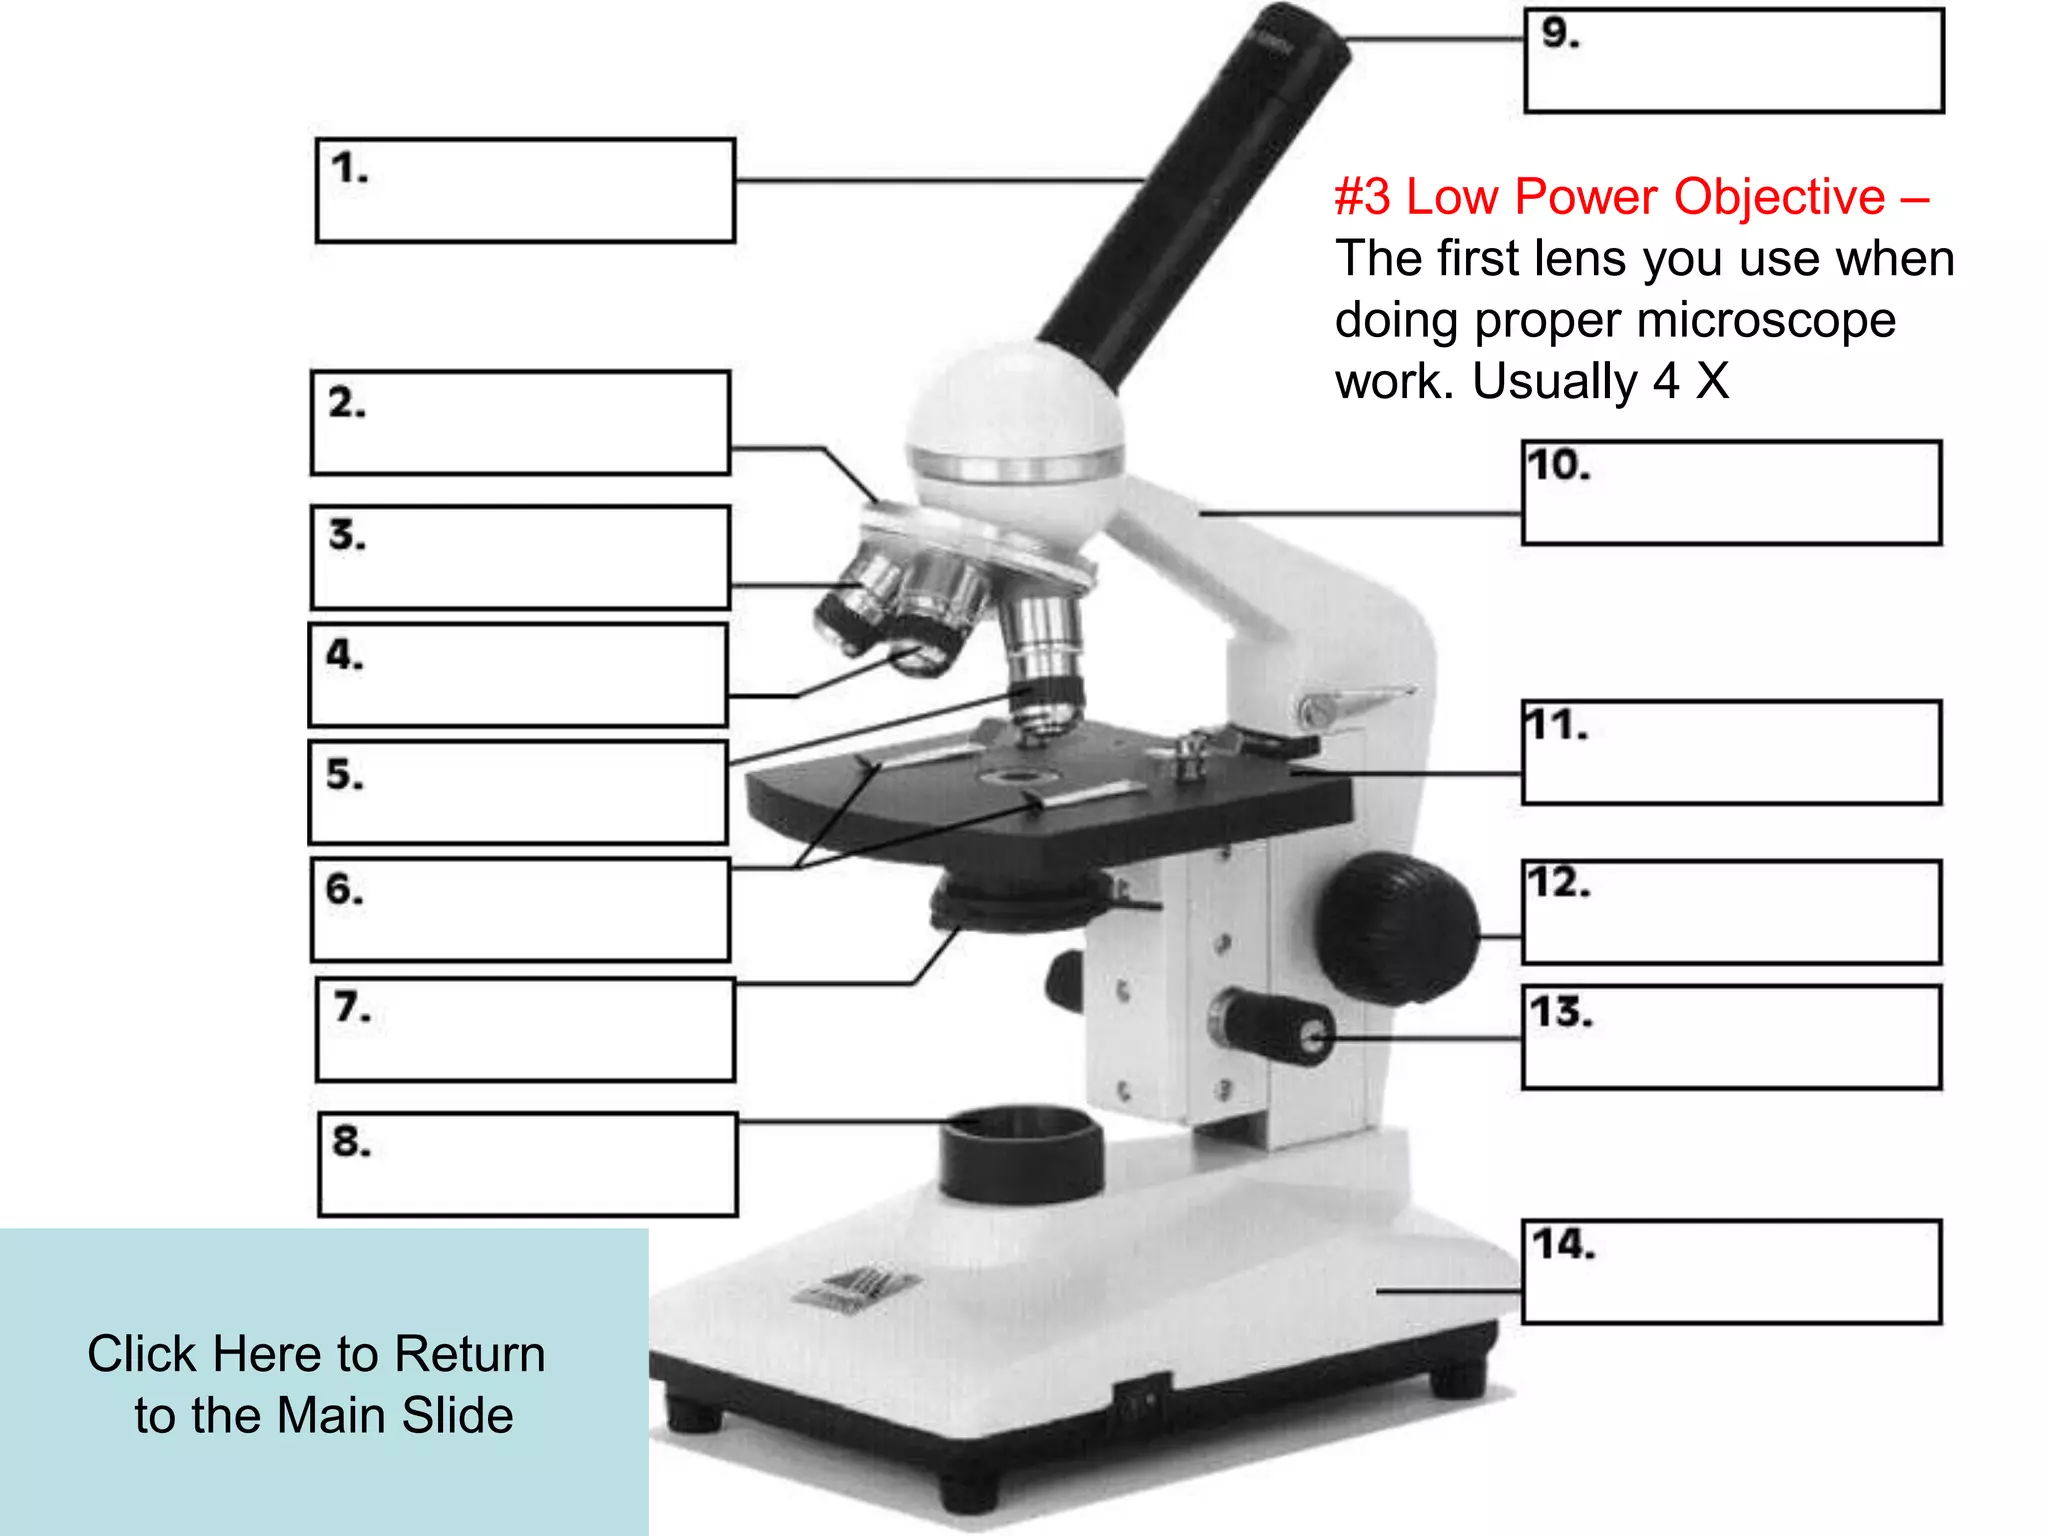
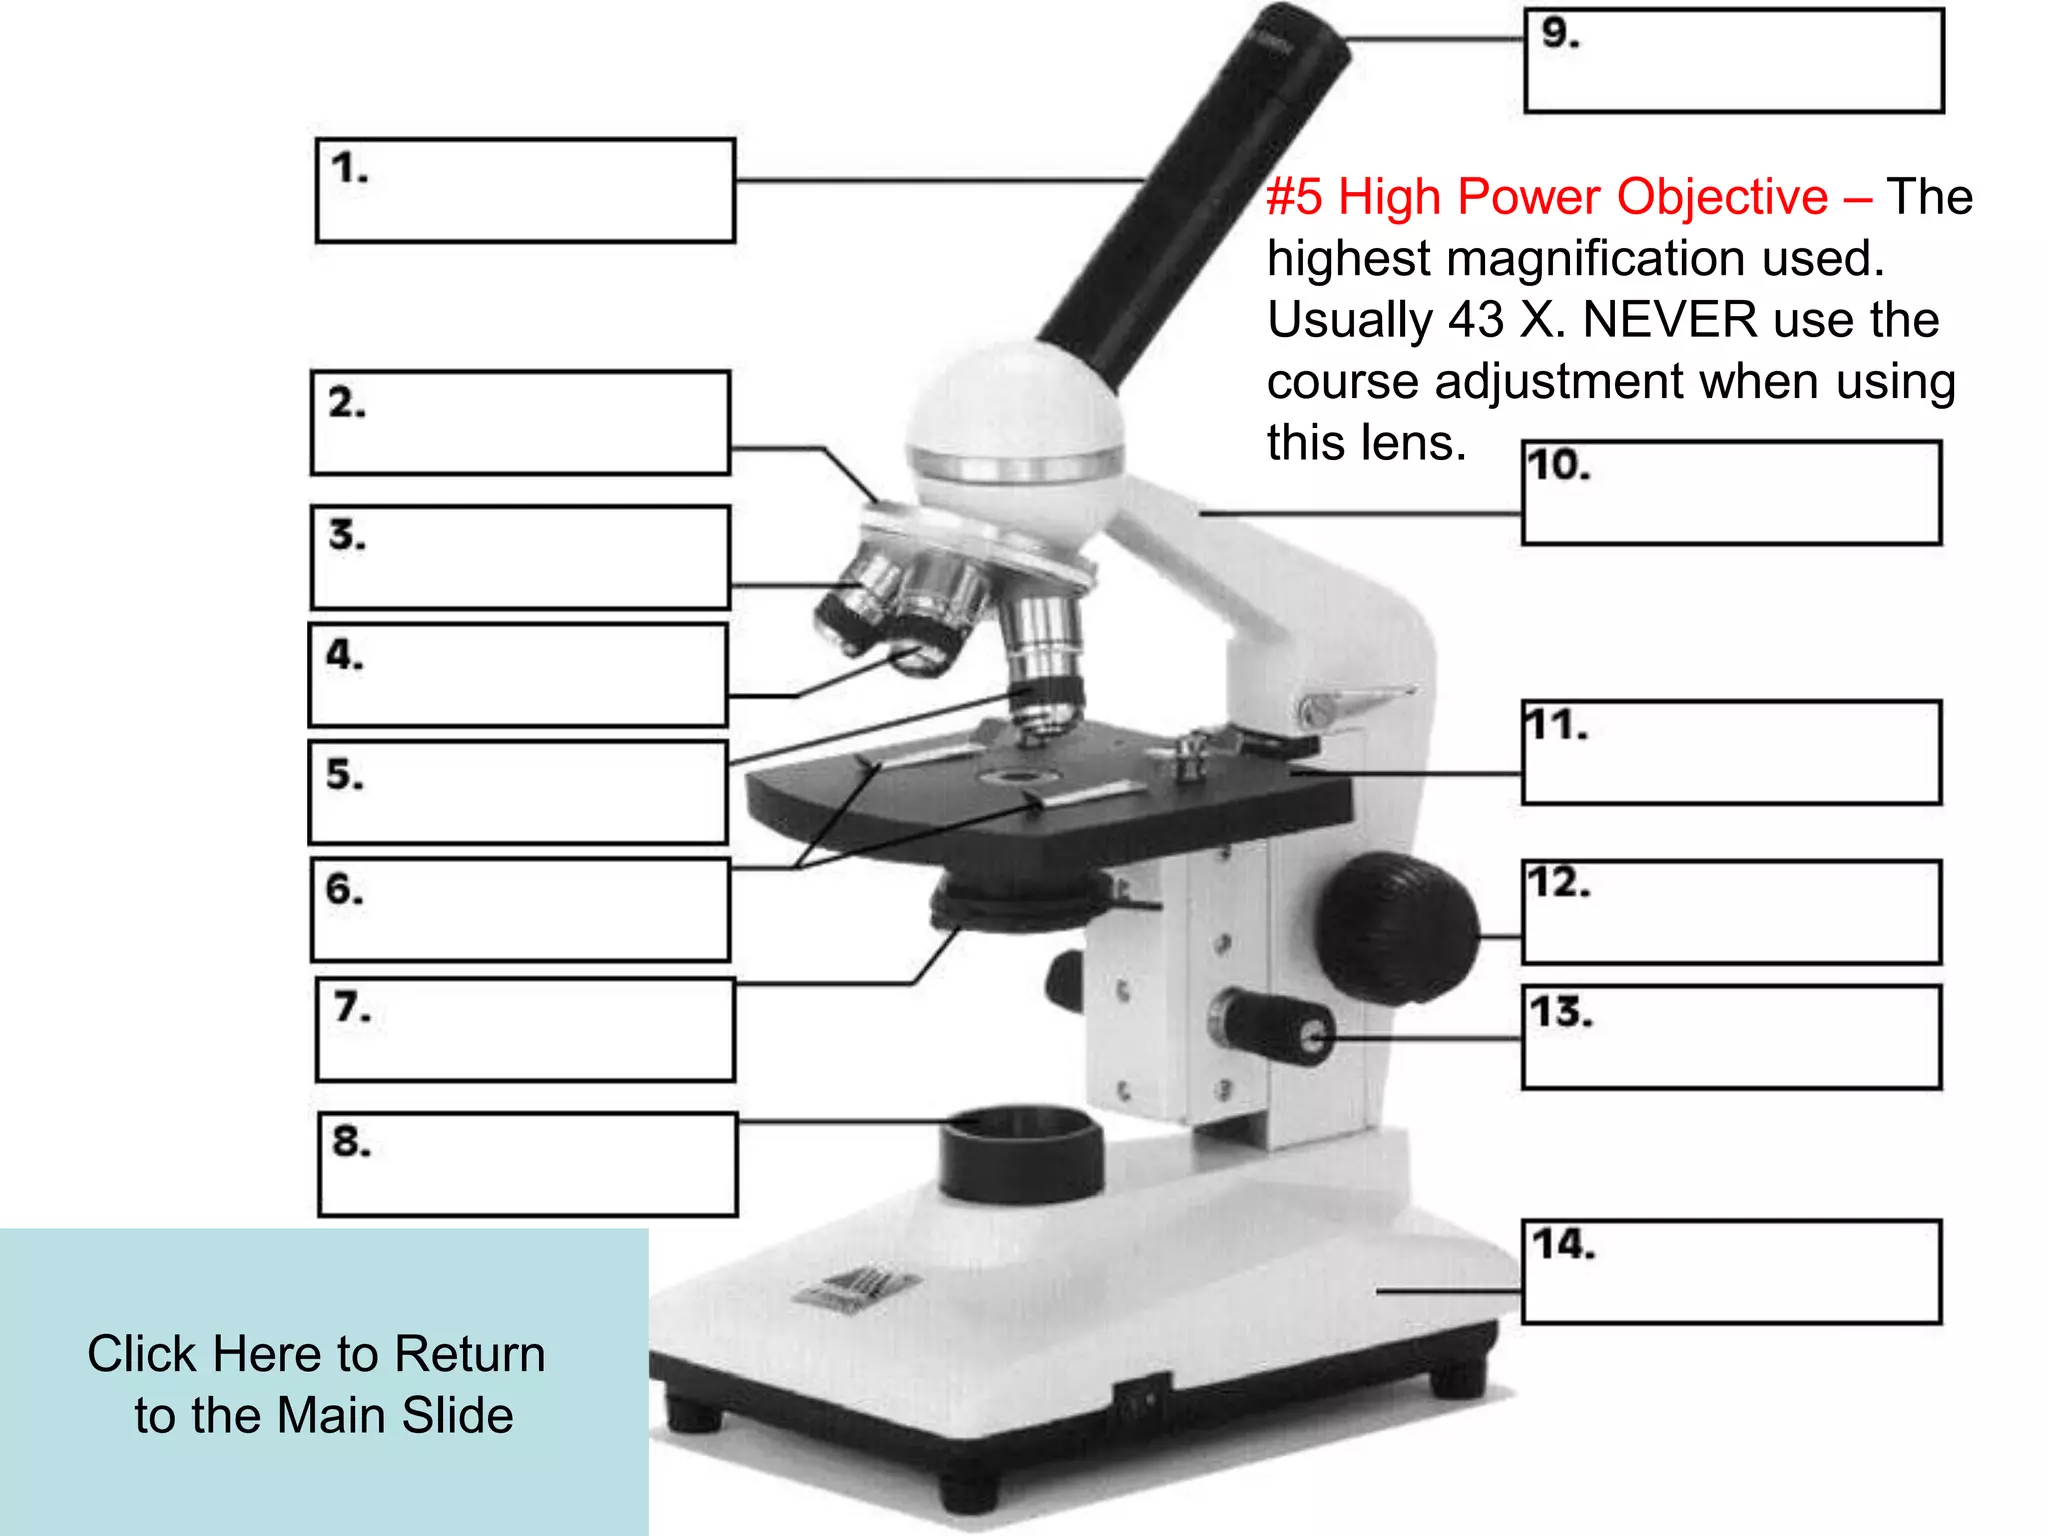
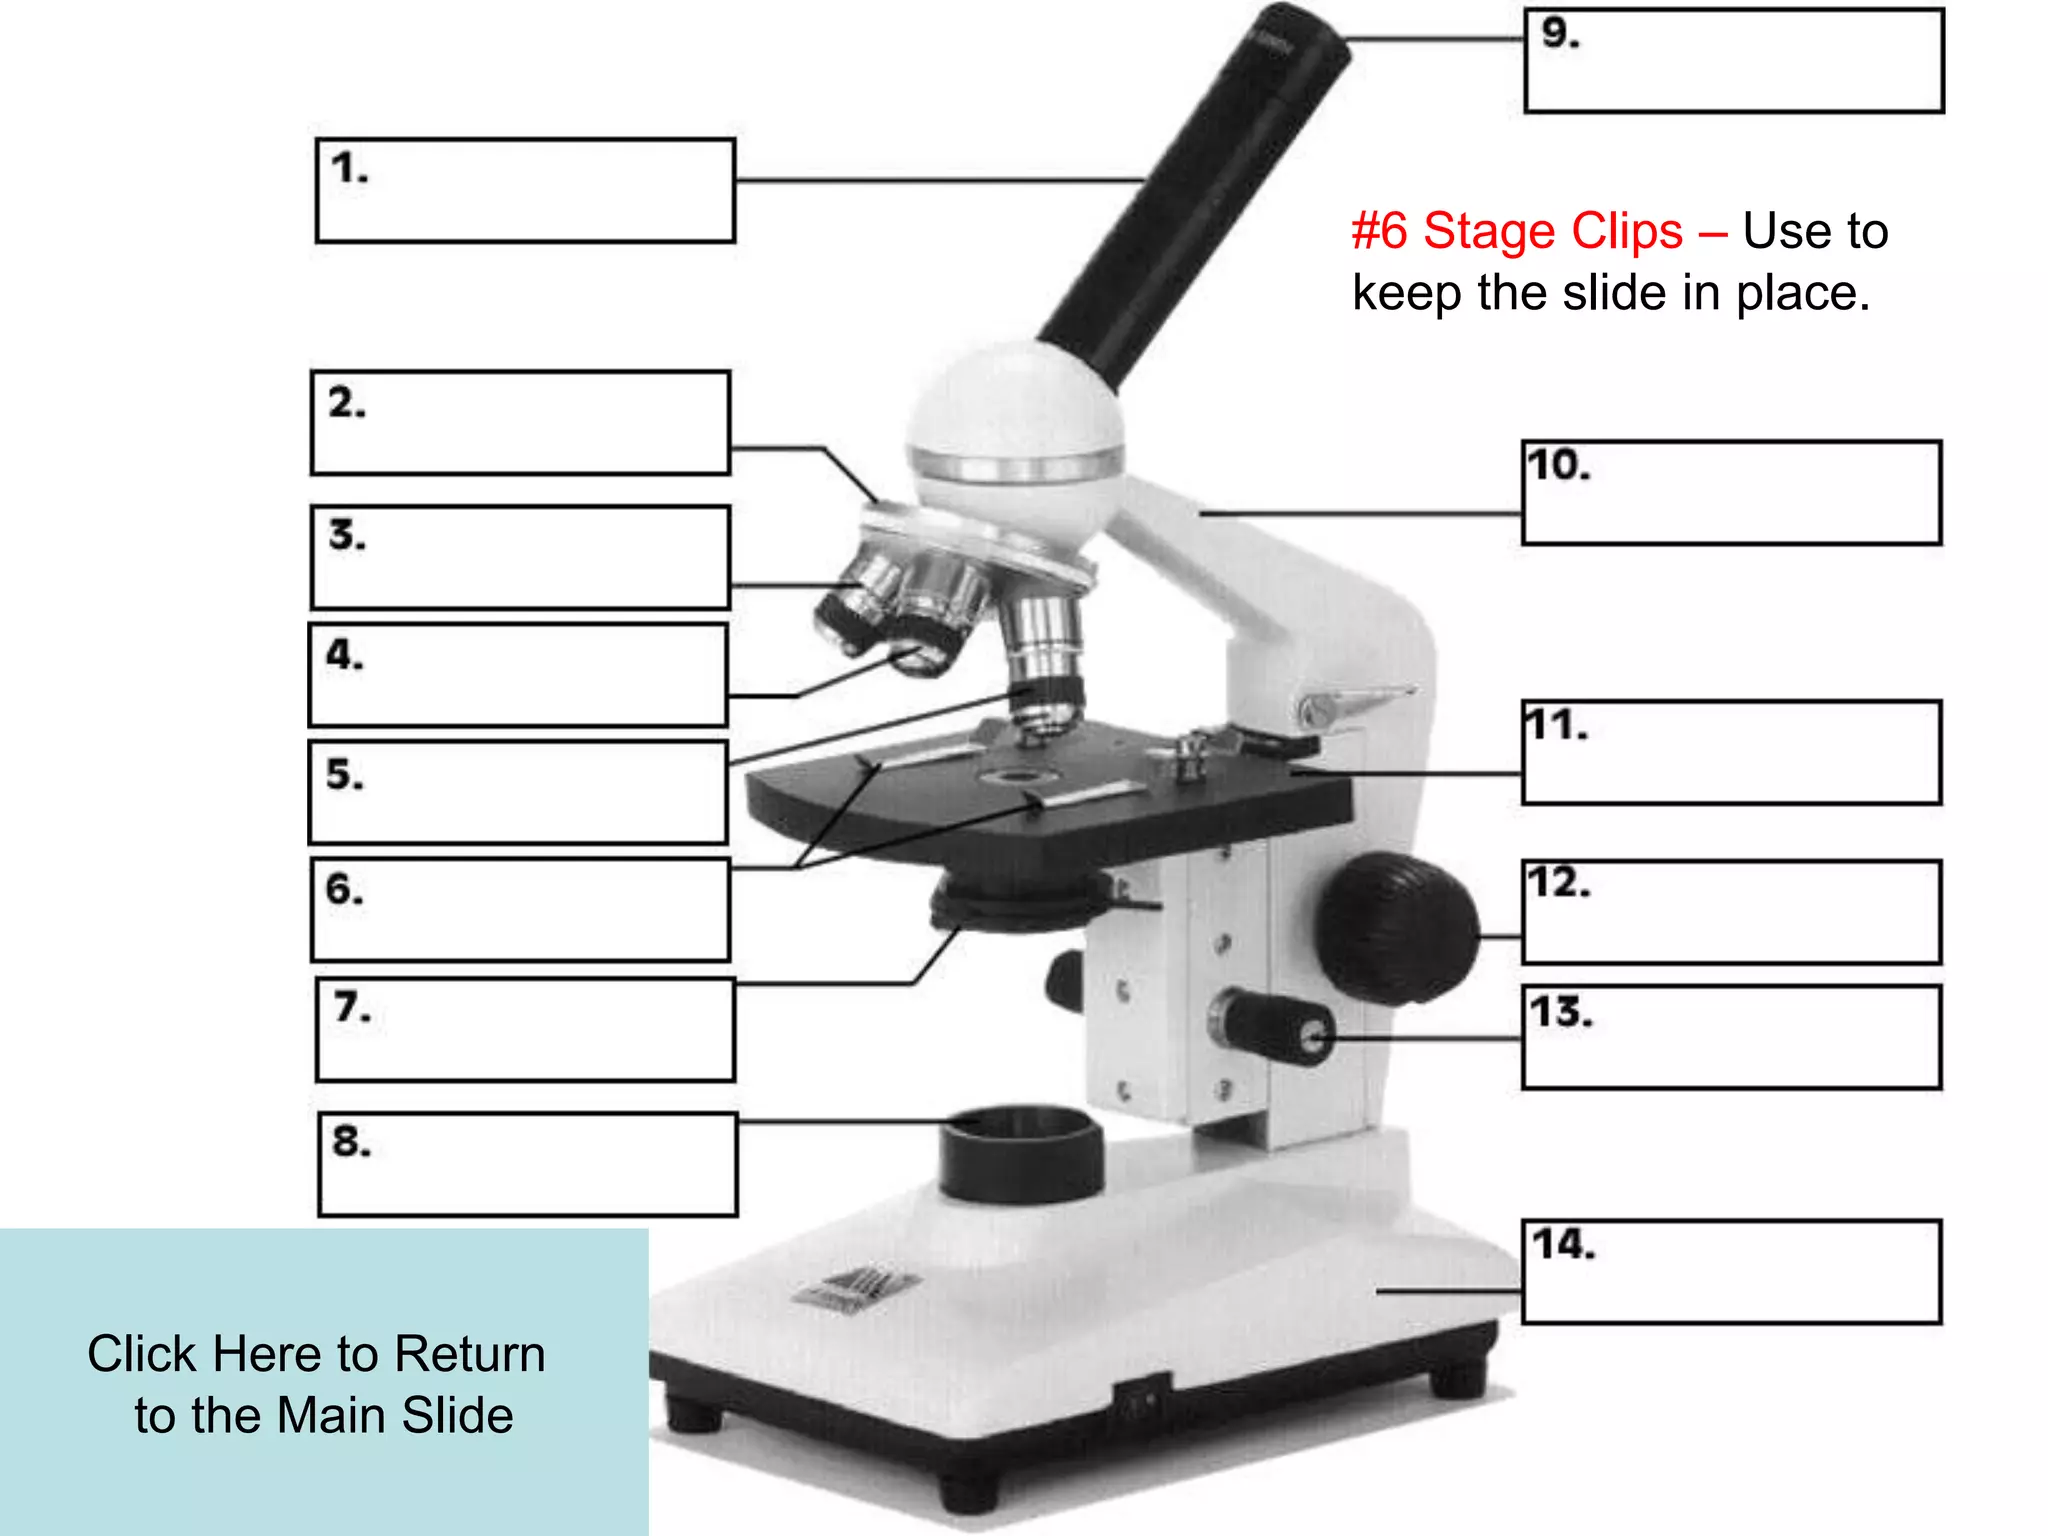
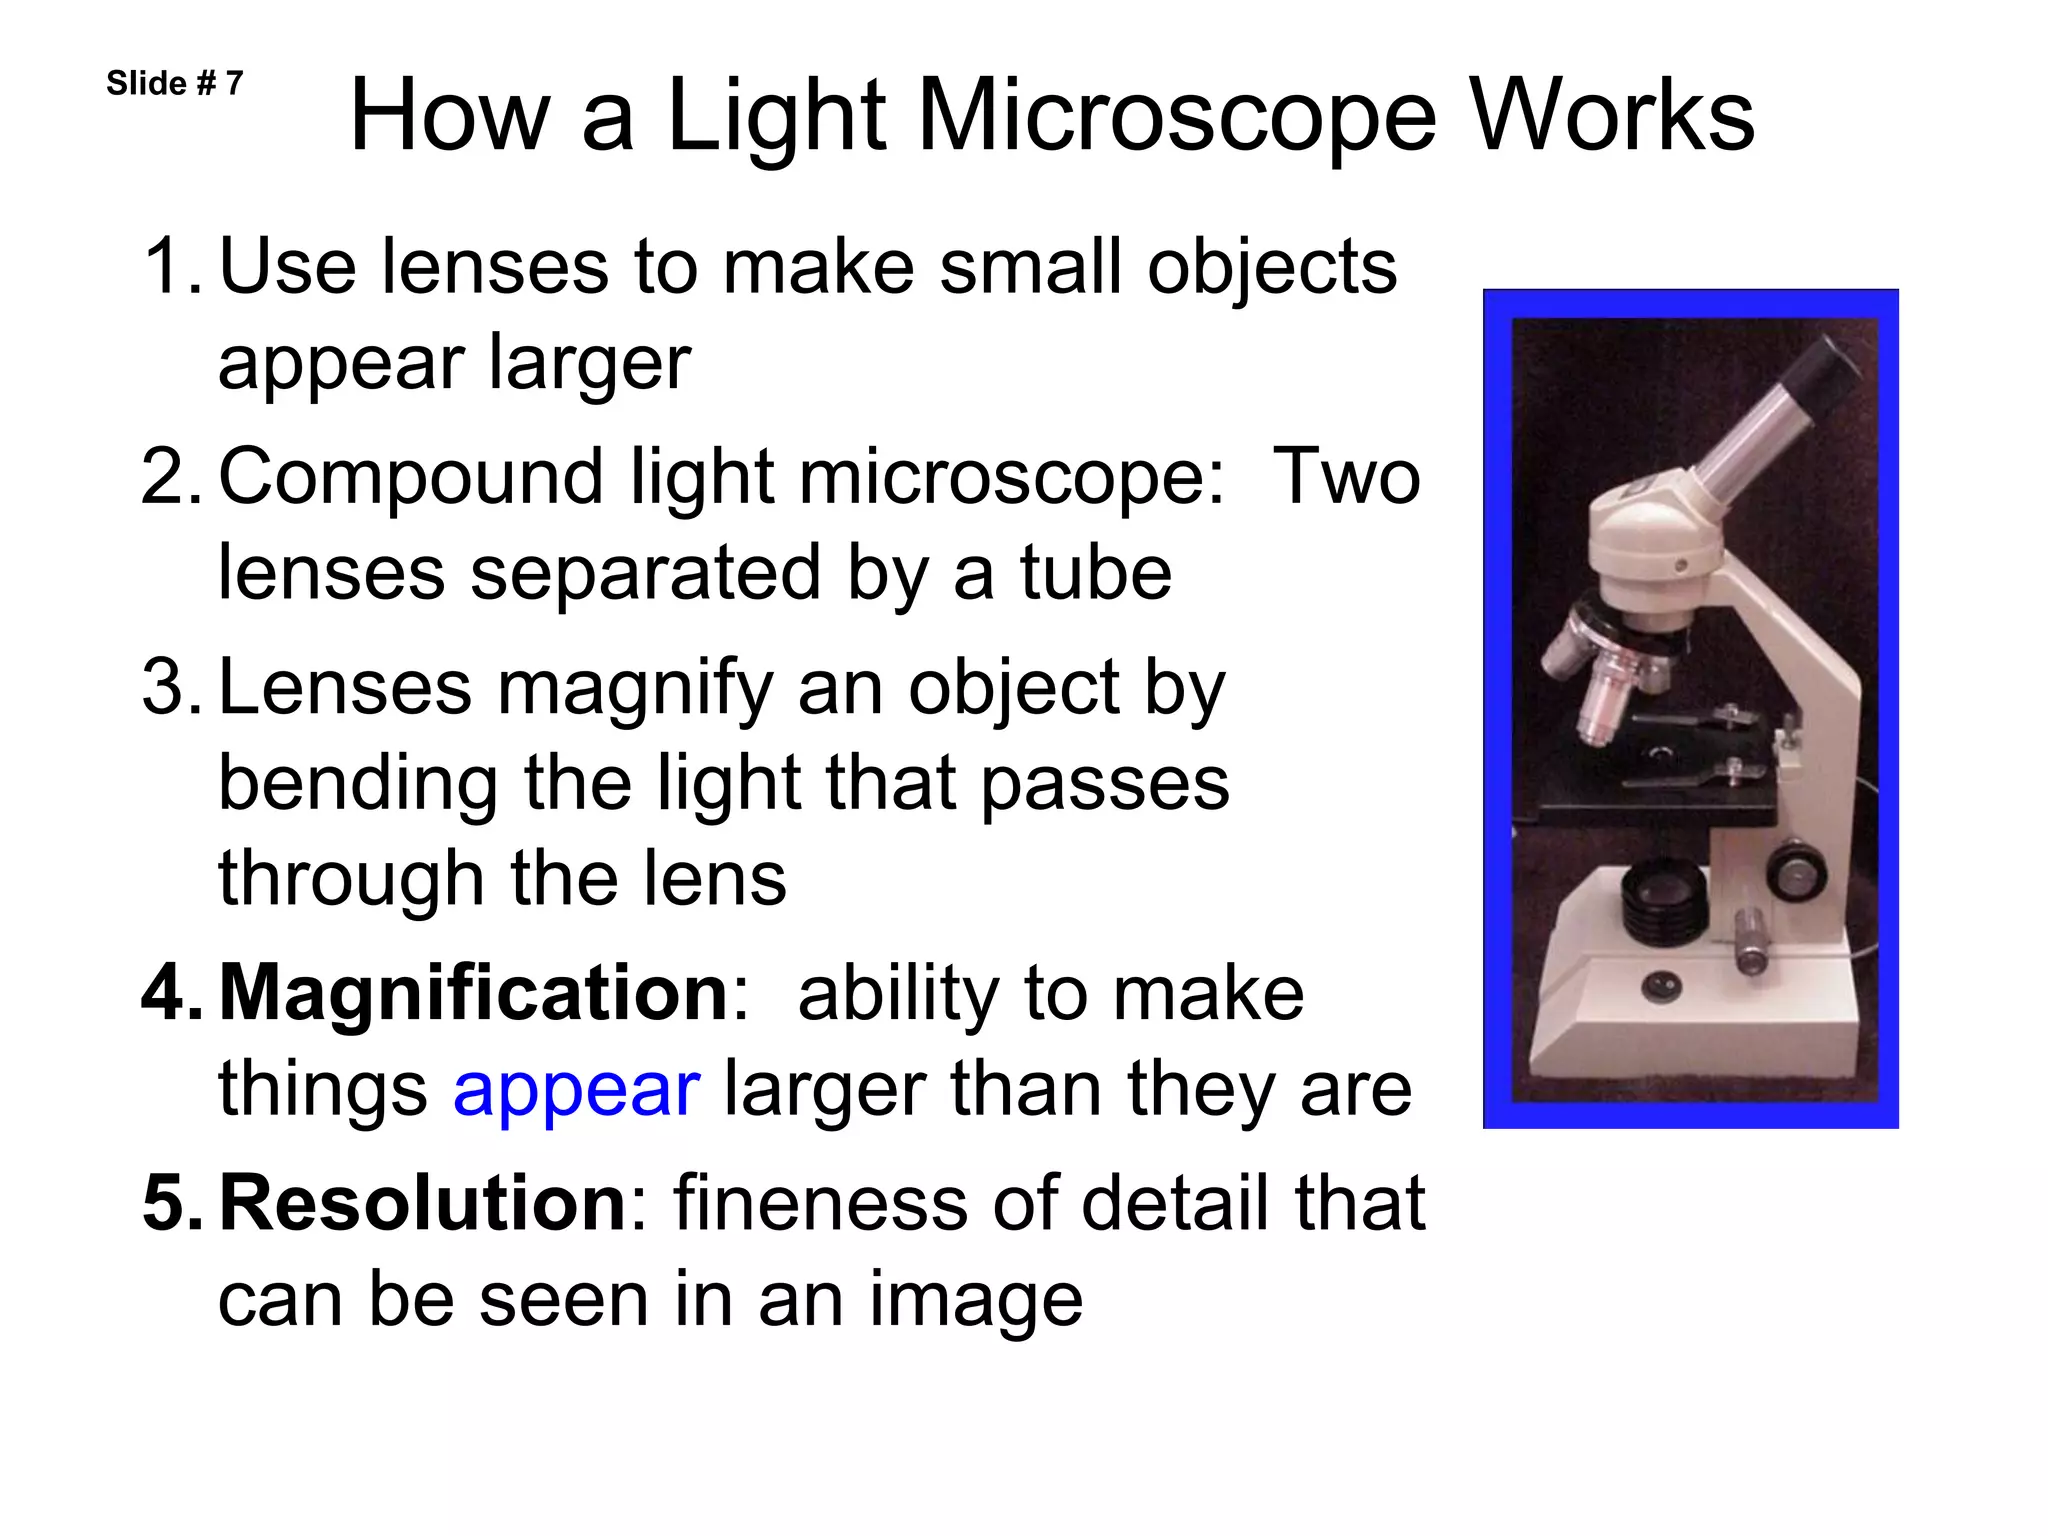
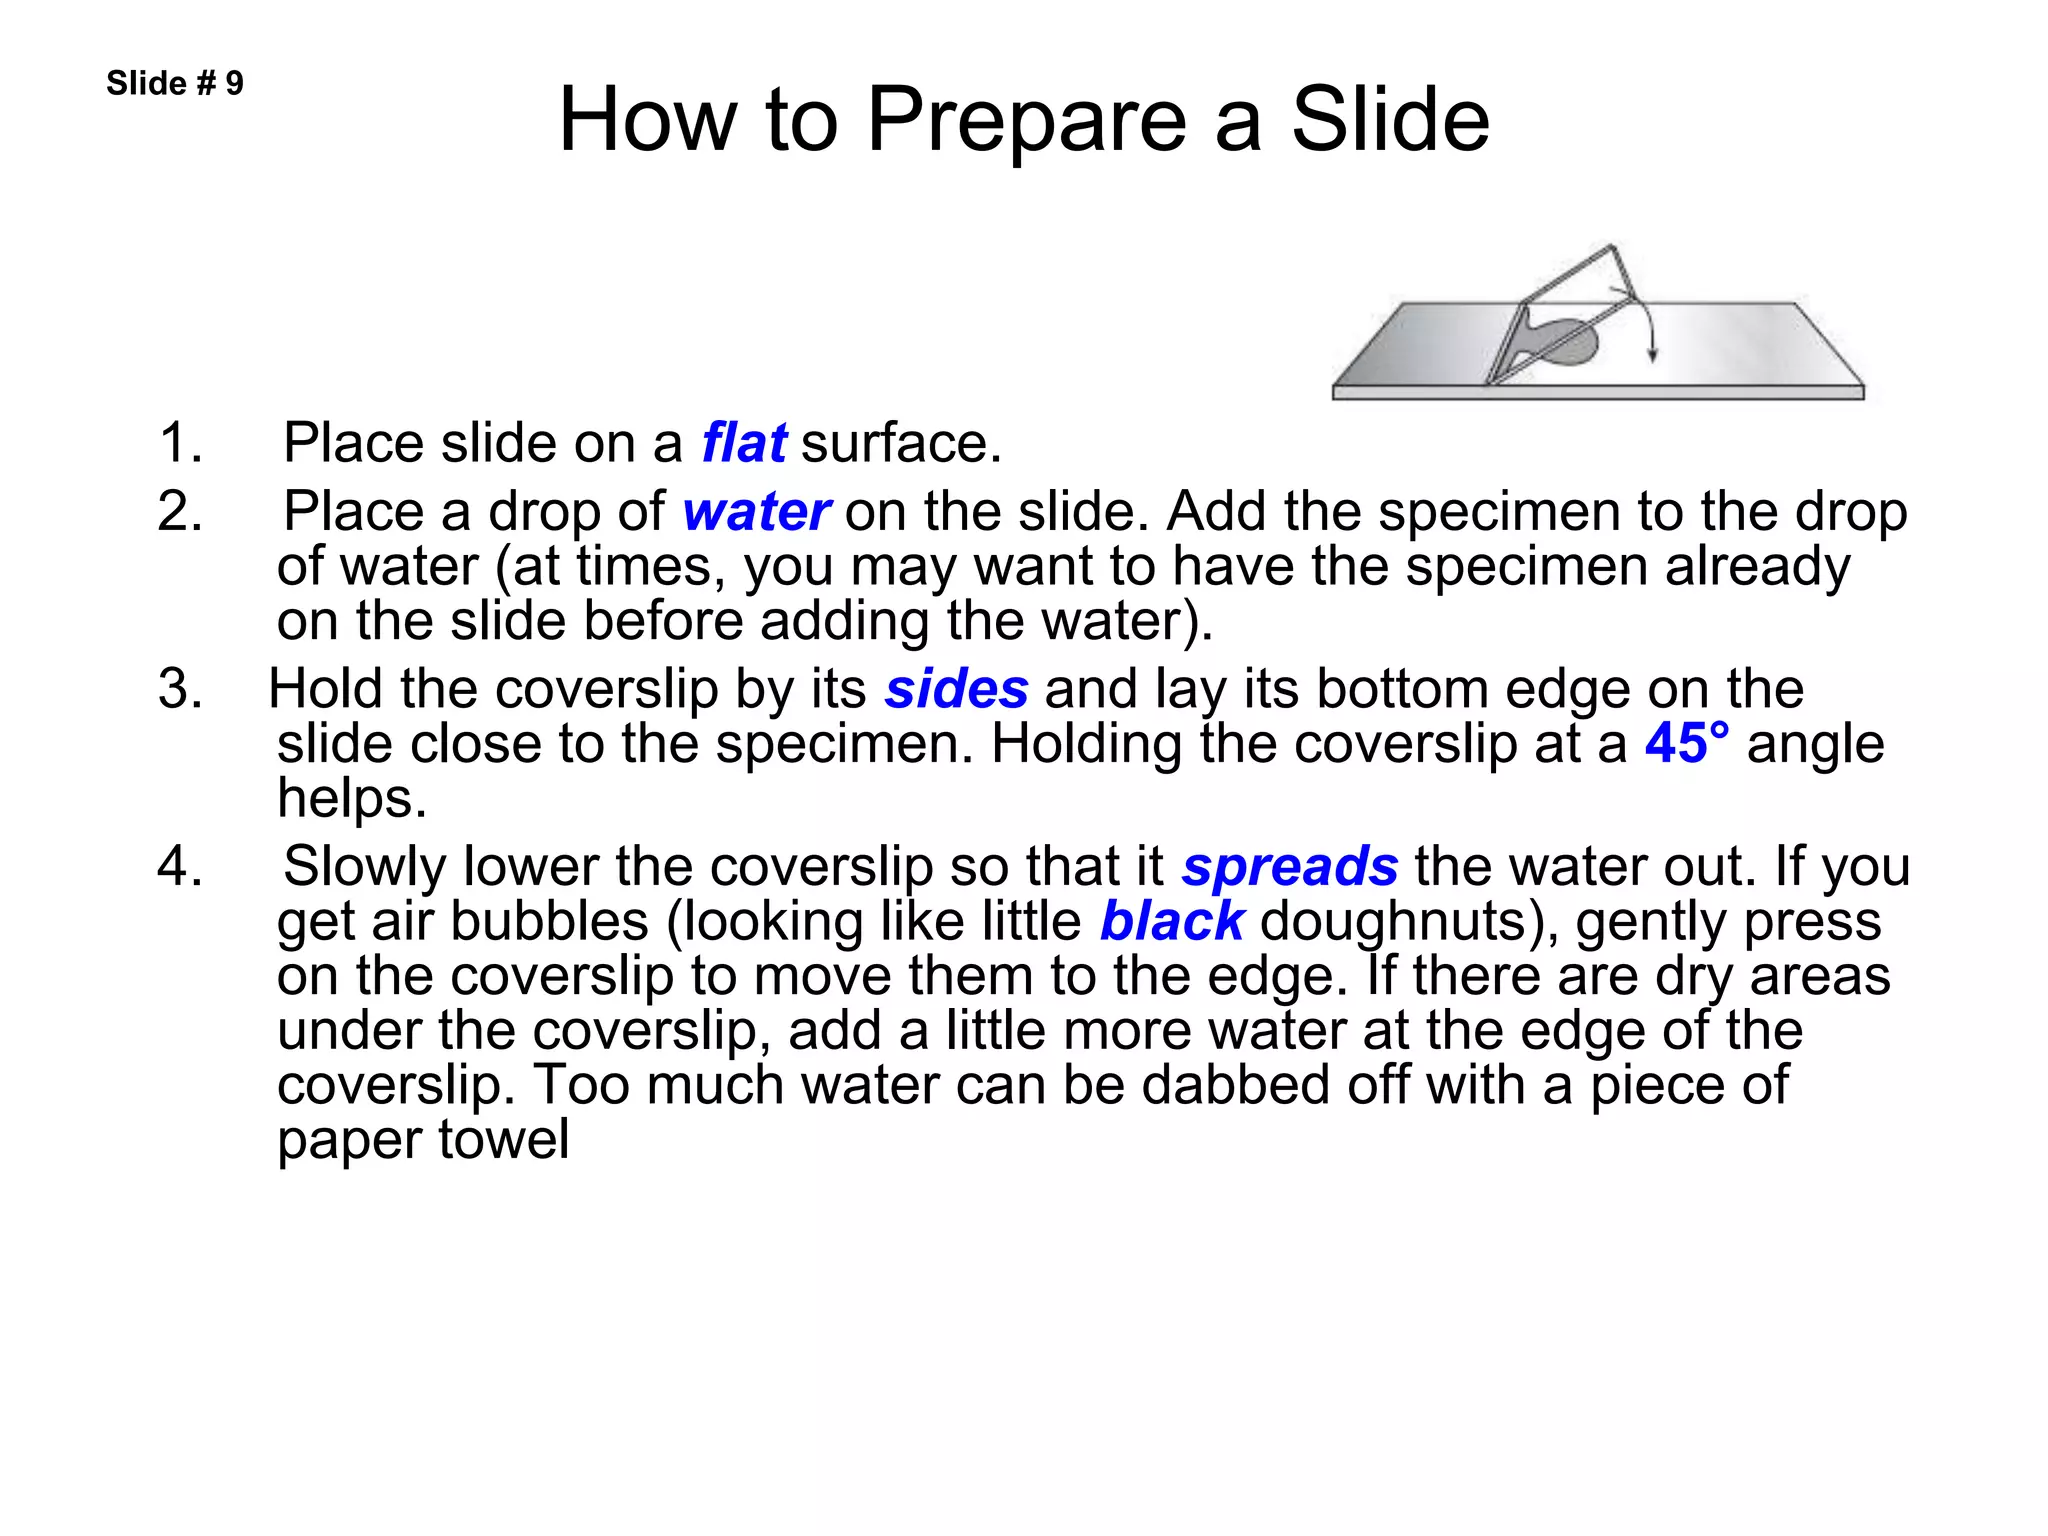
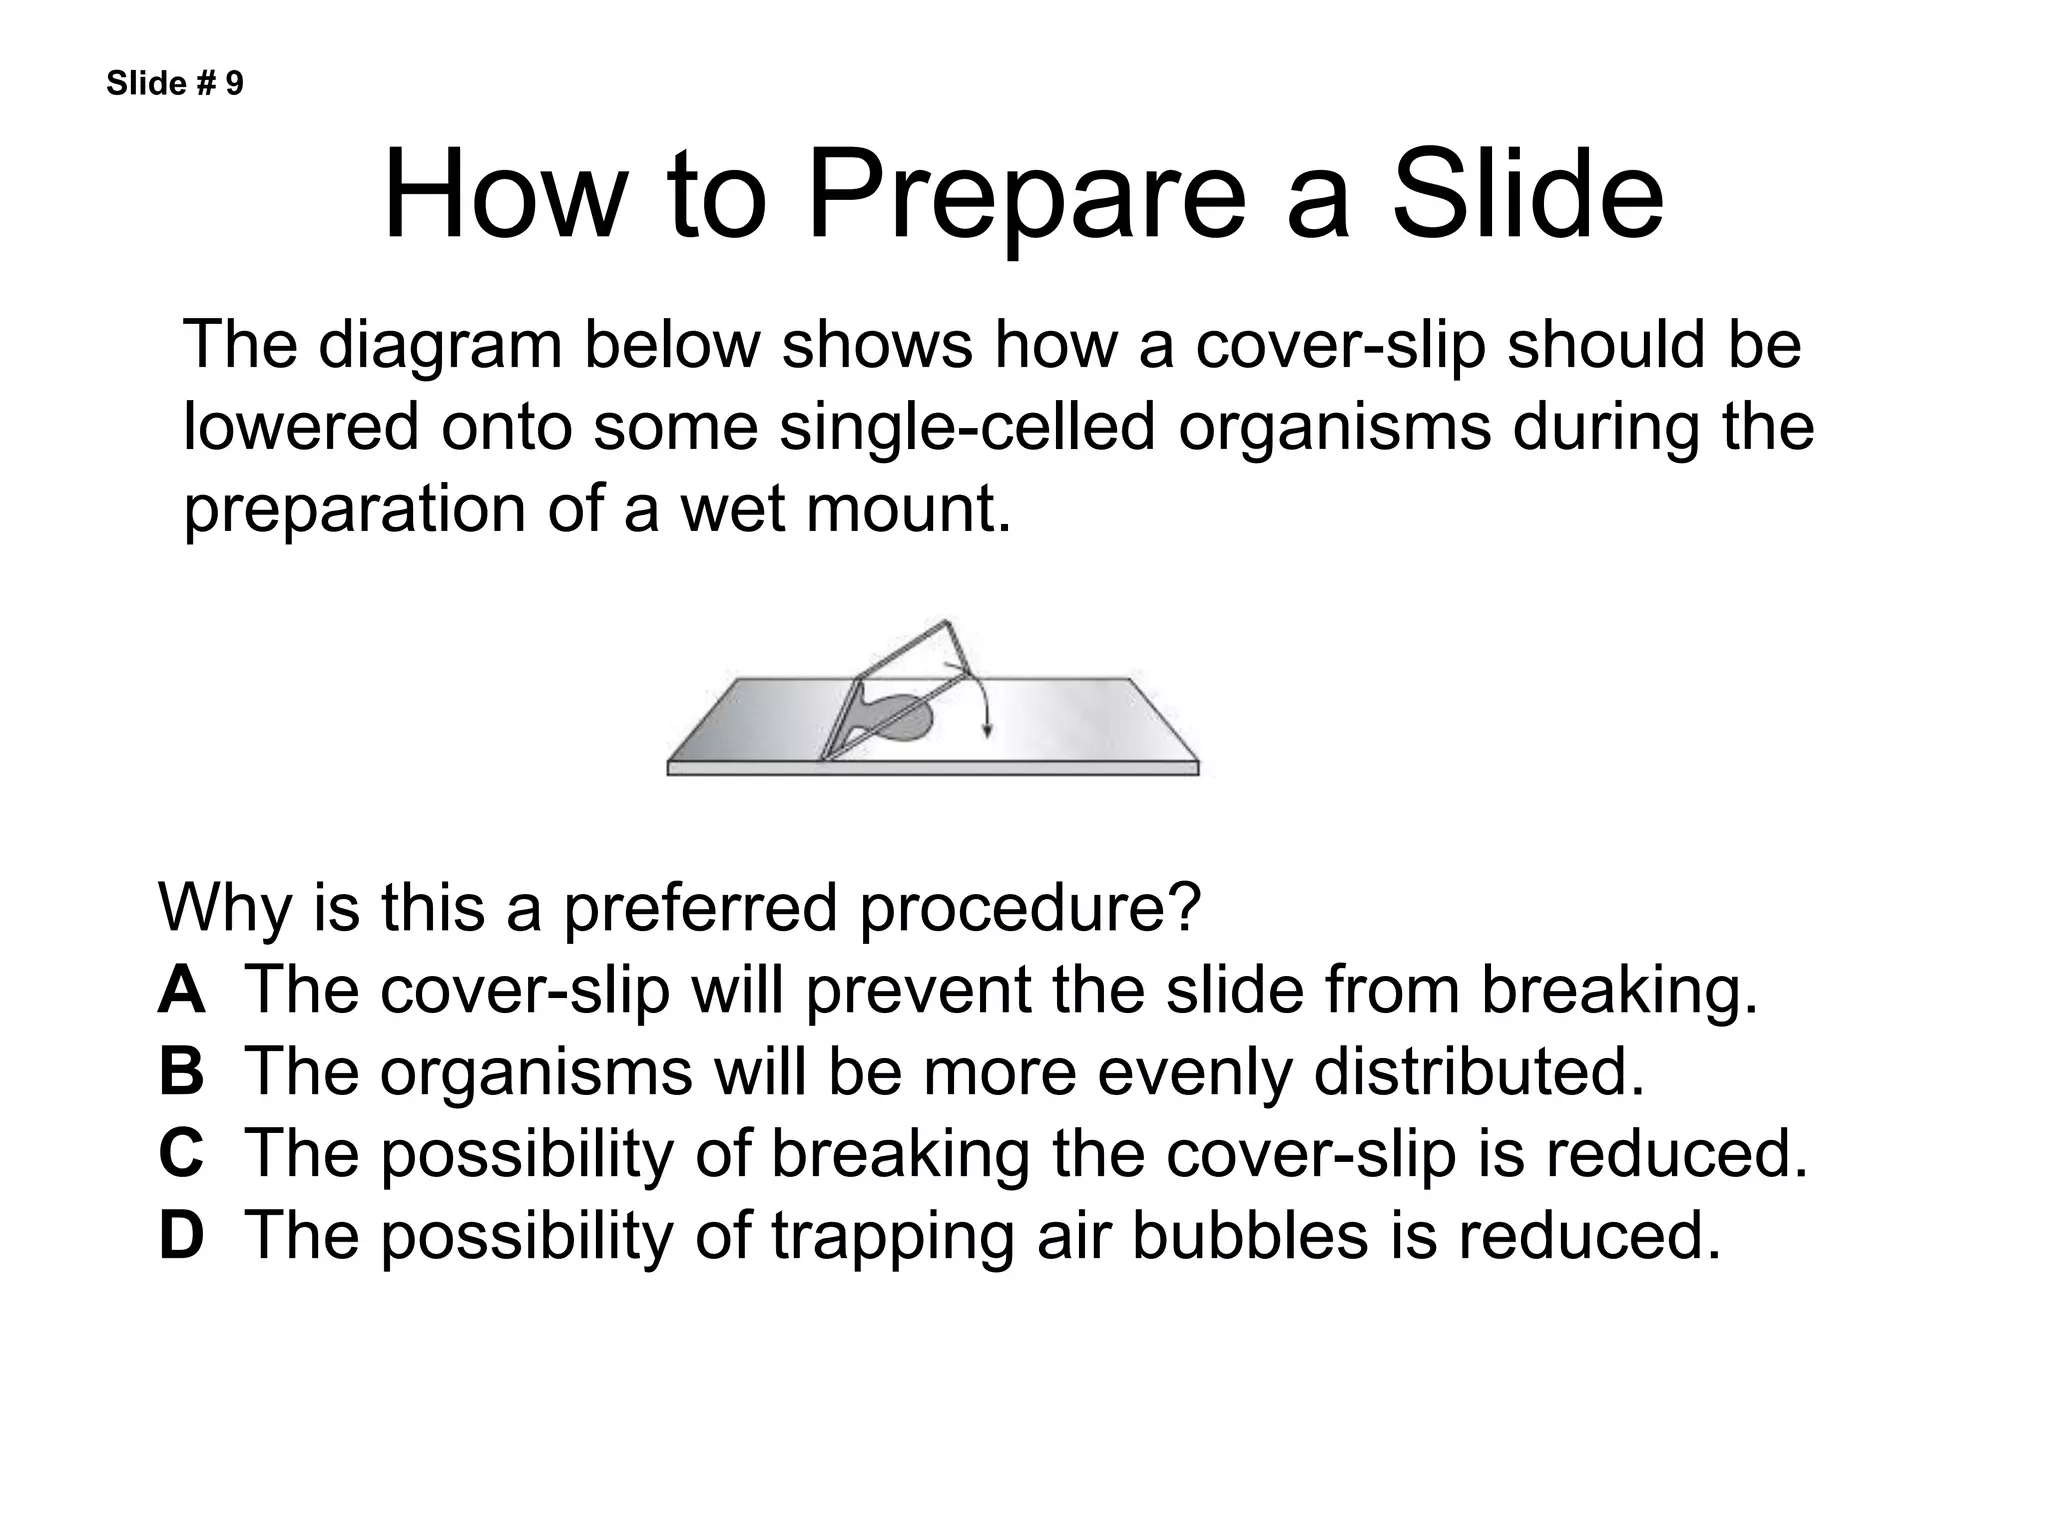
Parts of the Microscope
and Their Function
On the next slide there is an
image of a microscope, very
similar to the scopes we use in
class.
Click on the boxes to see the
name and function of each part of
the microscope.
Click on Me
Click on Me
Click on Me
Click on Me
Click on Me
Click on Me
Click on Me
Click on Me
Click on Me
Click on Me
Click on Me
Click on Me
Click on Me
Click on Me
#9 Eye Piece—The part you
look at with your eye.
Usually 10 X magnification.
Click Here to Return
to the Main Slide
Click Here to Return
to the Main Slide
#10 Neck – Used to safely
transport microscope
Click Here to Return
to the Main Slide
#11 Stage – Slides are
placed on this
Click Here to Return
to the Main Slide
#12 Coarse Adjustment –
Used to make large changes
in focus. NOTE Never use this
when viewing on high power
Click Here to Return
to the Main Slide
#13 Fine Adjustment –
Used to small adjustments
of focus
Click Here to Return
to the Main Slide
#14 Base – Used to safely
transport the microscope
Click Here to Return
to the Main Slide
#1 Tube – Reflects light up
to the viewers eye
Click Here to Return
to the Main Slide
#2 Rotating Objects –
Allows for quick change of
objectives
Click Here to Return
to the Main Slide
#3 Low Power Objective –
The first lens you use when
doing proper microscope
work. Usually 4 X
Click Here to Return
to the Main Slide
#4 Medium Power
Objective – The second
lens you use when doing
proper microscope work.
Usually 10 X
Click Here to Return
to the Main Slide
#5 High Power Objective – The
highest magnification used.
Usually 43 X. NEVER use the
course adjustment when using
this lens.
Click Here to Return
to the Main Slide
#6 Stage Clips – Use to
keep the slide in place.
Click Here to Return
to the Main Slide
#7 Diaphragm – Use to vary the
amount of light passing through
the slide. Usually it is better if
the amount of light is low.
Click Here to Return
to the Main Slide
#8 Light Source – Sends
light up through the
diaphragm and through the
slide for viewing
How a Light Microscope Works
1.Use lenses to make small objects
appear larger
2.Compound light microscope: Two
lenses separated by a tube
3.Lenses magnify an object by
bending the light that passes
through the lens
4.Magnification: ability to make
things appear larger than they are
5.Resolution: fineness of detail that
can be seen in an image
Go to
Section:
Slide # 7
How to Prepare a Slide
1. Place slide on a flat surface.
2. Place a drop of water on the slide. Add the specimen to the drop
of water (at times, you may want to have the specimen already
on the slide before adding the water).
3. Hold the coverslip by its sides and lay its bottom edge on the
slide close to the specimen. Holding the coverslip at a 45° angle
helps.
4. Slowly lower the coverslip so that it spreads the water out. If you
get air bubbles (looking like little black doughnuts), gently press
on the coverslip to move them to the edge. If there are dry areas
under the coverslip, add a little more water at the edge of the
coverslip. Too much water can be dabbed off with a piece of
paper towel
Slide # 9
How to Prepare a Slide
The diagram below shows how a cover-slip should be
lowered onto some single-celled organisms during the
preparation of a wet mount.
Why is this a preferred procedure?
A The cover-slip will prevent the slide from breaking.
B The organisms will be more evenly distributed.
C The possibility of breaking the cover-slip is reduced.
D The possibility of trapping air bubbles is reduced.
Slide # 9

parts-of-the-microscope-and-functions-ppt-1.ppt

  • 1.
    Parts of theMicroscope and Their Function On the next slide there is an image of a microscope, very similar to the scopes we use in class. Click on the boxes to see the name and function of each part of the microscope.
  • 2.
    Click on Me Clickon Me Click on Me Click on Me Click on Me Click on Me Click on Me Click on Me Click on Me Click on Me Click on Me Click on Me Click on Me Click on Me
  • 3.
    #9 Eye Piece—Thepart you look at with your eye. Usually 10 X magnification. Click Here to Return to the Main Slide
  • 4.
    Click Here toReturn to the Main Slide #10 Neck – Used to safely transport microscope
  • 5.
    Click Here toReturn to the Main Slide #11 Stage – Slides are placed on this
  • 6.
    Click Here toReturn to the Main Slide #12 Coarse Adjustment – Used to make large changes in focus. NOTE Never use this when viewing on high power
  • 7.
    Click Here toReturn to the Main Slide #13 Fine Adjustment – Used to small adjustments of focus
  • 8.
    Click Here toReturn to the Main Slide #14 Base – Used to safely transport the microscope
  • 9.
    Click Here toReturn to the Main Slide #1 Tube – Reflects light up to the viewers eye
  • 10.
    Click Here toReturn to the Main Slide #2 Rotating Objects – Allows for quick change of objectives
  • 11.
    Click Here toReturn to the Main Slide #3 Low Power Objective – The first lens you use when doing proper microscope work. Usually 4 X
  • 12.
    Click Here toReturn to the Main Slide #4 Medium Power Objective – The second lens you use when doing proper microscope work. Usually 10 X
  • 13.
    Click Here toReturn to the Main Slide #5 High Power Objective – The highest magnification used. Usually 43 X. NEVER use the course adjustment when using this lens.
  • 14.
    Click Here toReturn to the Main Slide #6 Stage Clips – Use to keep the slide in place.
  • 15.
    Click Here toReturn to the Main Slide #7 Diaphragm – Use to vary the amount of light passing through the slide. Usually it is better if the amount of light is low.
  • 16.
    Click Here toReturn to the Main Slide #8 Light Source – Sends light up through the diaphragm and through the slide for viewing
  • 17.
    How a LightMicroscope Works 1.Use lenses to make small objects appear larger 2.Compound light microscope: Two lenses separated by a tube 3.Lenses magnify an object by bending the light that passes through the lens 4.Magnification: ability to make things appear larger than they are 5.Resolution: fineness of detail that can be seen in an image Go to Section: Slide # 7
  • 18.
    How to Preparea Slide 1. Place slide on a flat surface. 2. Place a drop of water on the slide. Add the specimen to the drop of water (at times, you may want to have the specimen already on the slide before adding the water). 3. Hold the coverslip by its sides and lay its bottom edge on the slide close to the specimen. Holding the coverslip at a 45° angle helps. 4. Slowly lower the coverslip so that it spreads the water out. If you get air bubbles (looking like little black doughnuts), gently press on the coverslip to move them to the edge. If there are dry areas under the coverslip, add a little more water at the edge of the coverslip. Too much water can be dabbed off with a piece of paper towel Slide # 9
  • 19.
    How to Preparea Slide The diagram below shows how a cover-slip should be lowered onto some single-celled organisms during the preparation of a wet mount. Why is this a preferred procedure? A The cover-slip will prevent the slide from breaking. B The organisms will be more evenly distributed. C The possibility of breaking the cover-slip is reduced. D The possibility of trapping air bubbles is reduced. Slide # 9