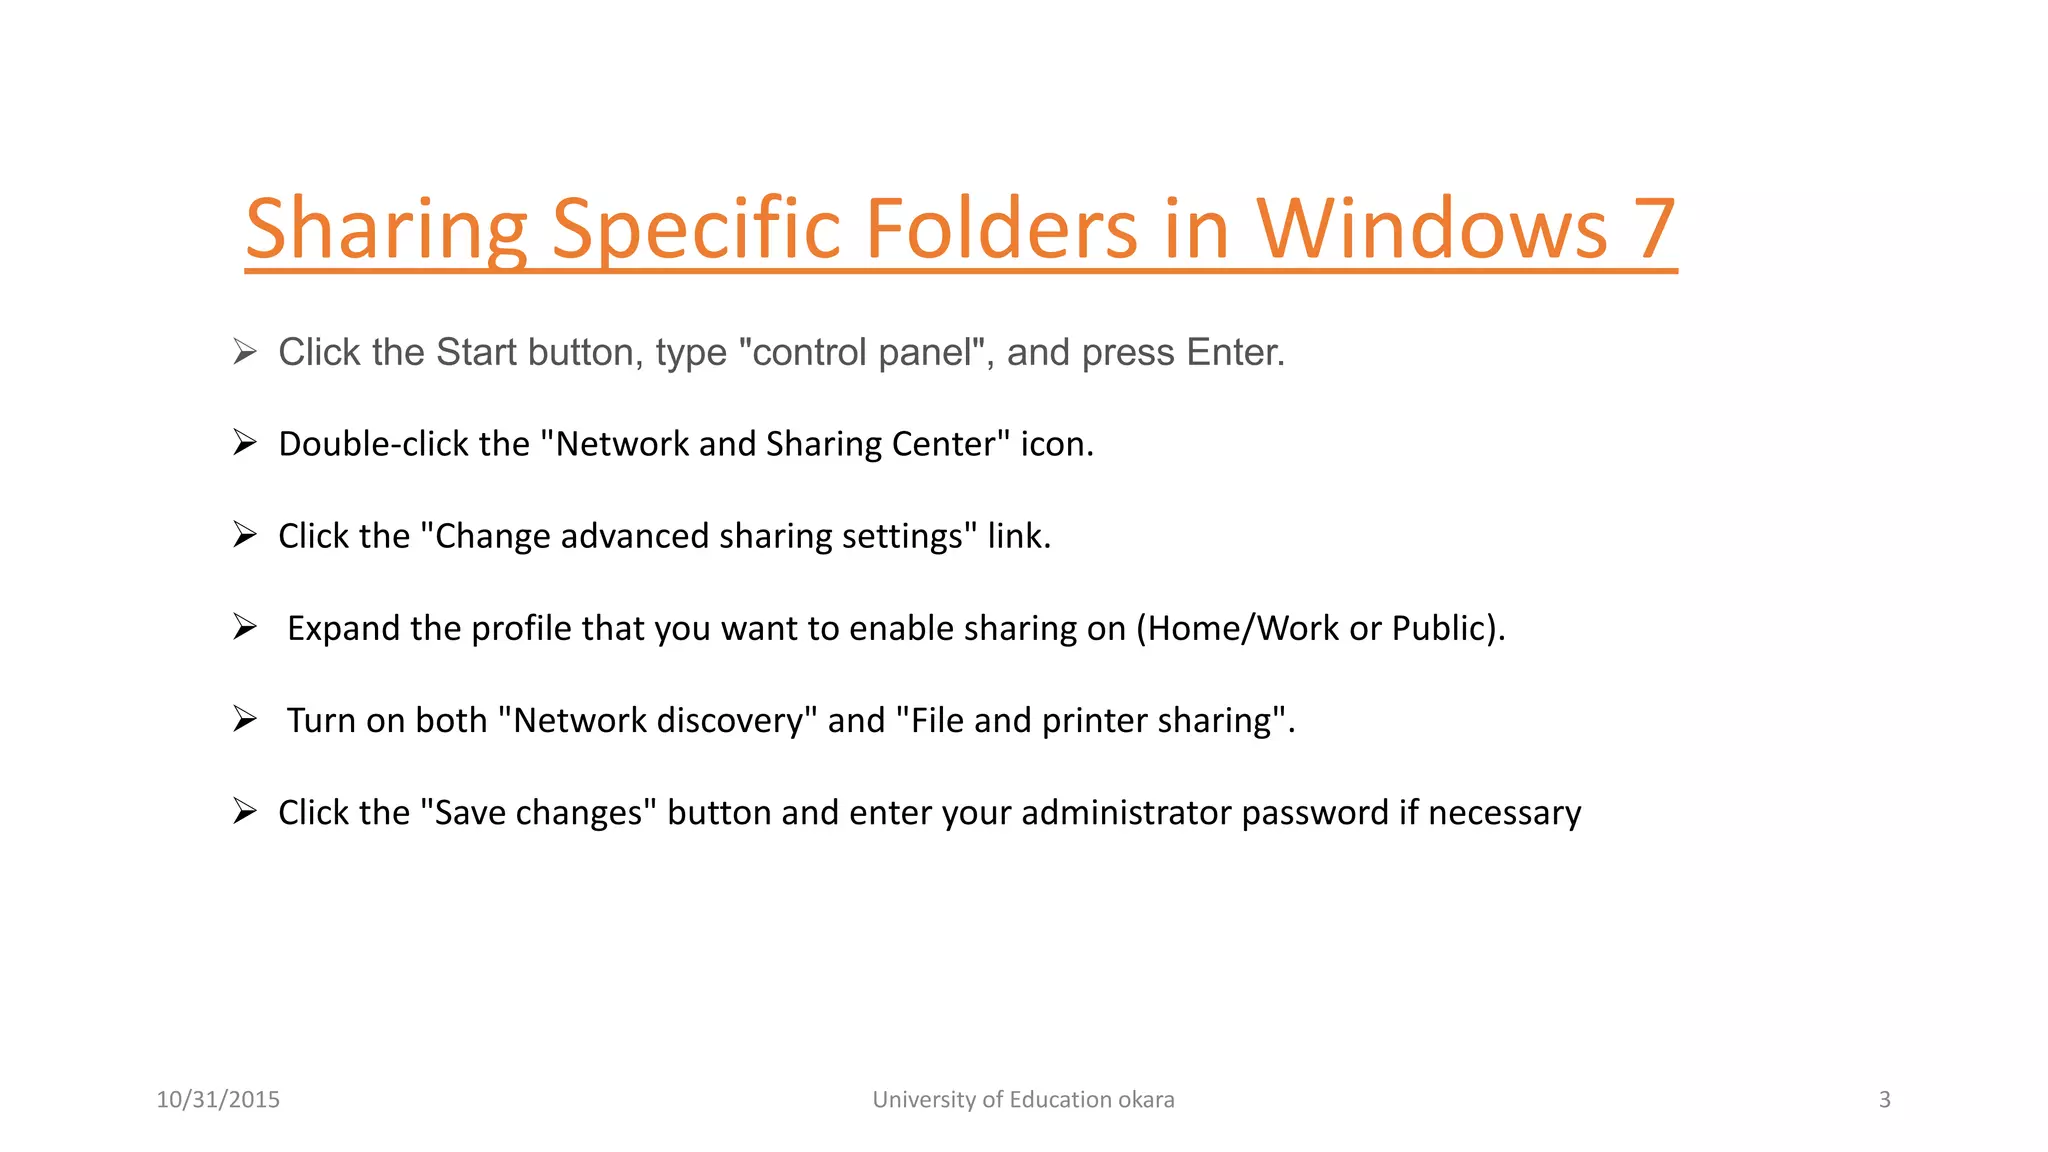
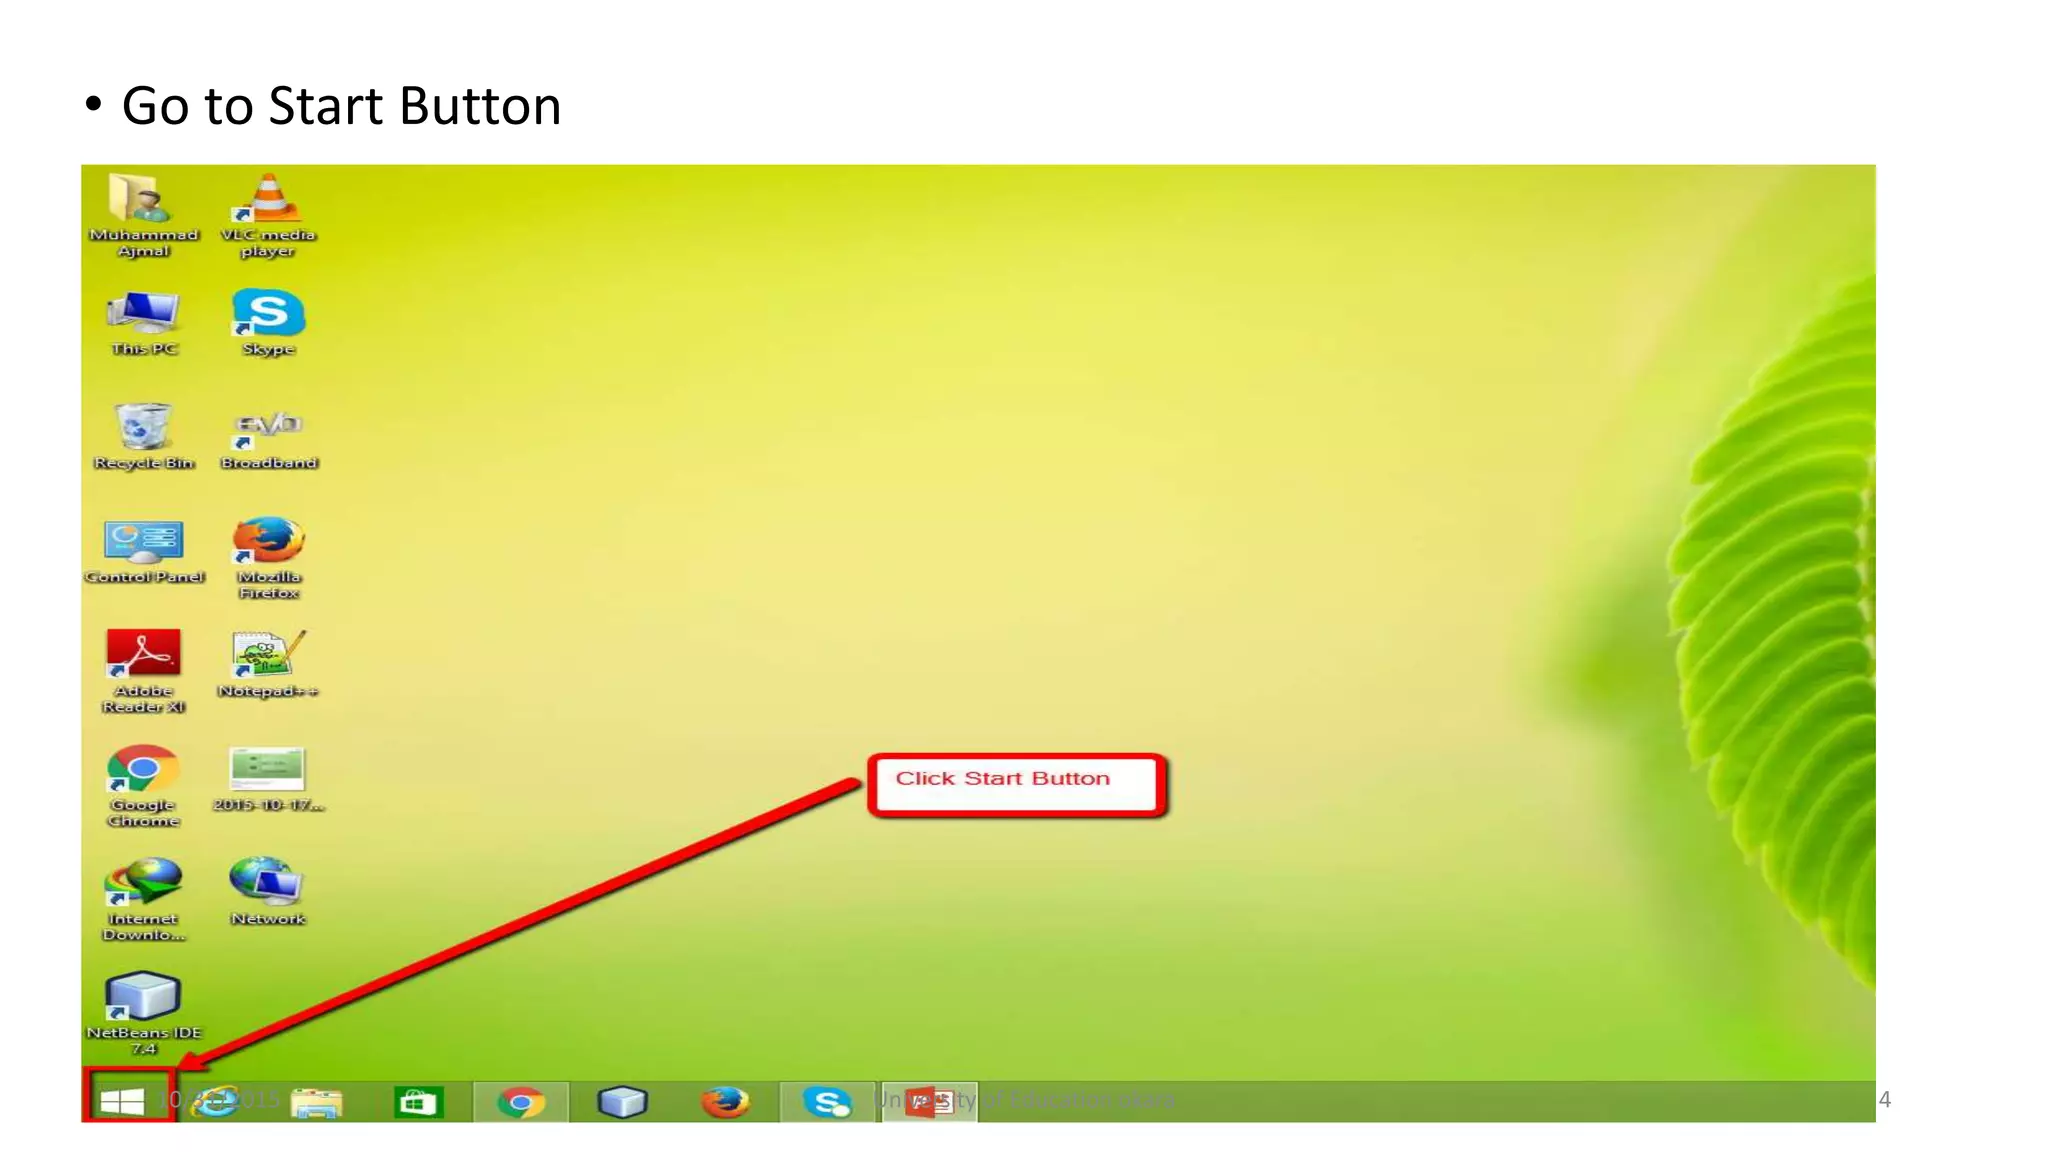
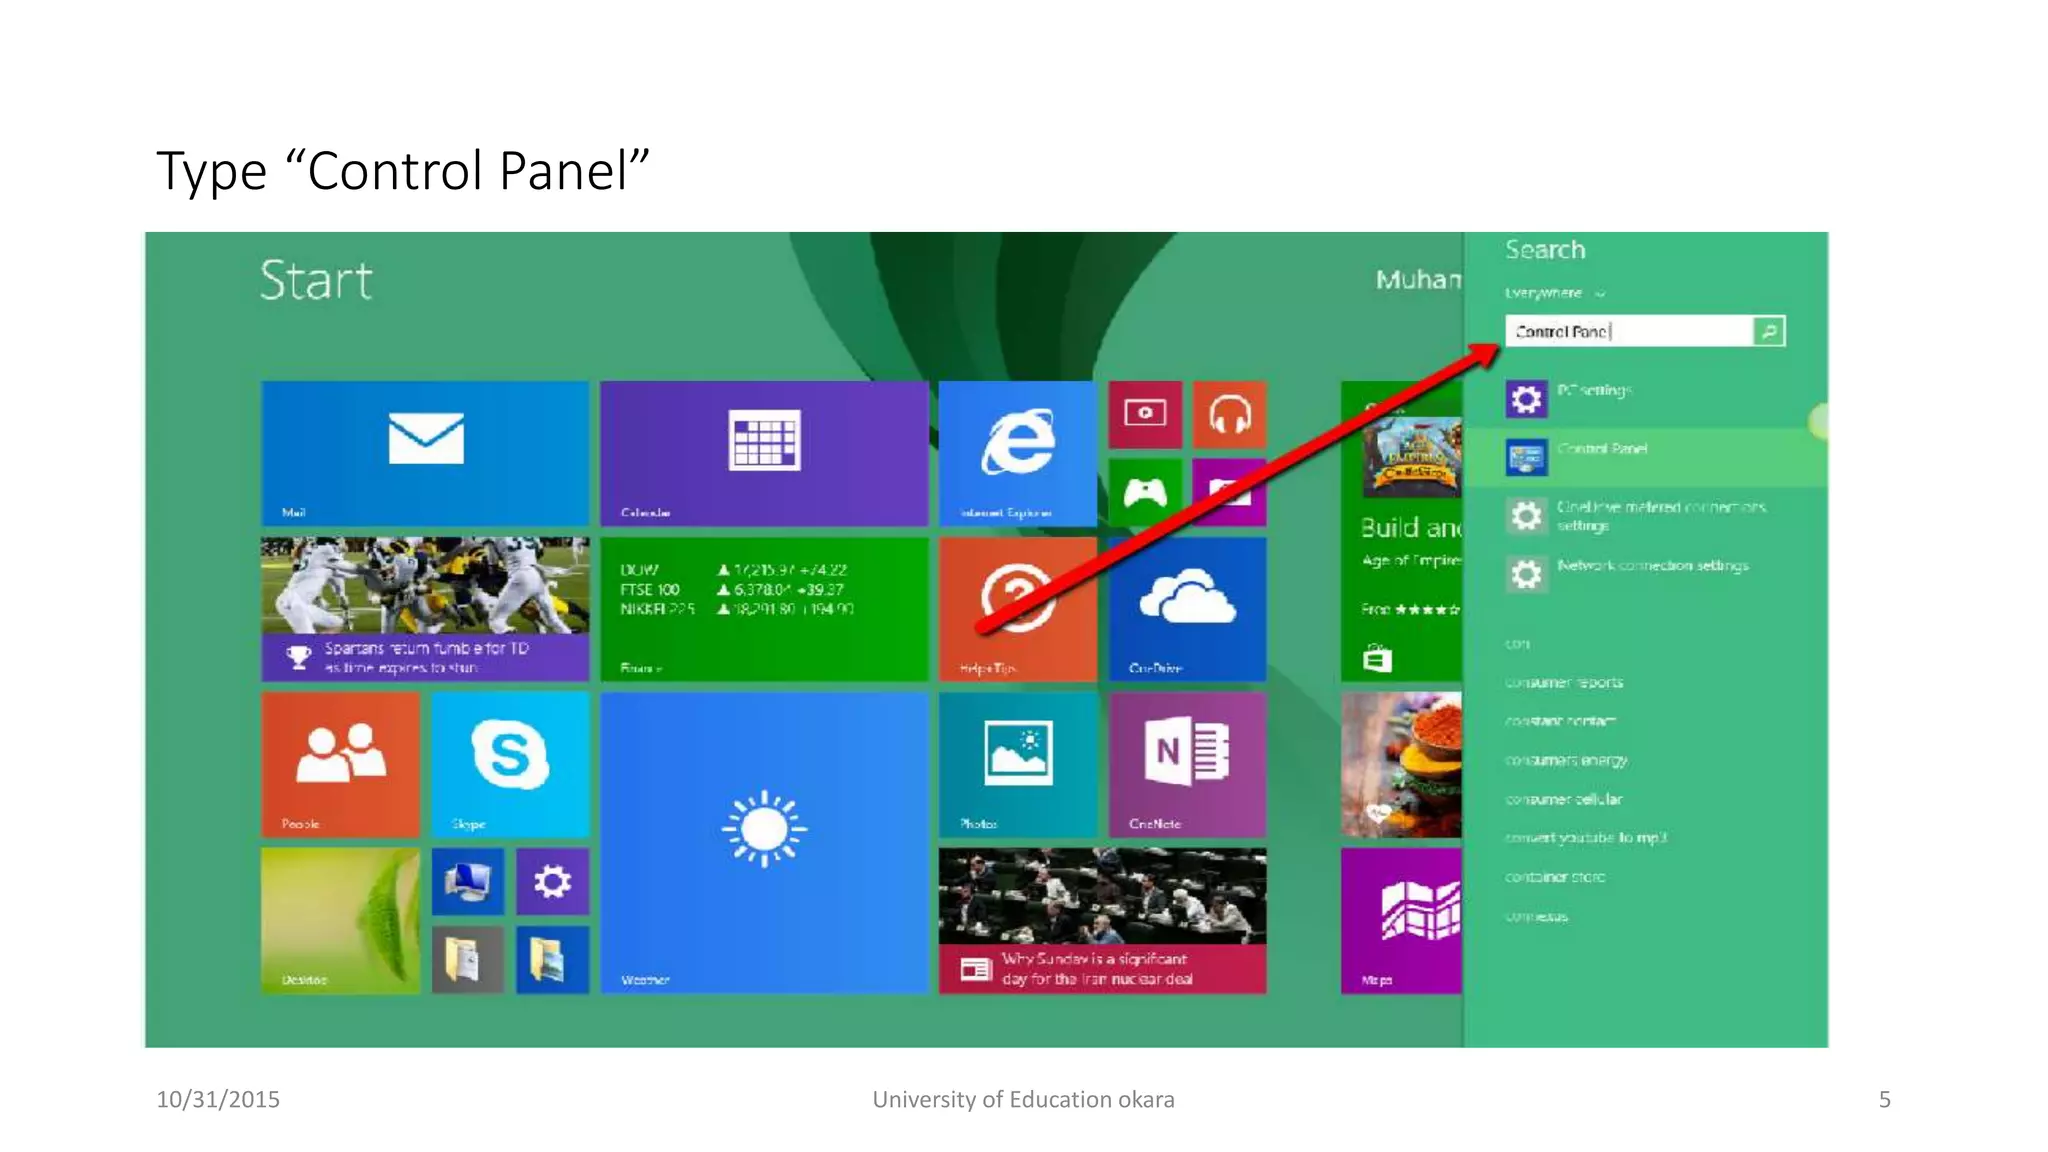
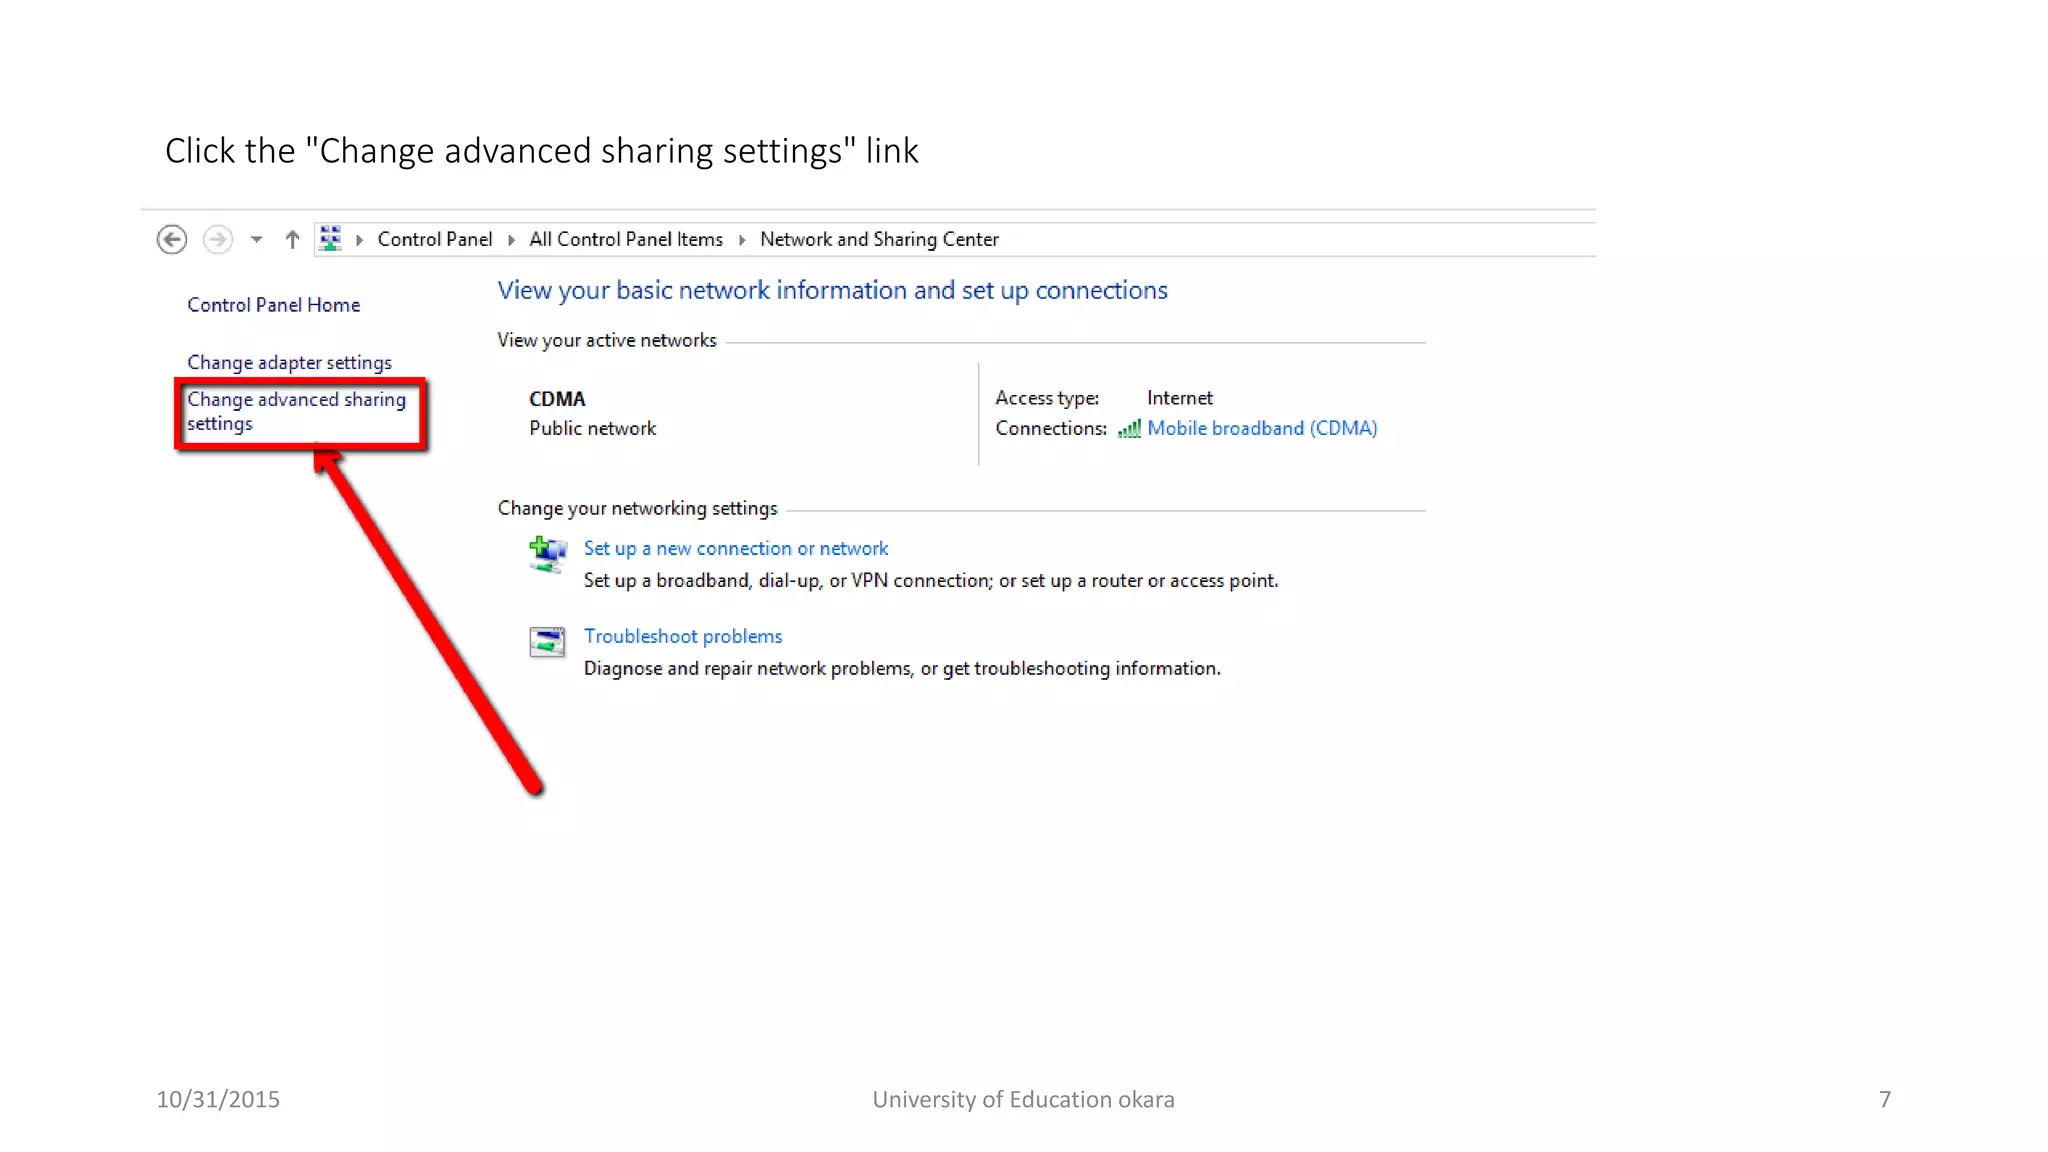
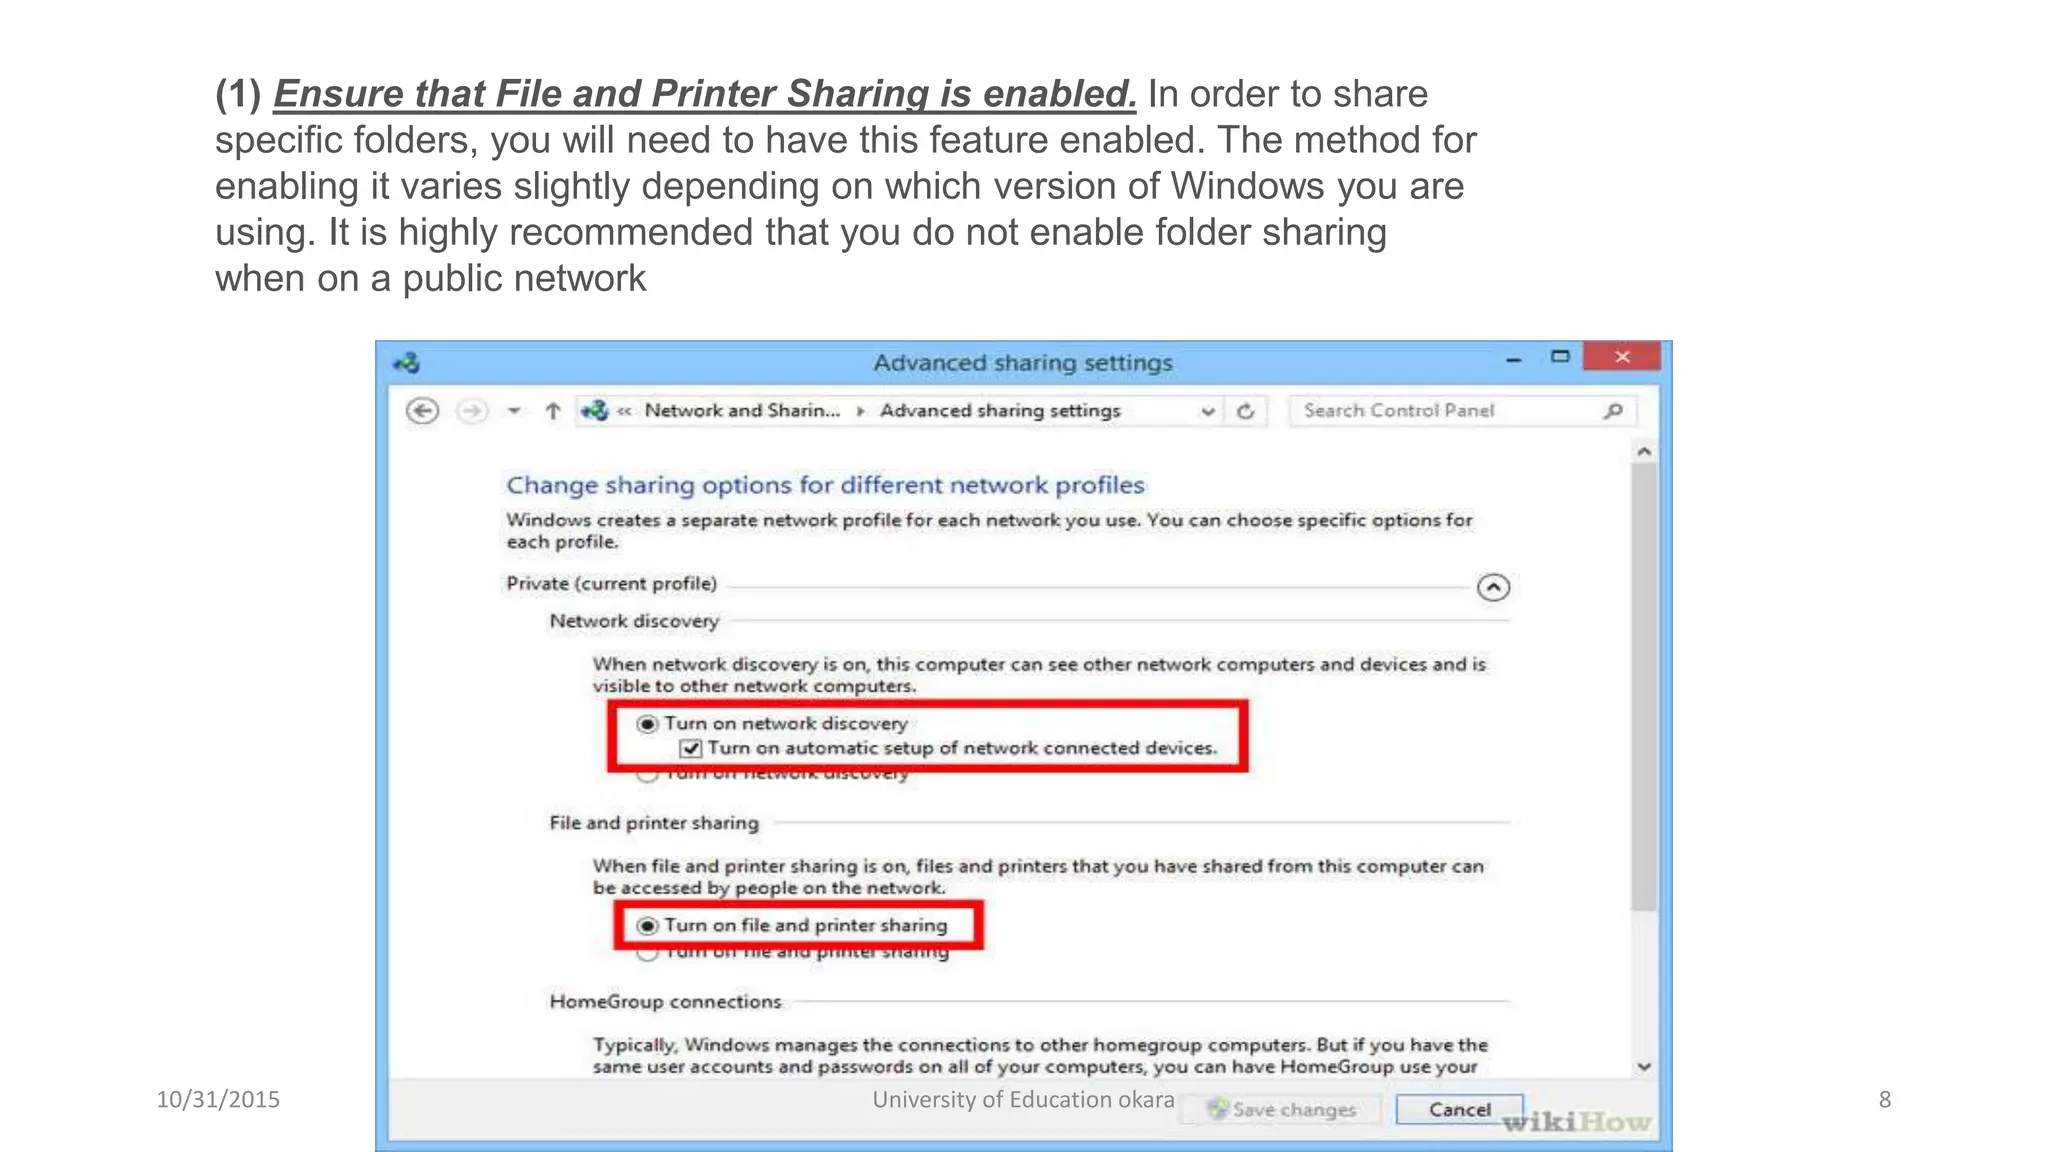
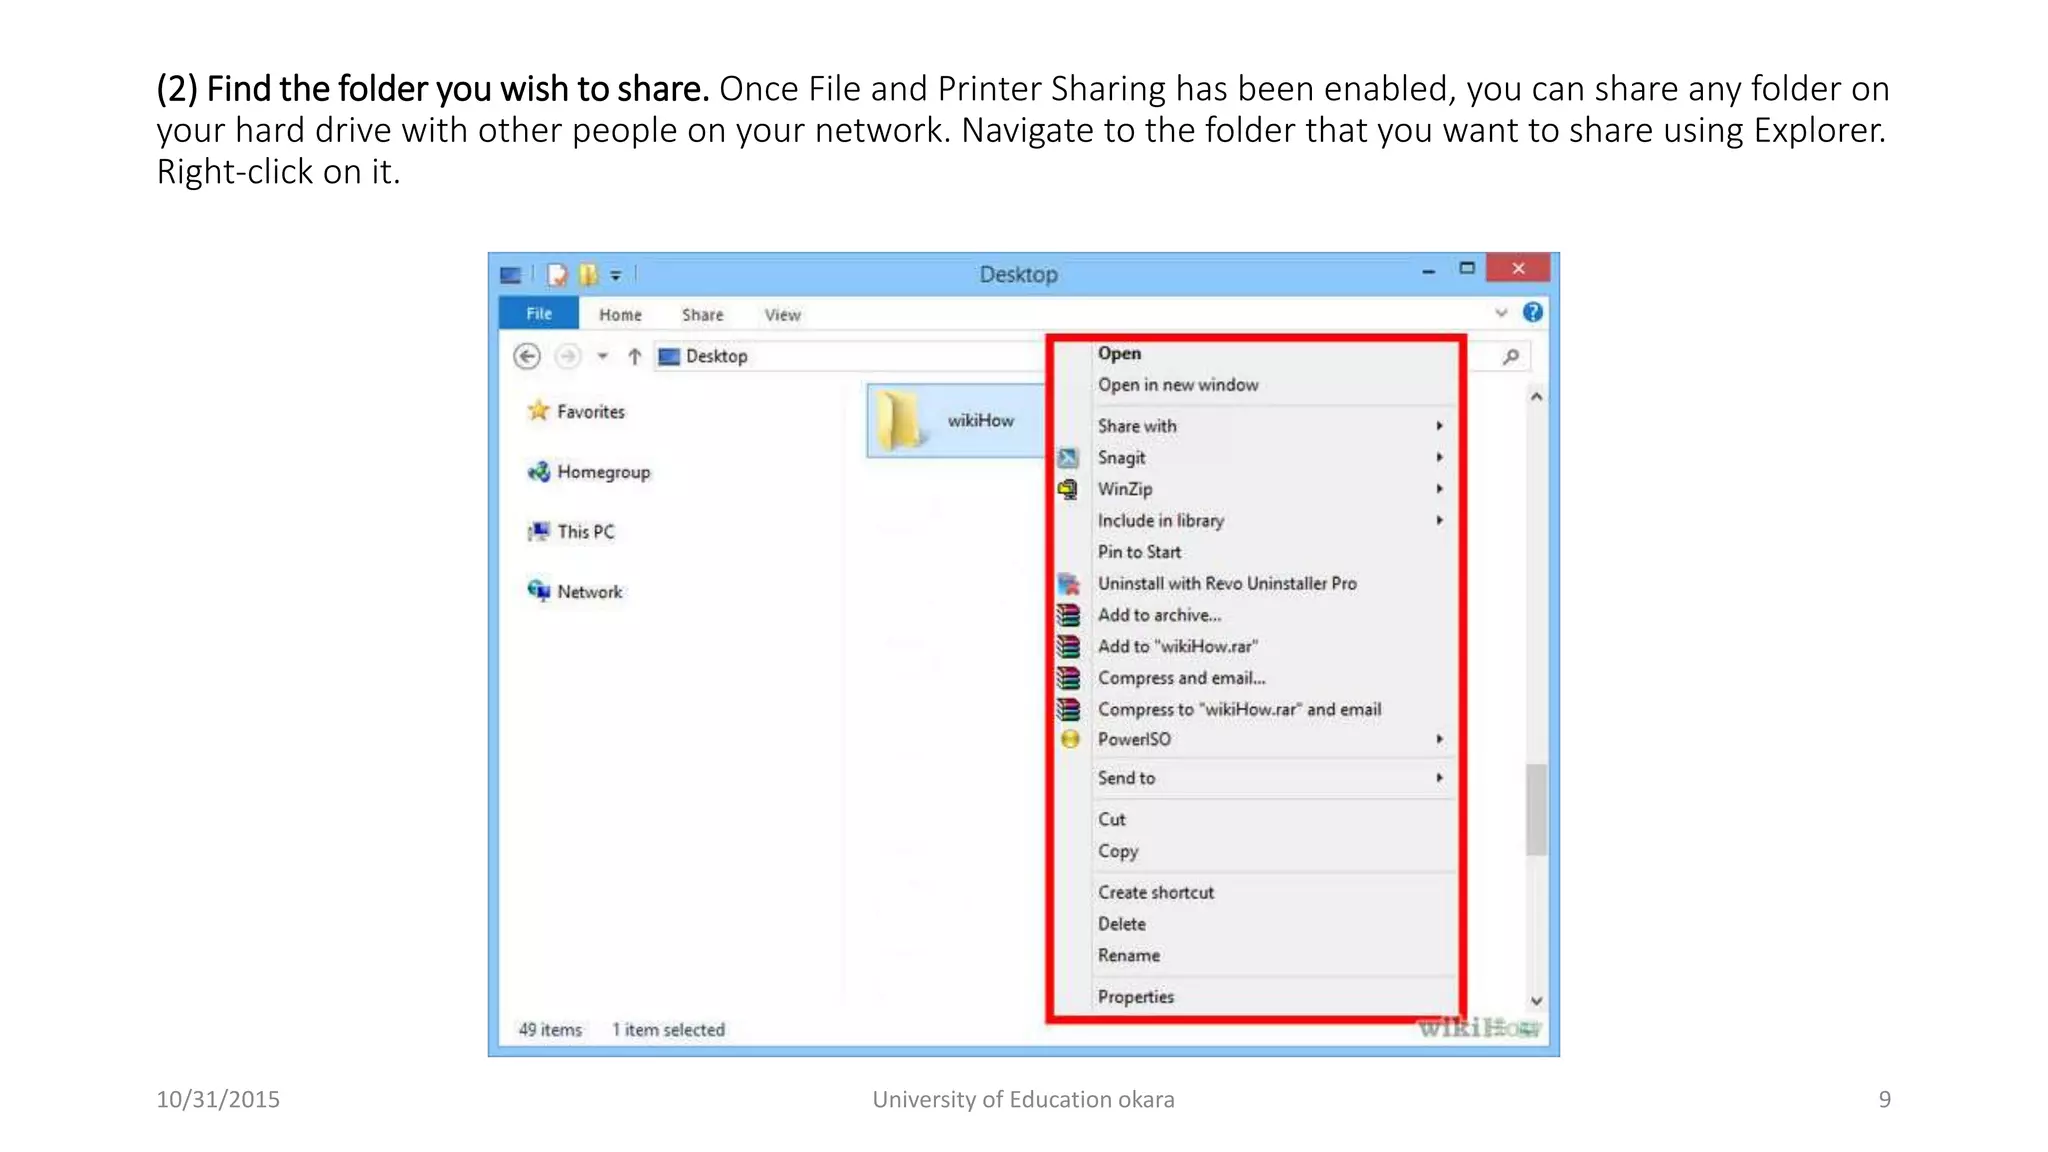
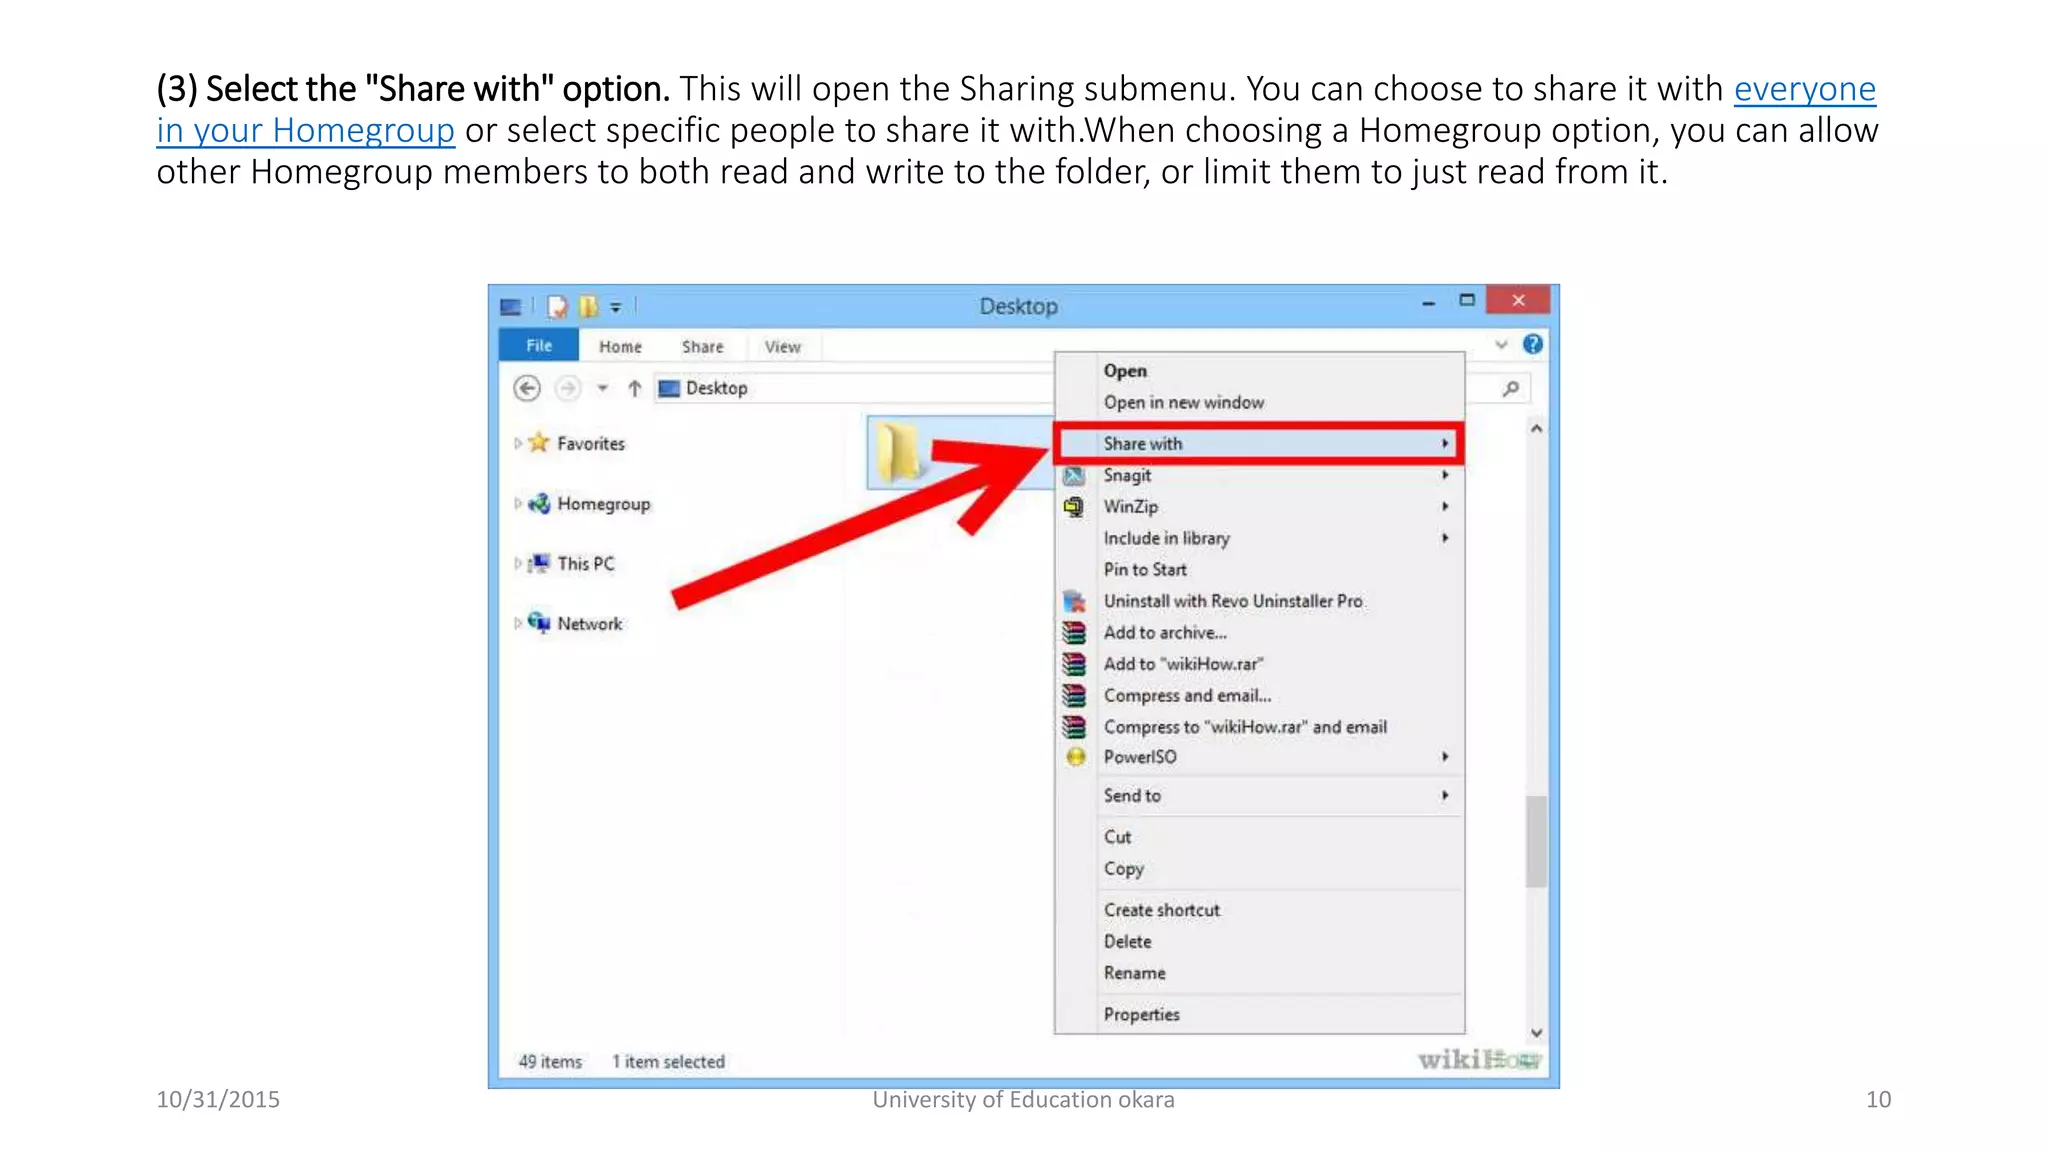
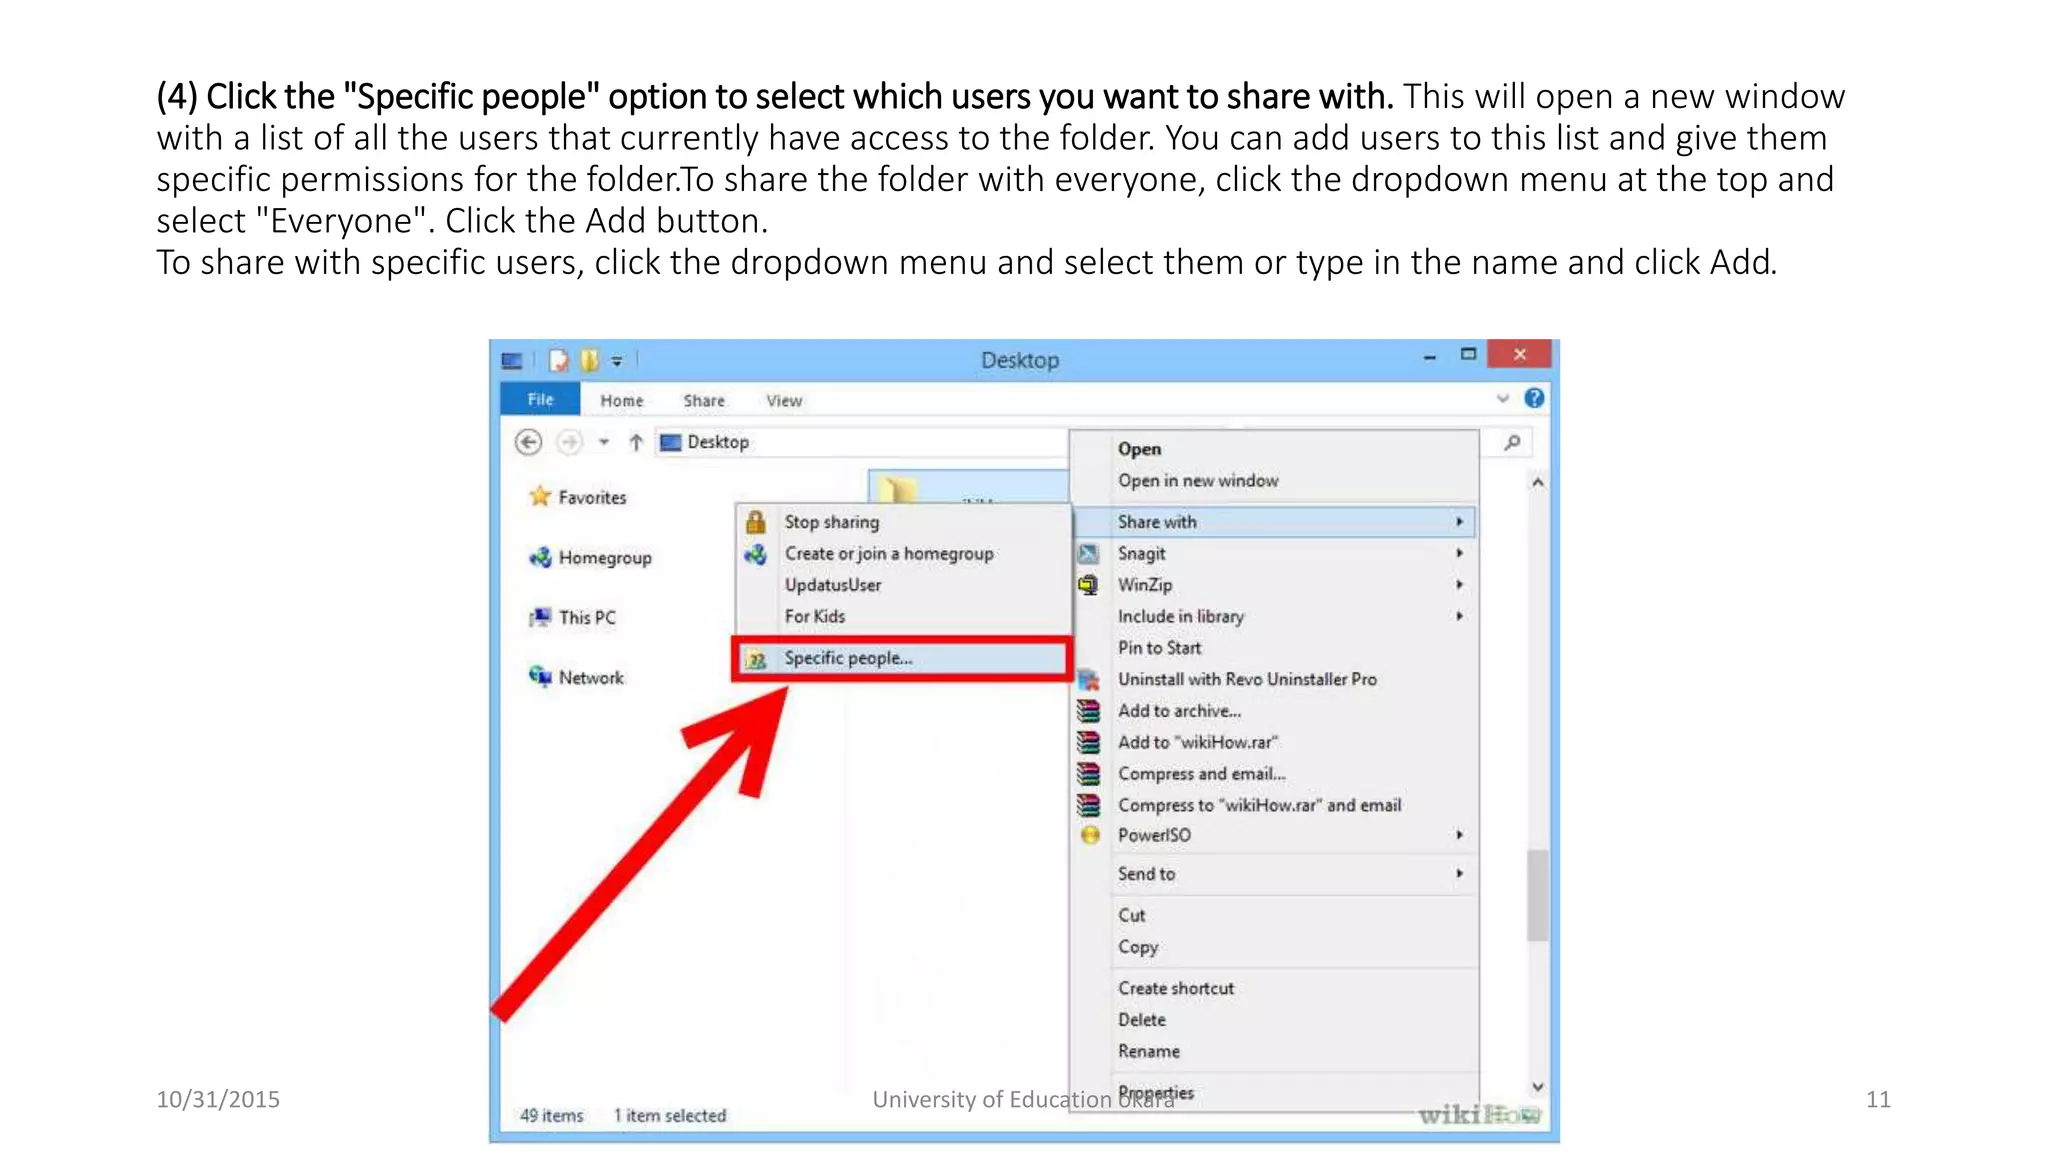
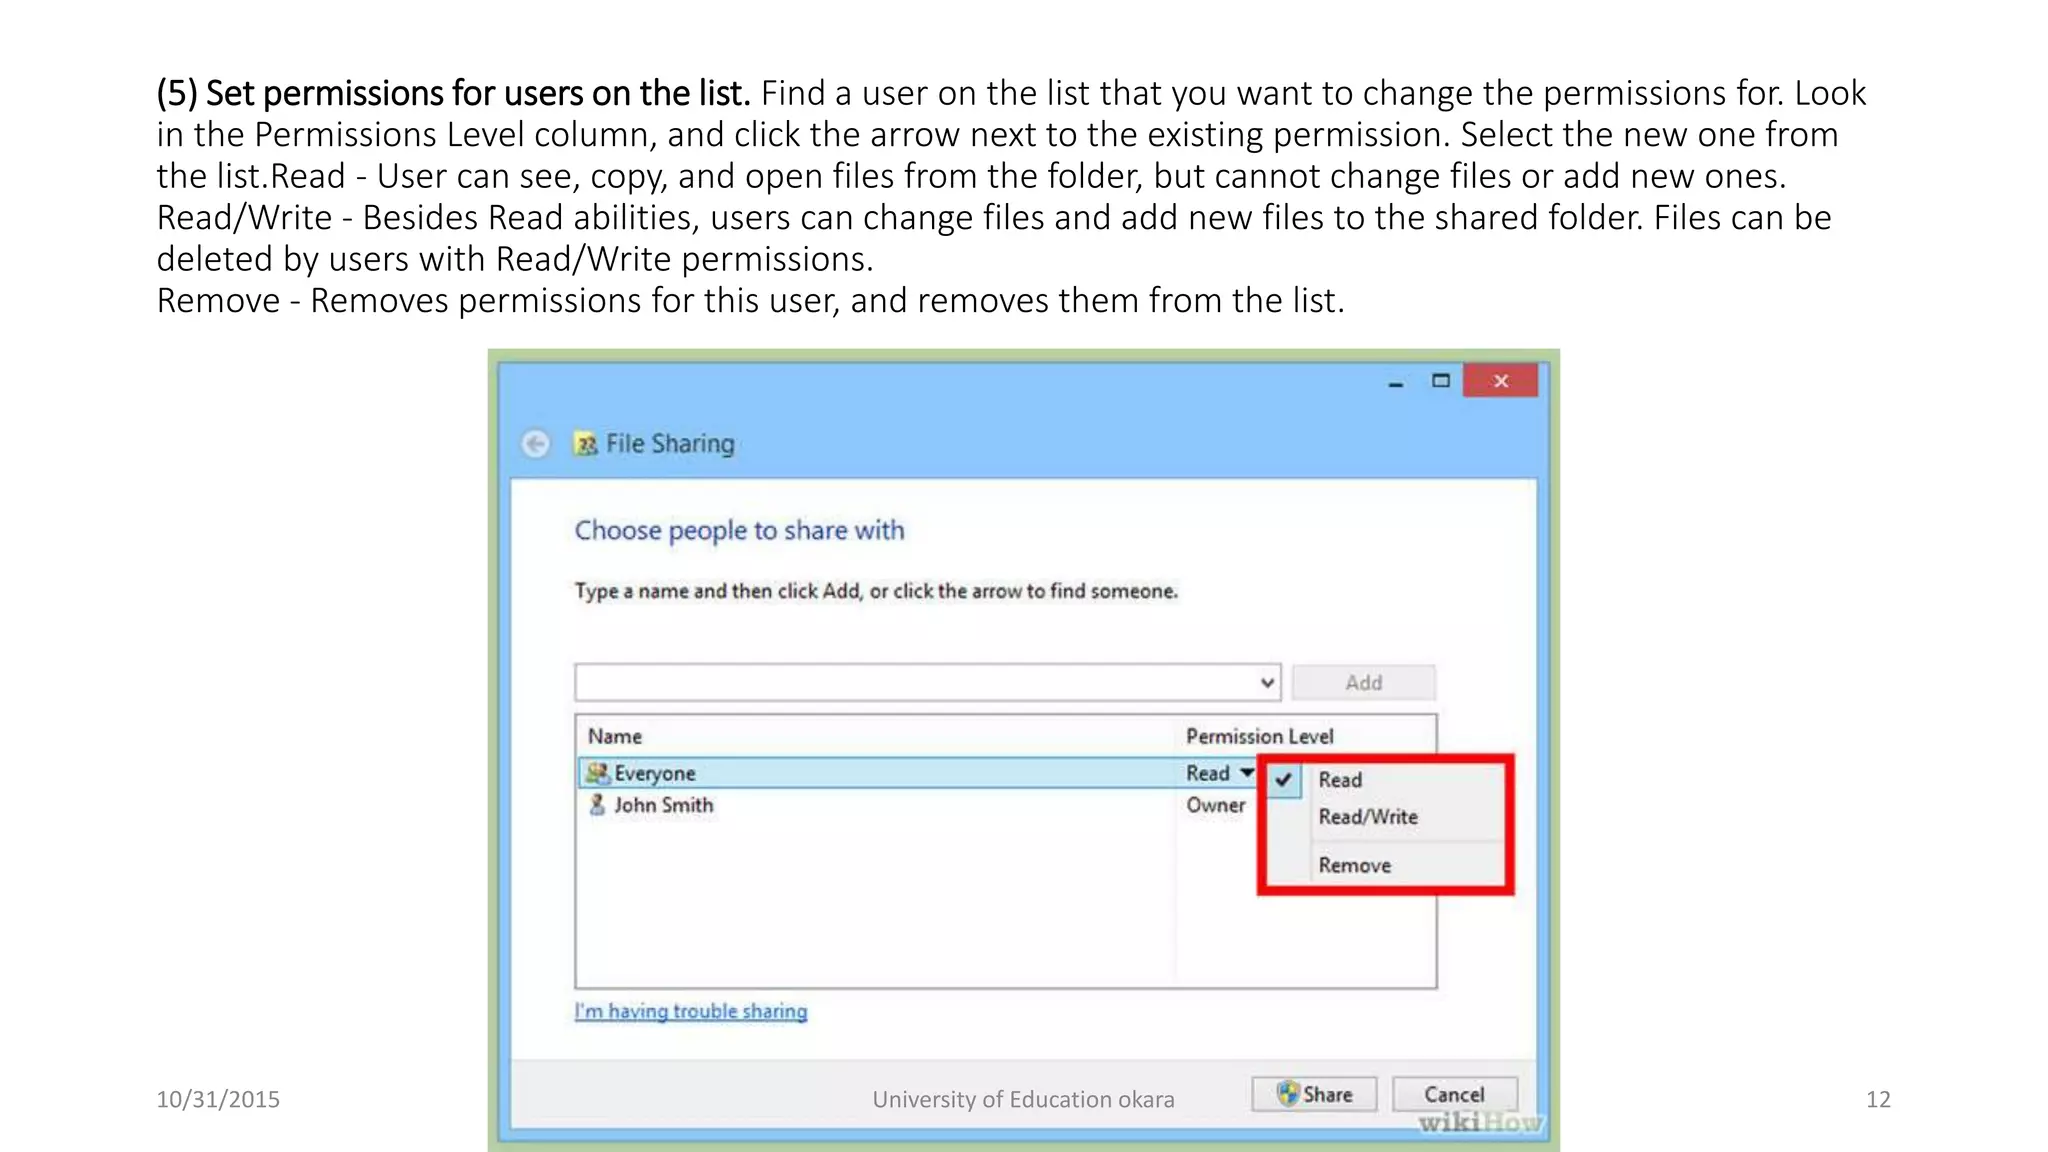
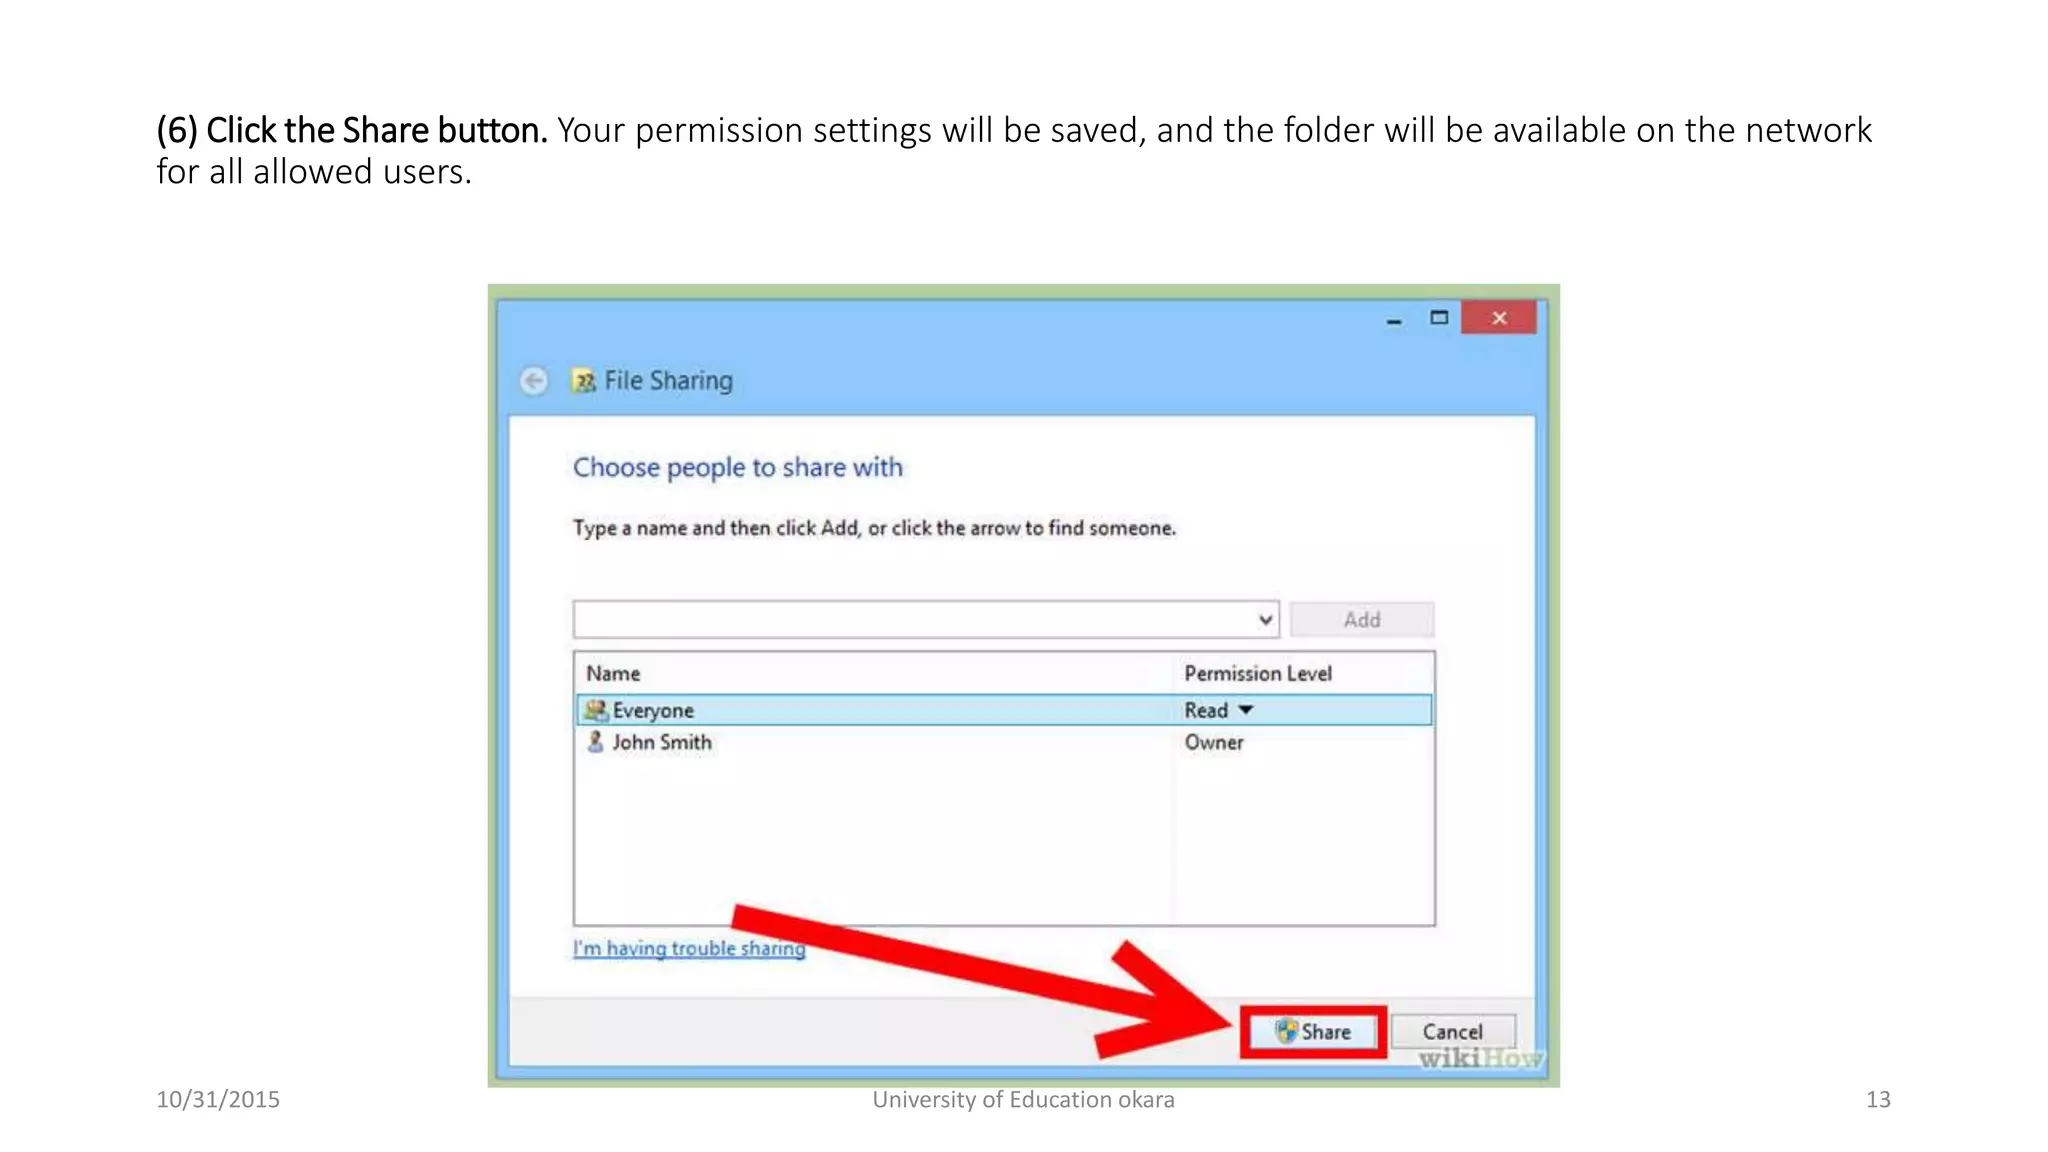
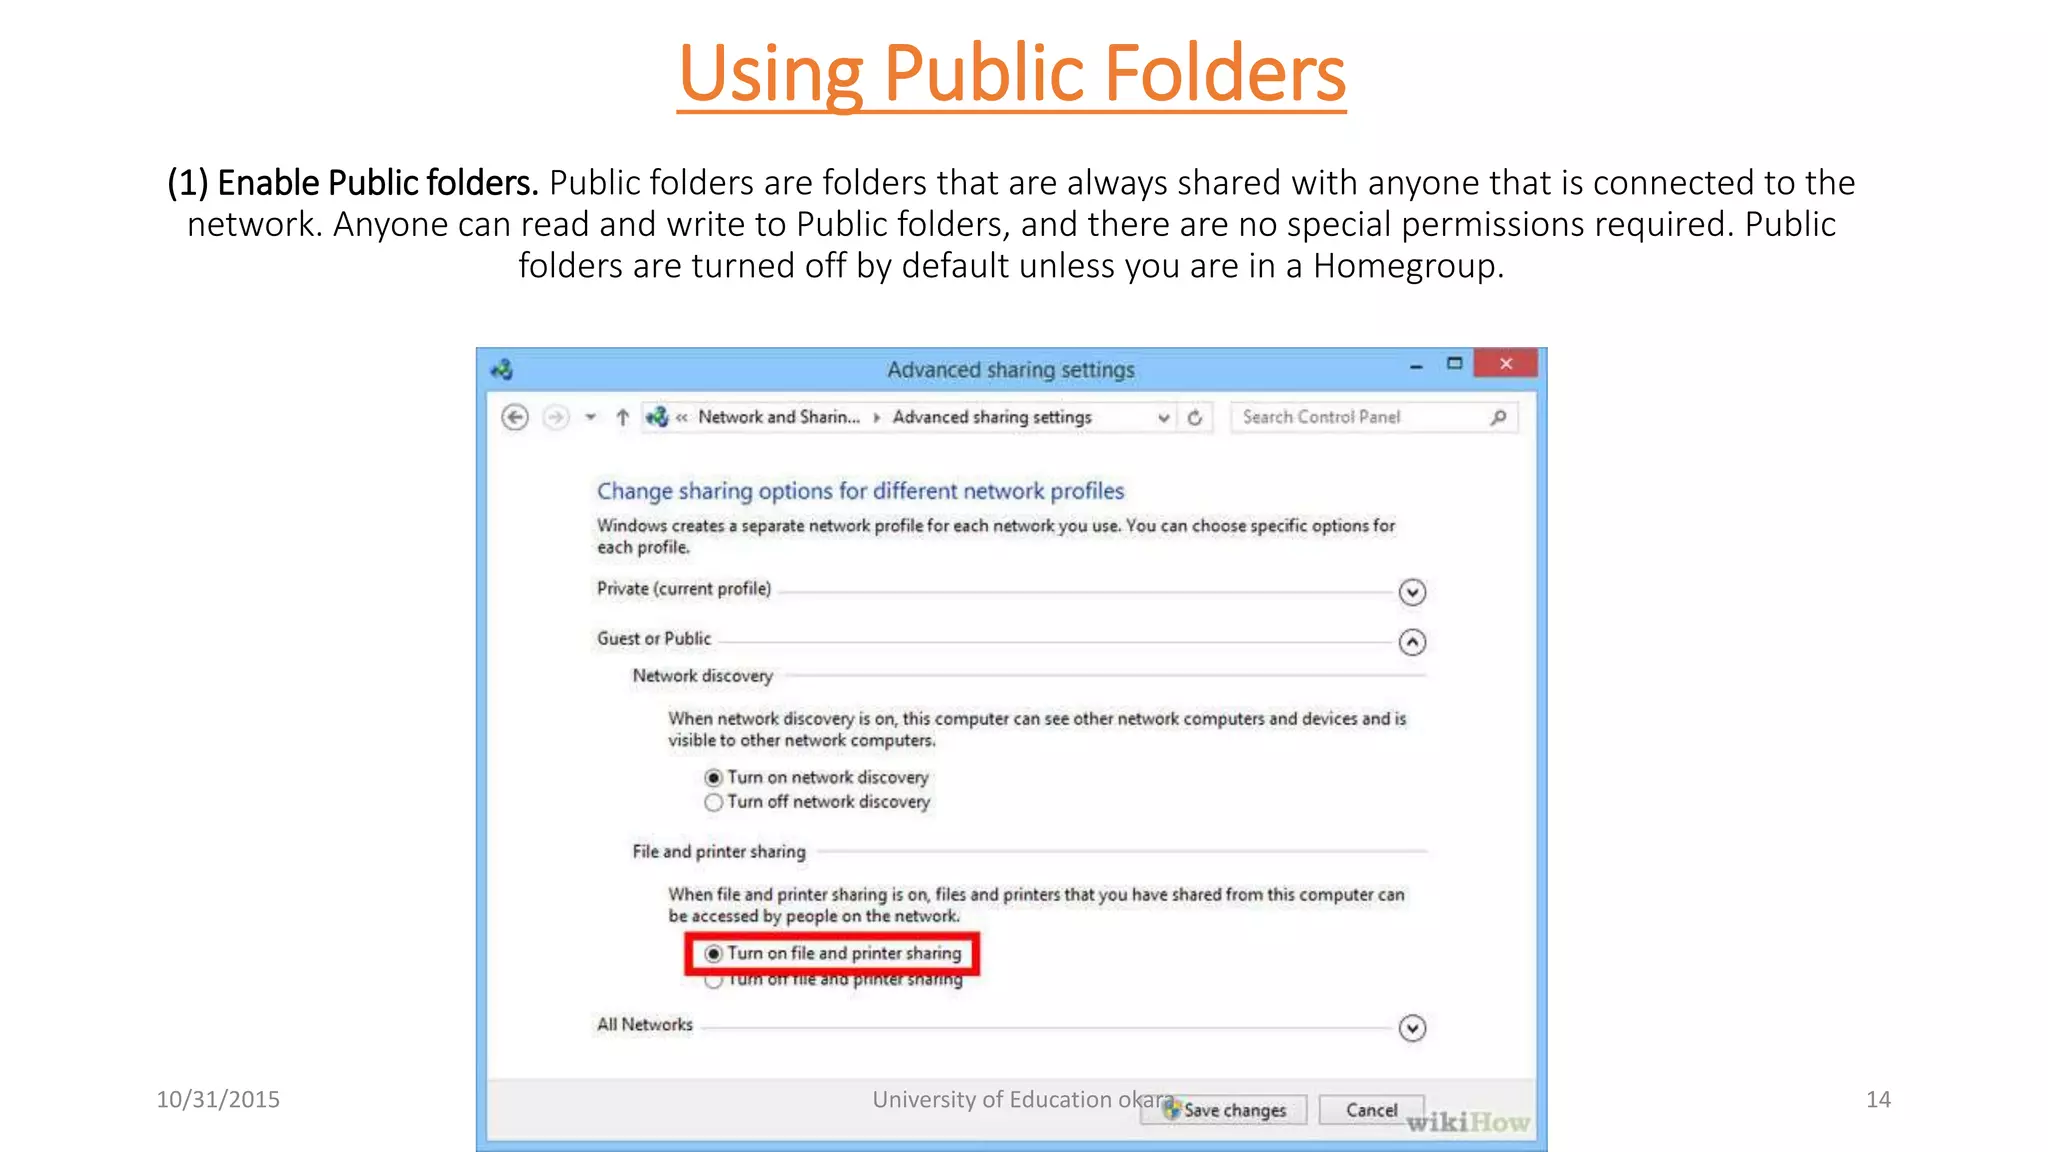
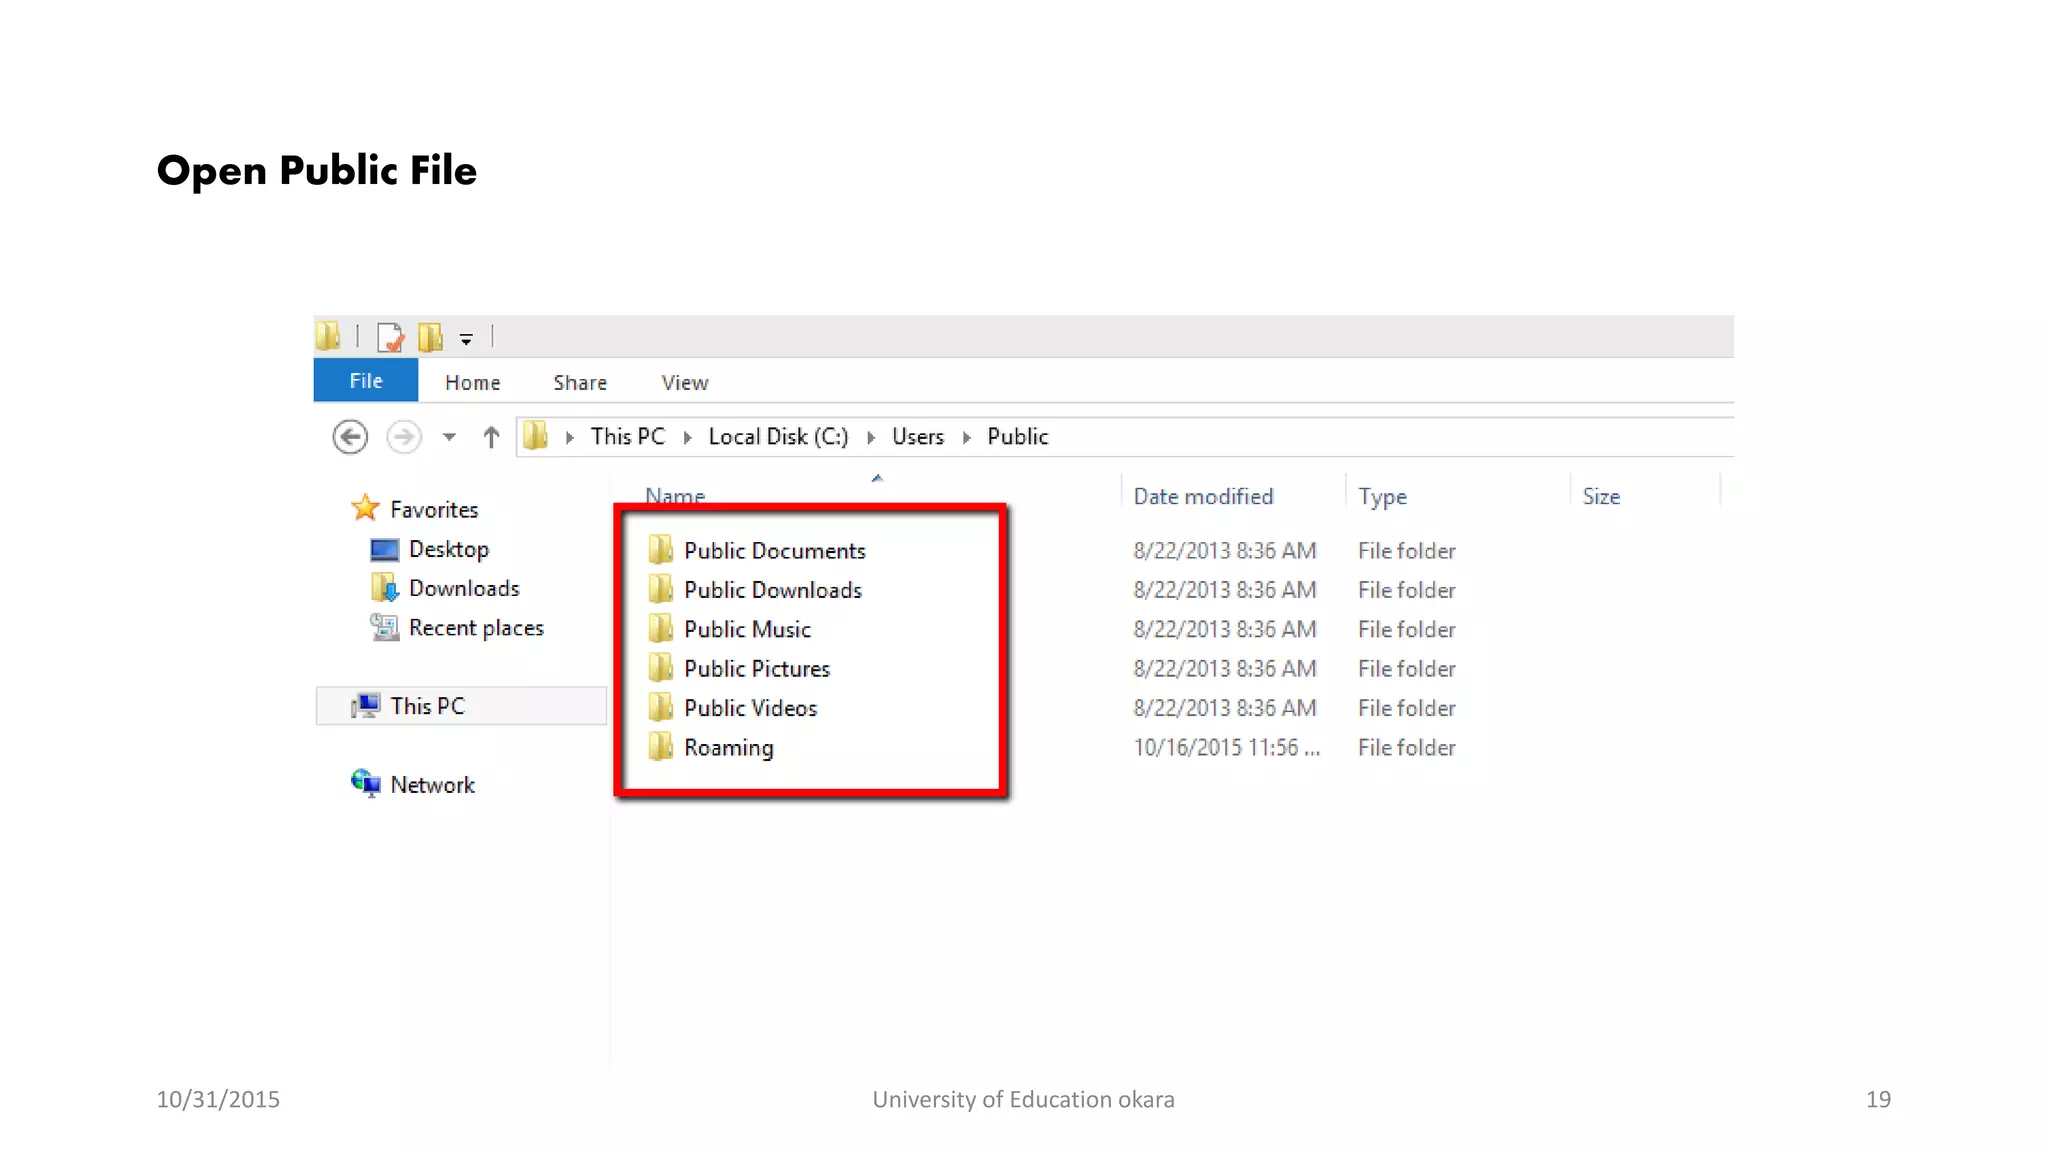
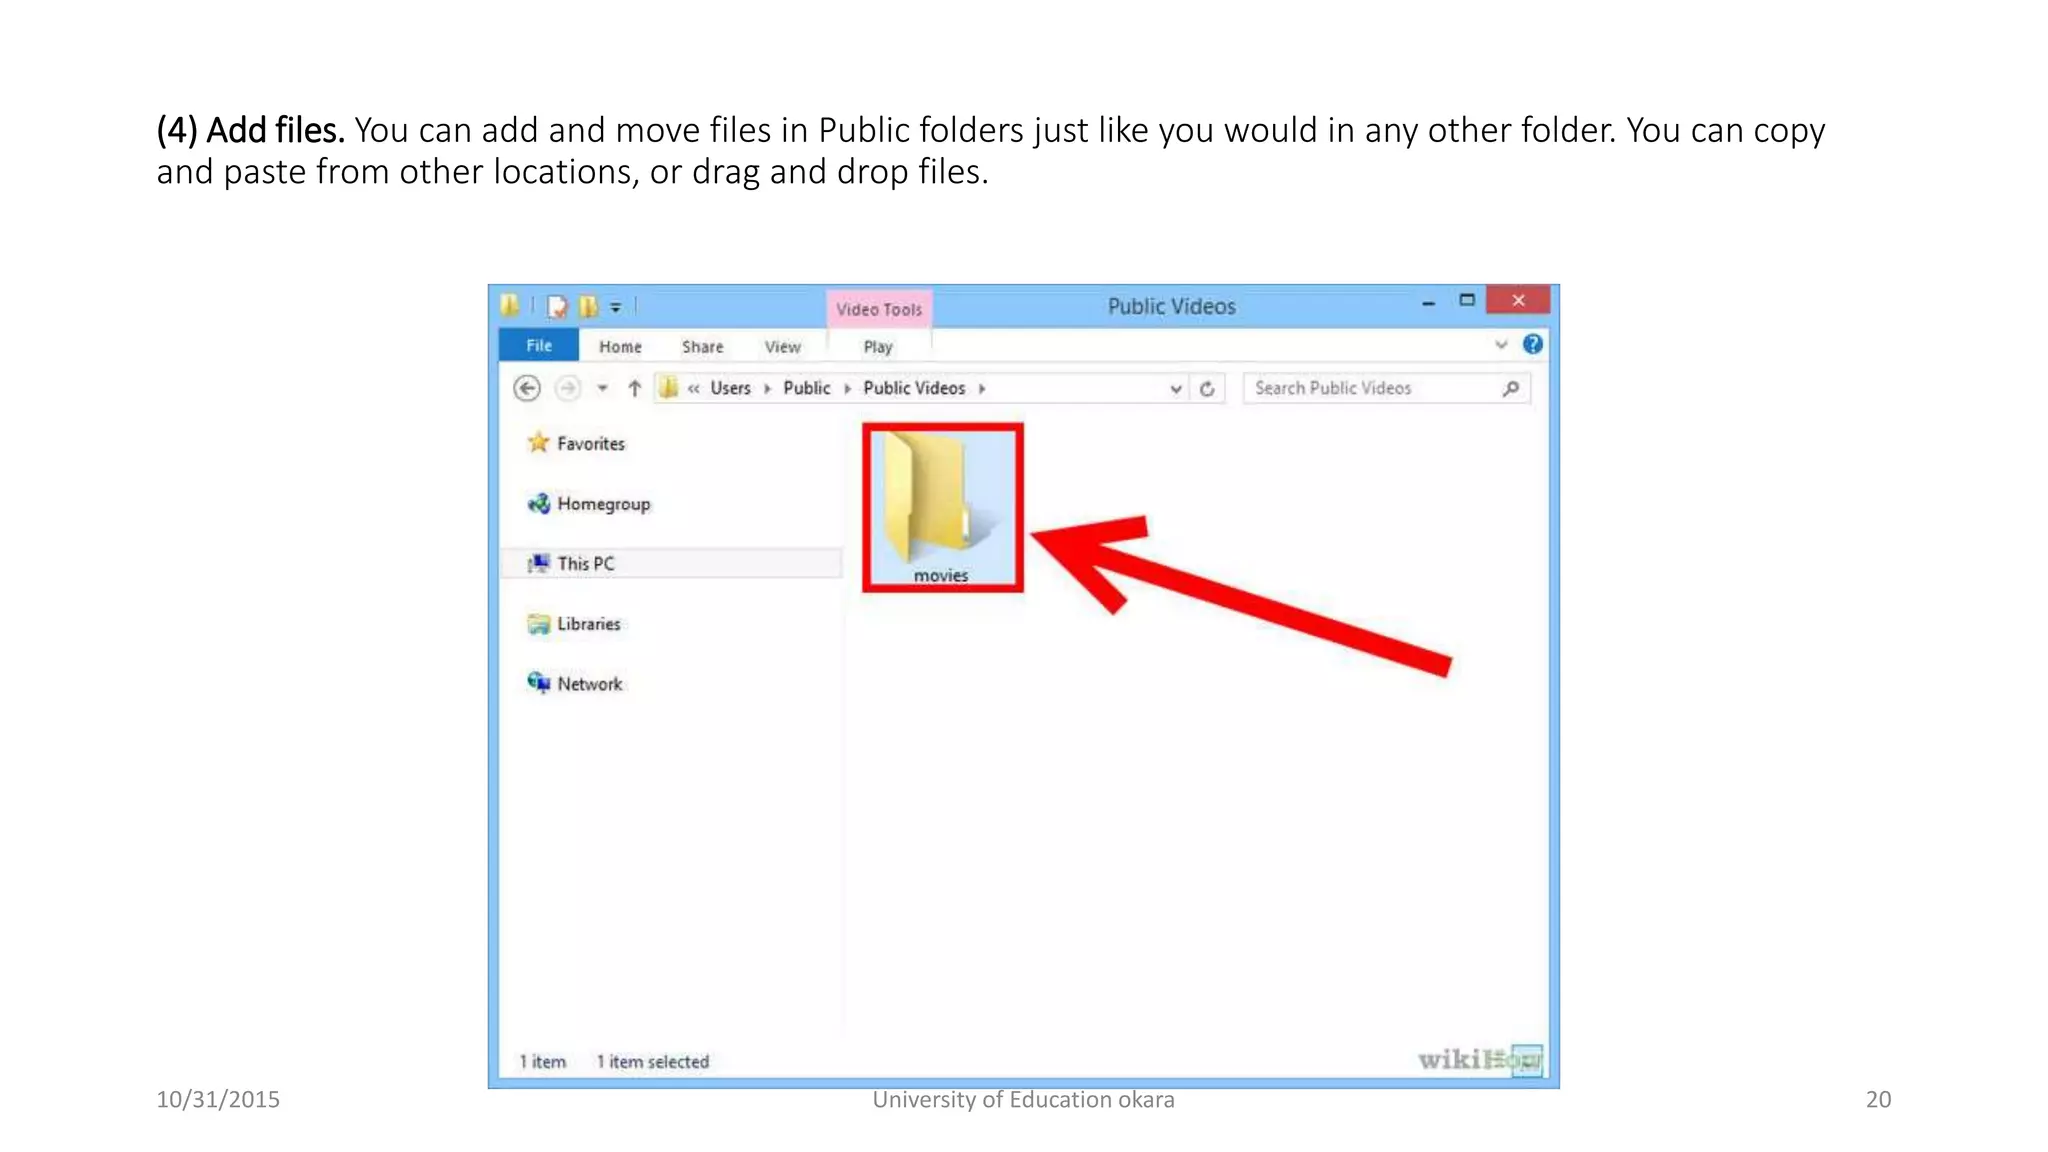
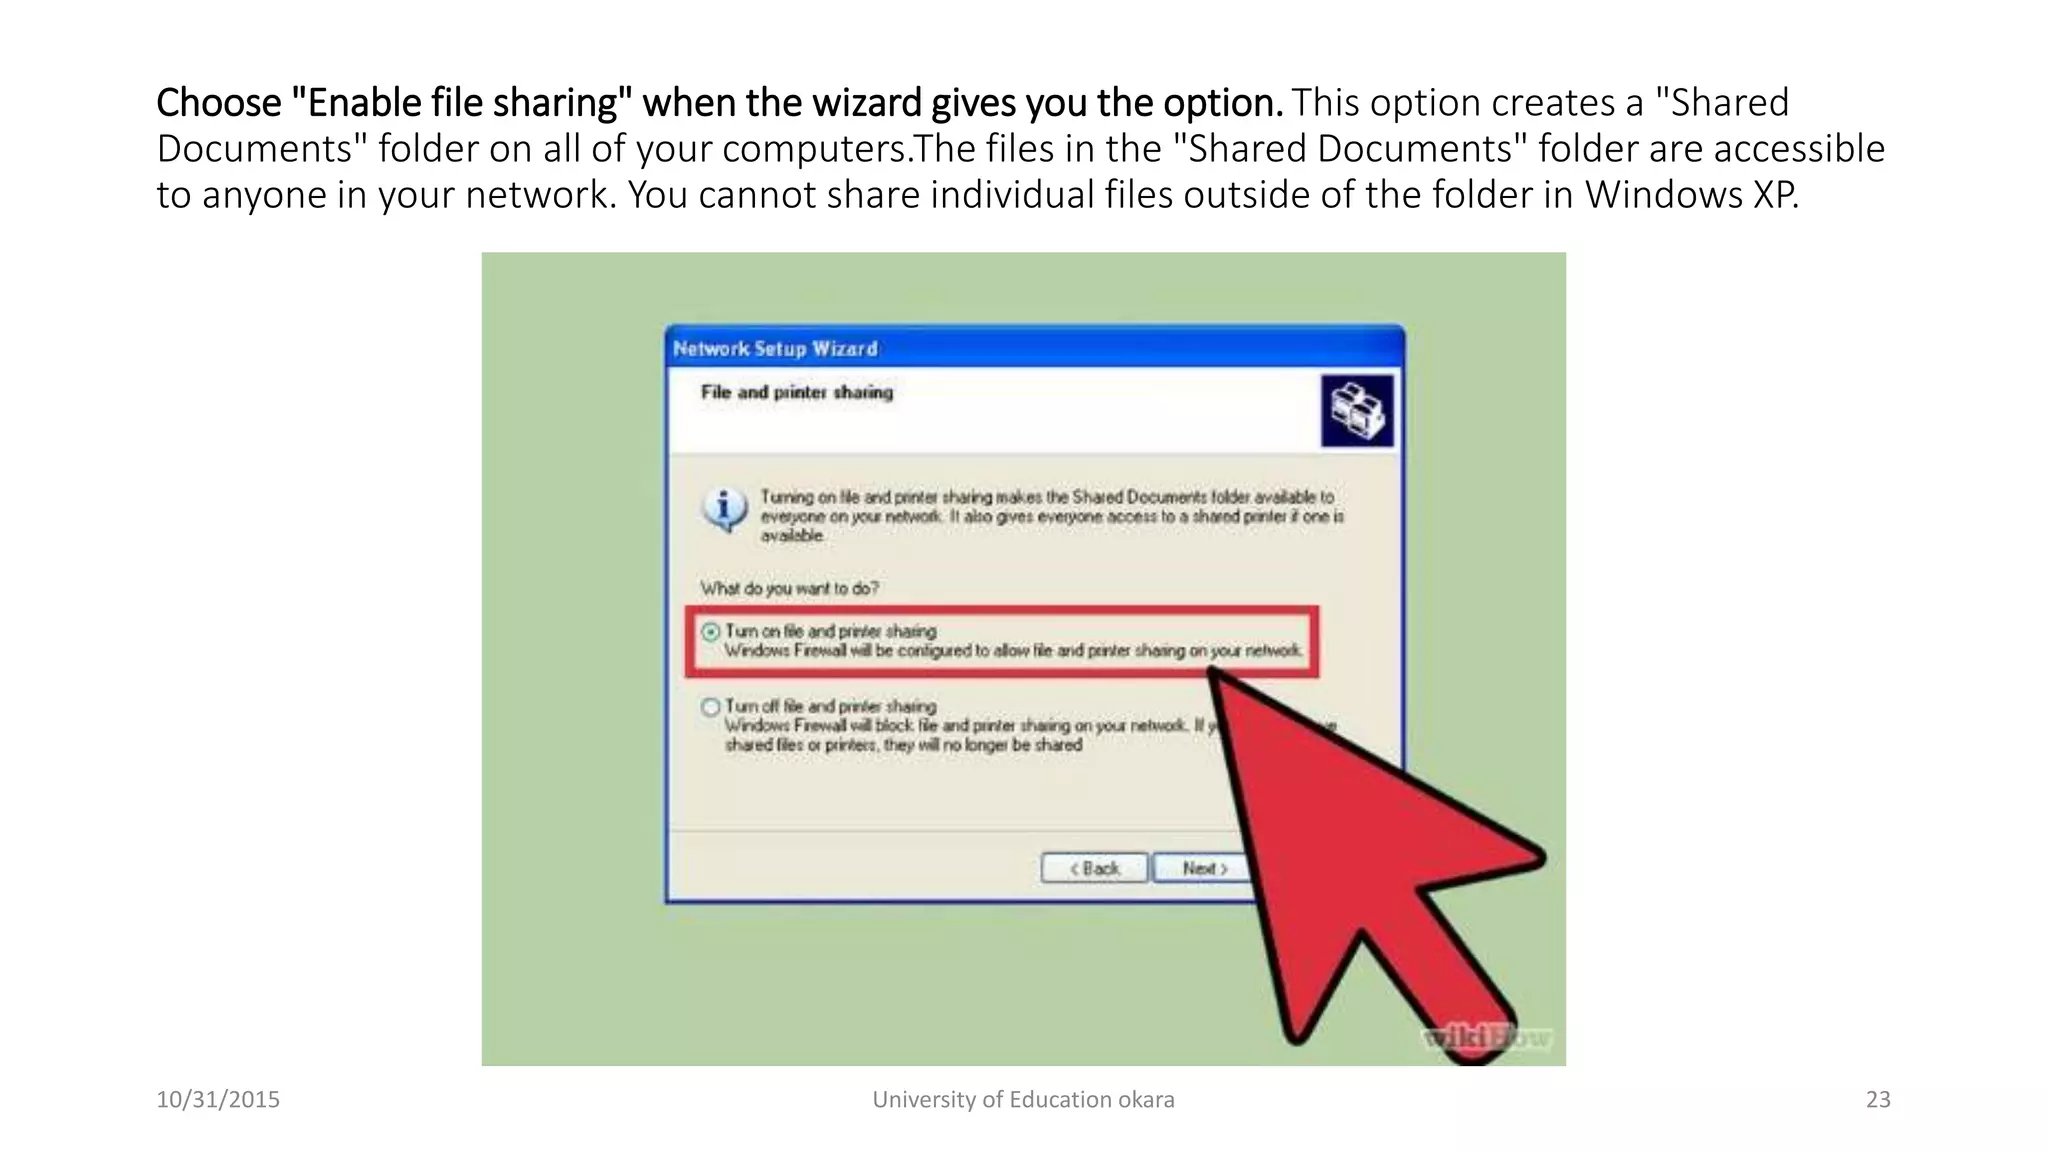
10/31/2015 University of Education okara 1
How to Share a Folder
 Windows 7
 Windows XP
 Mac OS
 Linux
Do you have multiple computers attached to your home network? You can increase efficiency and
easily share between all of your computers by creating shared folders. These folders can be
accessed by any other computer on the network that has permission, and is a great way to quickly
access the files you need anywhere on your network. See Step 1 below to learn how to share
folders on any operating system.
10/31/2015 University of Education okara 2
Sharing Specific Folders in Windows 7
 Click the Start button, type "control panel", and press Enter.
 Double-click the "Network and Sharing Center" icon.
 Click the "Change advanced sharing settings" link.
 Expand the profile that you want to enable sharing on (Home/Work or Public).
 Turn on both "Network discovery" and "File and printer sharing".
 Click the "Save changes" button and enter your administrator password if necessary
10/31/2015 University of Education okara 3
• Go to Start Button
10/31/2015 University of Education okara 4
Type “Control Panel”
10/31/2015 University of Education okara 5
Select "Network and Sharing Center“
10/31/2015 University of Education okara 6
Click the "Change advanced sharing settings" link
10/31/2015 University of Education okara 7
(1) Ensure that File and Printer Sharing is enabled. In order to share
specific folders, you will need to have this feature enabled. The method for
enabling it varies slightly depending on which version of Windows you are
using. It is highly recommended that you do not enable folder sharing
when on a public network
10/31/2015 University of Education okara 8
(2) Find the folder you wish to share. Once File and Printer Sharing has been enabled, you can share any folder on
your hard drive with other people on your network. Navigate to the folder that you want to share using Explorer.
Right-click on it.
10/31/2015 University of Education okara 9
(3) Select the "Share with" option. This will open the Sharing submenu. You can choose to share it with everyone
in your Homegroup or select specific people to share it with.When choosing a Homegroup option, you can allow
other Homegroup members to both read and write to the folder, or limit them to just read from it.
10/31/2015 University of Education okara 10
(4) Click the "Specific people" option to select which users you want to share with. This will open a new window
with a list of all the users that currently have access to the folder. You can add users to this list and give them
specific permissions for the folder.To share the folder with everyone, click the dropdown menu at the top and
select "Everyone". Click the Add button.
To share with specific users, click the dropdown menu and select them or type in the name and click Add.
10/31/2015 University of Education okara 11
(5) Set permissions for users on the list. Find a user on the list that you want to change the permissions for. Look
in the Permissions Level column, and click the arrow next to the existing permission. Select the new one from
the list.Read - User can see, copy, and open files from the folder, but cannot change files or add new ones.
Read/Write - Besides Read abilities, users can change files and add new files to the shared folder. Files can be
deleted by users with Read/Write permissions.
Remove - Removes permissions for this user, and removes them from the list.
10/31/2015 University of Education okara 12
(6) Click the Share button. Your permission settings will be saved, and the folder will be available on the network
for all allowed users.
10/31/2015 University of Education okara 13
Using Public Folders
(1) Enable Public folders. Public folders are folders that are always shared with anyone that is connected to the
network. Anyone can read and write to Public folders, and there are no special permissions required. Public
folders are turned off by default unless you are in a Homegroup.
10/31/2015 University of Education okara 14
(2) Enable or disable Password Protected Sharing. In the same place that you found the Public folder controls, you
can find the password protected sharing options. Turning this feature on means that only people who have a
user account and password on the same computer can access the Public folder. If this is on, users on other
computers will not be able to access the folder.
10/31/2015 University of Education okara 15
(3) Find your Public folders. Once the folder has been enabled, you can start adding things to it to be shared with
everyone on the network. The Public folder is part of the Libraries view, and is accessed slightly differently
depending on your version of Windows. There is a Public folder in each of the Libraries (Documents, Music,
Pictures, and Videos).
Click Start and select Documents. In the left pane, expand the Libraries and Documents folders, and then
select Public Documents. You can also choose Public folders in the other libraries as well.
10/31/2015 University of Education okara 16
Go to “c” drive
10/31/2015 University of Education okara 17
Click on “users” option
10/31/2015 University of Education okara 18
Open Public File
10/31/2015 University of Education okara 19
(4) Add files. You can add and move files in Public folders just like you would in any other folder. You can copy
and paste from other locations, or drag and drop files.
10/31/2015 University of Education okara 20
Folder Sharing in Windows XP
Many users need to share computer files with other users on their networks or computers. File
sharing can be useful for sharing documents and other types of files. This article will tell you how to
enable file sharing.
10/31/2015 University of Education okara 21
(Method 1) Run the "Network Setup Wizard" on the computer(s) you want to enable sharing on.
10/31/2015 University of Education okara 22
Choose "Enable file sharing" when the wizard gives you the option.This option creates a "Shared
Documents" folder on all of your computers.The files in the "Shared Documents" folder are accessible
to anyone in your network. You cannot share individual files outside of the folder in Windows XP.
10/31/2015 University of Education okara 23
10/31/2015 University of Education okara 24

Presentation (sharing folder)

  • 1.
    10/31/2015 University ofEducation okara 1
  • 2.
    How to Sharea Folder  Windows 7  Windows XP  Mac OS  Linux Do you have multiple computers attached to your home network? You can increase efficiency and easily share between all of your computers by creating shared folders. These folders can be accessed by any other computer on the network that has permission, and is a great way to quickly access the files you need anywhere on your network. See Step 1 below to learn how to share folders on any operating system. 10/31/2015 University of Education okara 2
  • 3.
    Sharing Specific Foldersin Windows 7  Click the Start button, type "control panel", and press Enter.  Double-click the "Network and Sharing Center" icon.  Click the "Change advanced sharing settings" link.  Expand the profile that you want to enable sharing on (Home/Work or Public).  Turn on both "Network discovery" and "File and printer sharing".  Click the "Save changes" button and enter your administrator password if necessary 10/31/2015 University of Education okara 3
  • 4.
    • Go toStart Button 10/31/2015 University of Education okara 4
  • 5.
    Type “Control Panel” 10/31/2015University of Education okara 5
  • 6.
    Select "Network andSharing Center“ 10/31/2015 University of Education okara 6
  • 7.
    Click the "Changeadvanced sharing settings" link 10/31/2015 University of Education okara 7
  • 8.
    (1) Ensure thatFile and Printer Sharing is enabled. In order to share specific folders, you will need to have this feature enabled. The method for enabling it varies slightly depending on which version of Windows you are using. It is highly recommended that you do not enable folder sharing when on a public network 10/31/2015 University of Education okara 8
  • 9.
    (2) Find thefolder you wish to share. Once File and Printer Sharing has been enabled, you can share any folder on your hard drive with other people on your network. Navigate to the folder that you want to share using Explorer. Right-click on it. 10/31/2015 University of Education okara 9
  • 10.
    (3) Select the"Share with" option. This will open the Sharing submenu. You can choose to share it with everyone in your Homegroup or select specific people to share it with.When choosing a Homegroup option, you can allow other Homegroup members to both read and write to the folder, or limit them to just read from it. 10/31/2015 University of Education okara 10
  • 11.
    (4) Click the"Specific people" option to select which users you want to share with. This will open a new window with a list of all the users that currently have access to the folder. You can add users to this list and give them specific permissions for the folder.To share the folder with everyone, click the dropdown menu at the top and select "Everyone". Click the Add button. To share with specific users, click the dropdown menu and select them or type in the name and click Add. 10/31/2015 University of Education okara 11
  • 12.
    (5) Set permissionsfor users on the list. Find a user on the list that you want to change the permissions for. Look in the Permissions Level column, and click the arrow next to the existing permission. Select the new one from the list.Read - User can see, copy, and open files from the folder, but cannot change files or add new ones. Read/Write - Besides Read abilities, users can change files and add new files to the shared folder. Files can be deleted by users with Read/Write permissions. Remove - Removes permissions for this user, and removes them from the list. 10/31/2015 University of Education okara 12
  • 13.
    (6) Click theShare button. Your permission settings will be saved, and the folder will be available on the network for all allowed users. 10/31/2015 University of Education okara 13
  • 14.
    Using Public Folders (1)Enable Public folders. Public folders are folders that are always shared with anyone that is connected to the network. Anyone can read and write to Public folders, and there are no special permissions required. Public folders are turned off by default unless you are in a Homegroup. 10/31/2015 University of Education okara 14
  • 15.
    (2) Enable ordisable Password Protected Sharing. In the same place that you found the Public folder controls, you can find the password protected sharing options. Turning this feature on means that only people who have a user account and password on the same computer can access the Public folder. If this is on, users on other computers will not be able to access the folder. 10/31/2015 University of Education okara 15
  • 16.
    (3) Find yourPublic folders. Once the folder has been enabled, you can start adding things to it to be shared with everyone on the network. The Public folder is part of the Libraries view, and is accessed slightly differently depending on your version of Windows. There is a Public folder in each of the Libraries (Documents, Music, Pictures, and Videos). Click Start and select Documents. In the left pane, expand the Libraries and Documents folders, and then select Public Documents. You can also choose Public folders in the other libraries as well. 10/31/2015 University of Education okara 16
  • 17.
    Go to “c”drive 10/31/2015 University of Education okara 17
  • 18.
    Click on “users”option 10/31/2015 University of Education okara 18
  • 19.
    Open Public File 10/31/2015University of Education okara 19
  • 20.
    (4) Add files.You can add and move files in Public folders just like you would in any other folder. You can copy and paste from other locations, or drag and drop files. 10/31/2015 University of Education okara 20
  • 21.
    Folder Sharing inWindows XP Many users need to share computer files with other users on their networks or computers. File sharing can be useful for sharing documents and other types of files. This article will tell you how to enable file sharing. 10/31/2015 University of Education okara 21
  • 22.
    (Method 1) Runthe "Network Setup Wizard" on the computer(s) you want to enable sharing on. 10/31/2015 University of Education okara 22
  • 23.
    Choose "Enable filesharing" when the wizard gives you the option.This option creates a "Shared Documents" folder on all of your computers.The files in the "Shared Documents" folder are accessible to anyone in your network. You cannot share individual files outside of the folder in Windows XP. 10/31/2015 University of Education okara 23
  • 24.
    10/31/2015 University ofEducation okara 24