Downloaded 102 times
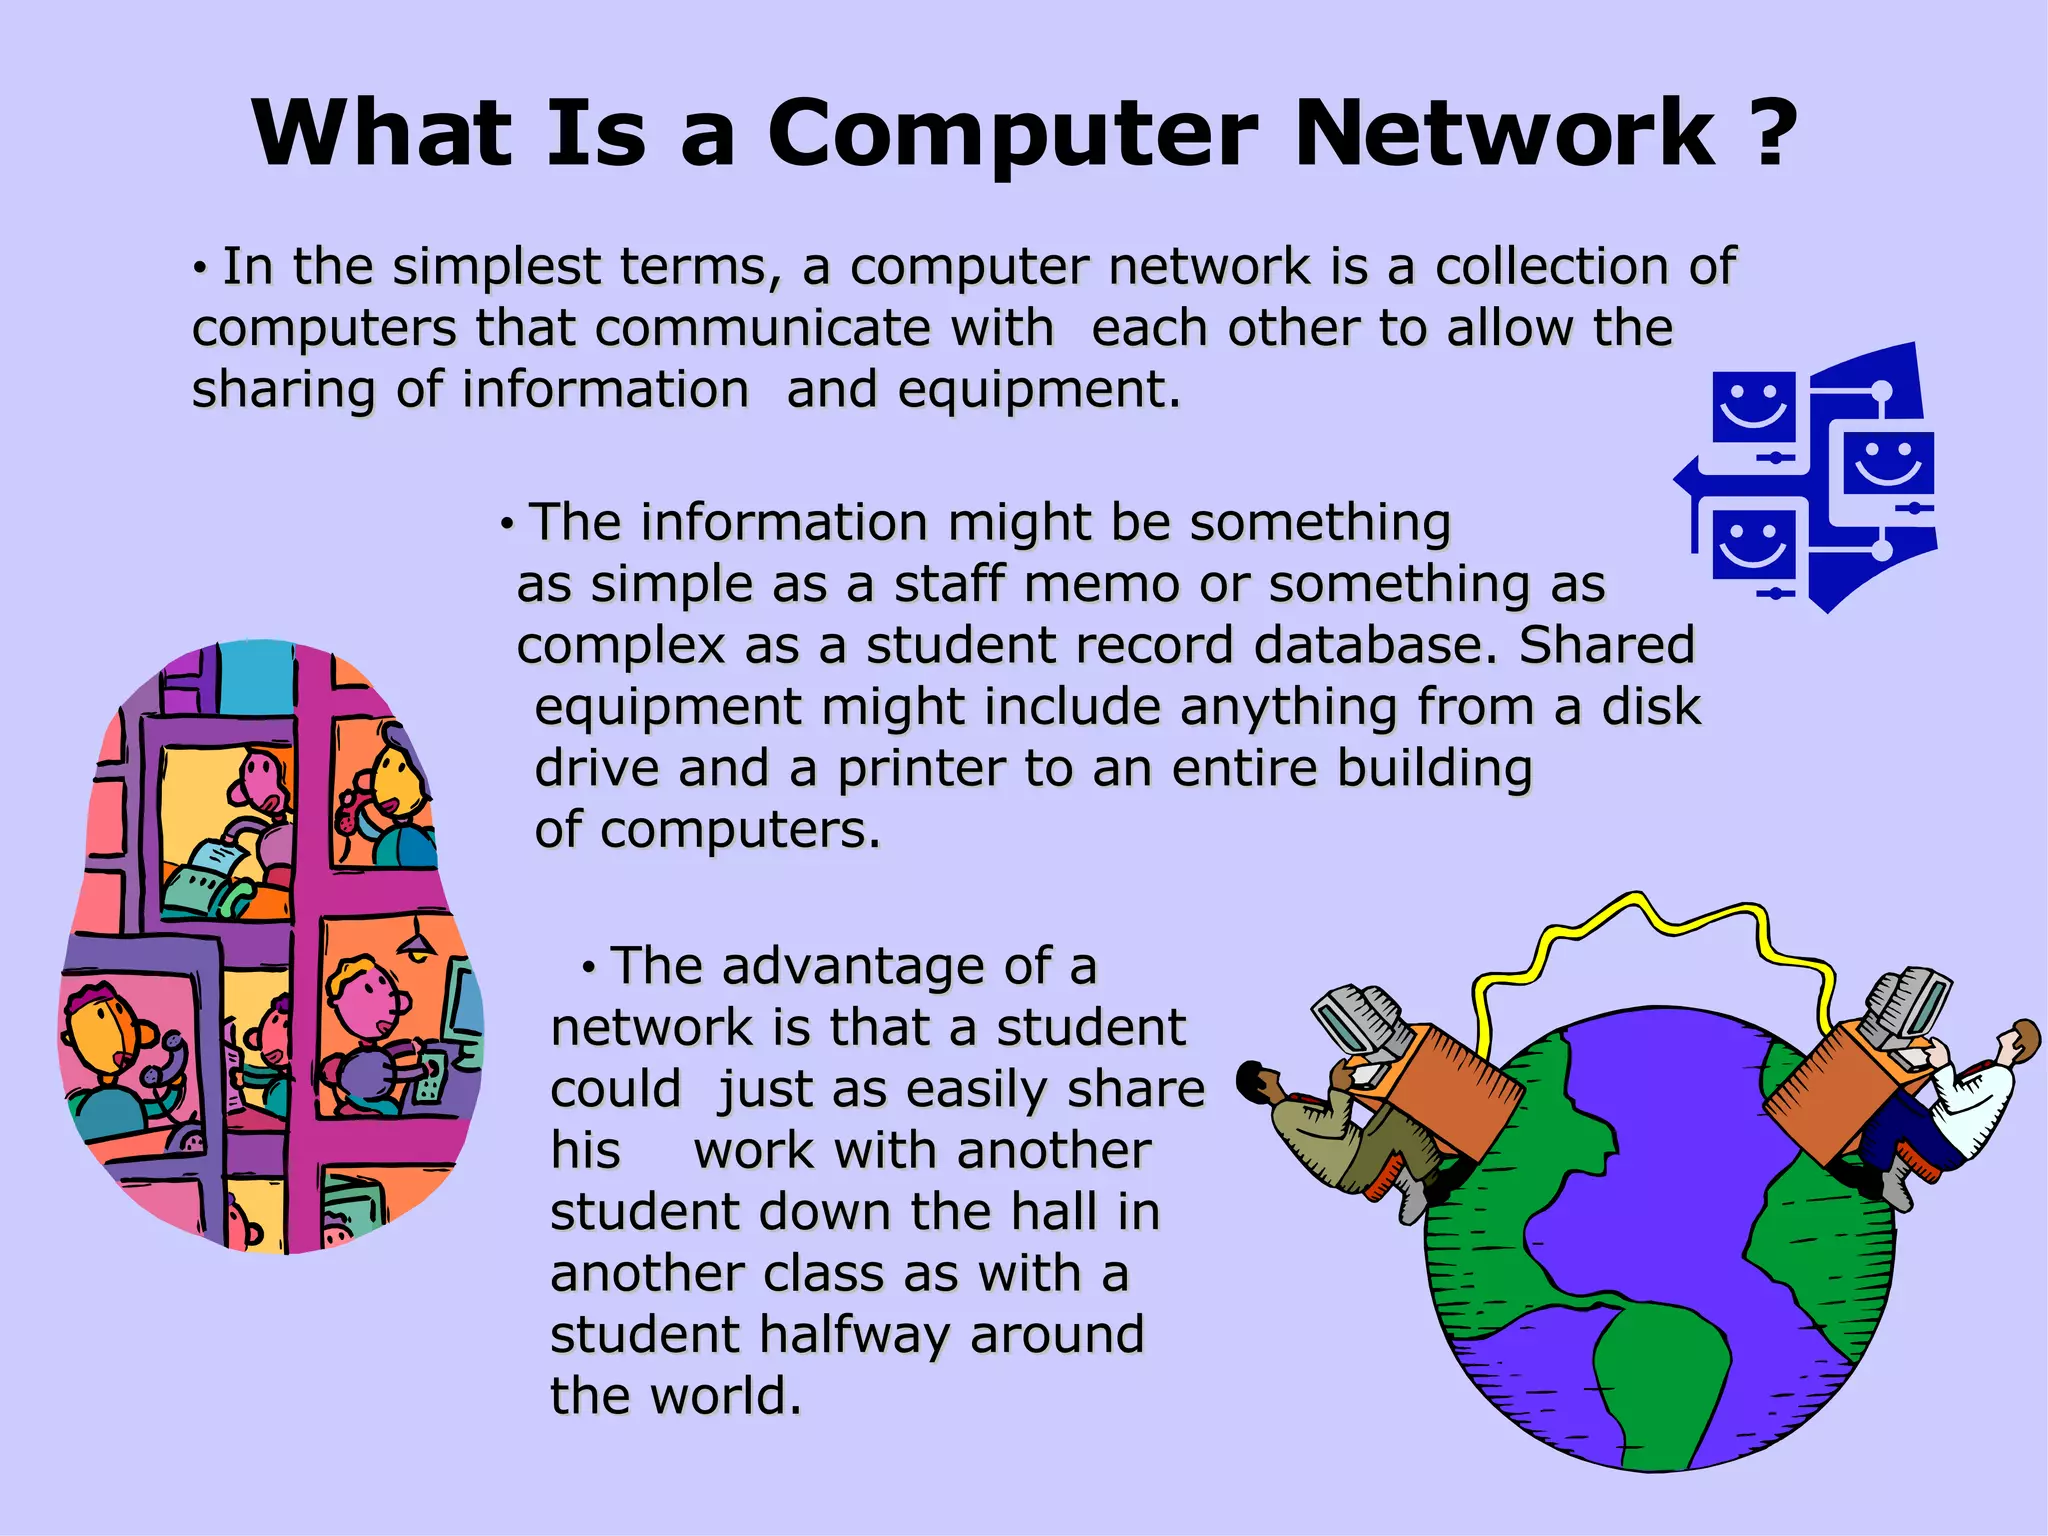

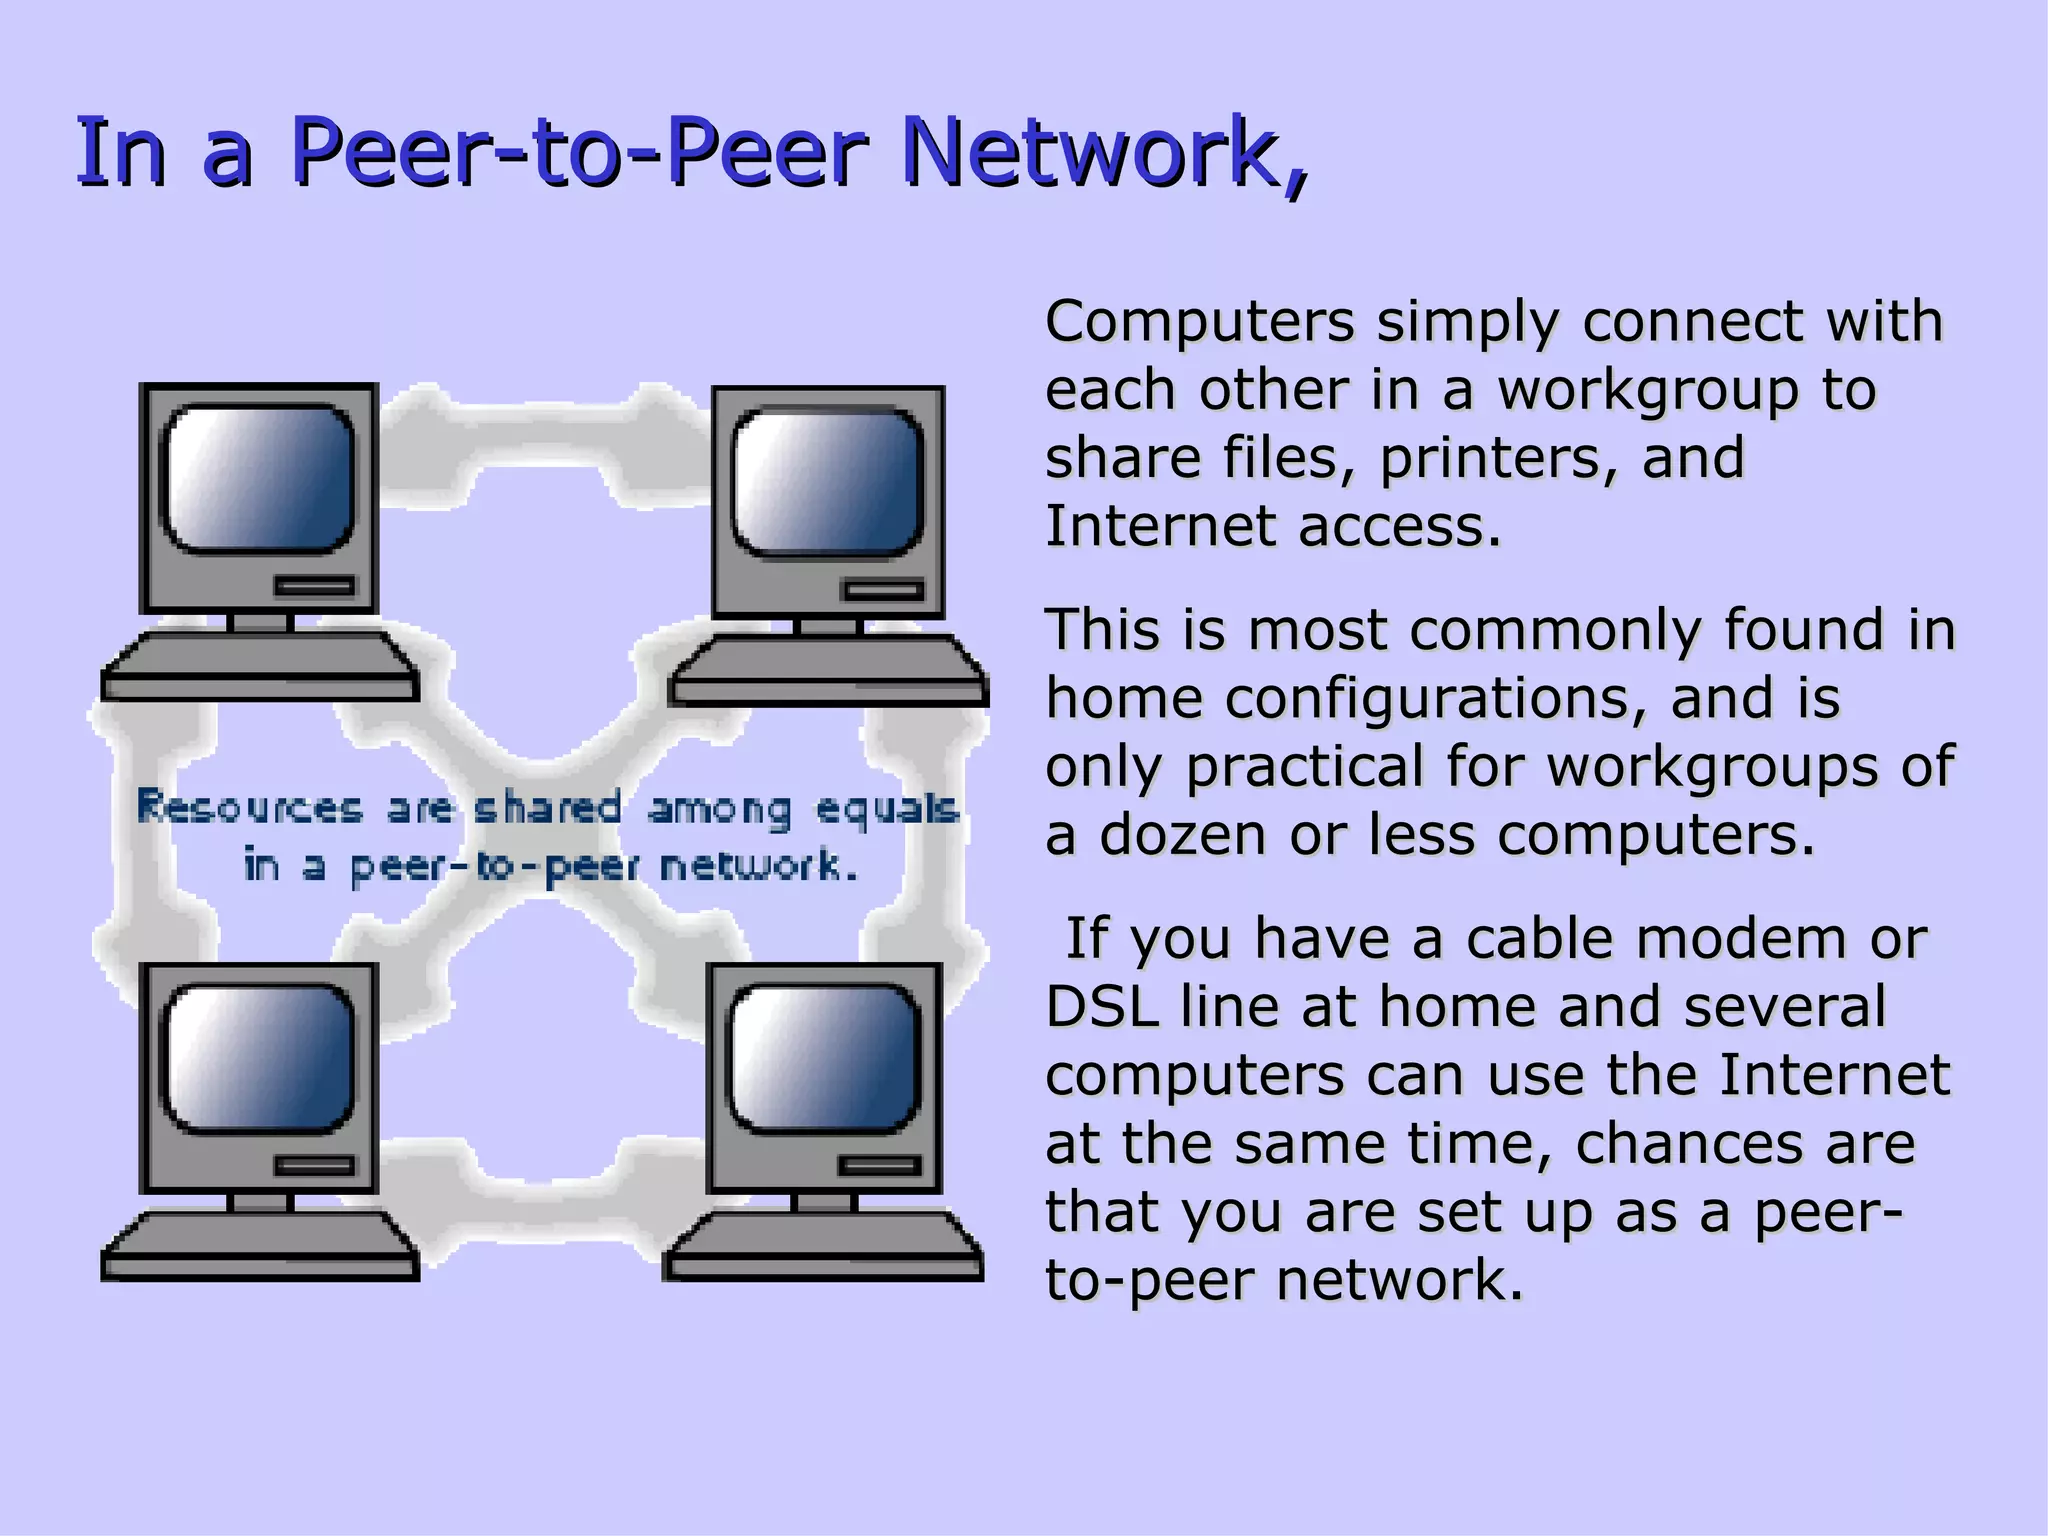
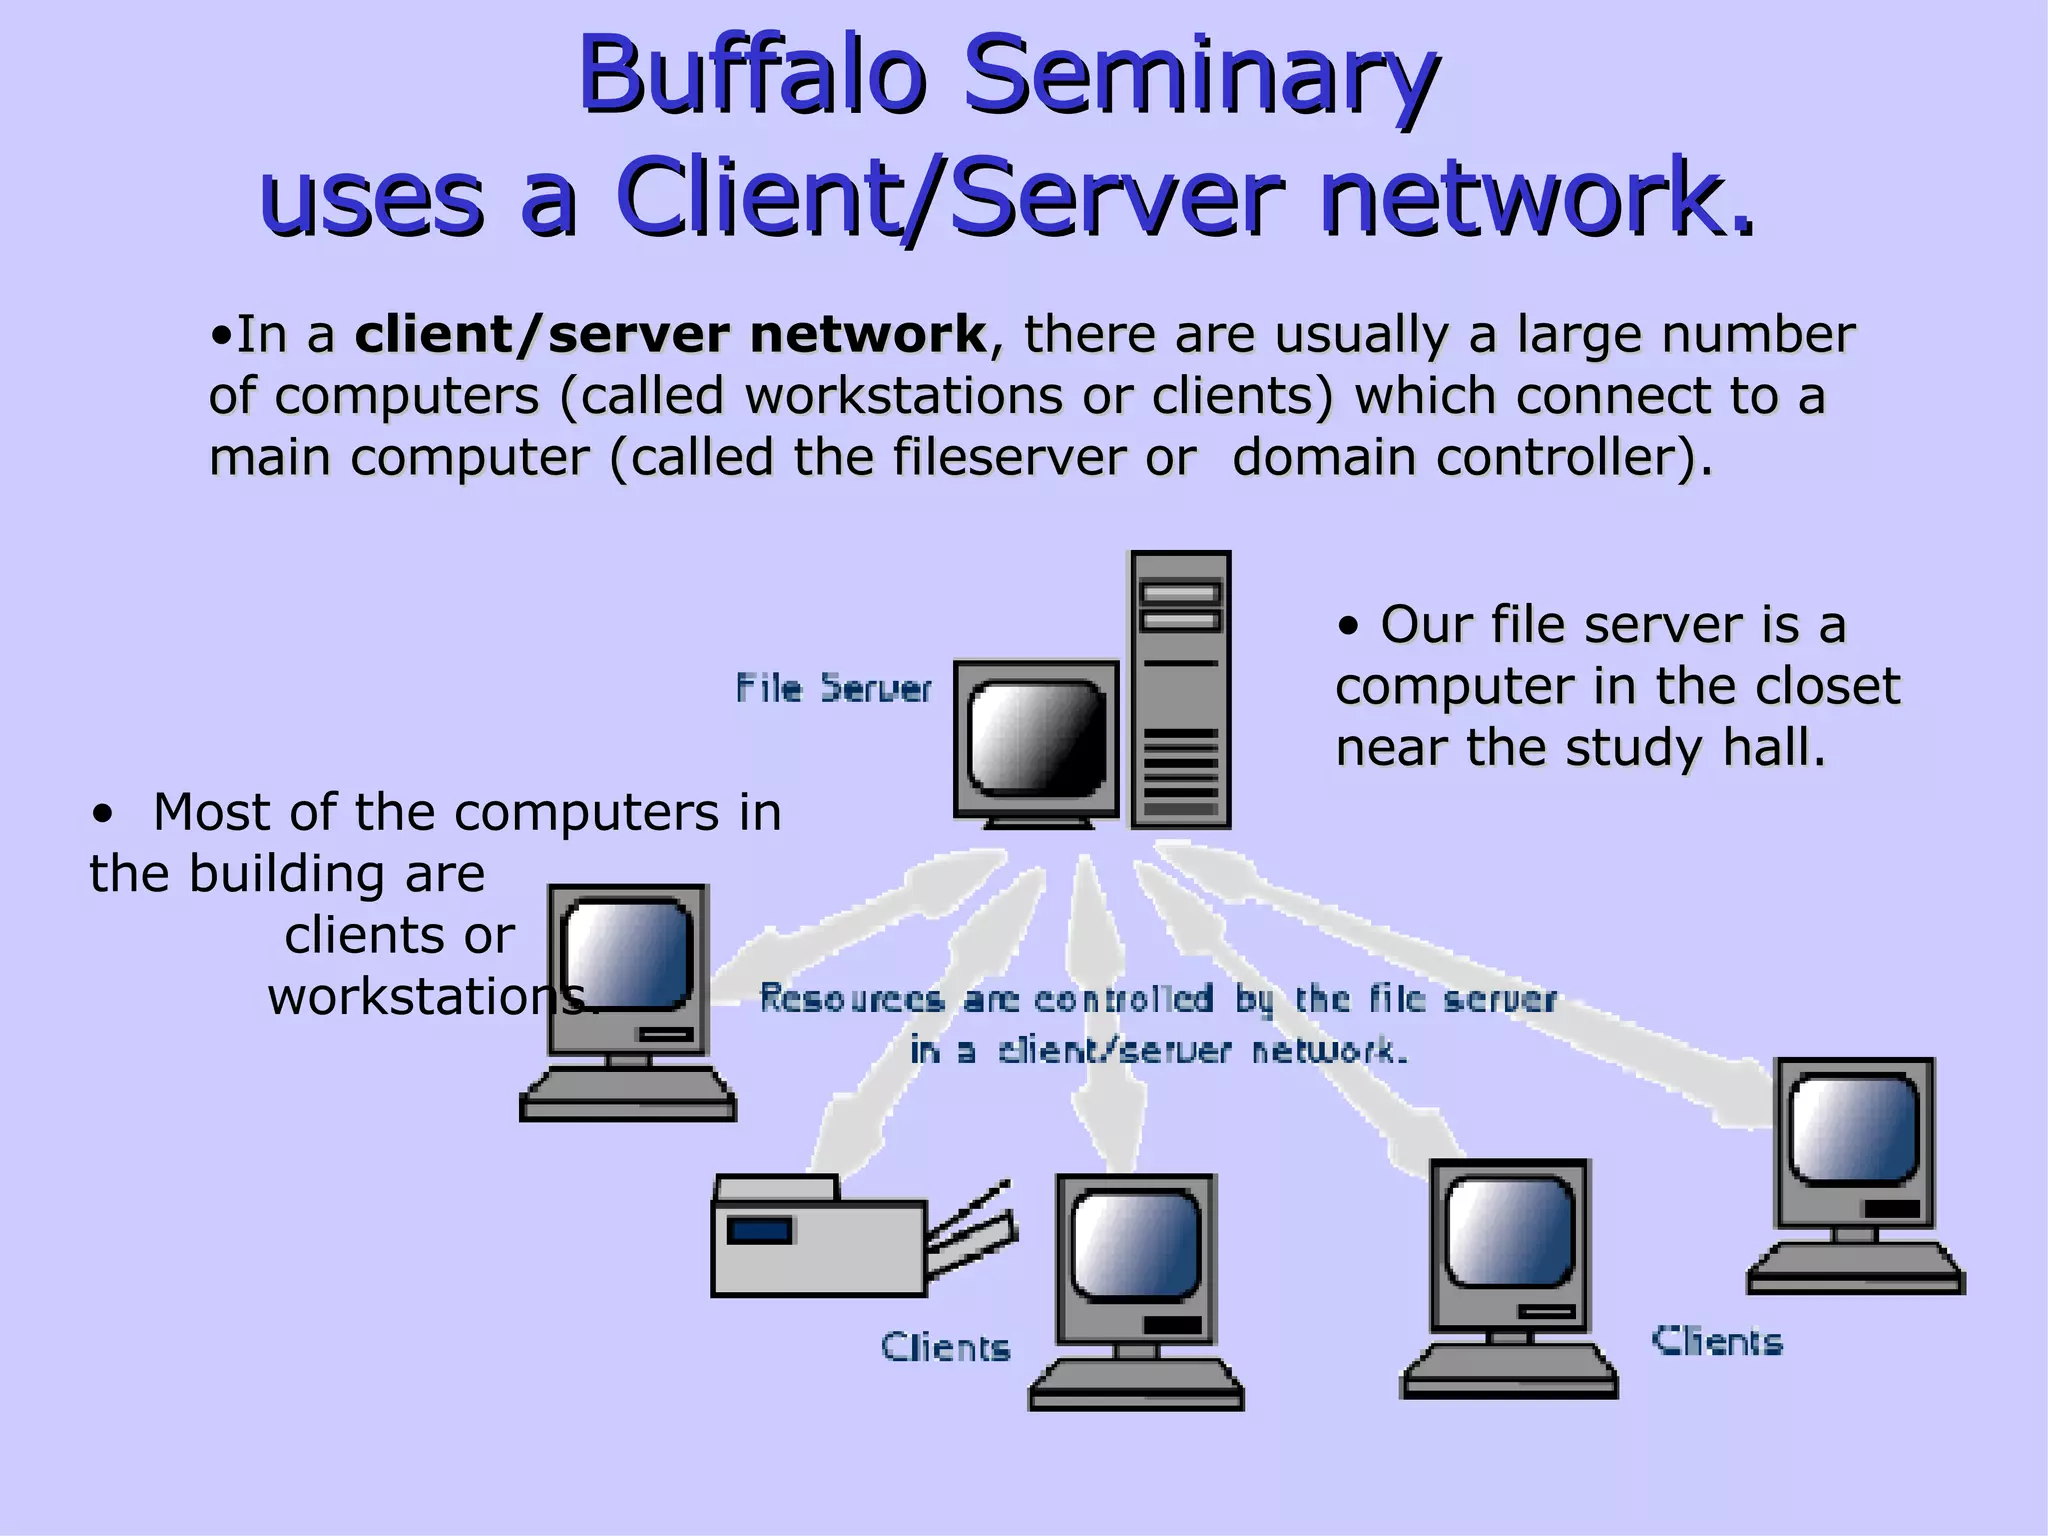
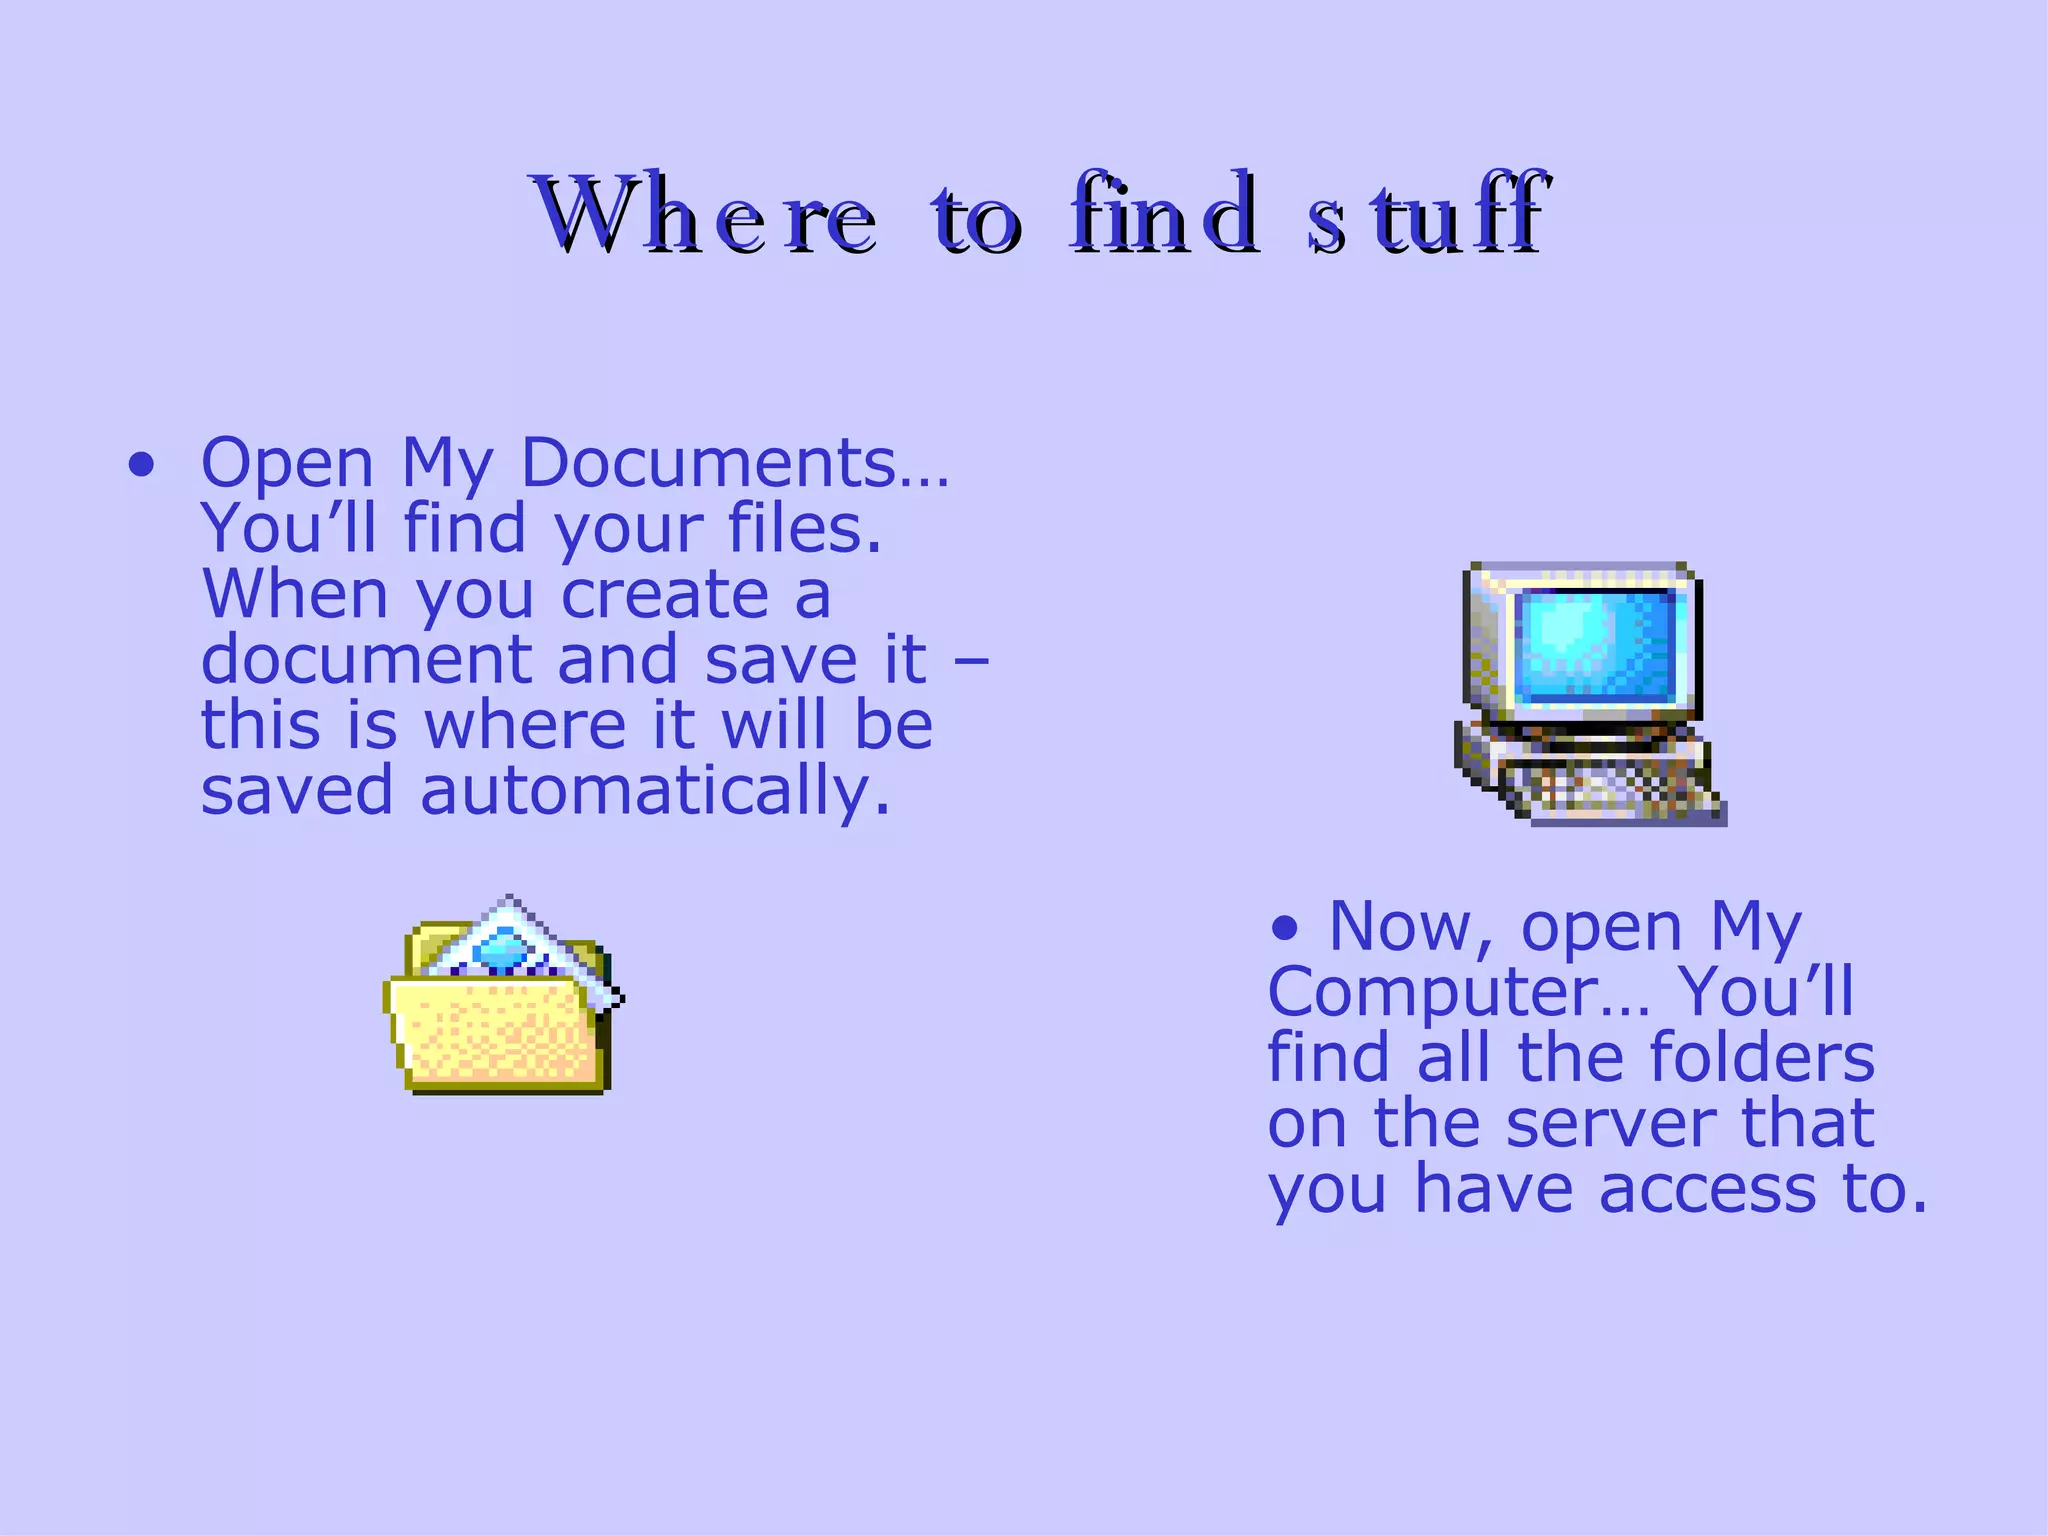
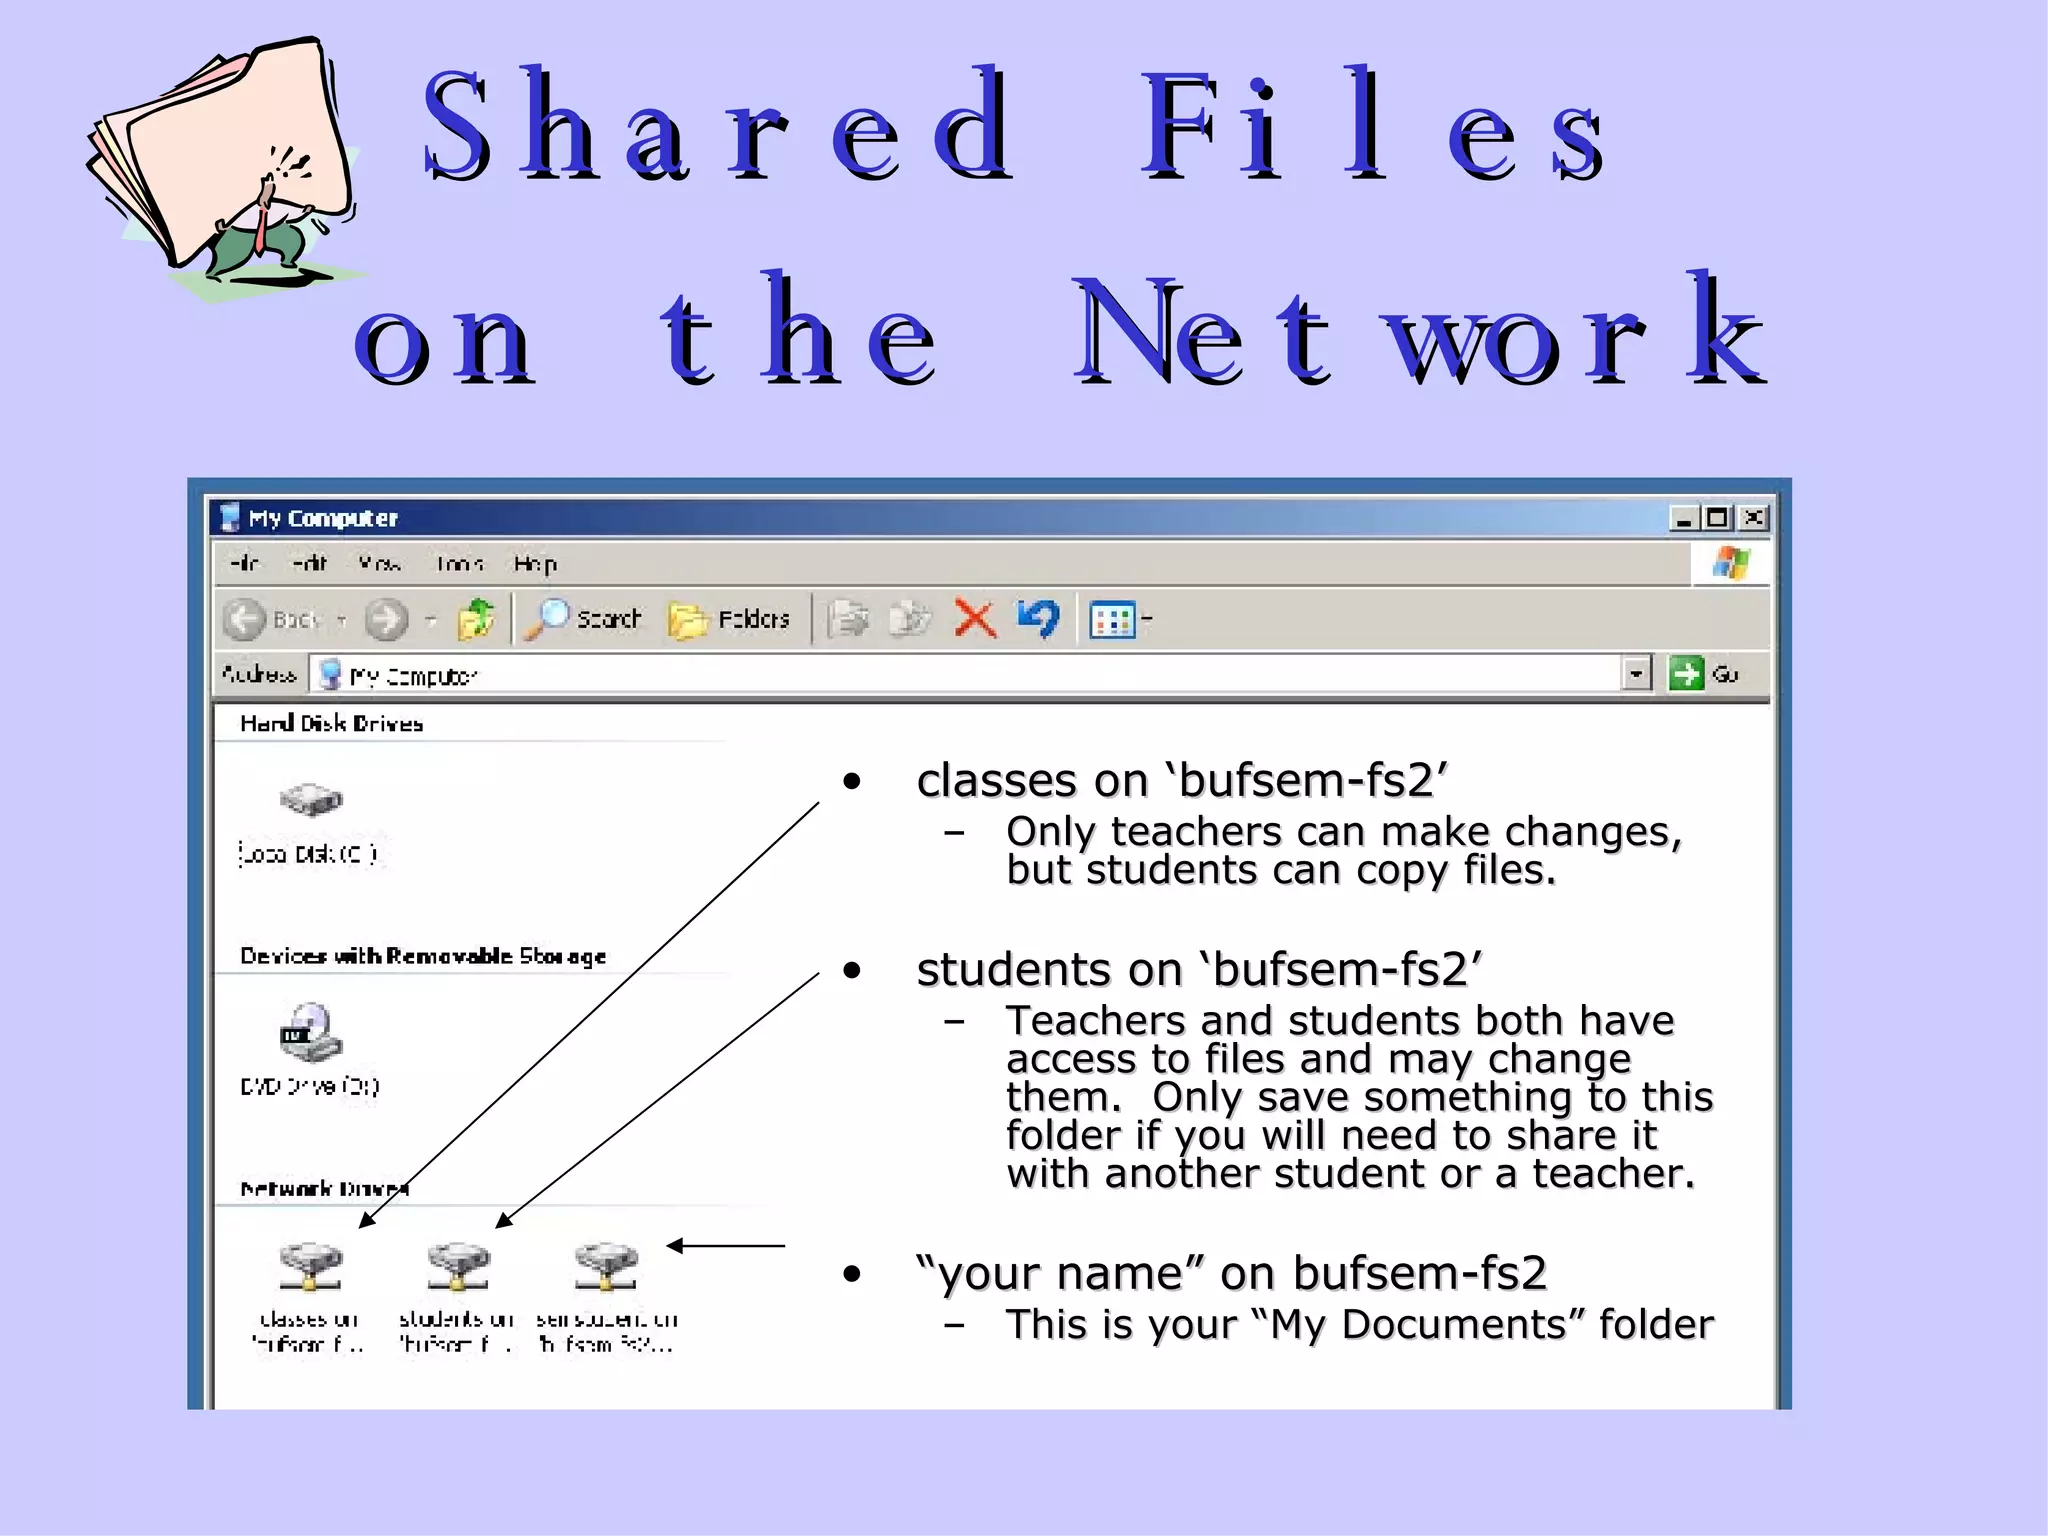
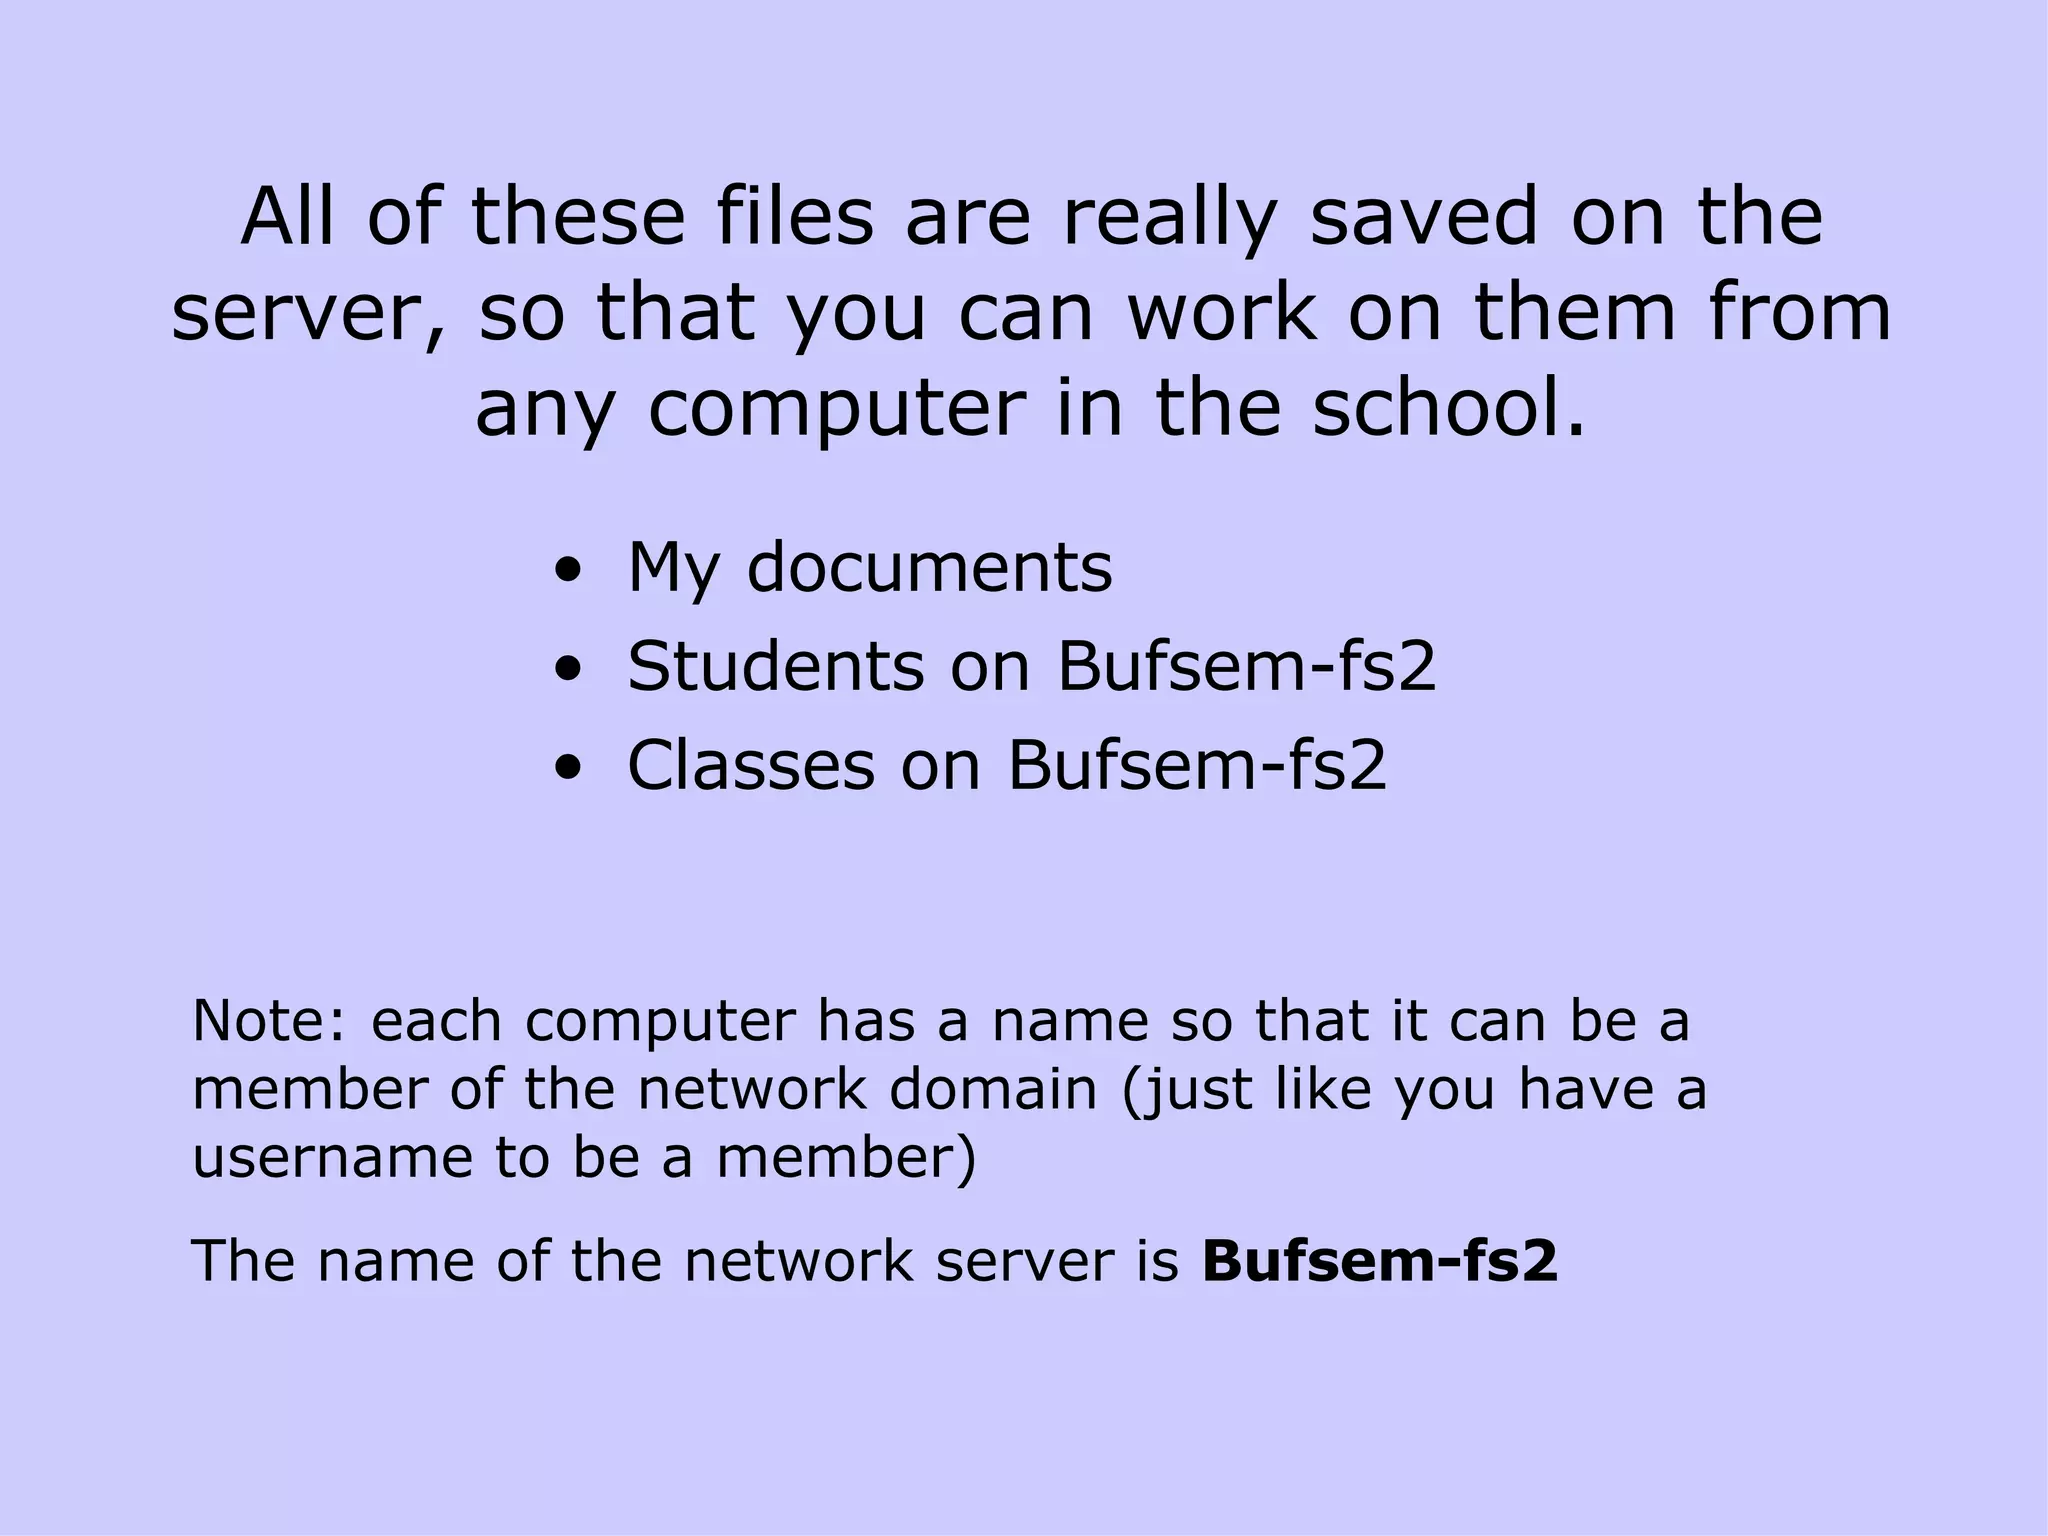
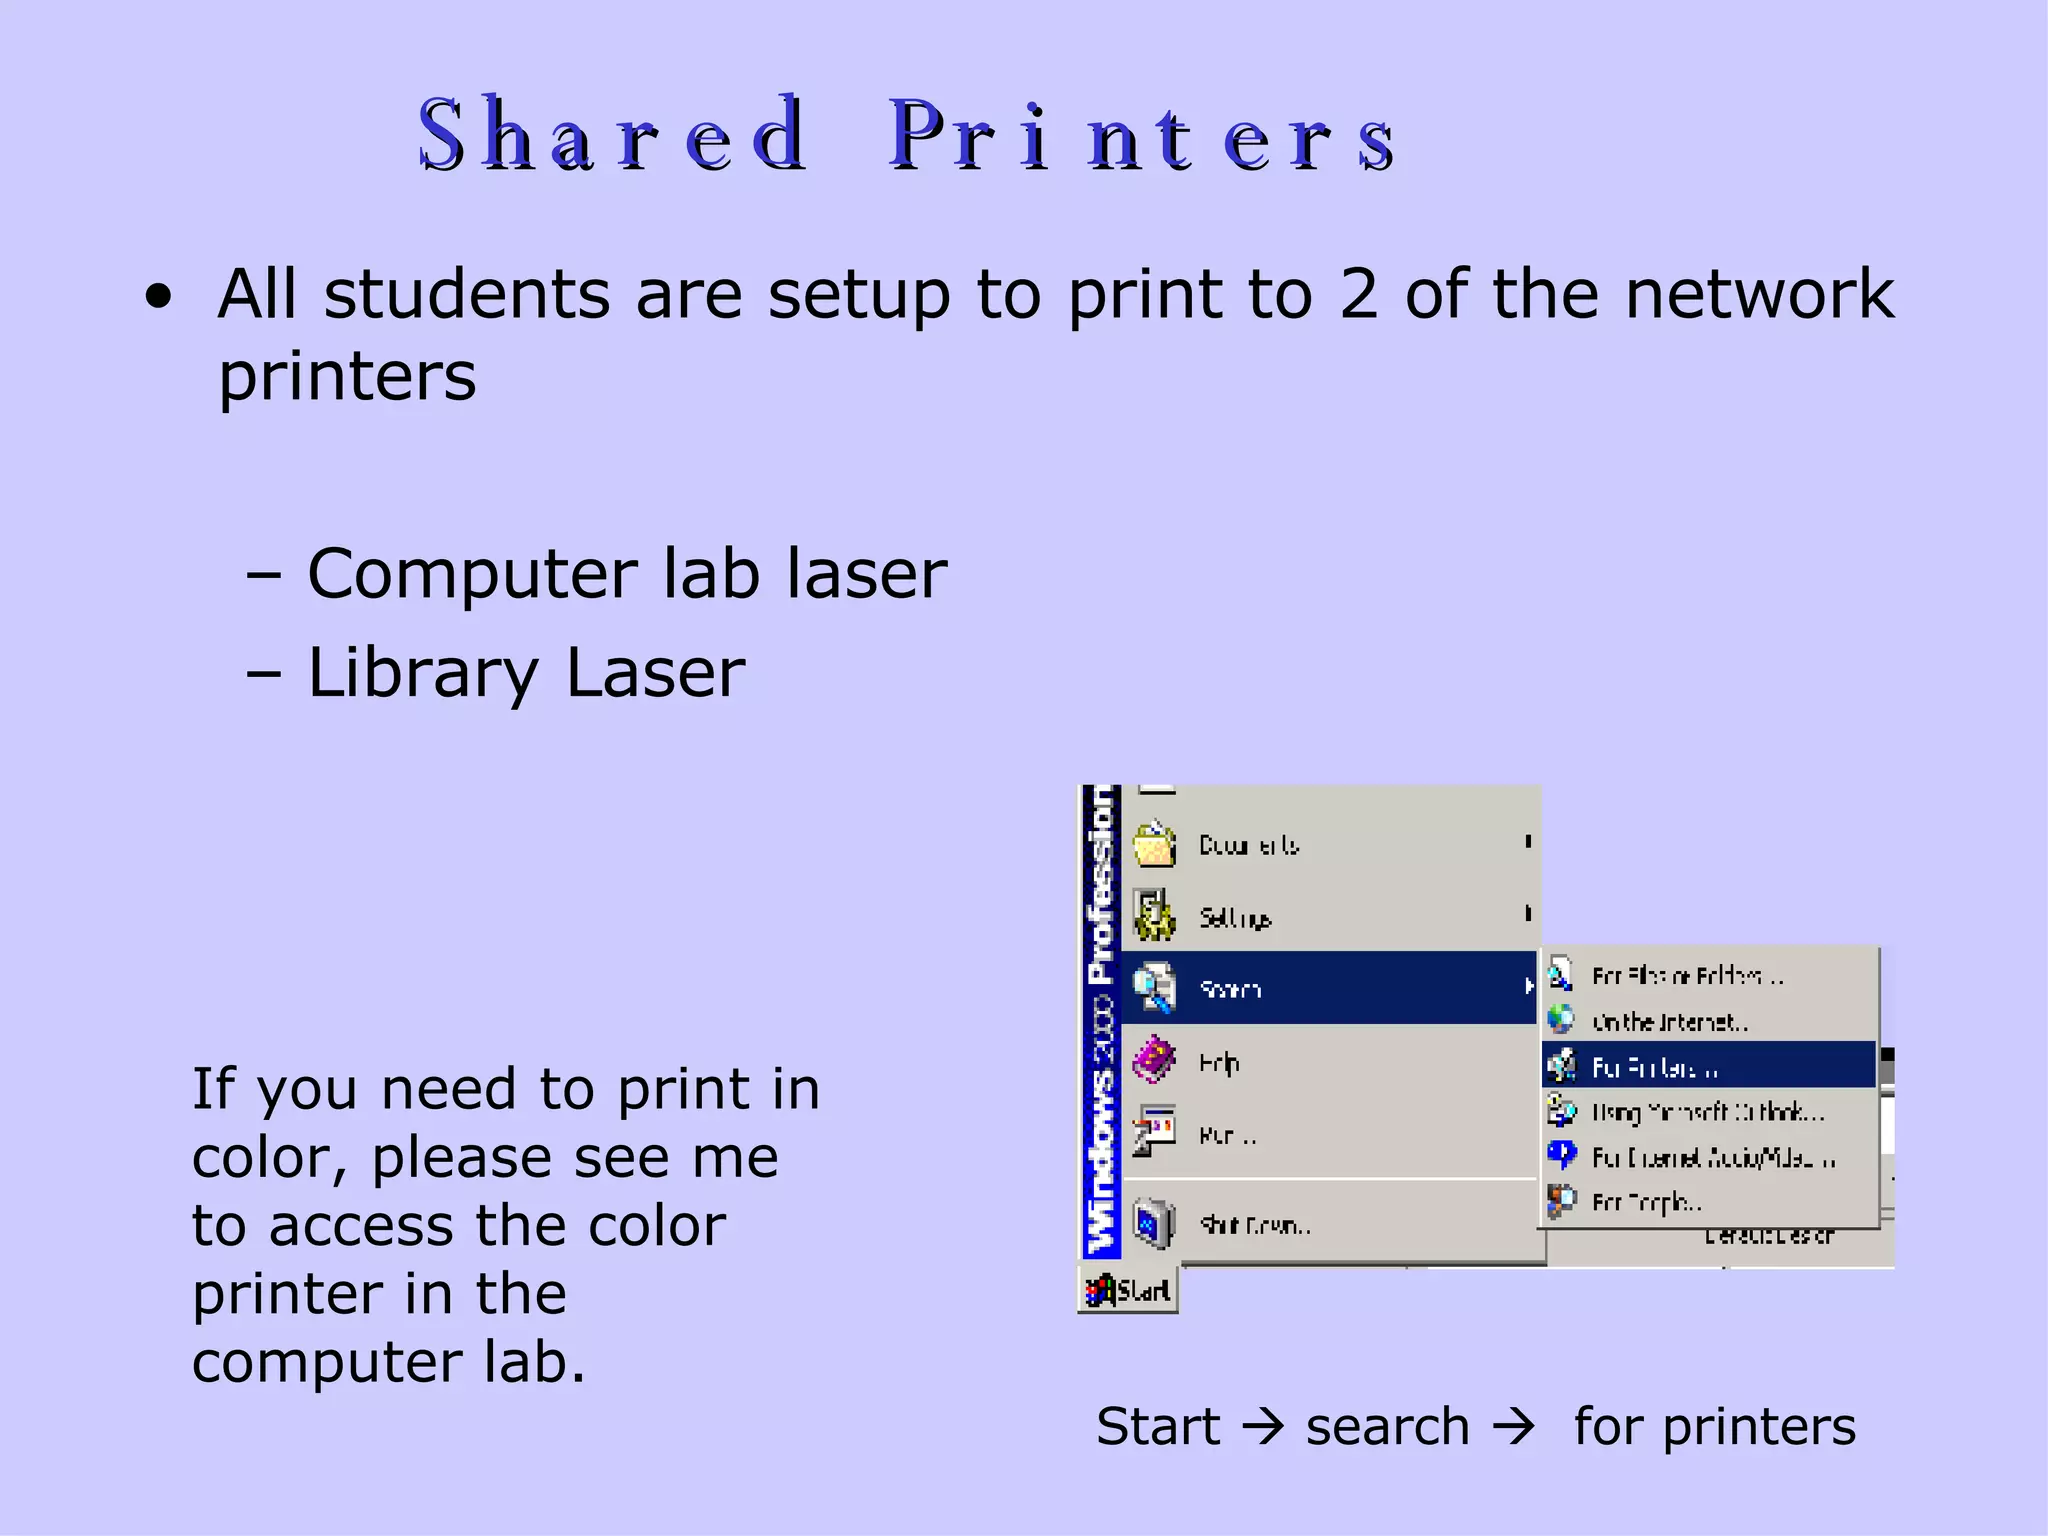

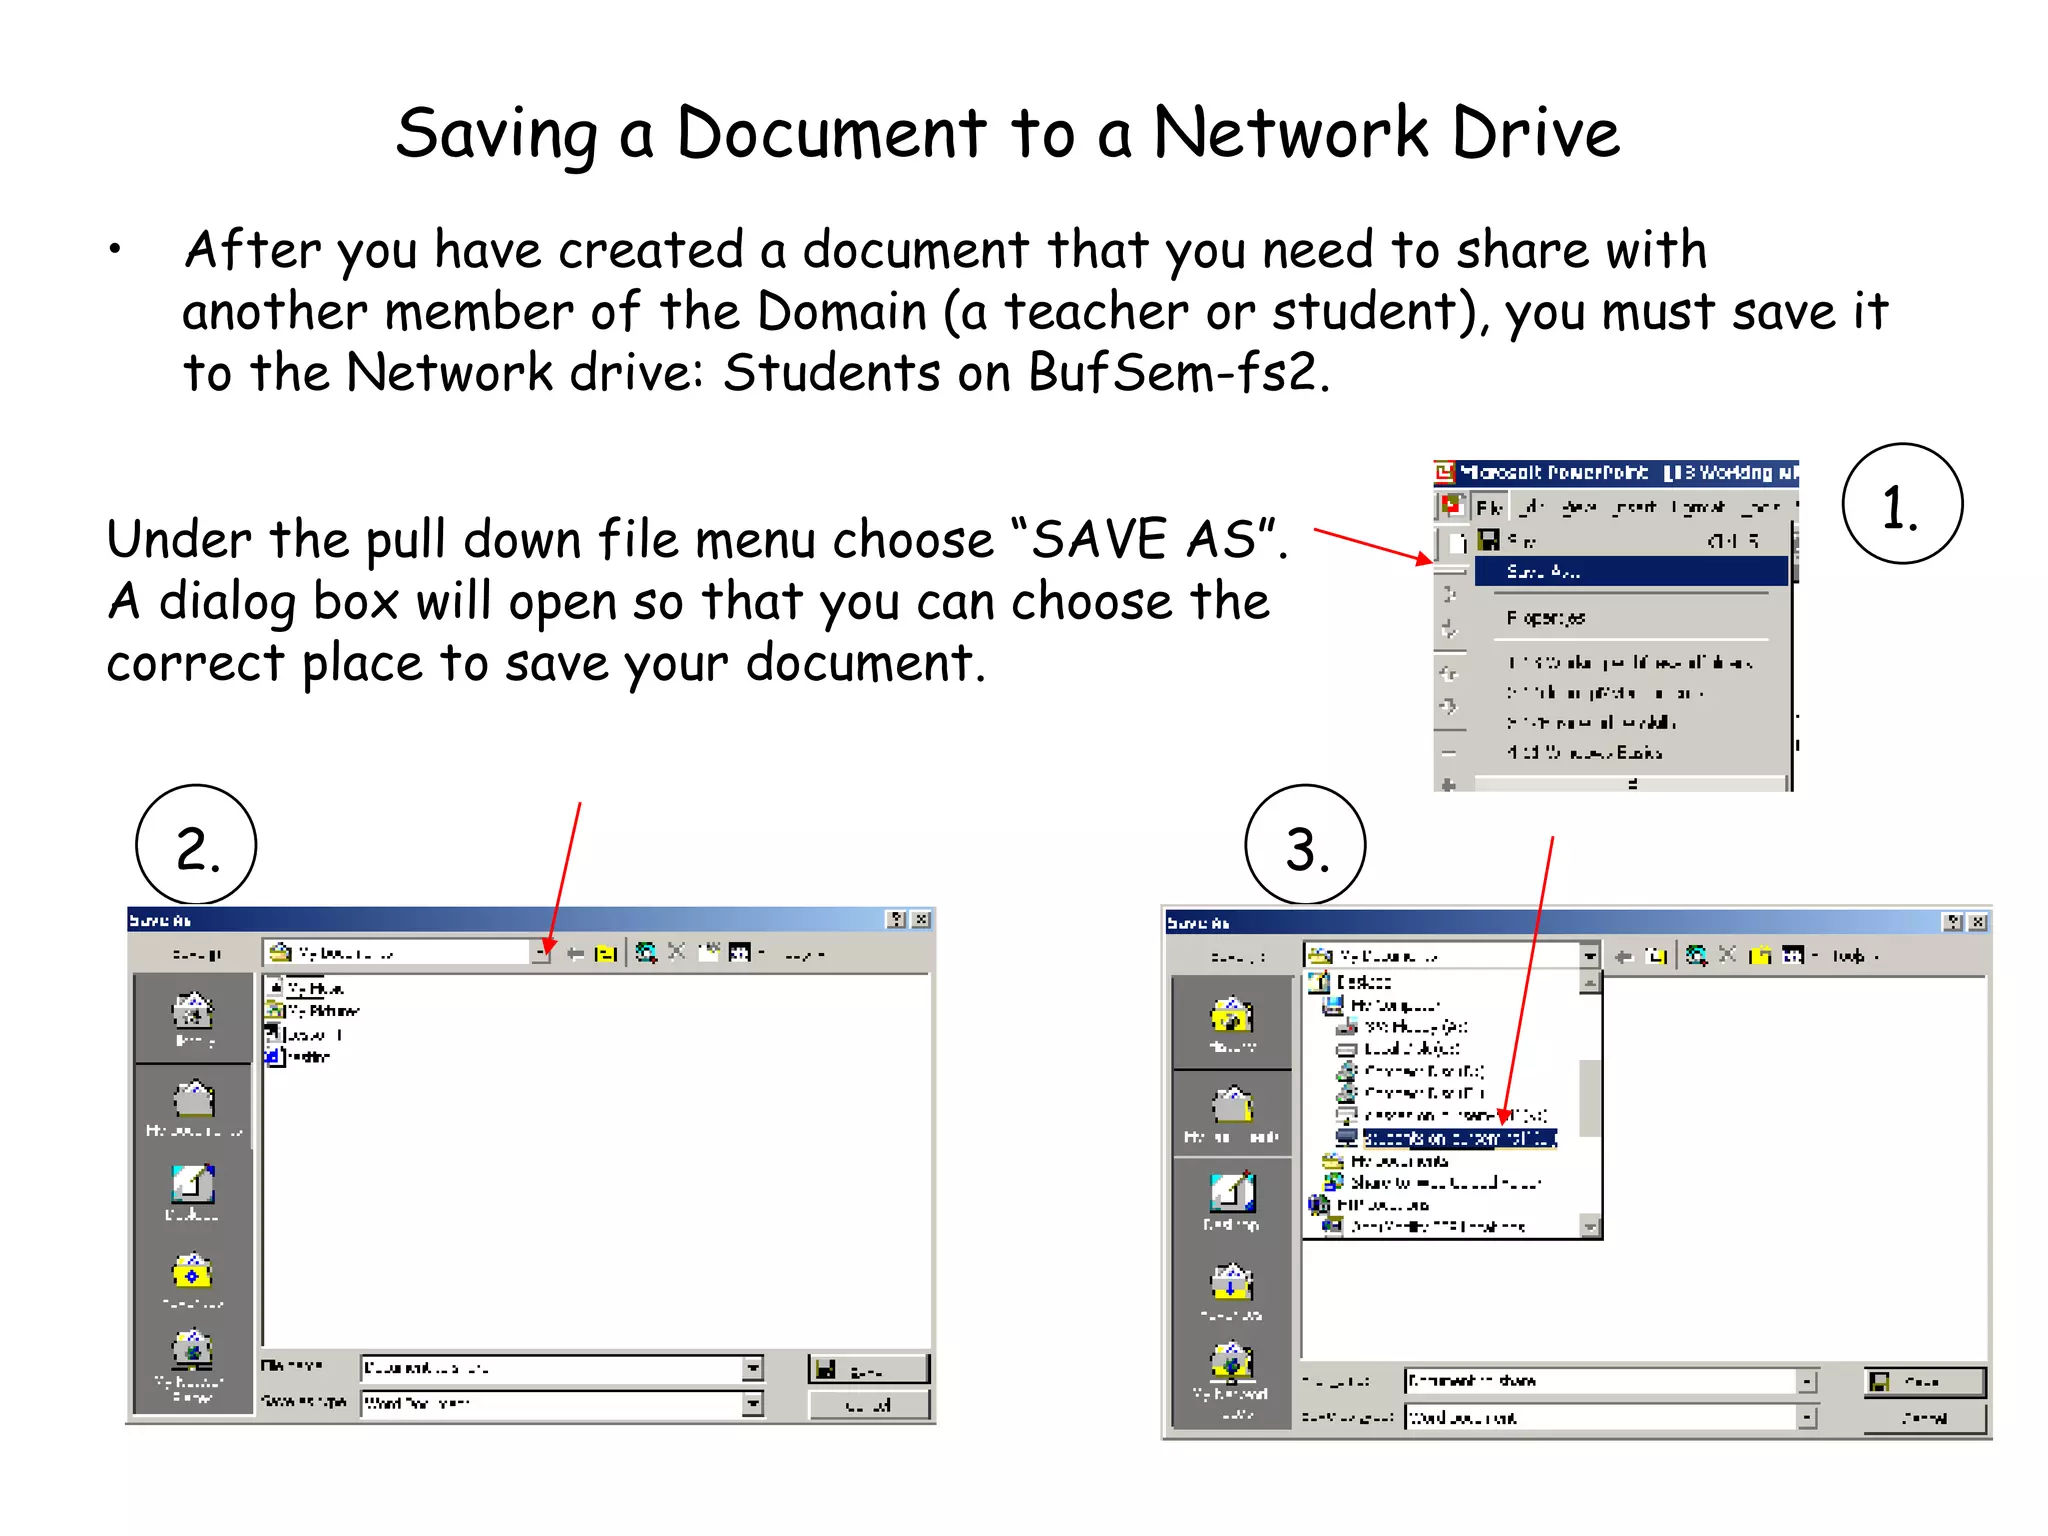
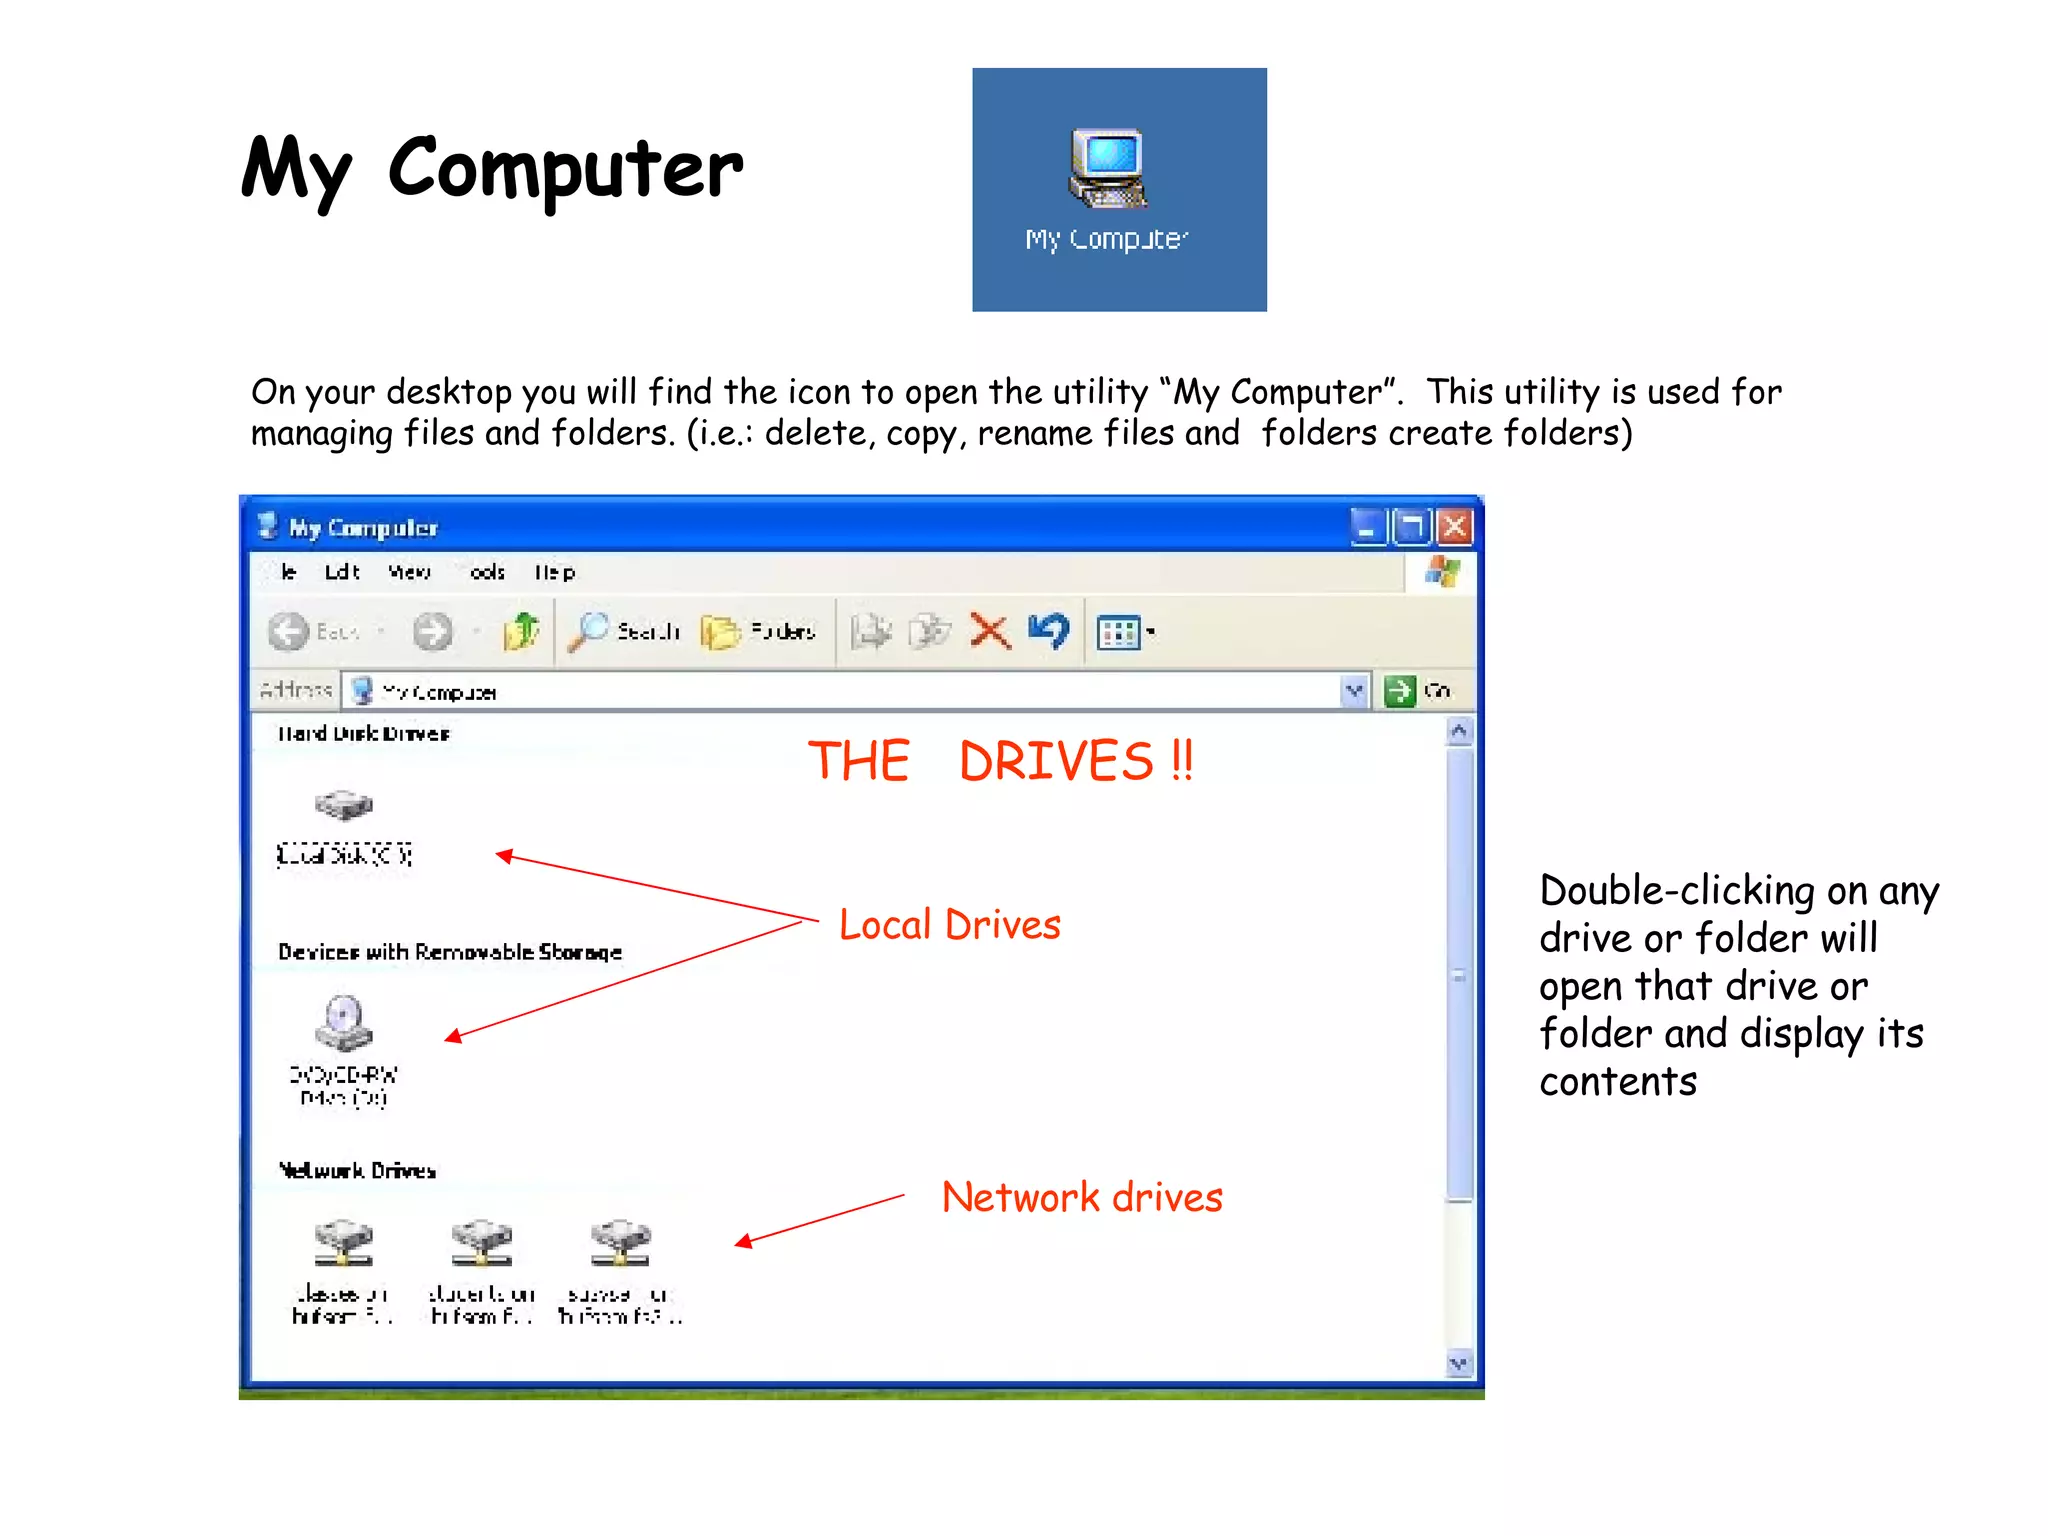
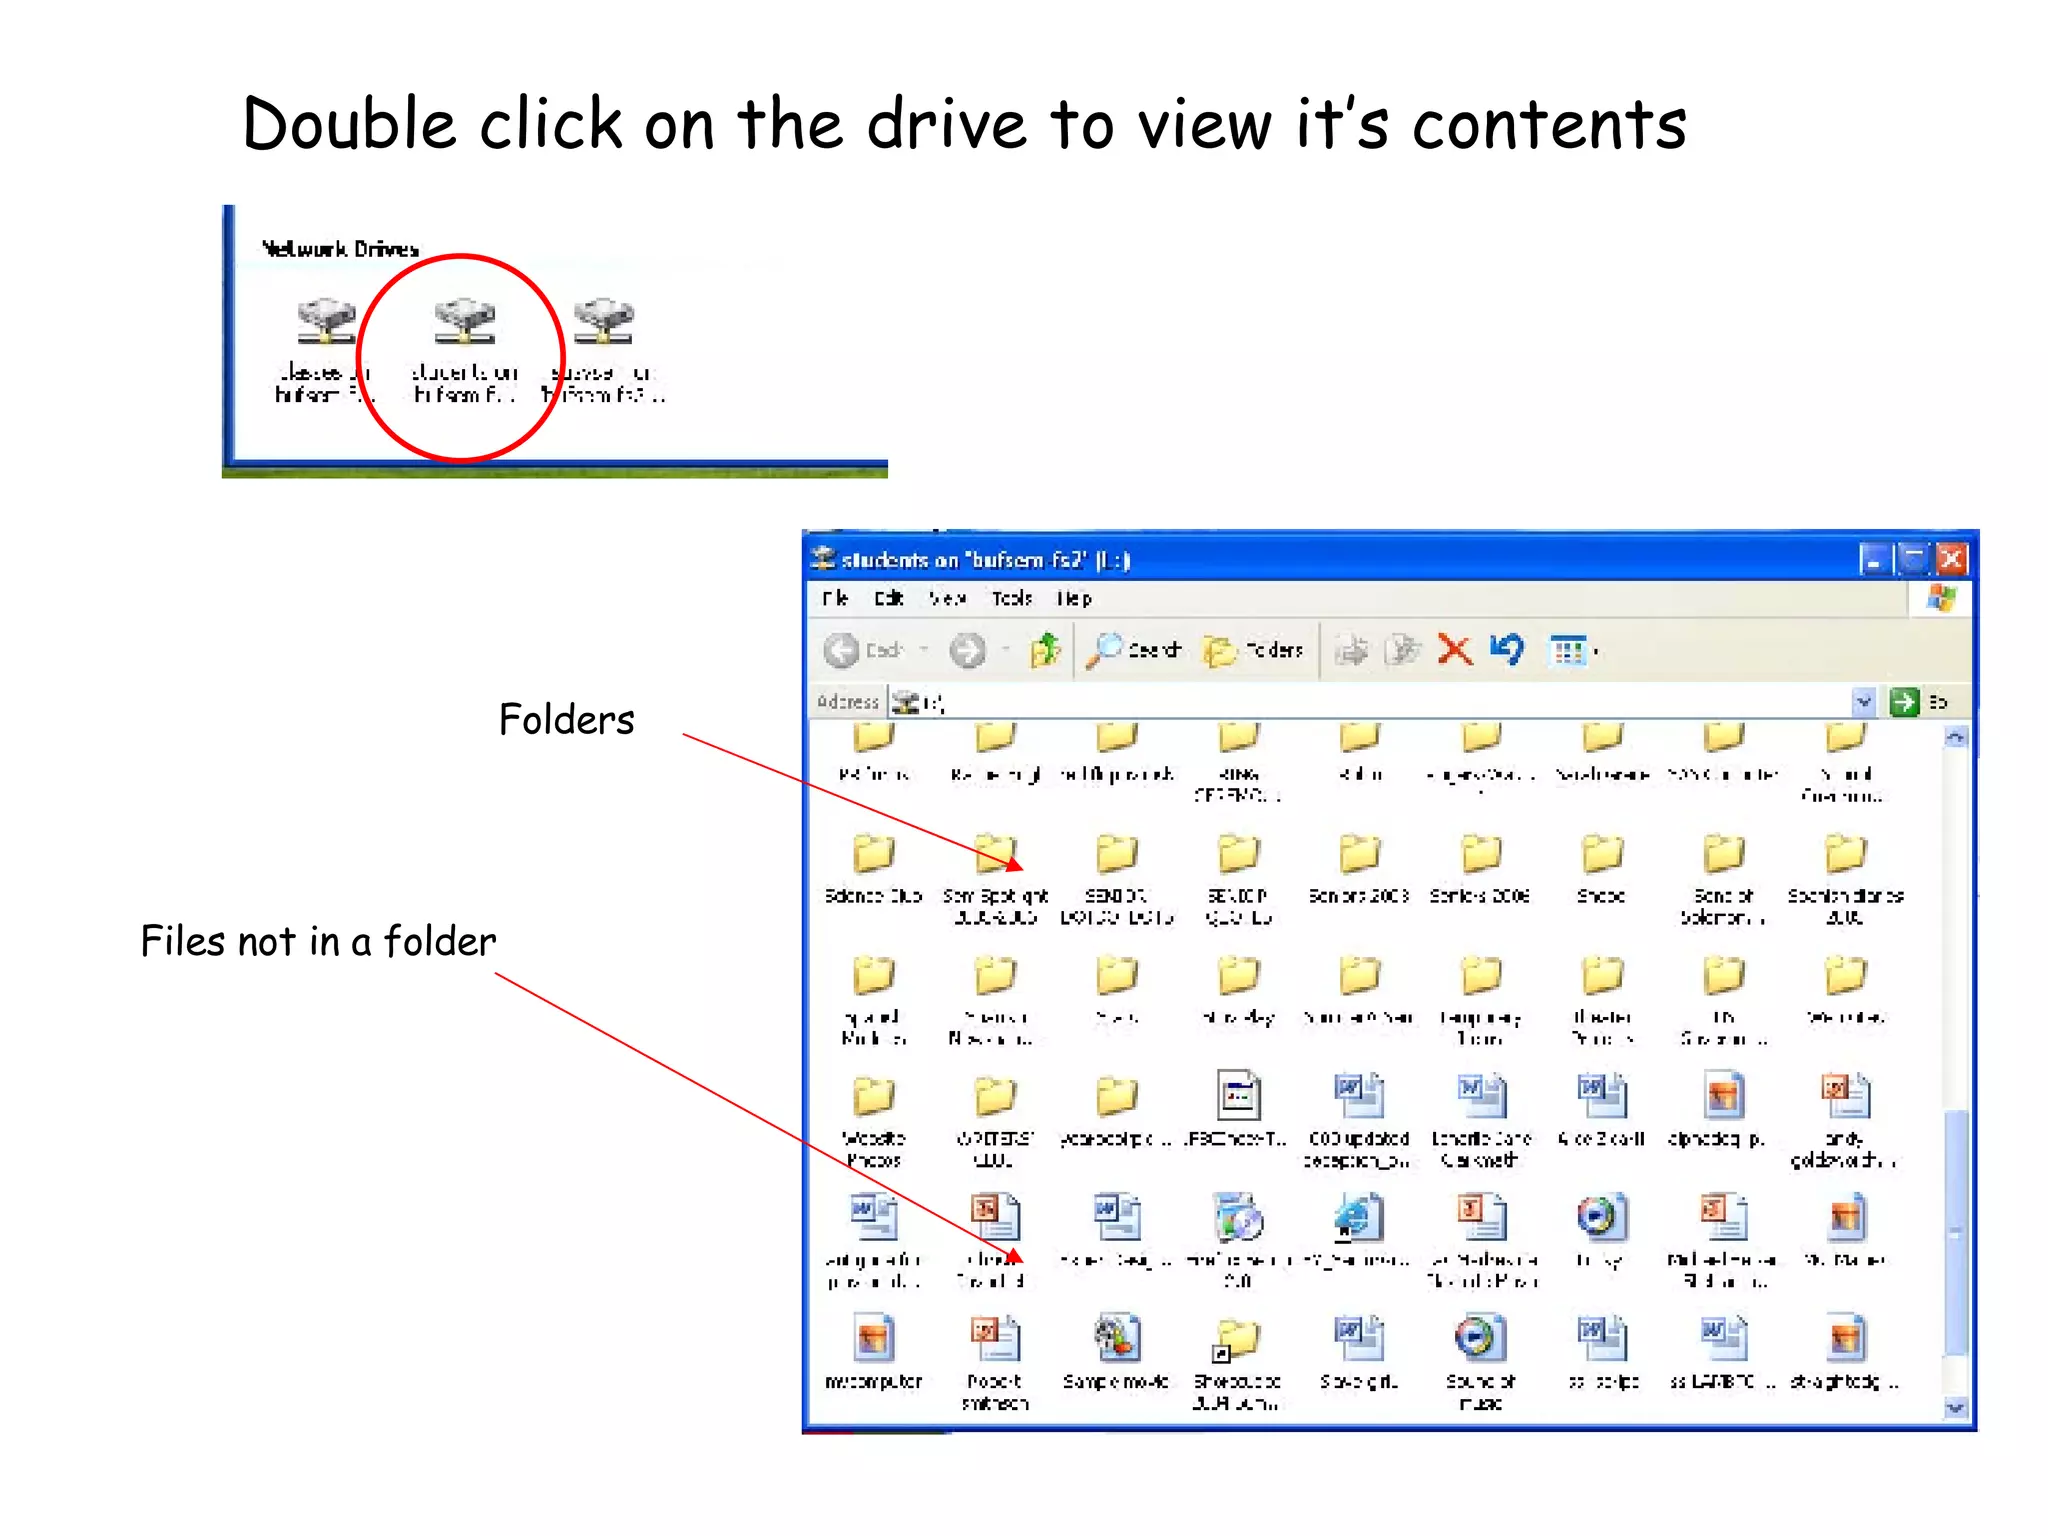


- A computer network allows computers to communicate and share information and equipment. This allows students to easily share work with other students nearby or around the world. - The school uses a client/server network where most computers are clients that connect to a central file server for sharing files, printers, and internet access. - The network provides shared folders for classes, students, and individual user folders that allow accessing and working on files from any computer at the school.