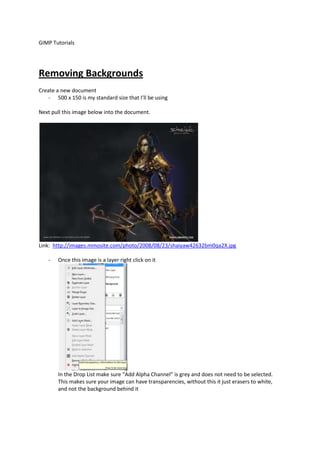
The document provides instructions for removing the background from an image in GIMP:
1. Create a new 500x150 pixel document and import the sample image link provided.
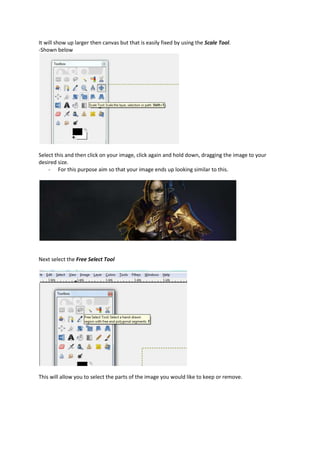
2. Ensure the image layer has an alpha channel selected to allow for transparency.
3. Use the scale tool to resize the image to fit within the canvas.
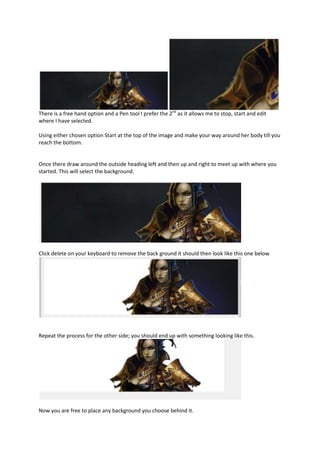
4. Use the free select tool to trace around the edges of the subject and delete the selected background areas.