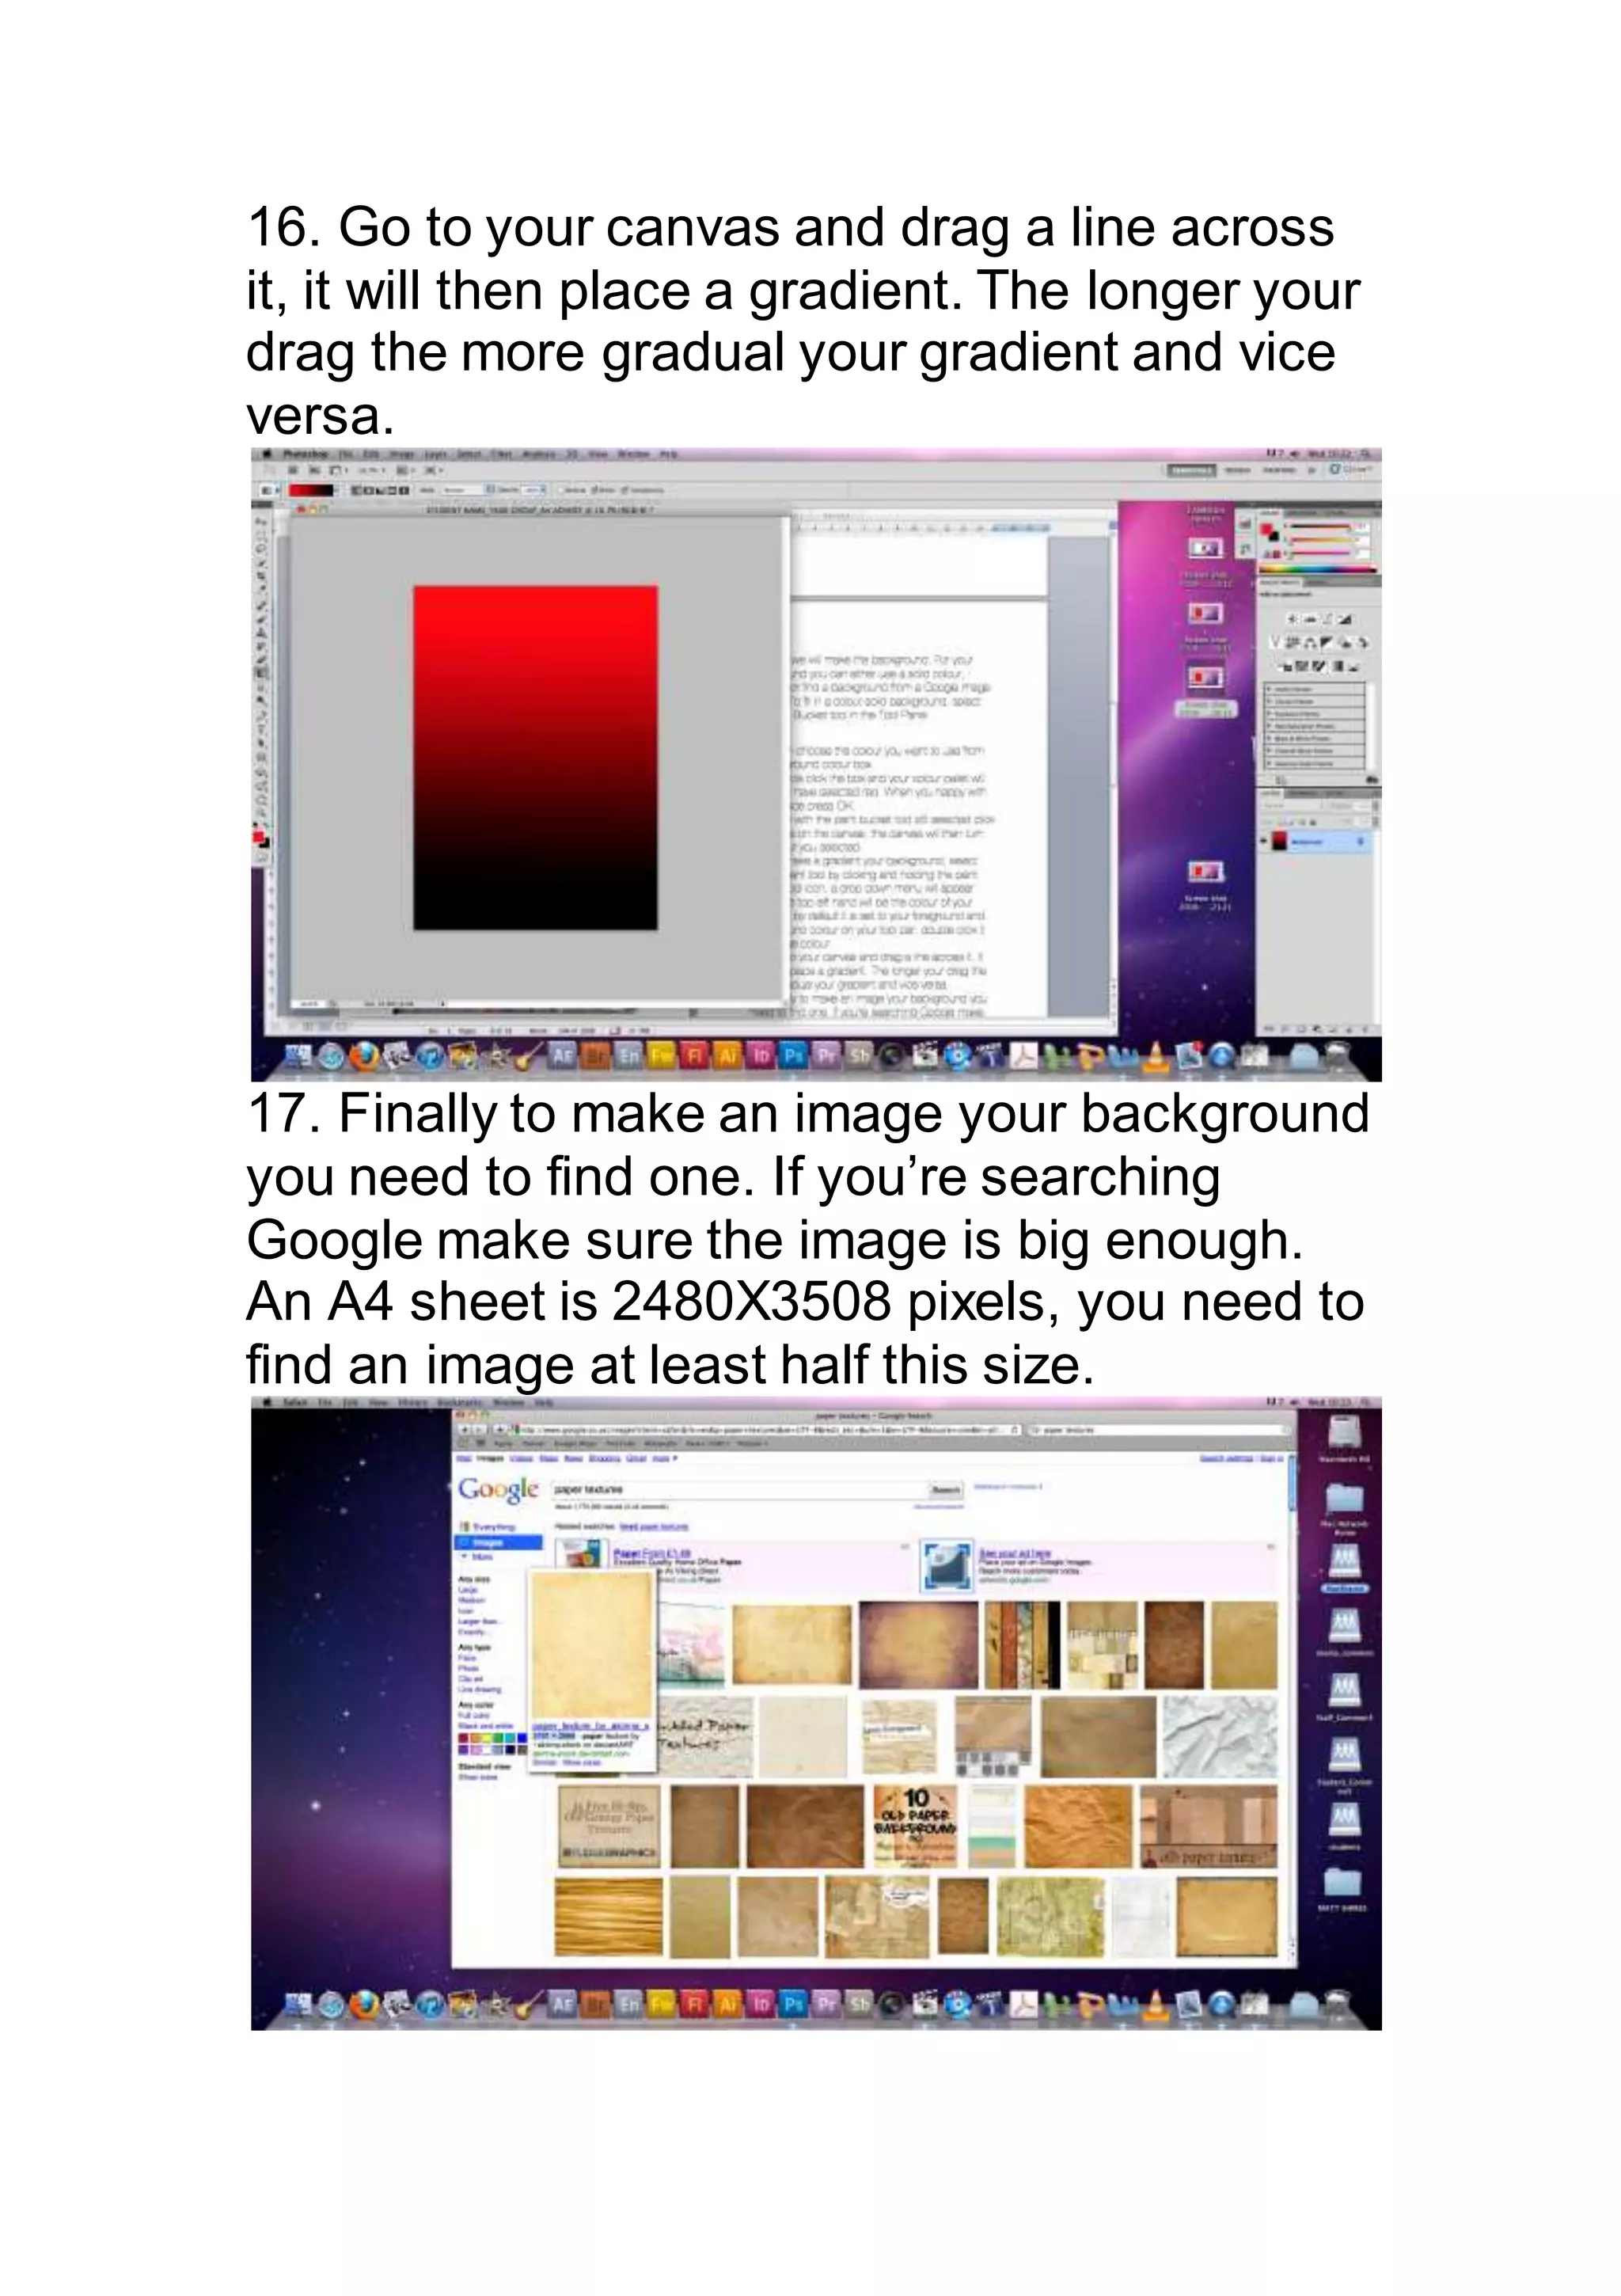
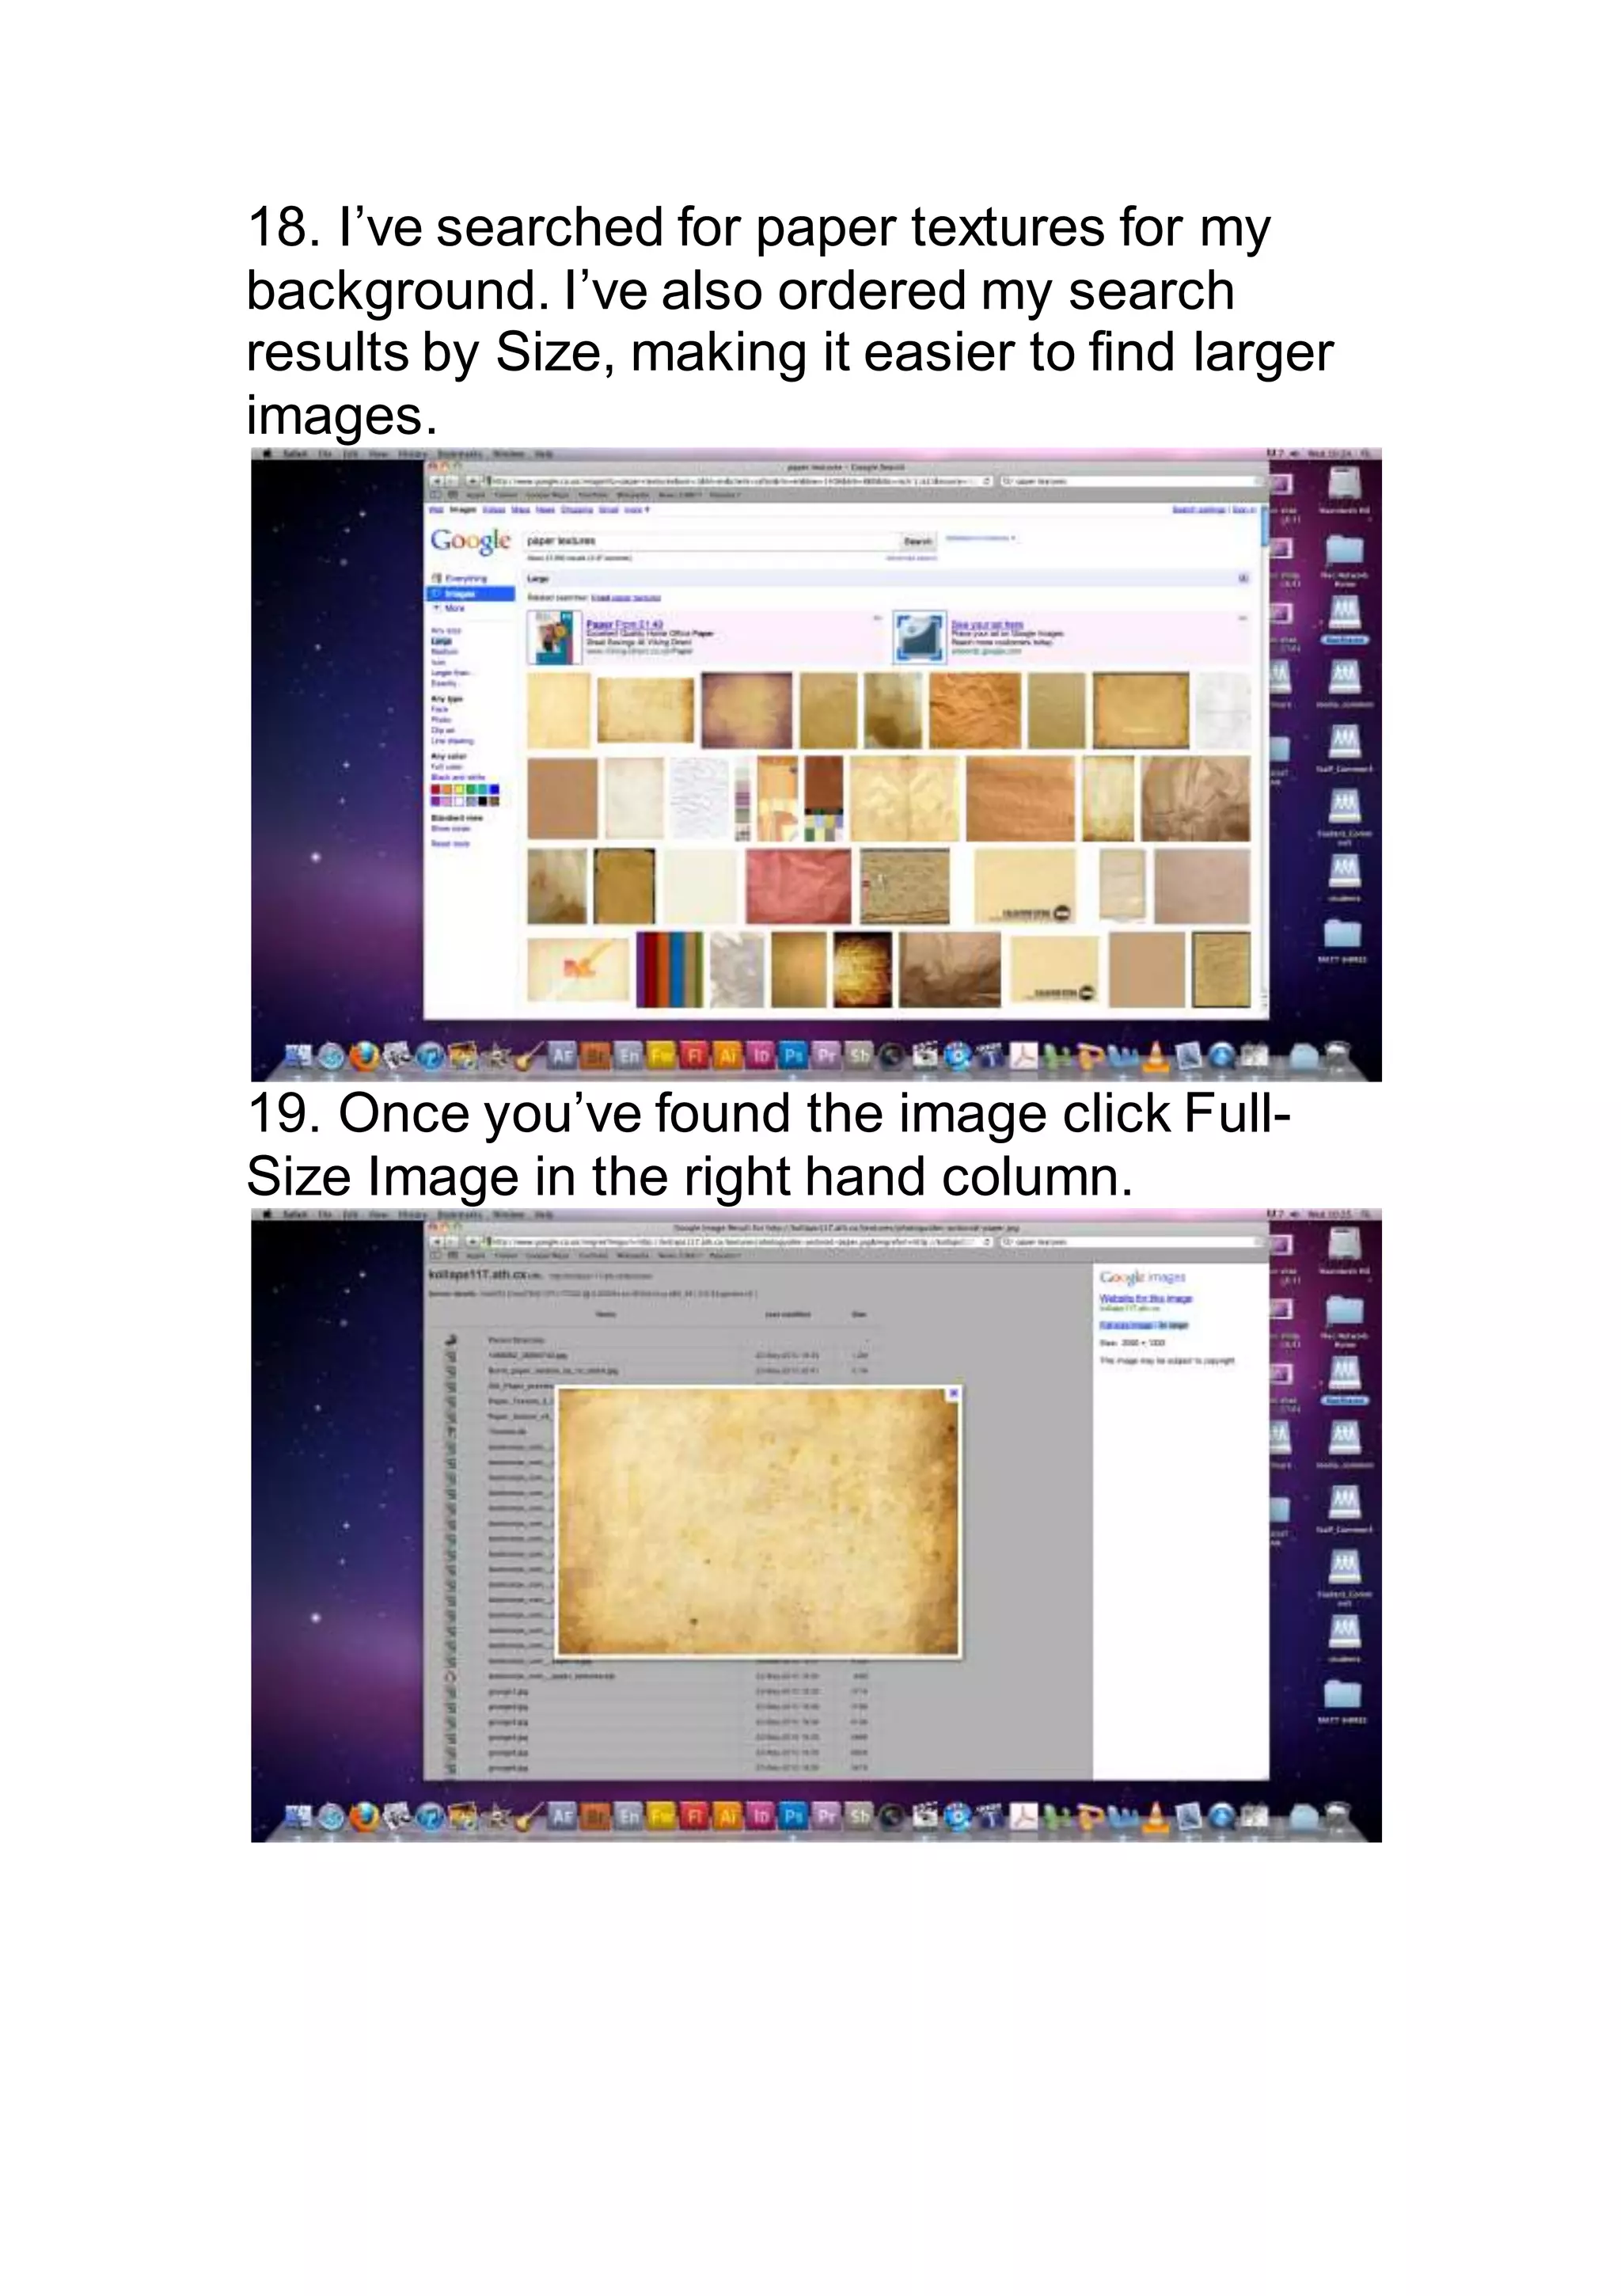
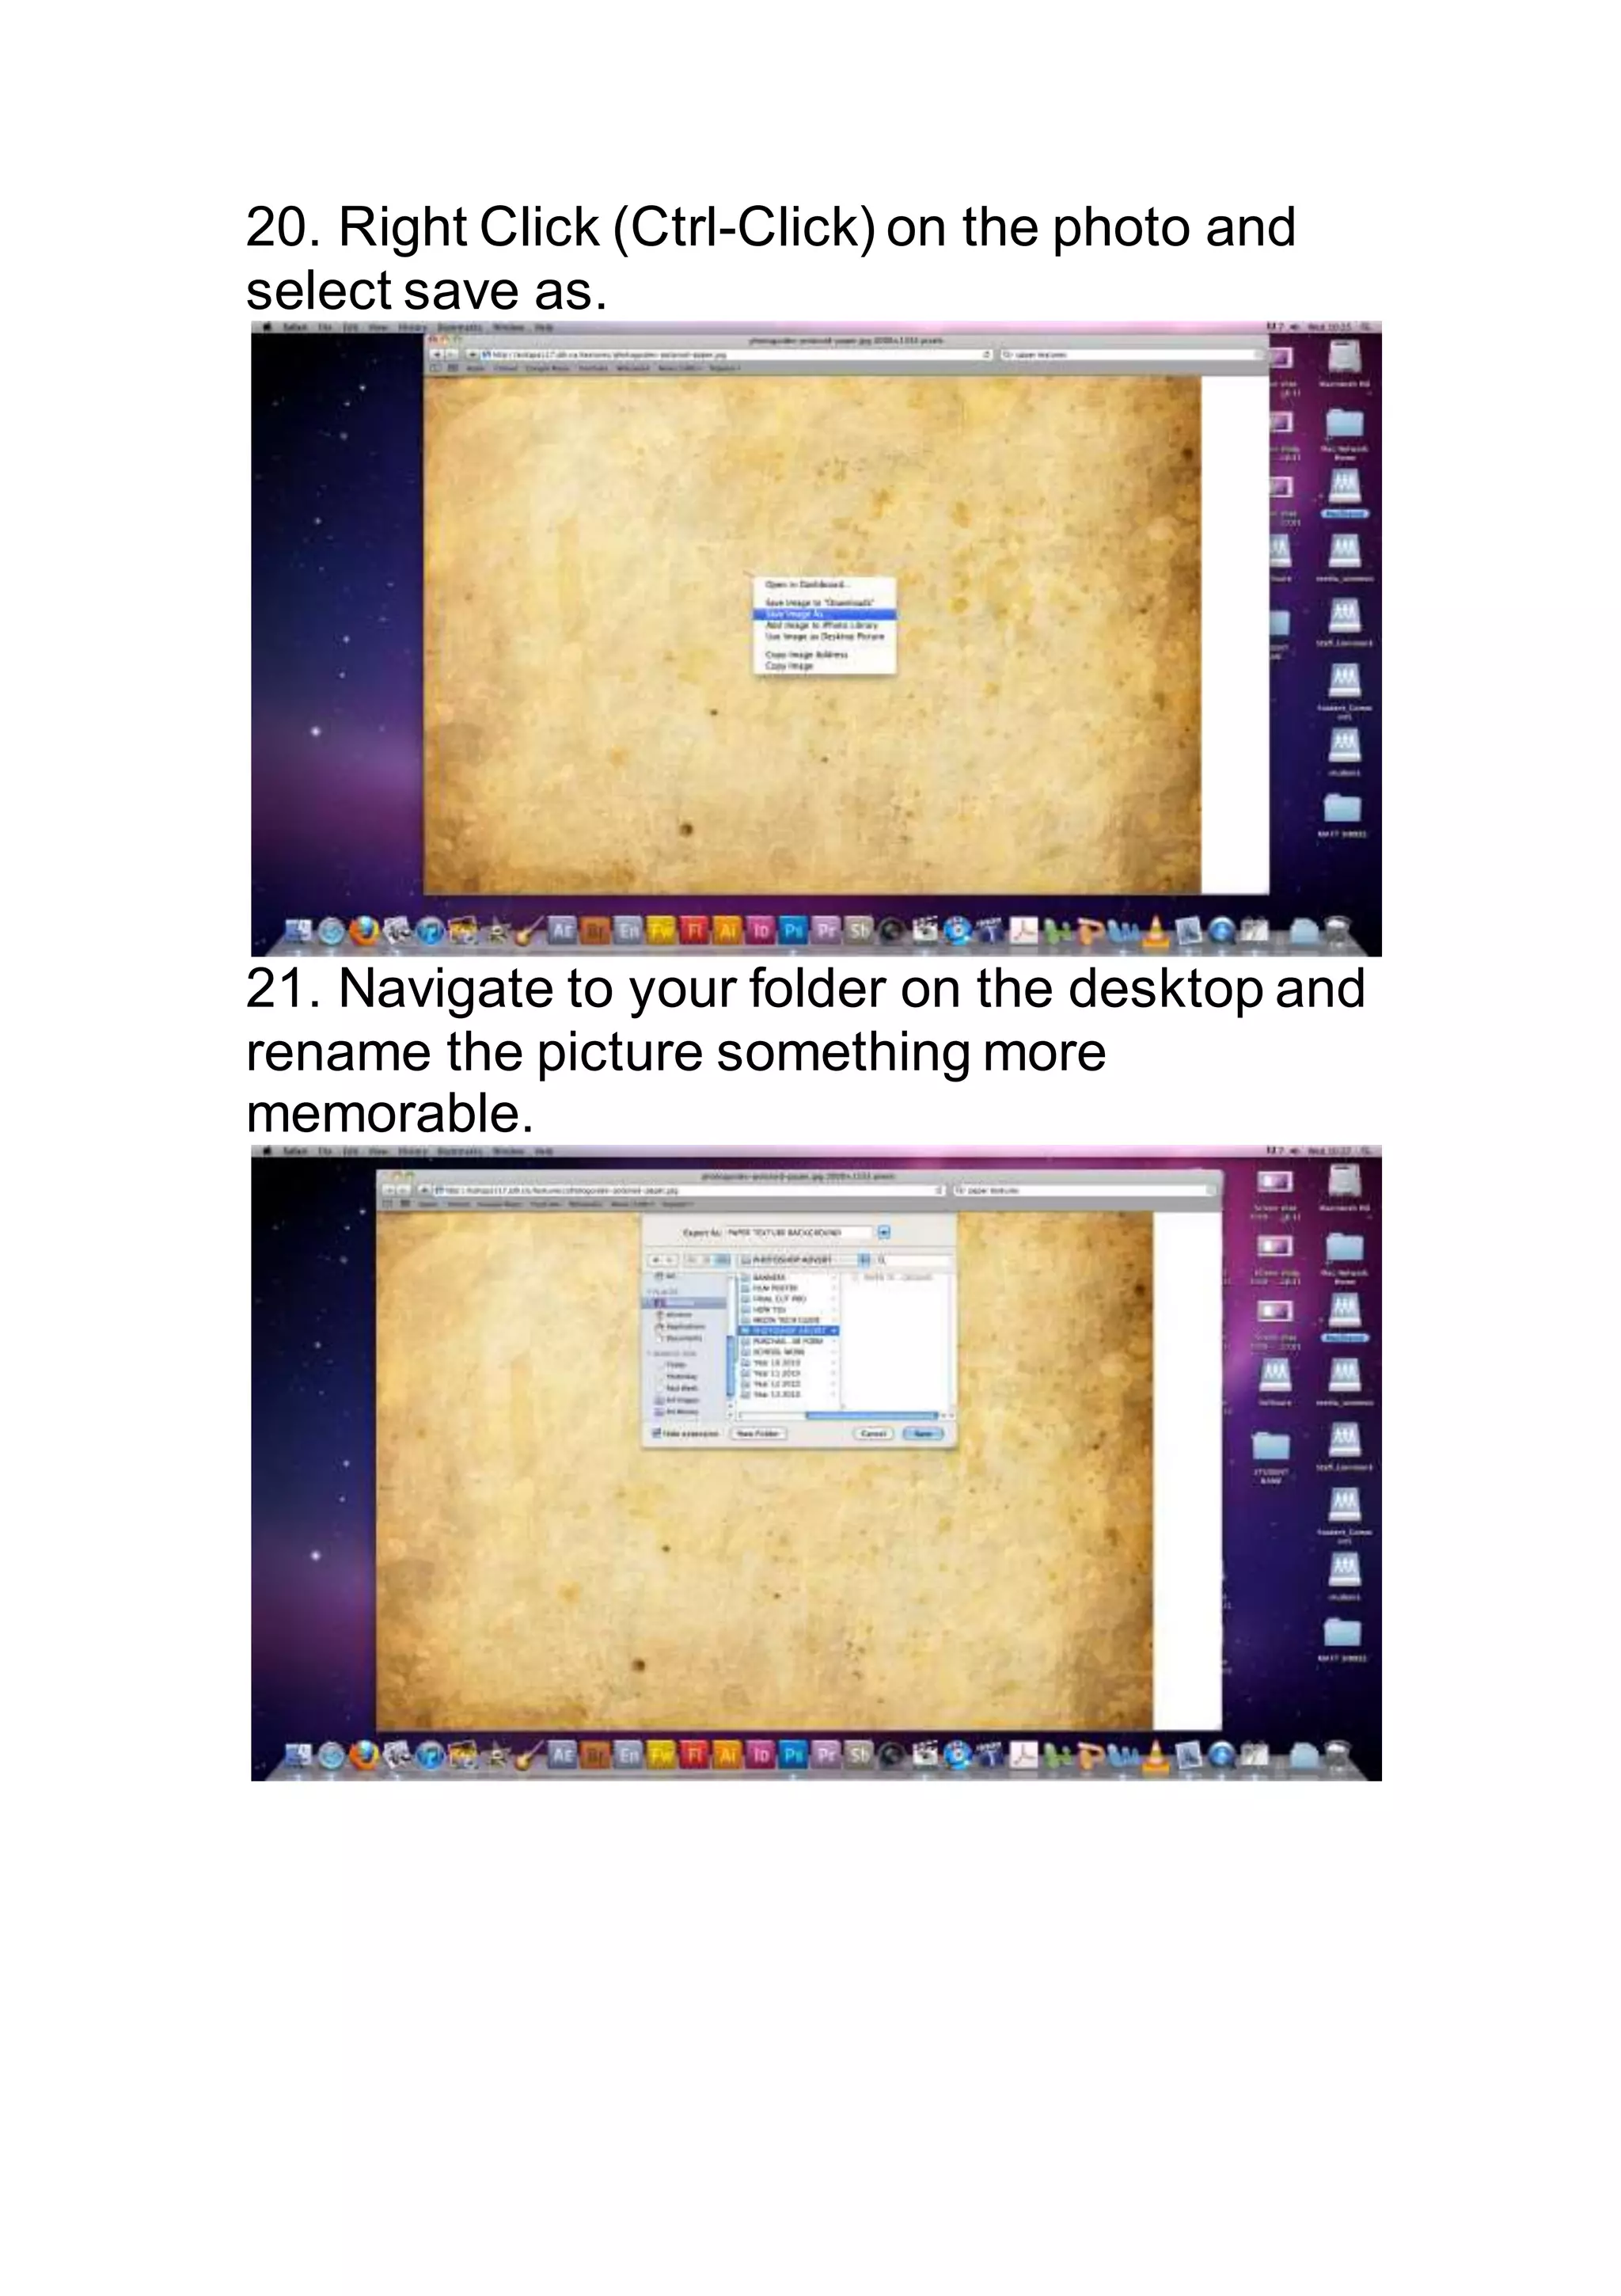
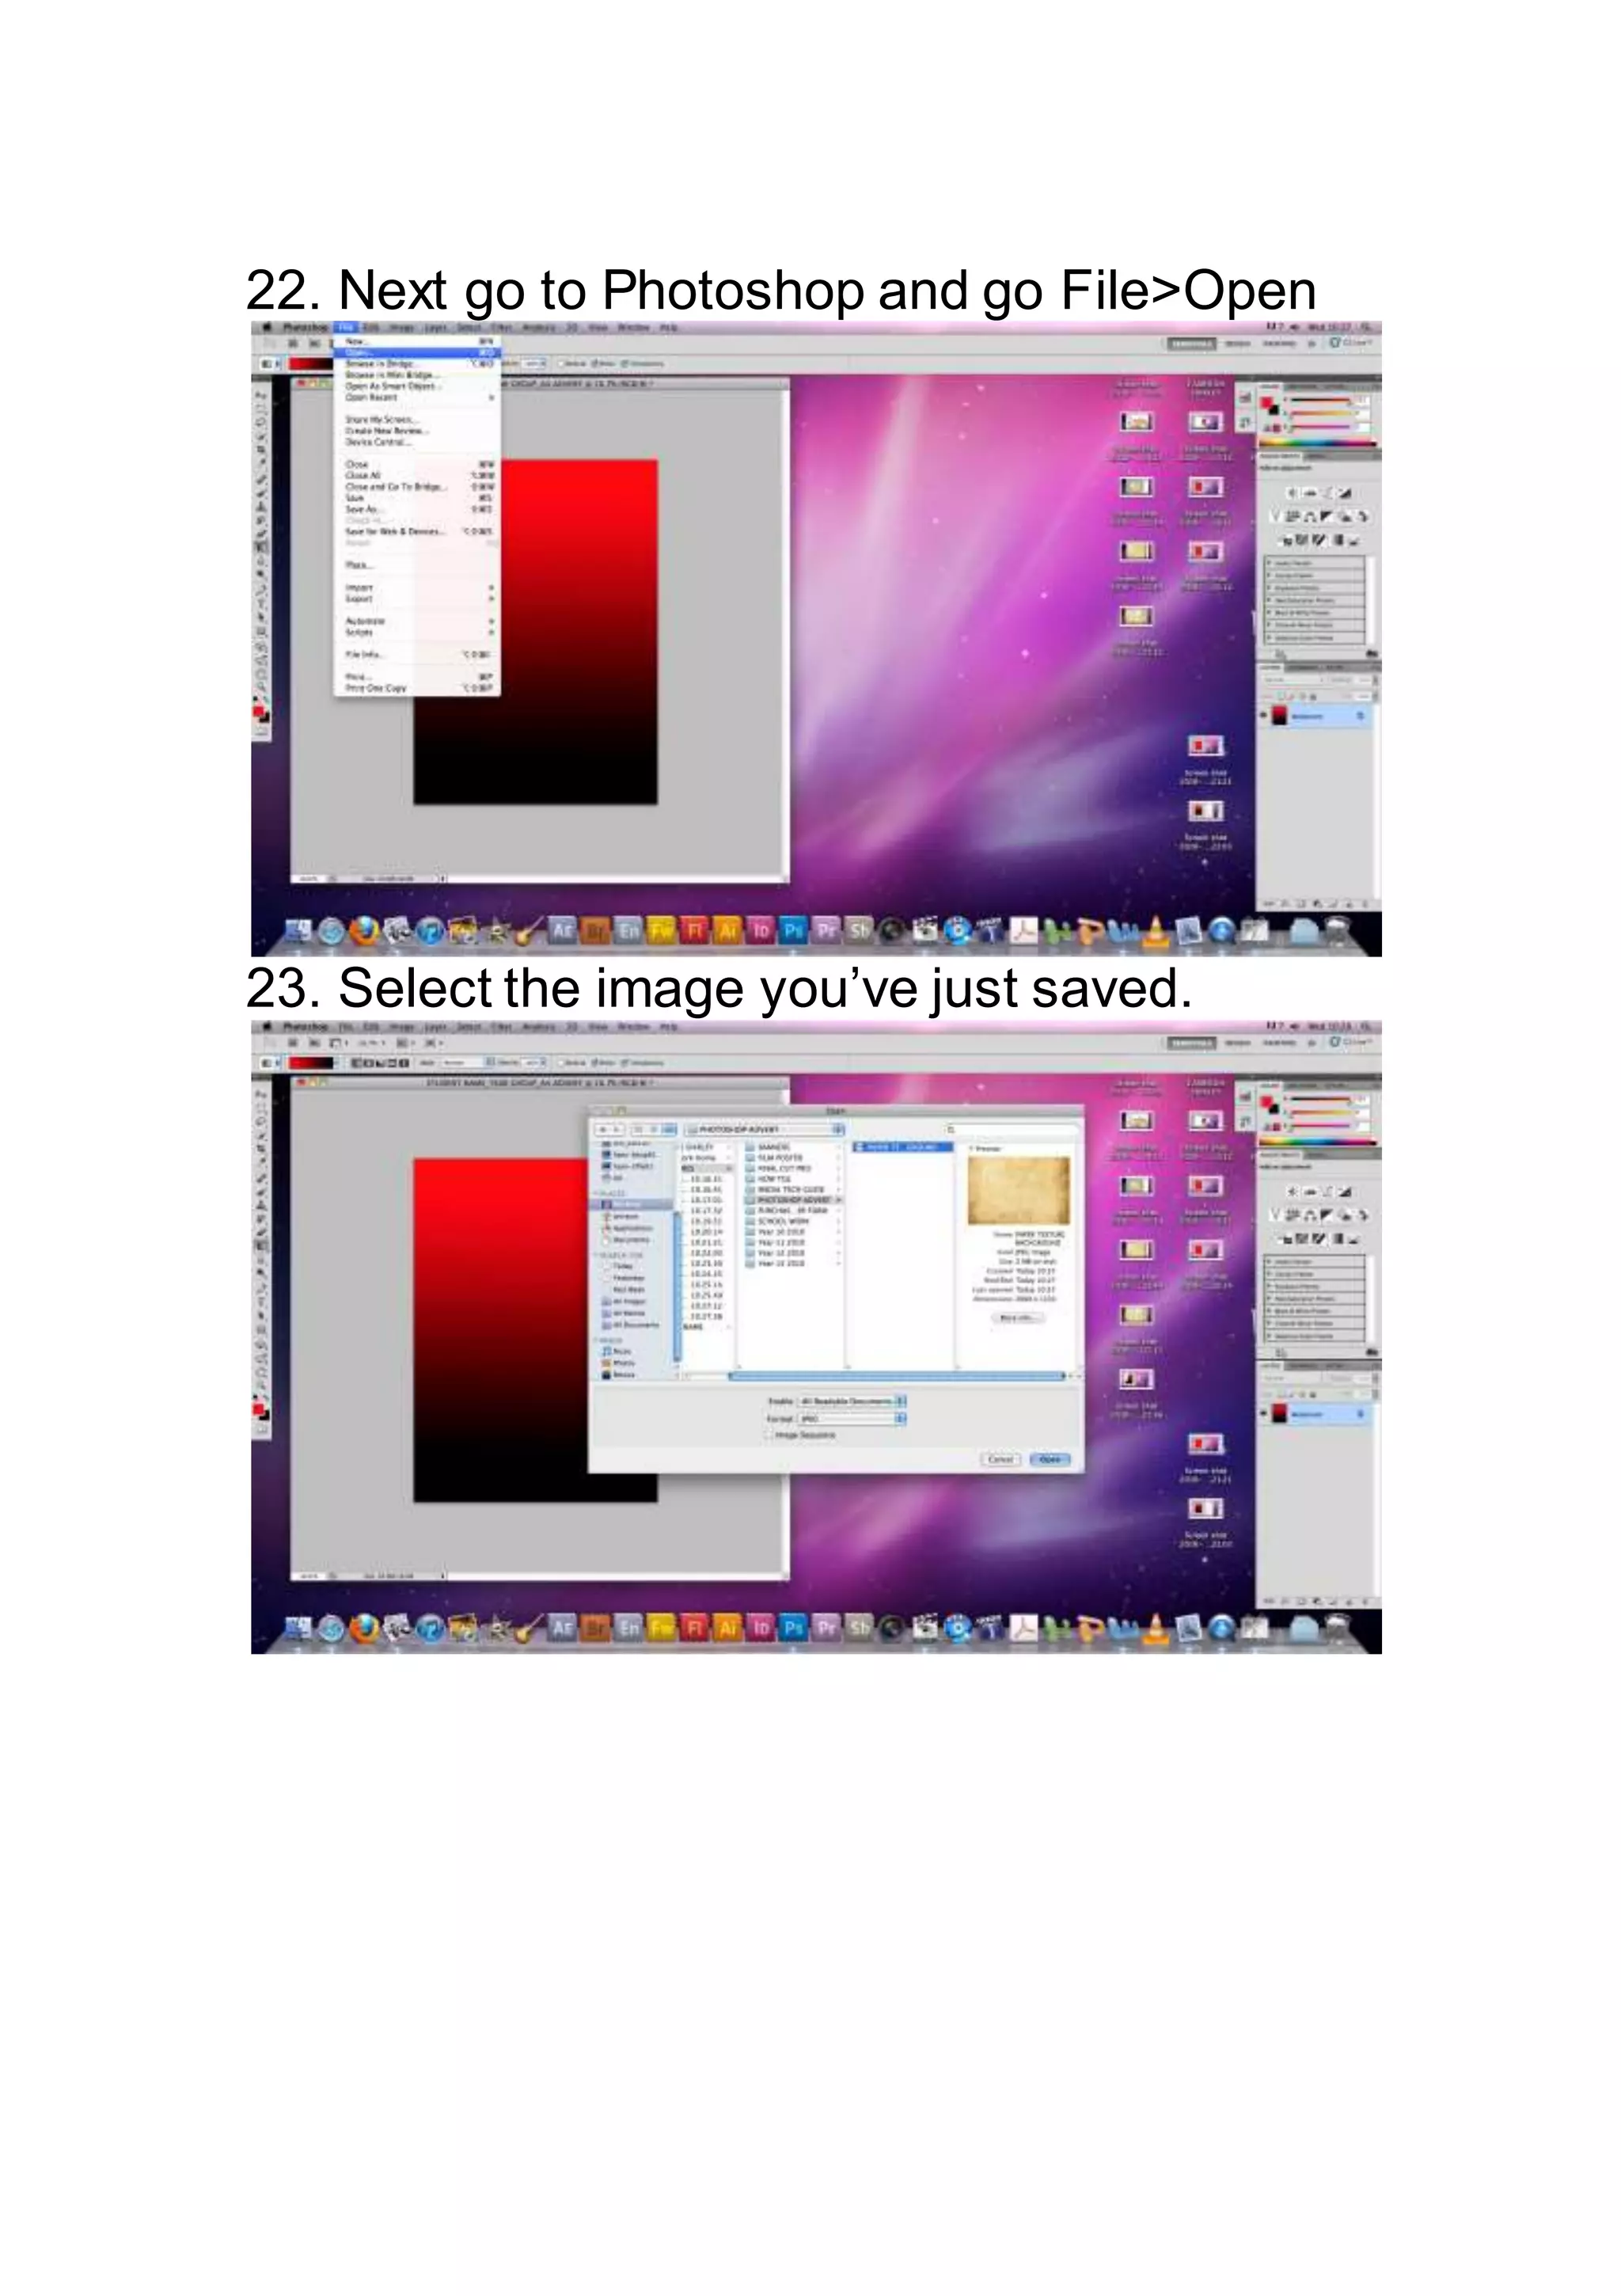
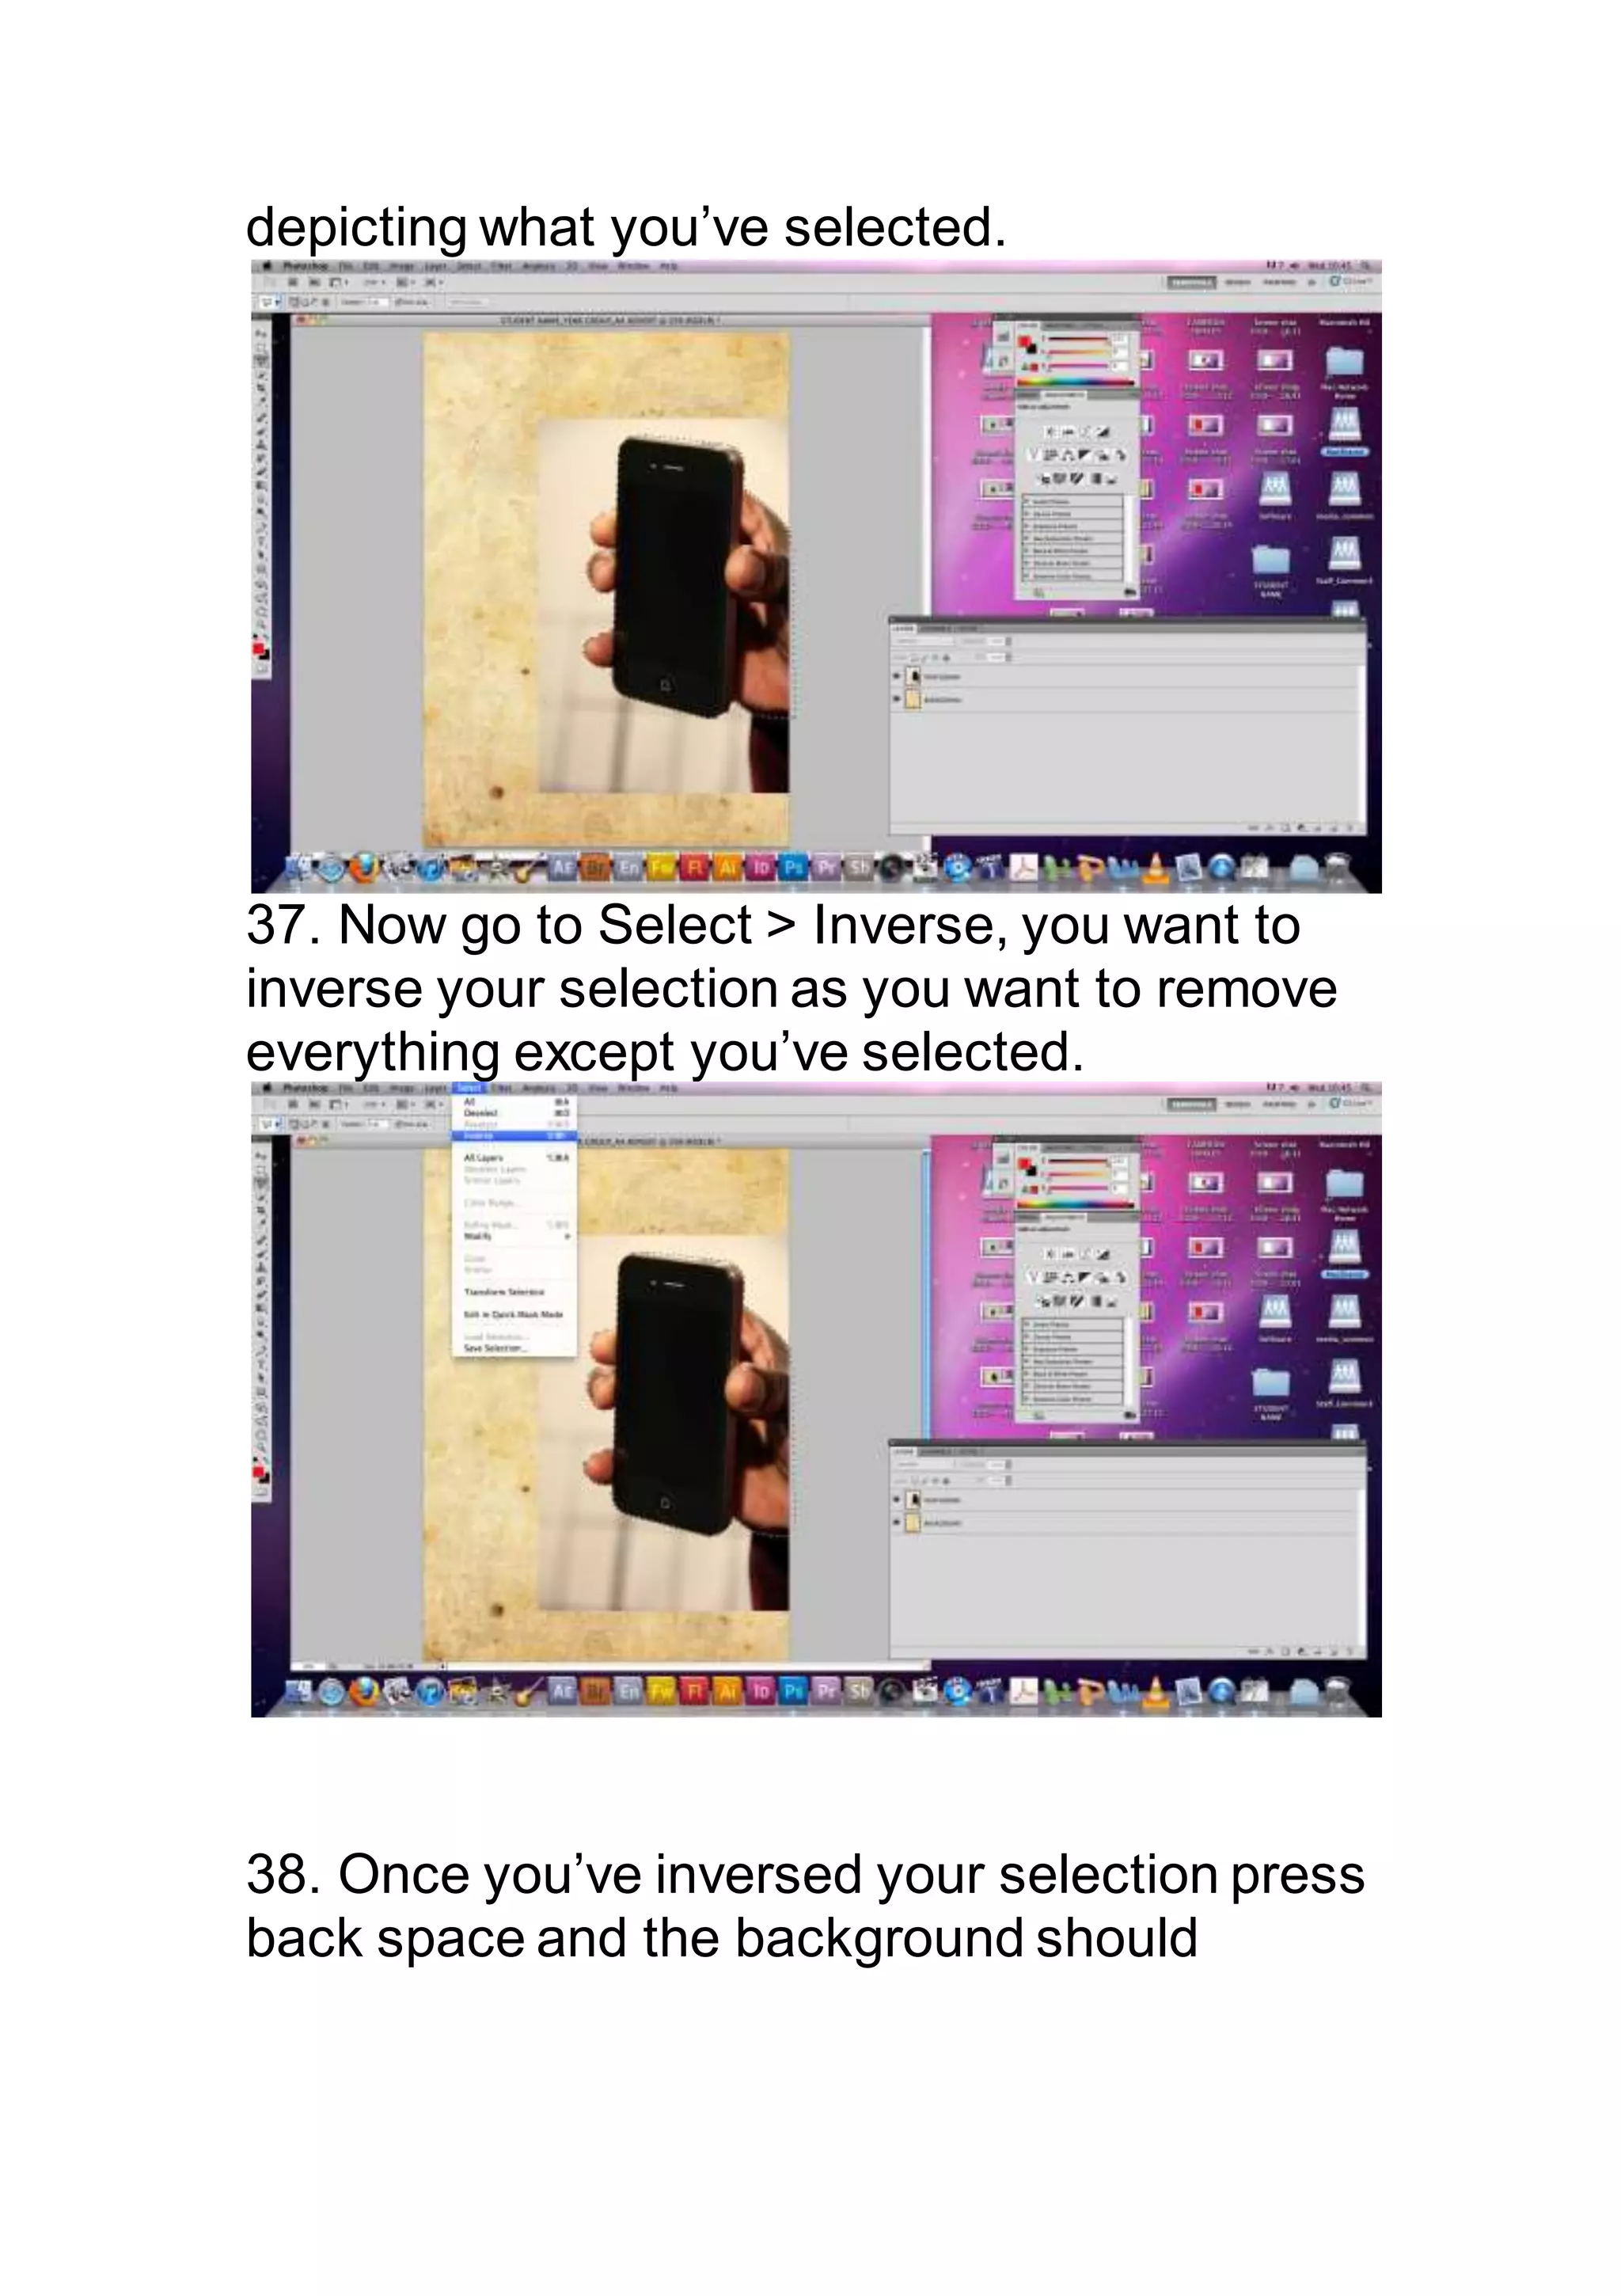
How to make a Photoshop A4 poster advert.
1.Click once on the Photoshop icon in the
Dock.
2. Photoshop will open. Even when Photoshop
is open you will still be able to see the
desktop.
3. Create a new Photoshop File go to File >
New
4. Name the new file with your Name, Year
Group, Project Name.
5. In presets you can select set parameters.
Click the two up and down arrows to show the
drop down menu, for this example I will setup
an A4 document, so I’ll select International
Paper.
6. Then in Sizes I’ll select A4
6. If you cannot find a suitable preset then you
can add a custom size by selecting Custom
from preset menu.
7. If you select custom setting then you can
change the width and height measurements
from pixels to any in the drop down menu as
shown below.
8.Once you’re happy with the setup of your file
press OK to open it. You can then save the
Photoshop file to your folder on your desktop.
Go File>Save As
9. Then navigate to the folder you want to
save the file in.
10. First we will make the background. For
your background you can either use a solid
colour, gradient or find a background from a
Google image search. To fill in a colour solid
background, select the Paint Bucket tool in the
Tool Panel.
11. Then choose the colour you want to use
from the foreground colour box.
12. Double click the box and your colour pallet
will appear, I have selected red. When you
happy with your choice press OK.
13. Now with the paint bucket tool still selected
click anywhere on the canvas, the canvas will
then turn the colour you selected.
14. To make a gradient your background,
select the gradient tool by clicking and holding
the paint bucket tool icon, a drop down menu
will appear.
15. In the top left hand will be the colour of
your gradient, by default it is set to your
foreground and background colour on your
tool bar, double click it to change colour.
16. Go to your canvas and drag a line across
it, it will then place a gradient. The longer your
drag the more gradual your gradient and vice
versa.
17. Finally to make an image your background
you need to find one. If you’re searching
Google make sure the image is big enough.
An A4 sheet is 2480X3508 pixels, you need to
find an image at least half this size.
18. I’ve searched for paper textures for my
background. I’ve also ordered my search
results by Size, making it easier to find larger
images.
19. Once you’ve found the image click Full-
Size Image in the right hand column.
20. Right Click (Ctrl-Click) on the photo and
select save as.
21. Navigate to your folder on the desktop and
rename the picture something more
memorable.
22. Next go to Photoshop and go File>Open
23. Select the image you’ve just saved.
24. You will now have two image tabs at the
top of your window, click and drag the tab
away.
25. Now you have two windows, one with your
blank canvas and one with your image, select
the move tool.
26. Click and drag the image to your empty
canvas.
27. Depending on the size of the image you
may have to adjust its size or position. Once
you’ve brought in your image go to Edit > Free
Transform.
28. Little boxes should appear around your
image. Click and drag a corner box to make it
bigger or smaller. It is very important, if you
don’t want to distort your image, to hold the
Shift key while scaling to stop it from distorting.
29. Once you have it the size and position you
want press enter to fix it in place.
30. Now you have a background it should
appear in your layers tab. You can close the
other window now.
31. Now you want to import your photo, find
the photo you want to import on the system
and follow the same procedure you did with
importing an image for your background.
32. You should now have three layers in your
layer tab. Remember which ever layer is on
top will be most visible. To delete your locked
Background layer, double click it in the layer
tab and make it a layer. Then select the layer
and to delete backspace. So your background
should be on the bottom and photograph on
the top. To move layers click and drag them
above and below one another. To rename
your layers double click the name in the layers
panel.
33. When your photo is imported you may
want to cut out the background, to do this you
need to select the background.
34. Go to the tool panel and select the Lasso
tool, click and hold the icon as you did with the
Paint bucket tool to get the gradient tool.
When the drop down menu appears select
Polygonal Lasso Tool.
35. With this tool you can click around the
object you want to select. Slowly and carefully
click around the subject to select it, press
backspace to delete a point. You must have
the Photo layer selected while doing this.
36. Once you’ve completed your selection and
arrived at the beginning of your line, double
click and you should see ‘marching ants’
depicting what you’ve selected.
37. Now go to Select > Inverse, you want to
inverse your selection as you want to remove
everything except you’ve selected.
38. Once you’ve inversed your selection press
back space and the background should
disappear.
39. If there are sections in the middle of your
photo i.e. between arm and body just select
those separately and press backspace to
delete. To deselect go to Select > Deselect
40. Now you have your background and photo
placed you can now choose your text. Select
the Text tool in the Tool column.
41. Click anywhere on the canvas and begin
typing.
42. When you have text you want just highlight
it as you would in Word and you can change
font, size and colour the option bar above.
43. You can reposition the text with the move
tool.
44. You can also use Free Transform tool to
Scale it and rotate it. To rotate an object turn
Free Transform on (Edit > Free Transform)
and move the cursor just out one of the
corners until a curved double arrow appears.
Click and drag to rotate.
45. Remember if you want to edit text, make
sure the text layer is selected by clicking on it
in the layer tab.
46. Select the Text tool and click somewhere
inside the text and highlight.
47. You should now have 3 separate layers
Background, Photo and Text. Click and drag a
layer to place it above or below any other.
48. Go File > Save, and quit Photoshop.

How to make a photoshop advert a4 poster

  • 1.
    How to makea Photoshop A4 poster advert. 1.Click once on the Photoshop icon in the Dock. 2. Photoshop will open. Even when Photoshop is open you will still be able to see the desktop.
  • 2.
    3. Create anew Photoshop File go to File > New 4. Name the new file with your Name, Year Group, Project Name.
  • 3.
    5. In presetsyou can select set parameters. Click the two up and down arrows to show the drop down menu, for this example I will setup an A4 document, so I’ll select International Paper. 6. Then in Sizes I’ll select A4
  • 4.
    6. If youcannot find a suitable preset then you can add a custom size by selecting Custom from preset menu. 7. If you select custom setting then you can change the width and height measurements from pixels to any in the drop down menu as shown below.
  • 5.
    8.Once you’re happywith the setup of your file press OK to open it. You can then save the Photoshop file to your folder on your desktop. Go File>Save As 9. Then navigate to the folder you want to save the file in.
  • 6.
    10. First wewill make the background. For your background you can either use a solid colour, gradient or find a background from a Google image search. To fill in a colour solid background, select the Paint Bucket tool in the Tool Panel. 11. Then choose the colour you want to use from the foreground colour box.
  • 7.
    12. Double clickthe box and your colour pallet will appear, I have selected red. When you happy with your choice press OK. 13. Now with the paint bucket tool still selected click anywhere on the canvas, the canvas will then turn the colour you selected. 14. To make a gradient your background, select the gradient tool by clicking and holding
  • 8.
    the paint buckettool icon, a drop down menu will appear. 15. In the top left hand will be the colour of your gradient, by default it is set to your foreground and background colour on your tool bar, double click it to change colour.
  • 9.
    16. Go toyour canvas and drag a line across it, it will then place a gradient. The longer your drag the more gradual your gradient and vice versa. 17. Finally to make an image your background you need to find one. If you’re searching Google make sure the image is big enough. An A4 sheet is 2480X3508 pixels, you need to find an image at least half this size.
  • 10.
    18. I’ve searchedfor paper textures for my background. I’ve also ordered my search results by Size, making it easier to find larger images. 19. Once you’ve found the image click Full- Size Image in the right hand column.
  • 11.
    20. Right Click(Ctrl-Click) on the photo and select save as. 21. Navigate to your folder on the desktop and rename the picture something more memorable.
  • 12.
    22. Next goto Photoshop and go File>Open 23. Select the image you’ve just saved.
  • 13.
    24. You willnow have two image tabs at the top of your window, click and drag the tab away. 25. Now you have two windows, one with your blank canvas and one with your image, select the move tool.
  • 14.
    26. Click anddrag the image to your empty canvas. 27. Depending on the size of the image you may have to adjust its size or position. Once you’ve brought in your image go to Edit > Free Transform.
  • 15.
    28. Little boxesshould appear around your image. Click and drag a corner box to make it bigger or smaller. It is very important, if you don’t want to distort your image, to hold the Shift key while scaling to stop it from distorting. 29. Once you have it the size and position you want press enter to fix it in place. 30. Now you have a background it should appear in your layers tab. You can close the
  • 16.
    other window now. 31.Now you want to import your photo, find the photo you want to import on the system and follow the same procedure you did with importing an image for your background. 32. You should now have three layers in your layer tab. Remember which ever layer is on
  • 17.
    top will bemost visible. To delete your locked Background layer, double click it in the layer tab and make it a layer. Then select the layer and to delete backspace. So your background should be on the bottom and photograph on the top. To move layers click and drag them above and below one another. To rename your layers double click the name in the layers panel. 33. When your photo is imported you may want to cut out the background, to do this you need to select the background.
  • 18.
    34. Go tothe tool panel and select the Lasso tool, click and hold the icon as you did with the Paint bucket tool to get the gradient tool. When the drop down menu appears select Polygonal Lasso Tool. 35. With this tool you can click around the object you want to select. Slowly and carefully click around the subject to select it, press backspace to delete a point. You must have the Photo layer selected while doing this. 36. Once you’ve completed your selection and arrived at the beginning of your line, double click and you should see ‘marching ants’
  • 19.
    depicting what you’veselected. 37. Now go to Select > Inverse, you want to inverse your selection as you want to remove everything except you’ve selected. 38. Once you’ve inversed your selection press back space and the background should
  • 20.
    disappear. 39. If thereare sections in the middle of your photo i.e. between arm and body just select those separately and press backspace to delete. To deselect go to Select > Deselect 40. Now you have your background and photo placed you can now choose your text. Select
  • 21.
    the Text toolin the Tool column. 41. Click anywhere on the canvas and begin typing.
  • 22.
    42. When youhave text you want just highlight it as you would in Word and you can change font, size and colour the option bar above. 43. You can reposition the text with the move tool.
  • 23.
    44. You canalso use Free Transform tool to Scale it and rotate it. To rotate an object turn Free Transform on (Edit > Free Transform) and move the cursor just out one of the corners until a curved double arrow appears. Click and drag to rotate. 45. Remember if you want to edit text, make sure the text layer is selected by clicking on it in the layer tab.
  • 24.
    46. Select theText tool and click somewhere inside the text and highlight. 47. You should now have 3 separate layers Background, Photo and Text. Click and drag a layer to place it above or below any other.
  • 25.
    48. Go File> Save, and quit Photoshop.