This document provides instructions for removing backgrounds from images using Photoshop. It explains how to:
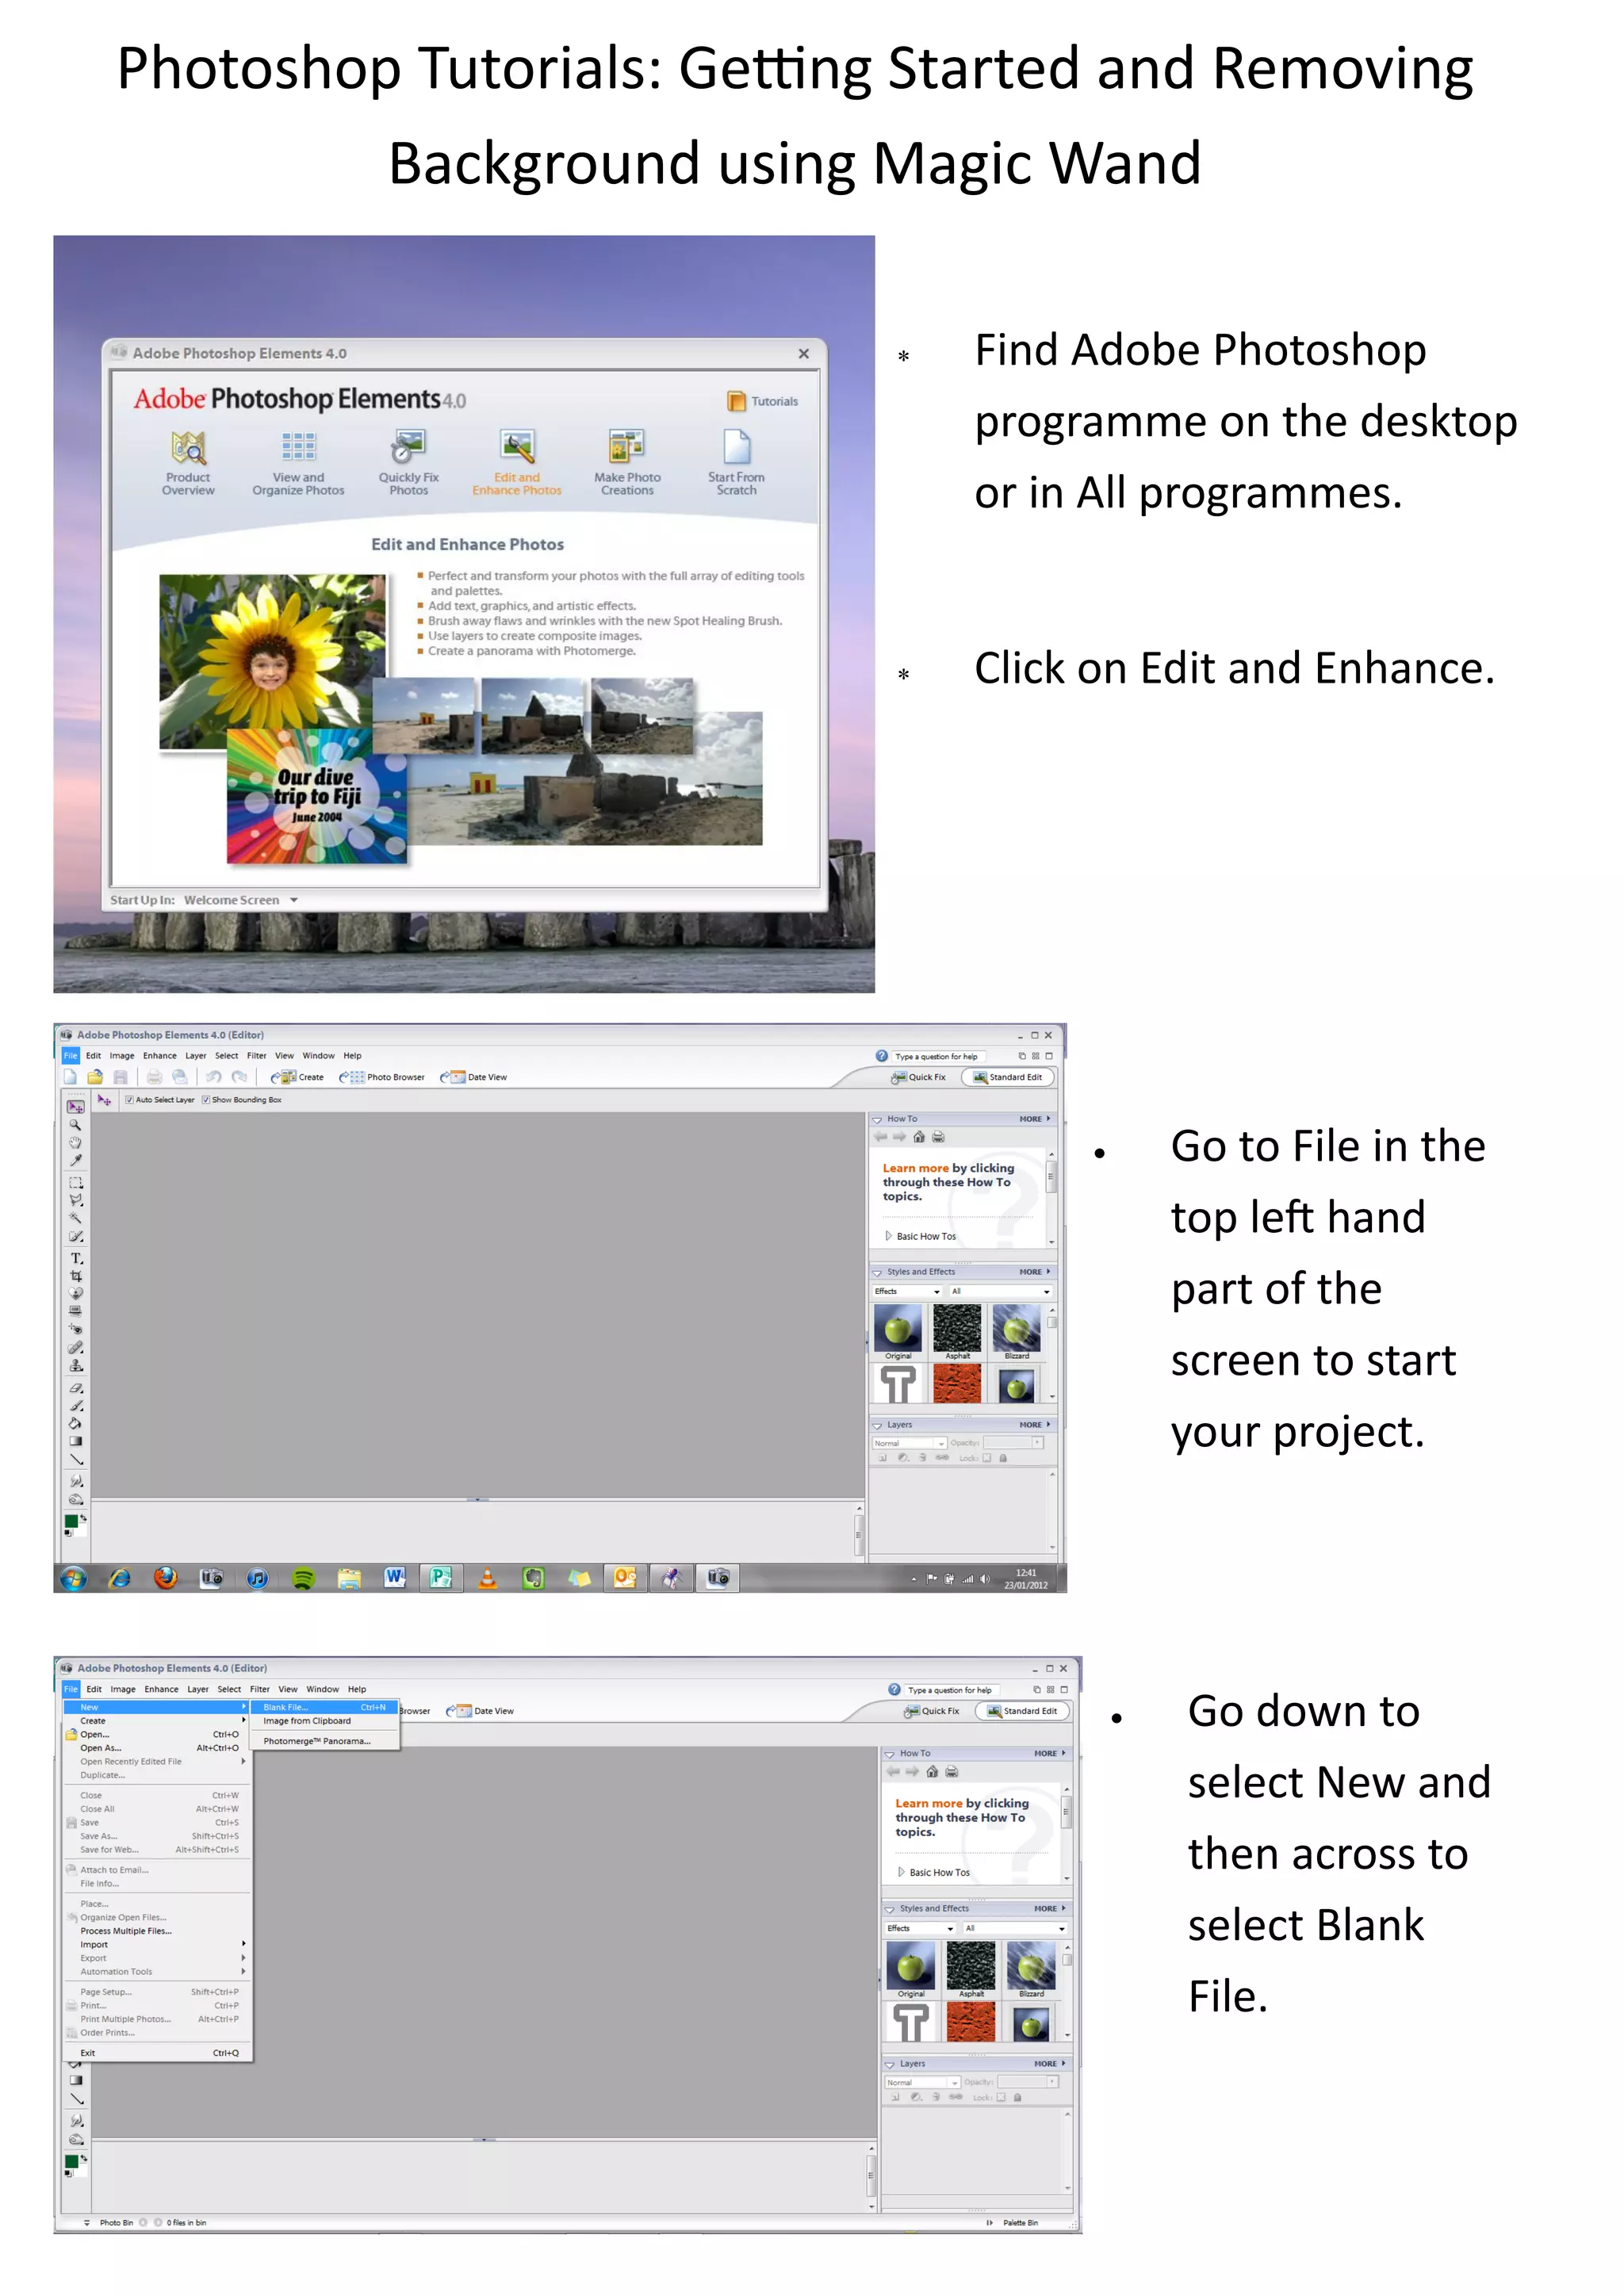
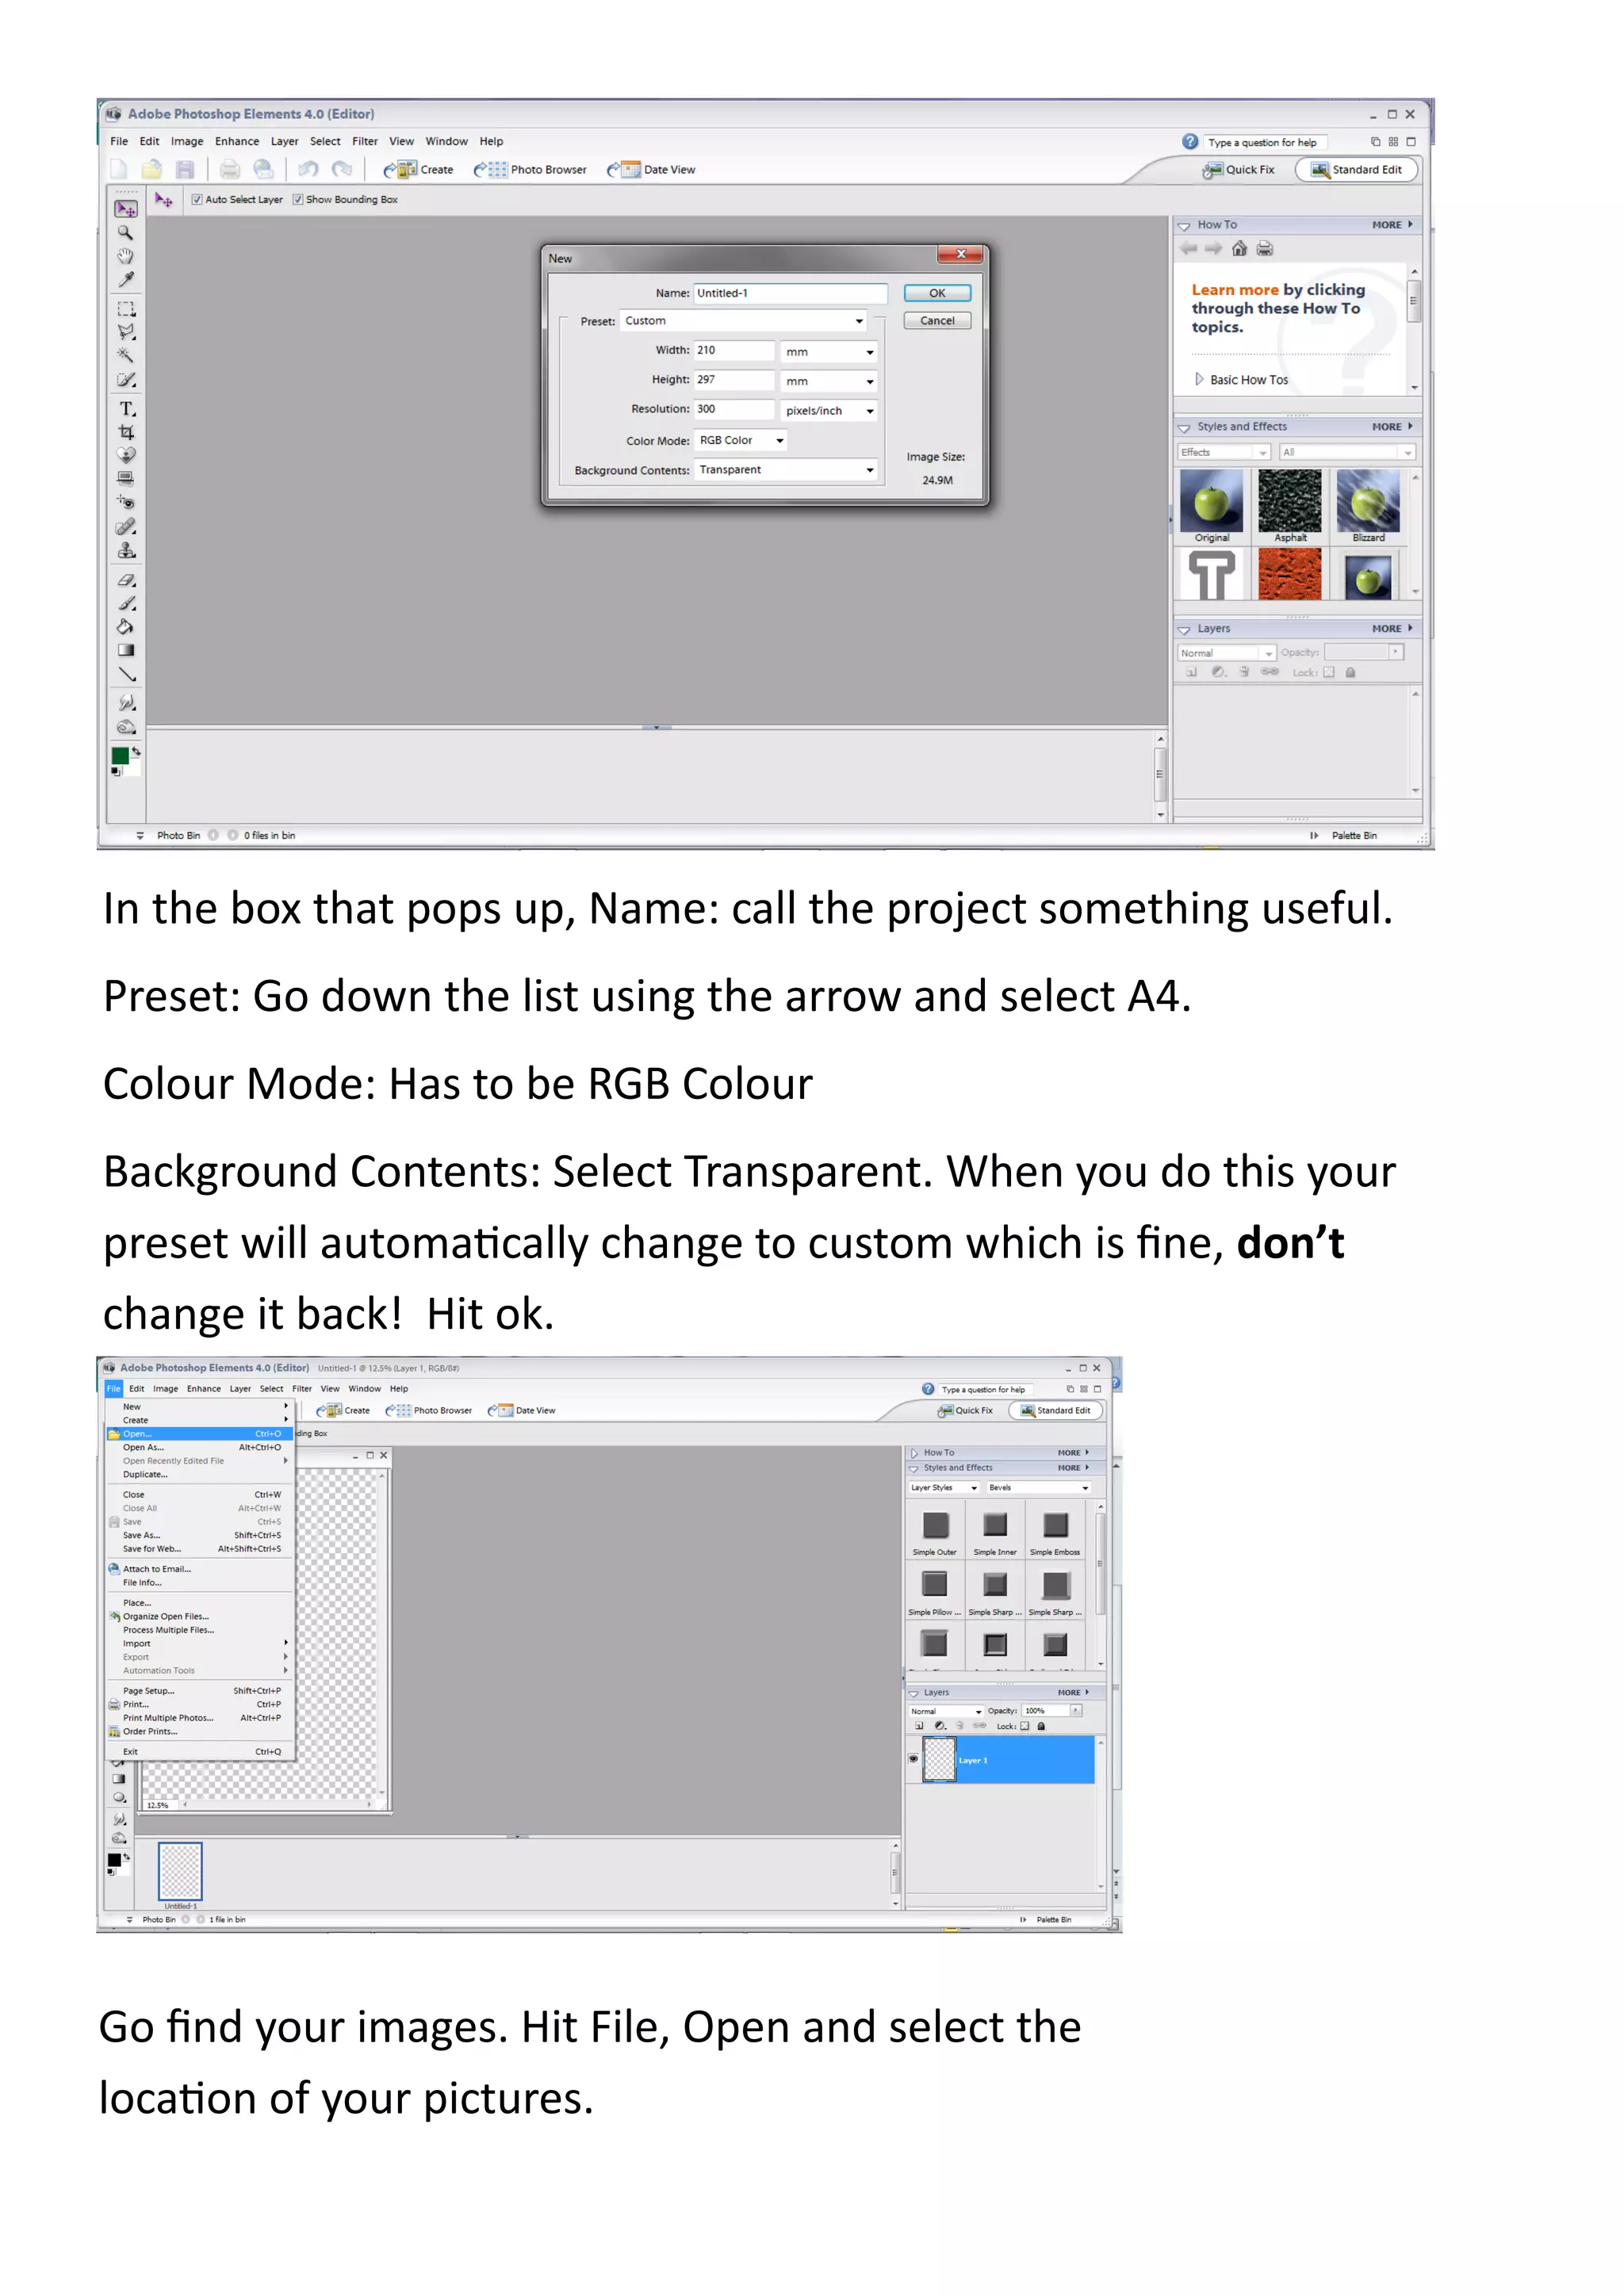
1. Create a new blank file and import images
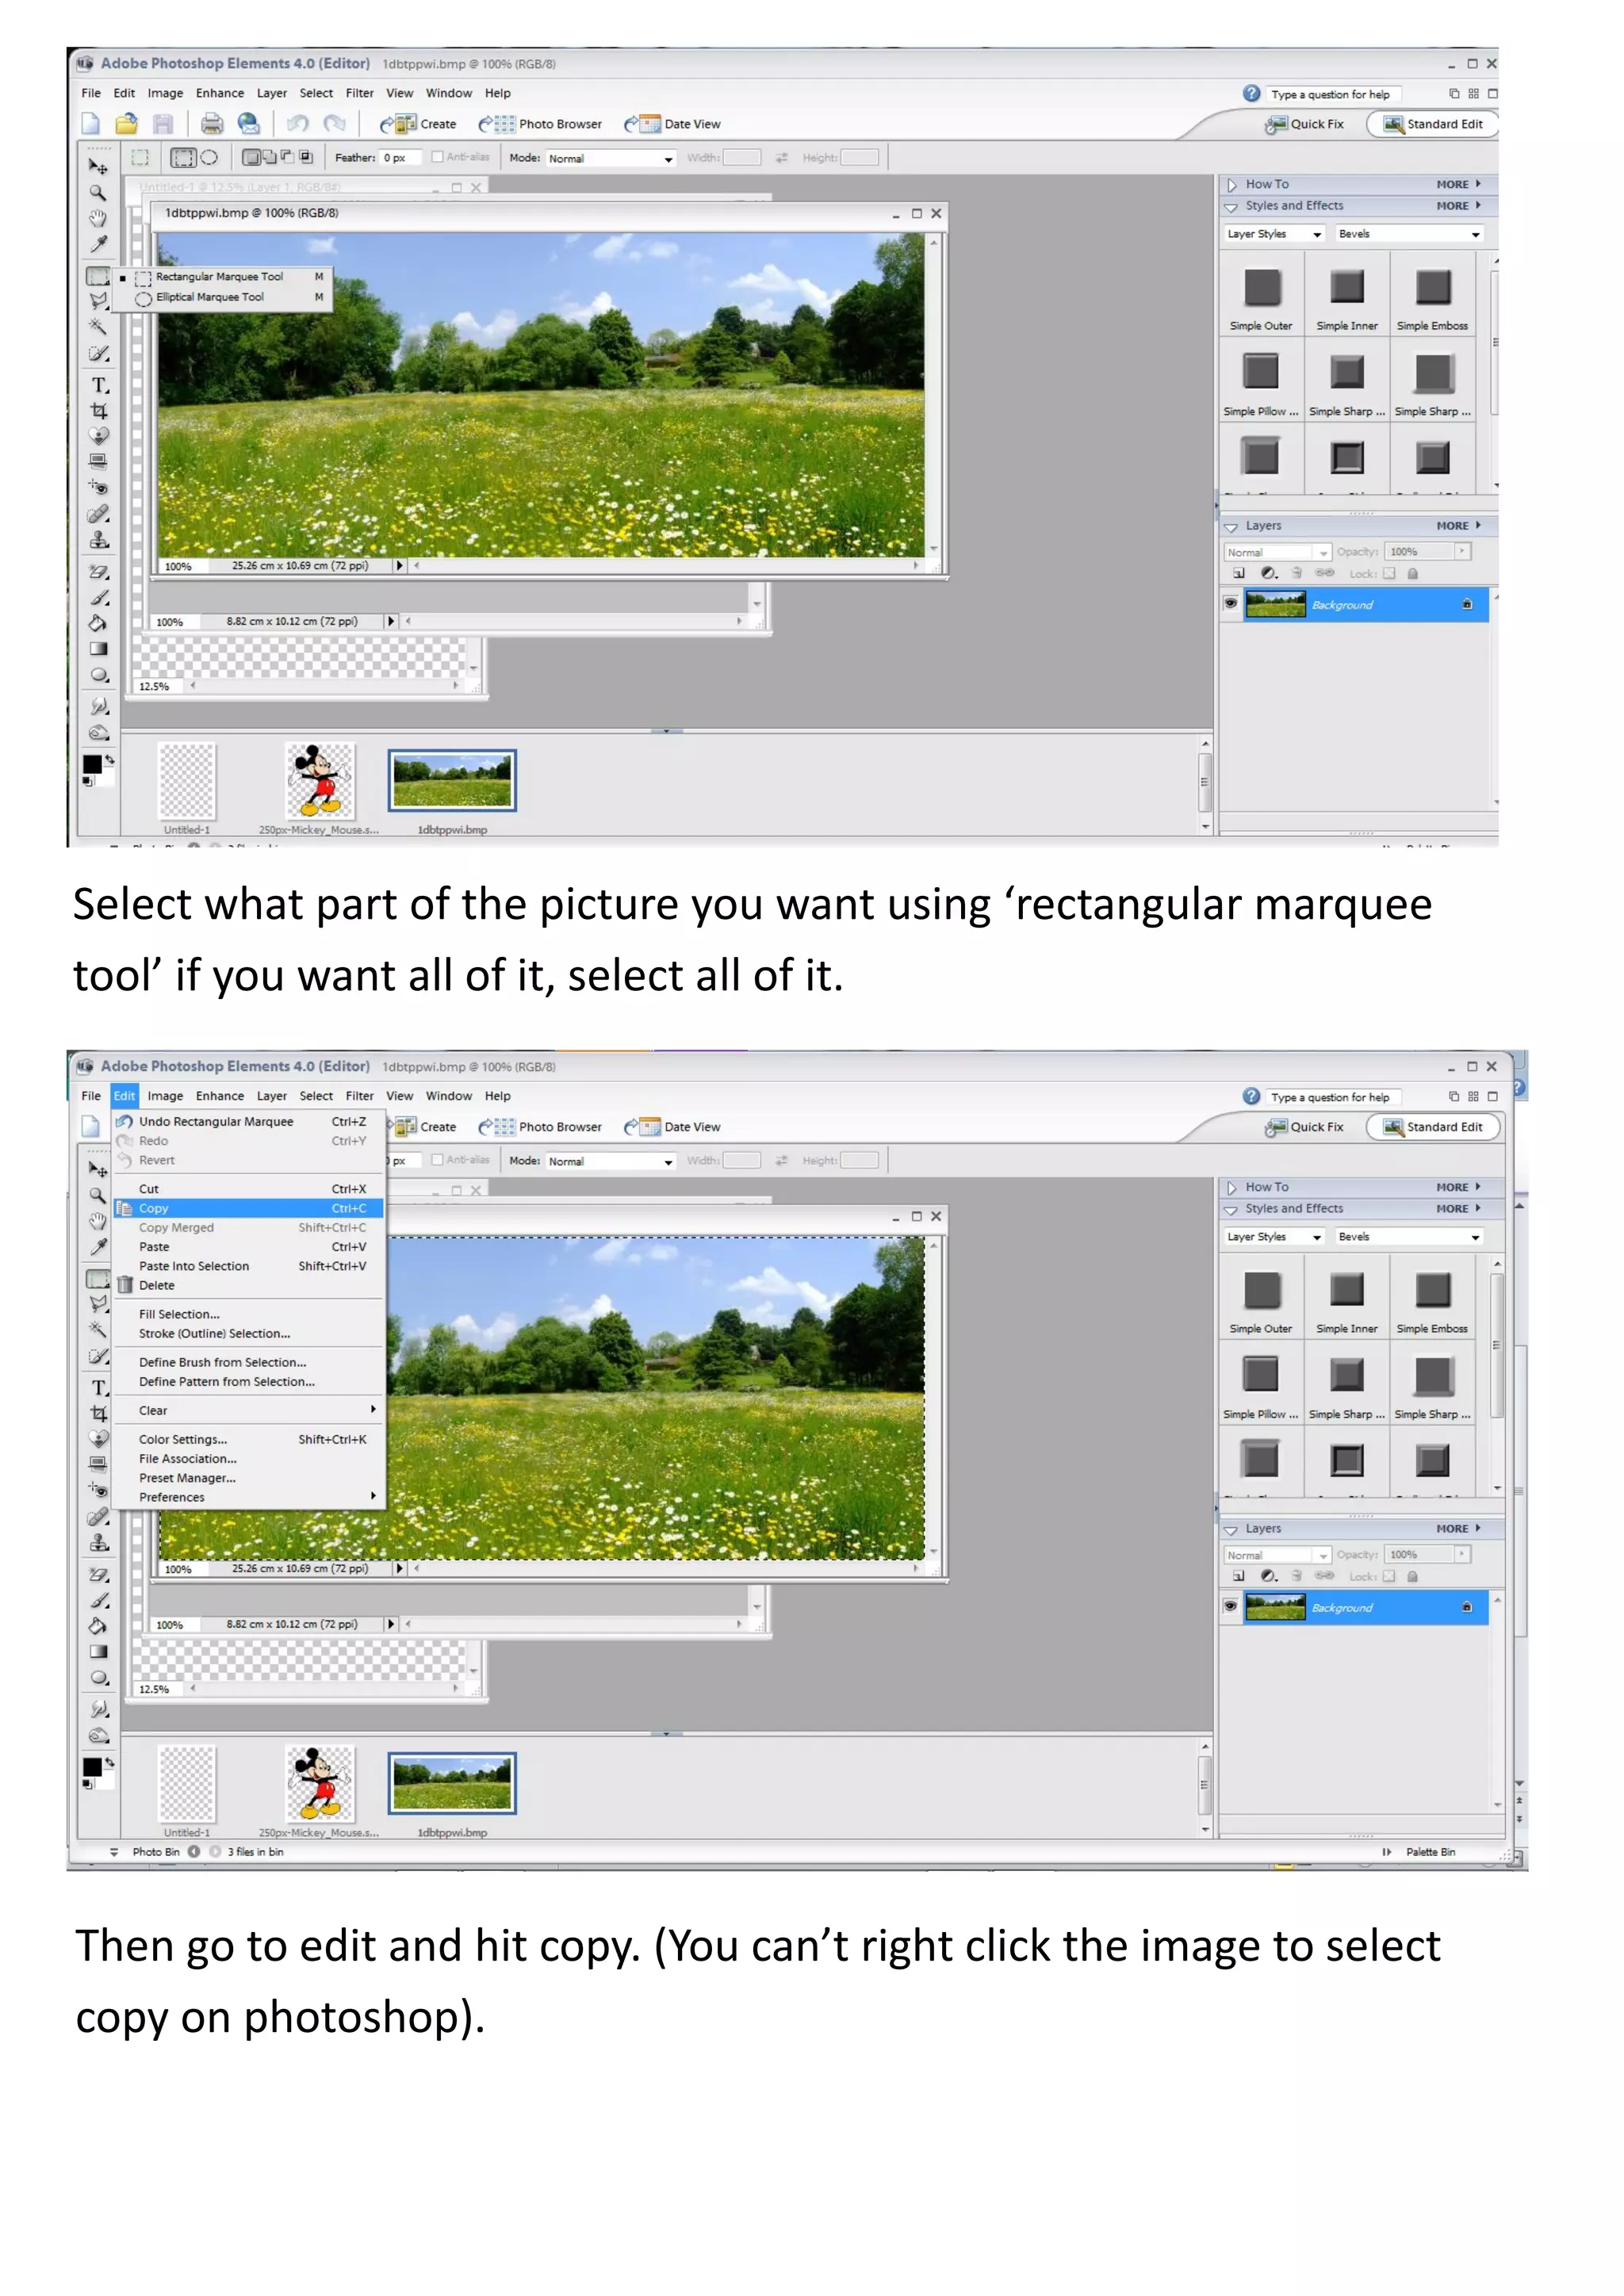
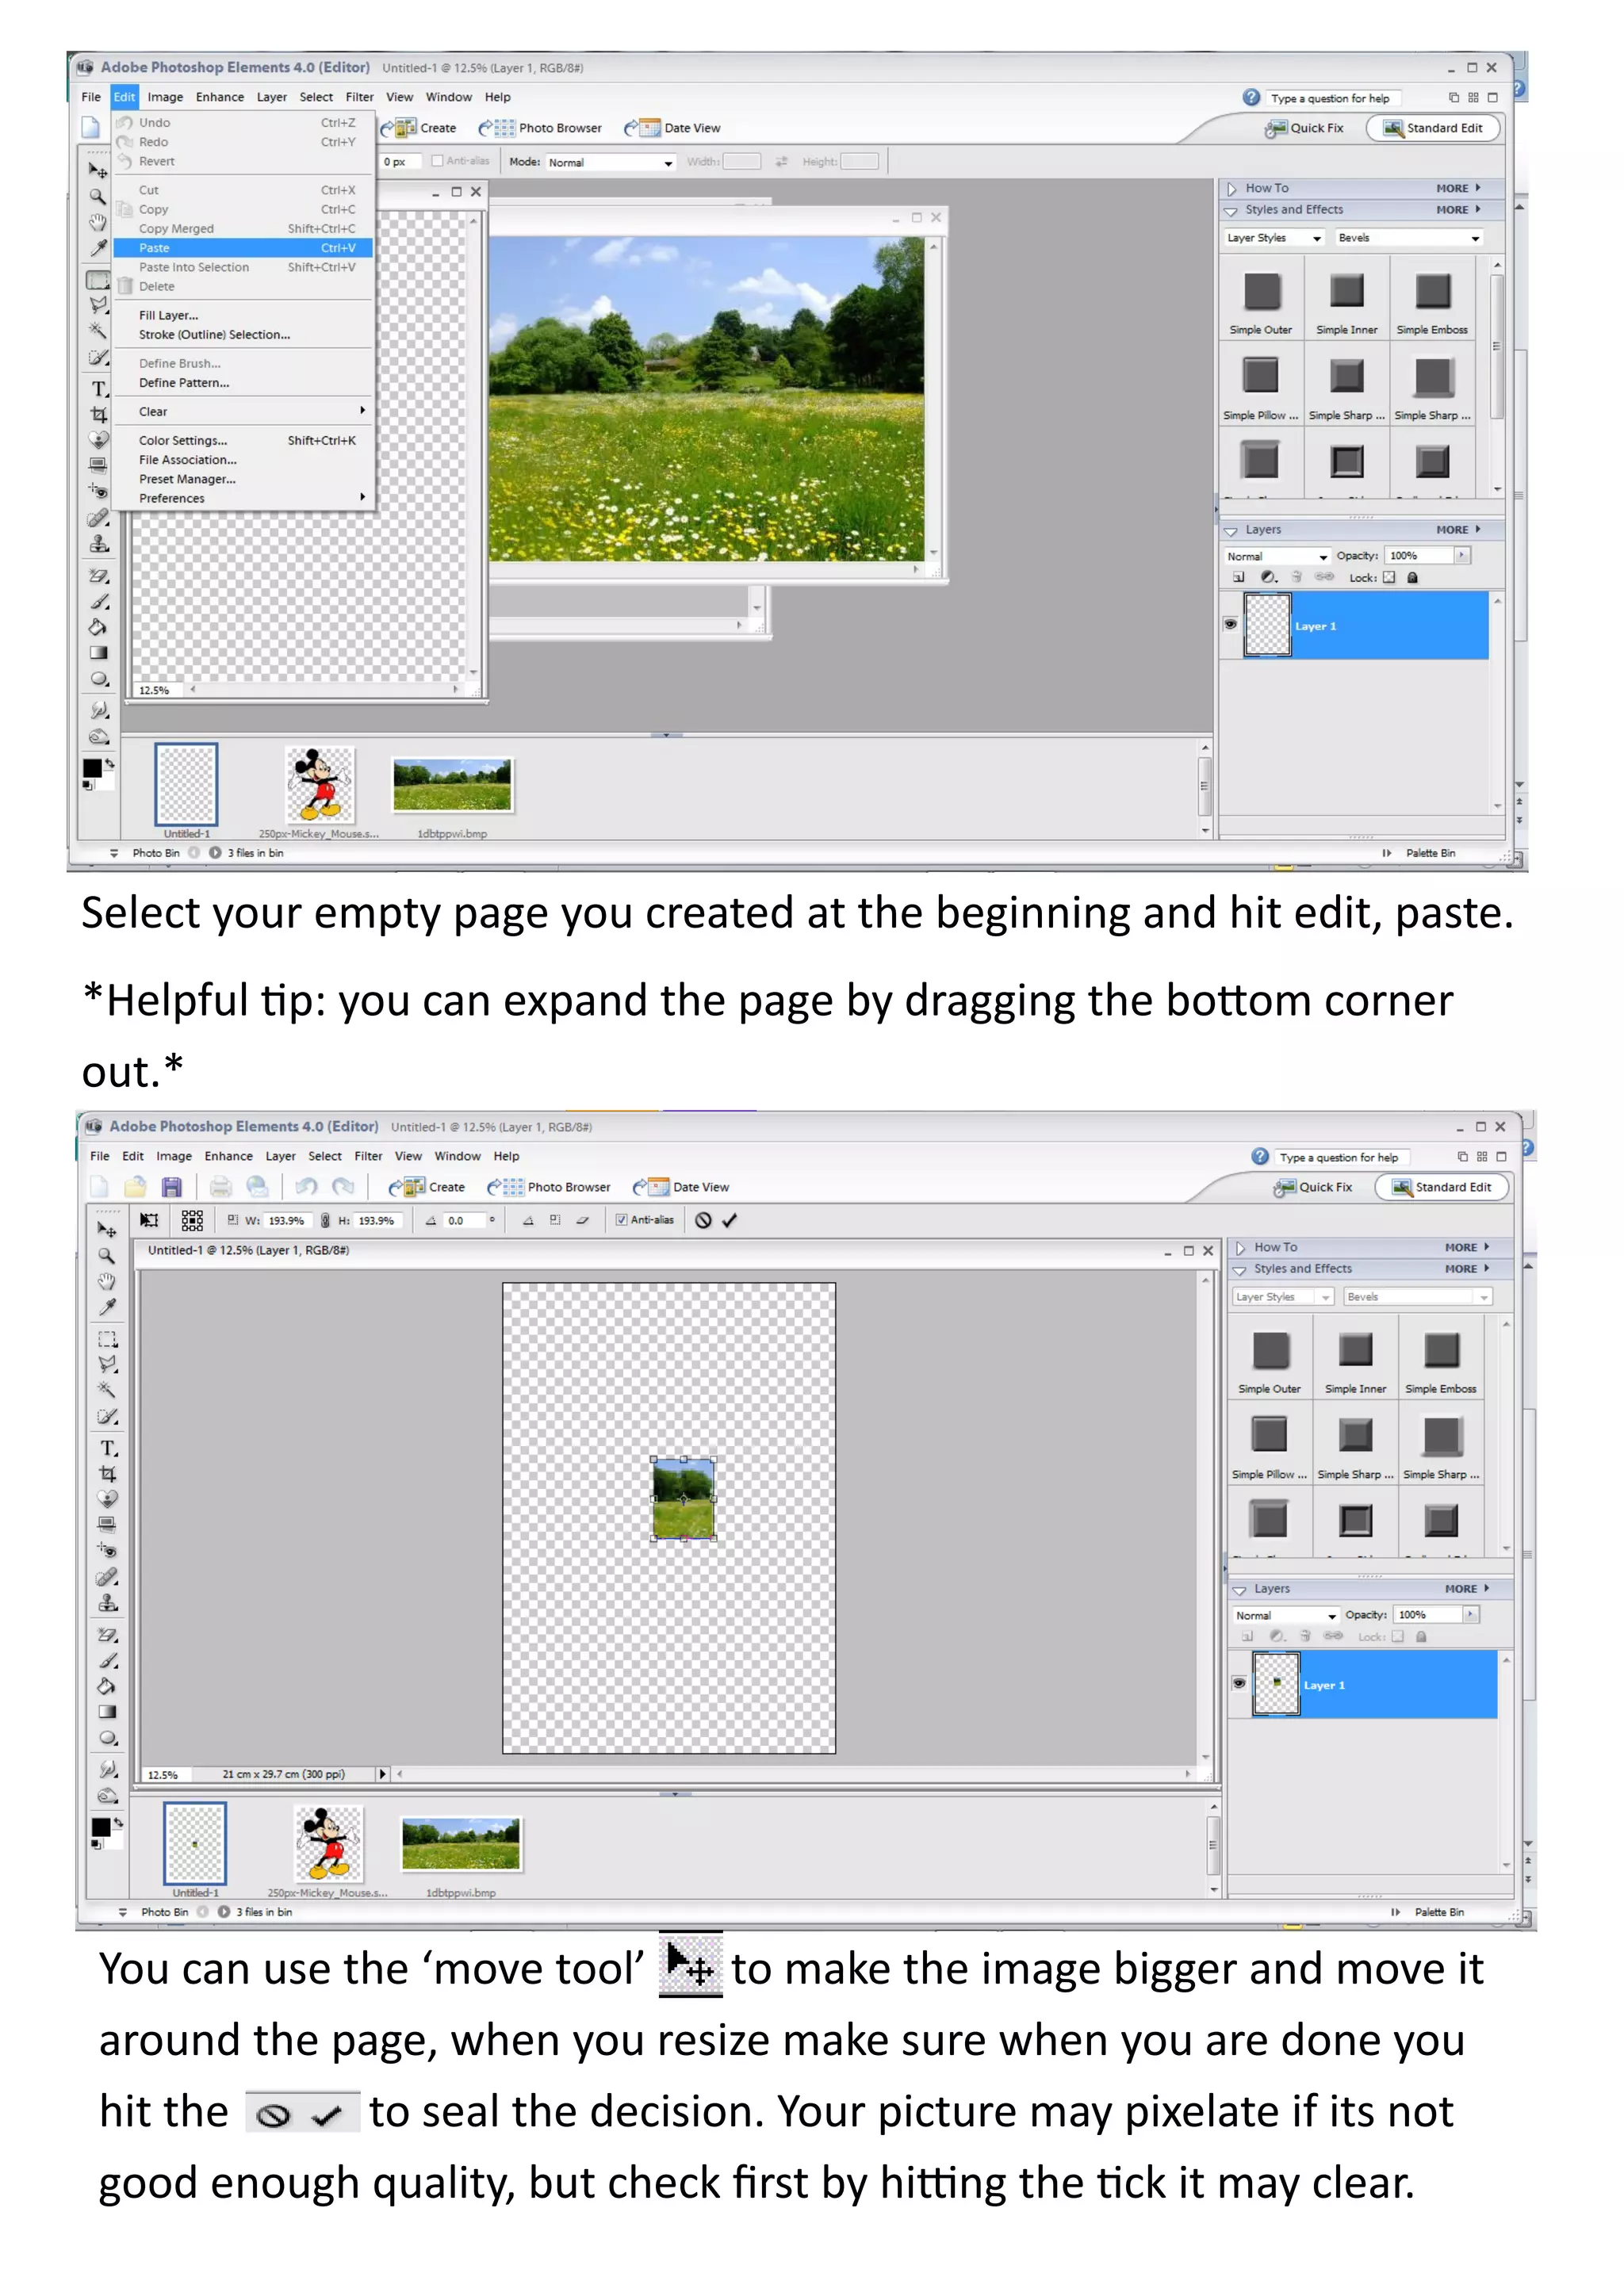
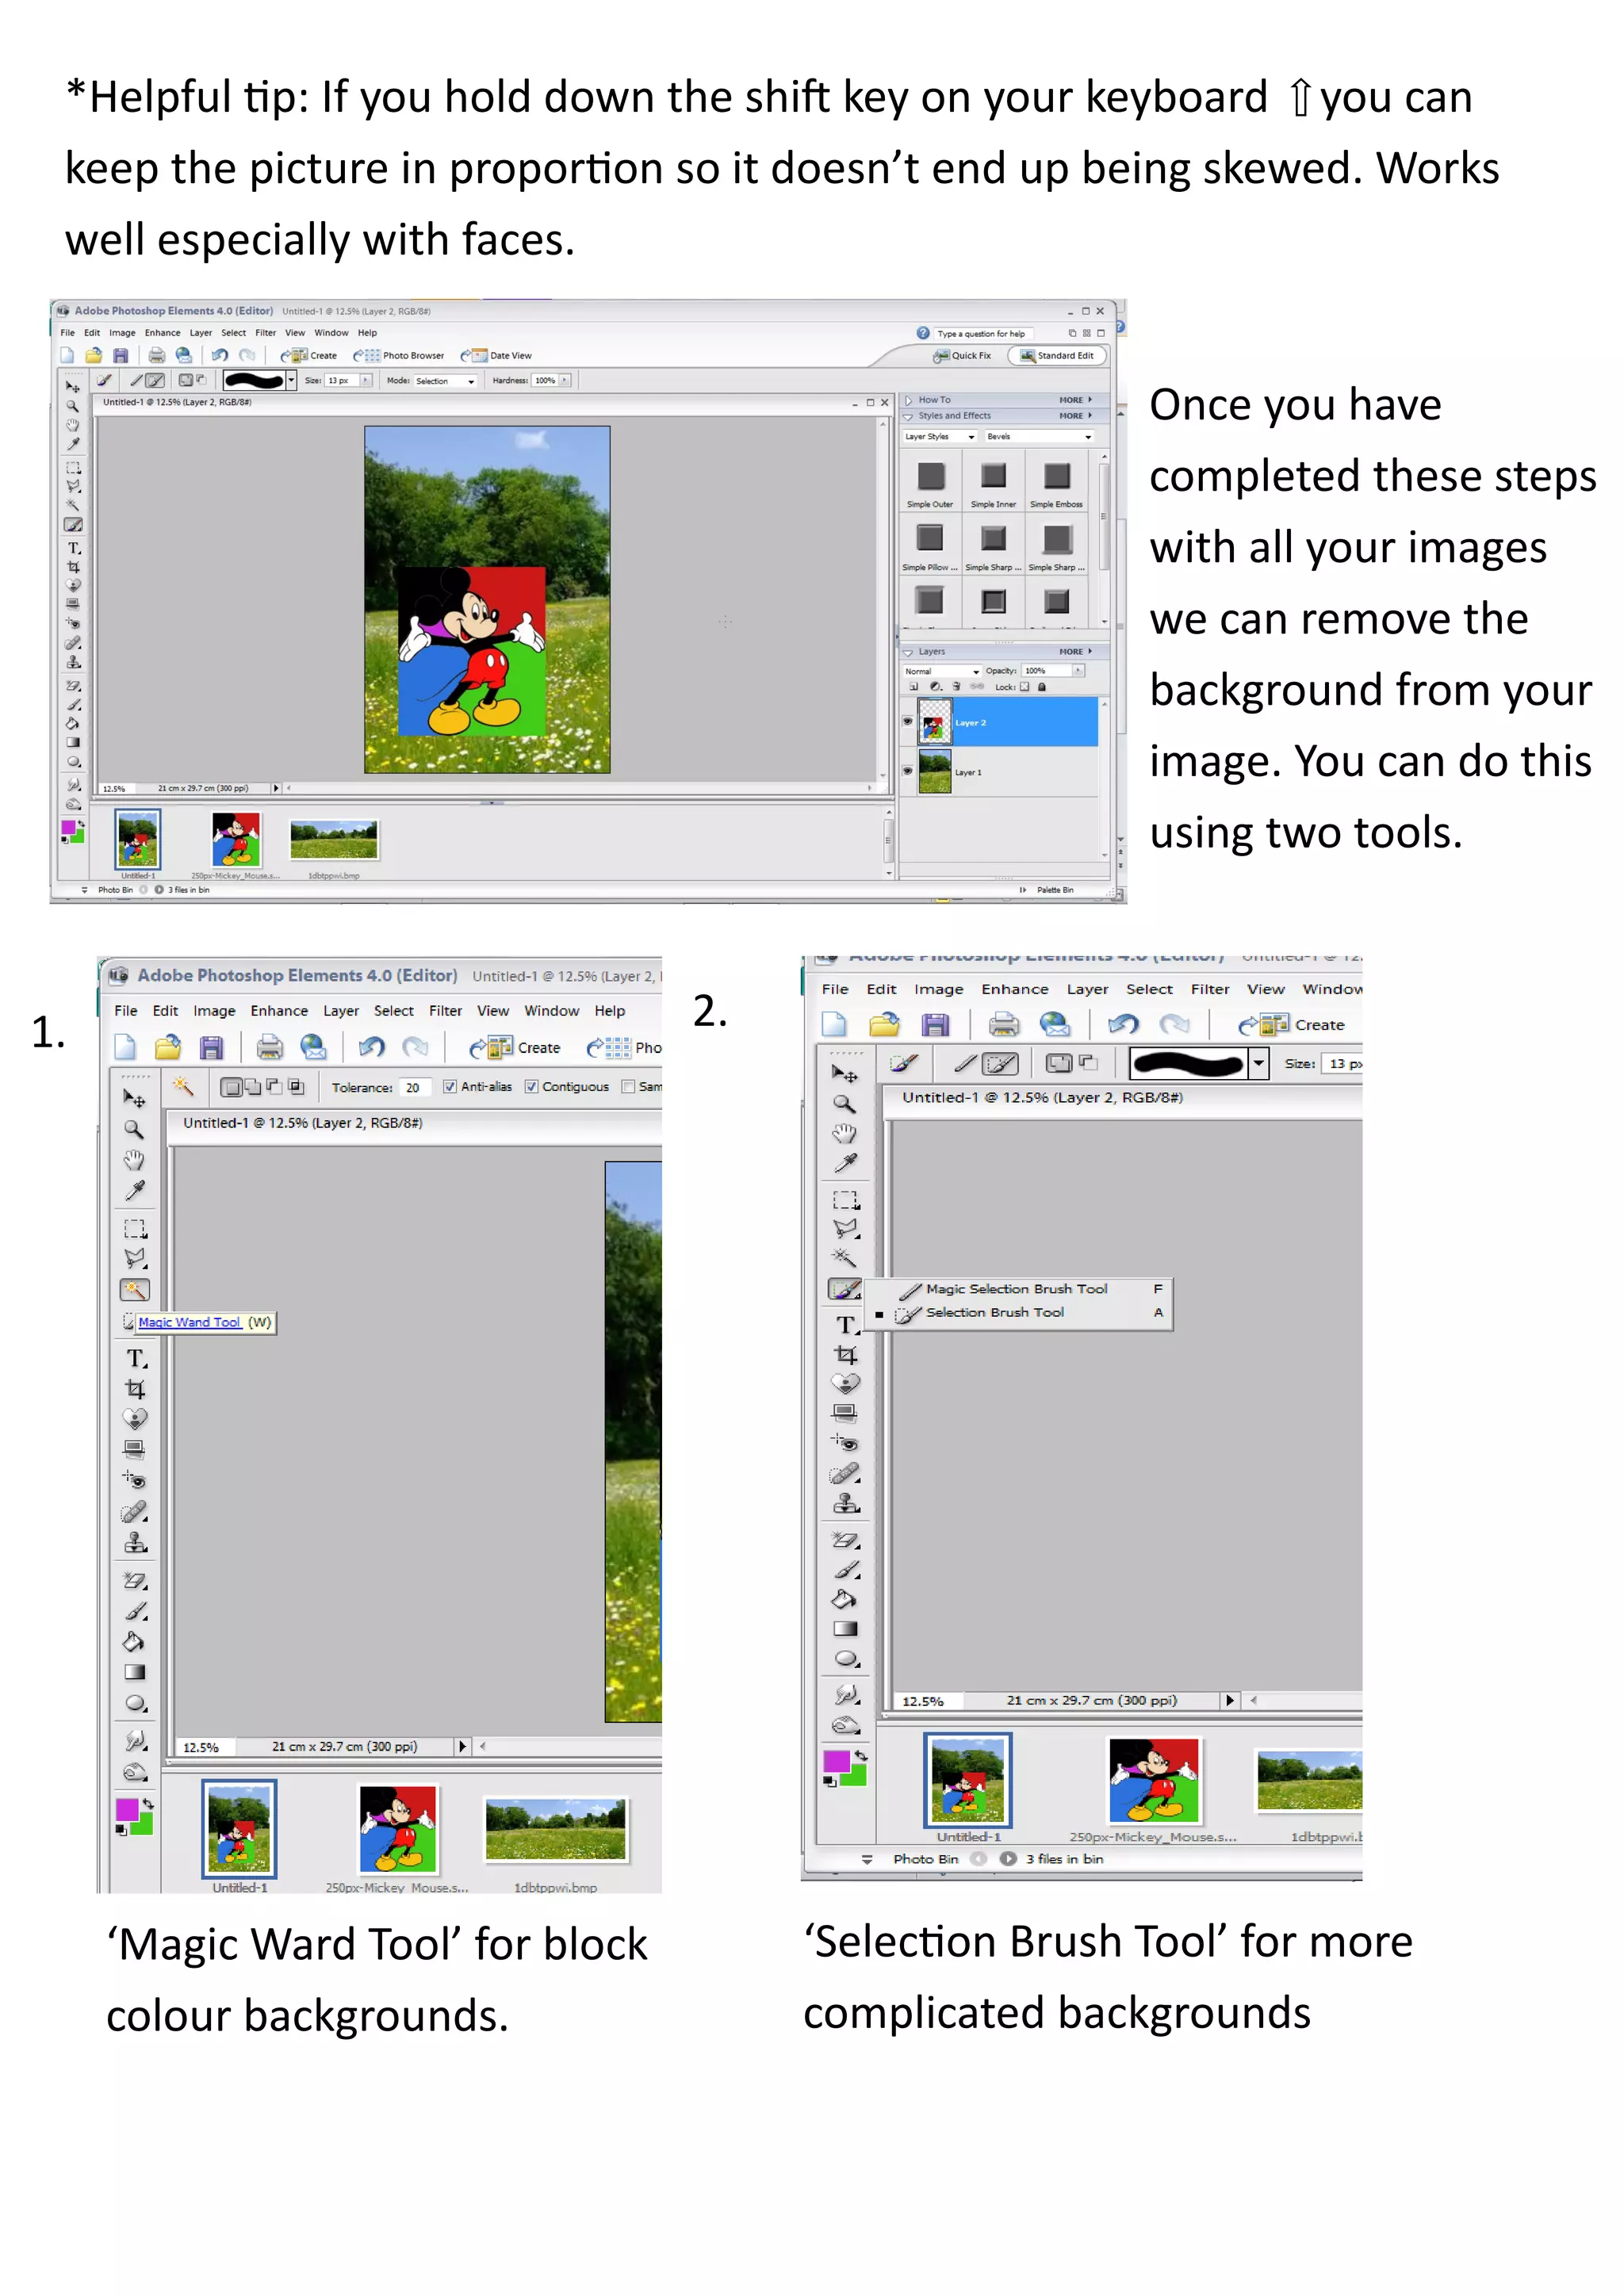
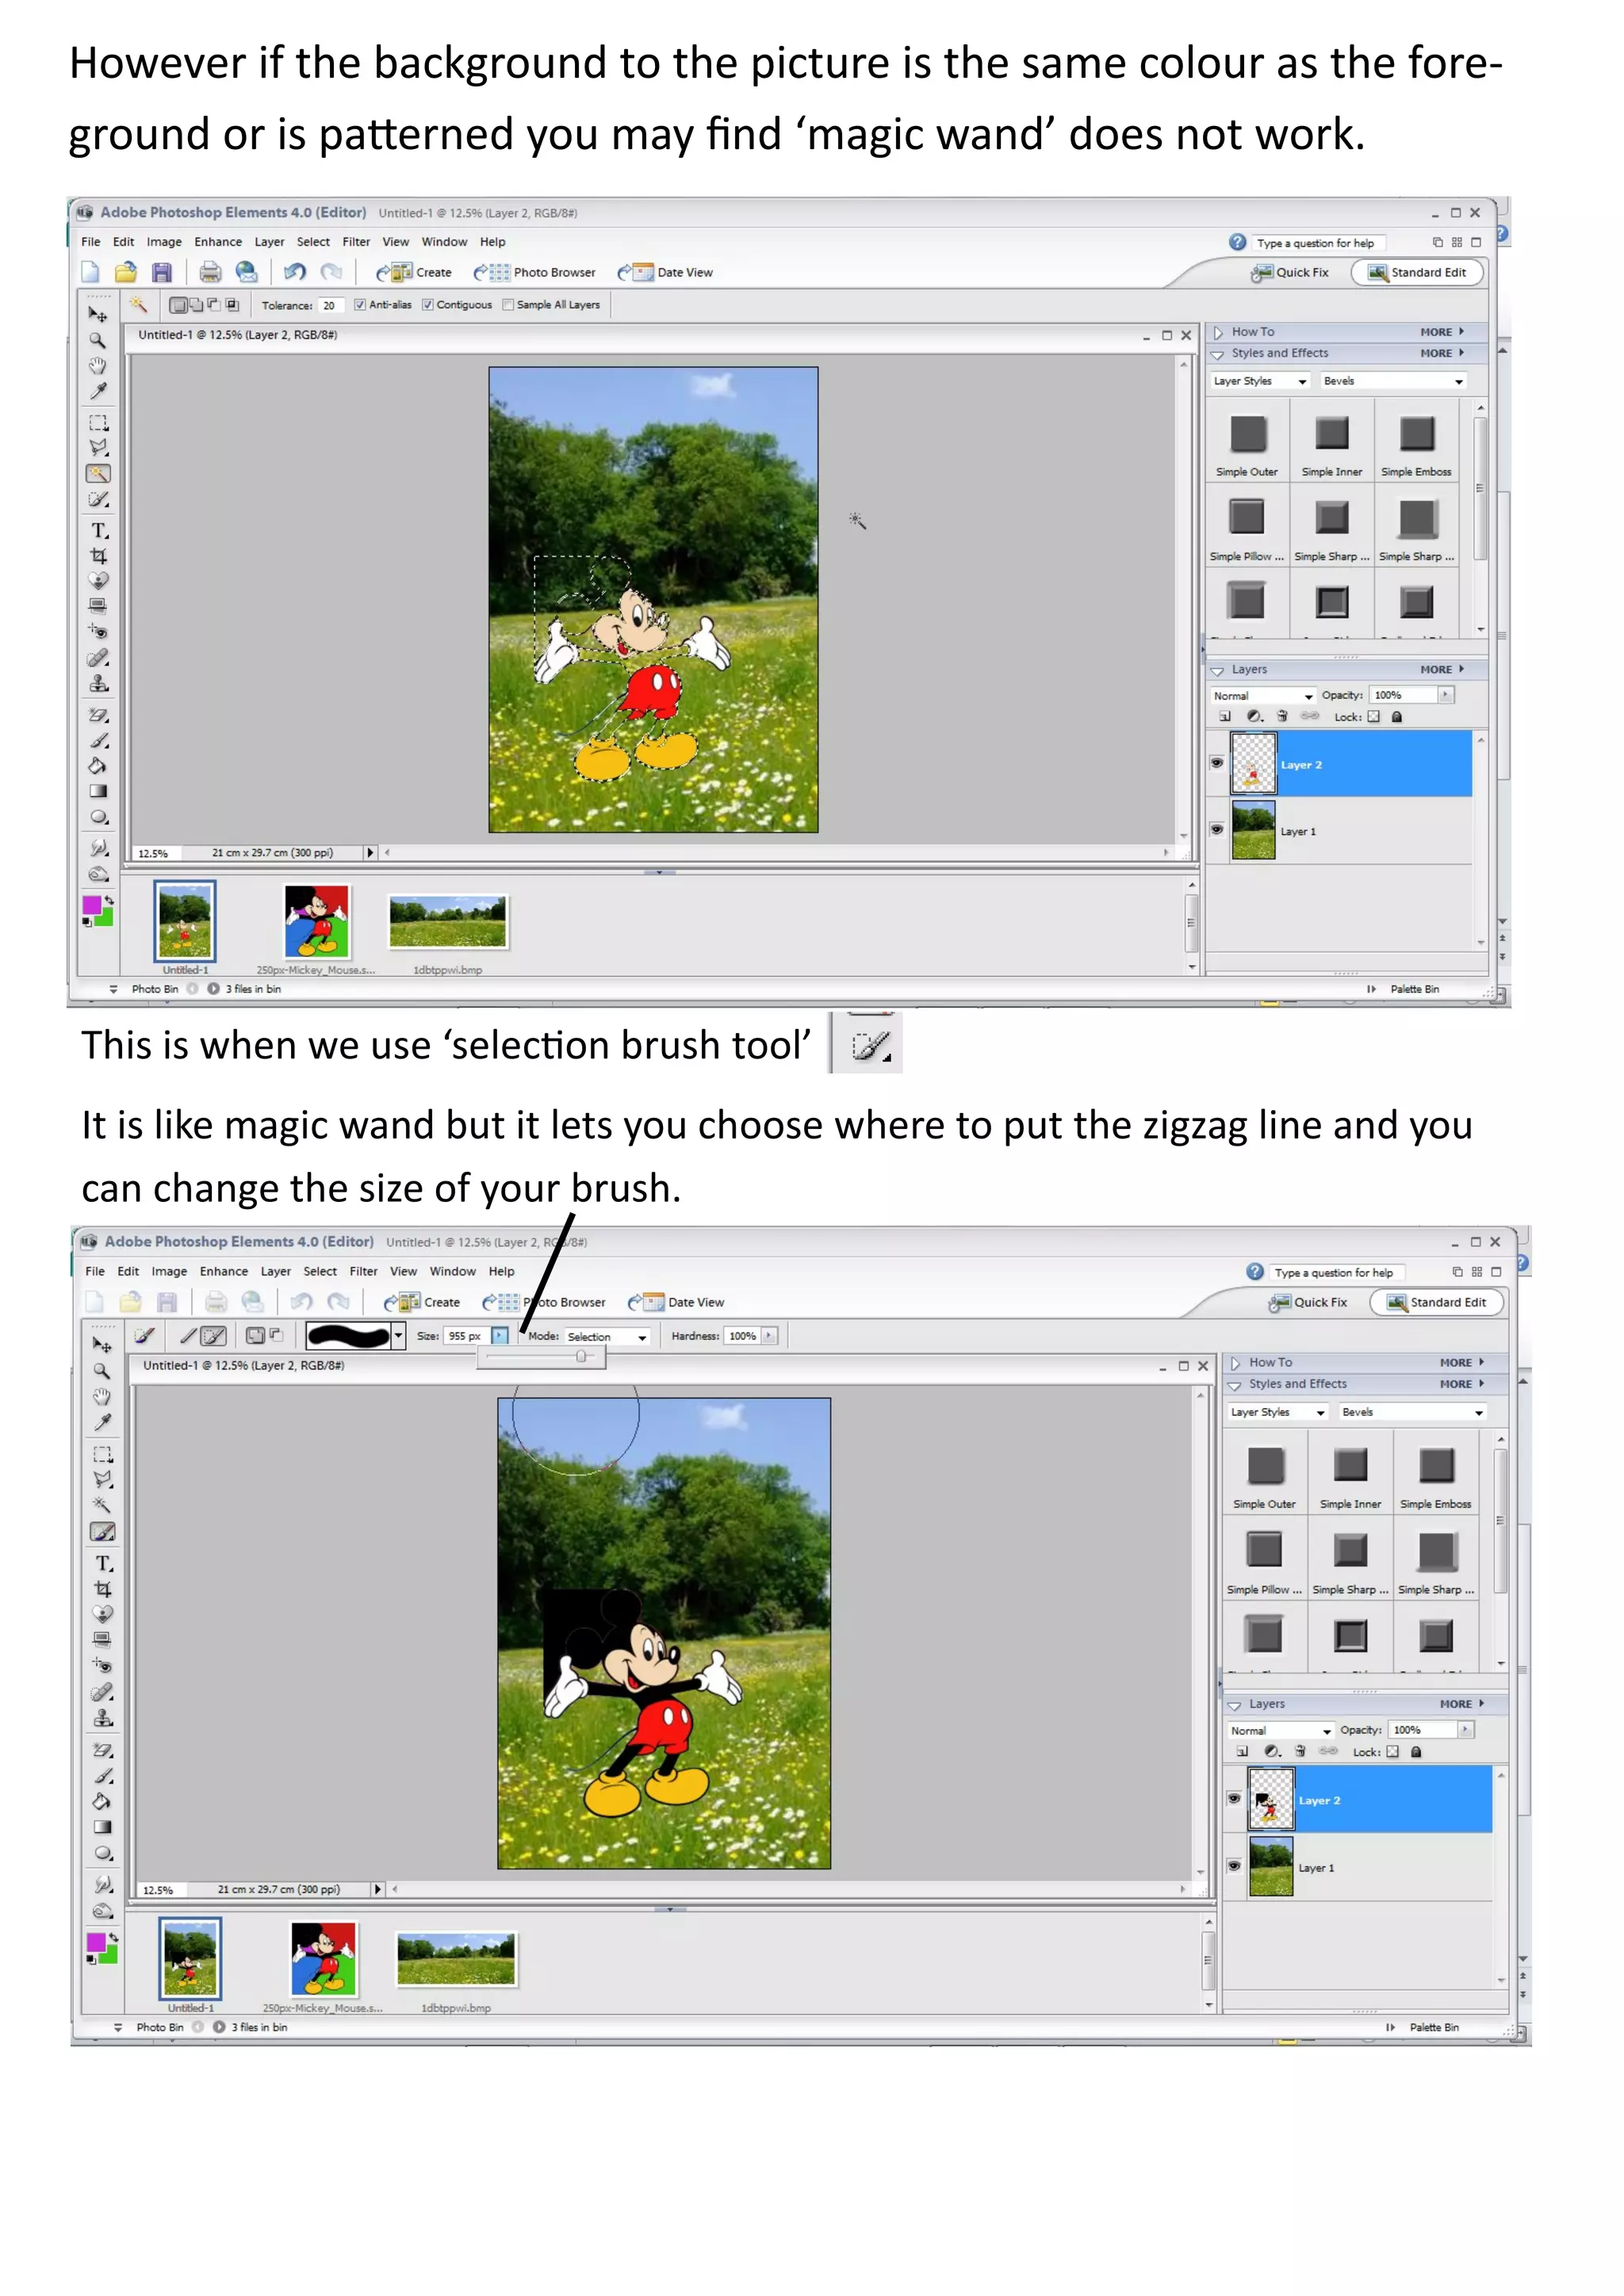
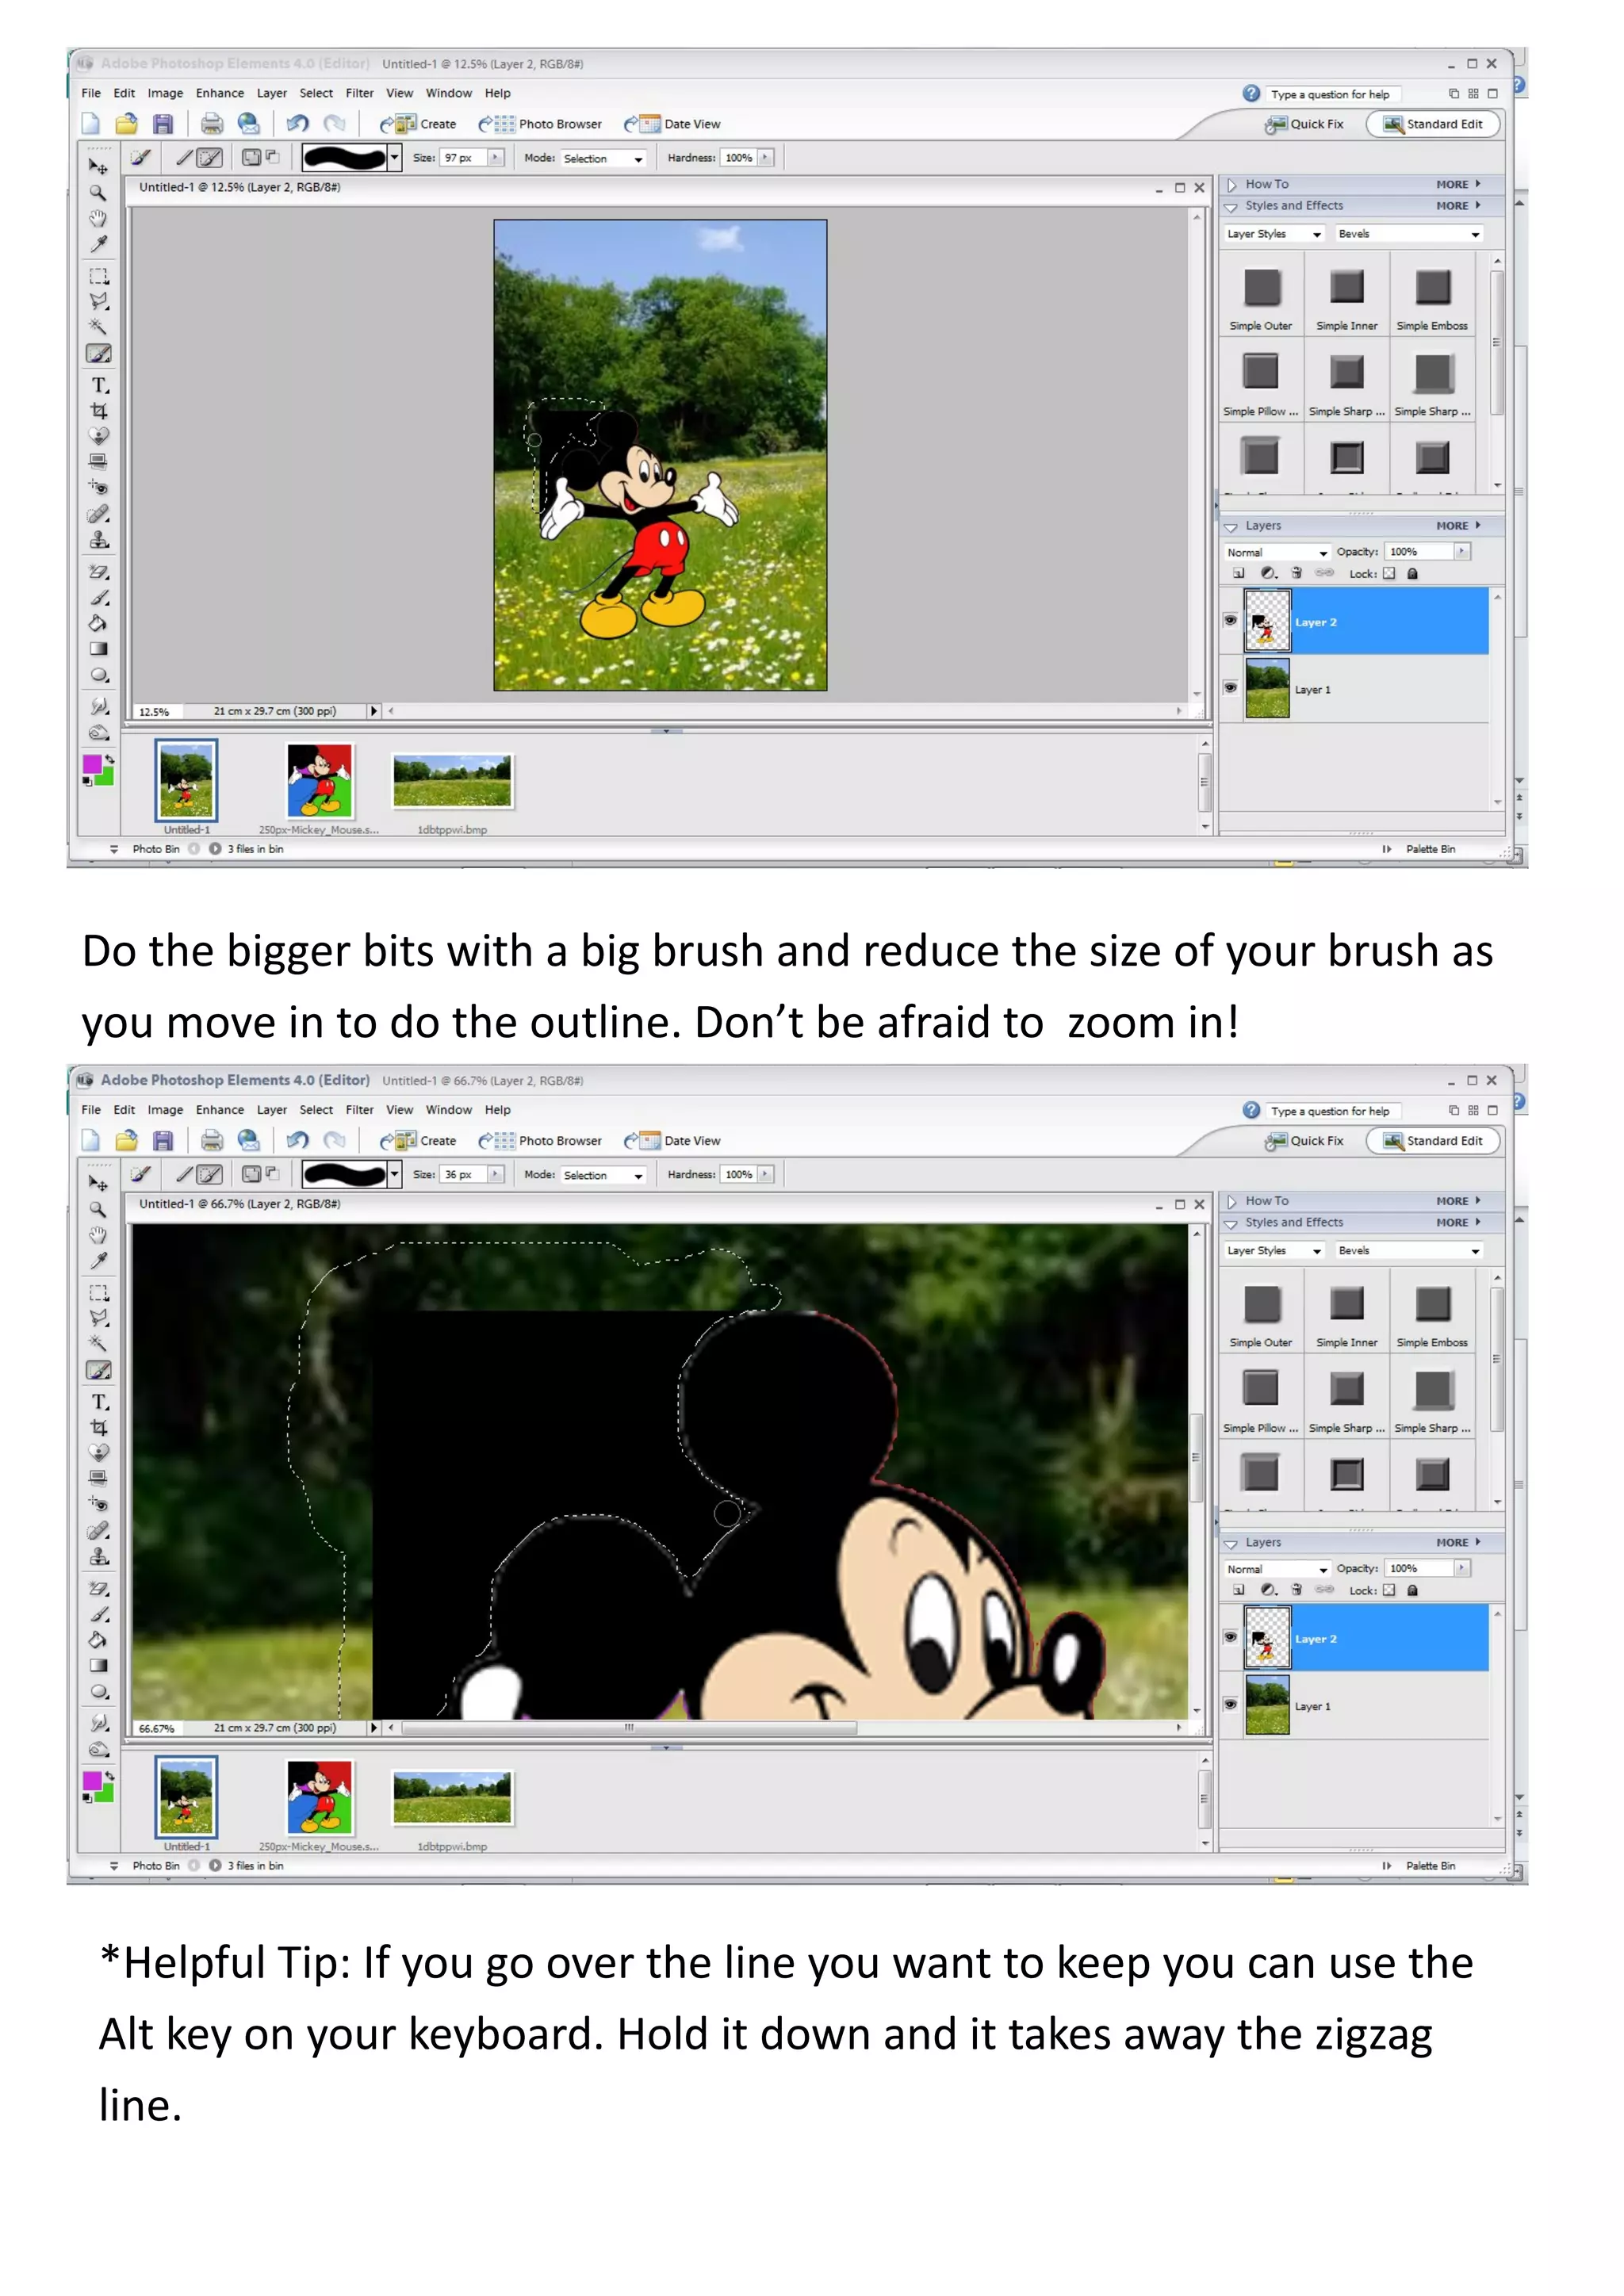
2. Select the area you want to keep using the rectangular marquee or selection brush tool
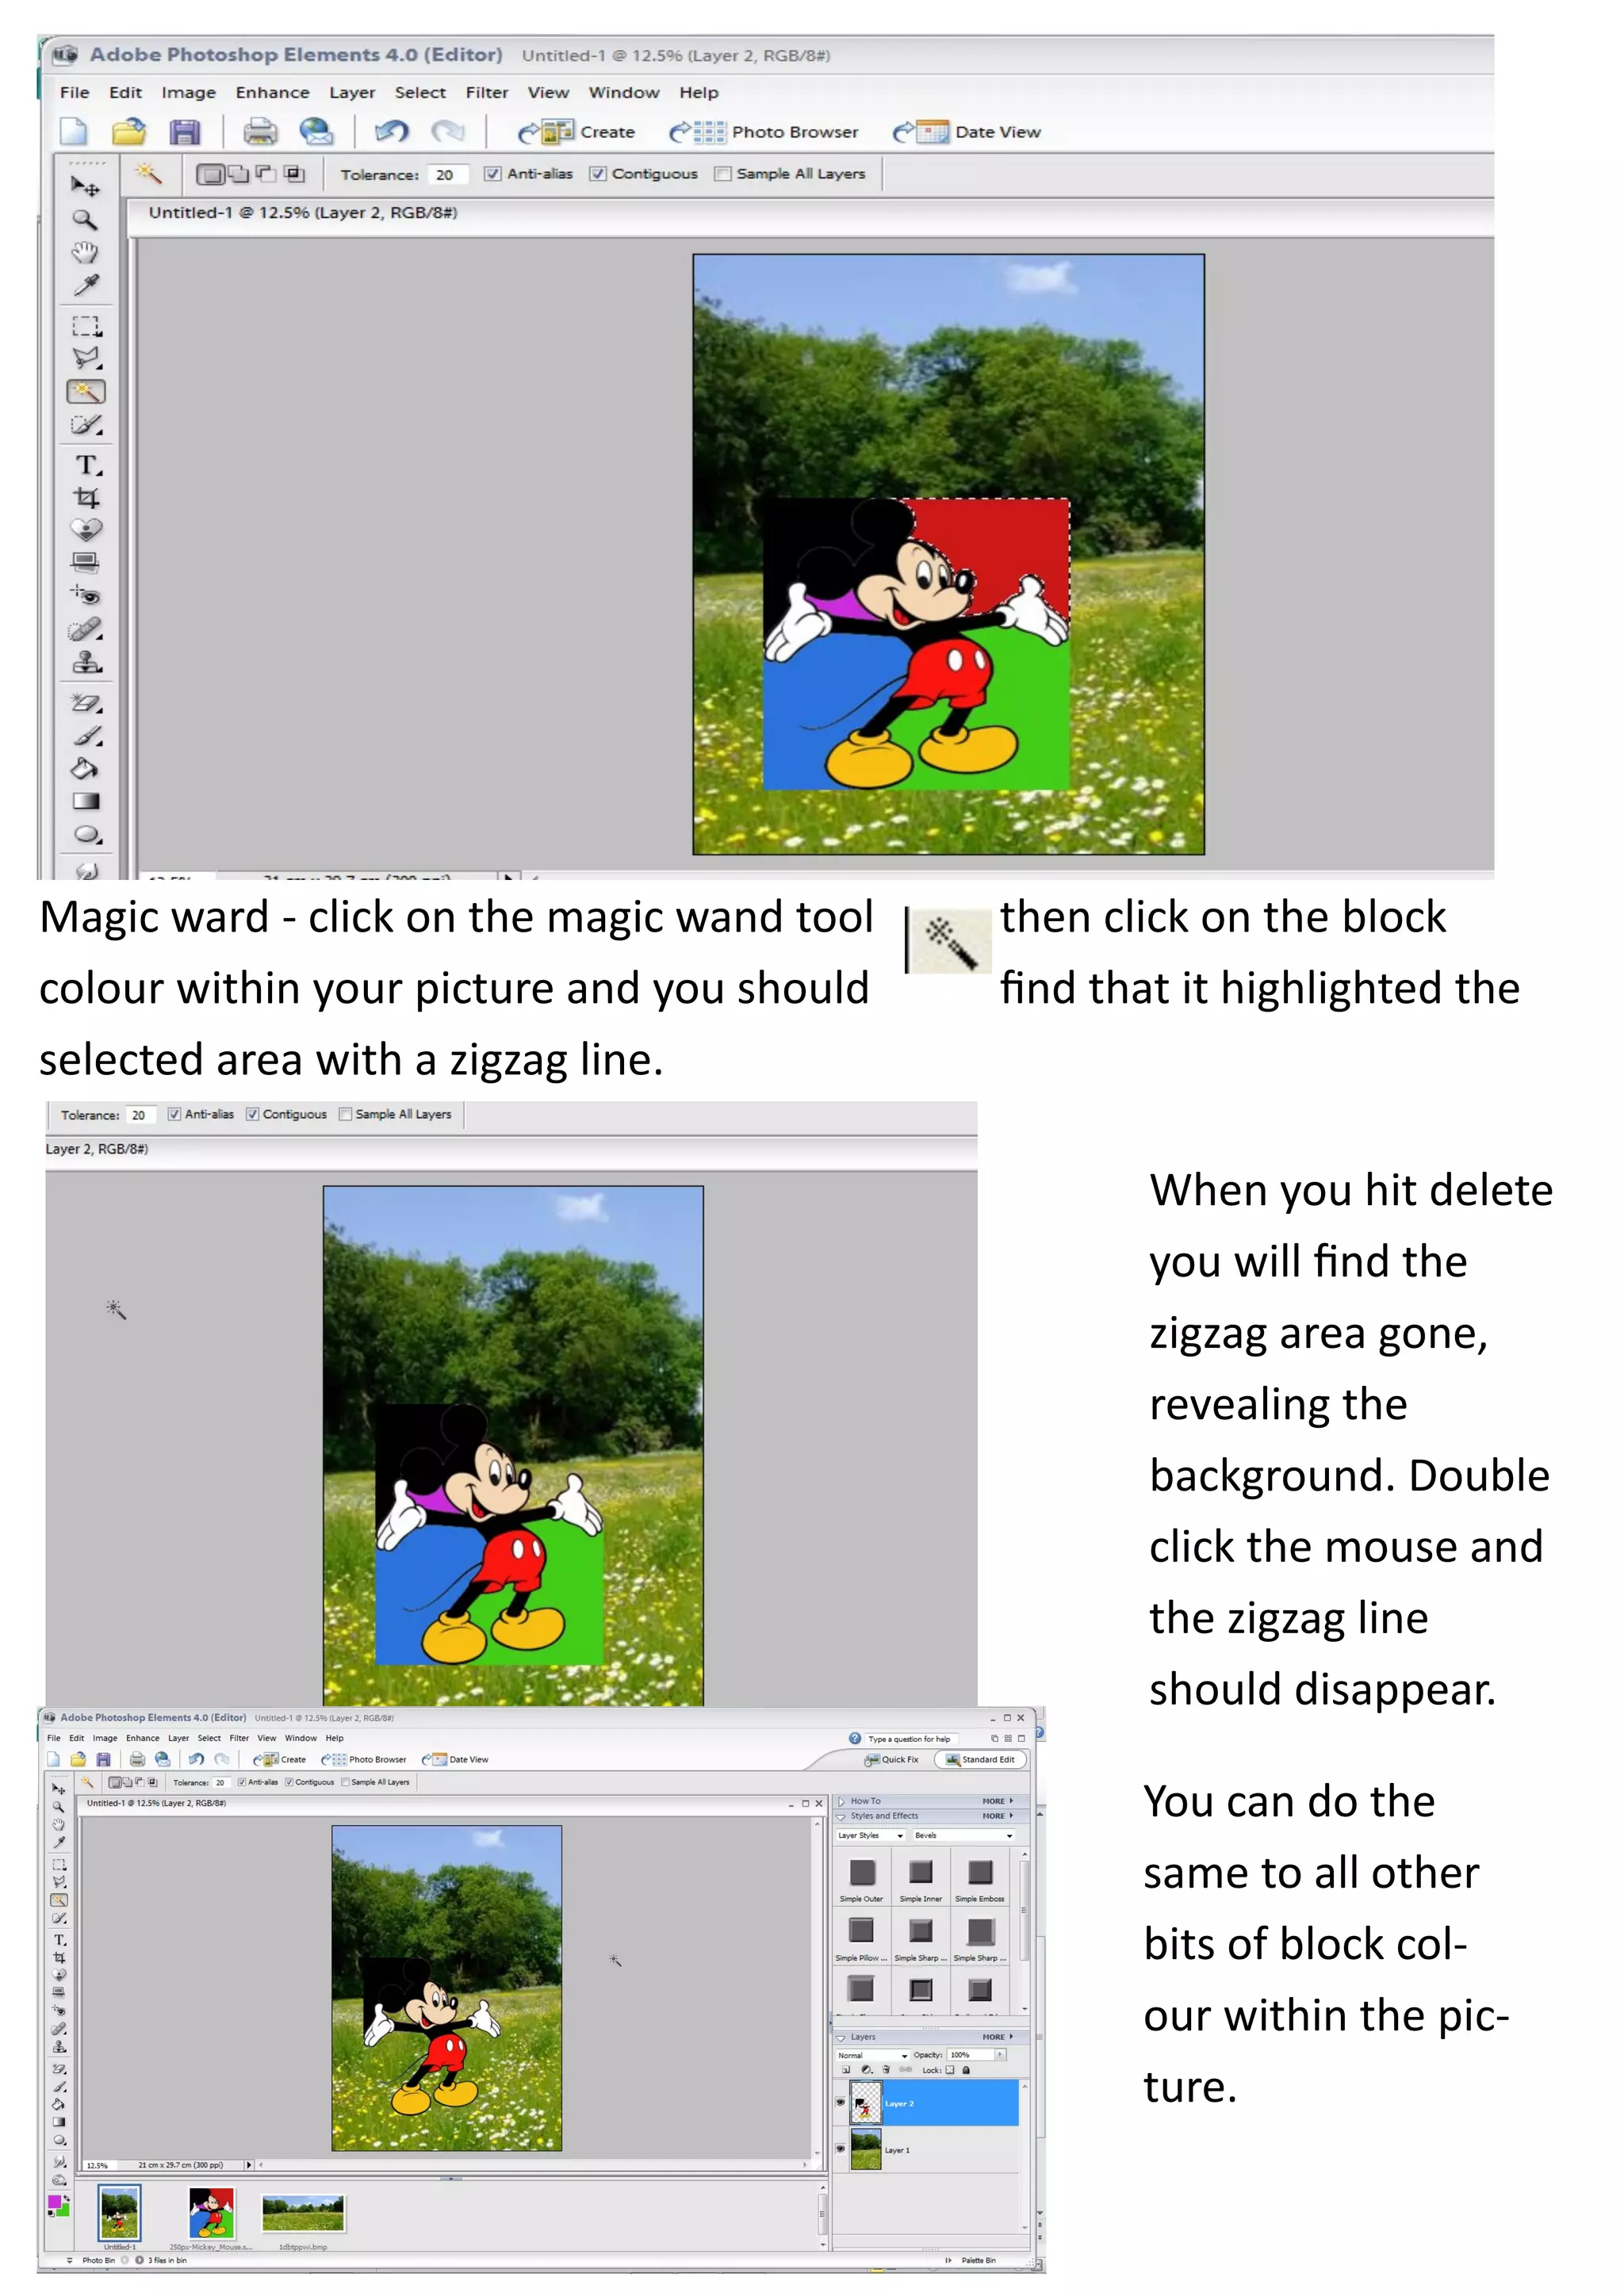
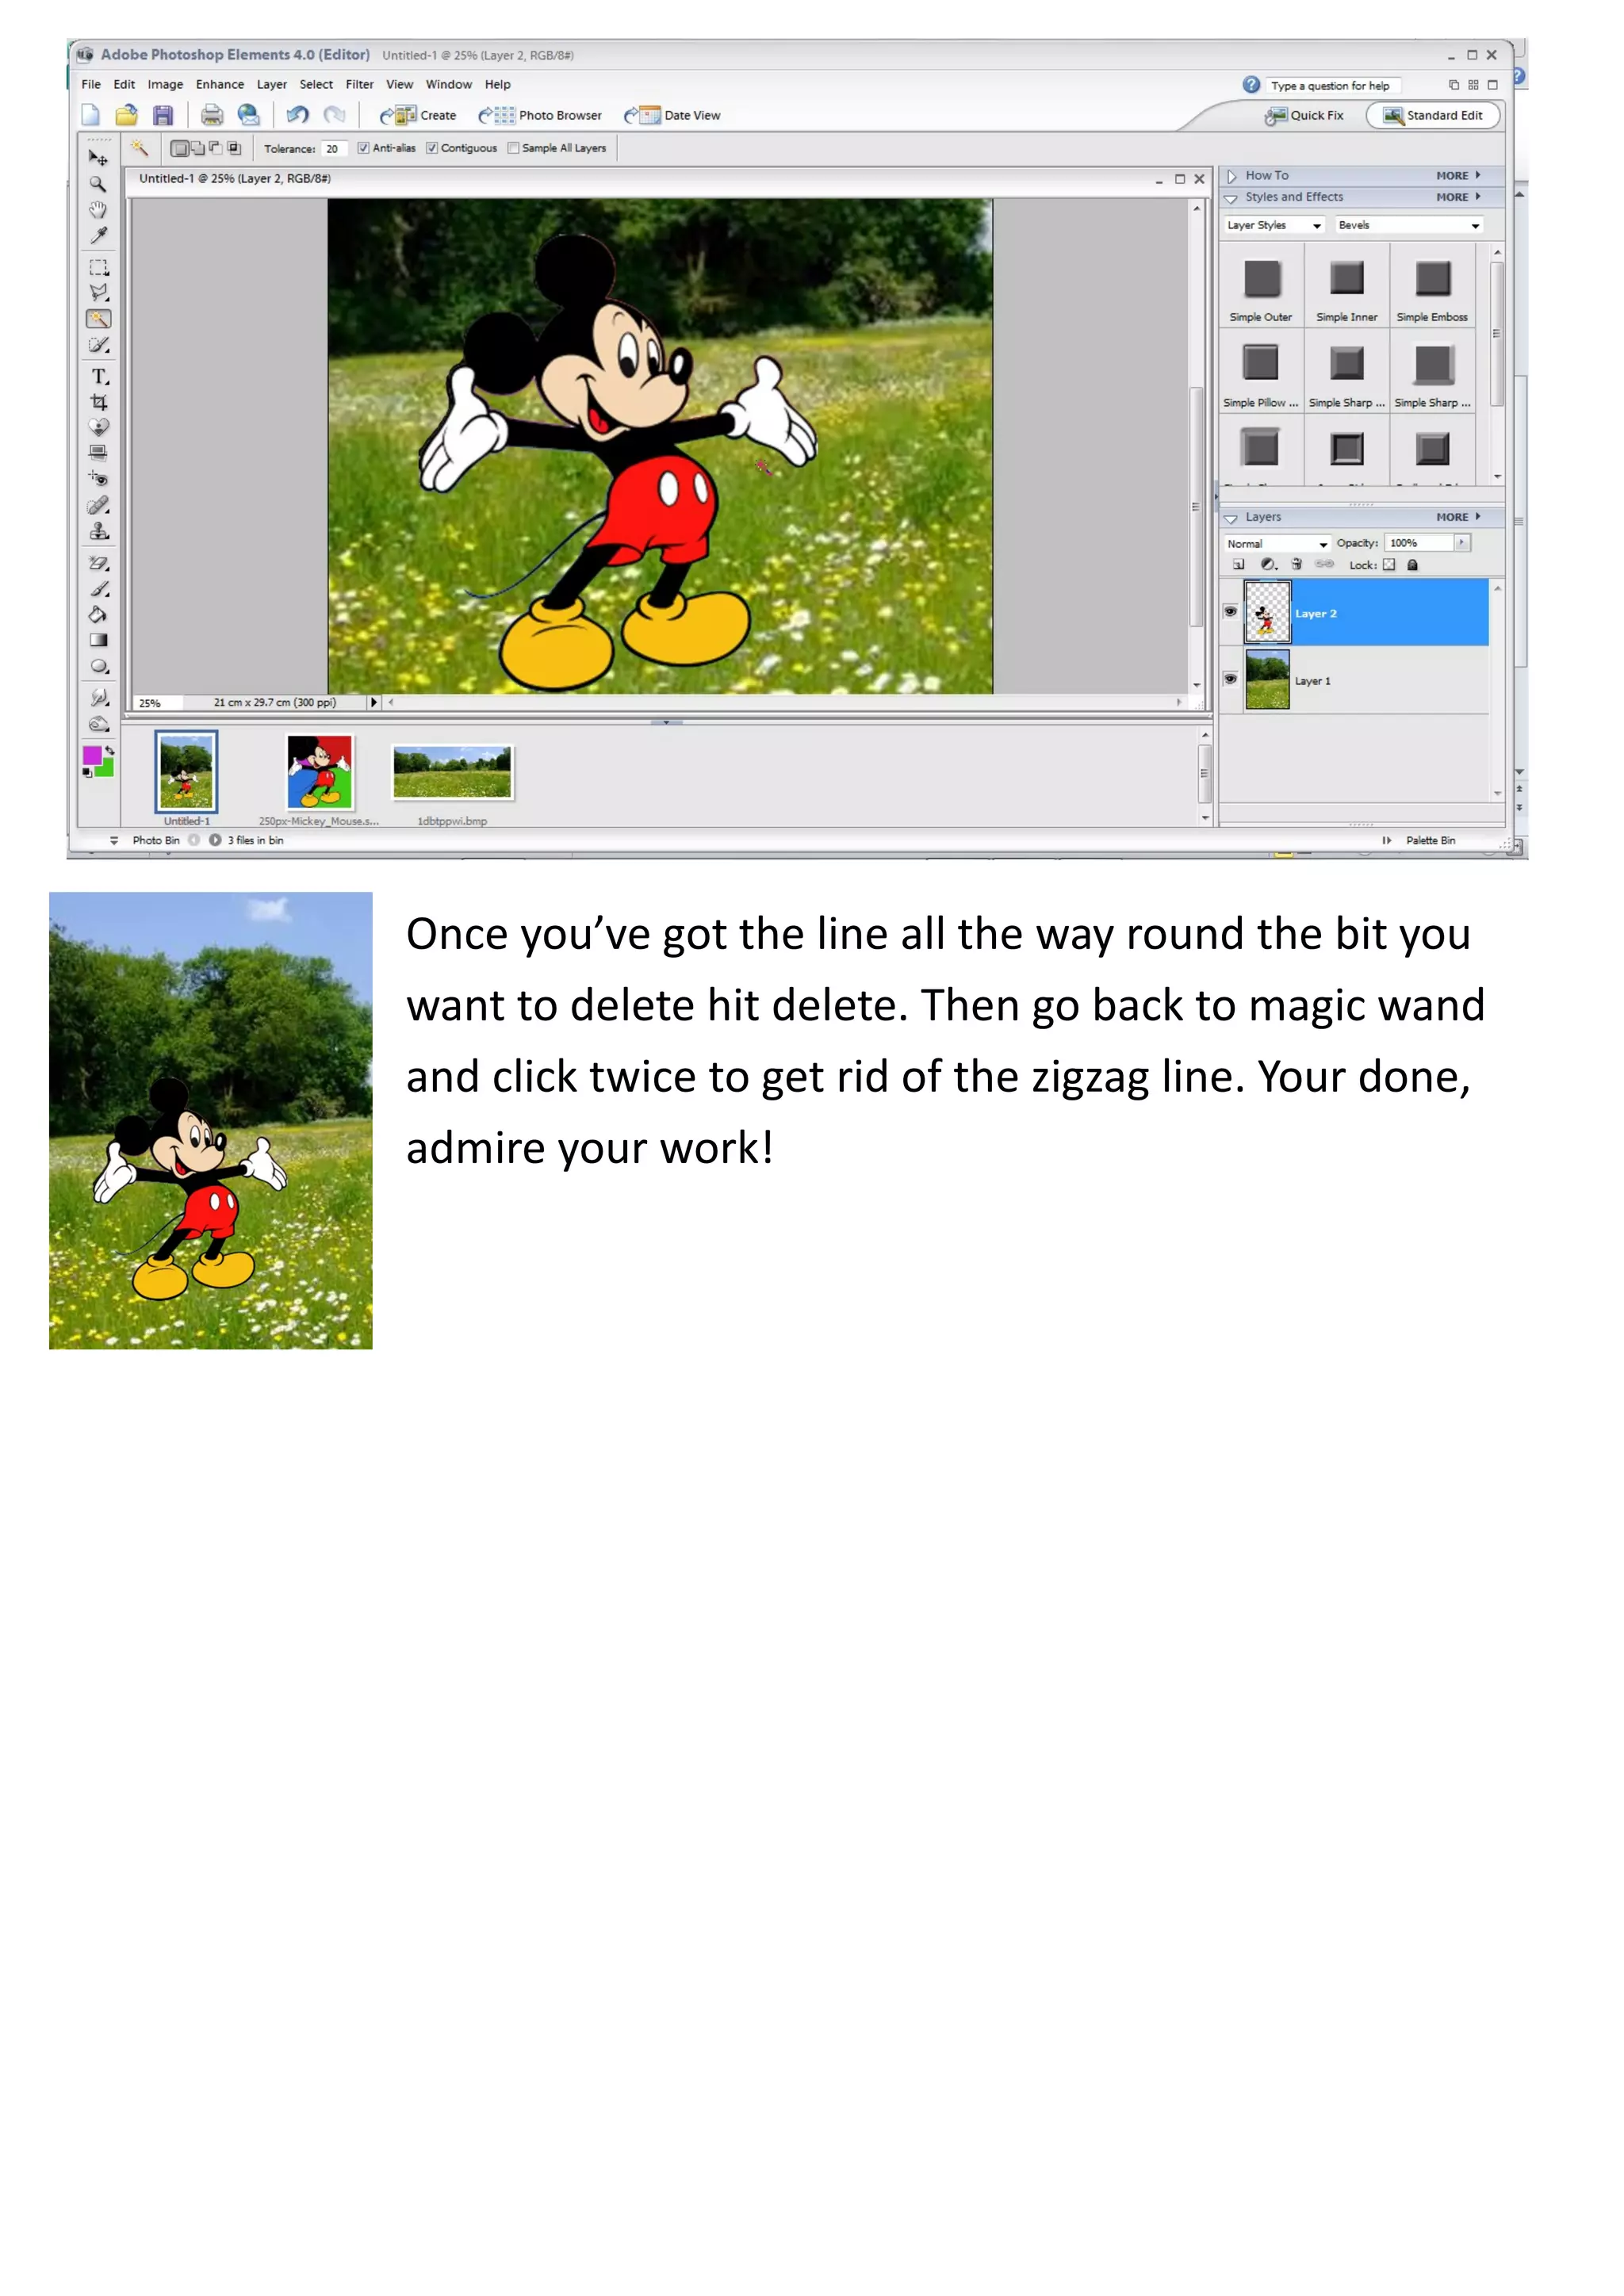
3. Remove the background by selecting it with the magic wand tool or drawing a selection with the brush tool, then hitting delete
Photo retouching tips and tricks in photoshopRemon Mia
If you want to redefine the foreground and background colors, use the Eyedropper tool to select the foreground color, and then switch the position with the background color, maybe by using the shortcut X, and pick up the next color. But there is an easier way. First, define the foreground color just as you’re accustomed to, but then define the background color by holding the Alt/Option key. Instead of changing the foreground color, you’ll redefine the background color with just one click.
https://goo.gl/pwqYM7
Are you looking for best Photoshop training in ambala?
Batra Computer Centre Provides you Training In basic Computer, C & C ++, HTML, Photoshop, Web Designing and Other Courses are Available here.
Are you looking for best Photoshop training in ambala?
Batra Computer Centre Provides you Training In basic Computer, C & C ++, HTML, Photoshop, Web Designing and Other Courses are Available here.
My goal with this document was to guide someone through the basic functions for Techsmith Snagit.
My main challenge was to instruct in a manner that was highly comprehensively and allowed for contingences where the reader may have become confused and stuck. I provided visual cues that illustrate what was being taught and provided opportunities for the reader to explore and develop their skills with the application.
In photography, Blur refers to an image (or sections of an image) that are not sharp. This is frequently brought about by camera shake, and it’s a mix-up that you ordinarily need to stay away from.
How to Create Shadow in photoshop cs6 - Photoshop Tutorial CPZ Media
Creating a shadow is very important in photoshop CS6. This increses the photo quality. This is so much important for the beginners. Follow this tutorial and ask quesition if you have.
clippingpathzone.com
this is a FUN slide share for every one who is interested in learning how to use Photoshop. in this slide share you will learn how to create COVER'S such as a Magazine cover, Story Book cover and a Advertisement cover!
HOPE YOU ENJOY IT!!
Similar to Photoshop tutorial - Getting Started and Magic Wand (20)
Photoshop tutorial - Getting Started and Magic Wand
1. Photoshop Tutorials: Getting Started and Removing
Background using Magic Wand
Find Adobe Photoshop
programme on the desktop
or in All programmes.
Click on Edit and Enhance.
Go to File in the
top left hand
part of the
screen to start
your project.
Go down to
select New and
then across to
select Blank
File.
2. In the box that pops up, Name: call the project something useful.
Preset: Go down the list using the arrow and select A4.
Colour Mode: Has to be RGB Colour
Background Contents: Select Transparent. When you do this your
preset will automatically change to custom which is fine, don’t
change it back! Hit ok.
Go find your images. Hit File, Open and select the
location of your pictures.
3. Select what part of the picture you want using ‘rectangular marquee
tool’ if you want all of it, select all of it.
Then go to edit and hit copy. (You can’t right click the image to select
copy on photoshop).
4. Select your empty page you created at the beginning and hit edit, paste.
*Helpful tip: you can expand the page by dragging the bottom corner
out.*
You can use the ‘move tool’ to make the image bigger and move it
around the page, when you resize make sure when you are done you
hit the to seal the decision. Your picture may pixelate if its not
good enough quality, but check first by hitting the tick it may clear.
5. *Helpful tip: If you hold down the shift key on your keyboard you can
keep the picture in proportion so it doesn’t end up being skewed. Works
well especially with faces.
Once you have
completed these steps
with all your images
we can remove the
background from your
image. You can do this
using two tools.
1. 2.
‘Magic Ward Tool’ for block ‘Selection Brush Tool’ for more
colour backgrounds. complicated backgrounds
6. Magic ward - click on the magic wand tool then click on the block
colour within your picture and you should find that it highlighted the
selected area with a zigzag line.
When you hit delete
you will find the
zigzag area gone,
revealing the
background. Double
click the mouse and
the zigzag line
should disappear.
You can do the
same to all other
bits of block col-
our within the pic-
ture.
7. However if the background to the picture is the same colour as the fore-
ground or is patterned you may find ‘magic wand’ does not work.
This is when we use ‘selection brush tool’
It is like magic wand but it lets you choose where to put the zigzag line and you
can change the size of your brush.
8. Do the bigger bits with a big brush and reduce the size of your brush as
you move in to do the outline. Don’t be afraid to zoom in!
*Helpful Tip: If you go over the line you want to keep you can use the
Alt key on your keyboard. Hold it down and it takes away the zigzag
line.
9. Once you’ve got the line all the way round the bit you
want to delete hit delete. Then go back to magic wand
and click twice to get rid of the zigzag line. Your done,
admire your work!