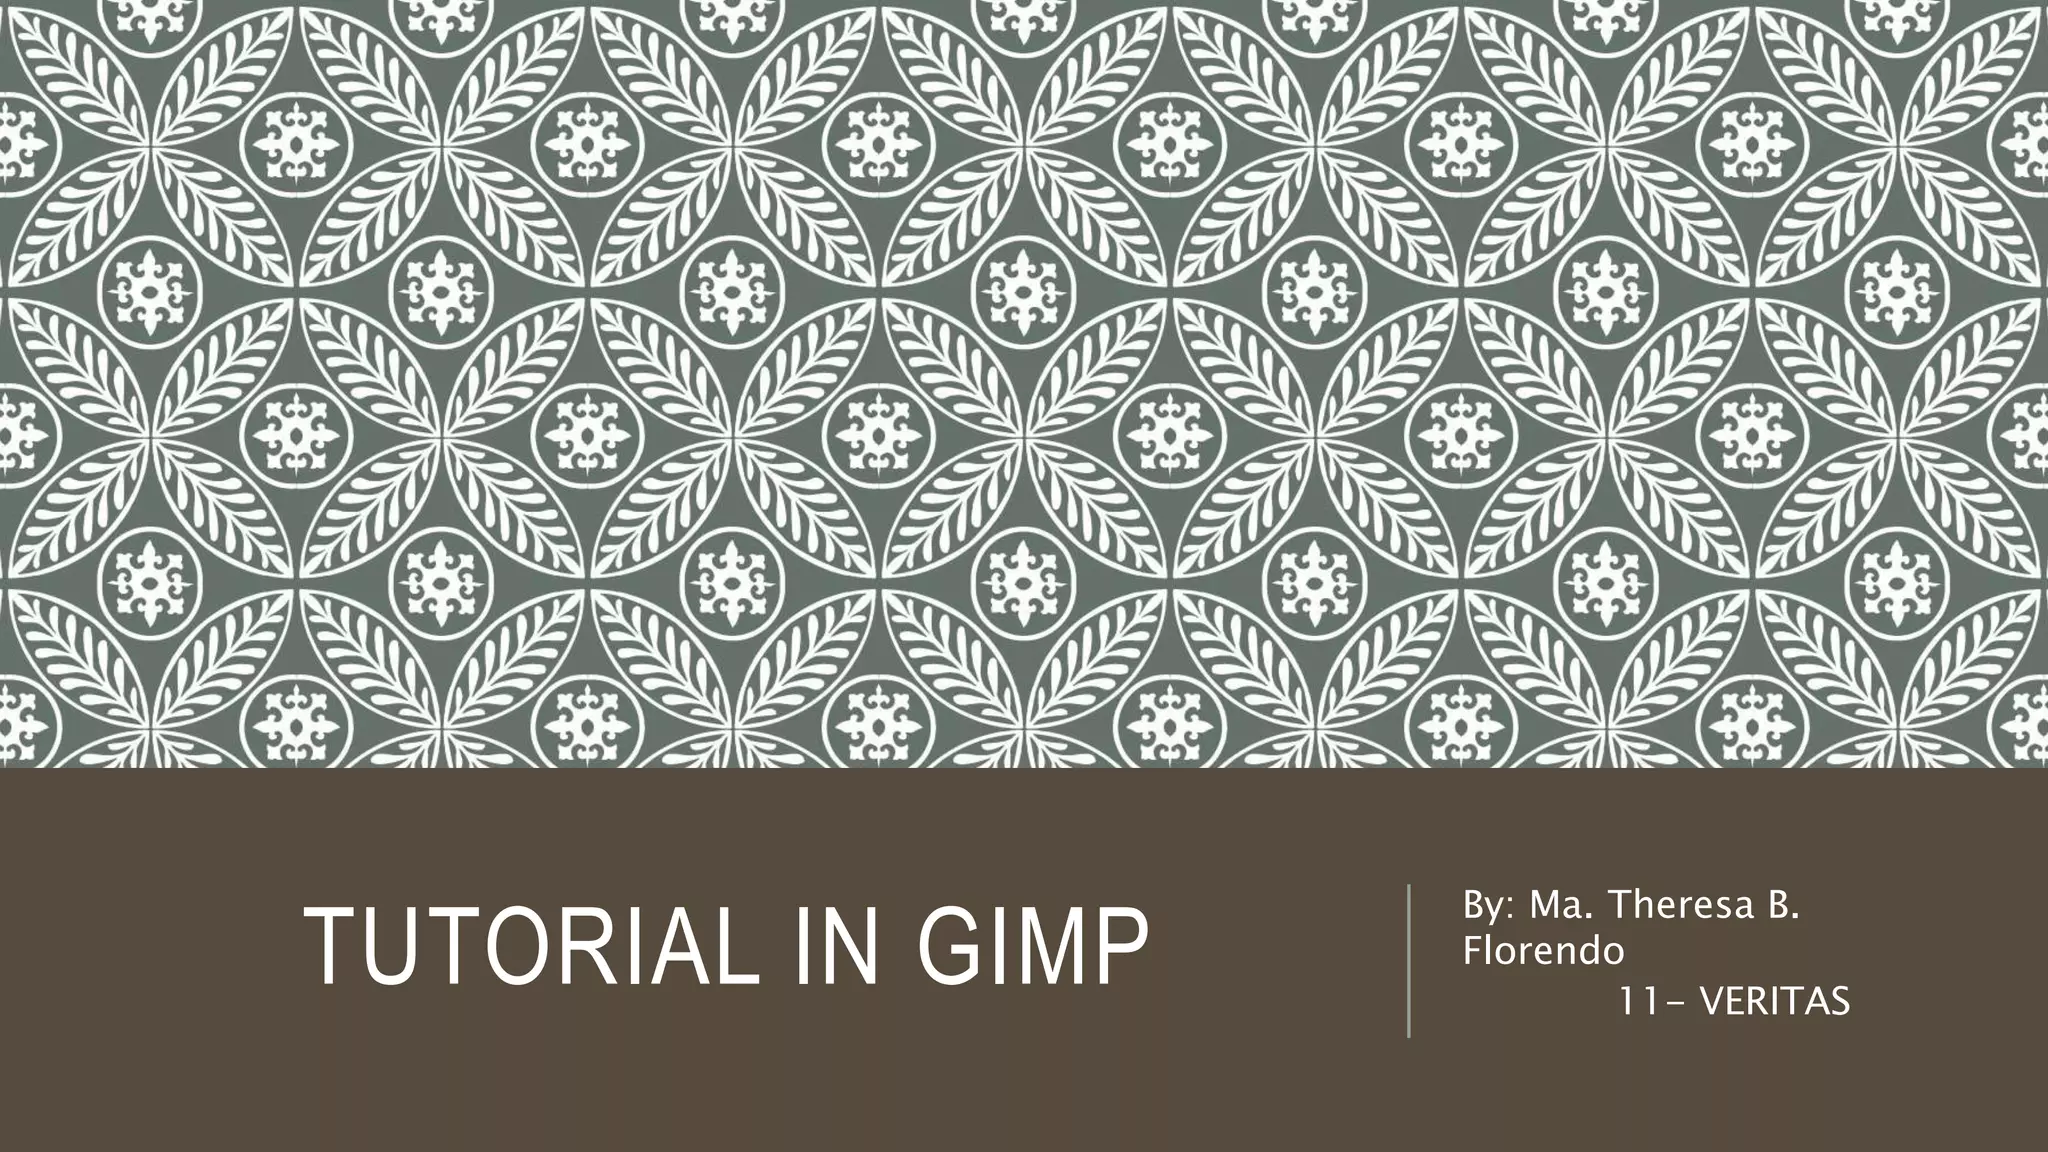
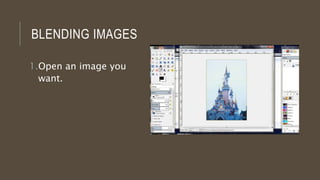
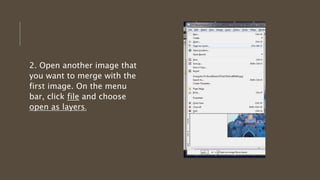
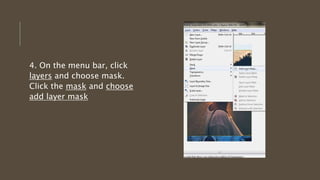
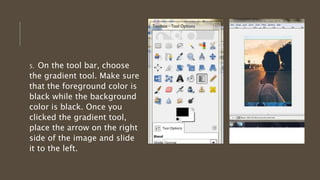
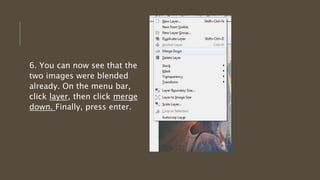
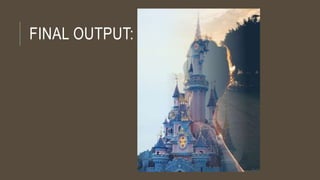
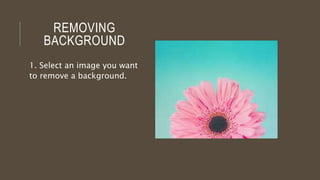
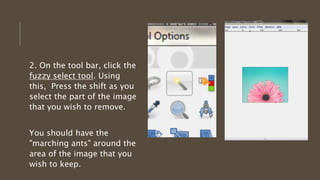
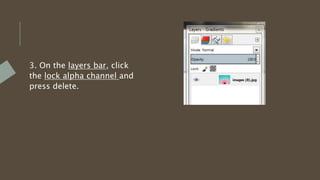
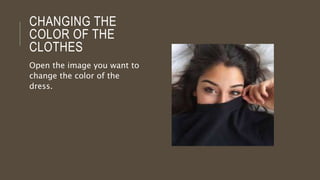
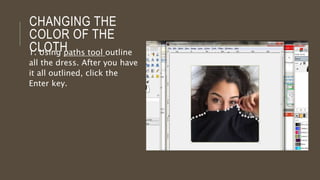
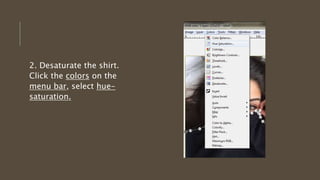
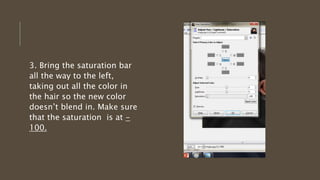
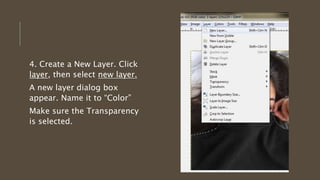
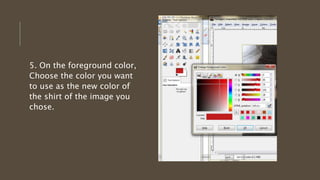
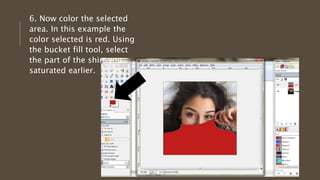
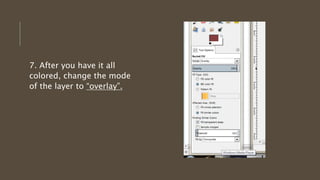
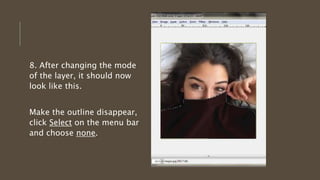
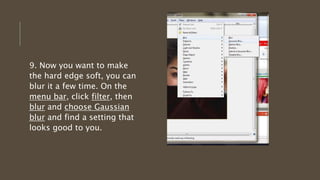
TUTORIAL IN GIMP
By: Ma. Theresa B.
Florendo
11- VERITAS
BLENDING IMAGES
1.Open an image you
want.
2. Open another image that
you want to merge with the
first image. On the menu
bar, click file and choose
open as layers.
3. You can now see that the
1st image which will serve
as the background image
was covered up by 2nd
image which will be our
foreground image.
4. On the menu bar, click
layers and choose mask.
Click the mask and choose
add layer mask
5. On the tool bar, choose
the gradient tool. Make sure
that the foreground color is
black while the background
color is black. Once you
clicked the gradient tool,
place the arrow on the right
side of the image and slide
it to the left.
6. You can now see that the
two images were blended
already. On the menu bar,
click layer, then click merge
down. Finally, press enter.
FINAL OUTPUT:
REMOVING
BACKGROUND
1. Select an image you want
to remove a background.
2. On the tool bar, click the
fuzzy select tool. Using
this, Press the shift as you
select the part of the image
that you wish to remove.
You should have the
"marching ants" around the
area of the image that you
wish to keep.
3. On the layers bar, click
the lock alpha channel and
press delete.
FINAL OUTPUT:
CHANGING THE
COLOR OF THE
CLOTHES
Open the image you want to
change the color of the
dress.
CHANGING THE
COLOR OF THE
CLOTH1. Using paths tool outline
all the dress. After you have
it all outlined, click the
Enter key.
2. Desaturate the shirt.
Click the colors on the
menu bar, select hue-
saturation.
3. Bring the saturation bar
all the way to the left,
taking out all the color in
the hair so the new color
doesn’t blend in. Make sure
that the saturation is at -
100.
4. Create a New Layer. Click
layer, then select new layer.
A new layer dialog box
appear. Name it to “Color”
Make sure the Transparency
is selected.
5. On the foreground color,
Choose the color you want
to use as the new color of
the shirt of the image you
chose.
6. Now color the selected
area. In this example the
color selected is red. Using
the bucket fill tool, select
the part of the shirt you
saturated earlier.
7. After you have it all
colored, change the mode
of the layer to “overlay”.
8. After changing the mode
of the layer, it should now
look like this.
Make the outline disappear,
click Select on the menu bar
and choose none.
9. Now you want to make
the hard edge soft, you can
blur it a few time. On the
menu bar, click filter, then
blur and choose Gaussian
blur and find a setting that
looks good to you.
FINAL OUTPUT:

Tutorial in gimp

  • 1.
    TUTORIAL IN GIMP By:Ma. Theresa B. Florendo 11- VERITAS
  • 2.
  • 3.
    2. Open anotherimage that you want to merge with the first image. On the menu bar, click file and choose open as layers.
  • 4.
    3. You cannow see that the 1st image which will serve as the background image was covered up by 2nd image which will be our foreground image.
  • 5.
    4. On themenu bar, click layers and choose mask. Click the mask and choose add layer mask
  • 6.
    5. On thetool bar, choose the gradient tool. Make sure that the foreground color is black while the background color is black. Once you clicked the gradient tool, place the arrow on the right side of the image and slide it to the left.
  • 7.
    6. You cannow see that the two images were blended already. On the menu bar, click layer, then click merge down. Finally, press enter.
  • 8.
  • 9.
    REMOVING BACKGROUND 1. Select animage you want to remove a background.
  • 10.
    2. On thetool bar, click the fuzzy select tool. Using this, Press the shift as you select the part of the image that you wish to remove. You should have the "marching ants" around the area of the image that you wish to keep.
  • 11.
    3. On thelayers bar, click the lock alpha channel and press delete.
  • 12.
  • 13.
    CHANGING THE COLOR OFTHE CLOTHES Open the image you want to change the color of the dress.
  • 14.
    CHANGING THE COLOR OFTHE CLOTH1. Using paths tool outline all the dress. After you have it all outlined, click the Enter key.
  • 15.
    2. Desaturate theshirt. Click the colors on the menu bar, select hue- saturation.
  • 16.
    3. Bring thesaturation bar all the way to the left, taking out all the color in the hair so the new color doesn’t blend in. Make sure that the saturation is at - 100.
  • 17.
    4. Create aNew Layer. Click layer, then select new layer. A new layer dialog box appear. Name it to “Color” Make sure the Transparency is selected.
  • 18.
    5. On theforeground color, Choose the color you want to use as the new color of the shirt of the image you chose.
  • 19.
    6. Now colorthe selected area. In this example the color selected is red. Using the bucket fill tool, select the part of the shirt you saturated earlier.
  • 20.
    7. After youhave it all colored, change the mode of the layer to “overlay”.
  • 21.
    8. After changingthe mode of the layer, it should now look like this. Make the outline disappear, click Select on the menu bar and choose none.
  • 22.
    9. Now youwant to make the hard edge soft, you can blur it a few time. On the menu bar, click filter, then blur and choose Gaussian blur and find a setting that looks good to you.
  • 23.