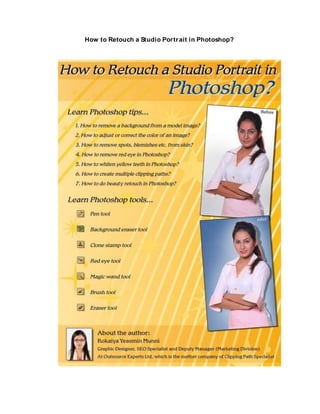
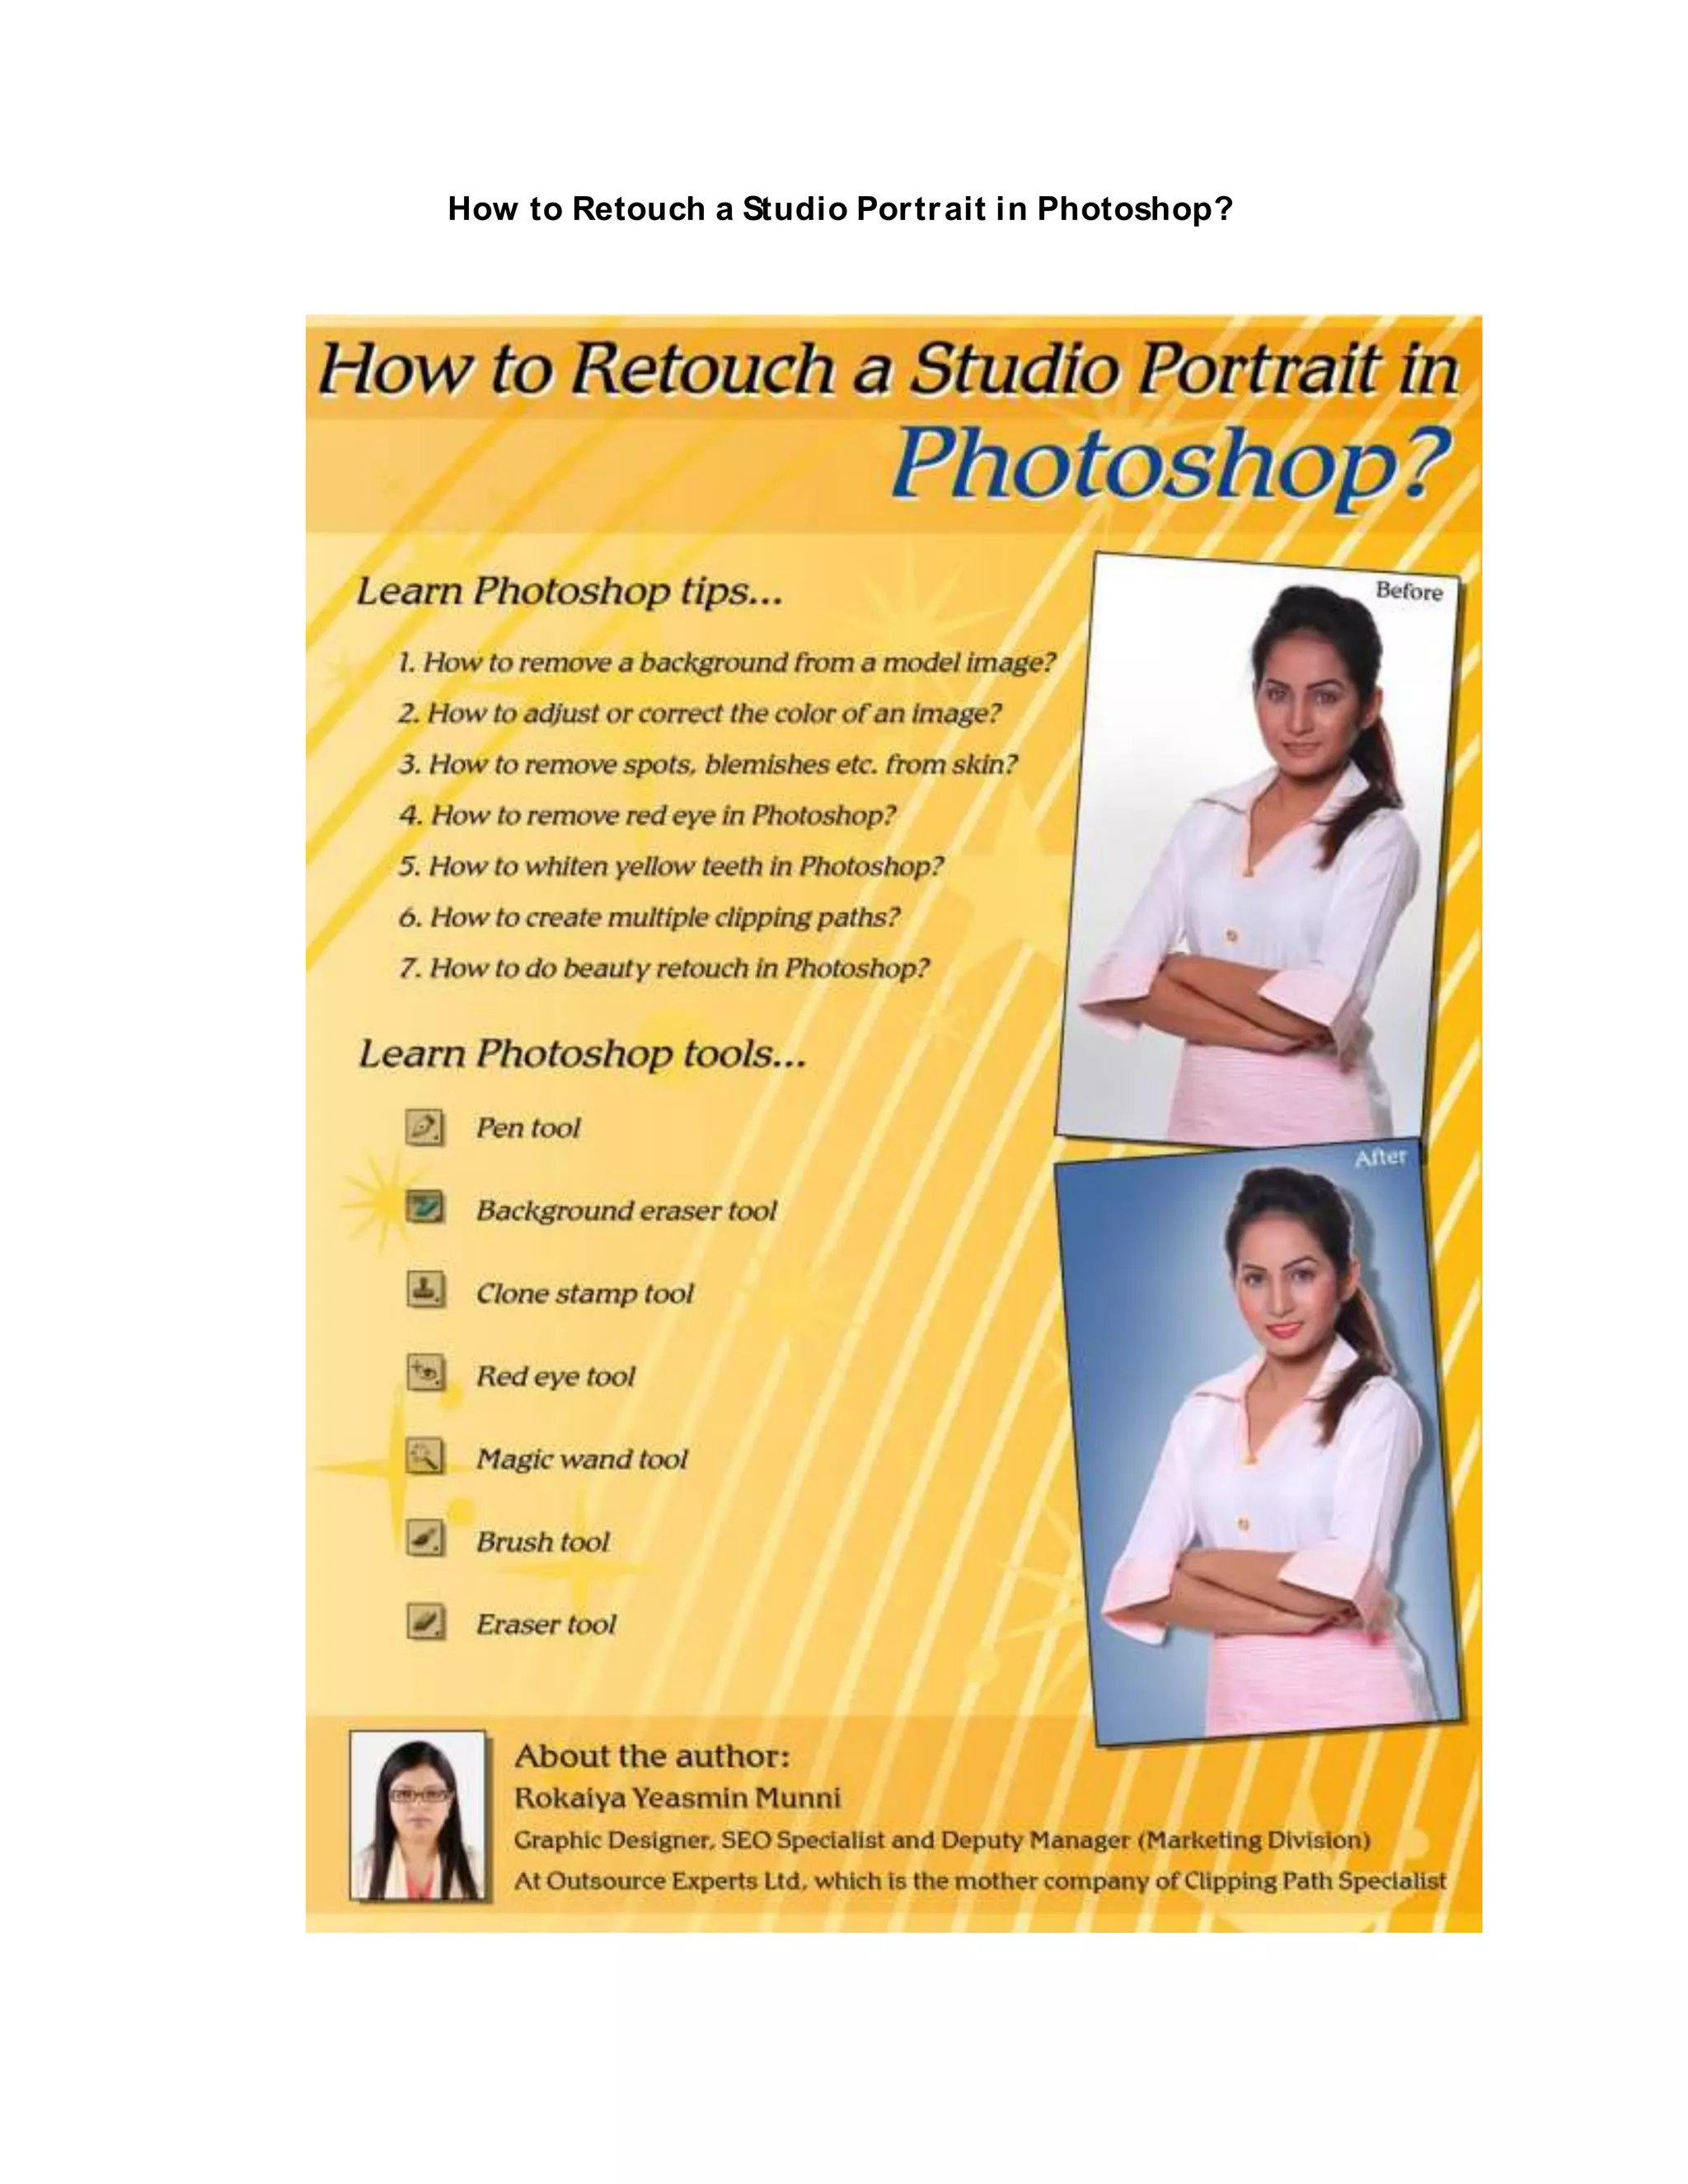
Most of the time the photos you taken from photo studio may not be able to satisfy your mind and you may think of looking better on that photos. But you don't know how this can be possible, don't worry an easy to learn tutorial can help you to retouch your studio portrait to make your photo according to your desire one in photoshop.
2. Suppose you have t aken some phot os fr om ap r ofessi on al phot o st ud i o that i s i n
desper at e need of a photo r etouching technique. Per haps you discover ed some
flaw s or damage t o t he phot o you just can’t live wit h and you want t o make t he
photos ext r a ordinar y, so what do you do? Today w e ar e going t o l ear n how t o r
et ou ch a st u di o por t r ai t i n Phot oshop. I w il l show you st ep by st ep, each photo
retouching tips t o give your photo a finished look. It is not as difficult as you
may t hi nk, just follow t he st eps and you wi ll be able t o mak e your phot os look
almost as good as t he pr ofessi onals, at a fract ion of t he cost. So, guys just follow
my tutorial and retouch the model image in Photoshop smoothly.
Quick Summary So Far:
I’ve enclosed a lot of Photoshop techniques and tools her e about w or ki ng wi th
retouching a studio portr ait, so befor e we move on and st art lear ni ng t he
whole t ut ori al, let ’s do a quick r eview at bellow shor t list t o know t hat how many t
echniques and tools we are going to study.
Photoshop retouching techniques:
1. How to remove a background from a model image?
2. How to adjust or correct the color of an image?
3. How to remove spots, blemishes and unwanted hair from skin?
4. How to remove red eye in Photoshop?
5. How to whiten yellow teeth in Photoshop?
6. How to create multiple clipping paths?
7. How to do beauty retouch in Photoshop?
Photoshop Tools:
Pen tool
Background eraser tool
Clone stamp tool
Red eye tool
Magic wand tool
Brush tool
Eraser tool
3. 1. Retouching the background:
The fir st t hing you w ant t o do is st ar t w it h t he backgr ound of the photo.
So, you ar e going t ol earn how to i solate the photo fr om the
back gr ound t o pl ace t he image in differ ent backgr ound or color, using t
he Photoshop Pen Tool.
All you need to do is select the Pen Tool, then go to the top of the screen
and be sure that you have chosen path, not the layer checked.
You t hen st art at any point on t he body or hand par t of t he image t hat you
wish, except t he hair (I w ill get t o t his lat er ). Then using t he Pen Tool,
anchor t he fi rst point , and cont inue t o make more point s, by dr awi ng a
pat h ar ound the ent ire edge of your image up t o the ar ea w here t he hair
st ar t s (you can dr aw ar ound t he hai r par t , but l eave par t of the backgr ound
closest to the hair; you will use a different tool for that part).
4. After you have completed the outline, you would then click on make
selection, select anti-alias and set the feather radius at 0.5-1 pixels.
5. Now you should see the marching ants surrounding the image.
Now go to the top of the screen, click on select, inverse and delete, now t
he background should disappear.
6. This is pr obably t he quick est and easiest w ays t o r emove backgr ound
from a solid image.
Next , you w ill be using t he Background Er aser Tool t o r emove the
back gr ound fr om hai r i m age.Open a new l ayer t o w or k w it h. You
should have alr eady removed most of t he back gr ound ar ound t he hair.
Select the Background Eraser Tool from the tool bar.
7. And choose t he size of br ush you wi sh t o use (I w ant t o use 150). Then
select Sampling: Back gr oun d Sw at ch, a t oler an ce of abou t 50 and
discontiguous.
Then cli ck your left mouse but t on, and use your Background Er aser
Tool to go ar ound the ent ir e object . You w ill not ice a ver y t hin light color
line t hat sur r ounds t he hair . How ever if you select a light color ed
backgr ound r at her than a dar k er colored one, you won’t even noti ce t hat
fine line. You have the opt ion of using a bur n t ool, if you w ant t he fine line
gone, but that’s up to you.
8. Now you can add a new backgr ound color if you l ike. See t he image
bel low I have used a different backgr ound color wit h a shadow t o make t
he image pop.
2. Color Adjustments:
The next st ep is t o adj ust br i gh t ness and cont r ast of your photo. We wil l
be using t he adjust ment s panel and focus on some of t he mor e impor t ant
adjustments that you can use to enhance and improve your photos.
9. Many people w ill go t o t he i mage ad j ust ment at t he t op of t he scr een, but t
hat is not r ecommended, as t hat makes t he adjust ment onto t he pixels t
hemselves. So now you can’t undo it, or modify it aft er t he fact . So t o have
mor e flexibilit y you wil l want t o go dir ect ly t o your adj ust ment s panel.
You wil l st ar t by using levels to mak e t he br ight ness and cont r ast of t he
image, and see how t o customize i t . So click on t he lit tle sunshine icon at t
he low er part of t he l ayer , and t henselect t he levels. This anal yzes t he
image and modifiesthe controls to give a good image.
So you w ill use t he slider bar t o adjust t he cont r ast and br i ght ness. Then
check befor e and aft er and you can deci de if you li ke i t or w ant t o do
more.
10. Your other opt ion is t o close t hat panel and go t o the opacity. Her e you
have a mor e subt le effect , you w ould decr ease t he opacit y and minimi ze t
he effect.
If t he pr oper t ies panel closes, al l you need t o do is doubl e click t he icon
for t he adjust ment l ayer , and it w ill r eopen w i t h t he cont rols so you can
make any further changes.
The neat t hing is that even aft er you mak e t he adj ust ment s you w ant , you
can w alk aw ay and come lat er and make diff er ent changes if you don’t
like the previous ones.
3. Remove Spots, Blemishes and Unwanted Hair from skin:
Her e you w ill use a sk in r etouching technique fr om Phot oshop t hat is
quit e handy for r emoving bl emishes fr om t he skin and cl eaning up your
photos.
11. First, zoom up on the image, use Command/ Ctrl + hold down the space
bar and it will turn into a zoom tool, so you can zoom the image you wish.
Then w e w ill t ake a layer by cli ck ing on “cr eat e a new l ayer ” icon at t he
low er par t of t he layer palate. You w ill be w or king in t his layer r at her t
han the original so that you can always go back.
12. The fir st t ool we w ant t o use is t he Clone Stamp Tool. Go t o the t ool bar
on t he left side of t he scr een, and click on t he lit t le st amp t ool. Basically,
what t his does is allow you t o clone par t of t he image and use it
someplace else in the image.
Now go to the top of the tool bar where it says aligned or unaligned.
To use it ali gned, you have t o sample an ar ea on t he image. To do that you
would hold down Alt / Opt to t ur n tool i nt o cross hai r s, click once t o
sample that area.
Now if you have a li ne check, go down t o t he j aw area and click and hold
dow n t he space bar , t hen st art t o paint , you wi ll see cross-hair s for m as
you duplicate that part of the image.
13. Now if you let go of t he mouse but ton, and move t o another par t of t he
image, and st ar t t o paint , t he cr oss hair moves w it h i t (i t i s at a fi xed
posi t i on away from t he br ush). You can move anywher e and it w ill alw ays
be aligned with the cross hairs.
I like to use the tool with the aligned left unchecked, as you have more
flexibility.
So, you hold Alt/ Opt and get close to a blemish like a little mole,click once t
o sample the area.
Then click over the top of the blemish and it’s gone.
14. When you sampl e an ar ea t hat i s si milar t o your t ar get area, it w ill fade
into the other par t of t he image. Remove all spot s and blemishes by this
pr ocess. See bellow image w her e I have r emoved all spot s, blemishes,
unwanted hairs etc.…
4. Remove Red Eye in Photoshop:
This is one of t he si mpl est t asks you w ill ever do. Ther e ar e advanced t
echni ques, for most purposes all you have t o do is use t he buil t in Red
Eye Removal Tool. Basical ly w hat happens is t hat t he flash i s t oo close t o t
he lens and the pupil of the eye can’t close fast enough, allowing the light
to enter the eye and reflect off the inner part of the eye.
15. On the toolbar to the left, click on the Spot Healing Tool, a box will drop
down, and you will see the Red Eye Tool, select it.
And t hen it is just a simple click over t he part of t he eye t hat is red, and
poof t he r ed is gone. If you ar e part i cular , you can go t o t he t ool bar at t he t
op of t he scr een and adjust t he si ze of t he pupil , as w ell as change how
dark it is, but that is optional.
16. 5. Whiten the Teeth:
Many t imes w hen you t ake a phot o of someone, the t eet h w ill appear
various shades of yellow . Since most of us find t hat unpleasant and
disgust i ng, I w ill be expl aining how to w hi ten the yellow teeth of your
subject.
So you take your photo and zoom in to the teeth area, where you will
notice a discoloration.
Fir st you w ill need t o select t he t eet h, t here ar e sever al w ays t o do t hi s,
using t he Magic Wand Tool or t he Lasso Tool. Here w e wi ll use t he
Magic Wand Tool. Select the tool from the left tool bar.
17. Then set the tolerance level to 20, check the Anti-alias, and Contiguous
boxes.
Then go t o t he t eet h ar ea and cl ick the mouse in a t ooth. You w ill see t hat
has made a sel ect ion, but not exact ly w hat you w ant . Now hold down t he
shift key and you w ill see a + sign. Now anyt hing you cli ck, w ill be added t
o t he cur r ent select ion. So now you just go ar ound t he t eet h and select as
much as you can, fill ing in any spot s you may have mi ssed at fi r st . Don’t
wor r y if you get int o t he gum ar ea, w e wil l t ake car e of t hat l at er.
Cont inue unt il the marchi ng ant s sur r ound t he t eet h. Now t her e ar e a few
spot s wher e t he gum was included, and w e w ant t o r emove t hose. Now
you w ill hold dow n t he Al t / Opt key inst ead of t he shift . Now you should
see a – (minus) si gn. Cli ck on t he gum ar eas you want r emoved and t hey
are gone.
Now go back t o t he t op and click on select , modify and feat her , I am using
a value of 2 in t he feat her r adius. This w ill basically smoot h out and
feather the edges of our selection, then click OK.
18. Now we w ill appl y t he color corr ect i ons. We ar e going t o use something
called t he hue and sat ur at ion dialog. Nowclick on t he l it tle sunshine icon
from t he layer pal at e and select t he hue/ sat ur at ion. The di alog box wil l
appear.
19. We w ill t urn dow n t he sat urat ion, since it cont r ols t he col or . Br ing t he
sat ur at i on dow n to –50; you w ill see t he color of the t eet h li ght en. The
last step is to increase the lightness to about +17, and then click OK.
Then deselect by pressing Ctrl D we now have teeth that are much
brighter.
6. Create Multiple Clipping Paths:
20. This t ype of t echni que is used w hen you ar e deal ing w it h sk ins, clot hs,
or nament s et c. We wi ll look at how t o sel ect each it em separ at ely, and t
hen change or cor r ect t he color s t o make model or st udio i mage more at
tractive.
First you will right click over the Pen icon on the toolbar, and then select t
he Pen Tool.
Next locate the Path icon on the toolbar at the top of the screen, and click
on it.
Now you w ill dr aw t he fi r st pat h ar ound t he it em you w ish (I am dr awing t
he cl ot h of t he model i n t he i mage), and close t he pat h by clicking on t he
first anchor point you made.
21. Then choose t he pat h you just finished fr om t he pat h palet t e and dr ag it t o t
he “New Pat h” icon at t he bot tom of t he scr een.Now let go of t he mouse t
o save your new path.
Next , you w ill click on t he Pen Tool agai n and follow t he same st eps t o
make each pat h unt i l you have complet ed as many as needed. You may
want to decide how to organize the additional paths you are creating.
You can cont inue draw ing t o create multiple sub-paths that Photoshop
will then consolidate into a single saved path. Another option you can use
22. is t o click t he “Cr eat e a New Pat h” icon ever y t ime befor e you begin
dr aw ing t o separ at e each new out li ne i nt o a differ ent pat h. Ther e ar e a
few opt ions; it ’s pr et t y much up to you. Let ’s see bellow how I have
corrected the cloth’s color using the multiple clippingpath.
23. 7. Beauty Retouch in Photoshop:
The l ast part of t he pr ocess is t o add some color to t he face, a beaut y
ret ouch of eye l i ner , eye shadow , l ipst i ck, bl ush, et c.… t omake t his photo
extra ordinary.
The fir st ar ea i s t o w or k on t he eyes. I t all depends on t he effect you w ish t
o achieve, or t he client ’s w i shes. It oft en helps t o st art your adjust ment s at
t he ext r eme end of t he scale, and t hen w or k your w ay dow n t o a mor e
subt le effect . You may w ant t o st art by cleaning up some of t he r ed veins
in the woman’s eyes, which I have done in technique “4“ of this tutorial.
Once you ar e happy w it h that , you can apply eye makeup. Fi rst go t o layer
pal let . You w ill cr eat e a new layer by clicki ng t he new l ay er b ut t on on t he
pallet.
And then choose your color as the blending mode.I chose 100 magenta,
80yellow,0 on the cyan and black.
24. Next, you will choose a brush (press “B” from keyboard to select brush)or
you can select from the tool bar.
Choose size whatever you wish (I like to select the size 40, hardness50 and
opacity 50).
Next, you can start apply the eye shadow to the new layer.
25. Then you will use the Eraser Toolfrom the tool bar.
And change the brush size to 81 and use a hardness of 10 to remove part
of the color and create a soft gradient.
26. Next , open a new layer, and t hen change t he blending mode t o mult iply.
Now you w ill cr eat e eyeliner of black color w it h a brush of 17 pi xels and t
ake out the overspill with an eraser brush of 12 pixels.
You can also t ouch up t he cheek follow ing t he same t echnique. Using t he
Eyedropper Tool click on the l ow er part of eye shadow t o select t he
same color. Now choose a lar ge br ush si ze, har dness and opacit y (I chose
br ush si ze 200, har dness 0 and opaci t y 15). Next , apply t his br ush in a new
layer.
27. Then, you may also use t he photo retouching technique t o smoot h t he
lips, make br ight er and t hen add color if you w ish. To do i t, I would lik e t o
select t he lips usi ng Photoshop pen tool. Creat e pat h ar ound t he lips and
select , choose feat her i s about 1 and then apply h ue/ sat ur at i on. See t he
result in the bellow image.
28. Take a cursory to look at the bellow image to see that how it is looking
after applied all the above techniques.
In summar y, t hese photo retouchingtechniques should help you
ret ouch and impr ove/ enhance your photos or st udio por t r ait s. There ar e
many differ ent w ays t o t ouch up phot os, but t he above t ips shoul d get you
st ar t ed i n doi ng r et ouchi ng w or k , using t he Photoshop Tools that wi ll
save you a lot of money w hen doing it your self. You can spend t housands
of dollar s when get t ing phot os done pr ofessi onally. Wit h a lit t le pr act ice,
your w or k wi ll look as pr ofessi onal as any exper t w ho does photo r
etouchingService. Happy drawing and best of luck!
Tutorial published onhttp:/ / www.clippingpathspecialist.com/ tutorial/ how-to- r
etouch-a-studio-portrait-in-photoshop/
About the author:
RokaiyaYeasminMunni
Graphic Designer, SEOSpecialist and Deputy Manager
(Marketing Division) At Outsource Experts Ltd,which is the
mother company of Clipping Path Specialist