Call Girls Satellite 7397865700 Ridhima Hire Me Full Night
Menggunakan Radial blur
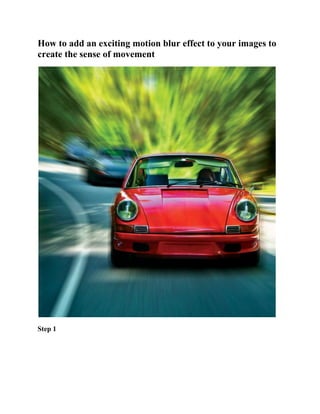
1. How to add an exciting motion blur effect to your images to
create the sense of movement
Step 1
2. When using this filter, we need to create a duplicate of the
Background layer. You’ll notice that this layer is locked (indicated with a padlock symbol on its
layer), which stops it from being edited. But by going to the Layer menu and to Duplicate Layer,
you can create an editable version above this locked one.
Step 2
Find the Quick Selection tool (W) in the Toolbar. The tool is kept
with the Magic Wand tool in Photoshop CS versions, but in Photoshop Elements it’ll be with the
Selection Brush tool. To use the Quick Selection tool, tick the Auto-Enhance option at the top of
the screen and click and drag a selection over your main subject.
Step 3
3. When using the Quick Selection tool, you may see some areas of the selection overflow into the
background. Hold the Opt/Alt key and click over these extraneous parts to remove them. By
pressing Q, you can view the selection in Quick Mask mode, so you know just how well it has
gone.
Step 4
When you have selected your main subject go to the Select menu
and down to Inverse. The shortcut for this is Ctrl/Cmd+Shift+I. This flips the selection from the
main subject to the background, making it the active area. This is indicated by the marching ants
around the edges of the image.
Step 5
4. In your Layers palette, click on the Add Layer Mask button at the
bottom. You’ll now see a white and black mask appear on the layer. This has used the selection
to hide parts of the image. Notice how the car is shown in black (hidden) and the background is
in white (revealed).
Step 6
At the moment the mask is the highlighted thumbnail. Click on
the image’s thumbnail next to this to edit the contents and not the mask. Head to the Filter menu
and go down to Blur>Radial Blur. Set the Amount to 30 and the Blur Method to Zoom. Hit OK
to see how your image has been affected by the filter.
Step 7
5. There may be an area in your image that hasn’t been blurred but
should be. You’ll need to click back on the layer mask thumbnail on its layer. Select the Eraser
tool and zoom in on this area (Cmd/Ctrl and +). By erasing the area that was missed out in the
initial selection process, the blur effect can show through.
Tags: car, effect, fast, filter, layering, mask, motion, Motion Blur, speed