SlideShare a Scribd company logo
MECHANICAL 
DRAWING
Procedure in Setting up Drawing 
tools, Materials and Equipment 
and 
Standard Operating Procedure
•Before starting the drawing activity: 
•Select the tools, materials and equipment which are needed 
in the assigned task. 
•Properly set up the required tools and materials in a place which is 
convenient for you to move and execute your work. 
•Clean the table and tools, see to it that these are free from the dust 
and other elements that would cause damage to your work. 
•Wash your hand with clean water.
•Activity proper: 
•Properly manipulate all the tools and equipment that are used in the 
activity. 
•Perform the activity by following the standard operating procedure 
per job requirement. 
•In case of meeting an errors or mistakes along the way of activity 
( for instance misprinting of lines, letters, and other forms of mistakes) 
use appropriate eraser for a particular mistakes.
•After the activity: 
• Submit your output to your teacher for checking 
•Check all the tools and materials to ensure that nothing has 
lost. 
•Return the tools and materials to the assigned tool keeper 
for safekeeping. 
•Clean your work station before leaving.
Alphabet of Lines 
Lines in technical drawing are represented as follows: 
• According to weight 
•Thick 
•Medium 
•Thin 
•According to construction 
•Continues line 
•Broken and dashed line 
•Combination of continues and broken/dashed line
•According to meaning or use
• Border lines are generally the heaviest or the darkest lines in a drawing. The 
border surrounds a drawing and is usually rectangular in shape. It makes the 
onlooker feels as if the parts of the drawing are combined into a single unified 
graphic representation.
• Visible lines this is used to show the outlines and corners that can be 
seen when the object is viewed. It is often called as the object lines.
• Hidden lines this is used to show the edges that are not normally 
seen when the object is viewed.
• Dimension lines this is a line terminated by arrowheads at each of its end, it 
is used to indicate the direction and extent of measurements. Along this line 
is a numerical value indicating the units of measurements. 
• Extension lines this is lines that extends from a point in the drawing to 
which the dimension refers and meets the dimension line at the right angle. 
20mm 20mm 20mm 
20mm 20mm 20mm 
60mm
• Center line this is used to indicate the center of a circle or arc, or to 
indicate the axis of an object with circular features.
•Leader Line – a thin solid line leading from a dimension value or a note to the 
part on the drawing to which the note applies. An arrowhead is used to point 
the leader, but never on the note end. The end note of the leader should end 
with a short horizontal bar at the mid-height of the lettering and should run 
either to the beginning or end of the note. 
Leader Line
• Cutting plane lines this lines are used to indicate an imaginary cut through 
an object along the line. It is made with long heavy dashes alternating with 
two short dashes. 
• Section lines this are light lines used in making sectional views. They are 
spaced evenly to make a shaded effect.
THEORIES AND PRINCIPLES OF ORTHOGRAPHIC 
PROJECTION 
The term orthographic came from the Greek word orthos and 
graphos which means straight line drawing. 
Planes of Projection 
•Frontal Plane – this shows the shape of an object when viewed from the front. 
This is known as the Front View of the object. 
•Horizontal Plane – this give the appearance 
of the object as if viewed directly from above. 
It shows the distance from the front to the rear. 
This is known as the Top View of an object. 
•Profile Plane – this shows the shape of the 
object when viewed from the side. The distance 
from bottom to top and front to rear also appears. 
It is known as the Side View of an object.
When opening the planes that forms a box or is sometimes called imaginary 
box, the six views of the object are represented on the following positions as 
shown below. 
1. Top View 
2. Front View 
3. Bottom View 
4. Rear View 
5. Left Side View 
6. Right Side View
FRONT VIEW: Height and Width 
TOP VIEW: Width and Depth 
RIGHT VIEW: Depth and Height
Principles of Orthographic Drawing 
1. The front view and top view are always drawn in line vertically. 
Align views with each other (features project from one view to the next)
2. The front and the right side view are always drawn in line horizontally.
3. The height of the front view is the same as height of the right side view. 
4. The depth of the top view is the same as the depth of the side view. 
6. A view taken from above is a top view and must be drawn above the front view. 
7. A view taken from below is a bottom view and must appear below the front view. 
8. A line projected perpendicularly to the plane of projection, its projection on 
the plane will be a line. 
9. A line when projected parallel to the plane of projection, its projection will be a 
line. 
10. An inclined line projected to the plane of projection, its projection on the plane 
will be foreshortened. 
11. A view from the right, is a right-side view and must be drawn left of the front 
view. 
12. The front view of the object in the top view faces the front view. 
13. The front of the object in the side view faces the front view.
Plan View or Top View 
This can be little more difficult to visualize because you have to imagine 
yourself moving over the top of the object and looking vertically downward. 
The left-hand and right-hand illustration shows how the plan is placed 
above the front. Again, sketch the light vertical construction lines to locate 
the plan in its proper position. Draw these upward from each corner of the 
front view.
Front View 
Concentrate on the front view. If you look at it correctly the effect 
will be seen below at the left, while at the right illustration shows what 
you will actually see. Notice that in the left-hand drawing, you can only see 
the dark-inked front “face” of the object. Notice also that you cannot see 
any of the other sides of the object. This is because all those sides are 
“going away” from you in your line of sight and are simply not visible from 
your view point. They are still there, of course, but are hidden behind the 
outer edges of the first face.
Right-Side View 
Right-side view should be drawn at the right side of front view. Imagine moving 
around the object to look directly at its right side. How you see it is shown below-left and 
what you see is shown below-right. Again the faces you actually see are heavily outlined.
Procedure in Constructing Orthographic Views 
1. Analyze the given object.
2. Draw the proper construction line where the three regular 
view of the orthographic projection will be designated. 
TOP VIEW 
FRONT VIEW SIDE VIEW
3. Start focusing at the frontal plane of the object to obtain the 
necessary details of the front view. 
• Consider the height and length of the 
object in constructing the front view. 
Draw the height details using construction 
lines.
4.Draw the length details of front view. 
• Extend the construction lines to the 
position of the plan considering that the 
front view and the plan share the same 
length as stated in the principles of 
orthographic drawing.
5. Draw the object lines base on the intersection of the construction lines 
of step 3 and step 4.
6. Provide a distance of not less than 20mm on top of the front view to 
start the construction of the plan. Draw the depth details of the object 
since the length details are already in place. Use construction lines in doing 
this step
7. Draw the object lines base on the intersected of the construction 
lines that corresponds to the details of the object.
8. Provide a 45° angle line that extends from the edge of the front view 
towards the side of the plan. 
•The 45°angle line will serve as a pivotal 
point of the lines that have intersected it 
coming from the depth details of the plan. 
Lines that are intersected will be projected 
towards the Position of the right side view 
which will provide the same depth of the 
right side view. Use construction lines in 
doing this step.
9. Draw the object lines base on the intersected of the construction 
lines that corresponds to the details of the object.
10. Provide the necessary labels, 
and dimensions of each of the views.
Drawing Exercises: Base on the given drawings, construct the 
three principal views following the principles in constructing orthographic drawing. 
Utilize the proper type of lines in accordance with its use. 
20mm 20mm 20mm 
20mm 20mm 20mm 
60mm
Draw 111- mechanical drawing and orthographic drawing

More Related Content

What's hot

leliso hobicho
leliso hobicholeliso hobicho
leliso hobicho
LelisoHobicho
 
Isometric drawings
Isometric drawingsIsometric drawings
Isometric drawings
dean dundas
 
Drafting no. 1
Drafting no. 1Drafting no. 1
Drafting no. 1
ARLYN P. BONIFACIO
 
Orthographic Projections
Orthographic ProjectionsOrthographic Projections
Orthographic Projections
Ravi Chaudhary
 
Auxiliary views
Auxiliary viewsAuxiliary views
Auxiliary views
Shelly Wilke
 
Isometric and Orthographic Drawing Powerpoint.pptx
Isometric and Orthographic Drawing Powerpoint.pptxIsometric and Orthographic Drawing Powerpoint.pptx
Isometric and Orthographic Drawing Powerpoint.pptx
KieranSullivan8
 
Isometric drawing
Isometric drawingIsometric drawing
Isometric drawing
hlalice
 
Orthographic Projection
Orthographic ProjectionOrthographic Projection
Orthographic Projection
Presario Nyioq
 
Sectional view
Sectional viewSectional view
Sectional view
Ahmed Shah
 
orthographic projection
orthographic projectionorthographic projection
orthographic projection
Weam Adam
 
Chapter 6 by lelis
Chapter 6 by lelisChapter 6 by lelis
Chapter 6 by lelis
LelisoHobicho
 
sectional views
sectional viewssectional views
sectional views
vikash singh
 
Lesson 1 intro to drawing
Lesson 1 intro to drawingLesson 1 intro to drawing
Lesson 1 intro to drawing
Priodeep Chowdhury
 
Sectional View
Sectional ViewSectional View
Sectional View
HabtamuGeremew
 
Technical Drawing
Technical DrawingTechnical Drawing
Technical Drawing
davidmandle
 
Drafting Tools and Materials
Drafting Tools and MaterialsDrafting Tools and Materials
Drafting Tools and Materials
Mary Jane Ocampo
 
Lettering
LetteringLettering
Lettering
KM Claudio
 

What's hot (20)

Chapter 05 pictorial sketching
Chapter 05 pictorial sketchingChapter 05 pictorial sketching
Chapter 05 pictorial sketching
 
leliso hobicho
leliso hobicholeliso hobicho
leliso hobicho
 
Isometric drawings
Isometric drawingsIsometric drawings
Isometric drawings
 
Drafting no. 1
Drafting no. 1Drafting no. 1
Drafting no. 1
 
Lecture iii orthographic projection
Lecture iii   orthographic projectionLecture iii   orthographic projection
Lecture iii orthographic projection
 
Orthographic Projections
Orthographic ProjectionsOrthographic Projections
Orthographic Projections
 
Auxiliary views
Auxiliary viewsAuxiliary views
Auxiliary views
 
Isometric and Orthographic Drawing Powerpoint.pptx
Isometric and Orthographic Drawing Powerpoint.pptxIsometric and Orthographic Drawing Powerpoint.pptx
Isometric and Orthographic Drawing Powerpoint.pptx
 
Isometric drawing
Isometric drawingIsometric drawing
Isometric drawing
 
Orthographic Projection
Orthographic ProjectionOrthographic Projection
Orthographic Projection
 
Sectional view
Sectional viewSectional view
Sectional view
 
orthographic projection
orthographic projectionorthographic projection
orthographic projection
 
Chapter 6 by lelis
Chapter 6 by lelisChapter 6 by lelis
Chapter 6 by lelis
 
Alphabet Of Lines
Alphabet Of LinesAlphabet Of Lines
Alphabet Of Lines
 
sectional views
sectional viewssectional views
sectional views
 
Lesson 1 intro to drawing
Lesson 1 intro to drawingLesson 1 intro to drawing
Lesson 1 intro to drawing
 
Sectional View
Sectional ViewSectional View
Sectional View
 
Technical Drawing
Technical DrawingTechnical Drawing
Technical Drawing
 
Drafting Tools and Materials
Drafting Tools and MaterialsDrafting Tools and Materials
Drafting Tools and Materials
 
Lettering
LetteringLettering
Lettering
 

Viewers also liked

Common drafting tools and materials
Common drafting tools and materialsCommon drafting tools and materials
Common drafting tools and materials
mer lendres
 
Orthographic projection exercises
Orthographic projection exercisesOrthographic projection exercises
Orthographic projection exercises
Sisco Batalla
 
Engineering Drawing
Engineering DrawingEngineering Drawing
Engineering Drawing
Dr. Bhuiyan S. M. Ebna Hai
 
4413Chapter_10_TOLERANCING
4413Chapter_10_TOLERANCING4413Chapter_10_TOLERANCING
4413Chapter_10_TOLERANCINGAteng Permana
 
Basic Geometrical Dimensioning & Tolerancing Tranning
Basic Geometrical Dimensioning  & Tolerancing TranningBasic Geometrical Dimensioning  & Tolerancing Tranning
Basic Geometrical Dimensioning & Tolerancing Tranning
Timothy Wooi
 
Front office SOP
Front office SOPFront office SOP
Front office SOP
Harry Singh
 
Product cost analysis icwa + c.com.
Product cost analysis   icwa + c.com.Product cost analysis   icwa + c.com.
Product cost analysis icwa + c.com.Pavan Kumar Vijay
 
Secondary Blasting Standard Operating Procedure
Secondary Blasting Standard Operating ProcedureSecondary Blasting Standard Operating Procedure
Secondary Blasting Standard Operating ProcedureCollins Sikanyika
 
Standard operating procedure
Standard operating procedureStandard operating procedure
Standard operating procedure
Danai Thongsin
 
Time mgt
Time mgtTime mgt
5 s
5 s5 s
Strategi cost management chap 2 john K shank
Strategi cost management chap 2 john K shankStrategi cost management chap 2 john K shank
Strategi cost management chap 2 john K shankAmelia Arista
 
5 S – A Program To Improve Project
5 S – A Program To Improve Project5 S – A Program To Improve Project
5 S – A Program To Improve ProjectIsidro Sid Calayag
 
Strategic cost management ppt @ bec doms
Strategic cost management ppt @ bec domsStrategic cost management ppt @ bec doms
Strategic cost management ppt @ bec doms
Babasab Patil
 
Chapter 10 axonometric_views__oblique_views
Chapter 10 axonometric_views__oblique_viewsChapter 10 axonometric_views__oblique_views
Chapter 10 axonometric_views__oblique_viewsYusrizal Mohd Yusof
 
terminal services division
terminal services divisionterminal services division
terminal services divisionAiDY
 
Strategic cost management
Strategic cost managementStrategic cost management
Strategic cost management
mnbvcz
 
Strategic cost management
Strategic cost managementStrategic cost management
Strategic cost managementVaibhav Banjan
 
drawing trainee
drawing traineedrawing trainee
drawing traineeltdat
 
Types of projections
Types of projectionsTypes of projections
Types of projections
Muhammad Umair Akram
 

Viewers also liked (20)

Common drafting tools and materials
Common drafting tools and materialsCommon drafting tools and materials
Common drafting tools and materials
 
Orthographic projection exercises
Orthographic projection exercisesOrthographic projection exercises
Orthographic projection exercises
 
Engineering Drawing
Engineering DrawingEngineering Drawing
Engineering Drawing
 
4413Chapter_10_TOLERANCING
4413Chapter_10_TOLERANCING4413Chapter_10_TOLERANCING
4413Chapter_10_TOLERANCING
 
Basic Geometrical Dimensioning & Tolerancing Tranning
Basic Geometrical Dimensioning  & Tolerancing TranningBasic Geometrical Dimensioning  & Tolerancing Tranning
Basic Geometrical Dimensioning & Tolerancing Tranning
 
Front office SOP
Front office SOPFront office SOP
Front office SOP
 
Product cost analysis icwa + c.com.
Product cost analysis   icwa + c.com.Product cost analysis   icwa + c.com.
Product cost analysis icwa + c.com.
 
Secondary Blasting Standard Operating Procedure
Secondary Blasting Standard Operating ProcedureSecondary Blasting Standard Operating Procedure
Secondary Blasting Standard Operating Procedure
 
Standard operating procedure
Standard operating procedureStandard operating procedure
Standard operating procedure
 
Time mgt
Time mgtTime mgt
Time mgt
 
5 s
5 s5 s
5 s
 
Strategi cost management chap 2 john K shank
Strategi cost management chap 2 john K shankStrategi cost management chap 2 john K shank
Strategi cost management chap 2 john K shank
 
5 S – A Program To Improve Project
5 S – A Program To Improve Project5 S – A Program To Improve Project
5 S – A Program To Improve Project
 
Strategic cost management ppt @ bec doms
Strategic cost management ppt @ bec domsStrategic cost management ppt @ bec doms
Strategic cost management ppt @ bec doms
 
Chapter 10 axonometric_views__oblique_views
Chapter 10 axonometric_views__oblique_viewsChapter 10 axonometric_views__oblique_views
Chapter 10 axonometric_views__oblique_views
 
terminal services division
terminal services divisionterminal services division
terminal services division
 
Strategic cost management
Strategic cost managementStrategic cost management
Strategic cost management
 
Strategic cost management
Strategic cost managementStrategic cost management
Strategic cost management
 
drawing trainee
drawing traineedrawing trainee
drawing trainee
 
Types of projections
Types of projectionsTypes of projections
Types of projections
 

Similar to Draw 111- mechanical drawing and orthographic drawing

Chapter 3 multiview drawings
Chapter 3 multiview drawingsChapter 3 multiview drawings
Chapter 3 multiview drawings
TigistWondimneh
 
Engineering Drawing: Chapter 05 pictorial sketching
Engineering Drawing: Chapter 05 pictorial sketchingEngineering Drawing: Chapter 05 pictorial sketching
Engineering Drawing: Chapter 05 pictorial sketchingmokhtar
 
Ch 3
Ch 3Ch 3
Chapter 5
Chapter 5Chapter 5
Chapter 5
LelisoHobicho
 
First and third angle projection
First and third angle projectionFirst and third angle projection
First and third angle projection
Safiullah Khan
 
Chapter 05 Pictorial sketching.ppt engineering drawing studies
Chapter 05 Pictorial sketching.ppt engineering drawing studiesChapter 05 Pictorial sketching.ppt engineering drawing studies
Chapter 05 Pictorial sketching.ppt engineering drawing studies
AyeleAdinew
 
Perspective Drawings.ppt
Perspective Drawings.pptPerspective Drawings.ppt
Perspective Drawings.ppt
DrAlfia
 
Class 10 presentation
Class 10 presentationClass 10 presentation
Class 10 presentationlaura_gerold
 
Lecture-1-ORTHOGRAPHIC-1.doc
Lecture-1-ORTHOGRAPHIC-1.docLecture-1-ORTHOGRAPHIC-1.doc
Lecture-1-ORTHOGRAPHIC-1.doc
ShielaFherlBudiongan2
 
Class 13 presentation
Class 13 presentationClass 13 presentation
Class 13 presentationlaura_gerold
 
Class 9 presentation
Class 9 presentationClass 9 presentation
Class 9 presentationlaura_gerold
 
CIVIL Engineering Drawing by haseeb muhammad
CIVIL Engineering Drawing by haseeb muhammadCIVIL Engineering Drawing by haseeb muhammad
CIVIL Engineering Drawing by haseeb muhammad
haseeb mohd
 
Sketching and lettering
Sketching and letteringSketching and lettering
Sketching and lettering
Dhaval Patel
 
Class 6 presentation
Class 6 presentationClass 6 presentation
Class 6 presentationlaura_gerold
 
CHAPTER 3. MULTI-VIEW DRAWING (2).pptx
CHAPTER 3. MULTI-VIEW DRAWING (2).pptxCHAPTER 3. MULTI-VIEW DRAWING (2).pptx
CHAPTER 3. MULTI-VIEW DRAWING (2).pptx
tefolol695
 
CHAPTER 3. MULTI-VIEW DRAWING 1.pptx
CHAPTER 3. MULTI-VIEW DRAWING 1.pptxCHAPTER 3. MULTI-VIEW DRAWING 1.pptx
CHAPTER 3. MULTI-VIEW DRAWING 1.pptx
tefolol695
 
CHAPTER 3. MULTI-VIEW DRAWING (2).pptx
CHAPTER 3. MULTI-VIEW DRAWING (2).pptxCHAPTER 3. MULTI-VIEW DRAWING (2).pptx
CHAPTER 3. MULTI-VIEW DRAWING (2).pptx
tefolol695
 
Presentation1 of eg
Presentation1  of  egPresentation1  of  eg
Presentation1 of eg
yash bhathawala
 

Similar to Draw 111- mechanical drawing and orthographic drawing (20)

Chapter 3 multiview drawings
Chapter 3 multiview drawingsChapter 3 multiview drawings
Chapter 3 multiview drawings
 
Engineering Drawing: Chapter 05 pictorial sketching
Engineering Drawing: Chapter 05 pictorial sketchingEngineering Drawing: Chapter 05 pictorial sketching
Engineering Drawing: Chapter 05 pictorial sketching
 
Ch 3
Ch 3Ch 3
Ch 3
 
Chapter 5
Chapter 5Chapter 5
Chapter 5
 
First and third angle projection
First and third angle projectionFirst and third angle projection
First and third angle projection
 
Pp chapter 5
Pp chapter 5Pp chapter 5
Pp chapter 5
 
Chapter 05 Pictorial sketching.ppt engineering drawing studies
Chapter 05 Pictorial sketching.ppt engineering drawing studiesChapter 05 Pictorial sketching.ppt engineering drawing studies
Chapter 05 Pictorial sketching.ppt engineering drawing studies
 
Perspective Drawings.ppt
Perspective Drawings.pptPerspective Drawings.ppt
Perspective Drawings.ppt
 
Class 10 presentation
Class 10 presentationClass 10 presentation
Class 10 presentation
 
Lecture-1-ORTHOGRAPHIC-1.doc
Lecture-1-ORTHOGRAPHIC-1.docLecture-1-ORTHOGRAPHIC-1.doc
Lecture-1-ORTHOGRAPHIC-1.doc
 
Class 13 presentation
Class 13 presentationClass 13 presentation
Class 13 presentation
 
Class 9 presentation
Class 9 presentationClass 9 presentation
Class 9 presentation
 
CIVIL Engineering Drawing by haseeb muhammad
CIVIL Engineering Drawing by haseeb muhammadCIVIL Engineering Drawing by haseeb muhammad
CIVIL Engineering Drawing by haseeb muhammad
 
Sketching and lettering
Sketching and letteringSketching and lettering
Sketching and lettering
 
Class 6 presentation
Class 6 presentationClass 6 presentation
Class 6 presentation
 
CHAPTER 3. MULTI-VIEW DRAWING (2).pptx
CHAPTER 3. MULTI-VIEW DRAWING (2).pptxCHAPTER 3. MULTI-VIEW DRAWING (2).pptx
CHAPTER 3. MULTI-VIEW DRAWING (2).pptx
 
CHAPTER 3. MULTI-VIEW DRAWING 1.pptx
CHAPTER 3. MULTI-VIEW DRAWING 1.pptxCHAPTER 3. MULTI-VIEW DRAWING 1.pptx
CHAPTER 3. MULTI-VIEW DRAWING 1.pptx
 
CHAPTER 3. MULTI-VIEW DRAWING (2).pptx
CHAPTER 3. MULTI-VIEW DRAWING (2).pptxCHAPTER 3. MULTI-VIEW DRAWING (2).pptx
CHAPTER 3. MULTI-VIEW DRAWING (2).pptx
 
Presentation1 of eg
Presentation1  of  egPresentation1  of  eg
Presentation1 of eg
 
Chapter 03 orthographic projection
Chapter 03 orthographic projectionChapter 03 orthographic projection
Chapter 03 orthographic projection
 

Recently uploaded

2024.06.01 Introducing a competency framework for languag learning materials ...
2024.06.01 Introducing a competency framework for languag learning materials ...2024.06.01 Introducing a competency framework for languag learning materials ...
2024.06.01 Introducing a competency framework for languag learning materials ...
Sandy Millin
 
The Roman Empire A Historical Colossus.pdf
The Roman Empire A Historical Colossus.pdfThe Roman Empire A Historical Colossus.pdf
The Roman Empire A Historical Colossus.pdf
kaushalkr1407
 
The French Revolution Class 9 Study Material pdf free download
The French Revolution Class 9 Study Material pdf free downloadThe French Revolution Class 9 Study Material pdf free download
The French Revolution Class 9 Study Material pdf free download
Vivekanand Anglo Vedic Academy
 
Sha'Carri Richardson Presentation 202345
Sha'Carri Richardson Presentation 202345Sha'Carri Richardson Presentation 202345
Sha'Carri Richardson Presentation 202345
beazzy04
 
Palestine last event orientationfvgnh .pptx
Palestine last event orientationfvgnh .pptxPalestine last event orientationfvgnh .pptx
Palestine last event orientationfvgnh .pptx
RaedMohamed3
 
Lapbook sobre os Regimes Totalitários.pdf
Lapbook sobre os Regimes Totalitários.pdfLapbook sobre os Regimes Totalitários.pdf
Lapbook sobre os Regimes Totalitários.pdf
Jean Carlos Nunes Paixão
 
Welcome to TechSoup New Member Orientation and Q&A (May 2024).pdf
Welcome to TechSoup   New Member Orientation and Q&A (May 2024).pdfWelcome to TechSoup   New Member Orientation and Q&A (May 2024).pdf
Welcome to TechSoup New Member Orientation and Q&A (May 2024).pdf
TechSoup
 
Unit 8 - Information and Communication Technology (Paper I).pdf
Unit 8 - Information and Communication Technology (Paper I).pdfUnit 8 - Information and Communication Technology (Paper I).pdf
Unit 8 - Information and Communication Technology (Paper I).pdf
Thiyagu K
 
Guidance_and_Counselling.pdf B.Ed. 4th Semester
Guidance_and_Counselling.pdf B.Ed. 4th SemesterGuidance_and_Counselling.pdf B.Ed. 4th Semester
Guidance_and_Counselling.pdf B.Ed. 4th Semester
Atul Kumar Singh
 
Phrasal Verbs.XXXXXXXXXXXXXXXXXXXXXXXXXX
Phrasal Verbs.XXXXXXXXXXXXXXXXXXXXXXXXXXPhrasal Verbs.XXXXXXXXXXXXXXXXXXXXXXXXXX
Phrasal Verbs.XXXXXXXXXXXXXXXXXXXXXXXXXX
MIRIAMSALINAS13
 
Mule 4.6 & Java 17 Upgrade | MuleSoft Mysore Meetup #46
Mule 4.6 & Java 17 Upgrade | MuleSoft Mysore Meetup #46Mule 4.6 & Java 17 Upgrade | MuleSoft Mysore Meetup #46
Mule 4.6 & Java 17 Upgrade | MuleSoft Mysore Meetup #46
MysoreMuleSoftMeetup
 
Language Across the Curriculm LAC B.Ed.
Language Across the  Curriculm LAC B.Ed.Language Across the  Curriculm LAC B.Ed.
Language Across the Curriculm LAC B.Ed.
Atul Kumar Singh
 
678020731-Sumas-y-Restas-Para-Colorear.pdf
678020731-Sumas-y-Restas-Para-Colorear.pdf678020731-Sumas-y-Restas-Para-Colorear.pdf
678020731-Sumas-y-Restas-Para-Colorear.pdf
CarlosHernanMontoyab2
 
Supporting (UKRI) OA monographs at Salford.pptx
Supporting (UKRI) OA monographs at Salford.pptxSupporting (UKRI) OA monographs at Salford.pptx
Supporting (UKRI) OA monographs at Salford.pptx
Jisc
 
How libraries can support authors with open access requirements for UKRI fund...
How libraries can support authors with open access requirements for UKRI fund...How libraries can support authors with open access requirements for UKRI fund...
How libraries can support authors with open access requirements for UKRI fund...
Jisc
 
aaaaaaaaaaaaaaaaaaaaaaaaaaaaaaaaaaaaaaaaa
aaaaaaaaaaaaaaaaaaaaaaaaaaaaaaaaaaaaaaaaaaaaaaaaaaaaaaaaaaaaaaaaaaaaaaaaaaaaaaaaaa
aaaaaaaaaaaaaaaaaaaaaaaaaaaaaaaaaaaaaaaaa
siemaillard
 
Model Attribute Check Company Auto Property
Model Attribute  Check Company Auto PropertyModel Attribute  Check Company Auto Property
Model Attribute Check Company Auto Property
Celine George
 
The basics of sentences session 5pptx.pptx
The basics of sentences session 5pptx.pptxThe basics of sentences session 5pptx.pptx
The basics of sentences session 5pptx.pptx
heathfieldcps1
 
The geography of Taylor Swift - some ideas
The geography of Taylor Swift - some ideasThe geography of Taylor Swift - some ideas
The geography of Taylor Swift - some ideas
GeoBlogs
 
June 3, 2024 Anti-Semitism Letter Sent to MIT President Kornbluth and MIT Cor...
June 3, 2024 Anti-Semitism Letter Sent to MIT President Kornbluth and MIT Cor...June 3, 2024 Anti-Semitism Letter Sent to MIT President Kornbluth and MIT Cor...
June 3, 2024 Anti-Semitism Letter Sent to MIT President Kornbluth and MIT Cor...
Levi Shapiro
 

Recently uploaded (20)

2024.06.01 Introducing a competency framework for languag learning materials ...
2024.06.01 Introducing a competency framework for languag learning materials ...2024.06.01 Introducing a competency framework for languag learning materials ...
2024.06.01 Introducing a competency framework for languag learning materials ...
 
The Roman Empire A Historical Colossus.pdf
The Roman Empire A Historical Colossus.pdfThe Roman Empire A Historical Colossus.pdf
The Roman Empire A Historical Colossus.pdf
 
The French Revolution Class 9 Study Material pdf free download
The French Revolution Class 9 Study Material pdf free downloadThe French Revolution Class 9 Study Material pdf free download
The French Revolution Class 9 Study Material pdf free download
 
Sha'Carri Richardson Presentation 202345
Sha'Carri Richardson Presentation 202345Sha'Carri Richardson Presentation 202345
Sha'Carri Richardson Presentation 202345
 
Palestine last event orientationfvgnh .pptx
Palestine last event orientationfvgnh .pptxPalestine last event orientationfvgnh .pptx
Palestine last event orientationfvgnh .pptx
 
Lapbook sobre os Regimes Totalitários.pdf
Lapbook sobre os Regimes Totalitários.pdfLapbook sobre os Regimes Totalitários.pdf
Lapbook sobre os Regimes Totalitários.pdf
 
Welcome to TechSoup New Member Orientation and Q&A (May 2024).pdf
Welcome to TechSoup   New Member Orientation and Q&A (May 2024).pdfWelcome to TechSoup   New Member Orientation and Q&A (May 2024).pdf
Welcome to TechSoup New Member Orientation and Q&A (May 2024).pdf
 
Unit 8 - Information and Communication Technology (Paper I).pdf
Unit 8 - Information and Communication Technology (Paper I).pdfUnit 8 - Information and Communication Technology (Paper I).pdf
Unit 8 - Information and Communication Technology (Paper I).pdf
 
Guidance_and_Counselling.pdf B.Ed. 4th Semester
Guidance_and_Counselling.pdf B.Ed. 4th SemesterGuidance_and_Counselling.pdf B.Ed. 4th Semester
Guidance_and_Counselling.pdf B.Ed. 4th Semester
 
Phrasal Verbs.XXXXXXXXXXXXXXXXXXXXXXXXXX
Phrasal Verbs.XXXXXXXXXXXXXXXXXXXXXXXXXXPhrasal Verbs.XXXXXXXXXXXXXXXXXXXXXXXXXX
Phrasal Verbs.XXXXXXXXXXXXXXXXXXXXXXXXXX
 
Mule 4.6 & Java 17 Upgrade | MuleSoft Mysore Meetup #46
Mule 4.6 & Java 17 Upgrade | MuleSoft Mysore Meetup #46Mule 4.6 & Java 17 Upgrade | MuleSoft Mysore Meetup #46
Mule 4.6 & Java 17 Upgrade | MuleSoft Mysore Meetup #46
 
Language Across the Curriculm LAC B.Ed.
Language Across the  Curriculm LAC B.Ed.Language Across the  Curriculm LAC B.Ed.
Language Across the Curriculm LAC B.Ed.
 
678020731-Sumas-y-Restas-Para-Colorear.pdf
678020731-Sumas-y-Restas-Para-Colorear.pdf678020731-Sumas-y-Restas-Para-Colorear.pdf
678020731-Sumas-y-Restas-Para-Colorear.pdf
 
Supporting (UKRI) OA monographs at Salford.pptx
Supporting (UKRI) OA monographs at Salford.pptxSupporting (UKRI) OA monographs at Salford.pptx
Supporting (UKRI) OA monographs at Salford.pptx
 
How libraries can support authors with open access requirements for UKRI fund...
How libraries can support authors with open access requirements for UKRI fund...How libraries can support authors with open access requirements for UKRI fund...
How libraries can support authors with open access requirements for UKRI fund...
 
aaaaaaaaaaaaaaaaaaaaaaaaaaaaaaaaaaaaaaaaa
aaaaaaaaaaaaaaaaaaaaaaaaaaaaaaaaaaaaaaaaaaaaaaaaaaaaaaaaaaaaaaaaaaaaaaaaaaaaaaaaaa
aaaaaaaaaaaaaaaaaaaaaaaaaaaaaaaaaaaaaaaaa
 
Model Attribute Check Company Auto Property
Model Attribute  Check Company Auto PropertyModel Attribute  Check Company Auto Property
Model Attribute Check Company Auto Property
 
The basics of sentences session 5pptx.pptx
The basics of sentences session 5pptx.pptxThe basics of sentences session 5pptx.pptx
The basics of sentences session 5pptx.pptx
 
The geography of Taylor Swift - some ideas
The geography of Taylor Swift - some ideasThe geography of Taylor Swift - some ideas
The geography of Taylor Swift - some ideas
 
June 3, 2024 Anti-Semitism Letter Sent to MIT President Kornbluth and MIT Cor...
June 3, 2024 Anti-Semitism Letter Sent to MIT President Kornbluth and MIT Cor...June 3, 2024 Anti-Semitism Letter Sent to MIT President Kornbluth and MIT Cor...
June 3, 2024 Anti-Semitism Letter Sent to MIT President Kornbluth and MIT Cor...
 

Draw 111- mechanical drawing and orthographic drawing

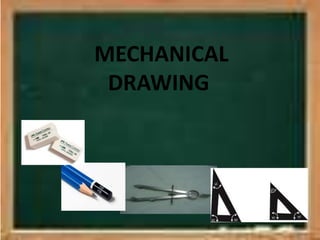
  • 2. Procedure in Setting up Drawing tools, Materials and Equipment and Standard Operating Procedure
  • 3. •Before starting the drawing activity: •Select the tools, materials and equipment which are needed in the assigned task. •Properly set up the required tools and materials in a place which is convenient for you to move and execute your work. •Clean the table and tools, see to it that these are free from the dust and other elements that would cause damage to your work. •Wash your hand with clean water.
  • 4. •Activity proper: •Properly manipulate all the tools and equipment that are used in the activity. •Perform the activity by following the standard operating procedure per job requirement. •In case of meeting an errors or mistakes along the way of activity ( for instance misprinting of lines, letters, and other forms of mistakes) use appropriate eraser for a particular mistakes.
  • 5. •After the activity: • Submit your output to your teacher for checking •Check all the tools and materials to ensure that nothing has lost. •Return the tools and materials to the assigned tool keeper for safekeeping. •Clean your work station before leaving.
  • 6. Alphabet of Lines Lines in technical drawing are represented as follows: • According to weight •Thick •Medium •Thin •According to construction •Continues line •Broken and dashed line •Combination of continues and broken/dashed line
  • 8. • Border lines are generally the heaviest or the darkest lines in a drawing. The border surrounds a drawing and is usually rectangular in shape. It makes the onlooker feels as if the parts of the drawing are combined into a single unified graphic representation.
  • 9. • Visible lines this is used to show the outlines and corners that can be seen when the object is viewed. It is often called as the object lines.
  • 10. • Hidden lines this is used to show the edges that are not normally seen when the object is viewed.
  • 11. • Dimension lines this is a line terminated by arrowheads at each of its end, it is used to indicate the direction and extent of measurements. Along this line is a numerical value indicating the units of measurements. • Extension lines this is lines that extends from a point in the drawing to which the dimension refers and meets the dimension line at the right angle. 20mm 20mm 20mm 20mm 20mm 20mm 60mm
  • 12. • Center line this is used to indicate the center of a circle or arc, or to indicate the axis of an object with circular features.
  • 13. •Leader Line – a thin solid line leading from a dimension value or a note to the part on the drawing to which the note applies. An arrowhead is used to point the leader, but never on the note end. The end note of the leader should end with a short horizontal bar at the mid-height of the lettering and should run either to the beginning or end of the note. Leader Line
  • 14. • Cutting plane lines this lines are used to indicate an imaginary cut through an object along the line. It is made with long heavy dashes alternating with two short dashes. • Section lines this are light lines used in making sectional views. They are spaced evenly to make a shaded effect.
  • 15. THEORIES AND PRINCIPLES OF ORTHOGRAPHIC PROJECTION The term orthographic came from the Greek word orthos and graphos which means straight line drawing. Planes of Projection •Frontal Plane – this shows the shape of an object when viewed from the front. This is known as the Front View of the object. •Horizontal Plane – this give the appearance of the object as if viewed directly from above. It shows the distance from the front to the rear. This is known as the Top View of an object. •Profile Plane – this shows the shape of the object when viewed from the side. The distance from bottom to top and front to rear also appears. It is known as the Side View of an object.
  • 16. When opening the planes that forms a box or is sometimes called imaginary box, the six views of the object are represented on the following positions as shown below. 1. Top View 2. Front View 3. Bottom View 4. Rear View 5. Left Side View 6. Right Side View
  • 17. FRONT VIEW: Height and Width TOP VIEW: Width and Depth RIGHT VIEW: Depth and Height
  • 18. Principles of Orthographic Drawing 1. The front view and top view are always drawn in line vertically. Align views with each other (features project from one view to the next)
  • 19. 2. The front and the right side view are always drawn in line horizontally.
  • 20. 3. The height of the front view is the same as height of the right side view. 4. The depth of the top view is the same as the depth of the side view. 6. A view taken from above is a top view and must be drawn above the front view. 7. A view taken from below is a bottom view and must appear below the front view. 8. A line projected perpendicularly to the plane of projection, its projection on the plane will be a line. 9. A line when projected parallel to the plane of projection, its projection will be a line. 10. An inclined line projected to the plane of projection, its projection on the plane will be foreshortened. 11. A view from the right, is a right-side view and must be drawn left of the front view. 12. The front view of the object in the top view faces the front view. 13. The front of the object in the side view faces the front view.
  • 21. Plan View or Top View This can be little more difficult to visualize because you have to imagine yourself moving over the top of the object and looking vertically downward. The left-hand and right-hand illustration shows how the plan is placed above the front. Again, sketch the light vertical construction lines to locate the plan in its proper position. Draw these upward from each corner of the front view.
  • 22. Front View Concentrate on the front view. If you look at it correctly the effect will be seen below at the left, while at the right illustration shows what you will actually see. Notice that in the left-hand drawing, you can only see the dark-inked front “face” of the object. Notice also that you cannot see any of the other sides of the object. This is because all those sides are “going away” from you in your line of sight and are simply not visible from your view point. They are still there, of course, but are hidden behind the outer edges of the first face.
  • 23. Right-Side View Right-side view should be drawn at the right side of front view. Imagine moving around the object to look directly at its right side. How you see it is shown below-left and what you see is shown below-right. Again the faces you actually see are heavily outlined.
  • 24. Procedure in Constructing Orthographic Views 1. Analyze the given object.
  • 25. 2. Draw the proper construction line where the three regular view of the orthographic projection will be designated. TOP VIEW FRONT VIEW SIDE VIEW
  • 26. 3. Start focusing at the frontal plane of the object to obtain the necessary details of the front view. • Consider the height and length of the object in constructing the front view. Draw the height details using construction lines.
  • 27. 4.Draw the length details of front view. • Extend the construction lines to the position of the plan considering that the front view and the plan share the same length as stated in the principles of orthographic drawing.
  • 28. 5. Draw the object lines base on the intersection of the construction lines of step 3 and step 4.
  • 29. 6. Provide a distance of not less than 20mm on top of the front view to start the construction of the plan. Draw the depth details of the object since the length details are already in place. Use construction lines in doing this step
  • 30. 7. Draw the object lines base on the intersected of the construction lines that corresponds to the details of the object.
  • 31. 8. Provide a 45° angle line that extends from the edge of the front view towards the side of the plan. •The 45°angle line will serve as a pivotal point of the lines that have intersected it coming from the depth details of the plan. Lines that are intersected will be projected towards the Position of the right side view which will provide the same depth of the right side view. Use construction lines in doing this step.
  • 32. 9. Draw the object lines base on the intersected of the construction lines that corresponds to the details of the object.
  • 33. 10. Provide the necessary labels, and dimensions of each of the views.
  • 34.
  • 35. Drawing Exercises: Base on the given drawings, construct the three principal views following the principles in constructing orthographic drawing. Utilize the proper type of lines in accordance with its use. 20mm 20mm 20mm 20mm 20mm 20mm 60mm