Camera Operation
•
5 likes•4,226 views

The document provides information about camera operation, including focusing, exposure, shutter speeds, apertures, ISO settings, and depth of field. It discusses how changing shutter speeds and apertures while maintaining the same exposure is called equivalent exposure. It also summarizes copyright information, noting the document is for educational purposes and images are from various sources including the author's own work.

More Related Content
What's hot
What's hot (20)
Viewers also liked
Viewers also liked (17)
Similar to Camera Operation
Similar to Camera Operation (20)
More from Drew Loker
Recently uploaded
Recently uploaded (20)
Camera Operation
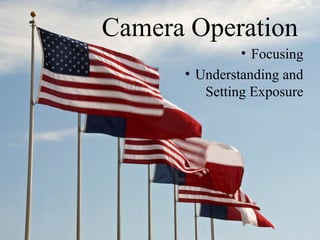
- 1. Camera Operation • Focusing • Understanding and Setting Exposure
- 2. Copyright Notice • Attribution-NonCommercial-ShareAlike CC BY-NC-SA • This presentation is for educational purposes only. No money is being made and is provided with similar allowances for other educators to use for non-profit, educational purposes. • Images are from various sources, including many of my own. If you would like to high res images I have shot, please visit www.DrewLoker.com for various work online. • If you are the original author of any of the samples, pictures, text, etc. please let me know if you object to the usage and I will remove your material promptly. Photo by Drew Loker
- 3. Why use different Shutter Speeds and Apertures.Why use different Shutter Speeds and Apertures. All photos in this presentation were taken by and are ©Drew Loker, www.drewloker.com, unless otherwise noted. However, please feel free to distribute freely this presentation as long as the photo credits stay intact.
- 5. Good pictures start with a steady shot. Be a rock!
- 6. Remember, even a monkey knows how to hold a camera.
- 7. Exposure Setting the exposure is like filling a bucket: How much you open the valve is going to determine how long it takes to fill.
- 8. Closing the aperture is going to make the exposure time longer.
- 10. Getting the Right Exposure • Sometimes the lighting is so hard to deal with, you have to use extreme measures, like an umbrella to diffuse the lighting. • Each of the pictures presented in this slide show are examples of difficult lighting.
- 11. 3 Types of Meters • Matrix – uses 5 or more zones and averages. Good for off center subjects. • Center Weighted – uses the same pattern as the Matrix, but puts more wieght in the center • Spot Meter – usually uses a smaller center than the center of the matrix or center area.
- 12. Not to be confused with Different Focusing Grids Split Field: Horizontal Clear Matte Fresnal: Get the center area sharp. Split Field: Diagonal • Cameras # 8, 10, 12, 13, 15, 19 have a Split Field Focusing
- 15. 5 Types of Meter Conditions of the Pentax k1000 1. Good 2. Bad 3. Dead 4. Dumb 5. Broken * While some of the details in this presentation apply mainly to older cameras, like the k1000, the concepts of proper meter reading apply to the most advanced cameras on the market.
- 16. Good Exposure Put the needle in the middle. • As you move the camera, the needle will react to the brightness of the various light and dark images. • The scene should be evenly lit for the best exposure reading.
- 17. Silhouettes • Any time you have the sun in your picture, you are going to have a tough exposure.
- 18. K1000 Meter • Picture of an actual meter INSIDE, on the right, of a k1000 • Other models will vary greatly on this…but work on the same principal.
- 19. Good Exposure, Maybe The Pentax k1000 is easily tricked: • 60% of the exposure is from the small center area of the screen. • 40% is from the rest of the viewfinder.
- 20. Good Exposure vs. Dead Battery The meter reading will be the same for both a GOOD reading and a DEAD battery. • A properly working meter MAY move up and down as it is pointed at different lighting. • A DEAD battery will have a needle stuck in the center.
- 21. Bad Meter Reading, Maybe • If the needle is DOWN…there may be TOO LITTLE light. • If the needle is UP…there may be TOO MUCH light.
- 22. Shutter Speed + Aperture = Exposure • Just because the METER reads correctly does NOT mean that you have a useful exposure – The meter MAY be in the middle with • 1/2 @ f/22 - WAY too slow of a shutter. This is the most common source of errors (too slow of shutter). • 1/1000 @ f/2 - lens would be at extreme edge of opening… resulting in soft corners and other lens challenges. • Ideal exposure is 1/250 @ f/8.
- 23. Sunny f/16 Rule • Assuming a sunny day, @ ISO 100, your exposure should be: – 1/125 @ f/16 • The Equivalent Exposures (EE) are – f/22 @1/60 – f/16 @1/125 – f/11 @ 1/250 – f/8 @ 1/500 – f/5.6 @ 1/1000 – f/4 @ 1/2000 As you increase the light by opening the aperture, you have to decrease the light by speeding up the shutter. More light Less light
- 24. Common Base Exposures • Your exposure should be (average): Location Exposure ISO – Sunny day 1/125 @ f/16 100 – Indoors in V61 1/60 @ f/2 400 – Indoors in V61 1/15 @ f/2 100 – F Hall (near doors) 1/125 @ f2 400 – G Hall (dark halls) 1/30 @ f/2 400 – G Hall 1/8 @ f/2 100 For the last 30 years, ISO 400 was pretty much the “fastest” (most sensitive) ISO rating you would want to use. In the last year, technology improvements allow for useful ISO ratings of 800, 1600…and even 3200 and 6400 on advanced cameras. The maximum sensor sensitivity will surely increase in the future.
- 25. EE vs. Bracketing • EE is SAME exposure…with variation on the SS or Aperture: – 1/125 @ f/16 – 1/250 @ f/11 • Bracketing is a CHANGE in exposure…by changing one of the variables. – f/16 @1/500 -2 Stops – f/11 @ 1/500 -1 Stop – f/8 @ 1/500 Metered Exposure – f/5.6 @ 1/500 + 1 Stop – f/4 @ 1/500 + 2 Stops As you increase the light by opening the aperture, you have to decrease the light by speeding up the shutter. More light Less light
- 26. Exposure Bracketing • Place the camera on a tripod. • Meter the scene and take a picture to get a good overall exposure. • Then, increase to +1 on the exposure compensation. This will make for a brighter picture. • Then repeat for +2, -2 and -2. • If your camera has -/+3 or more, shoot those as well. + 2 + 1 0 - 1 - 2
- 27. + 2 + 1 0 - 1- 2
- 28. HDR Merge – Blending Highlights and Shadows
- 29. HDR Merge – Blending Highlights and Shadows
- 30. HDR Merge – Blending Highlights and Shadows
- 31. • Taking 3 shots at different exposures (or5, 7, or9) - 1 stop Normal exposure + 1 stop • Bracket can be set in 1/3, ½ or1 stop increments • Exposure range can be set to –2 to +2 stops (oreven +5 or-5) Exposure Bracketing
- 32. Exposure Slider • Each number represents a FULL STOP • Moving left or right represents either 50% LESS light…or 100% MORE light. – IOW, you are either DOUBLING or HALVING your light. • Question: Moving from left to right on the Shutter does what to the amount of light?
- 33. Exposure Slider, Outdoors, ISO 100
- 34. Exposure Slider, Indoors, 100 ISO
- 35. Exposure Slider, Indoors, 400 ISO
- 37. Minimum shutter speed varies depending on the subject
- 38. Parallax Error
- 40. The Camera is only as Smart as the Photographer 1/125 @ f/8 1/15 @ f/8 Left: Good sky Exposure. Right: Good Skins Tones…shirt blown out.
- 41. Except for the new SMART cameras…then it is as smart as the people in FRONT of the camera. 1/320 @ f/4.5 with fill flash Here the camera balanced the background with enough fill flash to expose for the foreground. Photo by Aimee Loker
- 42. Using Exposure Compensation Program and Automatic Exposure Modes do a pretty good job when the subject is evenly lit. But when the subject is off center…or much darker/bright than the back ground, you have to use the Manual exposure mode…or dial +/- Exposure Compensation.
- 43. Using Exposure Compensation But which is correct? Depends on what you are looking for? Maybe you want a silhouette. Exposure Compensation is when you CHANGE the base exposure increasing or decreasing the total amount of light.
- 44. Equivalent Exposure (EE) is different than Exposure Compensation. EE is when you keep the SAME total amount of light…but change the variables to either stop or blur motion, or control your depth of field. Using Equivalent Exposure
- 45. Using Equivalent Exposure Long Exposures allow for creative control. Left: 4 sec exposure allowed for people to blur as the walked through the image. Right: 2 sec exp. Allowed for zooming while exposing. 4 sec @ f/10, 38mm 2.2 sec @ f/10, 112mm
- 46. Beach Ghost • A special effect filter was used to produce a LONG 15 sec exposure in bright sun for my wife to stand for 8 seconds…then walk out of the picture.
- 49. ISO Options
- 50. Ranges of various Digital Cameras Canon A85 • 50 • 100 • 200 • 400 Pentax 100d • 100 • 200 • 400 • 800 • 1600 • 3200 Nikon D3 • 200 • 400 • 800 • 1600 • 3200 • 6400 • 12800 • 25600 Nikon D40 • 100 • 200 • 400 • 800 • 1600
- 51. S +/- AWB
- 52. EE and ISO 100 200 400 800 1600 3200 6400 12k 22 16” 16 8” 11 4” 8 2” 5.6 1” 4 ½ ¼ 1/8 1/15 1/30 1/60 1/125 2.8 1.4
- 53. EE and ISO 100 200 400 800 1600 3200 6400 12k 22 16” 8” 4” 2” 1” ½ ¼ 1/8 16 8” 4” 2” 1” ½ ¼ 1/8 1/15 11 4” 2” 1” ½ ¼ 1/8 1/15 1/60 8 2” 1” ½ ¼ 1/8 1/15 1/30 1/60 5.6 1” ½ ¼ 1/8 1/15 1/30 1/60 1/125 4 ½ ¼ 1/8 1/15 1/30 1/60 1/125 1/250 2.8 1.4
- 56. Depth of Field - DOF 3 Ways to Control 1. Aperture 1. F/2 - shallow DOF 2. F/22 - deep DOF 2. Subject to camera distance 1. Close Up = Shallow DOF 2. Far away = Deep DOF 3. Focal Length 1. Wide (18mm) = Deep DOF 2. Tele (200mm) = Shallow DOF
- 57. Conclusion • Be smarter than your camera…know what light you are pointing your camera. – The meter is designed to read AVERAGE light. – If you have a bright object in your view finder, the meter is going to indicate that you have too much light…but you may be ok. – If there are a lot of shadows, the meter may read in the negative end…but you may be ok.