Downloaded 97 times


![Digital Signatures (4)
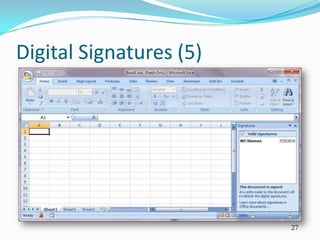
After you complete the necessary steps, your Excel
workbook is now signed.
When you close and then reopen the signed
workbook, the Excel title bar will display the words
[Read-Only] (in brackets) after the workbook name.
Additionally, the digital ID icon appears in the status
bar, and the Signatures task pane appears to indicate
that a digital signature has been added to the
workbook.
26](https://image.slidesharecdn.com/advancedexcelday5-121027051712-phpapp01/85/Advanced-Excel-Day-5-26-320.jpg)


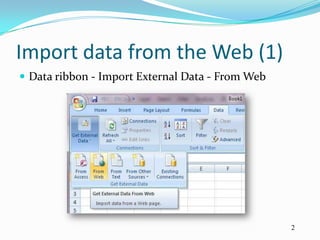
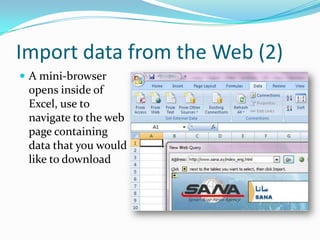
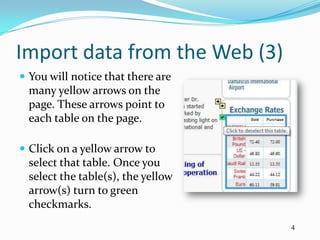
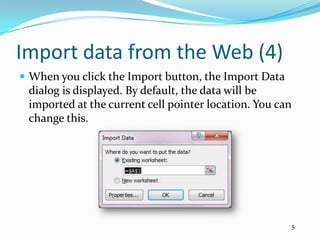
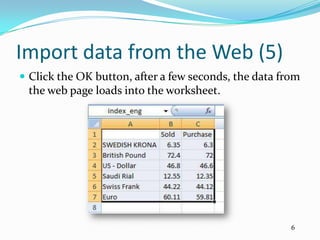
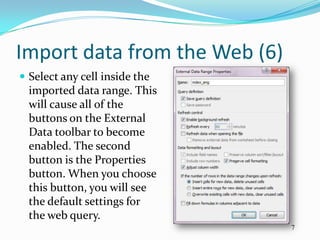
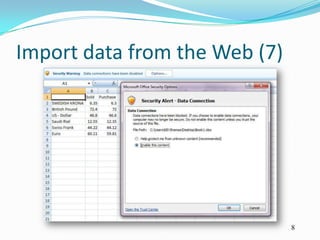
This document provides instructions for importing data from web pages into Excel. It explains how to use the Import feature on the Data ribbon to open a mini-browser and select tables on web pages for import. It describes how the imported data will be placed in the worksheet and how to access properties of the web query. Additional sections cover using comments, showing and tracing formulas, tracking changes made by collaborators, protecting Excel files with passwords, and adding digital signatures to verify the author of changes.


![Getting Started with Apache Spark: Big Data Made Simple [Free Meetup]](https://cdn.slidesharecdn.com/ss_thumbnails/apachesparkgettingstarted-260203175547-8361bcc3-thumbnail.jpg?width=640&height=640&fit=bounds)