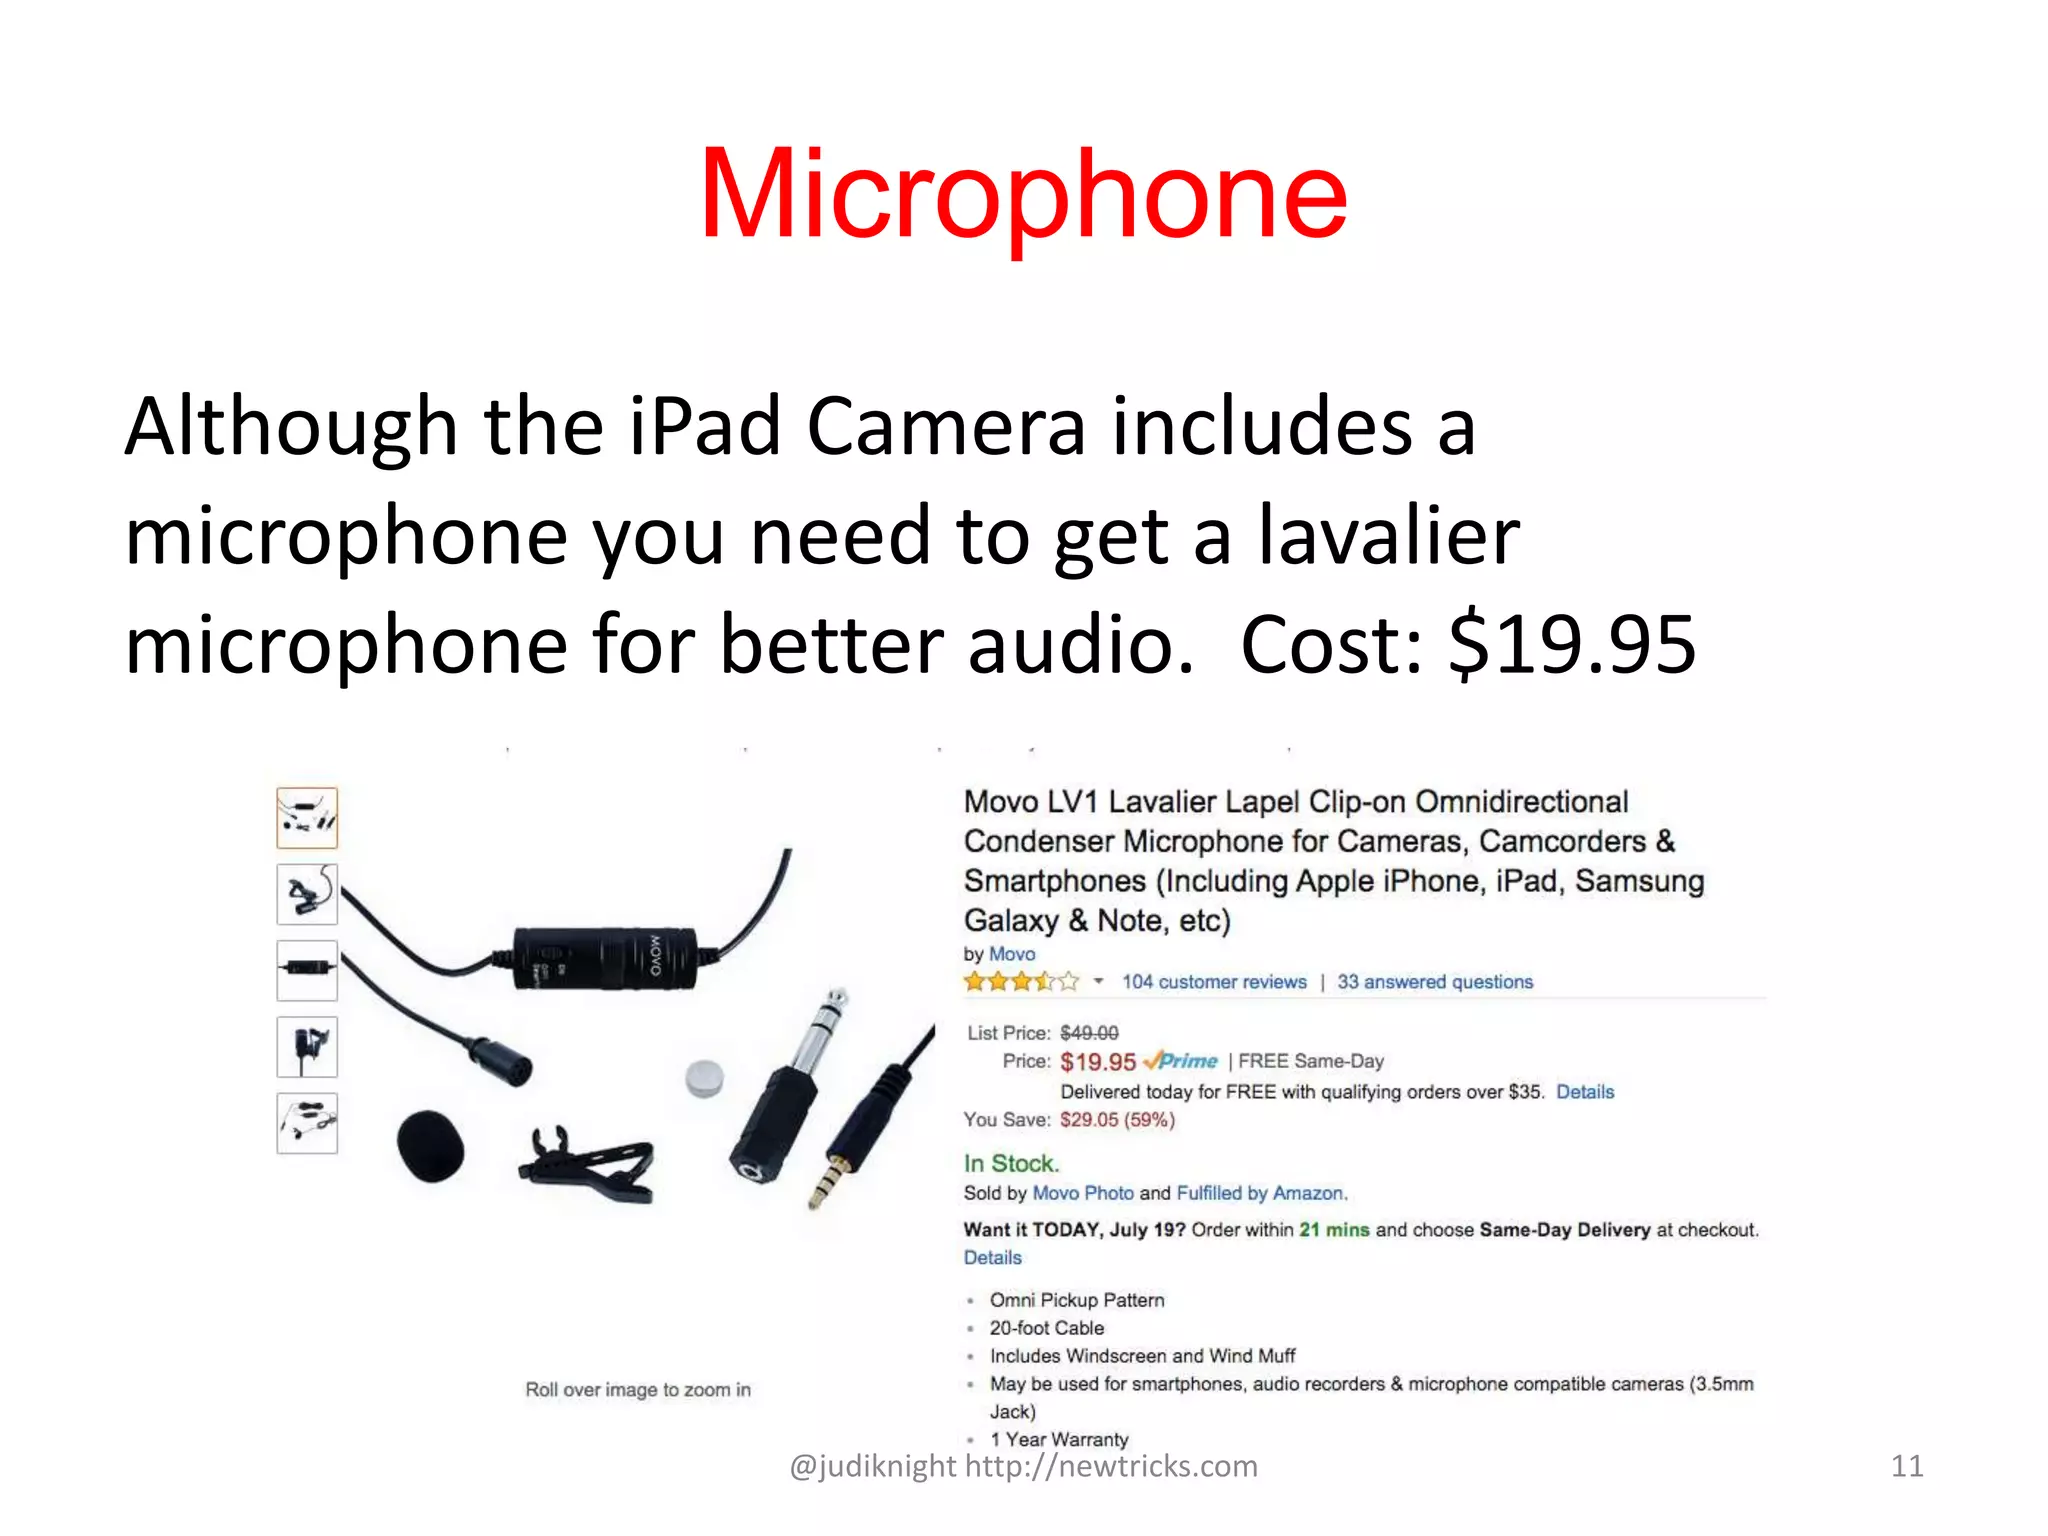
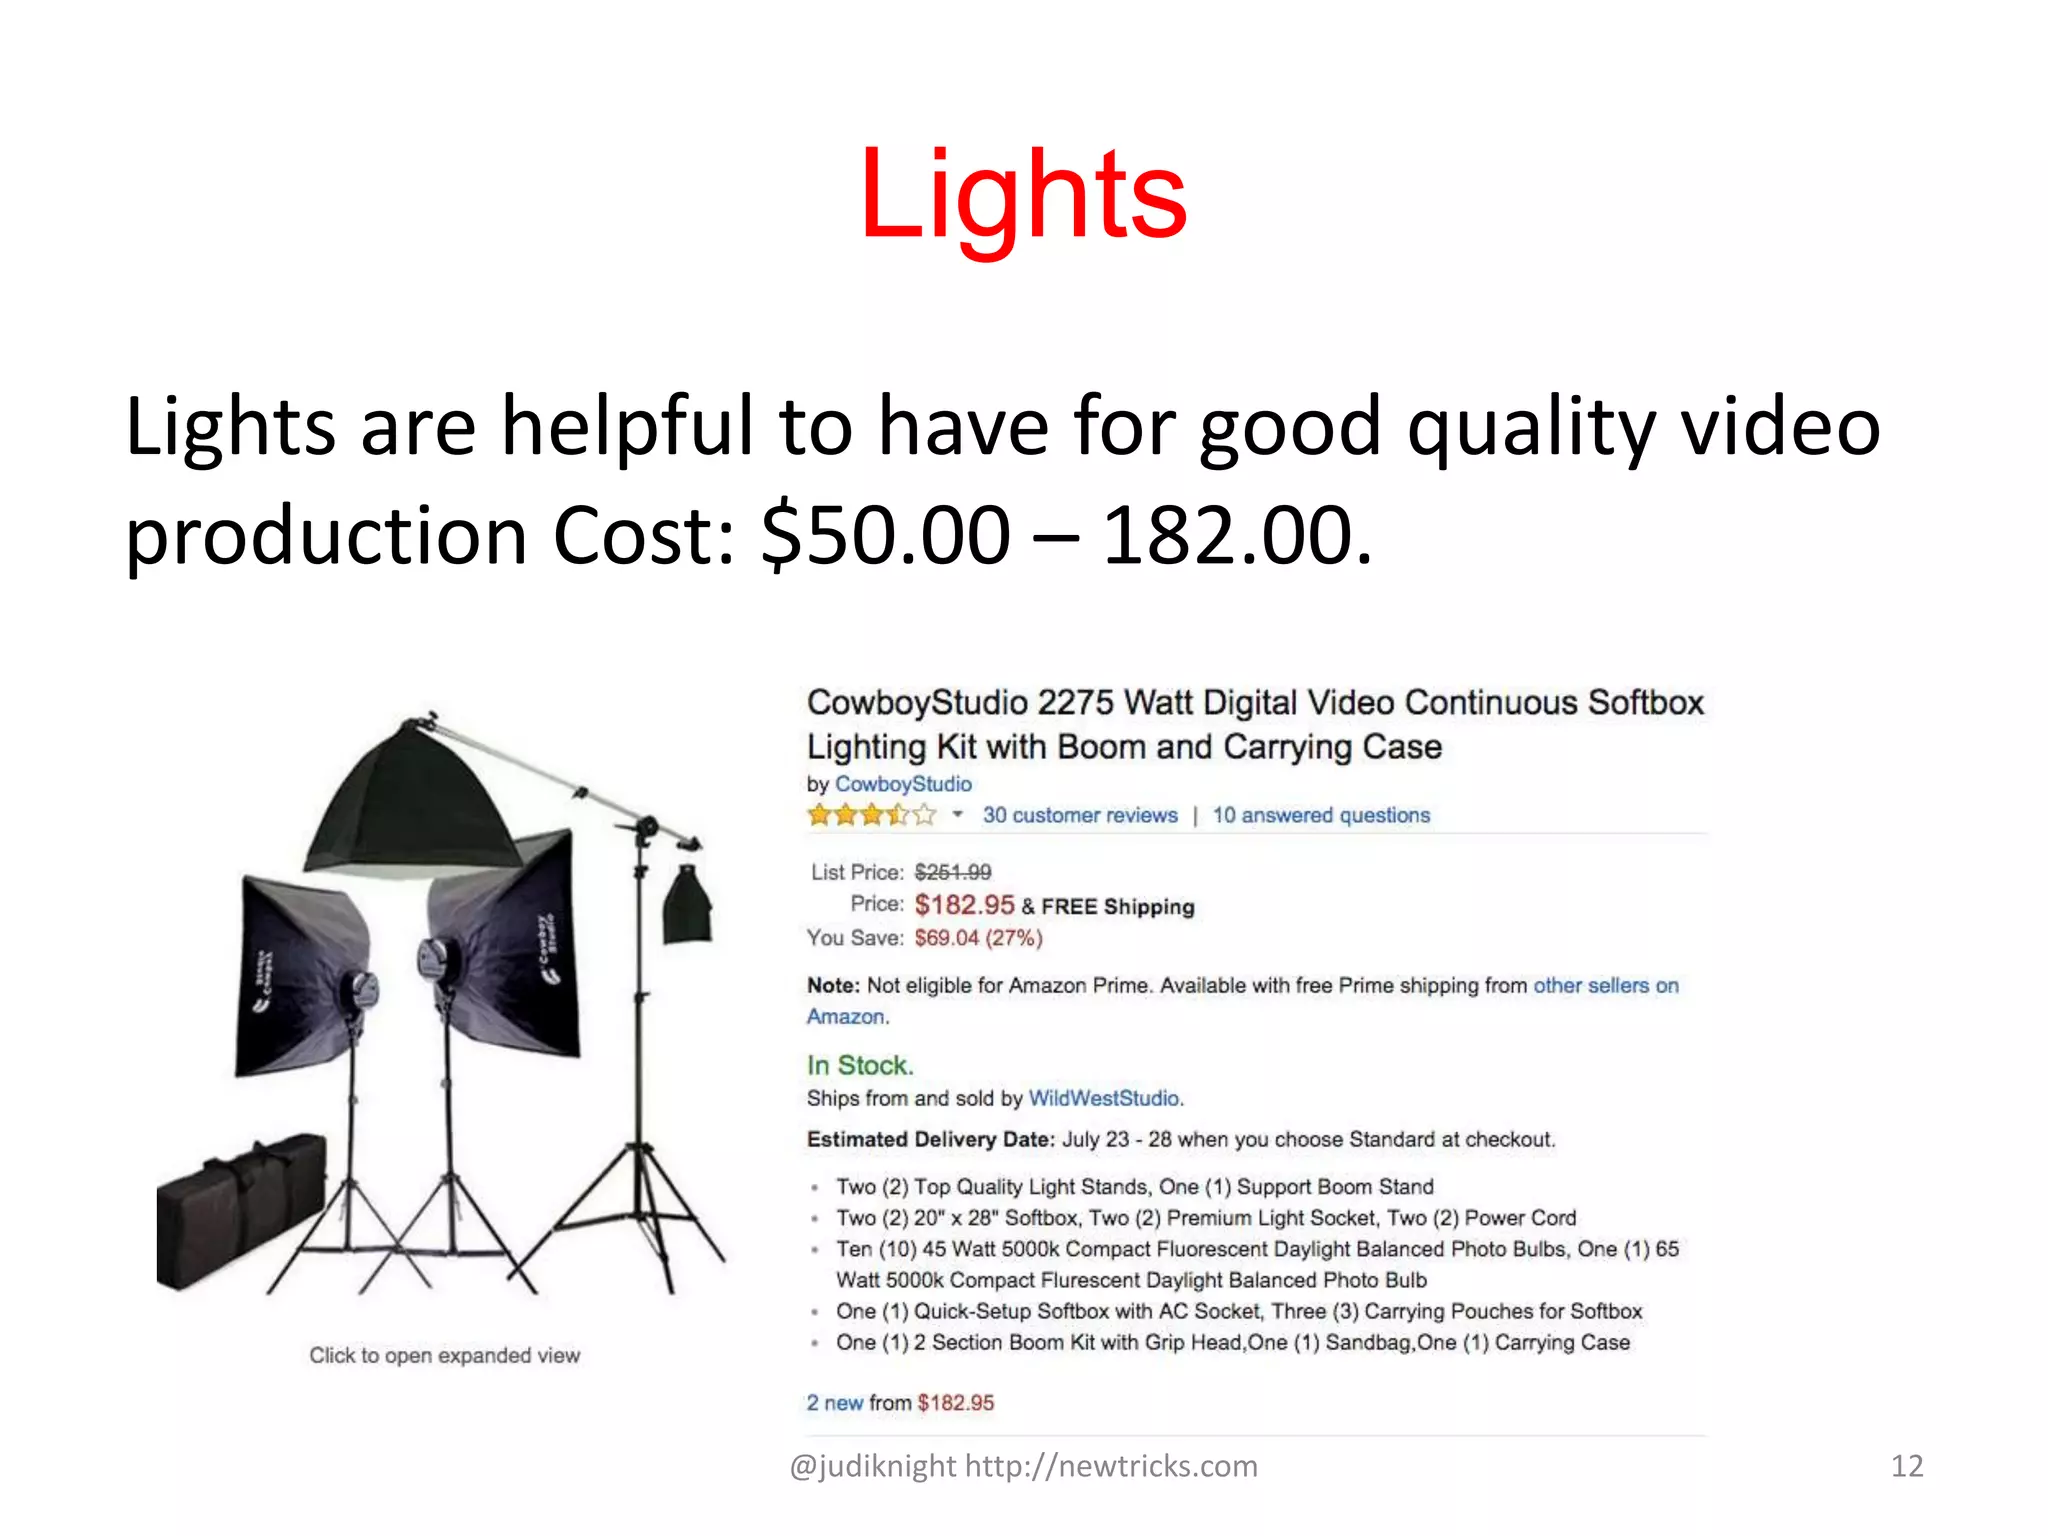
Easy Promo Video
For Your WordPress Site
Using iMovie for iPad
Judi Knight, New Tricks
@judiknight http://newtricks.com 2
Why Use an iPad?
• Great camera to shoot footage
• Easy to operate since it is bigger than a
camera.
• You can easily shoot video using selfie view
• You can edit right from the iPad using iMovie.
@judiknight http://newtricks.com 3
Why Use iMovie for iPad?
• It is free
• It’s easy
• iMovie for iPad has everything you need to
shoot a promotional video for your website.
• iMovie for iPad is easier to use than the
desktop version which includes things
beginners don’t need.
@judiknight http://newtricks.com 4
EQUIPMENT
@judiknight http://newtricks.com 5
What Do You Need?
• Ipad
• iMovie ( free software)
• Tripod
• Mount adapter to attach iPad to Tripod
• Lavalier microphone clip on
• Lights
@judiknight http://newtricks.com 6
iPad
You can use any version but the new ones have a
fantastic camera. I used an iPad Air2.
Cost: starts at $499.00 depending on amount of
memory and type of Internet connection.
@judiknight http://newtricks.com 7
iMovie
iMovie comes with your mac devices. Download
the latest version and you are good to go.
You can use video or photos you have on your
iPad camera roll.
You can import images or photos using Airdrop,
Dropbox, and many other methods.
You can easily save your movie as a video file
and upload it to YouTube or Vimeo.
Cost: Free
@judiknight http://newtricks.com 8
Tripod
You will want to invest in a tripod since having
someone hold the iPad and shoot is not such a
great idea. Cost: $23.49
@judiknight http://newtricks.com 9
Mount Adapter
A mount adaptor allow you to attach your iPad
to the TriPad. Cost: $9.99
@judiknight http://newtricks.com 10
Microphone
Although the iPad Camera includes a
microphone you need to get a lavalier
microphone for better audio. Cost: $19.95
@judiknight http://newtricks.com 11
Lights
Lights are helpful to have for good quality video
production Cost: $50.00 – 182.00.
@judiknight http://newtricks.com 12
Lights
Lights are helpful to have for good quality video
production Cost: $50.00 – 182.00.
@judiknight http://newtricks.com 13
PLANNING
@judiknight http://newtricks.com 14
Your Purpose
What is the purpose of the video?
Business or product promo video for
your website.
Connect with your target audience
Help you to sell online as easily as you
can do it in person.
@judiknight http://newtricks.com 15
Style
What is your brand?
The video needs to help you build
Know, Like and Trust to create an
authentic experience of you and your
business/product for your website
visitor.
@judiknight http://newtricks.com 16
Writing a Script
Keep it short
Stick to less than 60 seconds. It sounds like a
short time until you start to watch it.
Write a script and then start weeding it down.
You don’t have to explain every little thing.
People will get a gestalt and only remember the
high points anyway. So give them the high
points.
@judiknight http://newtricks.com 17
Write Your Script
What to Include ( not necessarily in this order)
• Introduce yourself and your business
• Call out major pain point of target user
• Explain how your company provides a most
excellent solution and gives your target user
what they really want or need.
• Call to action letting them know what to do
next.
@judiknight http://newtricks.com 18
Scripting the shots
• Chunk up the script so you can be on
camera saying a sentence or two.
• Intersperse those shots with images or
b-roll video with doing voice over that
you can read.
• Find images to use to demonstrate what
you are saying.
Don’t try and memorize it all.
@judiknight http://newtricks.com 19
Storyboard Prep
• Divide the script into sections where you plan to be on
camera and where you will do voice over.
• This allows you to film the sections separately so you
can do one or two sentences at a time and then edit
them together.
• You should be on camera when you are introducing
yourself.
• And be on camera at the end when you are making a
call to action.
@judiknight http://newtricks.com 20
Final Version of this Storyboard
@judiknight http://newtricks.com 21
Storyboard
Clip 1 – The Introduction
What:
Judi on Camera- in front of the wood wall with
the plant.
Text:
“Hi, I’m Judi Knight, . .
@judiknight http://newtricks.com 22
Storyboard
Clip 2 – End of the Introduction – Voice over
What:
Insert image of the New Tricks Logo.
Text- Voice Over:
……founder of New Tricks”
@judiknight http://newtricks.com 23
Storyboard
Clip 3 -What we do
What:
Judi on Camera in front of the wood wall with the
plant.
Text:
“When you partner with us at New Tricks, we use
our experience in psychology, technology and
design to create a carefully crafted website that
attracts visitors and converts them into clients
online – as well as you do it in person.”
@judiknight http://newtricks.com 24
Storyboard
Clip 4 – Address pain points –voice over
What:
Insert slide we created in Powerpoint with text
of this content and our logo.
Text-Voice Over
“We believe that the end result of a redesign
should be to bring you more leads, more
customers and more business.”
@judiknight http://newtricks.com 25
Storyboard
Clip 4 – Address pain points –voice over
What:
Insert slide we created in Powerpoint with text
of this content and our logo.
Text-Voice Over
“We believe that the end result of a redesign
should be to bring you more leads, more
customers and more business.”
@judiknight http://newtricks.com 26
Storyboard
Clip 5 - Call to Action
What:
Judi on Camera in front of the wood wall with
the plant.
Text:
“If you’d like to find out how you can use your
website to help get the results you want, click
the button next to this video to schedule a Talk
it Out Consultation Session with me.”
@judiknight http://newtricks.com 27
PRODUCTION
@judiknight http://newtricks.com 28
Set Up Equipment and Test
• Choose a location, simple clean background
• Set your tripod with iPad attached.
• Set up your lights
• Check your set with the iPad to see if the
background and lighting are right.
• Clip on your microphone and insert the other
end into the iPad. Test the audio.
@judiknight http://newtricks.com 29
Set up the Shoot
• Mount the the iPad on the Tripod horizontally.
• Place the tripod and iPad to your arms length
away.
• Put the iPad Camera on Selfie view.
• Adjust yourself in the viewfinder to find the
for best height and angle. For shooting.
@judiknight http://newtricks.com 30
Set up the Shoot
• Have your script nearby.
• Before each section of shooting you can look
at the script , get the one or two sentences
memorized and shoot that section.
• Don’t bother with a teleprompter. Your eyes
will give you away.
@judiknight http://newtricks.com 31
Shooting
• Be prepared to smile before you start and
before you end each section.
• Turn on the video and look at yourself. Tap
your nose to get a small yellow box, press your
finger on it to focus.
• Look into the camera lense, Smile . . .
Connect… Say that section of your lines.
• Push the button to end the video.
@judiknight http://newtricks.com 32
Shooting
• Go through each section of your script.
• You can go ahead and film yourself doing the
voice over sections but you don’t need to
make those look good since you can detach
the video and just use the audio.
• You can also wait and do the voice over later if
you want.
• You can do it all without b-roll if you change
your position in front of the camera for every
other section to help with transitions.
@judiknight http://newtricks.com 33
Shoot, Test, Reshoot
• Shoot some footage and then stop and play it
back to make sure the audio is set right and
that the video lights are right and that you and
your background look good.
• Finish shooting all of your clips.
• Check your video clips.
@judiknight http://newtricks.com 34
EDITING
@judiknight http://newtricks.com 35
Editing in iMovie
@judiknight http://newtricks.com 36

Creating a Promo Video using Your iPad and Editing with iMovie for iPad

  • 1.
    Easy Promo Video ForYour WordPress Site Using iMovie for iPad Judi Knight, New Tricks @judiknight http://newtricks.com 2
  • 2.
    Why Use aniPad? • Great camera to shoot footage • Easy to operate since it is bigger than a camera. • You can easily shoot video using selfie view • You can edit right from the iPad using iMovie. @judiknight http://newtricks.com 3
  • 3.
    Why Use iMoviefor iPad? • It is free • It’s easy • iMovie for iPad has everything you need to shoot a promotional video for your website. • iMovie for iPad is easier to use than the desktop version which includes things beginners don’t need. @judiknight http://newtricks.com 4
  • 4.
  • 5.
    What Do YouNeed? • Ipad • iMovie ( free software) • Tripod • Mount adapter to attach iPad to Tripod • Lavalier microphone clip on • Lights @judiknight http://newtricks.com 6
  • 6.
    iPad You can useany version but the new ones have a fantastic camera. I used an iPad Air2. Cost: starts at $499.00 depending on amount of memory and type of Internet connection. @judiknight http://newtricks.com 7
  • 7.
    iMovie iMovie comes withyour mac devices. Download the latest version and you are good to go. You can use video or photos you have on your iPad camera roll. You can import images or photos using Airdrop, Dropbox, and many other methods. You can easily save your movie as a video file and upload it to YouTube or Vimeo. Cost: Free @judiknight http://newtricks.com 8
  • 8.
    Tripod You will wantto invest in a tripod since having someone hold the iPad and shoot is not such a great idea. Cost: $23.49 @judiknight http://newtricks.com 9
  • 9.
    Mount Adapter A mountadaptor allow you to attach your iPad to the TriPad. Cost: $9.99 @judiknight http://newtricks.com 10
  • 10.
    Microphone Although the iPadCamera includes a microphone you need to get a lavalier microphone for better audio. Cost: $19.95 @judiknight http://newtricks.com 11
  • 11.
    Lights Lights are helpfulto have for good quality video production Cost: $50.00 – 182.00. @judiknight http://newtricks.com 12
  • 12.
    Lights Lights are helpfulto have for good quality video production Cost: $50.00 – 182.00. @judiknight http://newtricks.com 13
  • 13.
  • 14.
    Your Purpose What isthe purpose of the video? Business or product promo video for your website. Connect with your target audience Help you to sell online as easily as you can do it in person. @judiknight http://newtricks.com 15
  • 15.
    Style What is yourbrand? The video needs to help you build Know, Like and Trust to create an authentic experience of you and your business/product for your website visitor. @judiknight http://newtricks.com 16
  • 16.
    Writing a Script Keepit short Stick to less than 60 seconds. It sounds like a short time until you start to watch it. Write a script and then start weeding it down. You don’t have to explain every little thing. People will get a gestalt and only remember the high points anyway. So give them the high points. @judiknight http://newtricks.com 17
  • 17.
    Write Your Script Whatto Include ( not necessarily in this order) • Introduce yourself and your business • Call out major pain point of target user • Explain how your company provides a most excellent solution and gives your target user what they really want or need. • Call to action letting them know what to do next. @judiknight http://newtricks.com 18
  • 18.
    Scripting the shots •Chunk up the script so you can be on camera saying a sentence or two. • Intersperse those shots with images or b-roll video with doing voice over that you can read. • Find images to use to demonstrate what you are saying. Don’t try and memorize it all. @judiknight http://newtricks.com 19
  • 19.
    Storyboard Prep • Dividethe script into sections where you plan to be on camera and where you will do voice over. • This allows you to film the sections separately so you can do one or two sentences at a time and then edit them together. • You should be on camera when you are introducing yourself. • And be on camera at the end when you are making a call to action. @judiknight http://newtricks.com 20
  • 20.
    Final Version ofthis Storyboard @judiknight http://newtricks.com 21
  • 21.
    Storyboard Clip 1 –The Introduction What: Judi on Camera- in front of the wood wall with the plant. Text: “Hi, I’m Judi Knight, . . @judiknight http://newtricks.com 22
  • 22.
    Storyboard Clip 2 –End of the Introduction – Voice over What: Insert image of the New Tricks Logo. Text- Voice Over: ……founder of New Tricks” @judiknight http://newtricks.com 23
  • 23.
    Storyboard Clip 3 -Whatwe do What: Judi on Camera in front of the wood wall with the plant. Text: “When you partner with us at New Tricks, we use our experience in psychology, technology and design to create a carefully crafted website that attracts visitors and converts them into clients online – as well as you do it in person.” @judiknight http://newtricks.com 24
  • 24.
    Storyboard Clip 4 –Address pain points –voice over What: Insert slide we created in Powerpoint with text of this content and our logo. Text-Voice Over “We believe that the end result of a redesign should be to bring you more leads, more customers and more business.” @judiknight http://newtricks.com 25
  • 25.
    Storyboard Clip 4 –Address pain points –voice over What: Insert slide we created in Powerpoint with text of this content and our logo. Text-Voice Over “We believe that the end result of a redesign should be to bring you more leads, more customers and more business.” @judiknight http://newtricks.com 26
  • 26.
    Storyboard Clip 5 -Call to Action What: Judi on Camera in front of the wood wall with the plant. Text: “If you’d like to find out how you can use your website to help get the results you want, click the button next to this video to schedule a Talk it Out Consultation Session with me.” @judiknight http://newtricks.com 27
  • 27.
  • 28.
    Set Up Equipmentand Test • Choose a location, simple clean background • Set your tripod with iPad attached. • Set up your lights • Check your set with the iPad to see if the background and lighting are right. • Clip on your microphone and insert the other end into the iPad. Test the audio. @judiknight http://newtricks.com 29
  • 29.
    Set up theShoot • Mount the the iPad on the Tripod horizontally. • Place the tripod and iPad to your arms length away. • Put the iPad Camera on Selfie view. • Adjust yourself in the viewfinder to find the for best height and angle. For shooting. @judiknight http://newtricks.com 30
  • 30.
    Set up theShoot • Have your script nearby. • Before each section of shooting you can look at the script , get the one or two sentences memorized and shoot that section. • Don’t bother with a teleprompter. Your eyes will give you away. @judiknight http://newtricks.com 31
  • 31.
    Shooting • Be preparedto smile before you start and before you end each section. • Turn on the video and look at yourself. Tap your nose to get a small yellow box, press your finger on it to focus. • Look into the camera lense, Smile . . . Connect… Say that section of your lines. • Push the button to end the video. @judiknight http://newtricks.com 32
  • 32.
    Shooting • Go througheach section of your script. • You can go ahead and film yourself doing the voice over sections but you don’t need to make those look good since you can detach the video and just use the audio. • You can also wait and do the voice over later if you want. • You can do it all without b-roll if you change your position in front of the camera for every other section to help with transitions. @judiknight http://newtricks.com 33
  • 33.
    Shoot, Test, Reshoot •Shoot some footage and then stop and play it back to make sure the audio is set right and that the video lights are right and that you and your background look good. • Finish shooting all of your clips. • Check your video clips. @judiknight http://newtricks.com 34
  • 34.
  • 35.
    Editing in iMovie @judiknighthttp://newtricks.com 36