Download to read offline
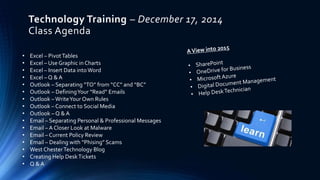
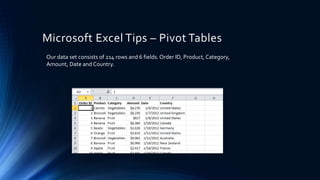
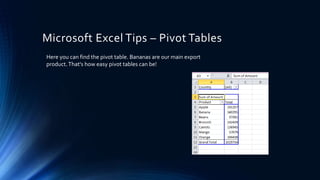
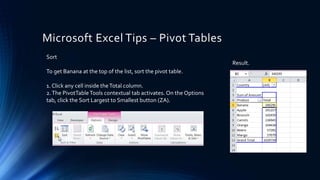
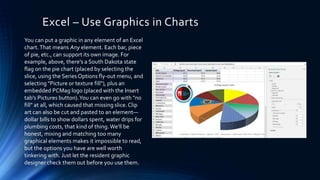
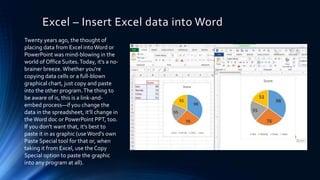
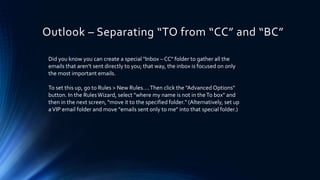
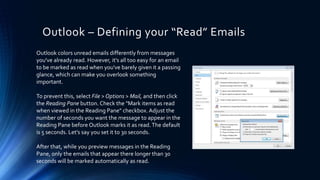
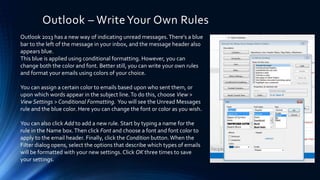


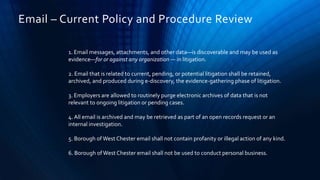


This document provides an agenda for a technology training session on December 17, 2014. The session will cover topics in Microsoft Excel, Outlook, email, and creating help desk tickets. The Excel portion will include tutorials on pivot tables, using graphics in charts, and inserting Excel data into Word. The Outlook section will cover separating contacts, defining read emails, writing rules, and connecting to social media. The email topics are separating personal and professional messages, malware, current policy review, and dealing with phishing scams. The session will conclude with an overview of the West Chester technology blog and how to create help desk tickets.


![[EMPOWERMENT TECHNOLOGIES] - ADVANCED WORD PROCESSING SKILLS](https://cdn.slidesharecdn.com/ss_thumbnails/lesson3-advancedwordprocessingskills2-211128024207-thumbnail.jpg?width=640&height=640&fit=bounds)


![Getting Started with Apache Spark: Big Data Made Simple [Free Meetup]](https://cdn.slidesharecdn.com/ss_thumbnails/apachesparkgettingstarted-260203175547-8361bcc3-thumbnail.jpg?width=640&height=640&fit=bounds)


